
Dragon Quest IX: Walkthrough Chapter 9
This chapter is the start of Dragon Quest IX's post game content and it begins with the Side Quest #039 Follow That Fish. Completion of this side quest will give you access to the Starflight Express again - even better - it'll let you fly it around the world map and access new places!
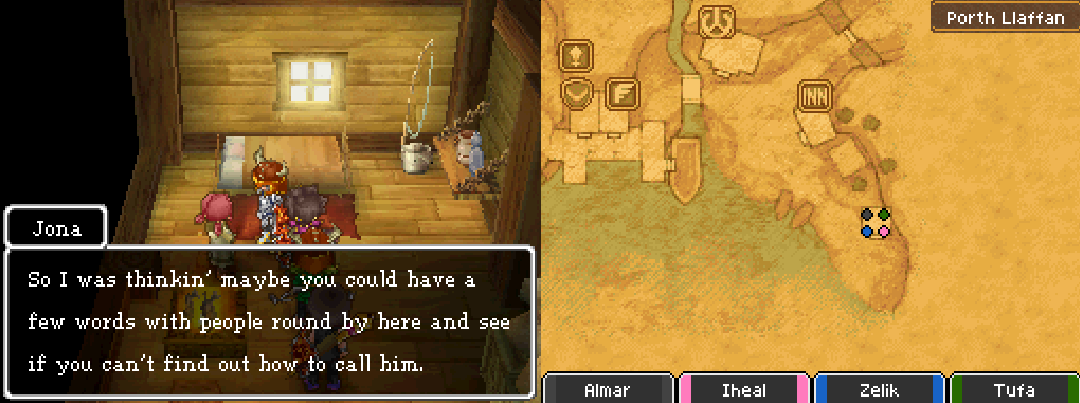
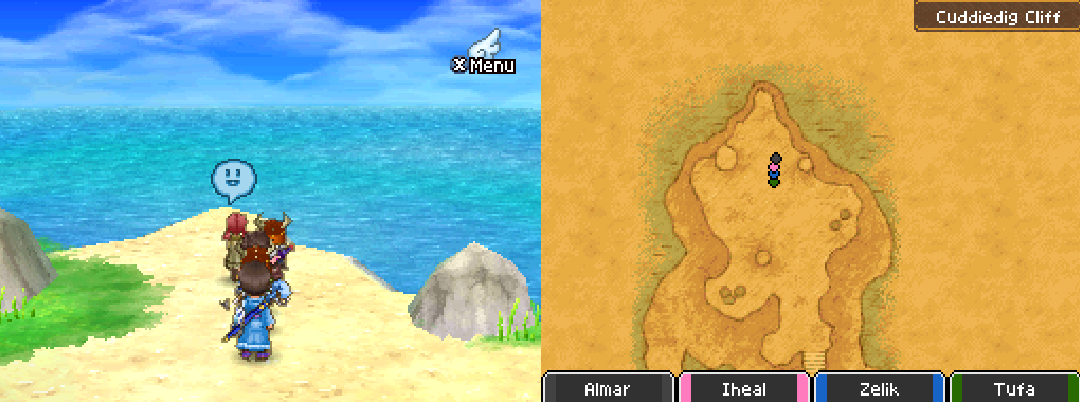
You'll find this quest in Porth Llaffan, speak with Jona, the girl from earlier in the game's story located in the southeastern most shack. After you've spoken with her spend the day at the Inn and during the night time speak with the Ghost on the shoreline and say 'No' when prompted.
She'll tell you the items that you need to equip in order to get Lleviathan's attention, two of them you probably already have (Flowing Dress and Watermaul Wand) but if you don't Zoom over to those towns and grab them. The third item, Silver Shield, you'll have to purchase in Stornway at the new armor shop that's here.
1. Buy Flowing Dress in Wormwood Creek
2. Buy Watermaul Wand in Gleeba
3. Buy Silver Shield in Stornway (new armour shop) or make with Alchemy.
With all three of these items equipped go and speak with Jona in Porth Llaffan for another scene. She'll head on up to the Tywll Cave location to summon Lleviathan (the same location we fought him earlier in the game) and you'll want to follow her.
After the fight Leviathan will give you a Fygg which you'll want to eat. Once the cutscene is over you'll be given Sterling's Key and now you're able to summon the Starflight Express anywhere on the world map. I'd recommend putting this in your Hero's inventory as we're going to be using this a lot.
Before doing anything else it's highly recommended you stop by Stornway and check the Armor and Weapon shop here to see the new stuff they got in stock. There's a new vendor at each of the two shops and they have some really awesome stuff for sale that's not sold anywhere else.
When you're done all of that stuff fly around the world and grab all of the available treasures, there's a bunch of side quests now available that you can grab too and you'll keep seeing this new dungeon name pop up called grottos.
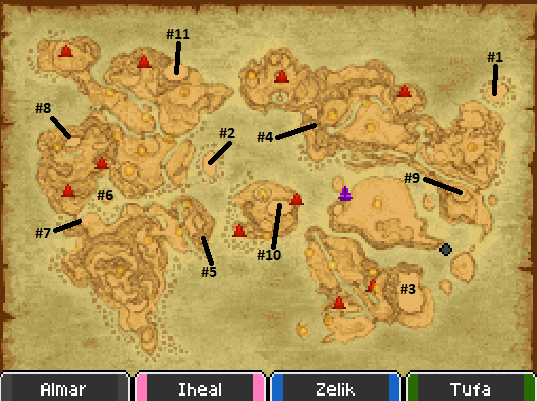
#1 Cringle Coast - On this island you'll find a single building and a cave. There's some goodies for you to find inside of the building and a chest for you waiting in the cave with Ruinous Shield. In addition to this chest there's a skeleton in the cave too which will give you Side Quest #062 Brain's Dyin' Wish.
#2 Eastern Stornway - You'll find a Divine Dress in the northern house and in the southern one you'll find Nicholas who offers you Side Quest #056
#3 Lonely Coast Cave - East of Bloomingdale you'll find this location up in the mountains. Don't land on the coastline area but on the ledge above. Mini Medal and lump of Orichalcum can be found in the chests inside of the northern cave.
#4 Ondor Cliffs - West of Batsureg in the mountains is where you'll find this location. There's a lady in a building which will teach you Wallop, a new party trick and some Alchemy Recipes on the bookshelf. You'll find more Alchemy Recipes inside of the well to the east of this building too. Side Quest #166 starts in the well on this cliff.
#5 Eastern Wormwood - Seed of Life and an NPC that gives you Side Quest #060 is found in the southern well. In the northern well you'll find some barrels with items and a quest NPC with Side Quest #059.
#6 Western Wormwood - There is a red sign post on this island which is part of Side Quest #063. No other loot is found on this island.
#7 Western Wormwood - Another well where you can find Alchemy Recipes and a Mini Medal, Spellspardrilles, Gold Bar and 2000G. There's also a man here who will offer you Side Quest #061.
#8 Slime Hill - This is one of the best leveling spots in the game. Side Quest #055 is found here too.
#9 Central Hermany - Alchemy Recipes can be found here as well as Side Quest #134.
#10 Central Newid Isle - In this area you can find Side Quest #058 and Side Quest #132
#11 Tower of Nod - One of the final story dungeons/DLC Content
Grottos and How They Work
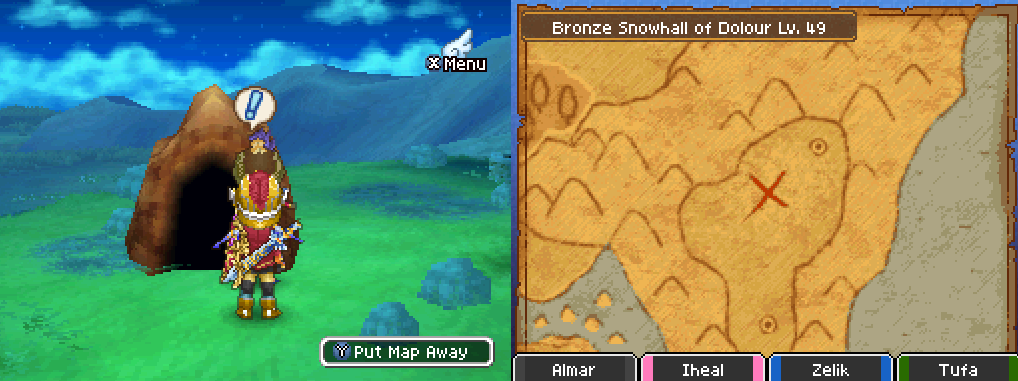
For the majority of the post game leveling/dungeon crawling you're going to be doing dungeons called Grottos. The very first Grotto you get access to in this game is most likely going to be Granite Tunnel of Woe Lv 1 which is a Treasure Map you get for completing Side Quest #015. Open your Menu, go to Items and select Treasure Maps to see which maps you have available and also to access any of the available maps you do have.
Every time you defeat a Grotto boss you're going to get a Treasure Map. Depending on what level your Hero is and how many times he has revocated the difficulty of the map you get is going to change. The higher level your Hero, the odds of you getting a harder map increases.
For every other Grotto you do aside from the first one, you'll have to hunt down the location using just the Treasure Map for guidance. Thankfully someone has already made a picture online with every single Treasure Map and where that Grotto is located on the world map. To see the picture I am talking about head on over to the All Grotto Locations (Picture). The picture isn't very easy to see and zooming in on it is a pain but it's the only thing I found that listed all Grotto locations.
I'd also recommend you read this FAQ over one Gamefaqs about Grottos. It talks about the RNG aspect of the Treasure Maps and fills you in on a lot about them and how the Treasure Maps and Grottos are generated.
Basically, each Grotto will have Blue Treasure Chests starting on B2 and continuing for every floor but the boss floor. These treasure chests can (and often do) contain some of the best loot in the game, like orichalcum, which you can then use in Alchemy to make some of the best gear in the game. Sometimes you'll get lucky enough to find that loot in the Blue Chests too but in this game the best gear is made through Alchemy.... and involves a crap ton of RNG for that too.
I'm going to assume you're a normal sane person who isn't going to grind for literally months to gear yourself out in the best gear - in this case levels and preparation will be the most important thing for you when it comes to conquering Grottos. Bring a buttload of items that can restore mana (or wear accessories that can) and you'll be just fine.
'Side' Side Quests & Which Are Worth Doing
As you've probably already noticed this game has a TON of side quests - many of them are tedious and pointless but some of them offer you amazing rewards from armor to weapons or even passive upgrades for your characters like abilities or other improvements during battle.
This part of the guide is going to give you a list of all the side quests that give you rewards that I would consider "must haves". If you'd like to see a complete list of all available side quests I recommend you use my Side Quests By Number Guide instead.
Side Quest #005 (Herb'list)
Location: Stornway; Soldier inside the NW tower
Task: Give him 1 Medicinal Herb, 1 Antidotal Herb & Moonwort Bulb
Reward: Gleeban Groat
Side Quest #006 (Get Well Water) - Required completion for a future quest
Pre-req: Finish Quest #005
Location: Stornway; Soldier inside the NW tower
Task: Give him 1 Angel's Tear
Reward: Seed of Life
Side Quest #015 (Collapsus's Call)
Location: Zere Rocks; Man on broken stairs
Task: Bring him Special Medicine
Reward: Granite Tunnel of Woe Lv 1 Treasure Map
Side Quest #036 (Little Miss Bossy Boots) - Swinedimples Salute required for a future quest
Location: Swinedimples Academy; Girl inside the school on L1
Task: Bring her Holy Water and 2 Royal Soils
Reward: Swinedimple Salute Party Trick; Thunderball when repeated
Side Quest #061 (Mager Migraine)
This is a post game quest
Location: North of Upover well on a hill
Task: Defeat the Shogum boss in low level grottos for Hexite
Reward: Lucida Shard; repeatable
Side Quest #062 (Brain's Dyin' Wish)
This is a post game quest
Location: Cringle Coast; Northeastern most island - Skeleton in a cave
Task: Defeat Salamarauders in Tywll Cave until they drop the item you need
Reward: Baramos Map
Side Quest #063 (Keep Your Eyes Peeled)
Pre-req: Sword Skill 30
Location: Swinedimples Academy; Man inside the church
Task: On the island east of the Bowhole in Western Wormwood
Reward: Warrior's Sword
Side Quest #064 (Turn In Your Badges)
Pre-req: Sword Skill 100 and Side Quest #063 Complete
Location: Swinedimples Academy; Man inside the church
Task: Collect 5 Badges from 5 different enemies in different locations
Reward: Swordcraft in Summary and Gigagash Ability
Side Quest #066 (Operation Multithrust)
Pre-req: Spear Skill 100 and Side Quest #065 Complete
Location: Swinedimples Academy; Man in western hallway
Task: Defeat 3 Metal Medley enemies with Pressure Pointer
Reward: Clear Spear Theory and Lightning Storm Ability
Side Quest #088 (Buckler's Buckler)
Pre-req: Shield Skill 100 and Side Quest #087 Complete
Location: Swinedimples Academy; Man in the west room near school entrance
Task: Defeat 10 Killing Machines with Blockenspiel
Reward: Secrets of the Shield and Passive Ability: Prevent all critical attacks
Side Quest #092 (Warriors Three)
Pre-req: Level 40+ Warrior and Side Quest #091 Complete
Location: Wormwood Creek; Farmer at southern fence
Task: Defeat 10 enraged Mandrake Marauders after enraging them with Whistle
Reward: Warrior's Workbook, Counterattack Ability and 5000G
Side Quest #105 (Challengus Maximus)
Pre-req: Level 40+ Gladiator and Side Quest #104 Complete
Location: Island East of Hermany; man standing on southern end
Task: Defeat 10 Drackals while under the effects of Double Up
Reward: Gladiator's Guide and Passive Ability: Occasionally Attack Twice
Side Quest #103 (Gladiator Graduator)
Location: Alltrades Abbey; Priest near the Inn on B1
Task: Defeat 3 Slimes with Dragon Slash while you have 100 tension
Reward: Gladiator Vocation Unlocked
Side Quest #105 (Challengus Maximus)
Pre-req: Level 40+ Gladiator and Side Quest #104 Complete
Location: Island East of Hermany; man standing on southern end
Task: Defeat 10 Drackals while under the effects of Double Up
Reward: Gladiator's Guide and Passive Ability: Occasionally Attack Twice
Side Quest #106 (Taking Soul Control)
Location: Gleeba; the Paladin on roof
Task: Use the Warrior Whipping Boy 10 times
Reward: Paladin Vocation Unlocked
Side Quest #109 (Elementary Training)
Location: Alltrades Abbey; Man in red inside Alltrades Abbey
Task: Defeat 2 Metal Slimes while under Wizard Ward
Reward: Armamentalist Unlocked
Side Quest #111 (The Fource... Forever)
Pre-req: Level 40+ Armamentalist and Side Quest #110 Complete
Location: Alltrades Abbey; Man in red inside Alltrades Abbey
Task: Defeat 5 different enemies under the effects of 5 different Fources
Reward: Armamentalist Album and Passive Ability: Fource abilities effect the whole party
Side Quest #112 (Ranger Changer)
Location: Heights of Loneliness at Entrance
Task: Defeat 3 Hocus Chimaera (Heights of Loneliness) with Toxic Dagger's poison DoT
Reward: Ranger Vocation Unlocked
Side Quest #114 (One-turn Wonder)
Pre-req: Level 40+ Ranger and Side Quest #113 Complete
Location: Heights of Loneliness at Entrance
Task: Defeat Drakularge enemies in a single turn 5 times
Reward: Ranger's Revelations and Passive Ability: Chance for critical increases when HP is low
Side Quest #115 (Sages in the Past)
Location: Gittingham Palace; Bookshelf on 2F
Task: Defeat 5 Great Trolls (Realm of the Mighty) with Frizz
Reward: Sage Vocation Unlocked
Side Quest #118 (A Star is Born)
This is a post game quest
Location: Gleeba; Girl with pink hair inside the dance hall
Task: Defeat a Moai Minstrel (mid-high level water Grottos) with the Minstrel ability Hot Lick
Reward: Luminary Vocation Unlocked
Continue to Chapter 10 - DLC Content