
Setting Up Your Interface (Advanced)
This is the Advanced version of 'Setting Up Your Interface Guide' and is seventh in my Isboxer and Macroquest 2 series. Before you start with anything in this guide you'll need to have finished reading the following things and/or be able to check them off our 'mental checklist' so to speak.
- You've set your box team up the same way that I told you two guides earlier in this series.
- You have read almost all of my Boxing Guides. That includes the Isboxer Series which does a much better job at holding your hand than this guide does. If you read this guide and feel like you need a little bit more explanation per point I recommend using my Isboxer Guides too.
Setting up your Interface is going to be a pretty ardious task depending on how many characters you have. You'll need to make macros on each of them and place the macros in the proper places and then create blank macros on your tank and place them in the same location. I talk about this in a lot more detail in this guide.
This will give you roughly the same layout that you saw in my Almar's Interface and Macros Guide. To give you an easier picture to reference here's another snippet of my layout but this time with all the Macroquest 2 keybinds I have showing as well as the Mq2 chat box.
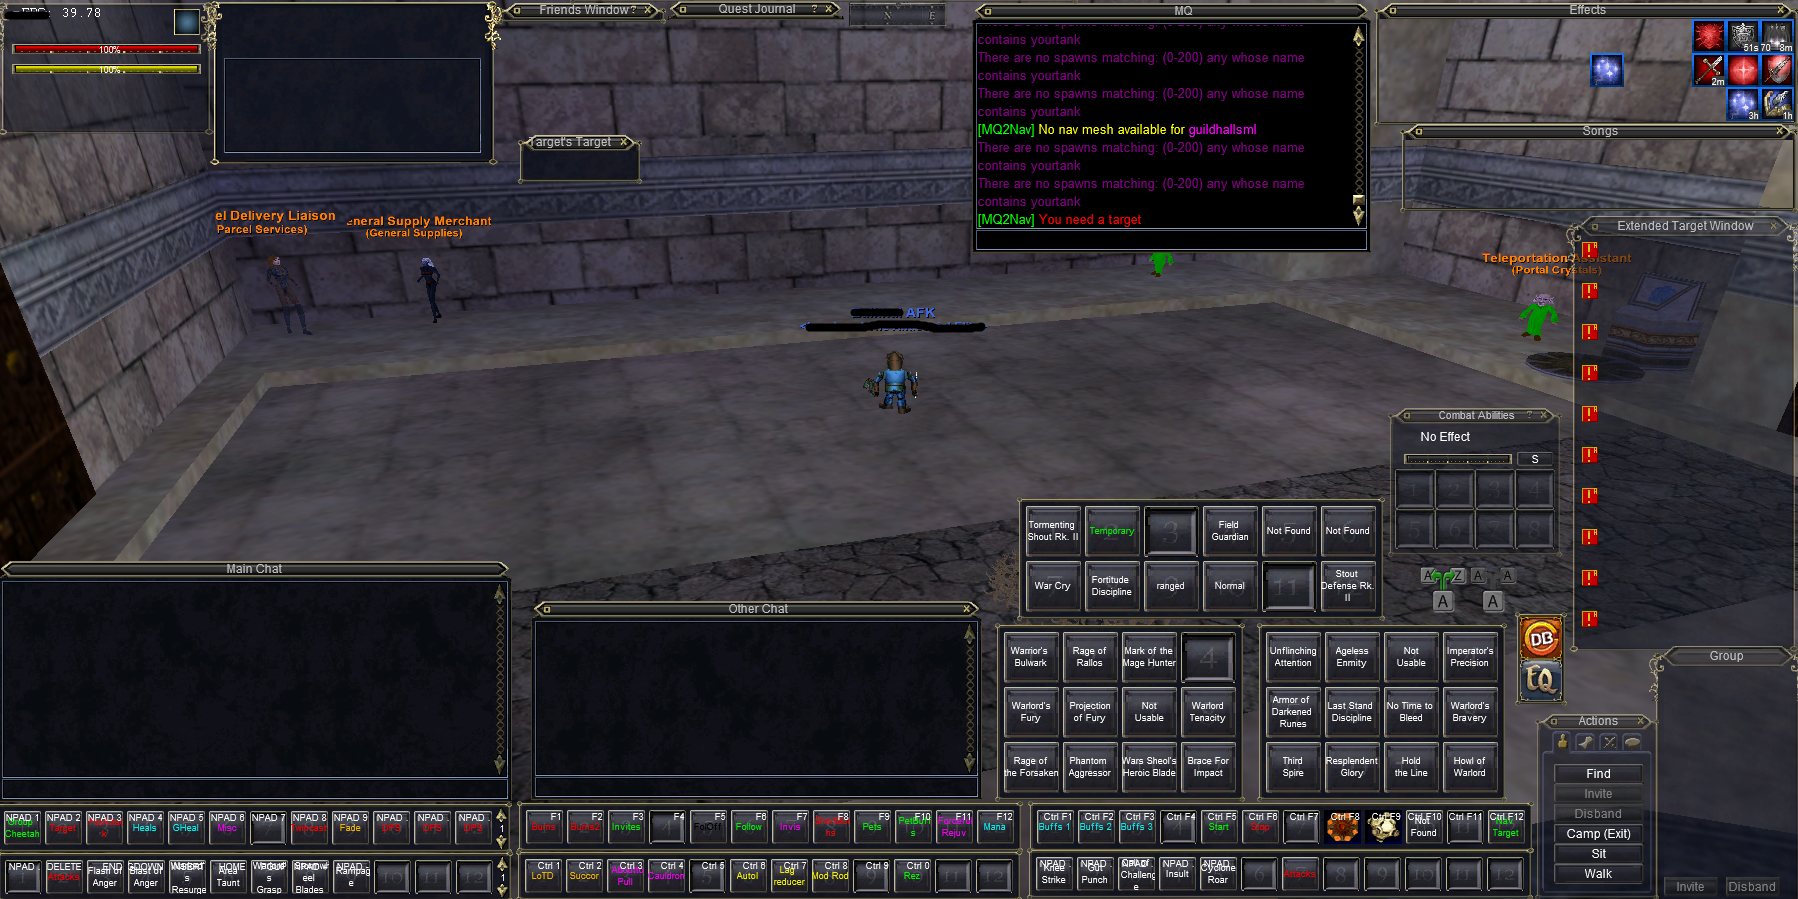
As you already were taught, the two hotbars furthest to the left in that screen shot are the first Boxing Hotkeys that you had to make as well as the Character Specific Hotkeys. The two hotbars in the center and the one on the right are primarily what we're going to be focusing on for the rest of this guide.
In the screenshot above you can see that I use Ctrl 1 - Ctrl 0 as well as F1 - F12 and Ctrl F1 - Ctrl F12. Depending on when the macro is used most determines what keybind it gets on my interface. If it's used a lot during combat then I usually try to bind it to F1 - F12. I don't like having to hold down Ctrl when hitting buttons during combat so anything that has Ctrl as a prefix is usually used outside of combat.
You don't have to use the keybinds that I do but you will have to make more than 10 boxing keybinds using the Isboxer Key Map Wizard. If you only made 10, which is how many I told you to make at the start, you're going to need at least another 10 but preferably 20. That's right, 20!! We're not going to be using them all right now - but you want them there just incase... Just like how my screen shot above has some empty spaces on some hotbars. You'll probably have that too.
Combine Ctrl with some keys like I do or Alt - whatever you want. Bind them both in Everquest as well as Isboxer and then get ready to start putting some macros in their place! Below is an organized list of all the macros you see in my screen shot above. Additionally you can find this same information with a different presentation over on the Almar's Interface page.
F1 - F12
Ctrl 1 - Ctrl 0
Cauldron of Countless Goods Keybind
Resurrection Macros (Clerics Only)
Ctrl F1 - Ctrl F12
There you have it! These are all of the ingame macros I use which I haven't already taught you! There's a few that I left out which we've already gone over in this guide - if you'd like to see them all again in a very similar format I recommend using my Almar's Interface & Macros Guide.
Go through each of these pages that I have linked to one by one and incorporate my ideas into your own box team. The Burn Macros, Invis Macros, Short Burn Macros, Restore Mana & Forceful Rejuv are all of the most important ones to make. If you're feeling extraordinarily lazy and only wanna make a few right now start with these. They'll greatly increase what you're capable of in the short term.
The next piece of advice I have for you is practical advice. The other three hotbars which are really big on my screen are there so I can keep track of my Cooldowns and also use them manually. Since the screen shot above is of my tank's screen he has one extra hotbar as well as the Combat Discs up too - my casters don't have that much clutter. My casters look a bit more like this..
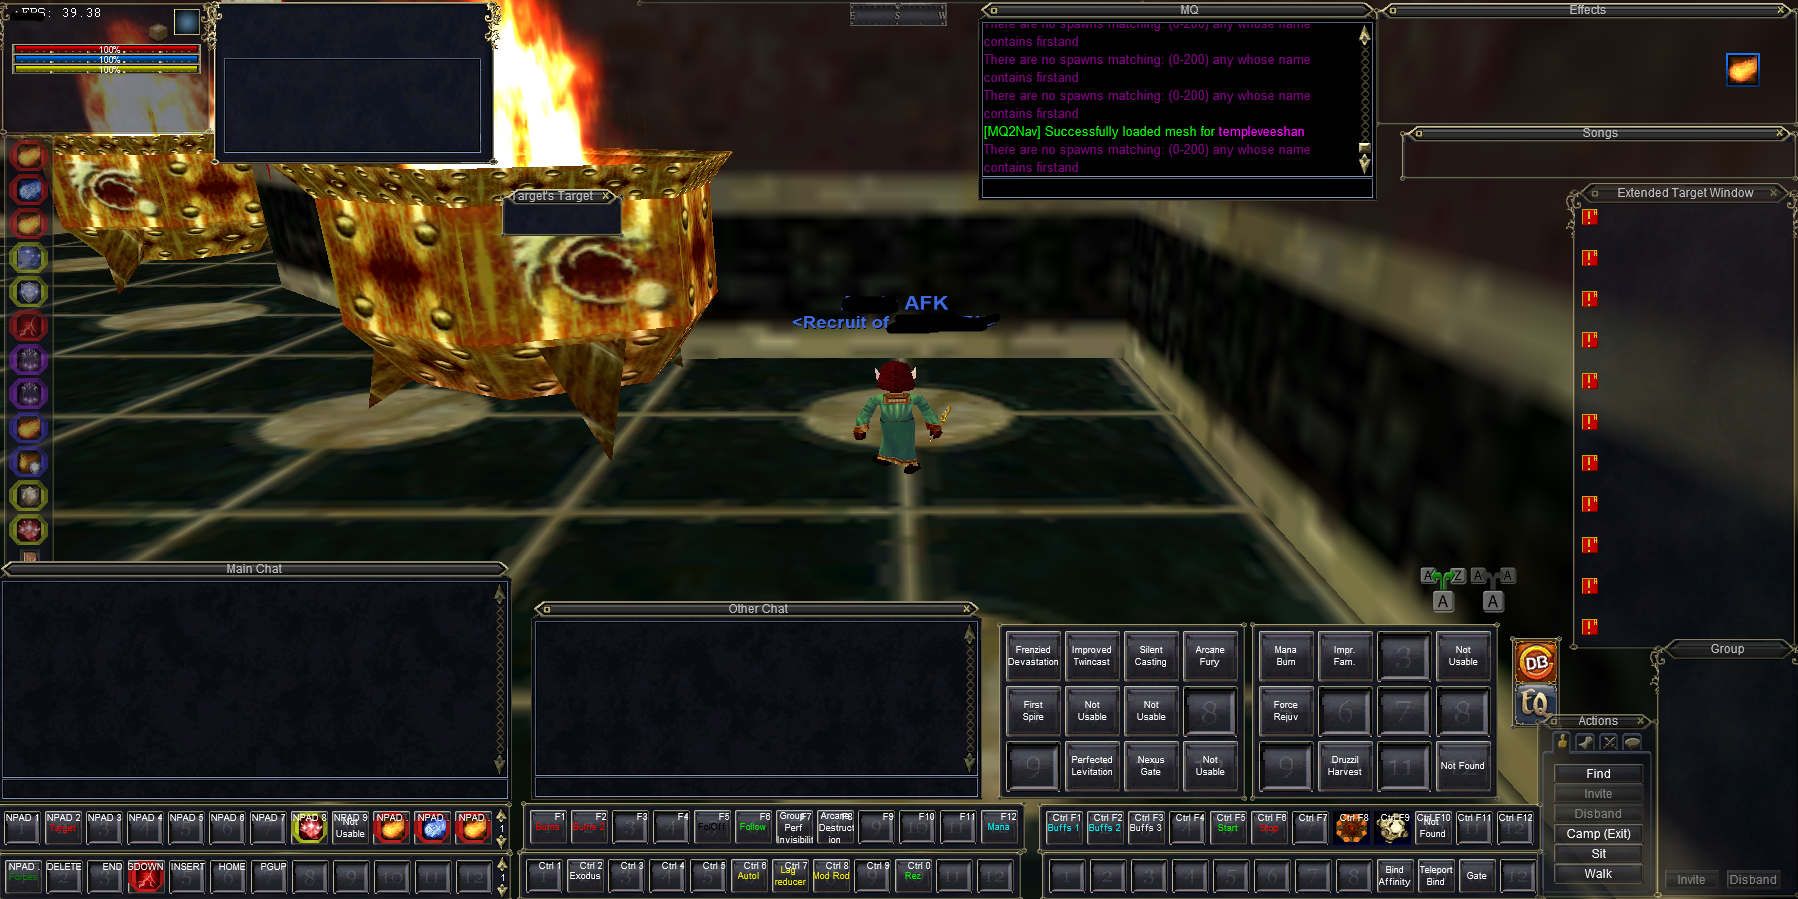
As you can see the interface is much more barren than on my tank. I don't put blank macros to help me remember abilities on everyone - just my tanks since they're the screen I am looking at almost the entire time I am playing. The main reason I am choosing to show you this caster's screen is because I want you to get an idea of what one of my other characters looks like.
The reason I recommend you place all your cooldowns on your hotbars like I do (and I recommend you blow you hotbars up in size too) is so you can see when you pop them if they all went off and so you can very quickly and easily see what your cooldown timers are.
To give you an example of a situation where it would benefit you greatly to have all your cooldowns out on the bars like I do... Say you're fighting a named and your DPS is total crap. You don't know what's going on - maybe one of your character's is targeting the wrong thing or someone's cooldowns didn't go off. You click on each of your different clients to see if they have the right target as well as which cooldowns are popped and which aren't.
You come across two of your Wizards like this: with only half their cooldowns popped.
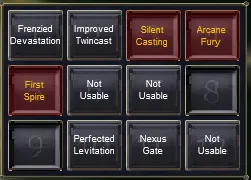
Well there you go! You've just isolated the issue of what's causing your DPS to suck so much. Now you just need to spam your Burns Macro a little bit more to make sure all your Cooldowns get popped this time and you're good to go. It's just a minor thing, sure - but it happens more than you'd think (all your cooldowns not firing). I'd recommend putting the cooldowns on your bars for no other reason than checking them for this very reason.
Before moving onto the next guide I have a few other guides that are somewhat related to your Interface and ingame Everquest Settings that you might want to look over. These are multi purpose guides which will help you in a variety of ways.
Tips & Tricks for Reducing Lag
EQ Client INI (Speeding Up Duplicating Interfaces & More)
That's really all the advice I can think of to give you for my Advanced Setting up your interface guide. We're not done yet - we still have a little bit more to teach you but hopefully you're starting to get a really firm understanding of how to box, control your team and are improving rapidly.
Continue to my Learning How To Play Part 2 (With Some Coding)