
a Dragon Quest VIII: Journey of the Cursed King Walkthrough Chapter 9
This guide is designed to point you in the right direction but not hold your hand throughout the entire game. Dungeons and Towns you'll be exploring mostly on your own, with my maps pointing out any treasures that are hidden in a dungeon as well as how to solve any puzzles you'll encounter that could possibly get you stuck.
Additionally depending on your own personal preference, my maps/pictures are designed to work as a guide of their own. If you'd like to skip reading text entirely while you play, you can just look at the maps for the treasure chest locations and where you need to go to advance the story forward.
Skill Point Tips: Jessica Staff (Kazing 100 Points); Whip (Attack Power Bonuses); Yangus Humanity (Golden Oldies 100 Points); Scythe (Attack Power Bonuses); Hero Courage (Omniheal 82 Points); Sword (Falcon Slash 52 Points) and Angelo Bow (Shining Shot 88 Points); Charisma (Divine Intervention 27 Points) and Staff (Oomph 65 Points)
Alchemy Tips: Mythril Helm, Raging Bull Helm, Hell Scythe, Flametang Boomerang, Liquid Metal Sword; Cheeses & Other Consumables
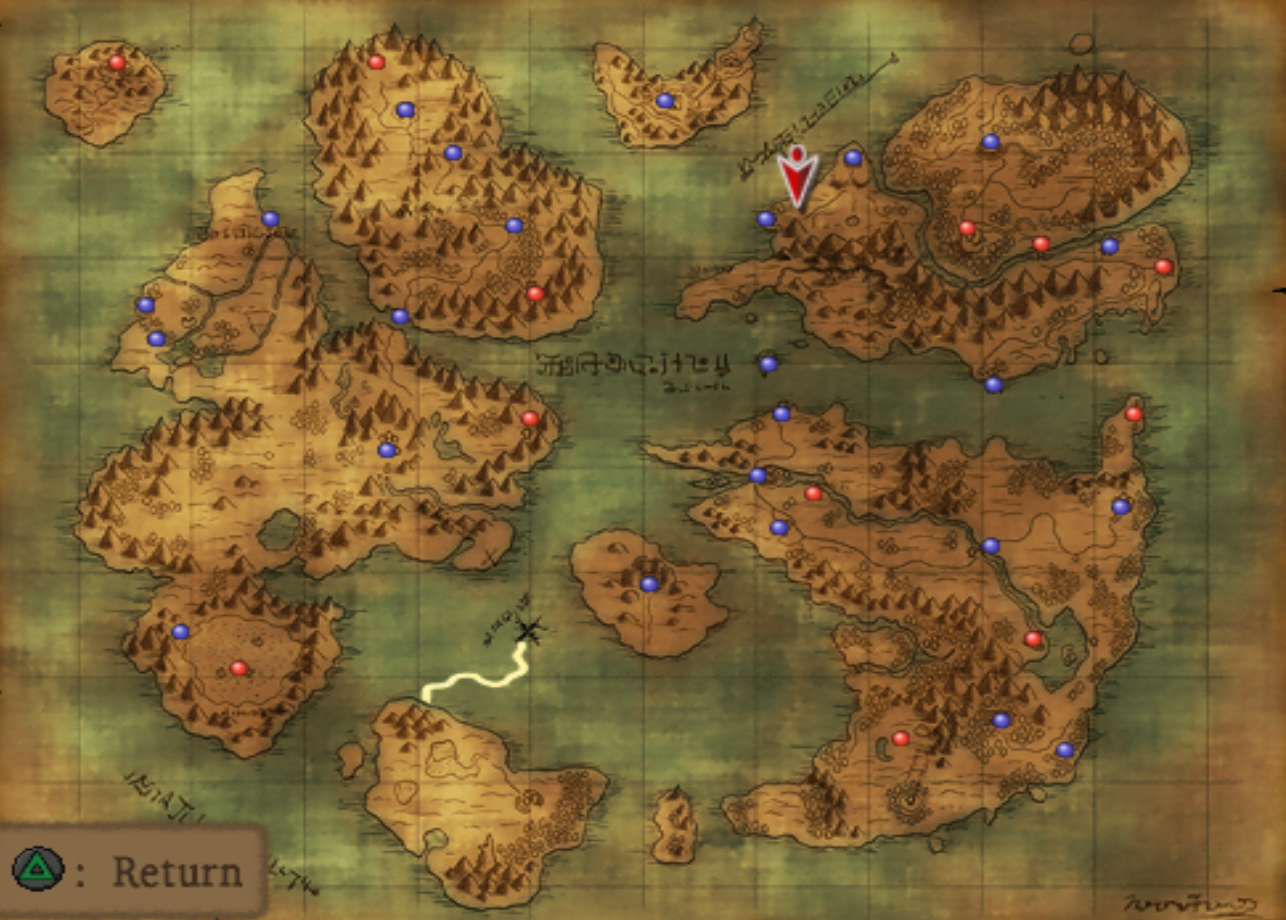
Before we get back to the main story there is a bit more side questing that we need to do first. Zoom over to Neos and travel south of town to find the monster Talos. He's just off the right hand side of the path - basically impossible to miss. Once you have Talos I would recommend you also get Dumbking aka King of Dumbira.
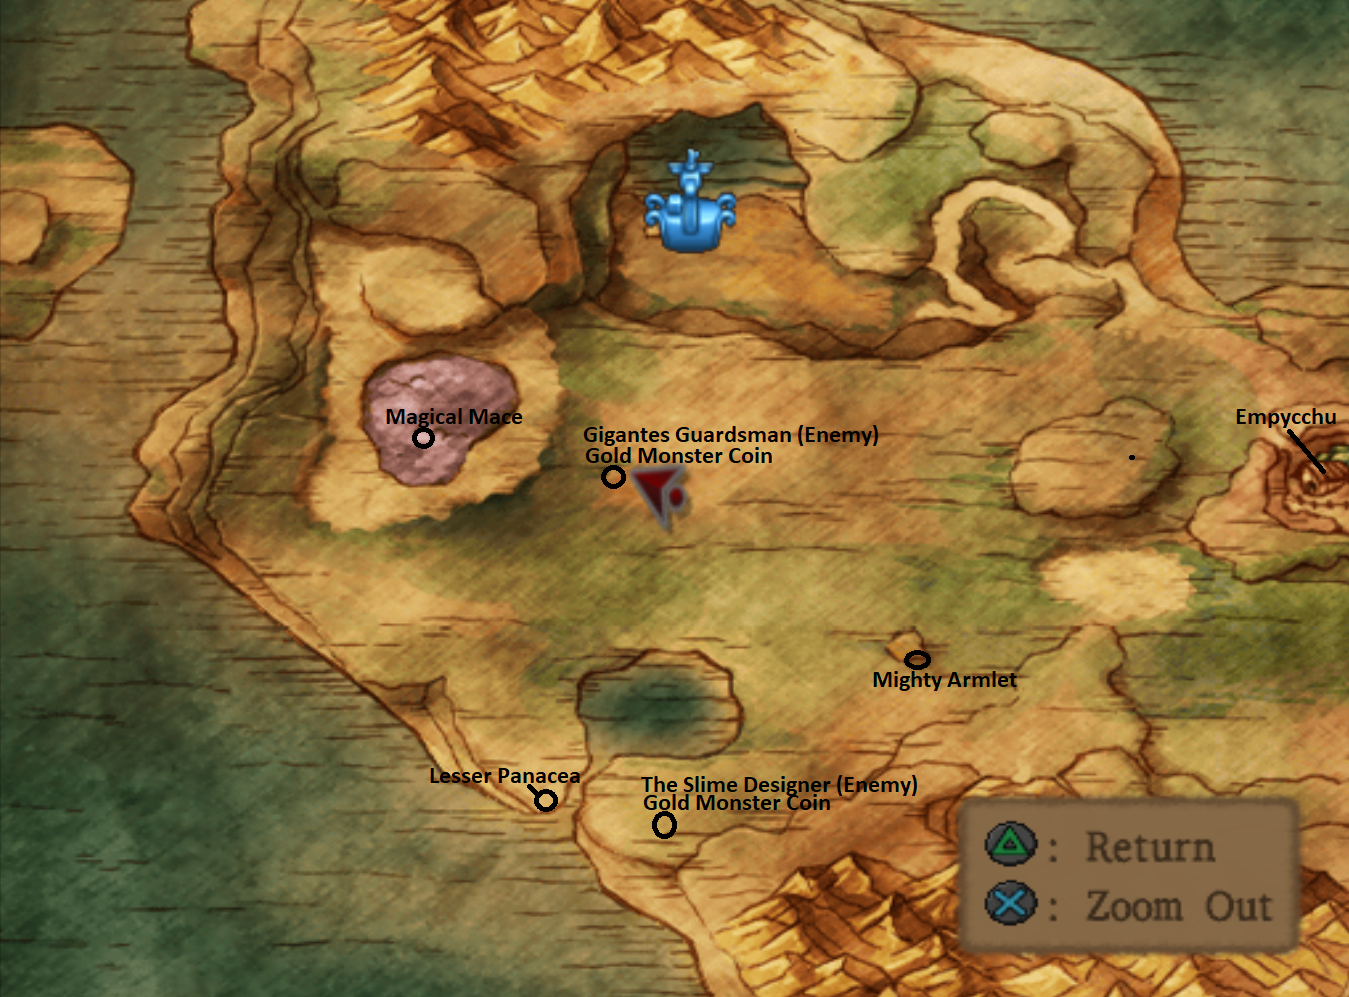
These two monsters will make your team powerful enough to take on the higher ranks of Monster Arena. I'd recommend you head over to my Monster Arena Guide at this time and finish every rank you haven't already until you beat Morrie. When you beat Rank B of the Monster Arena you'll need to recruit Octavion and Skeledoid. Octavion is found almost directly south of dumbking on the beach which you can only reach by boat. While you're in this area you'll want to also grab the two chests, one with the Seed of Strength and one with the Yggdrasil Leaf. Both locations are shown on my map below.
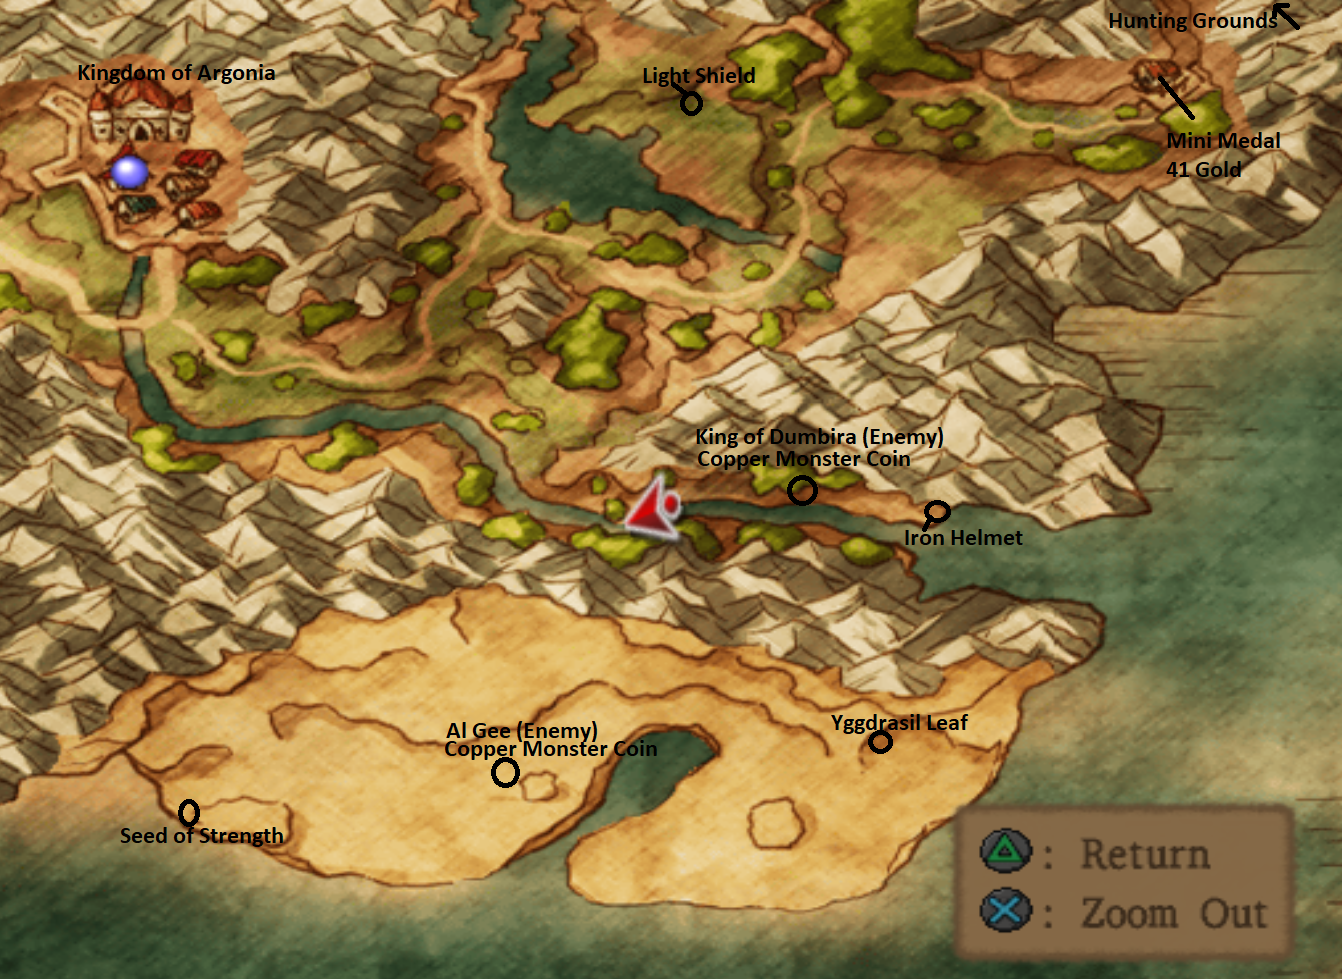
Octurion is on the eastern end of the beach south of the pillar.
Skeledoid is found west of the Dark Ruins; just Zoom over there and run west until you find him. Both of these monsters will not appear on the overworld until you've beaten rank B of the Monster Arena so don't bother even trying to recruit them before then. After you finish S rank of the Monster Arena there's still one more side quest we need to do before we go back to the main story.
Earlier in the game if you never raided the town of Neos for its goodies you should do so now. Zoom over to Neos or if you haven't been there yet, hop in your boat and sail to the island in the middle of the map. This is the island of Neos; here you'll want to collect all the goodies you find in that town. When you're done in Neos it's time for us to go to the Puff-Puff Club! Aside from a few unique scenes, inside of the Puff-Puff Club all you'll find is a Mini Medal and Silver Platter.
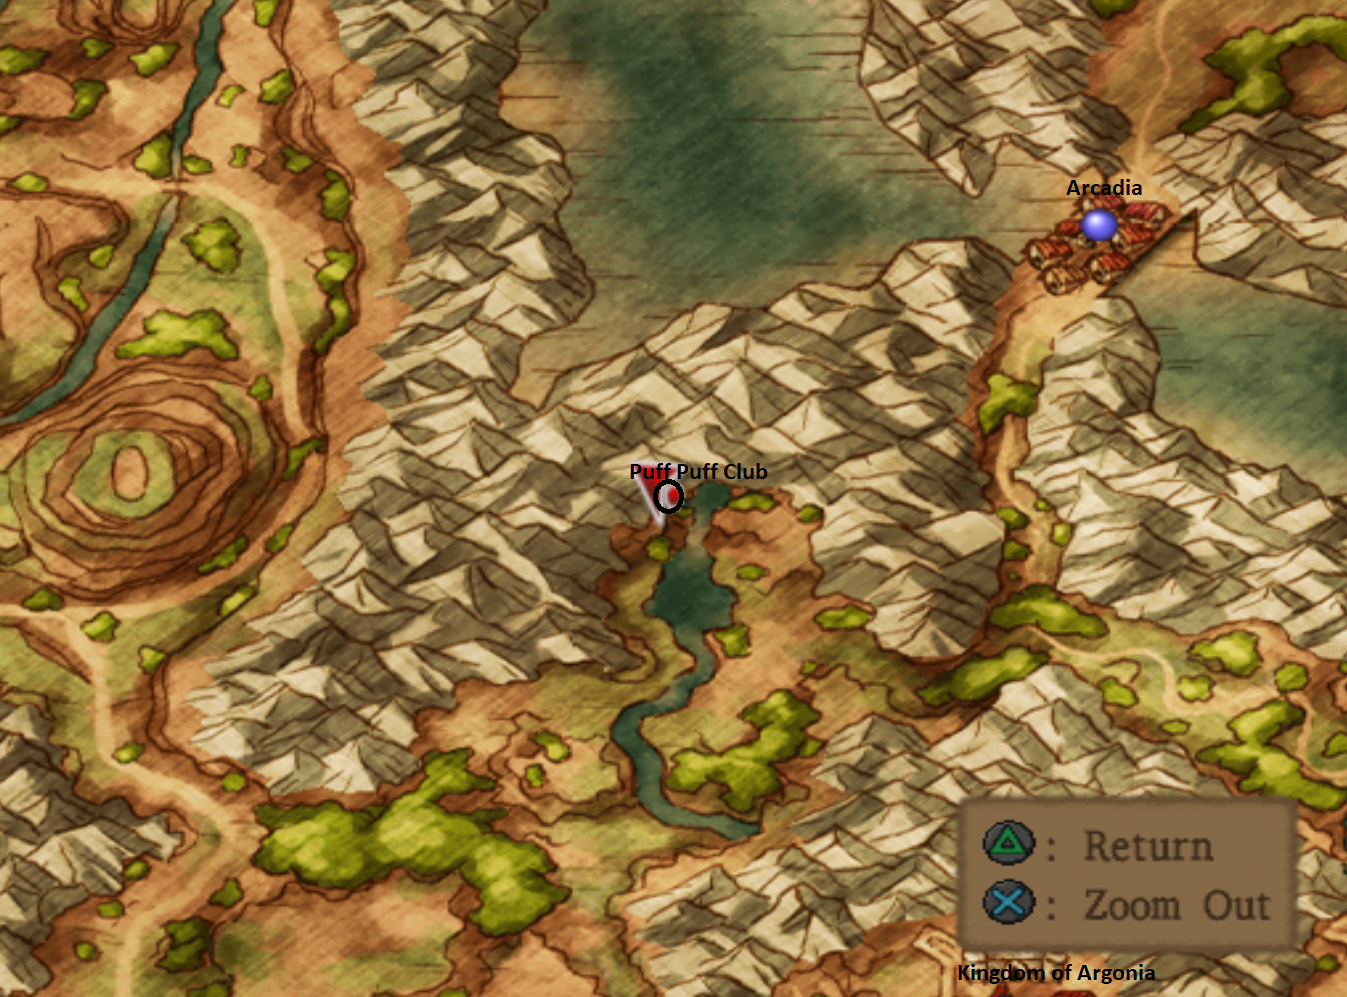
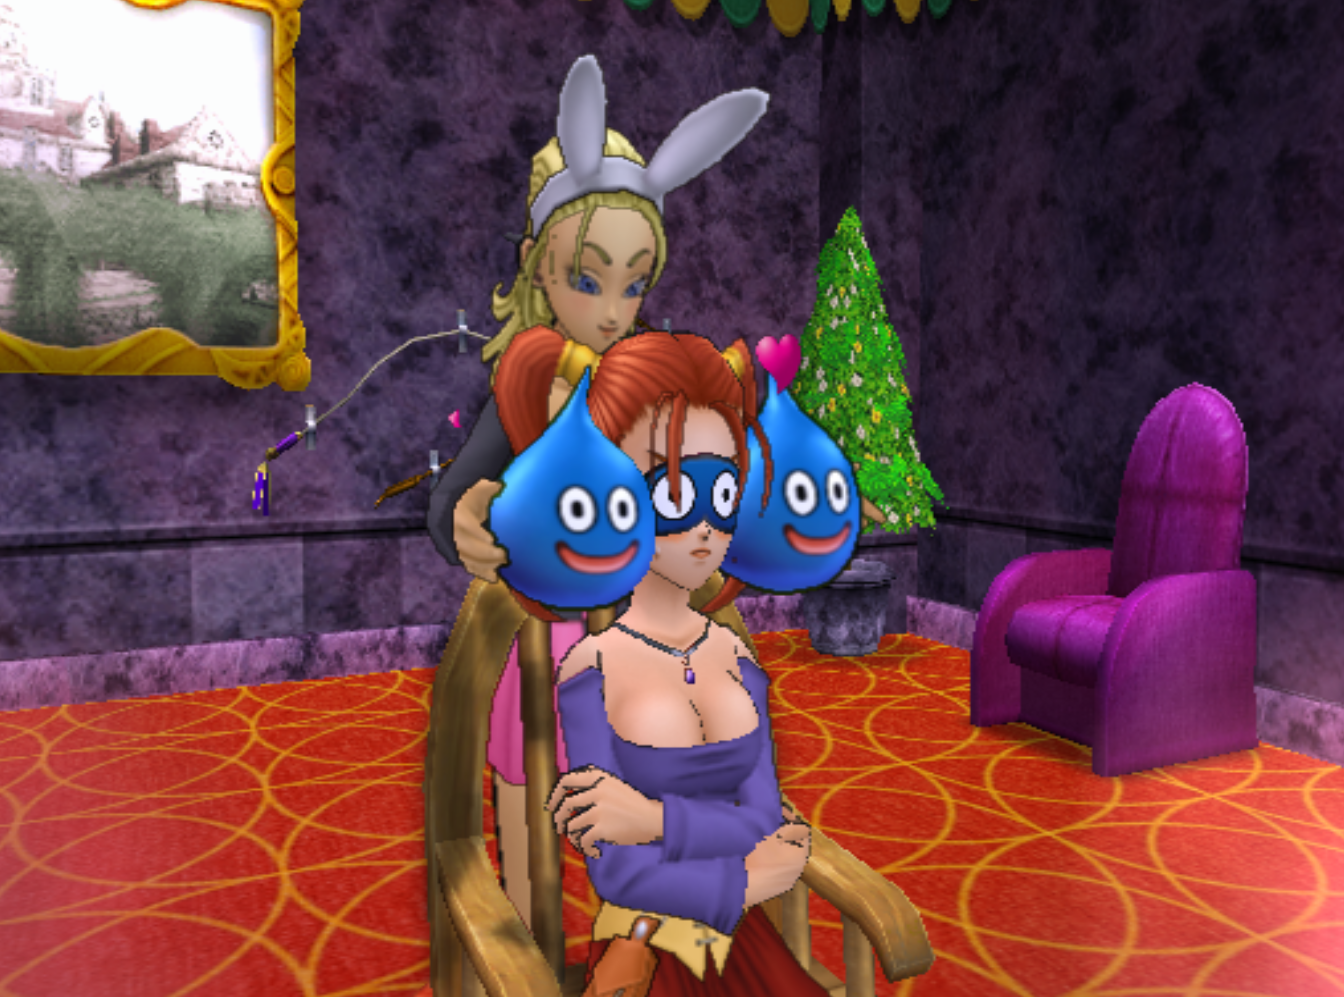
You can also switch your party members around and talk to the lady in here standing next to the chair to get the "Puff-Puff" treatment with your whole team. I had expected hookas or marijuana by the name "Puff-Puff" but actually all the lady does is rub two slimes against your face and makes you think it's her breasts. Jessica's reaction mirrors my own.
After you're done at the Puff-Puff Club it's time to get back to the main story. Zoom over to Seaview Church since that puts us closest to our next destination and hop on your boat. Sail to the island at the north-central portion of the world map. This is where we're going next.
There isn't much to find in the area around Savella Cathedral, only two treasure chests to grab before heading into town. Use my map below to learn their locations.
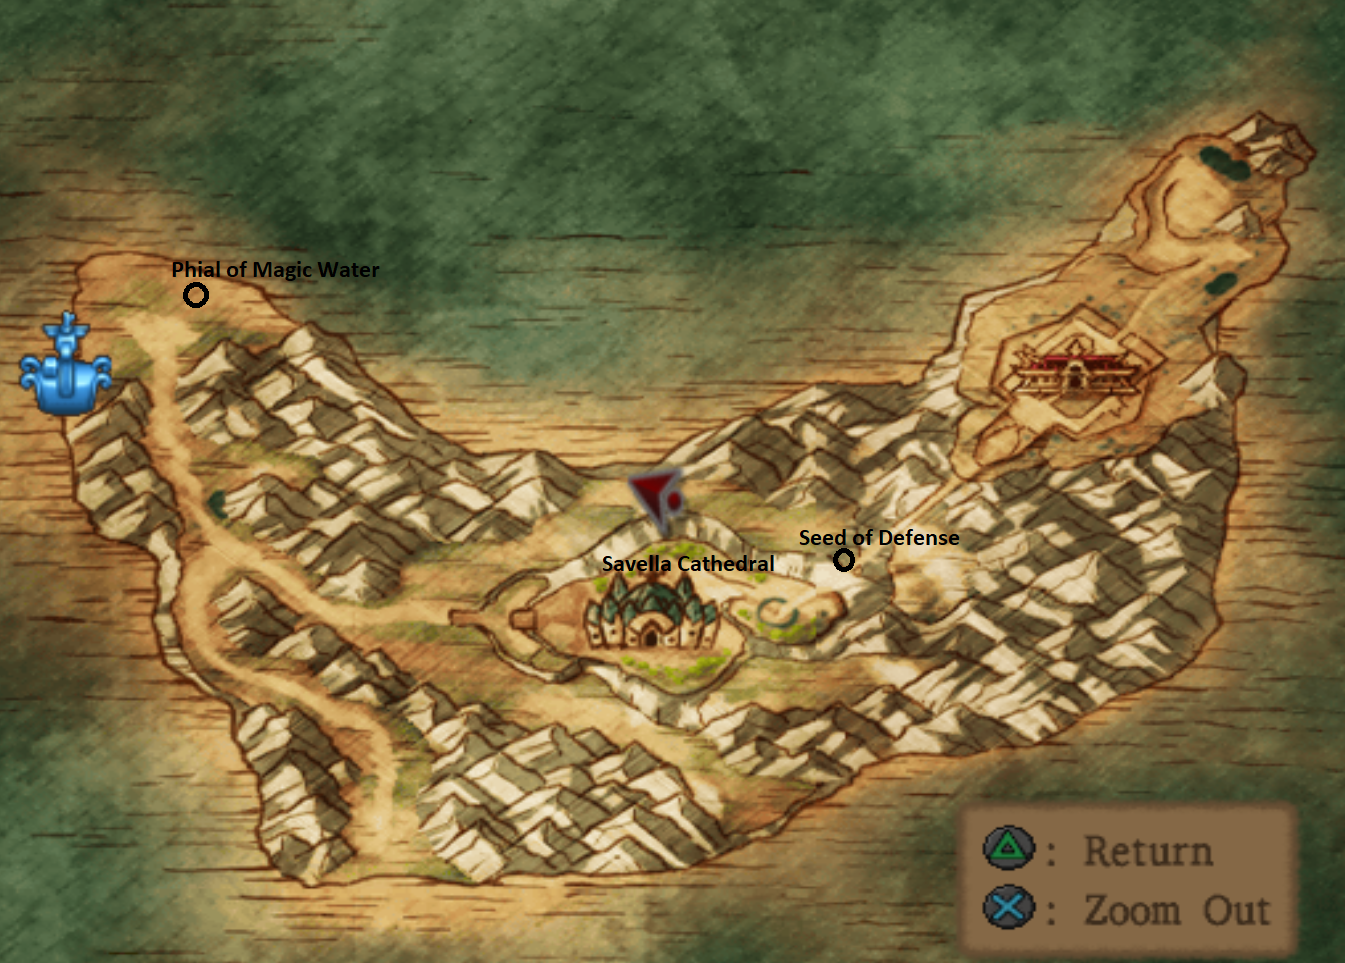
Town of Savella Cathedral
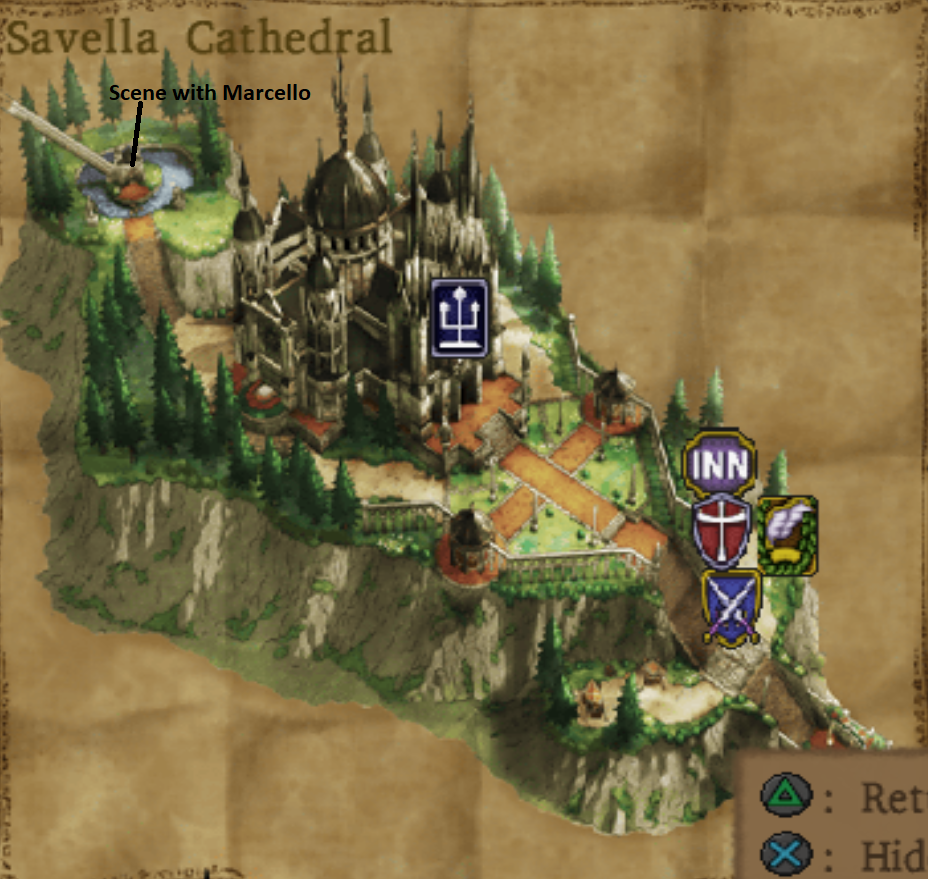
Despite the town of Savella Cathedral being very large there's actually not much to do here. You'll find two chests to grab inside of the armor shop but there's nothing else throughout the whole town as far as loot goes for you to collect. When you're ready to advance the story line forward you will want to go to the northwestern most portion of the town where there is you'll find an escalator type device.
Marcello will come riding down the ramp and a cutscene will ensue with him and your party. After the cutscene when you try to leave this room there will be another scene between the two guards. Once you've seen both of these scenes it'll be time to leave town and continue our journey.
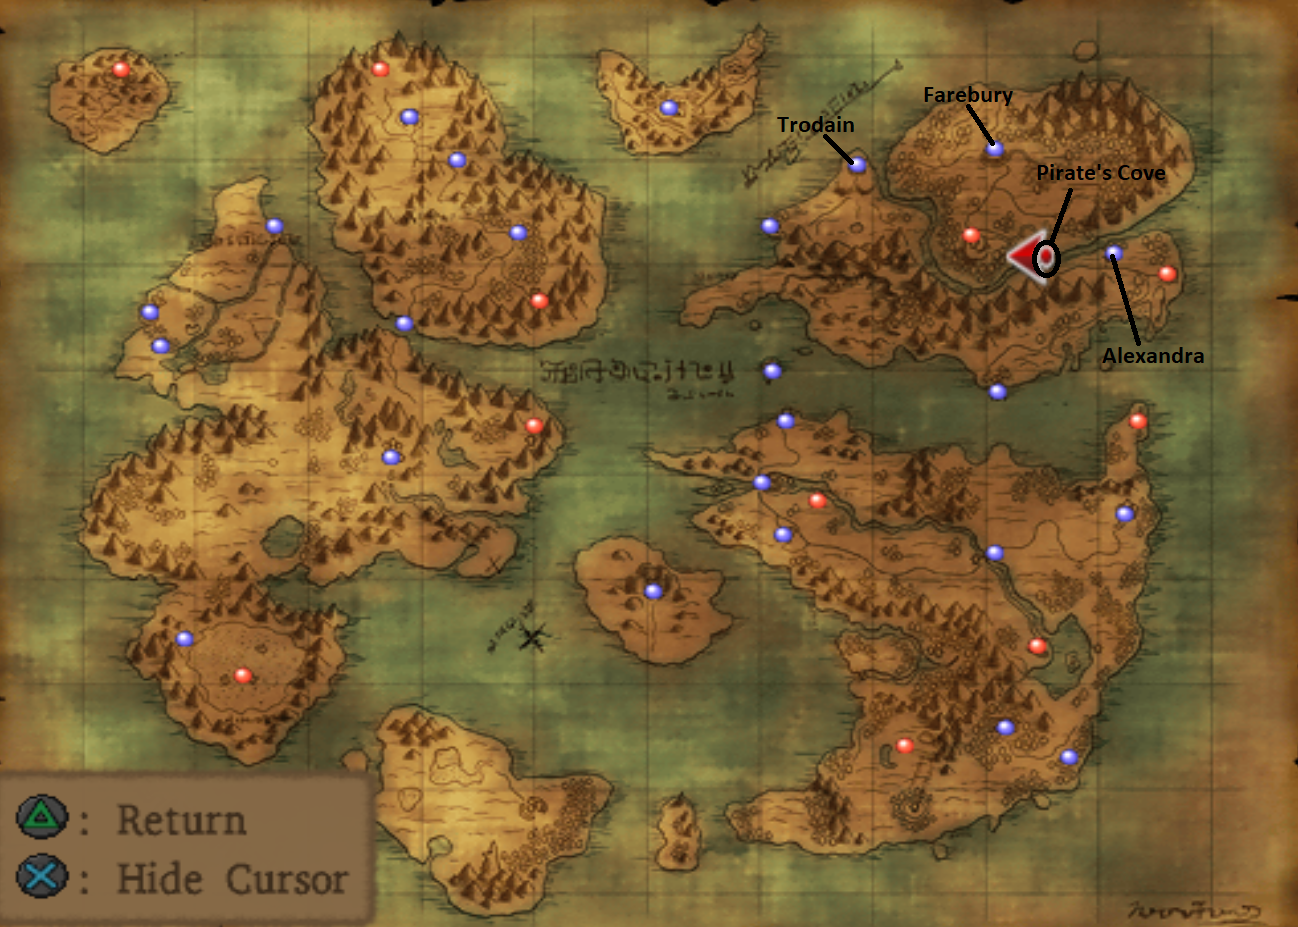
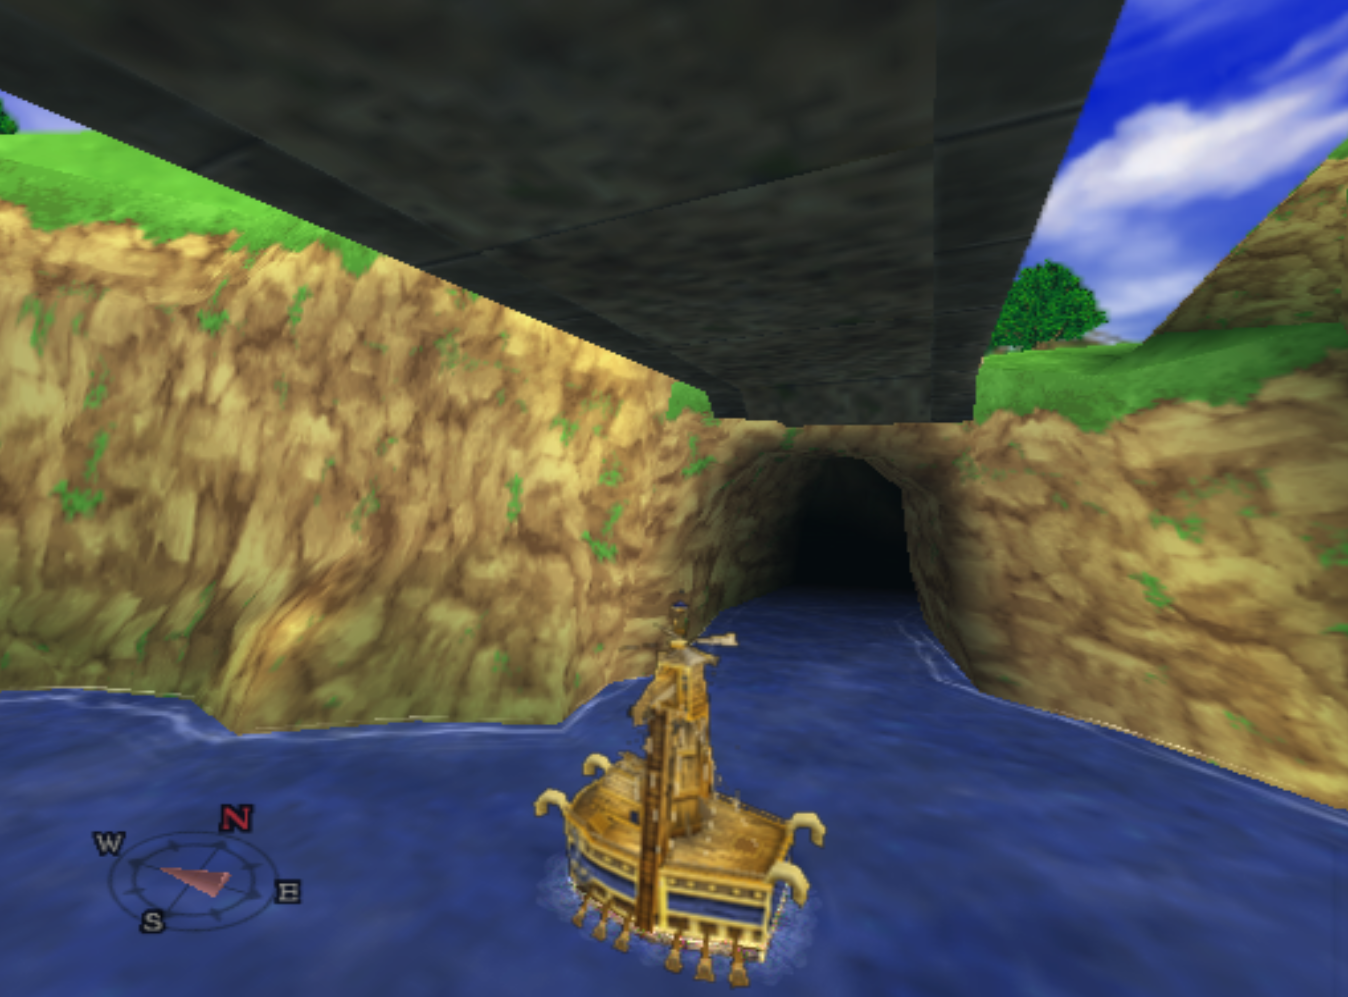
Our next stop is the Pirate's Cove which is actually on the same continent that we started our journey - it can however only be reached by ship. Just south of Farebury there is a bridge that connects the northern and southern portion of the continent. Pirate's Cove is located just under this bridge, shown in my screen shots below.
Pirate's Cove Dungeon
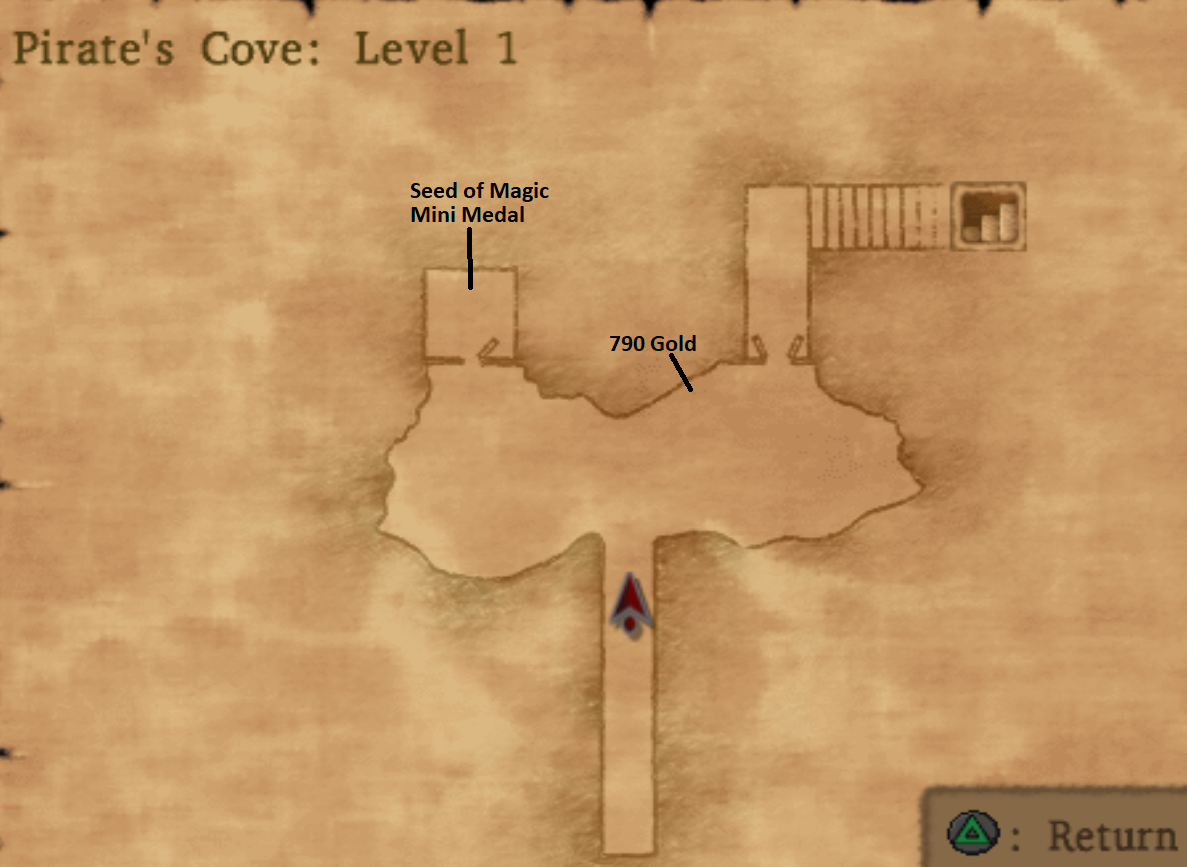
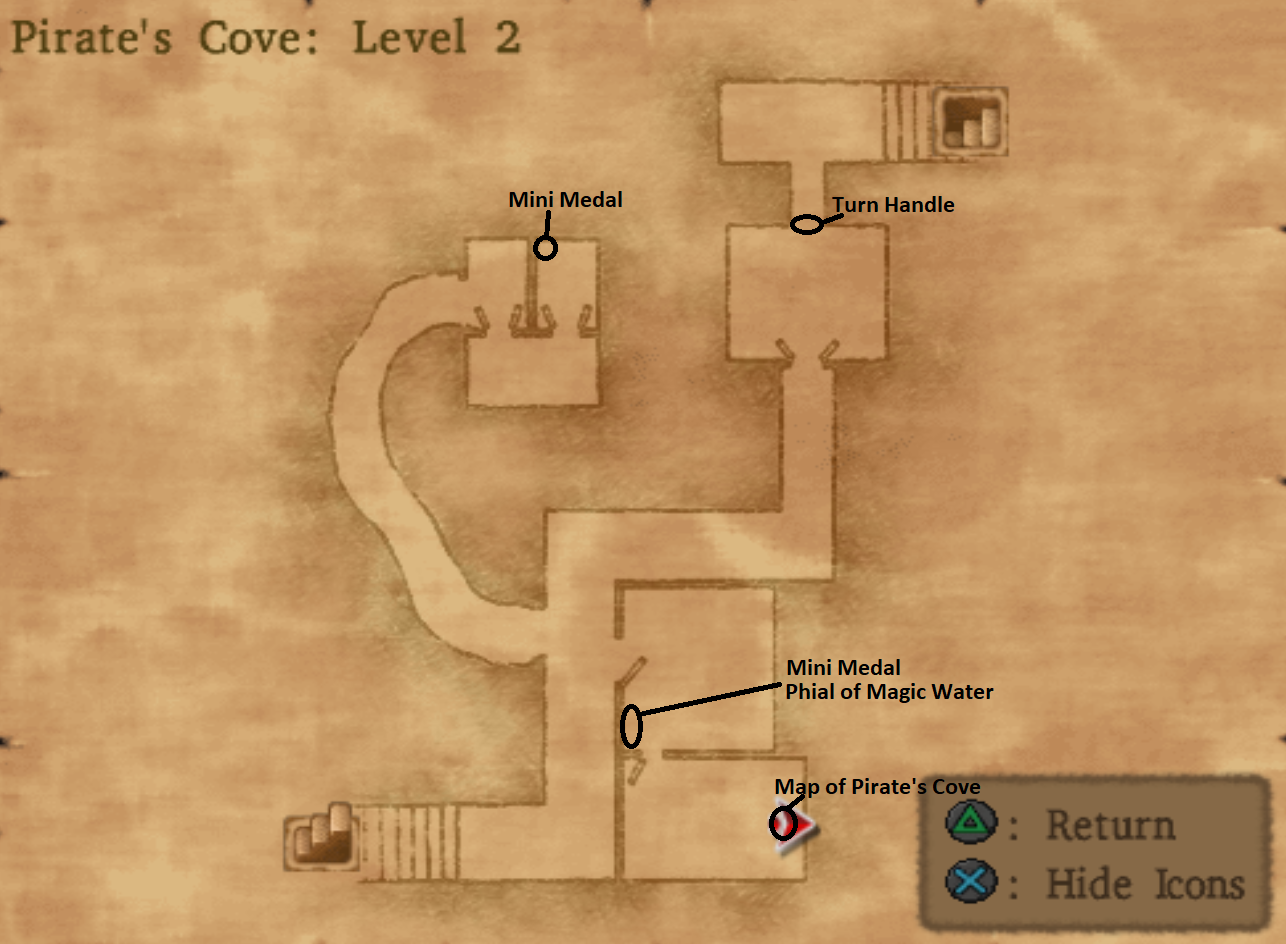
When you first arrive smash the barrels out front to get the gold and go in the door on the left. There's more goodies in here for you to collect too, a Mini Medal and a Seed of Magic. When you go in the door on the right it'll trigger a cutscene where Red arrives too.
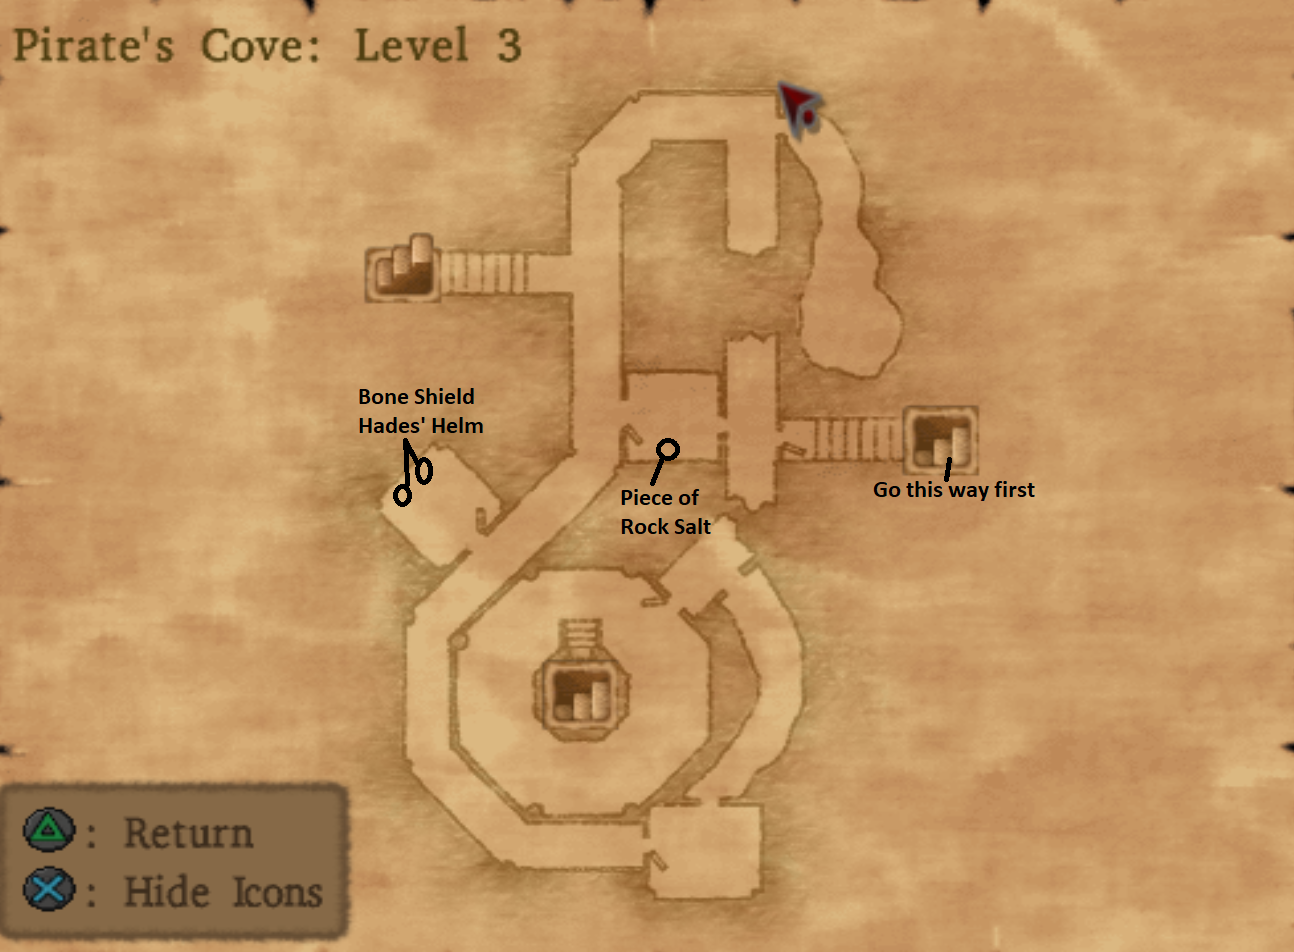
Throughout this dungeon there will be many scenes between you and Red, she is racing you throu gh the dungeon so-to-speak. You can take your time though, collect the goodies on each of the floors and solve the puzzles at your leisure.
On the third floor of the dungeon take the northern exit first; you need to drain the water from the column in the central portion of Pirate's Cove Level 4. It will open up the rest of the floor for us. After you do that you have to back track all the way back to the southern exit on Level 3.
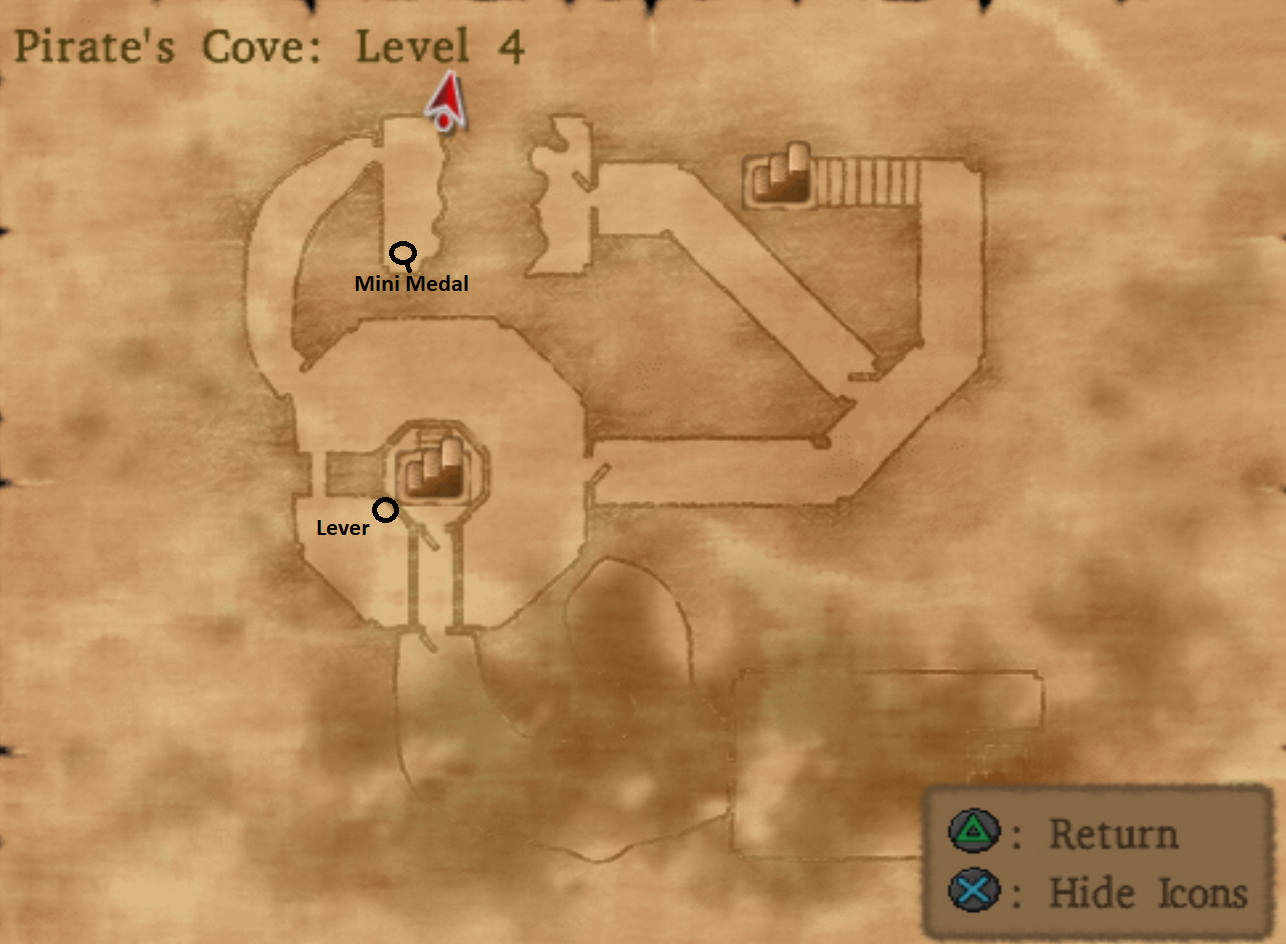
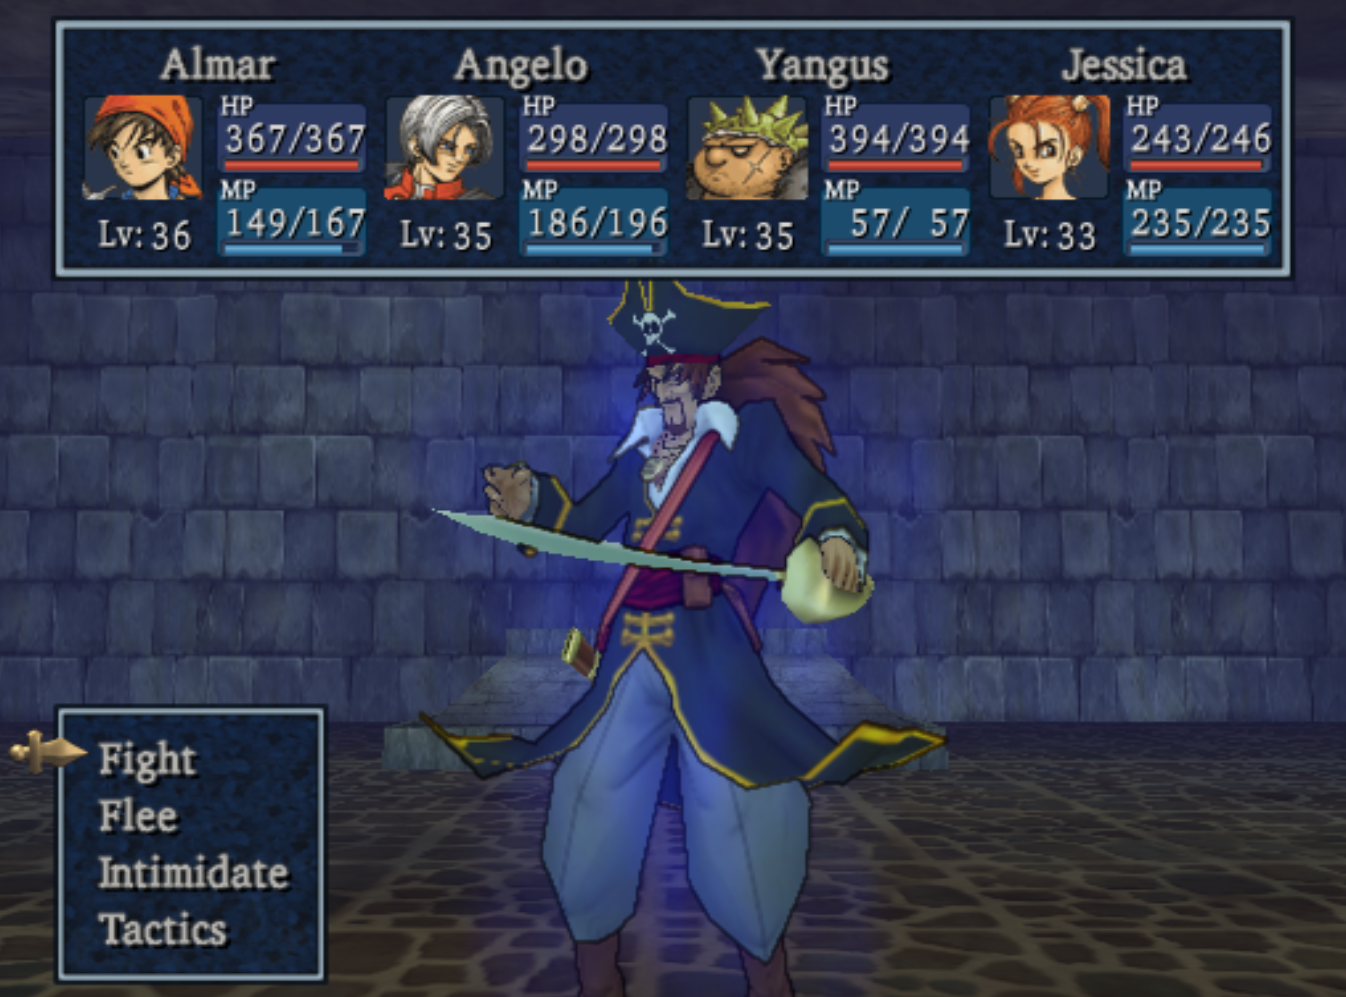
In the southeastern most smudged room on the map for Level 4 you'll find a treasure chest. It's guarded by the boss of the dungeon, Captain Crow - shown in my screen shot below. As you could probably already imagine you'll have to take out this boss to claim the treasure.
All in all Captain Crow is rather easy, he likes to build his tension up and do an AoE attack on your party - use Angelo's Multiheal each time he does an AoE attack and you should be able to negate most of the damage it causes. You'll need to spot heal when neccessary too since Captain Crow gets two attacks per round.
When the fight is over grab the Illuminated Sea Chart from the chest and a cutscene will trigger. After that Evac out of the dungeon and Zoom over to Neos. Our next stop is going to be the X on your World Map just southwest of here.
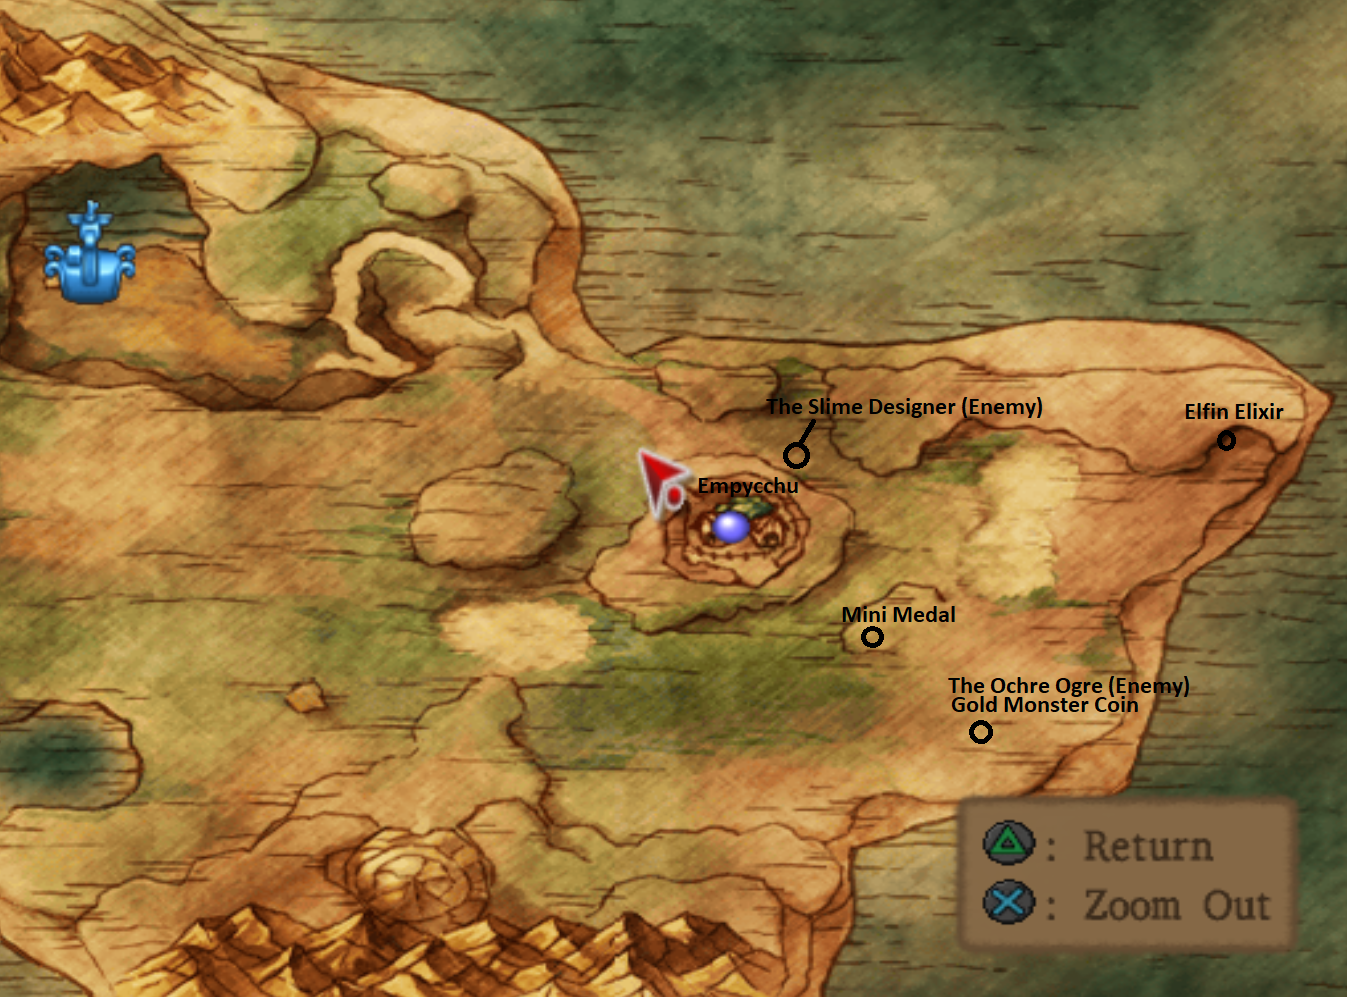
When you first arrive on the Isolated Plateau I'd recommend collecting all of the treasure chests scattered across it. Use my maps above for the locations of the treasure chests for us to collect. After you've collected all of the goodies head into the town of Empycchu.
Town of Empycchu

Explore Empycchu and collect all of the treasure chests and smash all of the pots throughout the town. There's actually quite a bit here for us to collect so be thorough when exploring the town. Also be sure to stop in at the Item Store shown on the map above. He sells armor too which is an upgrade for us right now.
In the northern most portion of Empycchu you'll find the Inn and Church. In this same building the chief sits by the center in a table. You need to speak with him in order to advance the story forward. The chief tells you about the two worlds and about Empyrea, the giant God-bird that is found on this island. Before leaving the Elder's Hut go into the Inn on the right hand side and spend the night here for free.
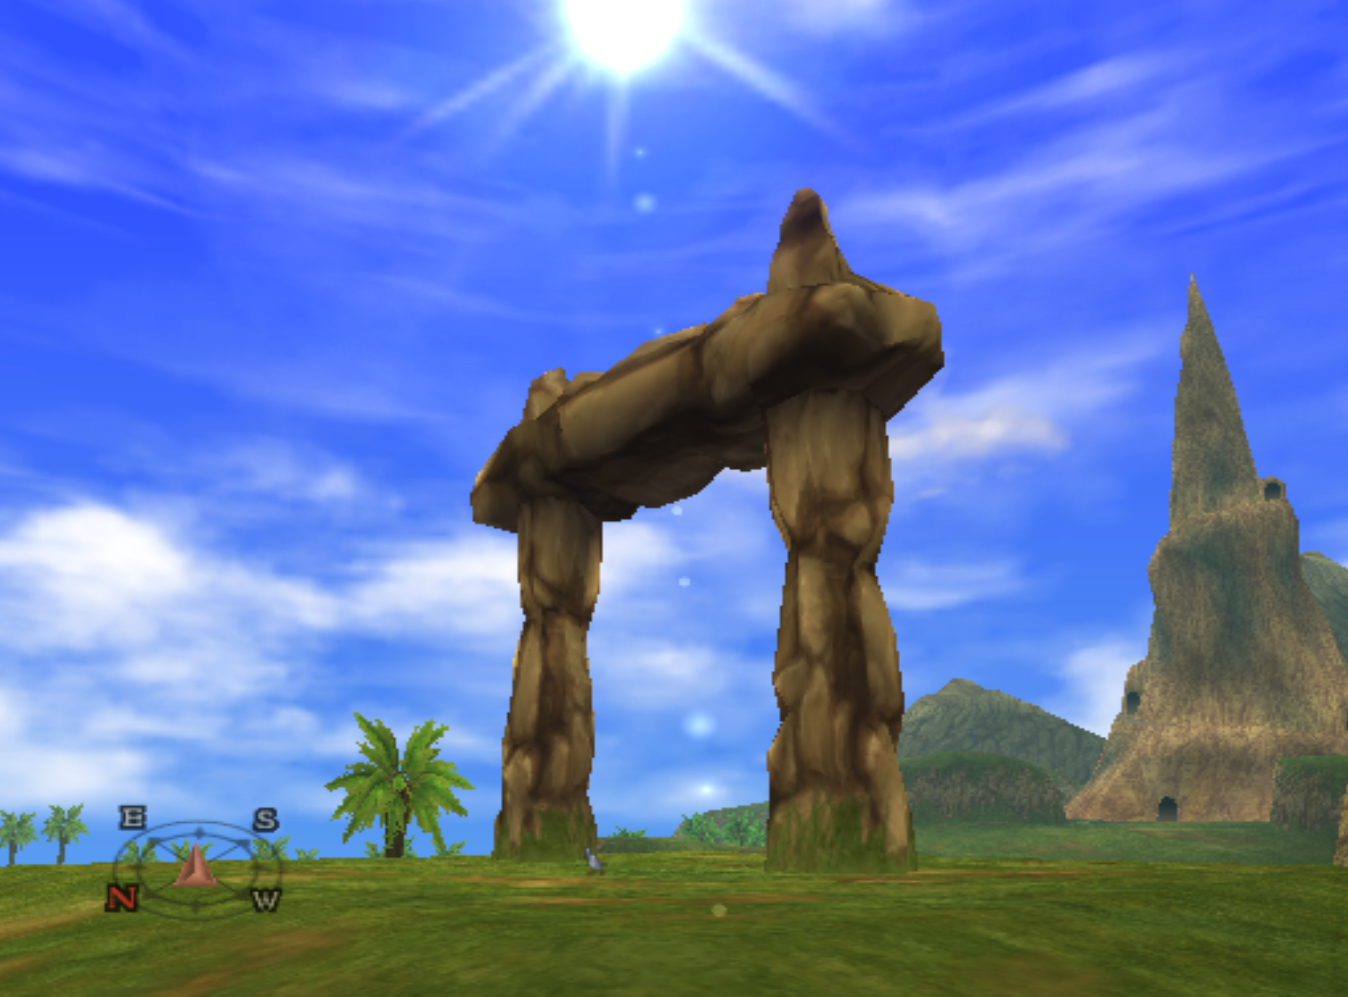
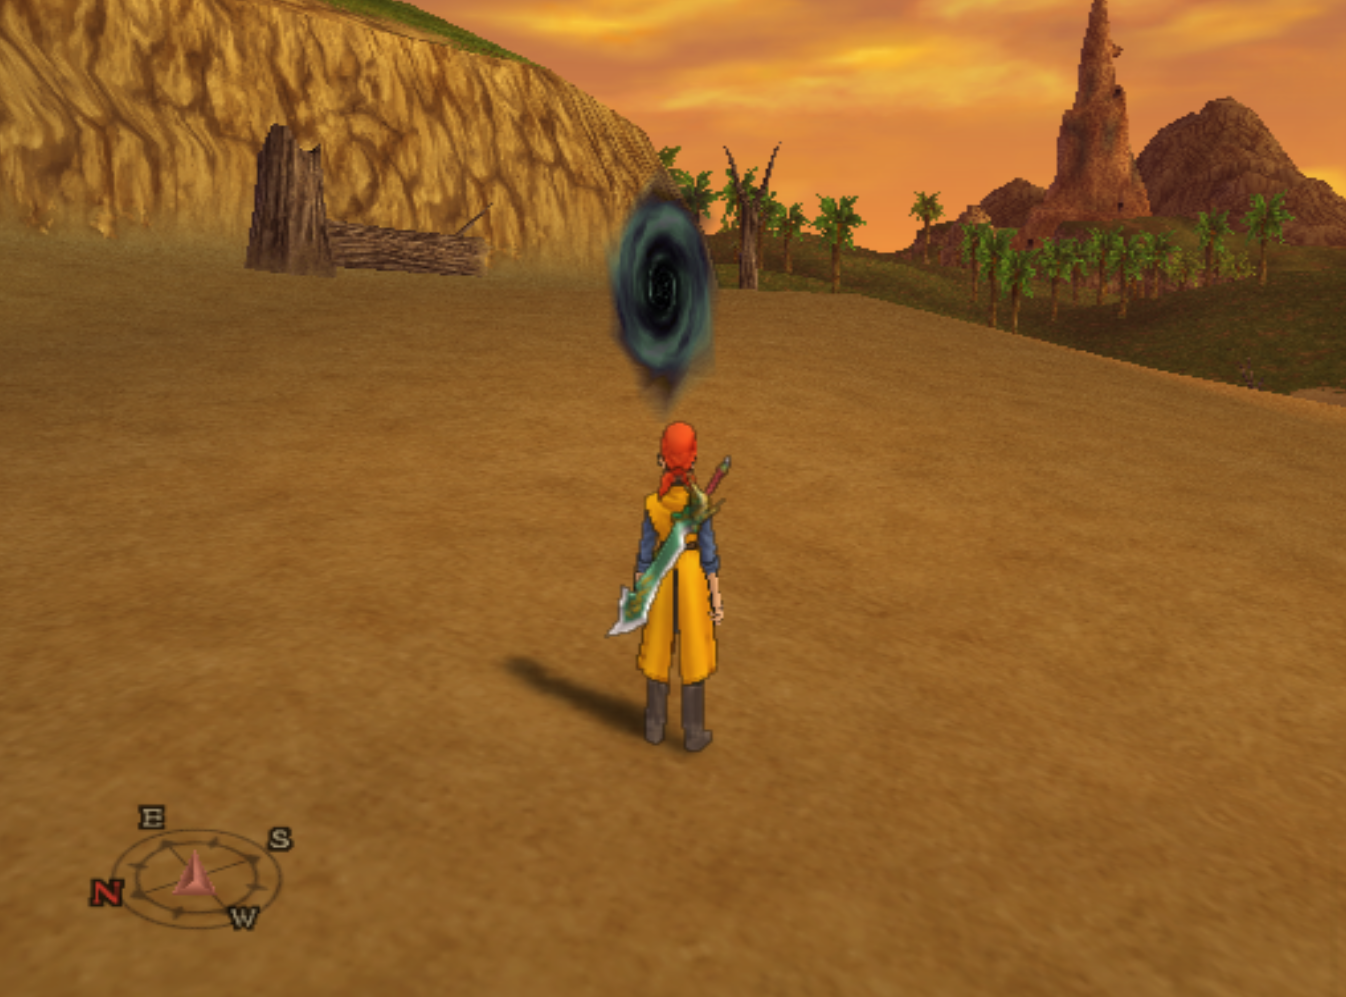
When morning arrives leave Empycchu and travel west to the large stone arch atop a hill. It stands out like a sore thumb so you can't miss it. Circling around this huge stone arch you'll see a large bird's shadow. If you follow this shadow it'll leave the stone arch area and travel west across the plains. Eventually it'll stop at the raised piece of land just north of the toxic lake. A portal to the Dark World will open after a scene - enter the portal to advance the story forward.
Note: If you have collected all the Mini Medals up to this point in the game you will have just enough to get Orichalcum Ore from Princess Minnie. Orichalcum is used in creating the best items in the game. The first piece you use you'll want to make a Liquid Metal Sword by combining Orichalcum, Rusty Metal Sword and Slime King Crown together.