
Dragon Quest IX: Walkthrough Chapter 4
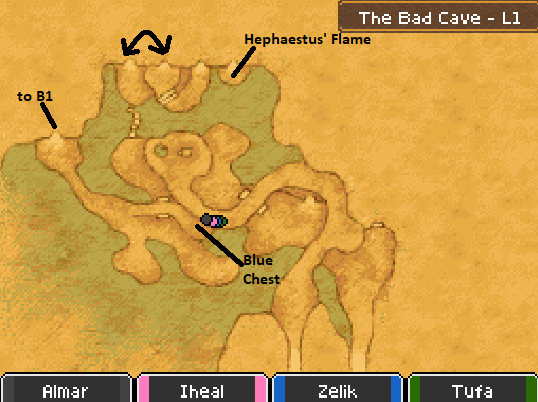
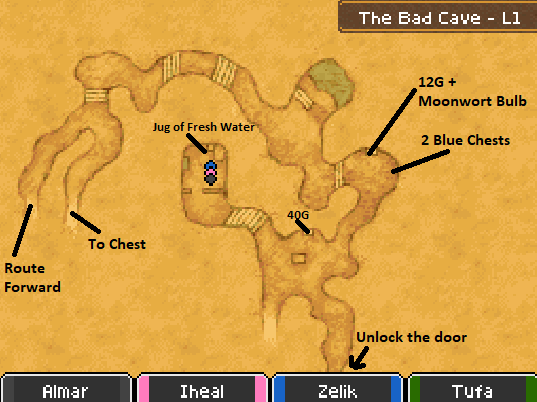
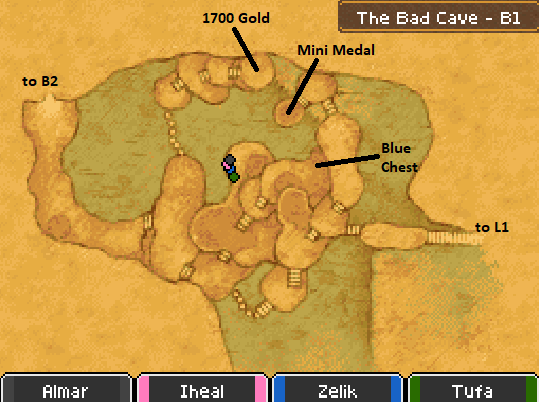
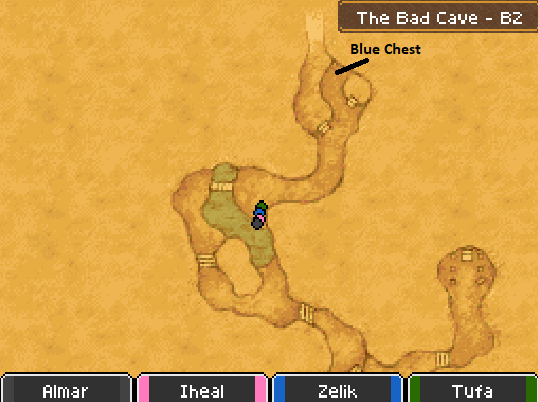
This chapter begins in The Bad Cave, a dungeon that's north of Bloomingdale on the eastern continent. In order for you to advance through this dungeon you'll first need to complete all of the previous story steps in Bloomingdale - assuming you've been following my guide this far you've already finished that step.
On the first floor of The Bad Cave you'll want to sit down at the lone chair that's situated at the table in the center of the room. When you do this a scene will appear with one of the Kidnappers coming out to talk to you. He'll also place a ladder next to the small ledge you're on, allowing us access to the rest of the dungeon.
At the end of the dungeon you'll find the girl you're looking for as well as the boss of this place, Tyrantula. This boss is actually rather easy to defeat, my party was level 15 when I did him since I was leveling new classes at the time. He has some annoying abilities like his AoE poison attack which deals 10 - 20 damage and can poison party members, a web attack which immobilizes people and an AoE wind attack that hits for 20 - 30 damage each.
Once you've defeated Tyrantula it's time to head on back to Bloomingdale to collect our Fygg. Go to the graveyard where we first met Marion's ghost and examine the southern gravestone again to receive your reward. Next stop is the harbor, if you've been reading the text Marion left the boat to you, allowing you to now sail around the world wherever you wanna go.
First stop is the lighthouse just west of Bloomingdale. You've been able to see it on the map this whole time, just unable to reach it. There isn't much for us to collect at this lighthouse but you should stop here and grab what's available, you can use it in Alchemy or just sell it for some extra change.
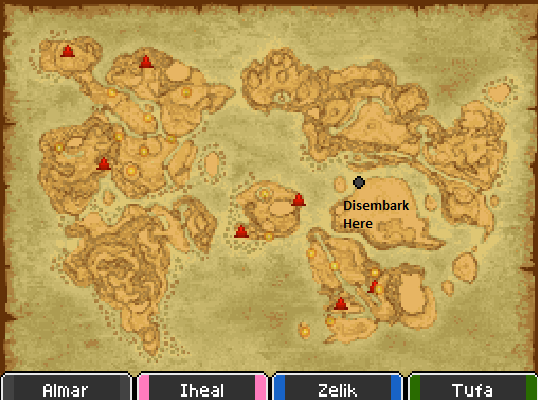
When you're ready to advance the story forward you'll need to sail to the island just north of the one we were on. It's got a huge desert on it and a large town right in the center of it. For those of you having trouble finding it, use my maps above.
Much like in Bloomingdale before it, Gleeba has a ton of events you need to complete inside of the town before you're able to advance the story forward. In fact, this is my least favorite town in this whole game - you'll see why. Here is a list of all the things we need to do and in which order:
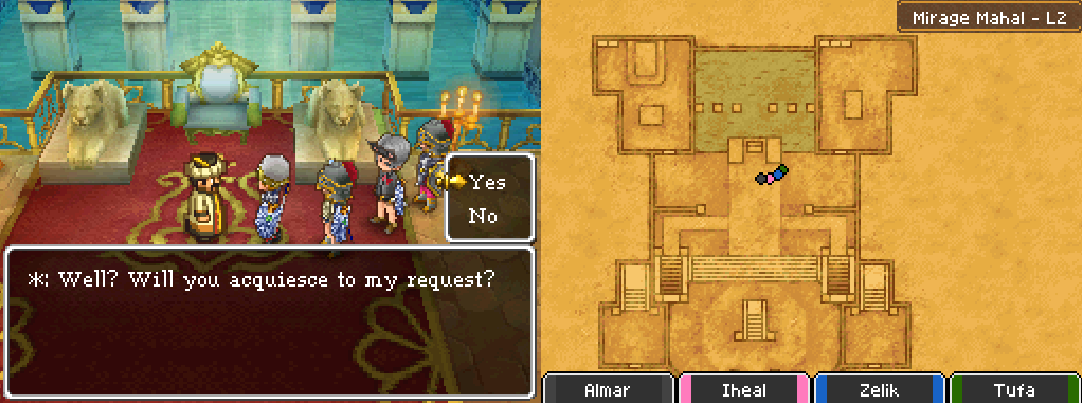
1. Speak with the Chancellor on L2 and agree to help him (screen shot below)
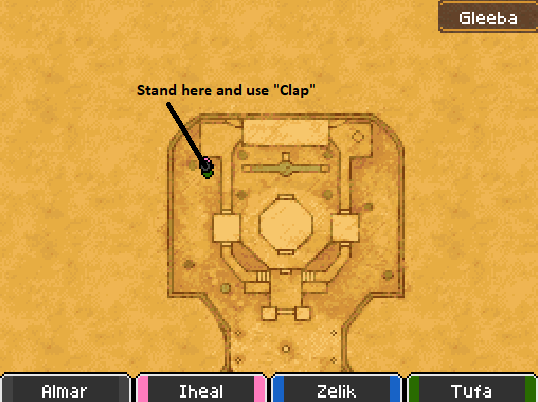
2. Go outside the Mirage Mahal and to the northwestern tree in the shade; use 'Clap' party trick to scare the lizard out of the tree (screen shot below)
3. Return to the Chancellor and give him the lizard
4. Go down to L1 and speak to the soldier guarding the bathroom
5. Speak with the woman just south of the bathroom door
6. Go to the roof and around the large oval structure to the back and enter it from the north
7. Grab the Magic Key
8. Speak with the man sitting on the fountain to learn how to get into the bath area
9. Jump into the fountain to be taken to the bath
Side Quest #028 (Desert Foxes)
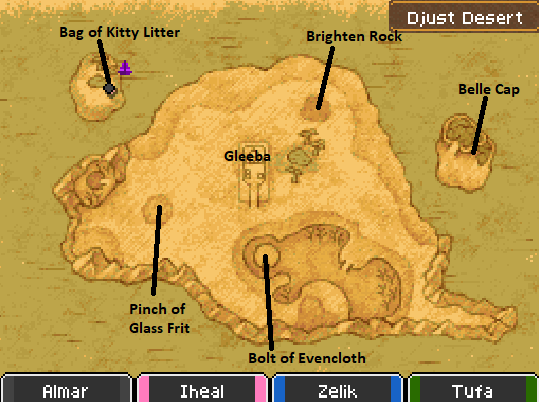
Location: A sign southwest of Gleeba in the desert; read the back of it
Task: Defeat Parched Peckerels until you've obtained 10 Duneberries
Reward: Platinum Ore; Silver Platter when repeated
Side Quest #029 (Fool's Gold)
Location: Gleeba; Man inside the southwestern house
Task: Defeat Gold Golems until you get a cutscene
Reward: 1000G; 500G when repeated
Side Quest #030 (Wrapper's Delight)
Location: Gleeba; Soldier in the southwestern house L2
Task: Acquire 5 Grubby Bandages from Mummy Boys in Plumbed Depths
Reward: Ruby of Protection; Corundum when repeated
Side Quest #031 (Feather for a Fan)
Location: Gleeba; Man inside the dance hall
Task: Collect 3 Hocus Chimaera feathers from Hocus Chimaeras
Reward: 1000G; 500G when repeated
Side Quest #033 (Lady of the Dance)
Location: Gleeba; Book in the northwestern corner of L1 of Mirage Mahal
Task: Defeat Goodybags around Batsureg until you get a cutscene
Reward: Belly Dance Party Trick
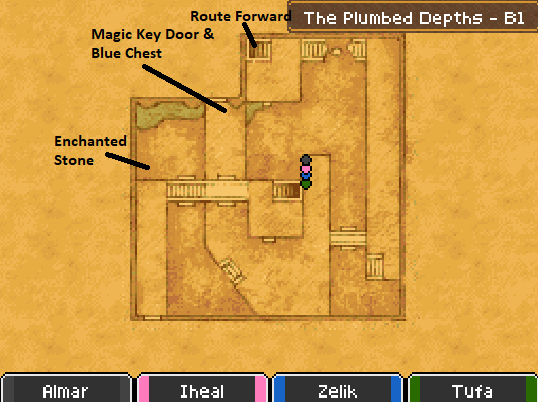
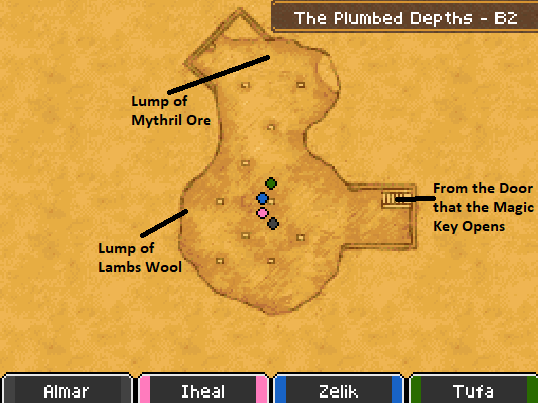
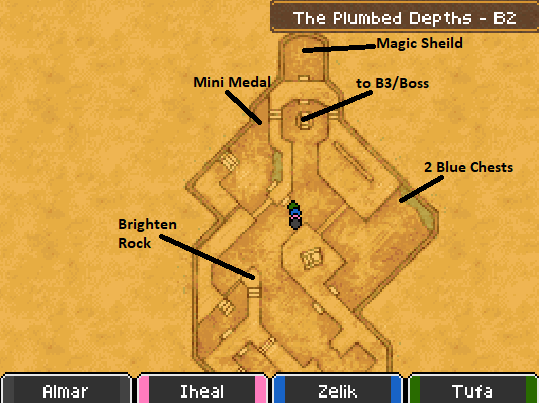
After watching the scene in the royal bath you'll need to follow the overgrown lizard who can apparently shrink himself at will into the well. The dungeon is called The Plumbed Depths and it's pretty easy and straight forward to complete. There's one treasure chest you can't reach in the dungeon yet which is behind a jail cell door, it requires the Ultimate Key to reach which we sadly don't have yet.
You'll find the Queen on B3 and as you could already guess you'll have to fight the lizard that captured her when you do.
Grand Lizzier is the name of the boss that you'll be fighting and his melee attacks can be quite deadly if you're under leveled or you have a lot of casters with you. He typically hits for about 60 points of damage with each melee attack - he only gets one attack a round though so long as you keep your health high it won't be a problem.
Once the battle is finished you'll be rewarded with another Fygg and then after the cutscene you'll find yourself back in the bath chamber. Before you leave the area search the western waterfall for a Dangerous Bikini Top, with that in hand you're officially clear to leave Gleeba.
Before we advance the story any farther though, now that we have the Magic Key, there's a bit of loot we can run around and collect first. In addition to this you can also complete the Paladin Class Unlock Side Quest in Gleeba and I would also recommend you start experimenting with other classes now if you have not already.
If you don't care about all the side quests and stuff, skip to Chapter 5 of this guide because the rest of this chapter is going to be going over side quests and how to 'play' Dragon Quest IX.
For those of you who have never played Dragon Quest IX before you may be unfamiliar with exactly how this game is designed/meant to be played. Technically you never have to switch your classes even a single time - you can always just grind when you can't beat an encounter until you eventually can and play it like any typical RPG.
However, the way Dragon Quest IX is designed is a bit more like Final Fantasy V. It expects you to switch classes multiple times and the abilities you pick up when spending Skill Points will carry over to other classes with you. Basically every time you hit level 15 - 20 on one of your characters you'll want to reroll them to another class and do the same thing, that's the best method I have found.
You'll be spending a lot of time grinding in the same locations over and over again - but you can speed things up a lot by only switching the classes of 3 characters at a time then grinding tougher enemies than you'd be able to handle on a full group of lower levels.
Here are some side activities that you can do while leveling up alternate classes on your team...
Magic Key Door/Chest Locations
Gladiator Class Unlock Sidequest
Armamentalist Class Unlock Sidequest
To give you an additional helping hand, I have created a list of abilities/classes you should level up that can be found below. It's highly recommended you raise Shield on everyone as soon as possible and you'll want to choose which characters you plan to play which role.
Martial Artist: Psyche Up (Increases tension) - All characters but primarily damage dealers
Thief: Half-Inch on as many characters as possible
Warrior: Whistle Ability on at least 2 characters
Shield: Increased Block Rate - All Characters
Weapon Skills: Raise as many different ones as possible if you plan to do lots of side quests... You'll need them
Mage/Priest/Armamentalist: Raise all three of these on your Healer
Continue to Walkthrough Chapter 5 (Batsureg, Gerzuun, Swinedimples Academy & The Old School)