
Dragon Quest IX: Walkthrough Chapter 3
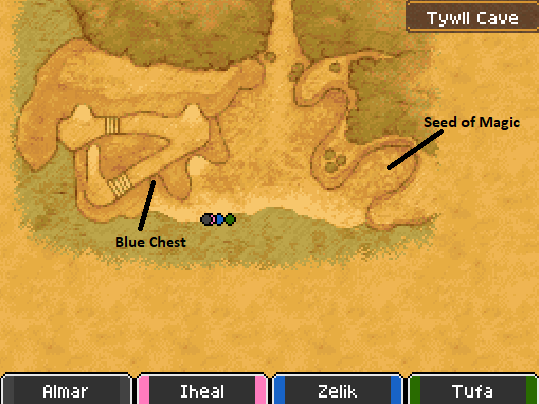
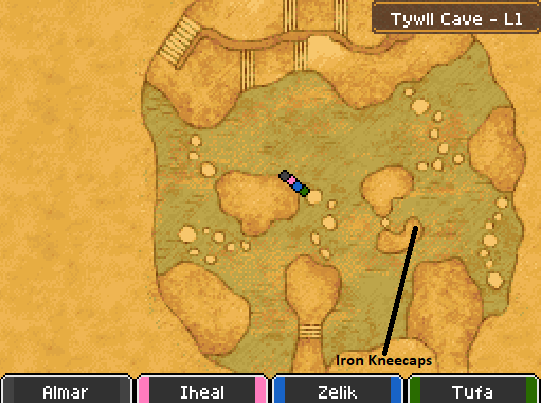
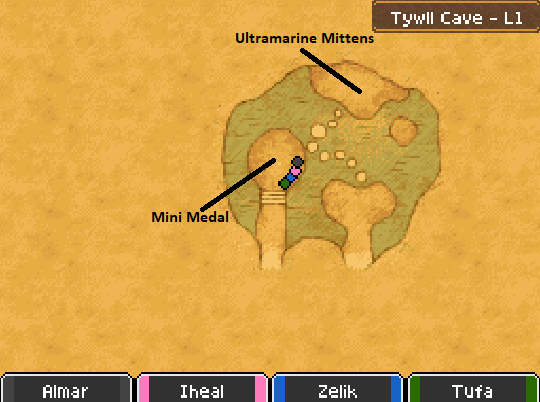
From Porth Llaffan you will want to follow the road west until you find your way to Tywll Cave by the shore. Before going into the cave you'll want to collect some treasure chests out front; as for the dungeon itself - it can be a pain in the butt if you don't plan your route carefully. Use my maps below along with your own for some extra guidance.
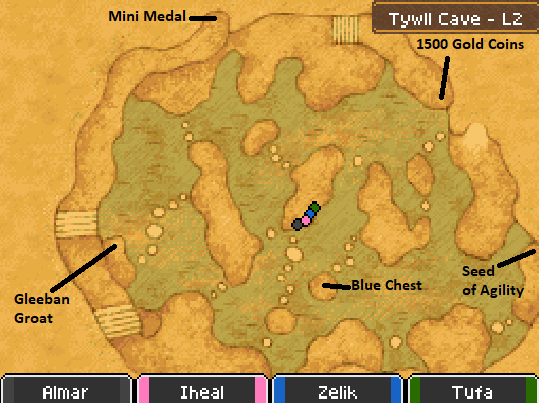

At the end of the dungeon you'll find an area called Cuddiedig Cliff. This is where you'll face off against the boss of this dungeon, Lleviathan. Compared to the previous boss, this guy is a total piece of cake. After defeating him you'll find yourself back in town at the Mayor's house. Speak with Jona who is standing on the shoreline then board the boat and talk to the captain to set sail.
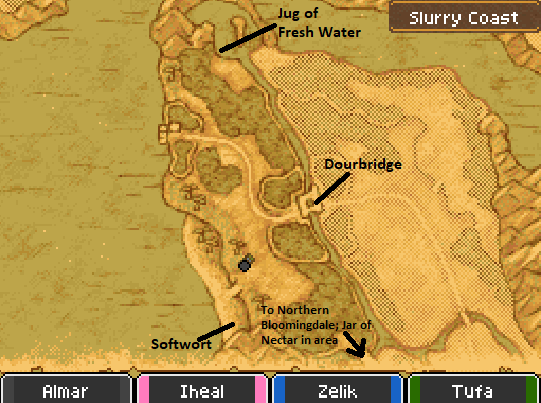
The boat docks at a place called Slurry Quay on the Slurry Coast which is on the eastern continent, this is a small town with an Inn and an item shop as well as a few NPCs that you can talk to. It'll also give you the Slurry Quay Zoom location incase you ever want to come back here. Grab the Seed of Strength in the chest that's unlocked next to the Inn and then head southeast out of town.
Our next stop is technically the town of Dourbridge to the southeast but there's some goodies you can collect around the world map first - if you're interested. They're mostly all alchemy ingredients, so if you have no interest in doing Alchemy there's no reason to grab anything.
Side Quest #006 (Get Well Water)
Pre-req: Finish Quest #005
Location: Stornway; Soldier inside the NW tower
Task: Give him 1 Angel's Tear
Reward: Gleeban Groat
Side Quest #019 (Moving House)
Location: Stornway; Old Man in western part of town
Task: Use his Strength Ring in Alchemy to make him a Raging Ruby
Reward: Life Ring
There isn't much for us to do in Dourbridge - however if you have enough Mini Medals for Cap'n Max Meddlin to give you the Thief's Key there'll be a lot of side questing to do prior to advancing the story forward. All you need is 4 Mini Medals and you'll receive the Thief's Key as the reward, I had twice as many on me when I got here so even if you missed a few you should be fine.
As always, here is a much easier to read format for doing this town:
1. (During the day) Go across the upper bridge to trigger a scene
2. Talk to the man in the most northern building
3. Speak with Cap'n Max Meddlin in the northeastern tent & get Thief's Key
Now is when you face two different paths... You can continue forward with the story or you can Zoom around a bit and grab three treasures that we couldn't collect before due to the lack of a Thief's Key. If you'd like to do the treasure chests head over to my Thief's Key Chest Locations. Otherwise head east out of Dourbridge and south towards the next location.
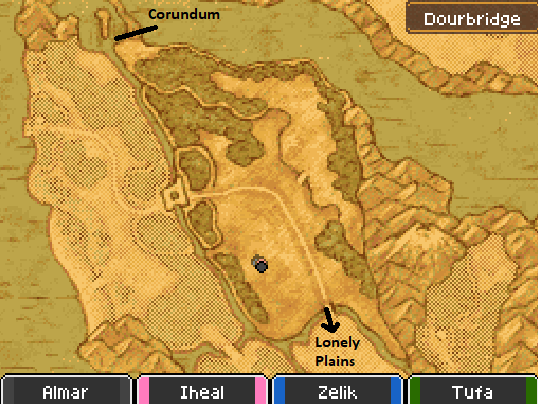
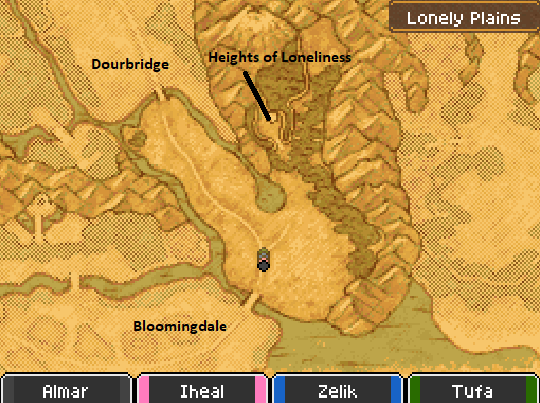
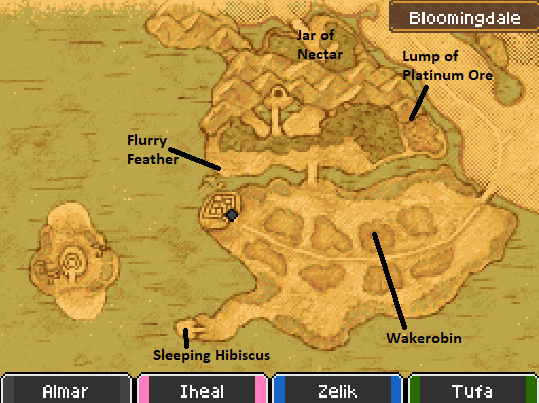
Technically our next stop is Heights of Loneliness in the Lonely Plains but I would actually recommend you head all the way southwest to Bloomingdale first. You can pick up some new gear and weapons here and you'll get a bit more EXP from any random encounters that happen - if they happen. The second reason I like stopping at Bloomingdale first is to pick up the Zoom location.
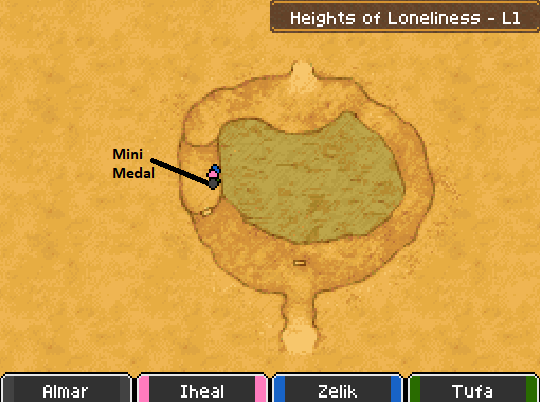
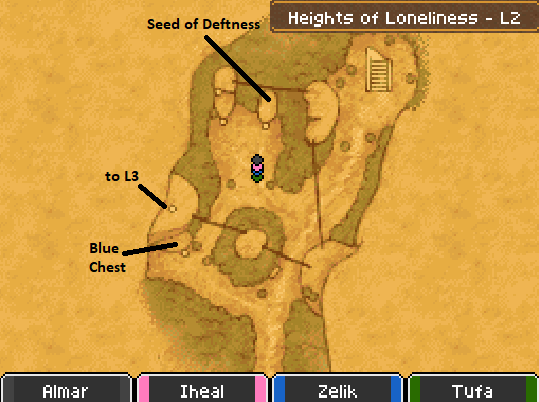
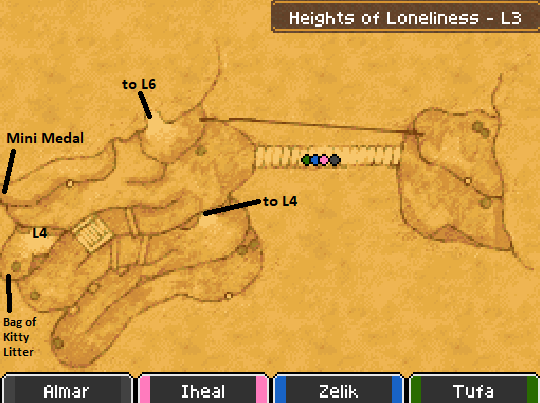
Once you've geared your team out and done whatever you need to do in Bloomingdale you can head northeast to the Heights of Loneliness, which is the next dungeon. Just outside of this dungeon you'll find a man that offers you a quest which allows you to switch your vocation to Ranger and is probably worth grabbing. For more information on this quest head over to my Unlocking the Ranger Class Quest Guide.
At the top of the Heights of Loneliness mountain you'll find the "town" of Zere Rock which has the exact same layout as an earlier town that we visited. In the northeastern part of this town, the same building where Alanna taught us the nursery rhyme, you'll find a Slime that you'll need to talk to in order to advance the story forward. After speaking with the Slime exit the building to find the boss.
Garth Gargoyle is the boss of this dungeon and he is pretty easy - despite being a major pain in the ass. Garth likes to buff himself with both Kabuff and Insulate making him highly resistant to both melee and spells. His attacks aren't anything to get worried about - he has a standard melee swipe which did about 30 damage to my team and a ground pound ability which damaged my whole group for 15 - 25.
Once you've dispatched the boss you'll witness a ghost going down into the basement right next to the hut with the Slime. Go down and speak to it in order to receive another Fygg as a reward at which point you're good to leave this place and return to Bloomingdale.
Side Quest #014 (Snug As A Thug)
Pre-req: Been to Zere Rocks
Location: Dourbridge; Man in northern house
Task: Bring him Lambswool
Reward: Utility Belt
Side Quest #015 (Collapsus's Call)
Location: Zere Rocks; Man on broken stairs
Task: Bring him Special Medicine
Reward: Granite Tunnel of Woe Lv 1 Treasure Map
Side Quest #016 (Help Meowt Here!)
Location: Bloomingdale; Cat on 2F of the Inn
Task: Equip Cat Ears & Speak with the cat
Reward: Kitty Shield
In addition to the three sidequests mentioned above, there are about a dozen other ones that you can stop and do at this point in the story. For a list of all the currently available sidequests as well as an explanation on how to complete it head over to my Chapter 3 Sidequests Page.
There's a few things you have to do in Bloomingdale in order to advance the story forward prior to going to our next dungeon.
1. Speak with Old Man at the Harbour
2. Go to the Mansion in the north at daytime and see Marion for a scene (speak to her as well)
3. Enter the small house to the west and talk to the elderly woman
4. Go to the armor shop in the central part of town and speak with Randolph for a scene
5. Speak with the ghost and follow it
6. Check the southern gravestone for a scene
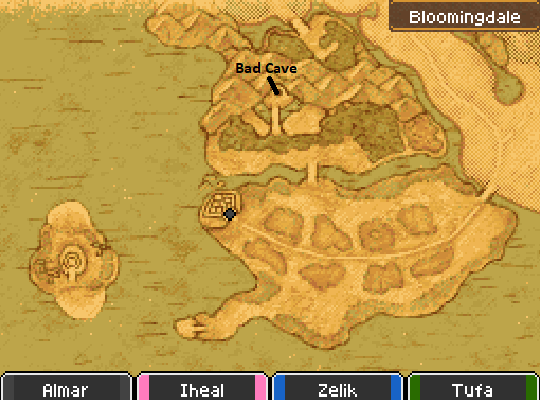
With all that out of the way we can now leave Bloomingdale and head to Bad Cave which is located almost directly north, use my map below if you're confused as to the location.
Return to Chapter 2 (Zere, Brigadoom, Coffinwell, Quarantomb, Alltrades Abbey, Tower of Trades)
Continue to Chapter 4 (The Bad Cave, Djust Desert/Gleeba, The Plumbed Depths & Sidequests)