
Dragon Quest 5 Walkthrough - Chapter 8
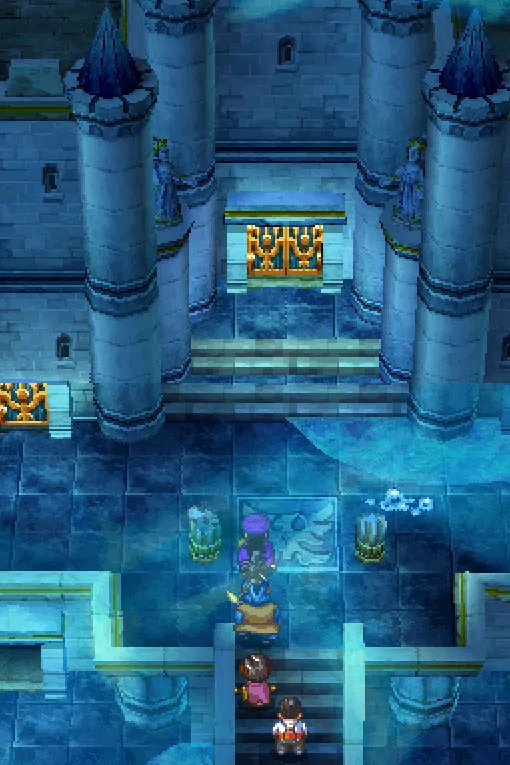
After going through the dungeon with all of the mine carts you'll find yourself in the underwater Zenithia Castle. Much of this tower will be off limits to you currently as there is water blocking you from going any way except a very linear path through. Your destination is the throne room, once there Agon will comment about a secret staircase behind the throne, inspect the ground to uncover it.
There will be some scenes in the basement area where Agon discovers what happen to the Gold Orb and cooks up a plan to make another one. In order to exit this dungeon return to where we first entered to find a whirlpool teleport pad that will take you back to the cave we came from.
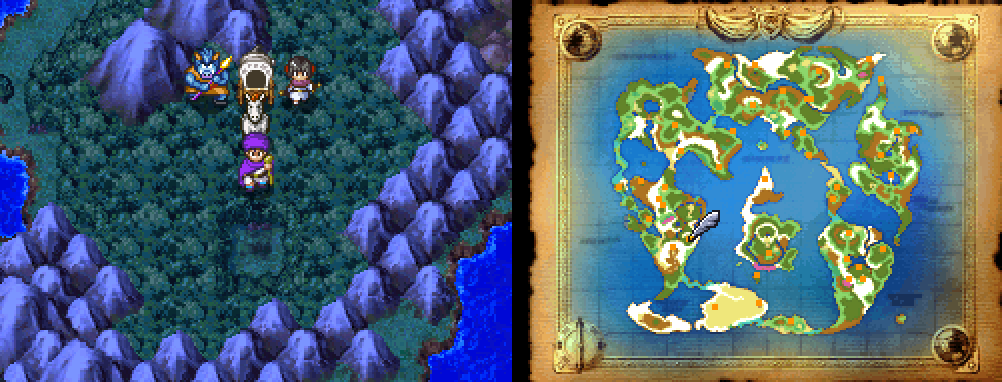
Our next destination is a small glade in the woods east of Mostroferrato (pictured below). You'll need to use the Flying Carpet to cross the river to get here but it's not too difficult to find otherwise. Prior to entering this forest make sure that you have at least one of your kids in your party since they're required for the upcoming story progression.
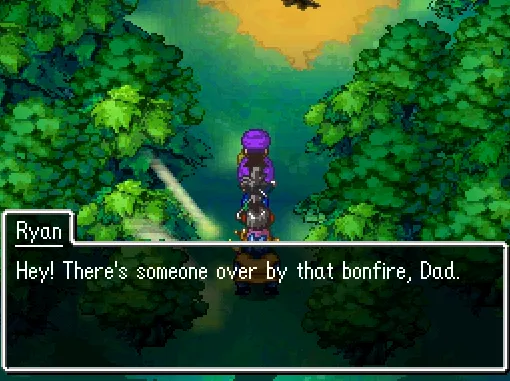
What you're looking for in this forest is a bonfire, to reach it just keep heading north every time that you are given an option to. Upon entering the screen with the bonfire for the first time you won't be able to see anyone but your kids will. If you try to walk on the left side of the bonfire directly next to it you'll collide with an invisible wall (which is the person).
If you leave this area and enter it again then you'll be able to see the person yourself but if it is your first time in this area you will have to talk to the invisible "wall" that you found. This Faery will guide you and your children to the Land of Faeries that we visited earlier in the game as a child.
Speak with Treacle in the Faerie Palace and ask her for help to receive the Faerie Horn. Zoom to the Knick-Knackatory from the land of the Faeries since that will save you a lot of time leaving the traditional route. From here you'll want to hop on the Flying Carpet and travel north of the Stairway to Zenithia/Zenithia Tower on the central most continent.
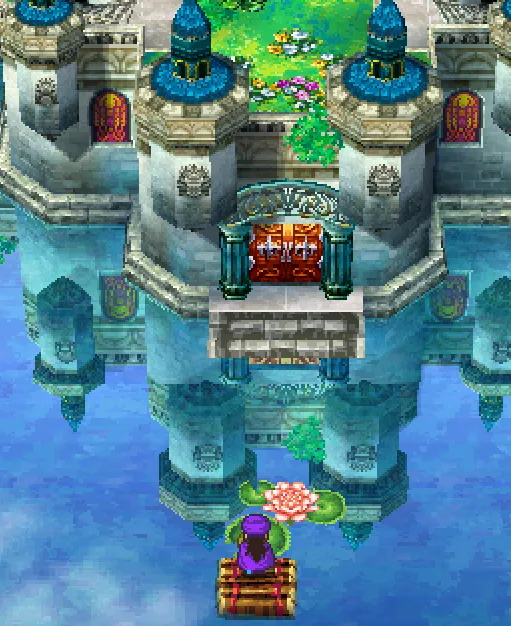
Look for the giant arrow in the sand pointing to a small lake surrounded by mountains in the center of the central continent. When you approach the lake you'll enter an area with a raft and a dock, hop on the raft and sail it to the north until you find a few lily pads. Use the horn here (on the southern side of the lily pads) to make a large castle appear (pictured below).
Inside the castle you will need to speak with the queen to receive a Gold Bauble; but wait there's more! Prior to leaving this castle there are a few story objectives that you need to complete first. As always, I've included them in a list format to make it easier to understand.
1. Speak with the Queen to receive the Gold Bauble
2. Go upstairs to the painting on the left
3. Place the Gold Bauble in the Hero's inventory & examine the painting
4. Speak with Pankraz inside of Sancho's house in 'past Whealbrook' and answer 'Yes' to every question he asks
5. Exit the village by going to the World Map to return to Faery Land
6. Inspect the painting a second time to return to past Whealbrook
7. Speak with the young Hero who is next to the church with his pet
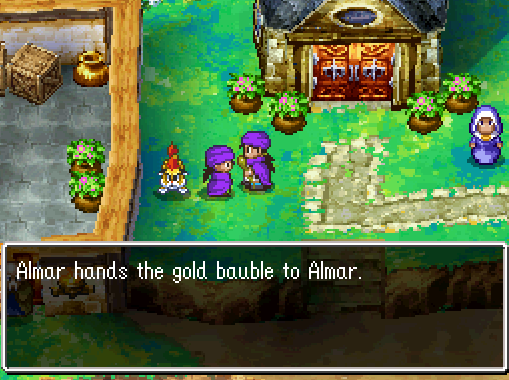
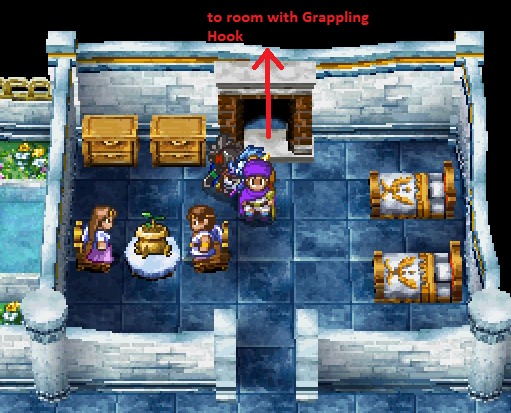
Giving the Gold Bauble to your past self (left) and the room with the Grappling Hook (right).
Once you have completed this exchange you're free to return to Zenithia and give the Gold Orb to Dr Agon who is still waiting for you in the basement below the throne room. With the castle back in the sky you're also free to explore it and collect all of the treasures throughout. The only treasure that you are required to find is the Grappling Hook as we need this key item for our next dungeon. You can find the Grappling Hook on the first floor of the castle (pictured above).
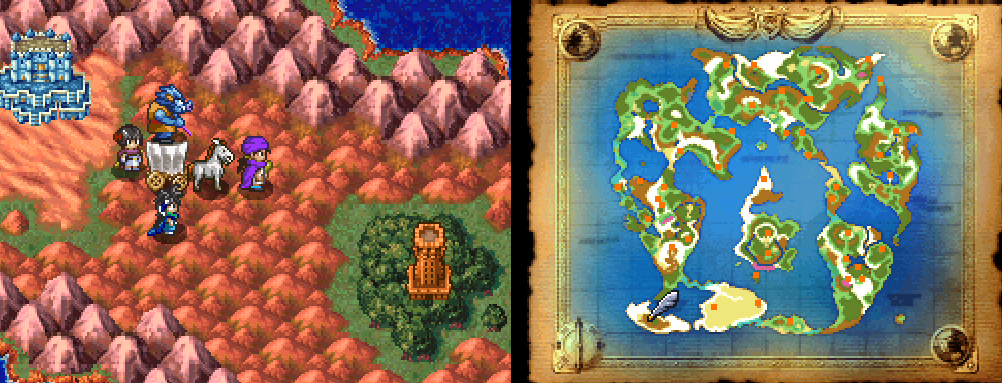
To proceed with the game's story you'll want to fly your castle to the southwestern portion of the World Map, just west of the town of Helmunaptra. There is a desert here which is enclosed by mountains and was previously inaccessible for us. In order to fly the castle you'll want to stand on the button between the two orbs, you saw Dr Agon stand on this button in the cutscene after returning the Gold Orb.
You can land the Zenithia Castle to the west of Talon Tower, our next destination, in a small patch of sand (pictured below). At the top of this tower you'll need to use the Grappling Hook that you just acquired to descend down into the dungeon.
Our goal in this dungeon is to collect the Dragon's Right Eye and the Dragon's Left Eye and then to place both of these in the Dragon Head that resides toward the ground level floor of the dungeon. You pass by it while clearing the dungeon numerous times. On the ground floor you'll find a lever right next to the front door of the dungeon, make sure you pull that your first time here so you don't have to always enter from the top with the Grappling Hook.
The Dragon's Left Eye is guarded by Slon the Rook and the Dragon's Right Eye is guarded by Ladja. You can find both treasure chests with these items in the basement of Talon Tower. When you go downstairs the road splits into four, the Dragon's Left Eye is reached by following the south (down) route and the Right Eye is the west (left) route.
During your time in this dungeon it is highly recommended that you get your Hero to at least level 30 so that you can easily do the Ultimate Key quest once we're done here. To complete this quest you will need to defeat Bjorn the Behemoose which can be a tough boss if you're not high enough level. You should also get your son to at least level 23 and your daughter to level 22.
Parry, your son, gets Insulatle/Insulate at level 23 which protects your entire party against Fire and Ice spells and your daughter, Madchen, gets Kasap which lowers the defense of a group of enemies. Both of these abilities are instrumental in defeating Bishop Ladja, the boss that guards the Dragon's Right Eye.
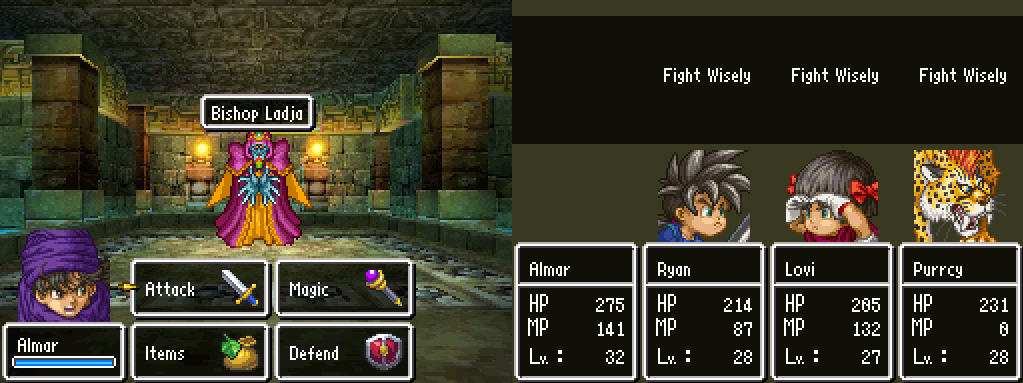
Bishop Ladja has the possibility of being an extremely difficult fight if you get bad RNG. He gets to attack twice per turn and he has the chance of doing major AoE damage to your entire party twice in the same round. He can also decide he doesn't like someone and Kafrizzle them twice in the same round which usually kills them.
Insulate is extremely important to use on your group because it will decrease the amount of damage he does to your whole group when he AoEs and when he uses Kafrizzle. Kasap will help you deal big damage to him which is why it's important to bring you kids along. Your daughter has the Oomph spell which is useful to use on whomever you're primarily attacking with. Other than debuffing him and buffing yourself this fight is pretty straight forward.
With Ladja defeated and both Dragon Eyes in your possession head over to the Dragon's Head in the tower portion of the dungeon (pictured below) and place both of them into the Dragon's Head. Once you've done that drop down to the bottom of this area and then enter into the hole in the Dragon's Mouth. You'll find the Dragon Orb (pictured below) as well as the Dragon Staff in the treasure rooms.
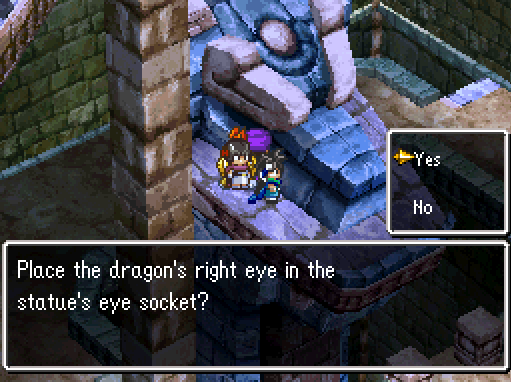
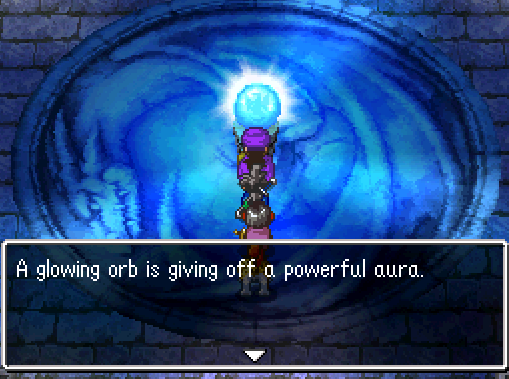
Placing the Dragon's Right Eye into the statue (left) and collecting the Dragon Orb (right).
Return to Zenithia and go to the throne room for a scene with Dr Agon. After the scene you'll be rewarded a Zenithian Tintinnabulum which will allow you to summon the Zenithian Dragon at any time on the World Map. This basically acts as your improved Flying Carpet and will let you fly to different parts of the world which were previously inaccessible.
At this point in time the next thing that we need to do is get the Ultimate Key. In order to do this you'll need to Zoom to Mostroferrato and speak with Mr. Briscoletti in his mansion. He'll send you to the shrine west of Stockenbarrel to check on the color of the urn here and then you'll need to return to him in the tower next to Mostroferrato.
For more information about the Ultimate Key quest as well as the fight with Bjorn I recommend you go to the Ultimate Key Side Quest Guide that I have. This is a tough fight so I strongly recommend you come prepared and know the strategy. If you'd like to earn some quick levels before fighting Bjorn check out my Metal Slime Hunting Guide for more information.
There are other side quests you can do to get some EXP if you'd like as well, if you don't want to just flat out grind for EXP at this point. Incase you missed it previously I went over many of the optional stuff to do in Chapter 7 of my Walkthrough, all of the optional stuff is at the top of the page including the Zenithian Helm location. Below are links to more optional content in Dragon Quest V that I would recommend you complete now before continuing with the game.
Magic Key Locked Door Locations
Ultimate Key Locked Door Locations
Once you have the Ultimate Key in hand I strongly recommend you visit each location on the Ultimate Key Locked Doors Guide, most importantly the Mantleplace location. Here you'll get Hela's Hammer which is one of the best weapons for Metal Slime hunting as well as the Pallium Regale which is an amazing cloak for the Hero.