
Dragon Quest 5 Walkthrough - Chapter 9
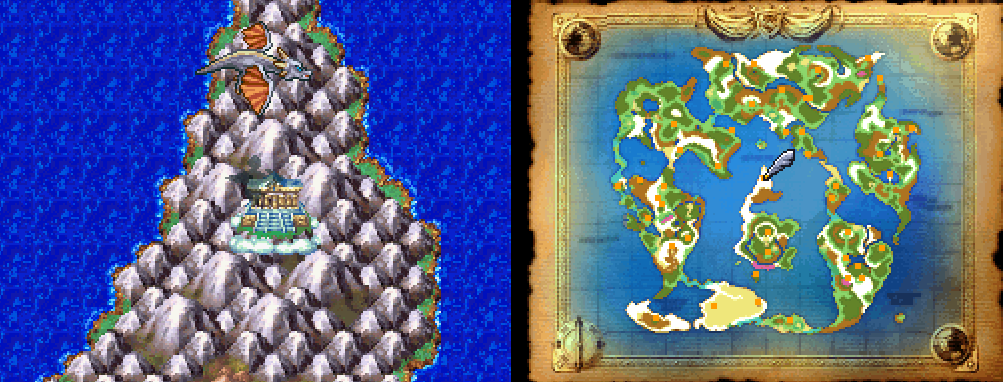
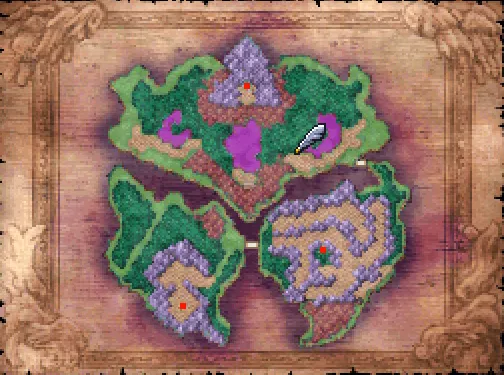
When you are ready to continue with this game's story you'll want to hop on your Zenithian Dragon by using the Zenithian Tintinnabulum item out of your inventory and fly to the northern most portion of the central continent. You'll find the dungeon of Crocodilopolis here surrounded by mountains (pictured above).
After landing be sure to grab the Zenithian Armor out of the watch tower on the right. For more information about this check out my Ultimate Key Locked Door Locations. Inside of the Crocodilopolis you will want to speak with one of the cloaked worshippers then with the guards that stop you from going up the stairs. Defeat the guards then go speak with the lady at the northern most end of the room near the statue of your wife.
Say 'No' to her first two questions and 'Yes' to the rest to avoid being Cursed - then a boss battle will begin!

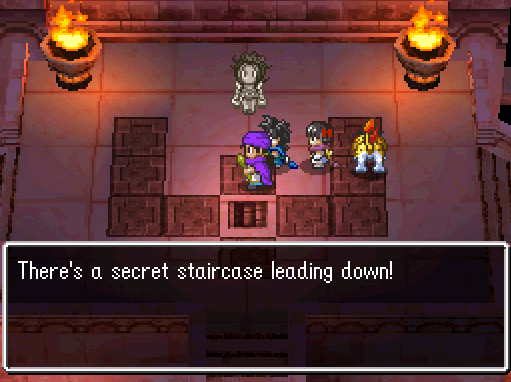
Queen Ferz boss fight (left) and the secret staircase going down (right).
Insulate/Insulatle, Kabuff and Oomph are the main buffs that you're going to want to use on your group. You should also use Kasap on the boss until it no longer has any affect on her to decrease her defense. Aside from this all you'll be doing is attacking and healing your group as usual.
Once the boss is defeated you'll want to inspect the dark tiles on the floor to reveal a hidden staircase (pictured above). This will give you access to the rest of this dungeon. Shortly into the dungeon you may notice that it's the same place you spent your years as a slave.
King Korol is the boss of this dungeon and compared to some of the other bosses we've already fought he isn't too challenging. Just remember the general strategy for all bosses, buff the crap out of yourself and your party - this boss is immune to Kasap so don't bother debuffing him.
Tip: At the start of this fight Korol will summon all members in your Wagon to you which gives you access to all 8 of your party members during this boss fight.
You will want to keep an eye out throughout the fight for when Korol casts Disruptive Wave which removes all of the current buffs on your entire party. It's important that you refresh Insulate/Insulatle when this happens because this buff helps against Korol's hardest hitting abilities.
After defeating Korol you'll have to retrace your steps back out of the dungeon to where the statue of your wife is for a scene. When you regain control of the Hero you'll be back in Gotha Castle in your bedroom. At this point there are a few things you need to do first before continuing with the story...
1. Speak with Prince Albert
2. Speak with your Wife in the bedroom
3.
Speak with Patty the Party Planner to add your kids and wife back into your party (if desired)
With all of that out of the way when you're ready to continue with the story Zoom over to Lofty Peak and hop in your ship. Travel north to the cave entrance that leads to Estuary Sanctuary and continue north through this dungeon until you dock at a temple with a locked door. You may remember this place from earlier in the game if you fully explored this dungeon.
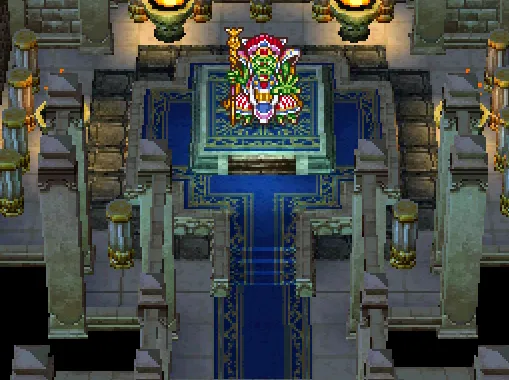
Use the Ultimate Key on the door and in the room with the 3 statues (pictured below) use your Circle of Water, Circle of Life and Circle of Fire in front of each statue to place them in the statue's hands. Doing this will open the portal to Nadiria for you.
When you first arrive in Nadiria (aka the underworld) Mada will drop a Sage's Stone on your group which is an extremely valuable and useful item in the Dragon Quest series. This item should be kept on one of your characters that can't heal at all times because it can be used during battle as an item to Multiheal your entire party for no MP cost. The best character to keep this on is usually your offensive spell caster, in this case your Daughter.
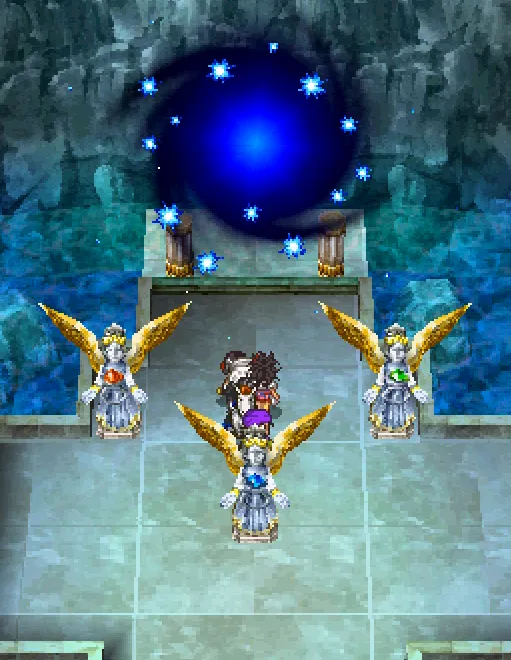
In the Underworld/Nadiria there are only 3 places for you to visit (for right now). The shrine we arrived at is #1; Precaria is #2 which is a small town to the southeast and the only town in the Underworld. Last but not least is Mt Zugzwang which is to the north and is the final dungeon in the game.
Tip: Once you visit Precaria in the Underworld and acquire the Zoom location you should Zoom back to Lofty Peak, hop in your boat and return to the room with the 3 statues pictured above. Since we have a Zoom location in the Underworld there is no point for us to leave the 3 rings sitting in these statues.
Depending on what level your party is you may want to take some time to grind a few levels before proceeding with the final dungeon. I'd recommend a Hero who is at least level 35 and for your other team mates to be at least 30+. As for your party, I would recommend the Hero and the two kids along with your pet Sabrecat or replace the Sabrecat with your Wife/a powerful monster.
If you give the Sage Stone to your Daughter then you can have her double has a healer and a spell caster which makes her exceptionally useful. Both your Hero and your Son get heal spells which will give you a total of 3 characters who can heal. The Sabrecat will be your party member who attacks every single turn aka your primary damage dealer.
When it comes to leveling up you have two options. You can either grind Metal Slimes which is the best EXP in the game or you can do optional content which will probably be a bit more entertaining but will be very slow EXP and you will probably have to grind anyway after you finish all of the optional content.
For a list of all the available optional content check out the bottom of Chapter 8 of my Walkthrough. If you'd like to take the expedient route and grind some Metal Slimes head over to my Metal Slime Hunting Guide for more information about where to find them and how to easily defeat them.
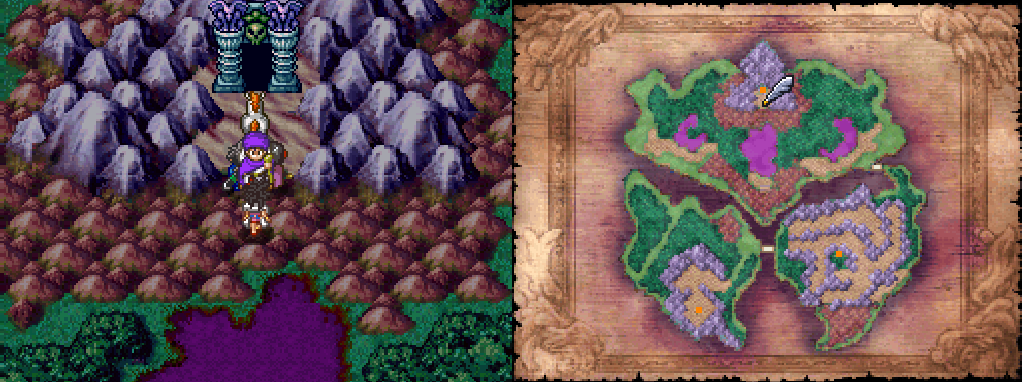
Whenever you're ready to tackle Mt Zugzwang you'll want to travel to the northern part of Nadiria (pictured below) which is where you will find the entrance to the final dungeon.
Mt Zugzwang is a very long and confusing dungeon with many treasures for you to collect throughout. During the first part of the dungeon (before your fight with Bishop Ladja) there are only 3 treasure to collect (mentioned below) and a whole bunch of ground to cover. No puzzles, just tunnels.
Treasures Before Ladja: Dark Robe, Ogre Shield, Mini Medal
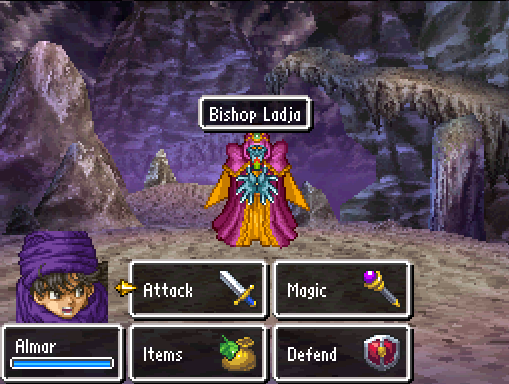
Your fight with Bishop Ladja is going to be the same as all the ones prior. Buff your characters, Debuff Ladja and beat him up with your attacks. Don't forget to use your Sage's Stone, it is a free Multiheal every single turn and you can just spam that baby the entire time.
Bishop Ladja boss fight (left) and the arrow puzzle room with Aspersorium and Sun Crown (right).
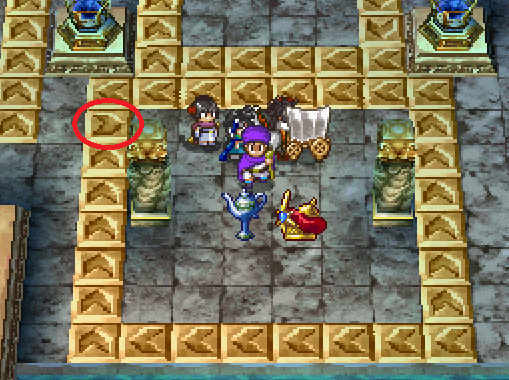
After your fight with Ladja you'll come across the token arrow puzzle room. There are optional treasures in this room of a T 'n' T Ticket and a Mini Medal. In the center of the room (pictured above) the two treasures are the Aspersorium, which you need in order to progress through the dungeon and the Sun Crown which is one of the best helms in the game.
Treasures After Ladja: Double-Edged Sword, T 'n' T Ticket, Mini Medal, Aspersorium, Sun Crown, 3800G, Mini Medal (Mimic), Metal King Helm, Ghoulroarer (Knick-knack on ground), Orichalcum Fangs
In order to reach the Aspersorium and Sun Crown all you need to do is step on the single tile that is pointing into the center of the box (pictured above). You'd think for such an important item the puzzle would be harder than this but it really isn't.
The Aspersorium gets used on the patch of lava found in the southern most cave from where you kill Bishop Ladja. In the next room you come across with the grates, to proceed forward you will want to step on either of the two grates that are connected together and blocking the southern path (pictured below).
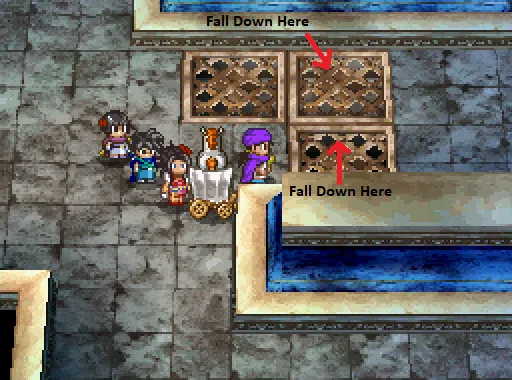
When you fall down into either one of these two grates you'll be able to use the nearby staircase to climb back up on the other side of them (on the same side im on in the screenshot). The next room that you come across you'll have to solve a very basic tile puzzle; move the bottom left tile over once to the right then move the other two tiles on the left side down once.
The tile at the top-center move to the left and then move the central tile up from the middle, it's as simple as that. If my directions are confusing for you don't worry, this puzzle is extremely easy and there are no encounters in this room anyway.
In the next large room you come across there will be a treasure chest and when you touch it two Barbatos enemies will bust out of the wall and attack you. After the fight, equip the Orichalcum Fangs you got on your Sabrecat or one of your more commonly used monsters and head through the doorway to Grandmaster Nimzo, the final boss of this dungeon.
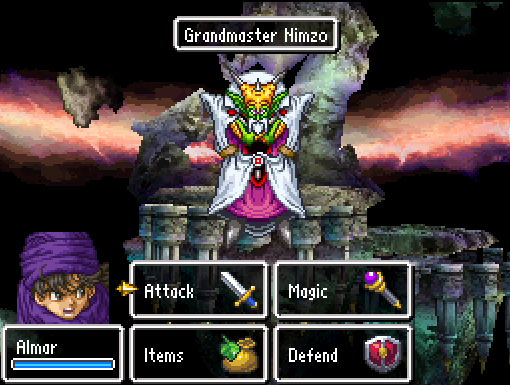
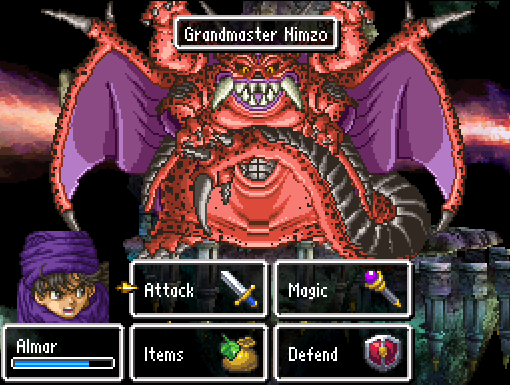
Grandmaster Nimzo phase 1 (left) and Grandmaster Nimzo phase 2 (right).
Insulate/Insulatle as well as Oomph are going to be the primary buffs you're using for this entire fight. Occasionally Grandmaster Nimzo uses Disruptive Wave on you and your party which will remove all of the buffs you've cast but that's ok, just cast them again. Insulate decreases the damage of his worst attacks significantly and is the most important buff to keep on your party; for this reason it's recommended you bring your Son aka the Zenithian Hero with you when you fight this boss.
Don't forget too that you have access to your Wagon during this fight which means you'll be able to bring 8 party members into battle with you. If you run out of MP on your characters or one dies and you can't resurrect him, you can always rotate to another character.
Grandmaster Nimzo (Phase 1): 1 attack per turn and he occasionally summons adds to assist him during battle. The adds he summons die immediately after this fight ends so keep that in mind. He has about 3000 HP in this phase.
Grandmaster Nimzo (Phase 2): He attacks twice per turn during this phase and he has some very powerful AoE attacks, sometimes he even uses them in the same turn. Protecting yourself with Insulate is the most important thing. He uses Kasap on you and your party which you'll want to counter with Kabuff too.
Tip: Struggling? Use your Sage's Stone every single round!
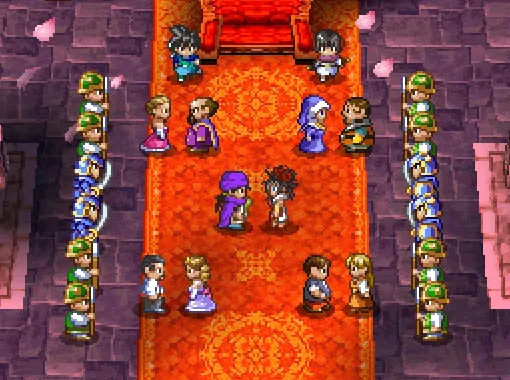
Once Grandmaster Nimzo is defeated you'll find yourself back at Zenithia Castle. Exit the castle and the Zenithian Dragon will fly you around from town to town where you have to participate in your victory fanfare in (most) of the important towns in the game. Once you are back in Gotha Castle head up to the throne room to finally complete the game.
...but wait, there's more! There is an optional post-game dungeon that you can do but first you'll need to wait until the credits roll and agree to make a completed game save. This next dungeon will be quite a challenge and I will cover it in Chapter 10 of my Walkthrough.
Continue to Chapter 10 - (Estark's Labyrinth (Post Game Content))