
Grandia Walkthrough - Chapter 3
The previous chapter ended with us reaching Disc 2 and visiting Cafu Village to speak with the elder. Speaking with the elder will unlock the next location to visit on our map... but before we do that we should visit the Weapon Store in town and upgrade everyone's equipment. When you're done sleep at the inn to recover and then exit to the World Map. Our next destination is Petrified Forest.
You'll find the first Mana Egg of Disc 2 in this dungeon, instead of going up the path to Petrified Forest (2) go straight south and you'll find the Mana Egg down there. To advance the game what you're looking for is a rocky path leading up into the mountains. It's found in Petrified Forest (2). At the top of this path you'll get a short scene where Rapp shows you the tower, after that you're kicked to the World Map and you'll have to choose Tower of Doom (the next dungeon) to continue.
Outside of the tower is a military complex that looks like it went through a recent battle, you can enter one building with a save/recover spot if you'd like... Otherwise keep running around the outside and heading northeast until you find our next boss, Milda. She is easy since she relies on single target attacks to beat you. Just keep interrupting her and you'll win no problem... Or an alternative strategy is to use Diggin' 7 times, this will result in Milda hitting you for less than 10 damage with every attack.
Milda will join your party after some dialogue when the fight is finished. She is basically your new Gadwin, considering the fact that she starts at level 35. To find the dungeon's entrance go north through the Tower of Doom (Army Facility) until you find the Tower of Doom (1st Floor). In the first room of this dungeon you'll find a door to the east and west, 3 staircases which go up to the same location and a save/recover terminal.
The first floor of this dungeon is very linear. It has a bunch of twists and turns but they all dead end immediately and the only way you can really go is forward. You're looking for a set of brown stairs that will lead you up to Tower of Doom (2nd Floor). The path will split on this floor, one route takes you back to the first floor and the other route takes you to a computer room (pictured below).
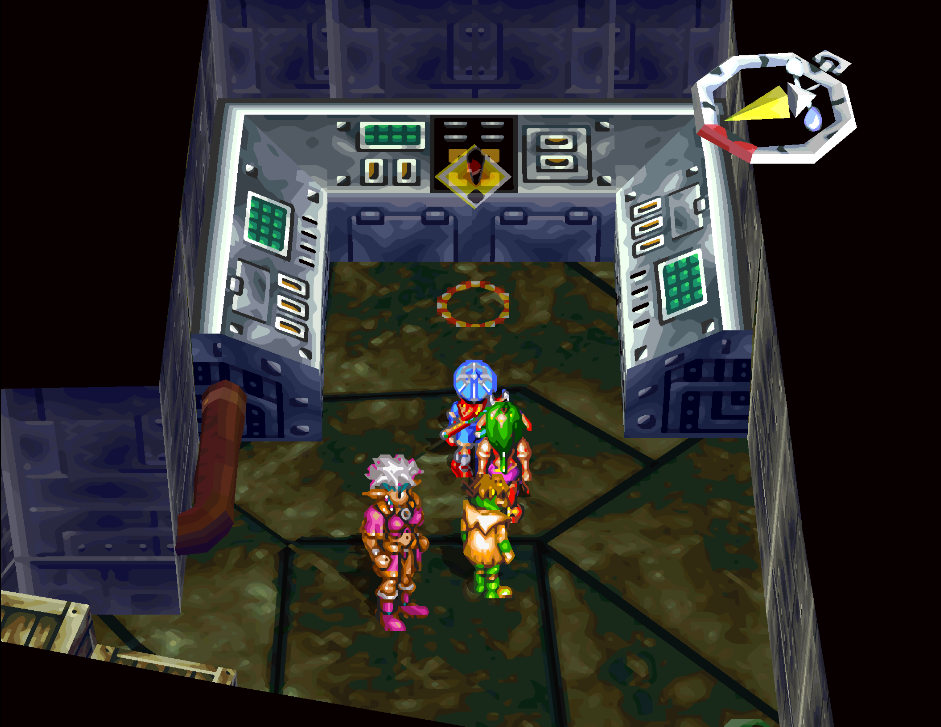
Smash the computer in this room to open more doors
Before you return to the first floor make sure you find the computer room pictured above. You need to smash the computer where you see the alert symbol on the ground, this will unlock a few doors for shortcuts that connect the parts we just explored.
Our next task is to take the other route on the 2F and go down the stairs that lead back to the 1F. You'll find another computer to smash down here, this one unlocks the other door on the 2F that leads up to the next floor. The room before this computer has some lasers which you can dodge, if you want to just run through them and heal yourself on the other side that's totally doable too.
With both computers smashed go back up to the 2F and go through the northern door. You will find a save/recover station on the 3F along with two buttons on the wall that you can press. If you turn one button off it will open some doors, you can do up to four different combinations with the two buttons. The only things you'll find are gold and a Plug Suit item, not worth the time in my opinion.
In order to advance to the next floor you'll need both buttons turned on, this opens the southernmost door for us. There's actually two more buttons in the final room along with stairs going up, these open the NE/NW door and close our exit door (depending on the combination you use). Again, just leave them lit and ignore the treasures, it's not worth the time it takes to run back and forth for the "puzzle".
Going up the stairs will begin our next boss fight, we'll be fighting Gaia Battler. There's multiple targets for this fight so my advice is to unload on it with AoE attacks. Doing this will constantly interrupt the enemy and prevent them from attacking. After beating the boss watch the scenes then exit the dungeon. Our next destination is Cafu Village.
Speak with the elder near the gate when you arrive in Cafu Village then eat dinner at the Inn. After dinner follow Feena outside and speak with her in Home Tree Plaza behind the Inn, when your scene with Feena is finished rush back to Cafu Village to find the Garlyle Forces.
Work your way through town to the back section with the mountain for some scenes. Once everything is done rest at the Inn for the night and have dinner (again) then go to sleep. Before we leave this town you'll probably want to spend the Mana Egg that we got. If Justin and Feena already have all 4 of their spells then give it to Rapp, I chose Wind Magic.
Exit to the World Map and continue to Zil Desert when you want to proceed with the game.
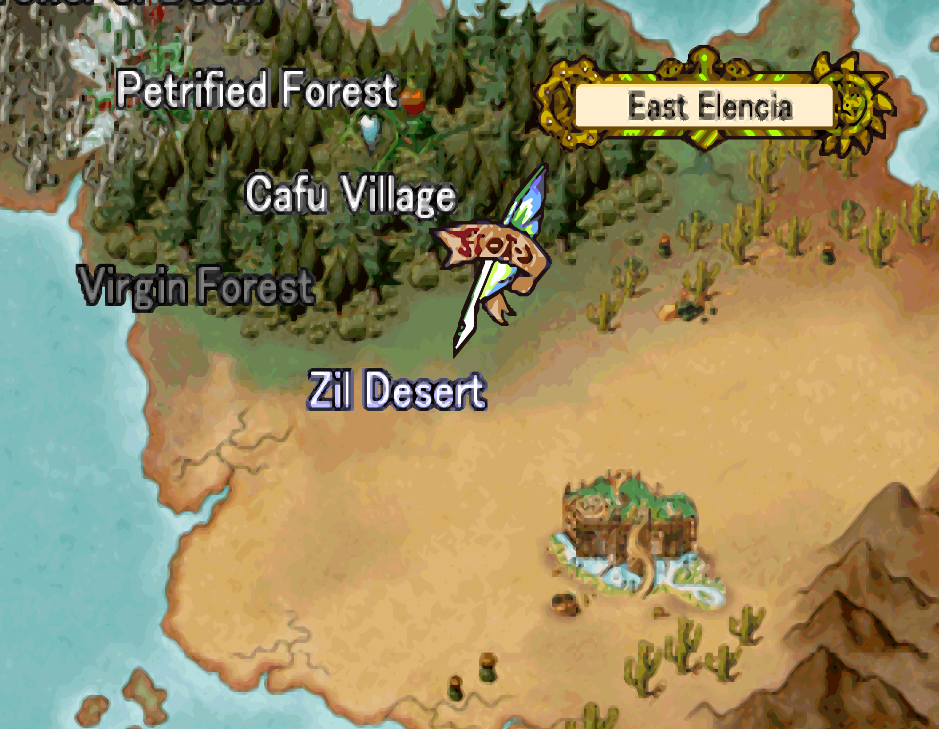
Zil Desert is a unique map because it has two totally optional dungeons attached to it. It's up to you if you'd like to do either of these dungeons, they are 100% optional and have no story elements in them... It's just for the loot and enjoyment of the game's combat system (I love the Grandia combat, it's so well done).
The second and easier of the two is called Castle of Dreams. You will find this in the South Zil Desert, aka the second portion of the dungeon that you will run through. Normally people run to Castle of Dreams first and complete it then backtrack to Soldier's Graveyard which is in North Zil Desert.
Continue to Castle of Dreams Side Quest Guide
Continue to Soldier's Graveyard Side Quest Guide
Note: We will have a few opportunities to come back and do these dungeons later too. I will mention them a few times before the end of the game.
Once you have completed both of these optional dungeons (or decided to skip them) you can exit South Zil Desert to the World Map. This will make a new location available, Zil Padon. We only have one mandatory thing to do in Zil Padon, rest at the inn and eat dinner. When you arrive at the inn you'll have to go back outside to witness an argument first, after that you can rest and eat.
Before we leave town you should hit up the shop to spend our Mana Egg and also purchase armor upgrades for everyone. If you did both of the optional dungeons you will have weapons for most of your team, I bought an upgrade for Milda though while I was here.
When you're all done in Zil Padon exit to the World Map and head to Savanna Wilderness. Much like Zil Desert, this map has two parts and it also has our next (and final) optional dungeon. Before we get to that though, there are two Mana Eggs which you can find here. The first Mana Egg is in the large area where you first enter (when you're coming from Zil Padon). Our second Mana Egg is found in East Savanna, it's on the south side of the area.
You'll also find the entrance to the Tower of Temptation in East Savanna. This is the final bonus dungeon of the game and it's a rather difficult dungeon, one you may want to come back to at a later time if you're unprepared. Levels won't help you that much in this dungeon, you really just need to be good with the game's combat system.
Continue to Tower of Temptation Side Quest Guide
After you exit Savanna Wilderness, before you head over to the next area (Brinan Plateau) you should visit Zil Padon and buy Rapp his last spell(s) using your Mana Eggs. Rapp is with us for the rest of the game (as is Feena) so make sure you have all schools of magic purchased for everyone.
Once you're done with all of that, head over to the Brinan Plateau to continue with the game. This dungeon is pretty straightforward, our first goal here is to locate a snowball that we can push down the hill to create a path (pictured below). One of these snowballs will create a path to the Fire Sword item and the other will create a path to our exit.
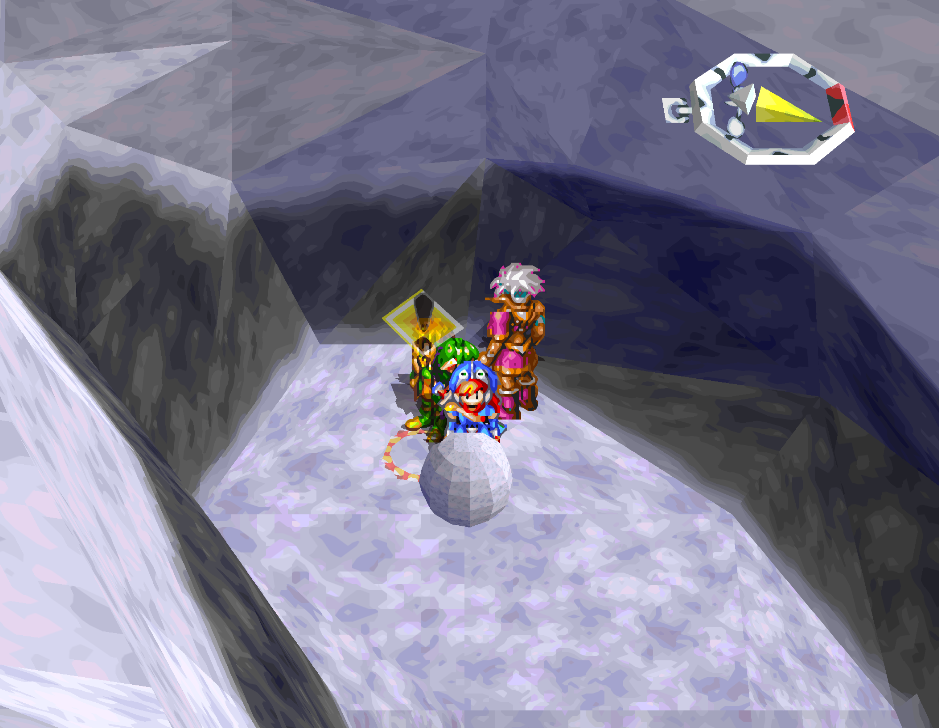
Push the snowball to make a bridge
Back on the World Map you'll want to select Laine Village as our next destination. When you arrive there will be some dialogue with Milda and her... lover? You will get a bunch of scenes with Darlin along with some backstory, when that's all done you'll be tasked with finding two more wise 'men' in this village. Seek out Derlin (search the village for Derlin's House) and then after you talk with him find Dorlin in the tower along the coast.
That concludes all the story things we need to do in Laine Village. If you want to hit up the shop for some upgrades you can do that before leaving, otherwise exit to the World Map and visit the Abandoned Laine Village. This dungeon is a big and confusing one since it teleports you from area to area. You can find a Mana Egg in Warp Space (2), it's found inside of a chest so it won't stand out as much.
Our destination in this dungeon is Warp Space Core, you will find a save/recovery terminal right next to the door that leads into this area. You'll find this boss in this room.
Tip: Just south of Warp Space Core door there is a tentacle that will hit you whenever you get close to it. This is a great spot to level up Rapp's water skill since you probably just got it for him recently. Just run into the tentacle until everyone's HP is 1 and then heal everyone back to max. Rinse & repeat as many times as you want.
Much like in the Tower of Doom, our boss this time is a Gaia Battler. Since there are 3 targets in total you'll want to do AoE damage until all but one remain then focus that one down with single target attacks. Once you beat the boss grab the Horn of Knowledge from the chest in the back and exit the dungeon. Step on the weird round portal looking thing near the first save/recovery spot to exit.
Return to Laine Village and head over to Dorlin's Tower again, talk with him for a scene. This is the end of the journey for Milda, she will say her goodbyes and stay behind in Laine. Just like with Sue, Milda left behind a bunch of items in your Stash which you can give to another character to get 1/3 of her EXP. Check your Stash for Cut 'em, Pound 'em and Chop 'em.
Once you're all finished in town exit to the World Map and travel back to Zil Padon. Visit the fountain in the center of town for a scene, you'll meet a new mogay named Gina. She'll tell you to visit the Mogay Elder in the 'cellar'... What she means is the weird yellow maze-like building nearby (pictured below).
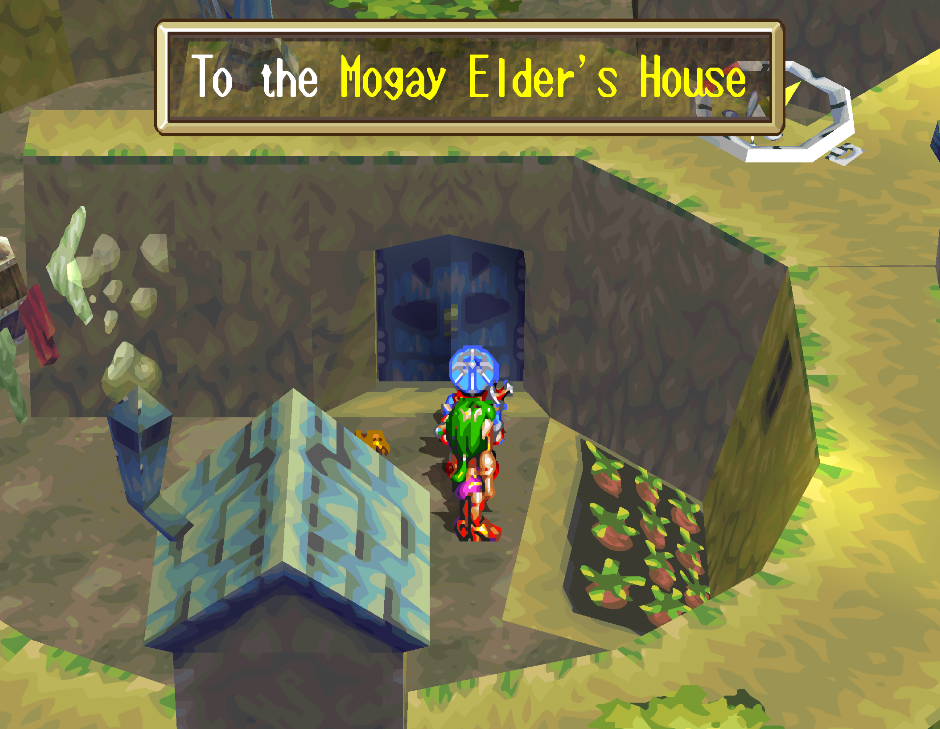
After talking with Guido in the Mogay Elder's House, he'll open the entrance to the next dungeon for us and join our party. Entering this next dungeon is a point of no return for a bit, the game will warn you about this before you enter. There's a few story beats that we're about to go through and we can't detour from them until we're done with them all.
Zil Ruins is pretty big, there's two items of note here... The All-Around Seed which is south of where you enter the dungeon and the Mana Egg which is at the very end... You probably don't need these anymore but if you still do, it's there. I found this dungeon to be extremely straightforward, if you ever get lost - follow the gold colored lines that snake across the ground. One path will lead you into a room with stairs that lead up to some floating platforms... This is the correct way forward through the dungeon.
Shortly after the floating platforms you'll have a save/recovery station, follow the path from here to Underground Ruins Shrine (1) which is where you'll find the dungeon boss. Ruin Guard is the boss of this dungeon and he's found standing out in the open. Much like most of the bosses we faced thus far, he comes with multiple targets.
I recommend you use AoE damage heavily until you get it down to one or two targets then focus them with single target damage. After defeating the boss be sure to loot the room(s) it was protecting. With the boss dead you can also spin your camera in the boss room now too, this will help you find some items.
To the right of the stairs leading into Underground Ruins Shrine (2) you can find a false wall panel with Counter Ring hidden inside. When you're done exploring head into the second shrine area and grab the Medal of Knowledge that we came for. On your way out of the dungeon you'll encounter the Garlyle Forces again, return to the shrine when the scenes are finished.
Across from the shrine's entrance you'll find a path we can jump down to, there will be a pile of gold down there letting you know that you can get down too. This route leads you to a room with murals where you'll have some more scenes with Mullen, Leen and Baal. When they're all done and you regain control of Justin - make sure you take time to search the room you're in for treasure. You're not timed despite the cave collapsing, so take all the time you need. The main items worth getting are Run Seed and Mana Egg (if you still need more Mana Eggs). You can find the Mana Egg inside of a chest.
Continue along the linear route for more scenes, after which Justin will be separated from the party.
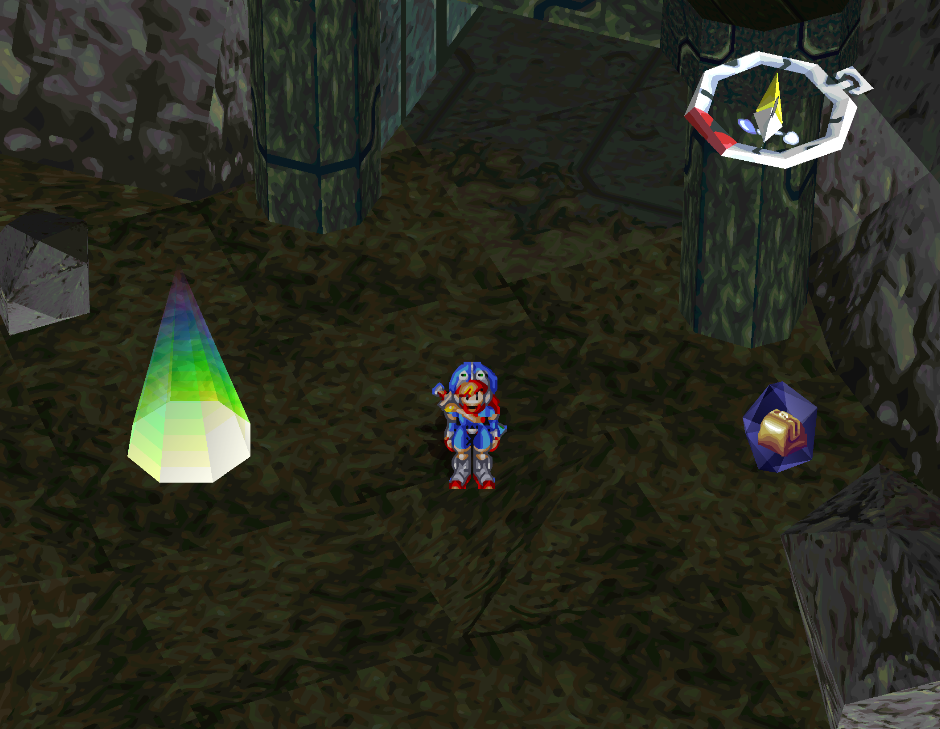
We have a couple of areas to go through with only Justin... So make sure you stash any vendor trash/extra items that you don't need so we can pick up the loot we find. The monsters in the upcoming areas aren't very difficult so don't worry about bringing a ton of items to deal with them. Just use your MP/SP instead. Our goal is to keep going up, so look for the stairs that lead upwards. Eventually you'll run into Mullen again for some scenes. There will be a linear part after this where you go through some ruins with Justin, then there's another scene.
Once the whole story segment is done and you get Rapp/Guido back you'll find yourself in control of Justin on The Grandeur. This next dungeon is very linear as well, there will be a lot of Combatant enemies around which are easily avoided if you want. Our goal is to reach the Grandeur (Control Room), we'll have our next boss fight in here.
This time we'll be fighting the 3 girls, Saki, Nana and Mio. My advice is to use Dragon Cut on Justin and Mogay Bomb on Guido, these skills will do a lot of IP damage to the girls which prevents them from attacking. When they're all taken care of grab whatever gold you want from the room and exit via the Grandeur (Passageway).
As you progress through this area your party will be split up again; much like before all you need to do is follow the linear route forward with Justin. When you reach the room with Baal you'll get some scenes, when they're finished climb out of the pit and return the way you came for a one on one boss fight with Baal.
Baal isn't really a tough fight, just unload on him with your strongest single target attacks to make quick work of him. You'll have some more scenes after Baal is defeated, after which you'll regain control of everyone in Brinan Plateau. We finally have the chance to roam around again and do optional content.
If you'd like to tackle any of the three bonus dungeons, now is the second to last time I will mention them. Normally I would wait until we get our final party member and Guido is gone but the items you can get in these dungeons will make your life much easier if you get them now rather than later... So the choice is up to you.
Continue to Castle of Dreams Side Quest Guide
Continue to Soldier's Graveyard Side Quest Guide
Continue to Tower of Temptation Side Quest Guide
Story wise, our next destination is Laine Village. You'll need to speak with Darlin and Dorlin here to open up our next dungeon, Rainbow Mountain. This dungeon is another that's pretty linear, there are a bunch of tight ropes that go in random directions but they all dead end pretty quickly (except for the route we need to go). You start at the base of the mountain and our goal is to work up to the summit.
When you arrive at the summit you'll get a scene, during which Guido will leave your party. Once we get to the summit there is no turning back until we've finished Alent... so make sure you're prepared!
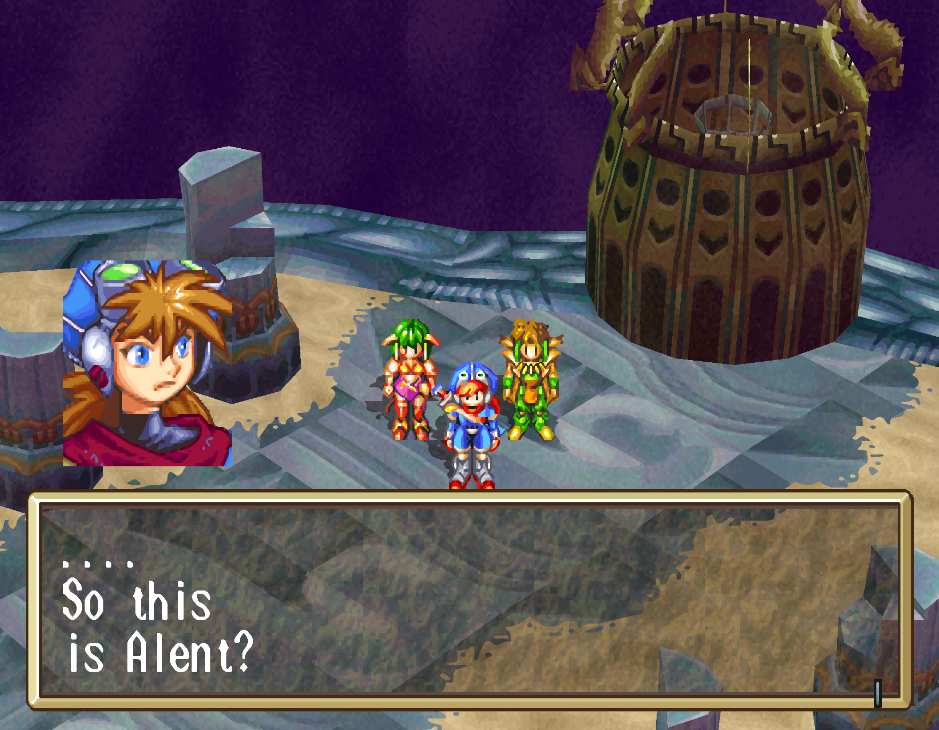
There isn't much going on in Alent. You will very quickly come across a Mana Egg but aside from that it's a linear path to our first boss, Hydra. Right before this boss you'll find a Stash, I recommend you put everything you don't need in there for right now.
As the name of the boss suggests, Hydra will be a battle with multiple targets. Just like always my advice is to unload on the boss with your strongest AoE skills and attacks. Once you get a head to around 500hp you can pick it off with a strong single target ability. With Hydra out of the way step onto the circular thing sitting in the sand in the 'room' behind where he was. It'll activate and fly you to a nearby ledge.
Keep following this path for another boss fight, this time we're against Great Susano-o. Just like before, if you keep hitting the boss with your strongest skills and magic you'll interrupt him and prevent him from doing much of anything. Also, much like before - after beating this boss follow the linear path to our third and final boss of Alent.
None of these bosses are really that challenging, they're just speed bumps on our way to Liete. Our final boss is Phantom Dragon, once beaten continue into the cathedral it was protecting. Inside the cathedral you will need to speak with all of the Liete illusions, then talk with the one standing on the glowing tile at the northern end of the room. This opens up the path to the real Liete, speak with her for even more scenes.
Liete is our final party member, from this point onward she will be the permanent fourth slot. After all the scenes in Alent are done, you'll find yourself back in the Savanna Wilderness. It's now our last chance to do the three optional dungeons in this game. If you haven't done Tower of Temptation yet you really should since the equipment it gives is best in slot for many slots.
Continue to Castle of Dreams Side Quest Guide
Continue to Soldier's Graveyard Side Quest Guide
Continue to Tower of Temptation Side Quest Guide
Once you're done with any optional content head over to Luzet Mountains, this is our next dungeon. Luzet is another very straightforward dungeon, it has two screens and both have a save/recovery terminal in them. You shouldn't have much difficulty navigating this place at all. Once you find the exit you'll want to head over to our next dungeon, J Base.
Head into the J Base (Hangar) and look for the J Base (Command Center) room that's in the hallway. This leads to J Base (TACOM Center) which has our story objective, a soldier lying on the ground (pictured below). Speak with him and he will tell you to use the statue in the back of the room to open up a secret passage.
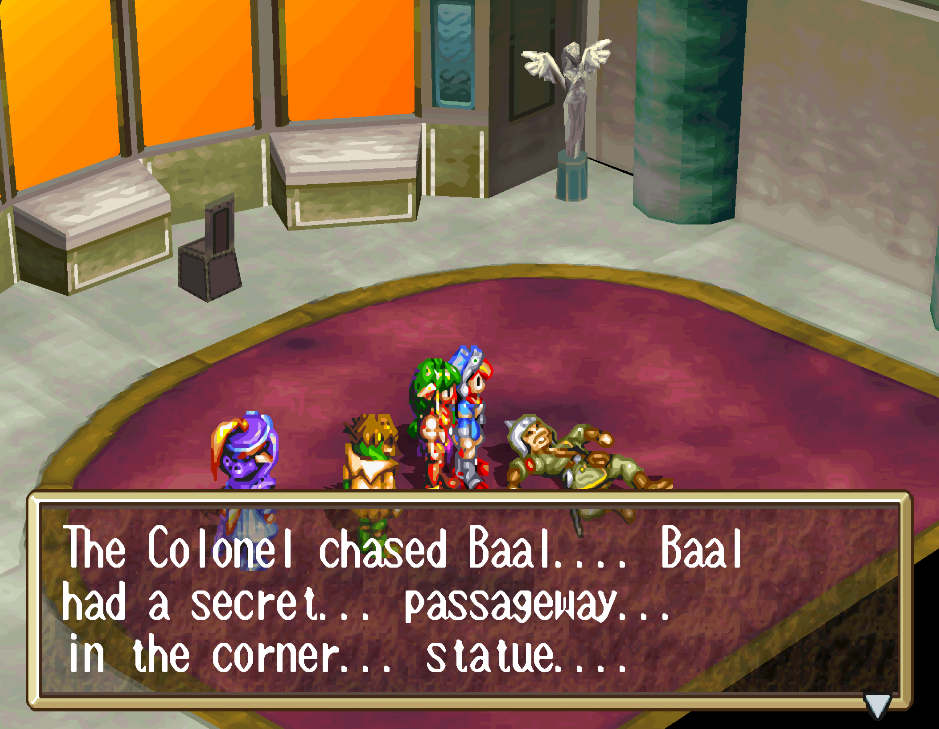
Follow the linear path after using the statue to find Mullen and our next dungeon, Underground Railway Ruins. This is quite possibly the most linear dungeon in the game, you basically just run south the entire time and at the end go up some stairs before you continue going south. You'll find a save/recover station before the Gaia (Ovarian Chamber)... which sounds like a lovely place... Inside is your boss fight with Baal.
Baal is honestly a pretty easy fight if you did the optional dungeons and especially the Tower of Temptation. It doesn't matter which target you attack, him or his arm - beating either wins the fight. I just unloaded on Baal with my highest SP damaging skills on everyone and made sure to throw in some AoEs to interrupt both targets.
Once you beat the boss watch the scenes and, when you regain control of Justin, run through the Lyonlot (Mullen's Ship) to find Mullen. After some more scenes you'll be tasked with finding Feena inside of the Officer's Tent and then speaking with Leen at the TACOM Center.
When you're done with those story events hit up the shop in this camp, they have a lot of good stuff available. Also explore the camp for available treasures and any gold. There's no encounters here so there is no one to stop you from taking everything!
To continue with the game head over to Zil Padon again. When you arrive there will be scenes and when you explore the town you will have multiple forced encounters with more scenes. Talk with the pink Mogay girl when you arrive at the Mogay house and after those scenes try to leave for our boss fight against another Gaia Battler.
Gaia Battler works the same way it always has, beat it up then watch the scenes. We need to visit the 'colorful Mogay tent' in town after the boss fight. You will get more scenes here after which our next destination is set - we're going back to J Base!
Unfortunately, we must go through Luzet Mountains again, this time with new enemies. Back at J Base head to the Command Center again but this time take the Stairway to the Control Room. You'll have some scenes in the Control Room, after which exit and go into the Steam Cannon Room which is in the stairs we took up to the Control Room. There's an exit in the Steam Cannon Room for the Roof which is where we need to go. You'll have even more scenes on the roof with Leen. When everything is done you'll be taken back to Zil Padon.
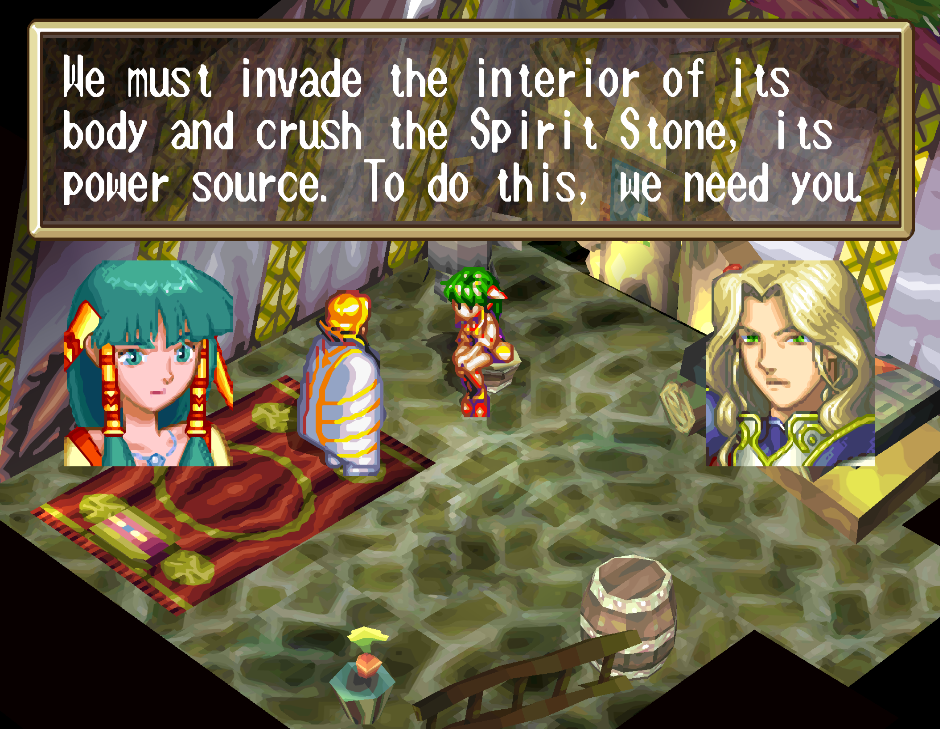
Speak with Rapp and Liete outside of the tent then a scene with Mullen will take place. When that's done visit Guido's house and speak with him, then return to the tent with Feena and there will be another short scene... It looks like we're heading back to the Field Base. Exit to the World Map and fast travel over to the Field Base, now is your last chance to use this vendor if you're interested.
To advance the story head over to the cliffs in the north and watch the scene with Feena and Mullen. When that's done and everyone abandons you (so cruel) exit back to the World Map and make a stop in Savanna Wilderness for some more scenes. You will regain control of Justin in Zil Padon when the scenes are done, head into the center of town and speak with Guido for some more scenes.
When the scenes conclude you will have access to the Spirit Sanctuary, our next dungeon. For being the third to last dungeon in the game it sure is an easy one. The 'trick' of this dungeon is floor tiles you step on to open up new passages. Explore around a bit, collect the treasures you find and eventually you will arrive in the area pictured below.
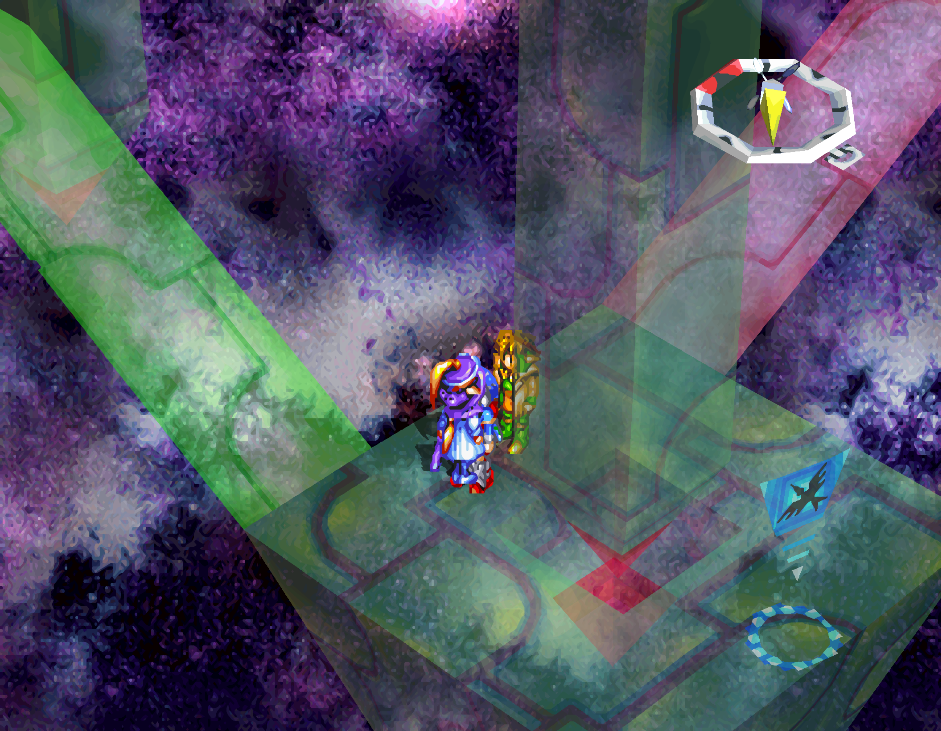
In order to advance out of this area you will need to follow the colored paths in the correct order, Red, Green then Blue. Some guides call the red path 'pink' but... it looks red to me... Once you finish this minor puzzle area it's a straight shot to the end of the dungeon which is where you'll find the boss, Mage King.
Mage King is a boss fight with 3 targets, two bodies and one wand. Just hit him with a bunch of AoE attacks to secure your victory. After that head into the area behind him and go up the rock platforms watching each scene as you go. Press X on each platform to advance to the next, at the end you'll be awarded the Spirit Sword.
Tip: Don't forget to equip the Spirit Sword onto Justin, it's his best in slot sword.
After all of the scenes you will regain control of Justin outside of J Base, head inside and go to the northern end of this room to find a giant hole in the wall... This leads to the Icarian City, the penultimate dungeon. In the first part of this dungeon you'll find a set of stairs that go down to B4. Most floors will have doors on them which lead to treasures but B2 is the way forward.
B2: Route forward through the dungeon
B3: You can find some gold and Lion Boots in here
B4: Orb Puzzle (press X when it's the same color as the platform nearby) Yellow = Gauntlets of Light and Blue = Spirit Helm.
To enter the orb stand on the colored gems on the ground and press X
When you follow the B2 route you'll be led to an extremely easy puzzle of sorts where you need to run across a bunch of tiles on the ground to change the elevation of other tiles around you. If you find yourself stuck just run around a bit to find the right tile to step on to lower/raise a path for you.
Keep following the main path through the dungeon until you find a floating blue crystal on top of a pedestal. When you interact with it you'll flip the stairs around and go down into B3 where you'll find some colored tiles surrounding a chest with a Crimson Potion. Step on them going counterclockwise to trigger some enemy fights and to unlock the western door. Follow the path to a room with a floating blue crystal over a ravine and press X to create a bridge (north of that ravine is a room with an Angel Robe inside of a chest). Unlock the door in the next room by pressing X on the middle floor tile.
The route will lead you to another blue crystal floating on top of a pedestal, much like before when you interact with it - the stairs will reverse and let you go down to B4. You will find another colored orb puzzle down here, blue will take you to a treasure with Evil Shuriken inside. Yellow takes you to a floating crystal we need to interact with a couple of times to make the path point south.
Enter the pink ball to teleport to a new area and from here it's north to our next set of bosses. Our first boss is Gaia Battler (again) and our second boss is a one on one fight with Justin and Mullen. After you beat the Gaia Battler follow the linear path forward a bit to find Mullen, there will be some scenes and a fight.
Mullen is very easy, just use your strongest special attacks against him and he won't even get a hit off. If he guards, he'll block all incoming damage - that's just about the only unique thing he does. With all of that said and done there will be more scenes after which you'll start the final dungeon, Gaia.
Return to Grandia Walkthrough Chapter 2
Continue to Grandia Walkthrough Chapter 4