
Tower of Temptation Optional Dungeon - Grandia Walkthrough
The Tower of Temptation is the final bonus dungeon in Grandia and it's the only one found in the Savanna Wilderness. Finding this dungeon is a real pain in the butt since the Savanna Wilderness area is kind of confusing. The easiest directions I can give you are to find the exit to the World Map in east Savanna Wilderness. Once you exit to the World Map immediately come back so that you start in East Savanna again. This is also the starting point I use in my video.
Note: The Tower of Temptation along with every other Optional Dungeon becomes permanently unavailable after major story events at J Base. After you return from Alent there is a short window to do these before you can't anymore.
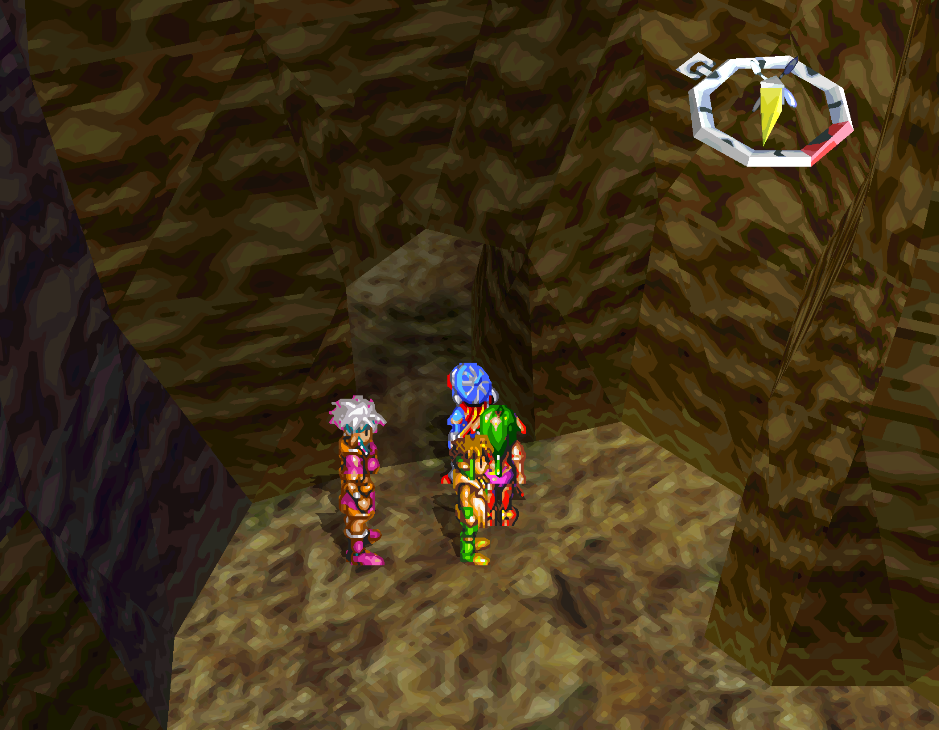
From this location you'll want to go directly west until you hit the wall with the path that goes over the top of the area. Go up the path and follow it to the other half of East Savanna, from here you'll go south until you arrive at the hole in the wall pictured below. In order to get through this hole you will need to blindly find your way around. There are 3 wrong ways and 1 right way to go. You kind of get used to the turns after doing it a few times... Unless you're me then you do it 3 times right and the time you go to film it you get confused...
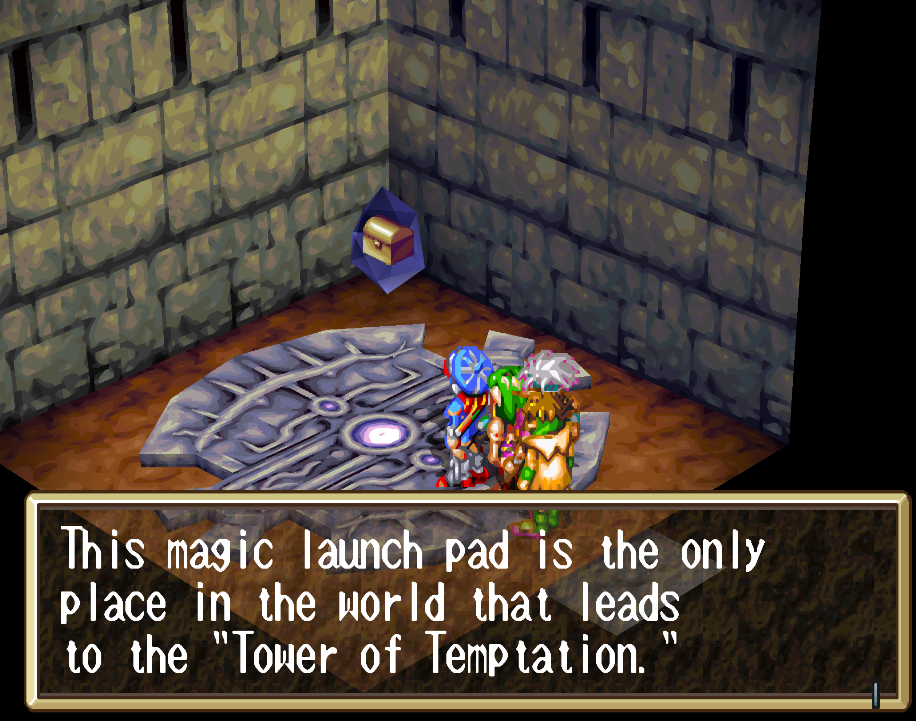
Successfully getting through this hole in the wall brings you to the Tower of Temptation entrance (pictured below). There's a Stash here and the teleportation pad that brings you to the tower. If you'd like to see a video guide of the instructions above check out my How to get to the Tower of Temptation Youtube Video.
Many of the items we want are at the top of the tower but there's a couple to be found on floors 1 - 7 as well. This dungeon can be done in multiple parts, it's best to come here with Milda and grab the Hurricane Belt on your way to floor 4. Once you make it to the fourth floor you can create a permanent shortcut back to the 1F.
Items of Interest
Hertz Spike: This is the best mace in the game.
Spirit Staff: Best staff in the game.
Staff of Life: 3rd best staff in the game.
Earthen Axe: It's the best axe in the game.
Demonslayer Boomer: Second best shuriken/boomerang in the game.
Fairy Tiara: +35 defense, someone's best in slot helmet.
Holy Crown: +38 defense, also someone's BiS helmet.
Moonlight Shield: 3rd or 4th best shield in the game.
Glass Slippers: Best in slot for either Feena, Milda or Liete.
Astral Miracle: Doubles weapon exp points. Very useful for catching a character up in levels.
Ethereal Miracle: Doubles magic exp points. You can use this to quickly level a character up.
Hurricane Belt & Sonic Belt: Both of these do more or less the same thing, they make a character move a lot faster. They help a lot on characters like Milda.
Ring of Rage: Restores a lot of SP with damage. It's a better version of the Medal of Yore.
Tower of Temptation Walkthrough
When you enter the Tower of Temptation you'll be placed outside of it and you'll have to choose one of four entrances into the tower. There's doors in all four cardinal directions (North, South, East and West), we need to go inside of the east door first to activate the statue that lets us go up to the 2F. The statue we're looking for is a purple cross (pictured below). Once you activate the cross enter through the south door and press X at the locked red door to advance to the next floor.
F1 East Door: Cross to open the door that leads to the 2F; also teleporter once you unlock it on 4F
F1 South Door: Stairs to 2F
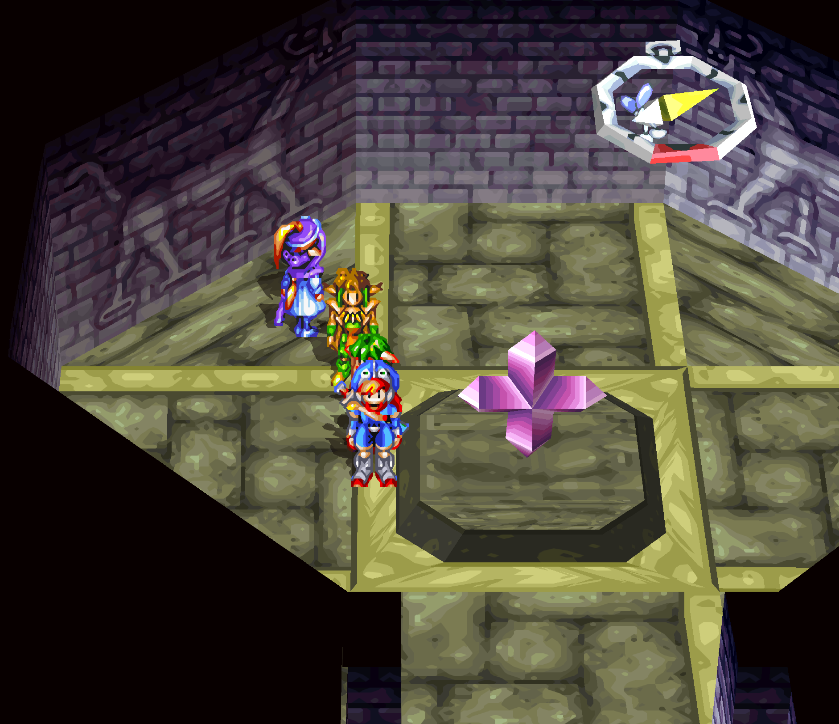
Use the cross on F1's east entrance to open the path to F2
The second floor of the Tower of Temptation is mixed together with the 3F. How it works is there's multiple elevators that will take you back and forth between the 2nd and 3rd floors... There is no easy way to explain this so instead I found you a map of the two floors online.
On these two floors you can find 3 very important items, Hurricane Belt, Earthen Ax and Staff of Life. The Staff is the least important of the three in my opinion, but the axe is the best axe in the game. All of these items are marked on the map(s) below.
Note: If all you care about is advancing past these two floors, when you arrive on floor 3 go straight to the first elevator you see. It's light blue on the F3 map below. This takes you to another elevator which leads to Rampart 1. From here it's a straight shot to Floor 4.
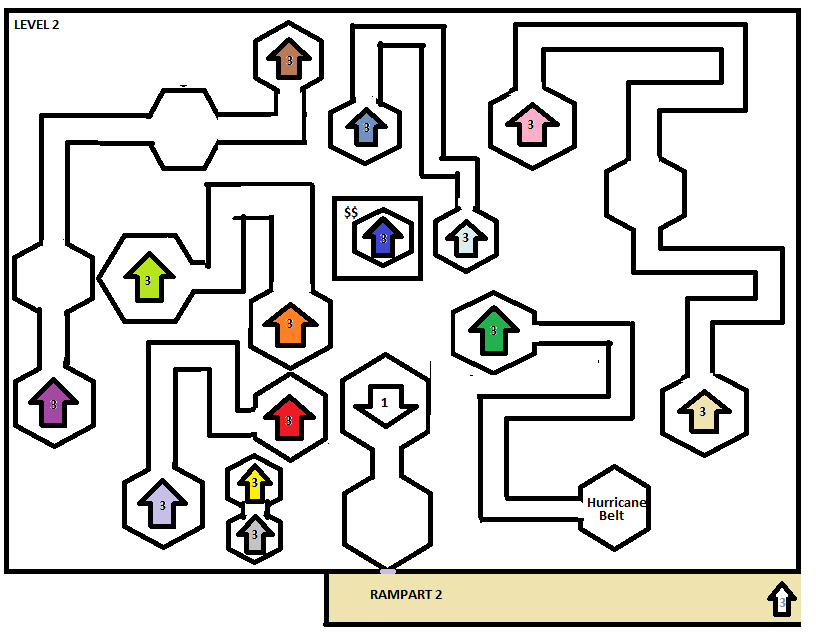
Tower of Temptation F2 Map (Original found here).
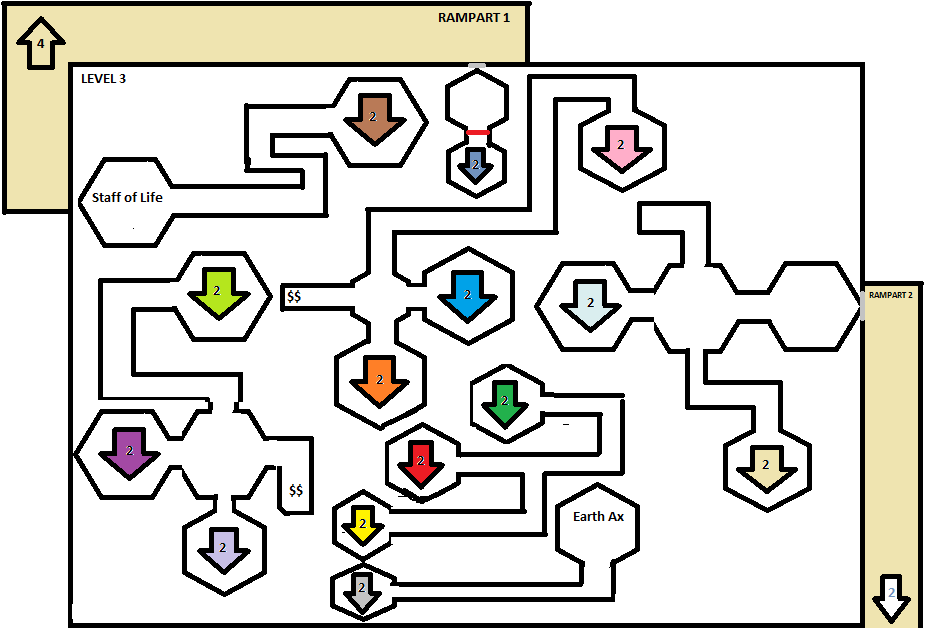
Tower of Temptation F3 Map. (Original found here).
These two floors of the dungeon are probably the most confusing... but only if you want to get the items. Really the only advice I can give is to plan your route using the maps above, one upside is many paths dead end quickly... so once you learn the route through it will become much easier to navigate.
Get used to traveling in and out of the tower for the save/recovery terminal too... I leave the dungeon for the recovery at least once every floor... This also teaches you how to get through each floor very quickly too, or if you want to look at it the other way... forces you to learn each floor.
When you finally make it to the fourth floor, you'll have a bit of a reprieve. The 'puzzle' of this floor is levers which you can only pull once, they will open/close off paths throughout this floor. If you ever get stuck press X while next to unopened doors, the walls around you or objects (like the face sitting on the pedestal). Sometimes doors just unlock instead of open when you hit a switch and sometimes the game traps you in an area and makes you knock down a wall to escape.
The first part that you may find confusing is the face sitting on the pedestal. Each time you interact with it you will spin it and point it at a different wall and open it. Turn it 3 times to open the hallway that leads to the switch we need. Once you pull this switch you will be able to knock down the first barrier that popped up after we pulled the first switch. There's no indication we can knock it down, just press X next to it and it'll work. After that, you can go open two doors that used to be locked in the same hallway (one has a switch behind it).
Not long after that switch you will pass by the entrance of this floor again and discover the teleportation shortcut (pictured below). There is a teleportation pad in this room which will send you back to the first floor so that we can more easily access the recovery/save station.
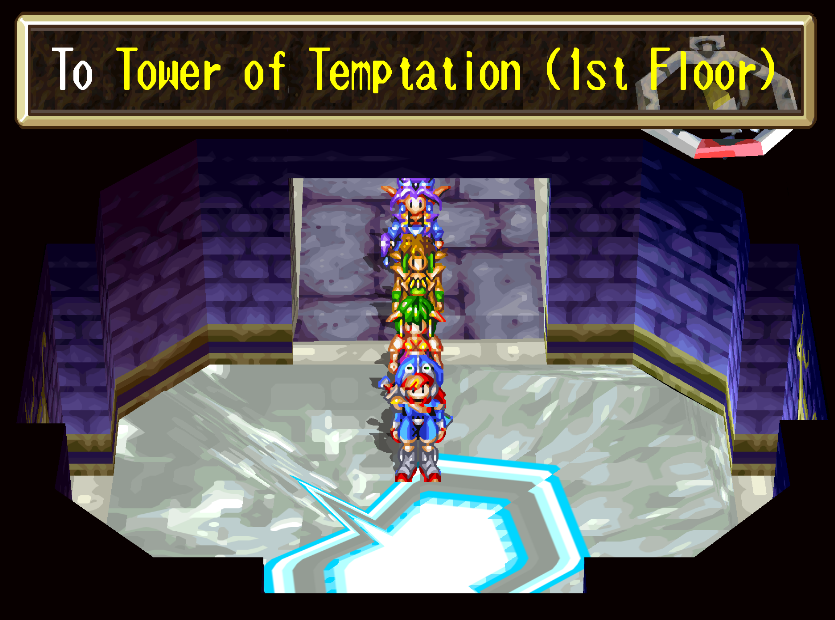
Tower of Temptation 4F has a teleporter back to the first floor
Near the teleporter pictured above you'll find the elevator which takes us up to Tower of Temptation 7F. You may be excited that we're skipping some floors but in reality, we're not. For the next few floors we're going to be traveling back and forth between the 7th, 6th and 5th floors all to reach the 8th floor.
To get started on the 7th floor you'll want to press X next to the hallway that's blocked off by a wall (this opens the 'wall door') and follow that hall to the blue gemstone on the ground. Press X on the blue gemstone to open the blue door nearby. We'll be using these floor gemstones throughout this part of the dungeon to open the various doors we find.
With the blue door open we can now visit the 6th floor. Explore all the areas you can to learn the layout on these floors. Once you're ready to advance look for the computer-like device next to a set of stairs (pictured below). When you interact with this computer it will change the hallway layout in the area we have been exploring.
Tip: To find secret passages press X next to walls which are slightly darker in color than the other surrounding walls.
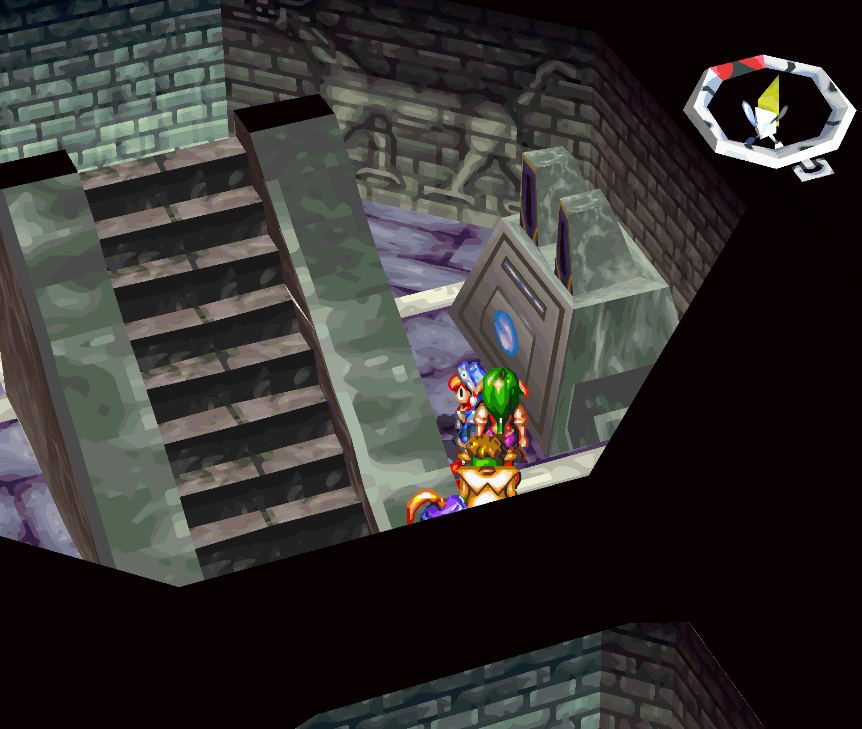
When you interact with this computer it will change the hallway layout
After using the computer go up the stairs and fall down the nearby hole to return to the floor below us. Following this path will lead us to our second computer terminal by a set of stairs going up. Unlike the previous terminal, we want to hit this one multiple times to change the path. If you want the Demonslayer Boomer item you'll have to hit the button twice, this lets you reach the chest from the room we're in.
To advance you need to reach the stairway to our north; this will require us to line up the openings on this elbow to the north and east. When we go upstairs and fall down into the hole from above we will be in the eastern hallway. So we need to be able to reach the stairs in the north from this hallway. Make sure you have the openings lined up before falling down in the hole otherwise it will require a lot of backtracking to fix.
Make sure you get the Moonlight Shield (MN Shield) in the room above the computer before you fall down into the hole too! It's in a secret hallway, interact with the wall that looks a bit darker than the others to find it. The shield is your landmark as well as loot for you. I imagine this part of the puzzle is where people mess up the most, it's easy to get stuck in a loop in this area because you are missing the one staircase we need to advance.
Follow the linear path on the 6F back to the 5F for another puzzle portion. The stairs you come down at on the 5F will have a secret hallway behind them, inside is a Cone of Light. This is another landmark of sorts for you. Honestly the better landmark is our next puzzle portion. There is a set of stairs on the 5F with a computer terminal next to it, if you go up the stairs you'll be on the 6F with another computer terminal. Don't touch the 6F terminal, it can only do east/west and north/south for openings and we need the north/south openings.
Instead, mess with the terminal on the 5F. You only need to press it once and it'll make the correct path for us. You probably find this explanation confusing so I have a visual aid to help too...
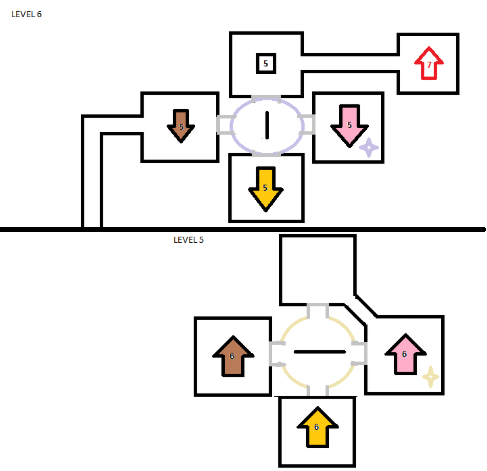
The room with the pink arrow is the one with the switches and the red arrow in the top right with a 7 inside of it is where we need to go. In order to reach this, we need the passage to go north and south on both of these floors. This only requires you to press the computer terminal once on the 5th floor, from here you can easily access what we need.
Follow the linear path back to the 7F where you'll find a black button we can step on. This will open up the black set of doors; instead of going through the second black door follow the hallway to its end and beat the Ghosts you find at the suspicious 'dead end'. You can inspect the wall behind these Ghosts to open a path to the red button which opens another set of doors. Now we're finally making progress...
Go through the red door and hit the purple button, backtrack from here to the purple door and hit the yellow button. Return to the red door and go to the end of the hallway this time, you'll find the yellow door and a green/teal button. There is also a hidden path in here which leads to Spirit Staff.
After hitting the green button you have one last door, the green one. From here we can head up to the 8F and then the 9F (we're almost at the top). Much like before, these two floors are a shared puzzle... but luckily it isn't anything nearly as annoying as the previous floor(s).
On the 9th floor you'll find a lot of trap doors, falling through one will put you back onto the 8F.. From here you fall through a trap door back to the 7F which is where you will restart the puzzle. The upside to this is the trap doors are easy to spot once you know what you're looking for. If you get close to them they will trigger and reset giving you some time to run over them.
To advance to the 10th floor you need to fall through a trap door northwest of where you come up the stairs. Doing this is the point of no return in this dungeon too, so you'll want to be prepared to take down the bosses ahead.... That probably means going all the way back down to the save/recovery location and then coming all the way back up...
All 3 of the bosses we're fighting are repeats of previous bosses - so you should already have somewhat of a strategy in mind on how to win. My biggest piece of advice is to have some Blue Potions, Miracles or Blue Pills available because we will need to restore MP between fights 1, 2 and especially 3. Thankfully Gargoyle drops Spirit Potion which restores 99 MP to your entire party for all 3 levels of magic. I normally save this for during the fight with Leviathan though, depending on your characters' levels anyway. Leviathan is no joke and losing to him means losing like 30-45min of progress (or more).
10F Gargoyle (First Boss): I literally just spammed Combo on all of my characters and healed when I needed to for this fight. My goal was to conserve mana and resources... Gargoyle is also resistant to all magic anyway so...
11F Slug Fish (Second Boss): Much like with Gargoyle, Slug Fish is resistant to all magic. I blew SP to destroy the Lure as quick as possible then focus on the body with physical attacks.
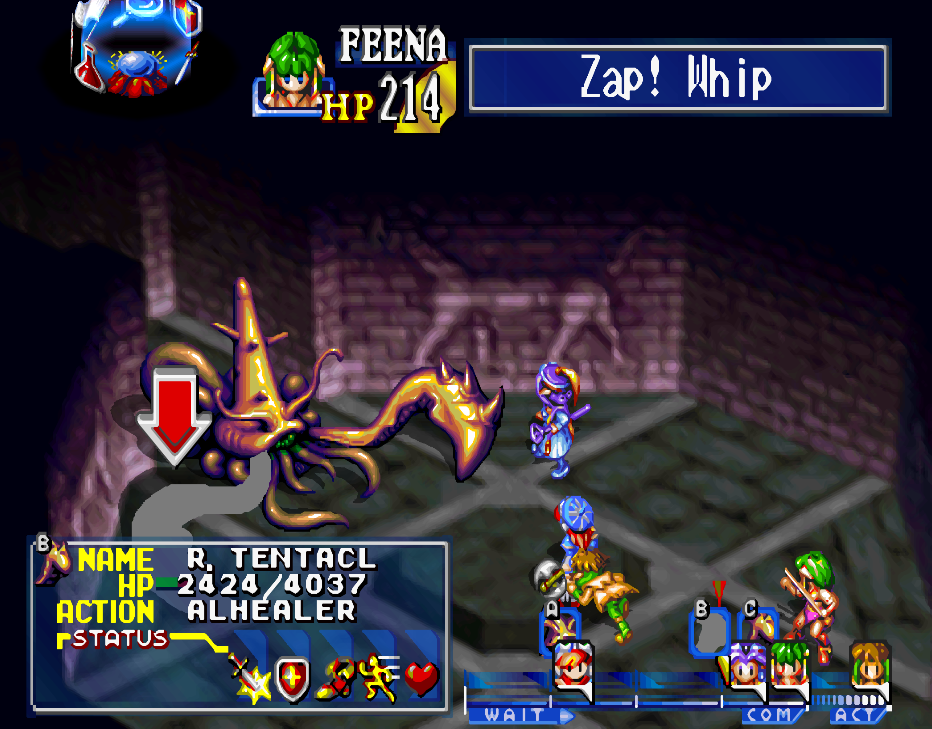
12F Leviathan (Final Boss): Our biggest threat for this fight is the right tentacle because it is the healer. For the first part of this fight you need to keep up the AoE damage almost non-stop until you defeat both tentacles - if you let the boss get too many hits in you're basically dead.
When you get to the tower's summit you can find tons of great rewards at the top. These include; 2 Revival Stones, Astral Miracle, Holy Crown, Ethereal Miracle, Ring of Rage, Fruit of Defense, Fairy Tiara, Hertz Spike and a Sonic Belt. The Sonic Belt isn't on the summit with the rest of the loot though, you have to run around the ring that goes around underneath the summit.
After you've collected all of the items head over to the teleporter in the north to leave. That concludes the worst dungeon in the entire game, you can now get back to more mindless dungeons with the main story!
Return to Grandia Walkthrough Chapter 3
Return to Grandia Walkthroughs Index