
Grandia Walkthrough - Chapter 2
Chapter 2 of Grandia picks up in the middle of the Garlyle Prison dungeon. We just opened the locked door after watching the three girls undress and give us the password. In the next part of the dungeon you will find a save/recover location, use it then enter the next room with the kid. Talk with the kid and Feena will mention a switch, nearby there will be a large wheel you can turn to open the cage, do so.
With Rem rescued return to the room with the locked door and you'll get a boss fight with Saki when you try to leave. She'll drop the Master Key once defeated, this can be used to unlock all of the doors in the hallway to your south. Explore the hallway and collect any treasures you want, when you approach the stairs going up you'll have another boss fight... This time it's against Nana.
Go up the stairs after beating Nana and follow the linear path to the dungeon's exit. There will be a couple of items along the way, so keep an eye out for things lying on the ground or in chests. Before we can leave the dungeon we'll have one more boss fight, this time against Mio. After beating Mio stash any items you don't want (any armor/weapons you found, Mana Egg, Master Key, put all of this in the Stash). Use the save/recover terminal and continue to the next room and board the train when you're finished.
There will be a bunch of scenes, when they finally conclude grab the chest near Justin then exit through the door for our first of a couple battles. For this next part of the game you have to run down a couple of train cars and fight battles as you go. When you reach the control room interact with the brakes for another scene. The train will finally stop in Misty Forest, nearby Rem's village.
Head north when you regain control of Justin and use the save/recover cone before you make your way through this version of the Misty Forest. If you're having trouble finding your way make sure the red portion of the compass is pointing up at the top of the screen. This lets you know that you're going north. When you reach the river look for the rock, you can cross over it to reach the other side.
Tip: If you are struggling with combat try interrupting enemies more. You can make most battles a lot easier by hitting the group of enemies with a weak attack to interrupt them and prevent them from attacking you. Fire spells do a good job of this as does Sue's Fire Away skill.
Once you reach Luc Village speak with Rem to gain access to the town. Before you speak with the village elder I recommend you visit the Weapons Store so you can purchase some weapon and armor upgrades for everyone. This is also our chance to clear out our stash and spend our Mana Egg. You can find the Stash inside of Rem's house.
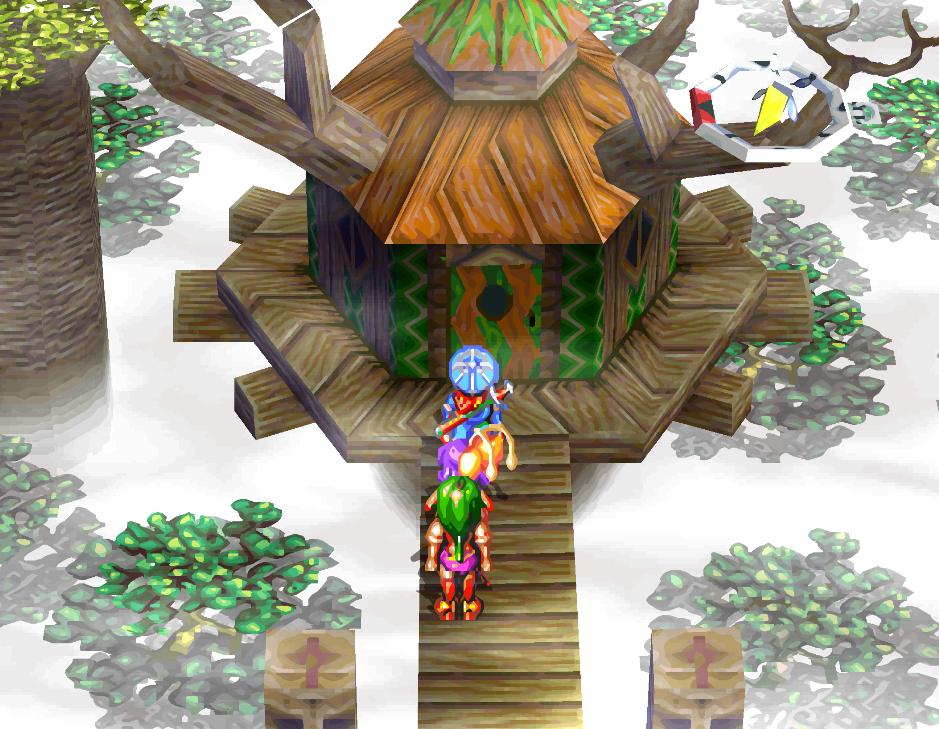
Luc Village Elder Chief's House
When you're ready to advance the game head to the eastern portion of the village and into the Village Elder's House (pictured above). Speak with him for our next task - we need to go to the God of Light Mountain which is behind the village. There's some nectar we need to bring back for him.
Head over to the northwestern fence (the wooden one) and head through towards the mountain. This is another dungeon where our goal is to go north to reach the item we're after. You can follow multiple paths north, I will leave the navigation up to you. At the mountain's peak you'll find Nectar of the Gods, this is what we need to bring back to the village elder. Repeatedly talk with the village's elder when you come back with the Nectar... Dialogue will end a bunch of times but there's much more you need to hear. When he tells you to go to Rem's house, you're done.
Speak with everyone inside of Rem's house and you'll have another meal scene. After the meal you'll have some more scenes, when they're done you need to return to the peak of the mountain a second time. There will be a couple of battles along the way and some scenes at the top. When they're all done you will be rewarded with the Mist-clearing Nut. Unfortunately we need to backtrack down the mountain ourselves... and enemies respawned.
Once you make it back to Luc you'll want to exit out of the eastern gate to the World Map. You can only select two options, so choose Misty Forest. This will put you in Misty Forest (East). Our goal for this dungeon is to... go east. In the middle of the dungeon Feena will ask you to stop and make camp, just like always - talk with everyone then rest. Keep heading east through this area into the final East Misty Forest (3) area. In the northeastern portion of this area you'll find an exit to the End of the World!
Tip: Right when you arrive in the End of the World, exit to visit the World Map. Travel back to Luc Village and sell items you don't need so that we have a clean inventory going forward.
End of the World is a pretty linear dungeon, it is 10 floors of finding your way around traps and tricks to go up. Look for the alert symbols on the ground, they will mark the spots where you can advance to the next floor. Feena will have your party stop and rest on End of the World (3) for the first time. This area will also introduce buttons as another mechanic in this dungeon. On the second floor of area 3 you'll have to hit a button to raise the floor so that we can progress.
The End of the World (4) will have our first 'boss' along with some rock golems. The boss is a bird on the floor above, it's protecting a button we need to press. It's also the same boss we beat at the start of the game, same HP and everything... Not a tough fight.
You will make camp again in End of the World (6), our next 'boss' is an emerald bird in End of the World (7). There's actually two of them we'll be beating in order to complete the level. When you beat the first one it makes the staircase below no longer turn into a slide. The second bird will attack you just before End of the World (7). At the final part of End of the World (8) you'll need to make the machine arm plug itself into the wall for the elevator to come down. From here it's a straight shot to the top of the wall. You'll have another camp scene with everyone when you reach the top.
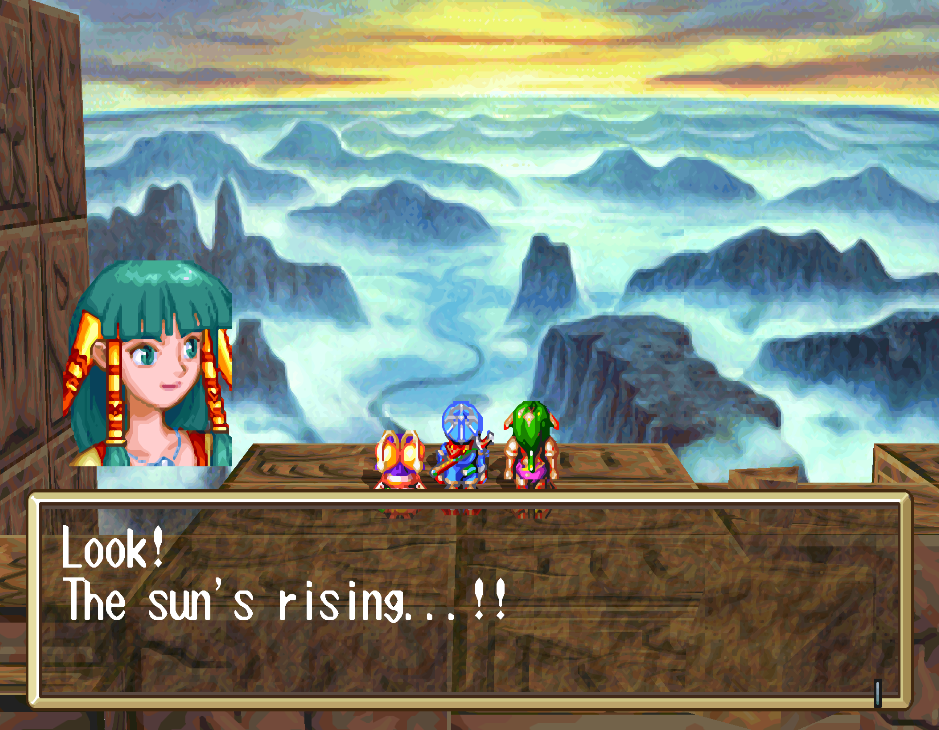
When the scene is over explore the top of the wall a bit for another scene. Once you regain control of Justin you will be on the other side of the wall without Sue. Save your game and stash any items you don't need for the time being. Head east to get through this area, you'll find a screen transition to Valley of the Flying Dragon (2).
Tip: If you don't have a way to cure your Poison return to the Recover spot and do it there.
It won't be long before you find Sue's Shoe and then Puff who will lead you to where Sue is. There will be a scene at Gadwin's House and a fight with him that you can't win. You will have more scenes after the fight, then you will have a meal with everyone. Speak with Gadwin a lot and make the man-to-man promise that he asks you to make. Once this is done you can sleep for the night.
This forest is a good place to get some EXP if you're not already in your mid to late teens. Also, the plants that damage you as you run by them make this a good spot for leveling up Water magic too if you haven't already. Literally all you do to level that up is take damage from the plants then heal yourself repeatedly. You can use the recovery location at Gadwin's House to restore MP. One thing to note is if you find boulders obstructing your route, you can usually destroy them by pressing X next to them.
Make sure you grab both Mana Eggs before leaving the Valley of the Flying Dragon dungeon. You can find one Mana Egg northeast of Gadwin's house, it's by the circular plant you run up to advance through the dungeon. Really hard to miss actually. The second Mana Egg is found in Valley of the Flying Dragon (4).
Exit to the World Map and head over to Dight Village, when you arrive Gadwin will leave the party. Our first destination is the Inn, you'll have a scene here with Guido. Talk to Guido until you're out of new dialogue and then speak with the Innkeep to stay the night. You'll have some scenes with Gadwin the next morning, follow him outside to the beach and you'll have another scene with him and the elder. During this you'll agree to help Gadwin with Mt. Typhoon. Exit to the World Map and head over to the dungeon.
In the first part of Mount Typhoon you'll find a Mana Egg, it's found amongst the acid rivers on a small patch of dirt. Once you find this you can go to Mount Typhoon (Peak) next... If you get stuck, run up the mushrooms that go up the wall diagonally. Look for the entrance to Typhoon Tower (1), this is where we need to go. You can find a restore point at the entrance, also make sure to grab the Mana Egg in the first large room you come across.
The same room that has the aforementioned Mana Egg also has the first mushroom button that we need to press to advance through this dungeon. Run into the pair of barrels in this room and press X to make it shake, this will make the crystal on the mushroom disappear (pictured below). Step on the Mushroom and press X to make the stairs come down next to it (also pictured below).
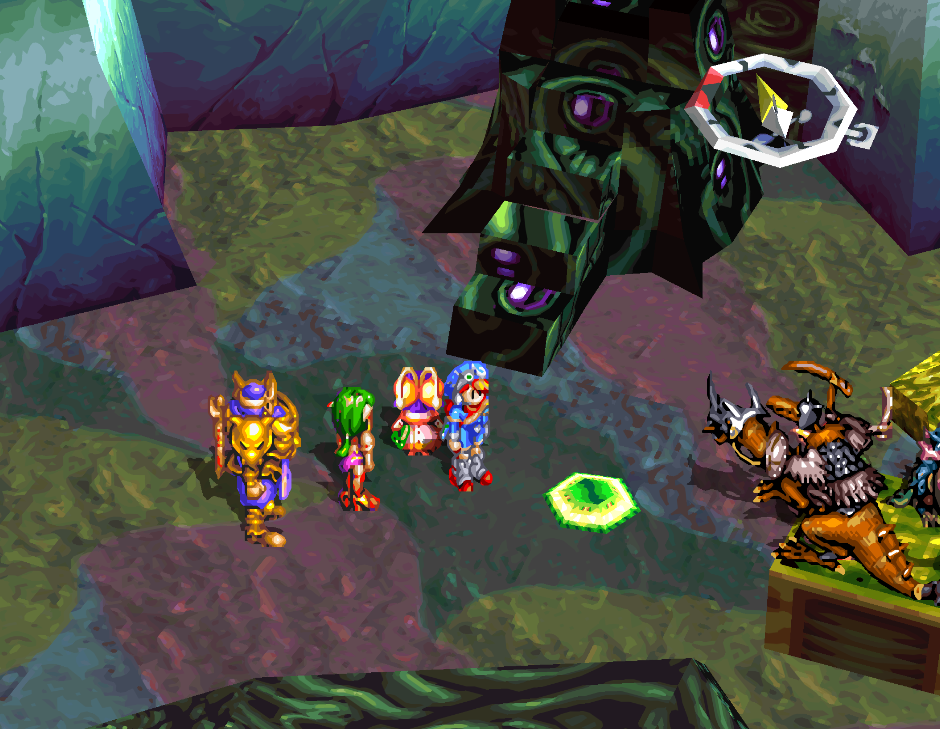
Typhoon Tower has different colored mushroom buttons you need to activate.
Doing this will get you access to a different portion of the 2nd floor, one set of stairs leads to treasures and the other set is the way forward. You're looking for a small hole on the 2nd floor with a rope going back down to the first floor. Use the rope and press the green mushroom in the room below, this will create another set of stairs which takes you to a small room on the 2nd floor. This sounds more confusing than it is. Interact with the pedestal in this room to make one platform rotate elsewhere in the dungeon... This is all we need from this side of the dungeon.
Return to the entrance and this time search for a set of red stairs near a red mushroom on the ground (pictured below). If you went this way originally it was a dead end, but now that we hit the button on the other side of the dungeon we'll be able to get across the gap.
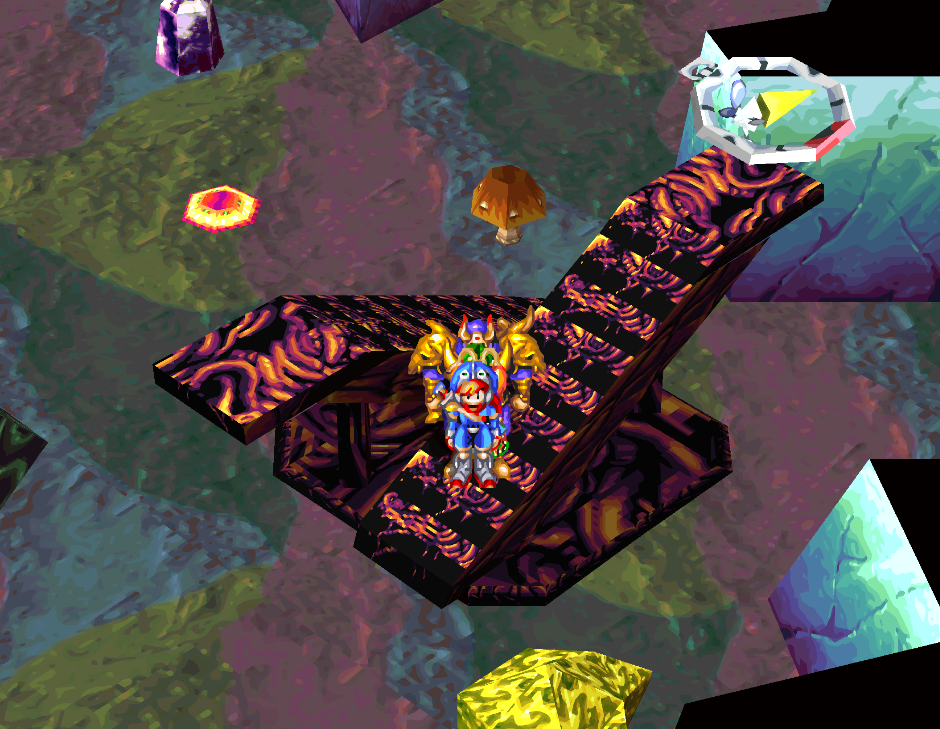
These stairs lead you to the end of the dungeon.
After going up the stairs it's a linear path to the end, our boss for this dungeon is a four headed Serpent. Defeat Nice Head first since it heals everyone then do the other 3. I recommend using skills or spells for the heads, you'll be able to take them out quickly that way. Don't forget how important interrupting the enemy's attacks are in this game. You can almost trivialize the fight by nuking the boss repeatedly with AoE attacks since that will keep pushing back their turns.
Once you defeat the boss step on the button behind the throne to make a new path. Follow it up and into the portal above, you will have more scenes in this room. When you inspect the stone tablet - it doesn't matter what route you choose as the result is the same either way. Just keep going through the dialogue and scenes until everyone ends up outside the tower and you get back control of Justin.
Return to Dight Village and go to the beach where we talked with the elder last time. He is standing next to the Dragon's Nest (a small hill on the beach with a sign next to it). After speaking with him, there will be a scene where Justin is declared the hero. Head up to the Dragon's Nest and interact with the hole on the ground to plant the spear there. Go back down and talk with Gadwin a couple of times to get him to join your party again and set the course for our next destination.
When you're all done in Dight Village exit to the World Map and choose Lama Mountains as your next destination. Our goal is to go straight south through this entire area to reach the exit, it's pretty straightforward to be honest. Shortly after reaching South Lama Mountains you will make camp, talk with Gadwin and exhaust his dialogue then sleep.
The South Lama Mountains can be a little more confusing since it's more or less a bunch of elevators that you ride around.. There's also a lot of enemies here, I recommend fighting them all since you could always use more EXP. I got into over a dozen encounters and spammed magic spells during all of them to level up my magics more.
Tip: It's best to vendor before finishing the events in Gumbo Village. You will be instantly sent to the next dungeon after the story events in this village.
When you exit South Lama Mountains you'll find yourself back on the World Map, from here enter Gumbo Village to continue. Visit the Chief's House in the town and speak with the man inside to learn what happened with this village and how to proceed. Talk with him again after the 'festival' to go to the Guest House and rest for the night. When it's morning head over to the Guest Tent and you'll be catapulted to the volcano...
For the first part of this dungeon we only have Feena and Justin, make sure to get the Mana Egg that's found in this area, it's actually the last one on Disc 1. Head up to Volcano Slope (2) and you'll find Gadwin and Sue. Once you have the whole party back you'll want to explore the dungeon and loot whatever you need/want then head for the Volcano Crater, you'll find the boss of the dungeon in here. Madragon is the name, hit it with your strongest attacks and you shouldn't have any issue with taking him out.
After your victory return to Gumbo Village for some scenes. Take Feena to the quiet islet when you go outside, it's found down the beach. You will have a lot of scenes here, after that you will have dinner with everyone.
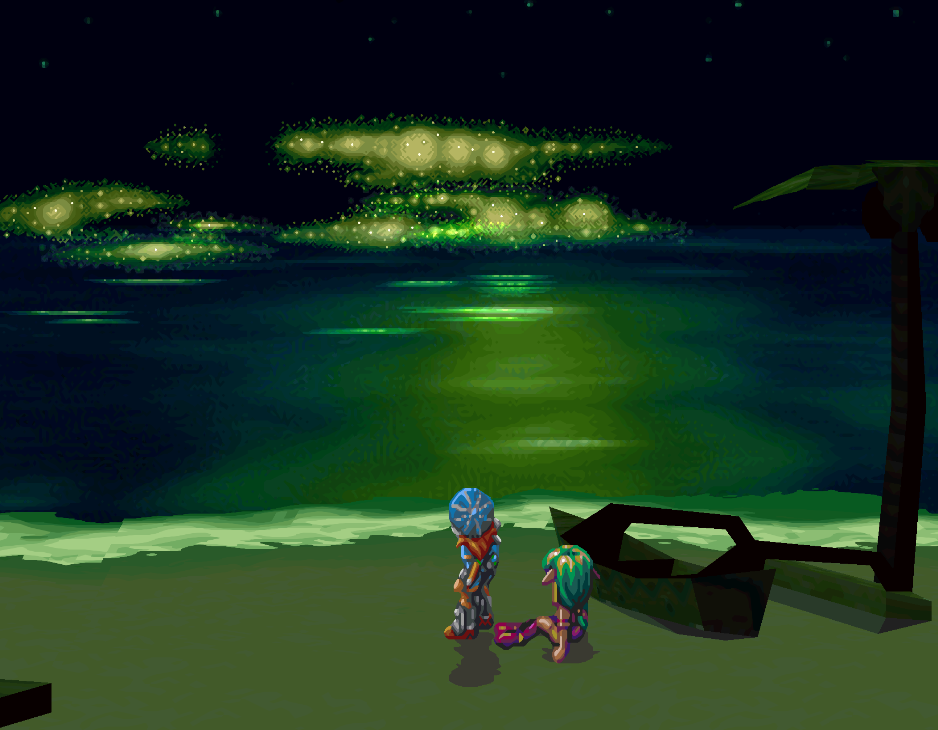
Justin and Feena watching the spirits in Gumbo Village
Before we leave Gumbo Village you should hit up the Tool Shed and sell any items you don't want/purchase upgrades and spend Mana Eggs on spells. Once you're done with all of that head down to the docks, Danda is at the very end with his girl standing next to a boat. Tell them you're ready to visit the Twin Towers and off you go.
If you want to return to Gumbo Village at any point you need to return to Danda at the dock and speak with him. As Danda told you - the only entrance into the Twin Towers is through the north gate. The dungeon itself is a labyrinth of hallways, you will need to progress through them until you find a button on the ground and step on it.
Each time you press one of these buttons two stones will go down and two will go up. Think of the four cardinal directions, north, south, east and west. If you are at the eastern end and you press the button you'll open up the east and west paths... but you'll close the north and south paths. Pressing the northern button will open the north and south paths but close the east and west. Both of these towers have this mechanic so you should understand how it works.
Our goal is to reach the Twin Towers (Vestibule) area, it's basically the Garlyle forces staging area. There will be a recovery/save location here for us as well as important story scenes when you approach the building in the center. Once the girls leave head inside of the building and inspect the device in the center of the room as well as the cubby. When you try to leave there will be some more scenes.
You will regain control of Justin by his lonesome, follow the linear path until you find Leen. There will be more scenes after which you'll regain control of Justin in a new area with Leen. Follow the linear path through the dungeon watching the scenes as you go. When you reach the top you'll get a cutscene along with Medal of Wisdom. It's a key item, it'll be named Wis Medl in your inventory.
After the cutscene Leen will give you back the Spirit Stone and leave. Now it's time to finish this dungeon! From the central area you ended up with Leen you can go north to collect a bunch of items or south to meet up with Feena and a bit further south to meet up with Sue and Gadwin again. No enemies spawn in this area so explore to your heart's content. Once the entire party is back together we're done with this dungeon. If you'd like to collect some more loot before we leave though... the west door is now open too.
To exit this dungeon go to Twin Towers (South) and from there continue to Twin Towers (Coast), you'll find Danda here. We need to return to Dight Village and speak with the Elder that's here, you'll find him inside of the Village Elder's House this time. Sue will fall ill shortly after our conversation with him and leave our party.
When you're ready to continue with the game, exit to the World Map and head over to the Mysterious Vanishing Hill. The first part of the dungeon is pretty linear, follow the path until you come to the area with a save/recovery location and two buttons with a door (pictured below).
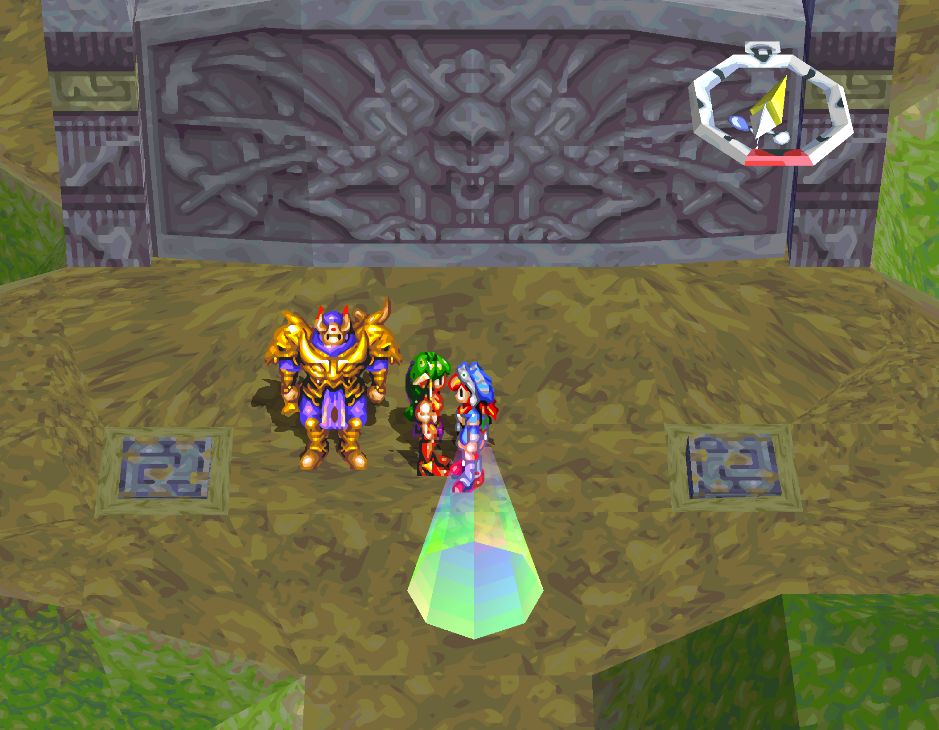
Step on these buttons to make the blocks line up and form a path. The west path leads to the Silver Key item which will allow us to open some of the doors in this dungeon (including the one pictured above). Our first boss of this dungeon can be found through this door, its name is Massacre Machine. Honestly it's a pretty easy fight, once you've beaten it you can ride the elevator up into the next area.
As you explore you'll come across a platform with the Gold Key on it. Press the two buttons in front of it then go up the newly formed block path nearby to another button. This one will lower the key which allows you to pick it up. With the Gold Key in hand, return to the door pictured above. This time go east, if you follow the path to the end you'll find a locked door. Open it and ride the elevator inside up into our final part of the dungeon.
You will fight another Massacre Machine coming up, it's only slightly stronger than the one we just beat. Not long after this boss you'll come across the final puzzle of this dungeon, it involves four buttons on the ground (pictured below).
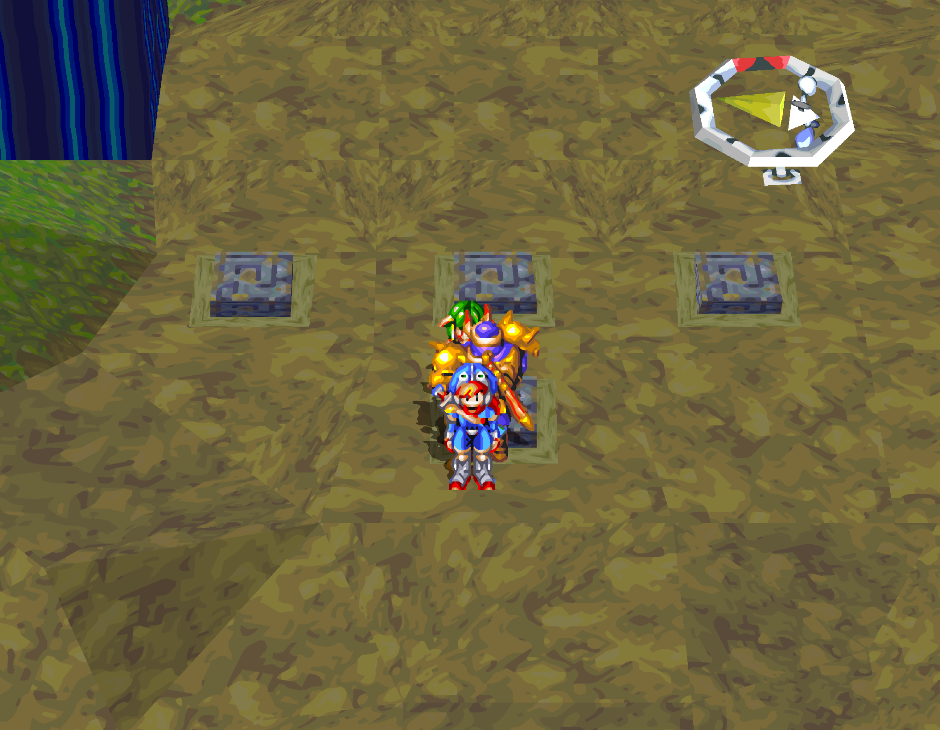
What we need to do is raise the three platforms in the correct order.. You can control these platforms by using the top 3 buttons. The bottom button is there for when you mess up and want to reset the puzzle... Each time you reset the puzzle the order of the buttons will be randomized as well - so there is no 'correct order' that I can give. It's literally just trial and error until you raise them in the right order (ascending order to reach the platform). Once they're in the right order step on the bottom button to lower the final platform down a bit so we can run up all four to reach the next area.
Grab the Teleportation Orb on the ledge above then exit this dungeon and return to Dight Village. We need to visit Dr. Alma's Clinic in the village and speak with Sue. As you learned from the scene, Sue will be leaving us for good. You don't have to clear out her inventory or unequip her items, all of that will be deposited into your Stash along with a unique item that I will explain in a bit...
Exit Dight Village and head over to Mysterious Vanishing Hill again. This time instead of going up the hill go into the crack right near the entrance and interact with the thing that looks like a face inside. Justin will put the orb here and everyone will say their goodbyes... It's actually a very good scene, all things considered. So far I have really enjoyed the story of this game, I can see why it is a gem.
Return to the Dight Village Inn and speak with Gadwin here again. Also hit up your Stash to withdraw some things... When a party member leaves you in this game they will also leave behind items which allow you to get back some of their EXP. Sue left behind Mace Book and Bow Book, both of these cover her weapon skills that you raised. Depending on what magics you taught her, she also leaves behind items for those too. Brn Crayn would be for Earth, Blue Crayn for Water, Red Crayn for Fire and Sky Crayn for Wind.
I normally put the Crayons onto Feena, assuming that Feena has all of those magic types. The reason I choose Feena is because Gadwin will be leaving us in the future too and he will also deposit items that we can use just like Sue did... Normally I put Gadwin's stuff onto Justin and Sue's onto Feena. The Mace and Bow book can sit in storage for now.
Tip: While you're in Dight Village put Wis Medl, Silv Key and Gold Key into the Stash.
When you're all done in Dight Village it's time to head over to the Valley of the Flying Dragon... Remember the spot where we first met Gadwin? He is waiting for us here currently, so find him again and speak with him. Just like the first time we met Gadwin, we'll be fighting him in a duel. This time though it's a much easier fight since Gadwin isn't using cheat codes... Actually, Gadwin didn't get a chance to attack me at all when I beat him. His speed is so slow Justin kept getting the first move. I just spammed my most powerful single target damage skills on Gadwin till he went down.
Once you beat Gadwin he will say his goodbyes to you, just like Sue. As a departing gift Gadwin will teach you Dragon Cut, his ultimate move. In order to use this skill you will need sufficient Sword, Fire and Earth ranks. If the skill doesn't unlock for you right away it may be because one of those skills isn't high enough - or sometimes you just need to raise one of those three skills a single time to trigger the unlock.
Head over to Dight again and speak with Dr. Alma at the docks (pictured below). When you agree to leave you will never be able to return to this part of the game again, so you may want to tie up some loose ends... Like finding any Mana Eggs that you may have missed. To be honest, it doesn't matter if you miss one or two since we will be getting more on Disc 2. It's also not necessary that every character know all four spells. It does help them though with stat growth if nothing else.
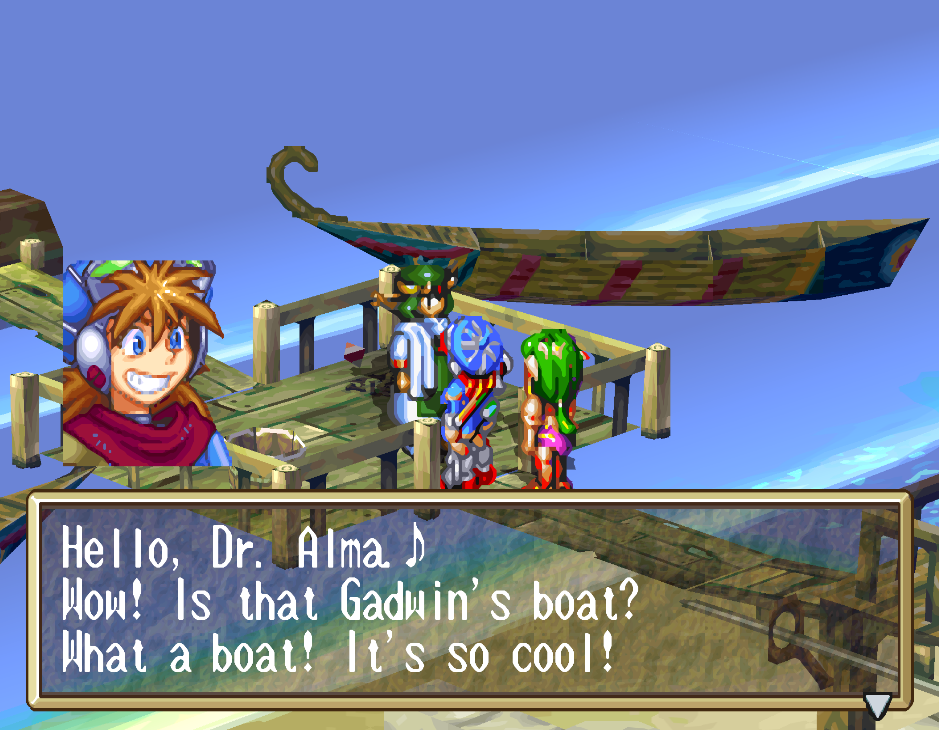
When you tell Dr. Alma you're ready to go he'll let you board the boat and sail off to Pirate Island. There will be a save/recover location on the boat as well as a Stash, when you wake up go outside and talk with Feena for another scene. When you regain control of Justin you'll be on Pirate Island, it's a very linear dungeon - there are two routes to the middle which is where the boss is found. If you need to rest/save you can return to the boat and use the location there.
The boss has two targets, Lure and the main body. I recommend you focus on the main body since that is the only target you actually need to defeat. Beating the boss will trigger some scenes, after which you will find yourself on Disc 2. Save your game then insert Disc 2 and load your save file to resume playing.
Disc 2 Begins!
Disc 2 begins with a dungeon called Virgin Forest. Much like with the previous dungeon, if you need to heal you can return to the boat and use the terminal there... Although when you do this it will respawn all enemies in the dungeon, which can be a boon or a detriment... depending on if you want to grind some.
I strongly encourage you to grind for a bit and level up your magics. As you level up magic you will unlock new abilities, raise your stats and unlock new spells. Just like I taught you before, the best way to raise Water magic is to get hit by environmental damage and then heal yourself... Luckily for us this dungeon has a ton of things that will hurt us outside of combat. This gives us a great opportunity to level up Water. You'll notice a difference if you do two cycles of spending all your MP on healing then returning to the boat and resting for your MP back.
Tip: You don't have to watch your HP when it gets low, the environmental effects will lower you to 1HP but never kill you.
Leveling magic can get a bit tedious, but - like any JRPG of its era... you gotta grind. When you are ready to complete this dungeon you'll want to look for the giant flowers on the ground (pictured below). These flowers act as catapults and will shoot you into different parts of the dungeon. You'll need to ride on one of these flowers to reach the dungeon's exit.
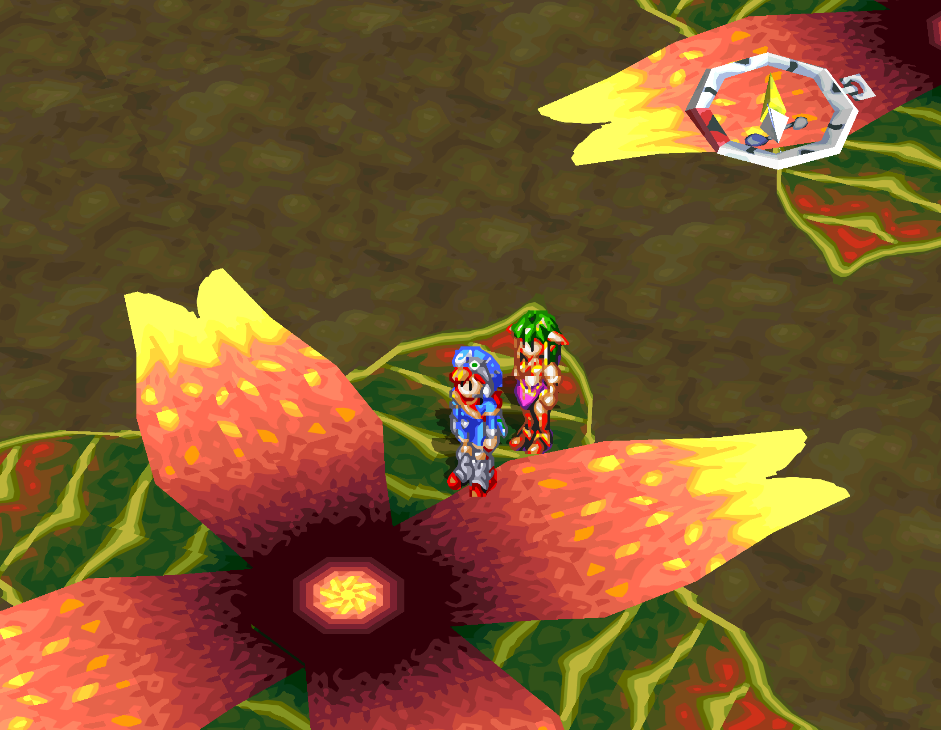
Stand inside one of these flowers to be shot to a different part of the dungeon
About halfway through the dungeon you will run into Guido again, you'll have some dialogue with him after which you will rest for the night. You can return to his house and rest as many times as you want, each night will be 100G. From here continue through the dungeon until you reach an alert sign by some lily pads, when you find this you know that you're going the right way. There will be a few more things you jump across as you go until eventually you run into a kid.
Not long after meeting the kid you'll go into Virgin Forest (3) and meet a future party member, Rapp. Shortly after you meet Rapp he will run off to deal with our next boss... Grab any items in the area and use the save/recover station before heading over to Rapp and the boss. This boss is extremely easy, you will have 3 targets in total to deal with and my advice is to spam AoE attacks on them to take them out. I used Burnflame, Flame Whip and Dragon Cut as many times as I could until it was just the main body... Then I did single target.
Rapp will tell you to head back to Cafu Village, we'll have one more dungeon area to get through before we can access the World Map again. Select Cafu Village on the World Map and once you're there head for the Elder's House (pictured below).
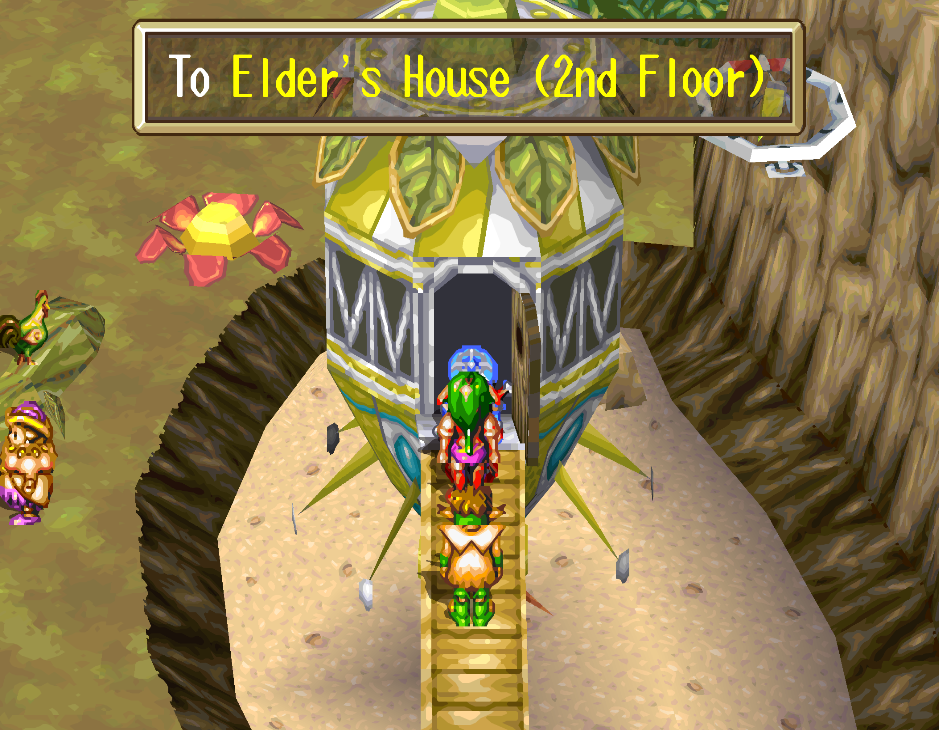
Once inside of his house you'll need to climb down the rope in the middle to find him on the first floor.
Return to Grandia Walkthrough Chapter 1
Continue to Grandia Walkthrough Chapter 3