
Xenogears Walkthrough - Chapter 4
Upon entering the Nisan Mausoleum you'll want to head down the stairs until you find a locked door. You can ask Margie to open it, otherwise inspect the eastern side of the machine to find a panel. Once the door is open follow the linear path to another room with some guards and beat them for a scene. When it's over get onto the elevator and inspect the panel to ride it up.
Much like before, follow the linear path and you'll get another scene where you finally learn what the Fatima Jasper is. Shortly after this room the hallway will split for the first time, go through the door here to find a room with a Memory Cube and a chest that contains Desert Worm. If you take the other path it will go to an elevator that you can ride upstairs, you can find a Deathblower1 in one of the rooms up here too. If you enter the Energy Block from the north, go past 2 doors and enter the third. You'll find the Deathblower1 item in that hallway.
To advance the story you need to find the next Jasper Lock for Bart and Margie. Enter the Energy Block from the north and enter the second door that you pass. In this hallway you'll find an additional door right before the Gear Hangar area. Inside that room will be a Jasper Lock and a Memory Cube. You'll get a short rumble when you use this Jasper Lock, go into the Gear Hangar nearby and head southwest down the portion of the floor that is lit up. This leads you into a room with a Gear, you'll get a scene in here.
Inspect the panel at the base of this Gear for another scene and to return power to the Control Room on the floor below you.
Someone from the town of Nisan will be waiting for you in the Control Room and they will act as a vendor if there's anything you need. Talk with him to buy/sell then inspect one of the computers in the room for a scene involving the Gear we just found. We'll need to return to the Gear and deal with Shakhan's men along the way. Shakhan's men are very powerful and can defeat your entire party in just one round if you're not careful. My advice is to clear all of them on the way to the Gear. If you get caught by one group that means more will intercept you when the battle is done. This will typically result in a Game Over.
As you could probably expect too we'll have to deal with a boss fight once we reach the hangar. The fight with the boss is easier than the fight with the enemies leading up to it. Once it's finished you'll get some more scenes after which you'll regain control of your team in Nisan. You can switch one person in your team by talking to them in town, otherwise there isn't much to do here aside from shop. If your Gears aren't above 10k HP each yet, you should buy them better parts.
Refuel your Gears and heal them, it didn't happen automatically during story events!! To continue with the story exit Nisan and head west on the island it's located on, you'll find a small cave titled Ignas' Gate Cave on the World Map. Inside this cave you'll have one fight against normal enemies then the boss fight against Shakhan.
The boss fight with Shakhan is a difficult one, I recommend you equip Seal Ar on every Gear since that will reduce the incoming damage of his Seal spell by a lot. You may also want to equip Waterveil Ar onto multiple Gears too, that'll further reduce his damage with Ignas Storm. When you think you're ready, continue down the hallway to settle Bart's fate.
When Shakhan is hooked up to the Gate he'll heal for 1k on each of his turns. The catch is he'll be unable to counter physical attacks and when he falls under 50% HP he'll start healing 1k as a counter attack. For this reason it's best to whittle him down at the start of the fight as you wait for him to unplug, then unload on him.
Use Yin Power on Fei for the bonus attack and Booster on everyone. Then use your best Deathblows on Bart and Fei; Elly is probably the best third for this since she can spam Aerods. Citan is a good choice too though since he has high speed and can do Renki + Suiseii to reduce Ignas Storm damage. When the fight is over, watch the scene then run out of the cave for another scene.
After a long time, we finally have access to Bledavik again. If you gave that kid 1000G earlier in the game he has since opened a shop that sells Hob-Jerky, Hob-Meat and Hob-Steaks. When making a purchase wait on the price menu for a bit and the kid will lower the prices. You can resell these in Nortune for more money than you paid, if you're interested.
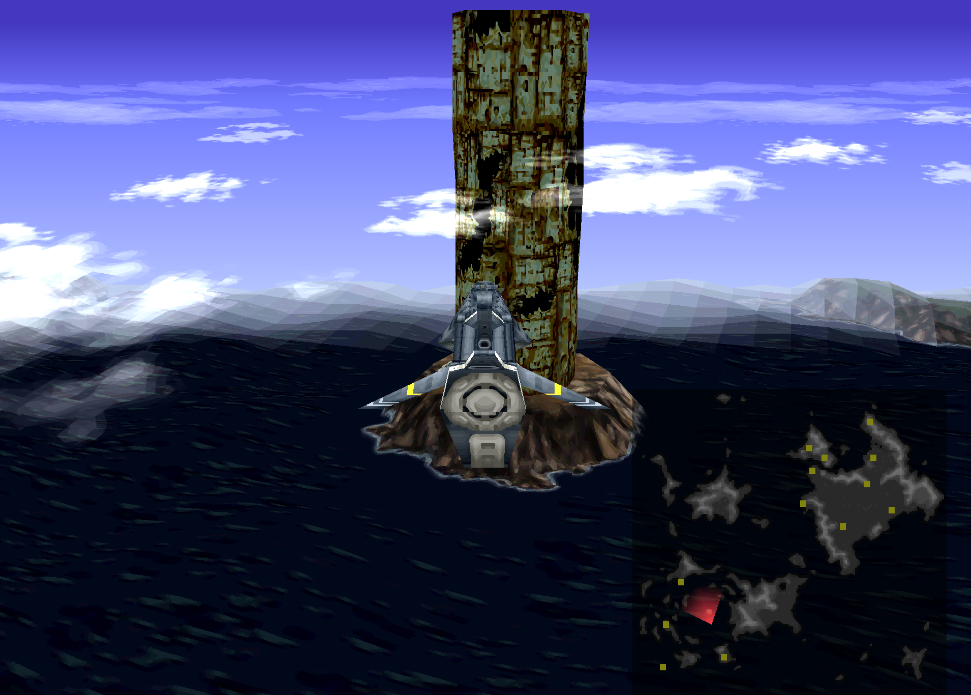
To continue with the story you'll want to head over to Babel Tower. We're going to enter this place and then have multiple boss fights so make sure you're well prepared and fully healed/refueled. When you enter Babel Tower you'll be asked to choose party two. I recommend replacing Chu-Chu with Maria.
Head into Babel Tower with Fei and drop down into the pit, exit your Gear and go into the room to start a scene. The next few boss fights are all pretty easy, you'll have to fight both teams twice after which you'll get more scenes. When you regain control of your team you'll want to fly the Yggdrasil over to the Thames and speak with the Captain here. Before you leave the Thames visit the Gear Shop in the Supply Entrance area. The Gear parts you can buy from here are a needed upgrade.
Tip: If you're struggling with Gear combat, you should buy Frame HP30 for everyone from the Yggdrasil Gear Shop. This item will allow you to heal yourself at the cost of Fuel while you're in the dungeon. Also, you can return to the Yggdrasil by going south in the first screen of the water dungeon (aka run towards the screen).
When you're all finished return to the Bridge of the Yggdrasil and speak with Sigurd to start our underwater adventure. This dungeon is pretty straight forward, you can find 3 items inside (Mermaid Mail, Dark Rod and DeathBlower2). Mermaid Mail is found right next to the Memory Cube and DeathBlower2 is found near the boss at the end of the dungeon.
Near the end of the dungeon you'll reach a point where a jet of water will keep pushing you back. Don't forget that you can press Triangle to jump on your Gears while underwater, this will make getting past the jet much easier. In the area past the jet you'll find a chest with a Dark Rod inside and an empty chest next to it. Opening the empty chest will disable the jet stream. Back track to that split in the path and follow the right tunnel up to the boss.
Crescens is the name of the boss and all in all she is pretty easy, use your strongest Deathblows and attacks on her. Once beaten you'll get a long scene during which Emeralda will join your party, she's the last party member that will be joining you. When you regain control of Fei you'll be in Shevat, before we talk to the Queen and advance the game again you may want to tie up any loose ends that you still have.
This is your last chance to complete a lot of the Side Quests/mini games on Disc 1. Once we enter Solaris we can't leave until we complete the first Disc. The 3 Badges, Shevat 3 Rocks, the Speed card game all goes away once we advance to Disc 2. You may also want to take some time to learn new Deathblows, check out my Deathblow Guide for more information about the best way to do this.
When you're all done and ready to complete Disc 1, speak with the Queen in Shevat to continue. You'll have some scenes after which you'll regain control of Fei in an upside down area. Walk over to a tube nearby and interact with it for another scene. Interact with the computer terminal on Fei when you can and you'll find yourself in a slave labor camp of sorts.
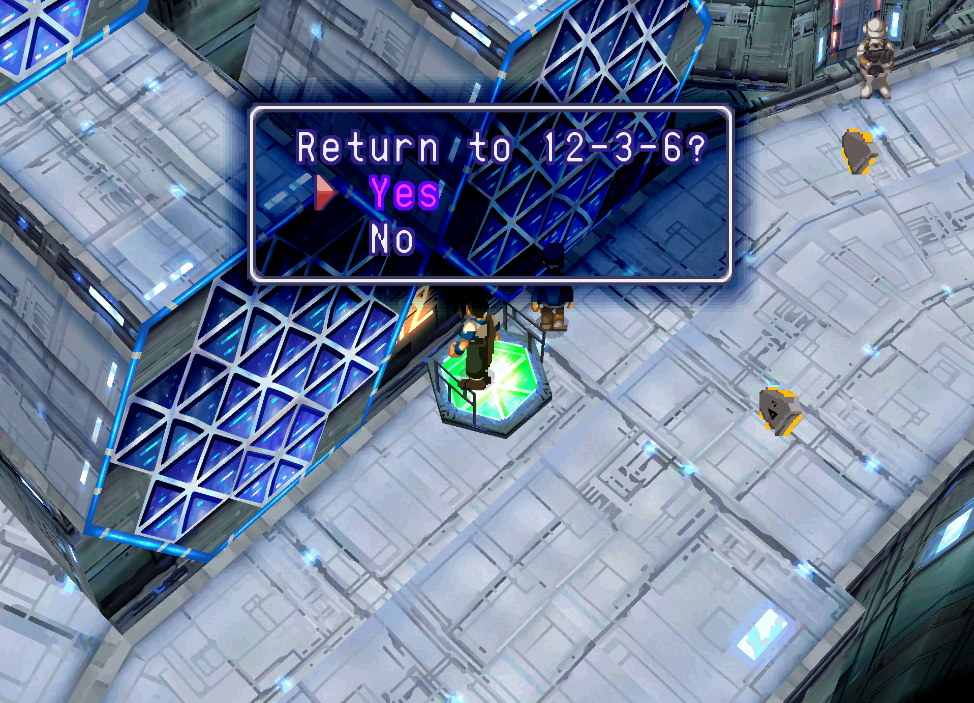
You'll need to search for the elevator marked 12-3-6 (jump ontop the elevator then inspect the wall to see its number); a picture of what you're looking for is above. Ride this elevator up to a small room and speak with someone in there named Samson. Exit and find the elevator marked 10-4-1, ride it to another small room to regroup with Elly. Head back to Samson and speak with him again to get the Work Permit item, with that we can enter the guard tower near his room.
From the entrance of the guard tower head northeast until you reach an elevator, take it up. This next area will have robot guards on patrol, if they see you that means you'll have to restart from where we first entered the area. Our goal is to reach an elevator on either side of this room; both of them take you to where you need to go. You can't stand in the same row as a robot otherwise it will instantly see you and you will fail. Continue to reach Samson, there will be a scene with him after which you'll go through the machine with Elly.
The next area is an actual city portion of Solaris with some shops and stuff to do. I recommend you visit the shops and upgrade your equipment, do all the normal RPG stuff when arriving in a new town. When you want to advance the story you're looking for an apartment building of sorts. The first floor will have two rooms and an elevator, ride that up to the next floor and you'll find a lady in one of the two rooms. Speak with her and she'll offer you the tickets for the festival (pictured below).
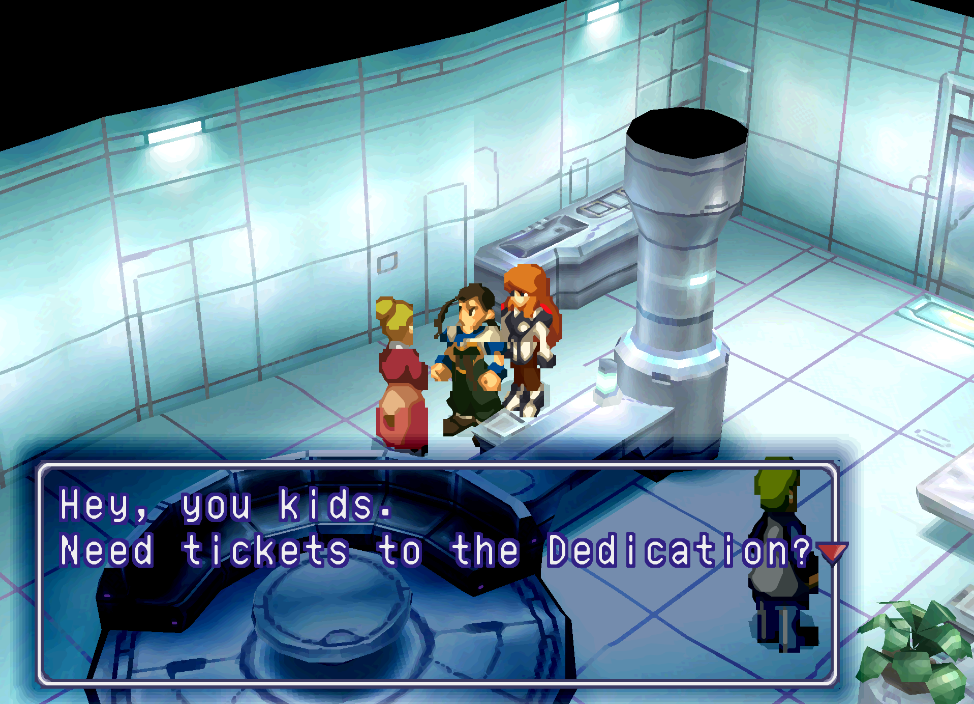
Exit the building that you got the tickets in and go south to find a guard blocking the road. Talk to him, show him the tickets and you'll be able to pass. You'll have a long scene in the next area where you learn more about Solaris and Fei's past. When you regain control of Fei it'll be in the sewers. For this part you'll have to run away from the security bots while jumping and climbing over all the obstacles. There are 3 chests along the way, they contain a Crimson Vest, Aquasol DX and a FeatheredCap. If you want, this segment is pretty good for leveling Deathblows since the security bots don't hit very hard and you can spam attacks on them.
Once you make it out of the sewers, try to enter the locked gate to the north/west for a scene with Elly. Inside her house there will be another scene after which you'll want to talk with Elly's mother to make her leave and with the Maid for a Psycho Rod item. With Elly's mom out of the house you'll be able to enter her parent's room and access the computer for another scene.
After you're done in Elly's house you'll regain control of Fei in the city portion of Solaris from earlier. Try to return to the prison area where we first arrived in Solaris and you'll meet Citan on the way there. Our next stop is the prison area, you'll find a raised platform with a blue hexagon on it. Interact with the hexagon to drop down into the dust chute.
Inspect the computer with the blinking green light for a short scene during which Elly will rejoin your party. Use the computer and enter the machine to be swept away to a new area. Grab the Ivory from the nearby chest and climb up the platforms to reach the door. Climb the ladders to reach a small room with a blade spinning in the middle. Push the hunk of scrap in this room into the blades to stop them, then jump down to the platform below and climb up to the door.
Note: There will be a new annoying type of enemy that you can start encountering in this area called a Dorothy. You can only beat Dorothy enemies by healing them with either items or spells.
The next area is pretty linear, you can find two chests in total one has a Hob-Steak and the other has an Aquasol DX. The Aquasol DX is right near the door we need to use to exit this area, when you're done here exit through it to find a factory. Almost all of the chests in this area contain garbage so I am not going to bother pointing them out.
Head across the platforms from where you entered to find a door, next to it is a chest with a Hob-Steak. This room will require you to input a code on the computer to advance; it gives you 4 blocks and they can either be lit up or not lit up. From my reading online, it seems like sometimes this code is a bit wonky for people (it was for me too). The bottom row of lights is what matters, the top row is just your way of shuffling the bottom row.
In a nearby room the game gives you an explanation of this puzzle. A lit up box is a 1 and a dark box is a 0. With that in mind, the correct code(s) are...
Gold Nugget: 1001
Gold Bullion: 1111
Advancing: 0101
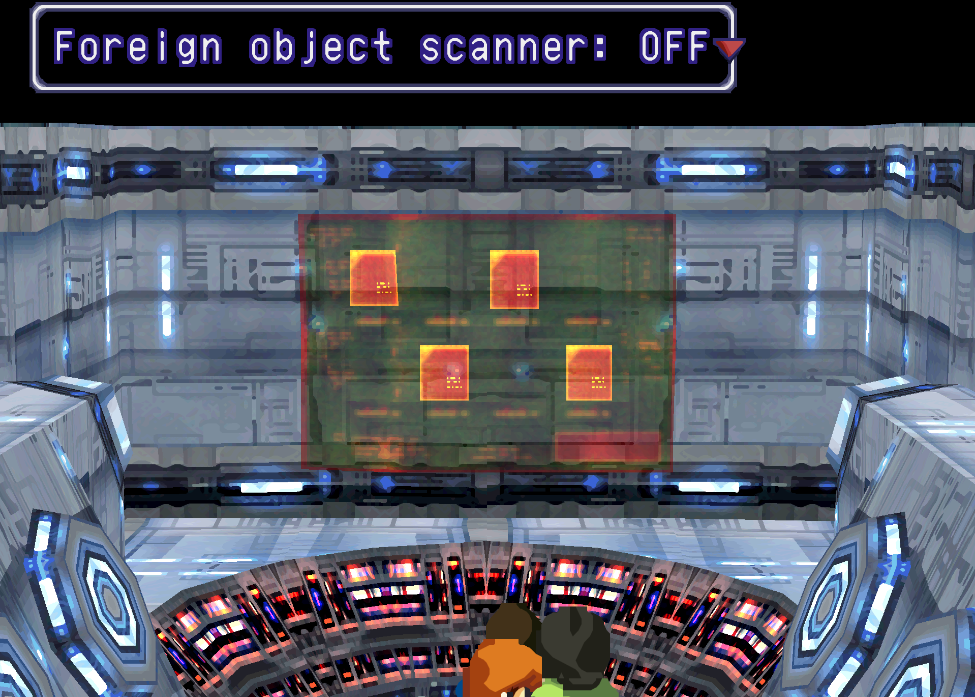
This is the correct combination for advancing
When you finally get the combination right you'll get a notification at the top letting you know. Exit the room and run up the conveyor belt to the northeast, you'll be able to get through the green light now. Follow the linear path to the door for another few scenes. Citan will explain what Fei and Elly ate, after that you'll want to grab the nearby Zetasol from the chest and the Gold Nugget on the other side of the room where we exit. Use the Memory Cube in the next area if you wish and go up the elevator in the adjacent room.
Krelion's Laboratory is the name of this dungeon and it's the final one for Disc 1. If you want to get all of the treasures, this dungeon can be pretty confusing... but otherwise it's pretty linear. Exploration and treasures are (mostly) up to you, I will navigate you through the dungeon. From the start, take the northeast door. The hall will split twice and lead to some side rooms (both have chests, one has a Memory Cube); grab them if you want otherwise follow the hall to a dark room with some catwalks.
If you interact with the small terminal in the middle of the catwalk you'll get a scene with the Gear in the water below you. The two rooms after this one will have 3 jail cells, you can interact with the computer terminals on the wall to open them. Each one has an enemy and a chest. Our next hallway will have two sets of pink doors, they each have two rooms, each with a chest. Continue around the bend to the final room in this hallway, inside you'll find a computer and another chest. The chest has an Aquasol DX inside of it, grab that and interact with the computer to disable the security system in the facility.
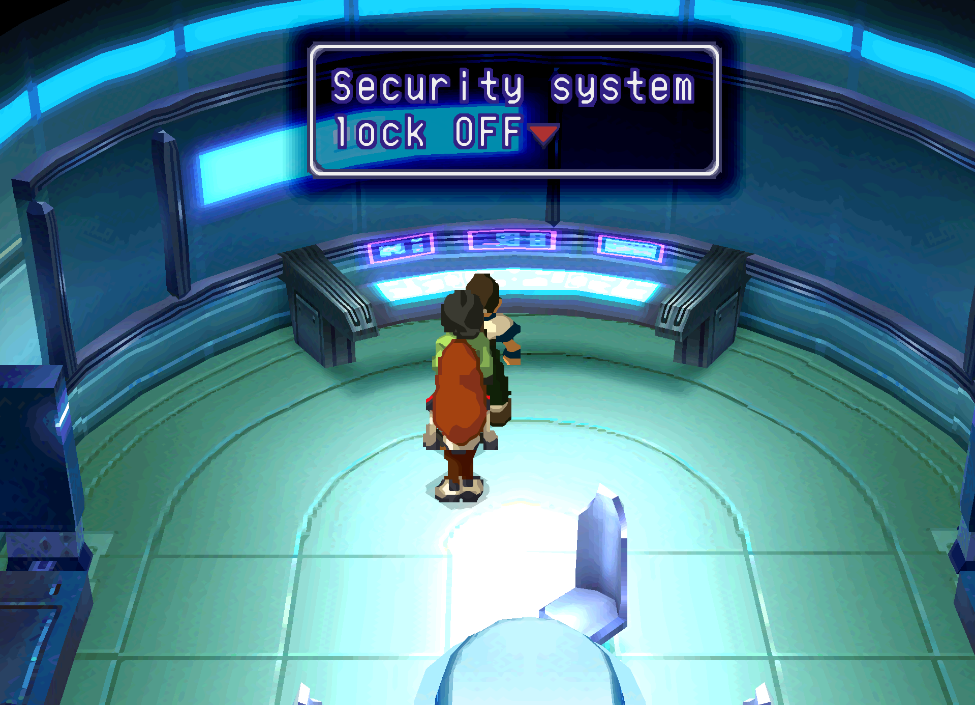
Disable the security system to get access to the second floor.
Exit the room with the security system and continue down the hallway to the northeast, this leads right back to the first room of the dungeon. Go up the stairs because now that we've disabled the security we can open the door here. Grab the treasure chests and continue southeast down the hallway. Following this route will lead you to two rooms, both of them will have chests and the second room will have an off-shoot with chests too (it will be a jail cell you unlock and fight enemies for two chests... both of which are good). Grab whatever you want and continue through the doors to the southeast.
After a series of hallways you will come to a split in the road, go southwest first. It leads to 3 dead ends, all of them have chests but the important one is the big room on the right which has a computer. When you interact with it you'll hear some sounds which is meant to be a password (Citan says as much). The other direction at the split in the road will lead you to the door that this password is used at.
Audio Password Combination: Up, Down, Up, Left, Right
Beyond the door you'll find a circular room with 3 doors, each has a set of stairs with a chest. All 3 stairs go to the same place so visit each once for the chest then go up the final one to the top. The third floor is pretty linear. Northwest leads to a chest with a dead end and southeast leads to 4 side rooms (each with a chest). At the end of the hall is an area with a big and important scene.
When you regain control of Fei search for a nearby door for some more scenes. After that you'll regain control of Fei with a new party, you now have Bart and Billy with you. Equip them with new stuff if needed and then go southwest down the hall to find a hatch, enter to find Elly and more scenes. Much like before, run down the next hallway and enter the room for more scenes.
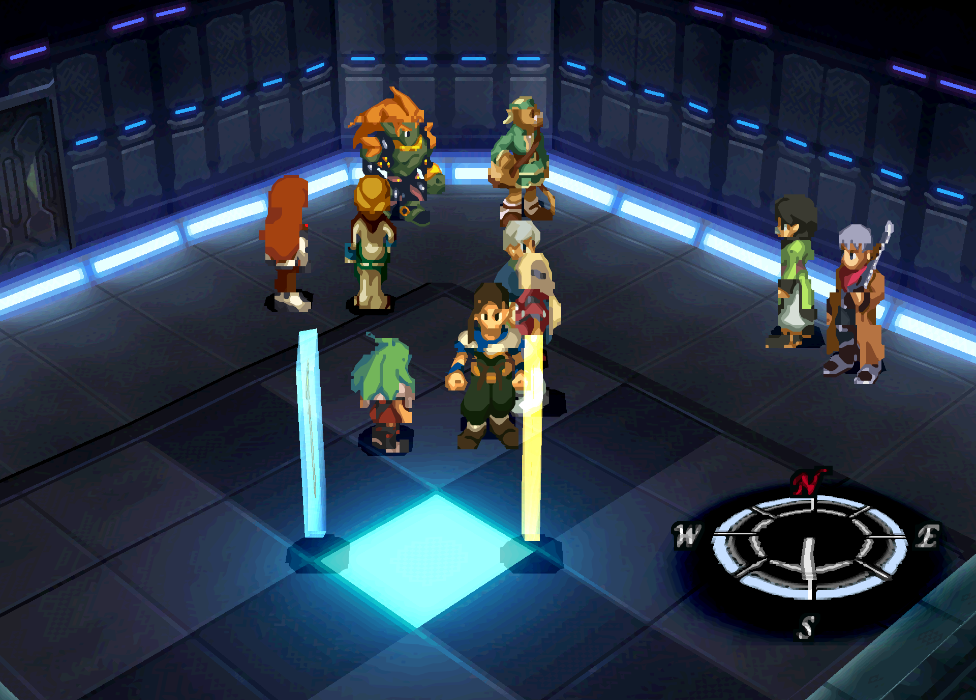
This area (pictured below) is the final rest stop of Disc 1. You can buy items at Hammer, speak with and change out party members as well as save your game.
Just like Krelion's Lab the next part can be a bit confusing if you want to get all of the treasures. There are a lot of side rooms and cubbies which have chests, however 90% of the doors you come across can not be opened. So it's just a confusing maze of hallways and doors that you can't open. Truthfully, none of the treasures are worth the frustration to get during this part, so I would advise just skipping them.
To make it through this maze try to always move west/southwest. After a couple of hallways you'll make it to the Gear Hangar where everyone is waiting for you. Talk to anyone you wanna talk to then continue past them to the hangar to trigger the scenes. As you can probably imagine, we're about to have a boss fight to conclude Disc 1.
Our boss fight will be against Grahf and an Executioner enemy. Believe it or not, the Executioner is actually harder than Grahf and should be your first target. Really the only difficult part of this fight is the instant death attacks that the Executioner uses. Counter them with Zetasol items and beat both enemies up with your strongest Deathblows to win. Once you beat this boss you'll have like 30min of dialogue and scenes before you're asked to insert Disc 2.
Disc 2 Walkthrough
You begin Disc 2 in Taura's Home, as almost every fan of Xenogears points out--Disc 2 pacing is going to change dramatically. There is going to be a lot of scenes followed by you moving your character a little and talking to someone then getting more scenes. We begin Disc 2 with a couple of these, when you finally regain control of Fei head inside Taura's house and speak with him for more scenes followed by a boss fight with Ramsus.
The fight with Ramsus starts with you in System Id mode, it lasts for 3 turns and you can use it a second time once it fades if you wish. Otherwise, just spam your strongest Deathblows against Ramsus to easily win. You'll get a bunch more scenes, during which the Super Dimensional Gear Yggdrasil IV makes its first appearance (pictured below).
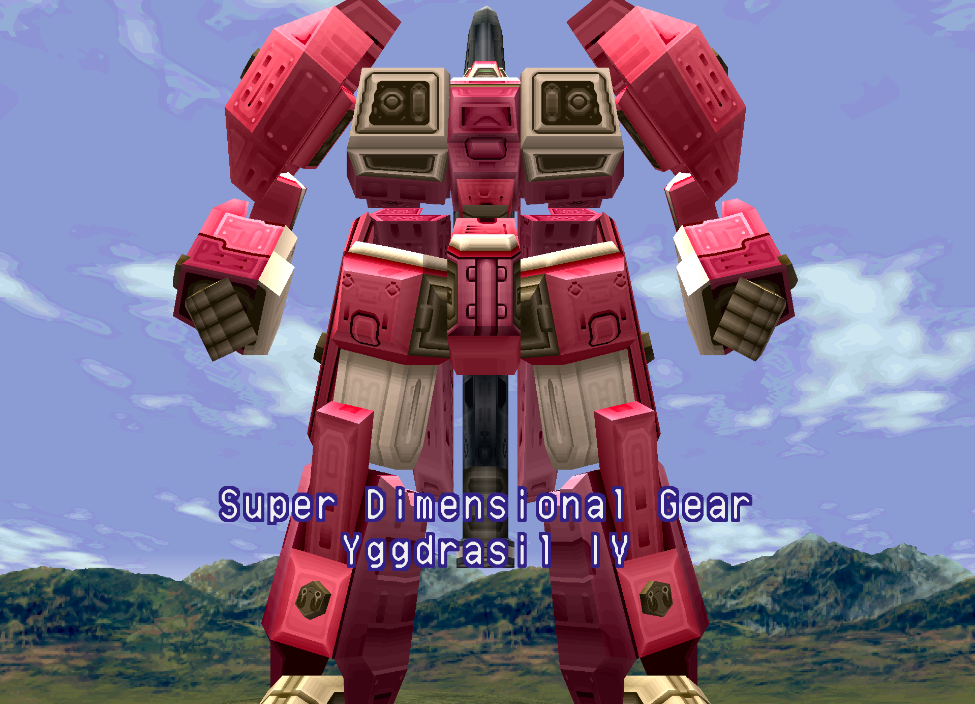
Bart will be in control of the new Gear, use your Ygg Cannon attack to deal 9999 damage to the boss... Or just spam your regular attacks to win, this is mostly just a story fight. More scenes will occur after which you'll have to control Fei, Citan and Elly for a battle in the Soylent Facility. This is another easy fight, leave one minion alive and just spam Deathblows to make quick work of everything. If you defeat all the minions and leave just the boss he'll do a drain attack which instantly kills someone and heals him for equal damage. This makes his 4800 health more of a slog to get through.
More scenes will transpire after which you'll get control of Fei in a Gear Hangar. You should speak with the big Gear here and buy upgrades for all of your Gears. He sells better Engine/Frame/Armors and good accessories, so go on a shopping spree. If you want to upgrade your characters and their accessories now would be a good time as well.
In this large room you can find multiple treasures. Behind the bot we shop at is an Ether Guard and in the west is a Starlight (you can't be in your Gears if you want to reach this one). Go north up a road when you're ready to proceed until you reach a large factory of sorts. Dismount your Gears (if you're on them) and you can grab two treasures by jumping around the pipes of the building. One is a Zetasol DX and the other is a King's Helm. Enter the building for the Anima Dungeon.
Following the main hallway through the dungeon will lead you into a room with a locked door that says "Door Lock System Area A". If you jump ontop of the computers and inspect the sparking box on the wall you'll learn that you need a fuse. The room right next to this one has the fuse, inspect one of the two boxes in there for it. You'll have to backtrack a bit through the hallway to reach the room since the door connecting them is locked though. Once you put the fuse in both doors will be unlocked and you can proceed.
The next area will have a computer that you need to activate as well, this one requires a password. If you look at the server rack near this computer, which ones are broken on each row is the password. So it ends up being 0320.
Input 0320 as the password to activate the terminal
After putting in the code make sure you interact with the other computer to unlock the B doors. In the next room you'll ride an elevator down to an area with a Memory Cube and two doors. One door leads back to the entrance of this facility and the second one is a small computer room where you can activate another elevator in the middle of this room. Activate the elevator and ride it down to find yet another puzzle room.
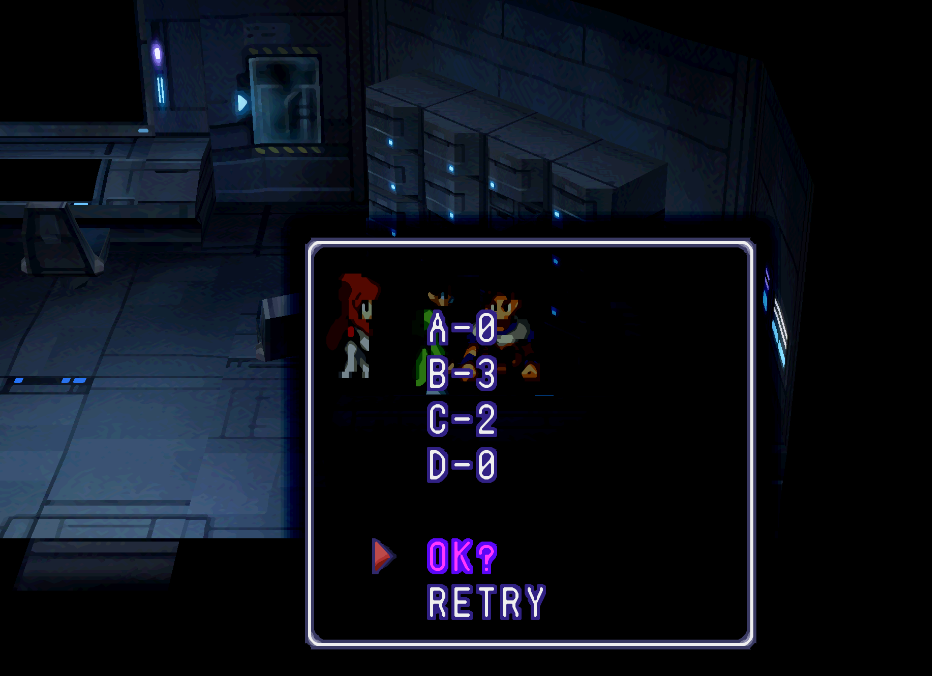
For this room there are four computers and they're paired together. North/South make one pair and East/West make another. You need to input the right numbers into the pair of computers to advance. For North/South the numbers are 5 and 4; for East/West the numbers are 2 and 8. It doesn't matter which computer you put the number into as long as you use the same two numbers for each pair. Below is the combination I used.
North Computer (B): 5
South Computer (D): 4
East Computer (C): 2
West Computer (A): 8
Right next to the western computer (terminal A) you'll find a box that looks like a server. Inspect it and choose "Release Lock" after inputting the password. You can now ride the central lift down and continue with the story. Be prepared for two boss fights coming up, the first will be as humans and the second in your Gears. During the second fight use Elly's Aerods attack and make sure to use System ID on Fei, this will make things much easier. Another tip with System ID is on the third turn before you return to normal use Charge to restore 10x more Fuel than normal.
With the G Elements taken care of you'll get a bunch more scenes after which you'll be asked to choose your party again. Confirm your members to begin Anima Dungeon #2. The room we start in has a vendor as well as a giant rock blocking the door forward. Shop at Johnny and buy whatever you need before hopping onto your Gears and pushing the rock out of the way so we can go through that door. You'll need to dismount your Gears after pushing the rock to fit through the small door.
This next area (pictured below) is regarded as a giant pain the ass because of the puzzle we need to complete here.
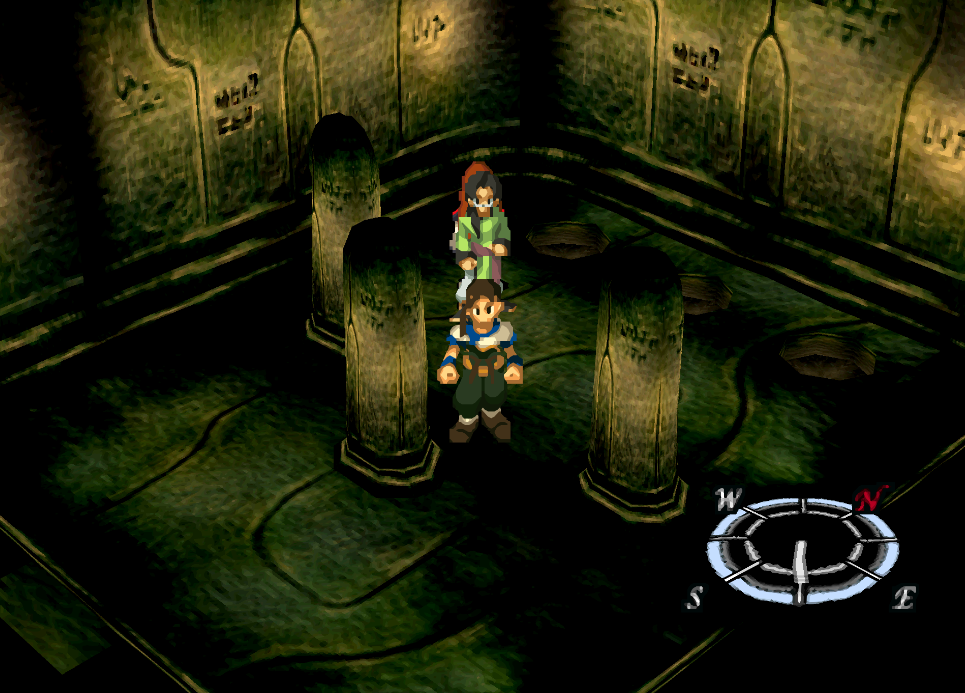
In order to solve this puzzle we need to make 3 rocks fall from the ceiling and then push them into the open holes in this room. To make a rock fall you need to fulfill 3 different triggers inside of this room, all 3 of those triggers are listed below.
Rock #1: Search the back of the pillar in the northwest.
Rock #2: Jump on the block that just fell, use that to jump onto the northern pillar and then jump again. This will make the next one fall.
Rock #3: Near the block that just fell you'll find some writing on the wall, it'll say "4 steps South, 10 steps West". After doing the required steps you have to press X to make the stone fall.
Note: For the 4 steps South, 10 steps West rock, it doesn't matter where in the room you do these steps, you can do them running into a corner.
For those of you who would like to see a video of this section, I referenced the Xenogears World Record Speedrun for this strategy. A speedrunner isn't going to waste time, he's going to hit all 3 flags as quick as possible so you can see how he does it if you're still confused. Here is another video that demonstrates how to do these 3, not a speedrun. When I did this puzzle, I had an extremely hard time getting the 4 steps South, 10 steps West to work. It took me two hours of trial and error along with shaving off days of my life in frustration. I did it twice because I figured after beating it the first time repeating it for a video would easier, but it wasn't.
What finally "worked' for me is to stop counting the steps and follow the route most people take in the videos. From where you read the wall it's 4 steps south so that you're lined up with another pillar in the room. From here you walk south until you reach the wall in the south and it's like two steps into the wall before you press X to drop the stone. Following this pattern worked much better for me than trying to count the steps. Even when I turned the emulation speed down on Duckstation and counted the steps perfectly, I still didn't get the rock to drop.
Continue to Walkthrough Chapter 5
Return to Walkthrough Chapter 3