
Xenogears Walkthrough - Chapter 3
This Chapter begins with us driving the Yggdrasil II around on the World Map. As I recommended in the previous chapter, you should visit Nisan if you didn't get the EtherDoubler item earlier in the game. It's a powerful accessory for Elly (and any other character with offensive Ether attacks). If you feel under leveled, now is a perfect time to grind a bit too. My team was level 40 at this time, I did most of my grinding in the Sewers though when we were in Nortune.
While exploring the World Map all you need to do to fully restore your HP/Fuel is press Square. This will bring you to the Yggdrasil II's bridge, it also instantly restores your Fuel/HP. Our destination when you're finished with all the side activities will be Ethos H.Q. (pictured below).
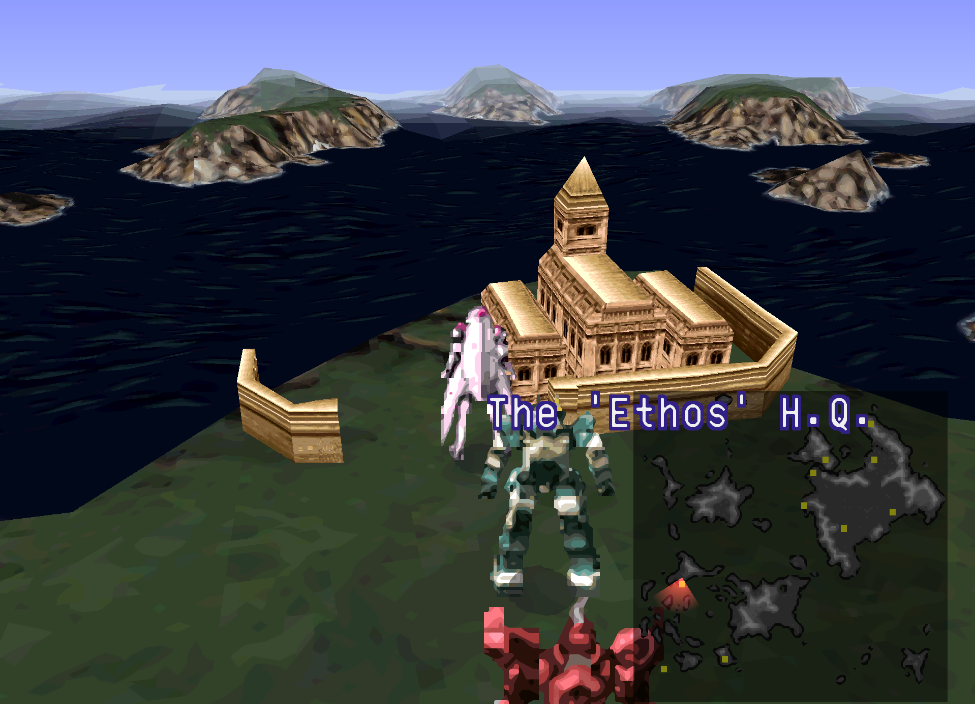
Billy will be waiting for you in the first room of Ethos H.Q. and he'll take you directly to Fei. Elly will leave the party at this point and you will need to go talk to someone in the building 10 times to advance. It doesn't matter how many rooms you enter or how much you run around, it's just talk to someone/people 10 times. After doing this Elly will meet you on the first floor and bring you to Fei.
You'll have a short scene with Fei after which you will be returned to the Yggdrasil II. Our next stop is the Orphanage, it's on a small island southeast of Ethos H.Q. It is one of the dots on your mini map that was added when you first got the Yggdrasil II. We have a few things to do here, including the final part of the 3 Badges Side Quest. Help the kid catch the chickens for the final badge then visit Billy inside of the building here.
Tip: In the house talk with the kid in the first upper loft and agree to keep "it" a secret. This will get you Book 1. In the next room there will be a kid in the toilet, try to get in 3 times to get Book 2 from him. For the final book talk to the boy in the bedroom with Primera when Rico is in your party. You can show him the Bell Amulet from the Nortune Sewers for Book 3. All 3 of these books can be turned in later for a good weapon for Billy.
There will be a short scene when you talk to Billy, during which your party changes. Head through the same door he went through and then through the door at the end of a hall to find a small room with a bookcase. Interact with the bookcase to make Billy come out, there will be another scene with Bishop Stone. Now you can return to the Yggdrasil and talk with Sigurd in the Gun Room (aka the room with Maison) for yet another scene.
When you wake up in the morning return to the Gun Room and talk with Billy. After your conversation with Billy you'll be asked to choose your party. I went with Billy, Elly and Citan. Just like Billy explained, in order to properly use his weapon you'll need some ammo... So you should probably visit Maison before leaving the Gun Room and purchase some ammo for Billy.
Once you're fully prepared you can exit the ship via the ladder near the bridge. This will take you to the Transport Ship which is our next dungeon, in this first room the only confusing part is the barricaded crates. If you get close enough and press X Billy will kick them down. Turn on the lights by interacting with the switch on the wall and kick down a few more barricades to reach the chest with Penguin Coat inside. Head up the ladder after you've grabbed the item and head north to find another ladder/hole going down.
Fall down the hole and grab the chest with B&JM10S Ammo then go south to the chest on the other side of the room, it has a SurvivalTent inside. In the eastern part of this room you'll find a button which you need to press to open the B lock. Run back through the weird moving bag things and go through the door in the north. You'll find yourself in a hallway with 3 rooms on each side and a door at each end of the hall.
The first door on your right has a box and a trash bag in it, inspect the bag for a Cabin Key. The second room on the left has a Silver Beret and the third room has a Shot G60 Ammo. Run into the door at the northern end of this room 5 times to break it down then keep going north until you find a ladder. Climb the ladder and follow the top section north until you reach the Memory Cube. On the platform just before this Memory Cube you'll find a hole you can jump into, this leads to our next boss.
We'll be fighting a boss named Bloody, he is a weaker version of Redrum from the Sewers... and yes he comes with the Murder skill so be prepared to resurrect your characters if they die. One thing you can do that will speed things up a bit is use Speed Up on Billy. This will get Citan 3 turns per round sometimes. Once you defeat Bloody interact with the computer terminal in this room to call Billy's Gear to you. After a scene you'll be fighting against the next boss in a Gear battle!
Giant Wels is the next boss and you won't be able to hurt him with normal attacks, it'll be Ether attacks only. That means you'll want to use Elly's attacks (hit it with Aerods) and Billy's Square button (Square is his Ether gun). Each time the Giant Wels is hit with an Eth attack it will enlarge and get stronger, Billy's attacks won't increase the size but Elly's will. Once you beat the boss you'll get a short scene during which Billy asks you to take him to Ethos H.Q... Before we go there though we want to go back to the Orphanage first.
Remember the room that Billy came out of behind the bookcase? If you collected all 3 Books earlier you can get the B&J M686 Gun and B&JM686AAmmo from the room behind this bookcase. Return to the Orphanage and place all 3 books in the bookcase to open it, then collect your rewards. With that out of the way, you can now return to Ethos H.Q.
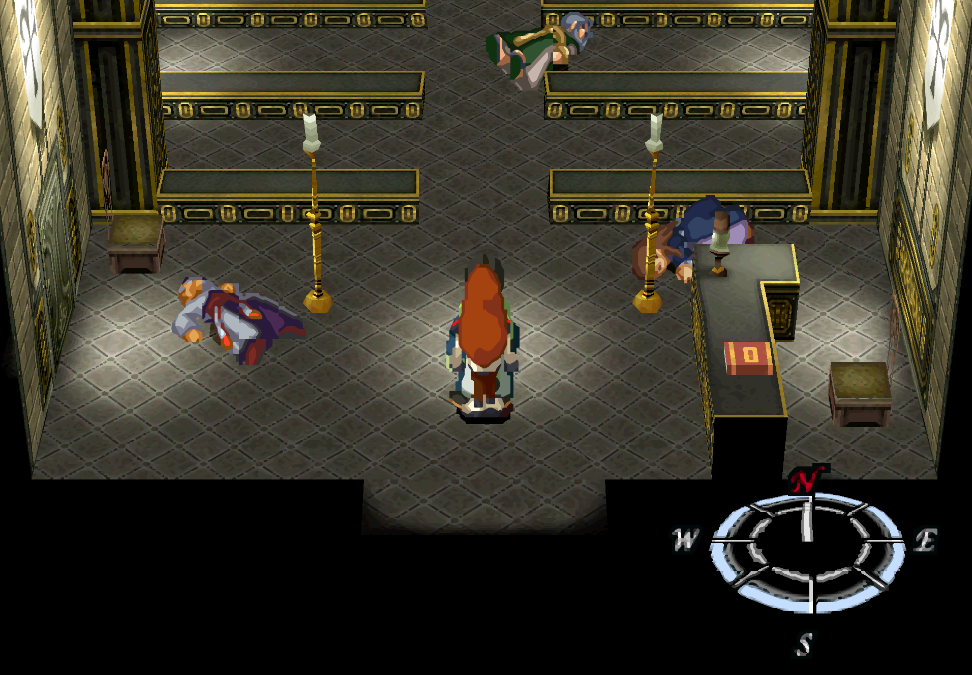
The first thing you'll notice when you arrive is that the place has been attacked. There will be enemies in this place now and it'll basically be a dungeon. Our goal is to reach the Data Bank room in this building, you can find it by going downstairs. Go through one of the doors that was locked for us the last time we were here. When you reach the Data Bank you'll get a bunch of scenes and some more lore will be shared with you.
Exit to the hallway and go through the northern door for more scenes and a fight. After the fight follow Jessie into a room for more scenes, you'll be taken back to the Thames and asked to choose your party again when they're done. I went with Citan, Billy and Elly. Visit the shops and outfit any Gears if needed before talking to Sigurd to get control of the ship. Our destination is the Thames; it's the dot in the bottom left hand corner of the World Map.
On the Thames you'll want to ride the elevator up to (4F) Bridge and speak with the Captain. He'll tell you that the monsters fled to an excavation site and it'll be marked on your mini map when you venture back to the World Map. Exit the Thames and go just a bit north to the 'Ethos' Dig Site, enter it to begin the next dungeon.
Tip: Soon you'll need to reload on Billy, you'll do this out of combat by going into Equip in the menu and selecting Billy. Press D-pad Left or D-pad Right while hovering over your gun to choose the ammo type.
The route is pretty linear for the first bit of this dungeon, sometimes you'll see multiple doors but you can only enter one of them. When you go down the second elevator past the save point you'll find a B&JM686AAmmo in a chest. Keep going down the halls until you find a guard blocking a door, defeat him to access the computer room here. Inside you'll find a chest with a Sleep Guard. You may want to equip the Sleep Guard onto someone right away since the Shellbelles use Sleep on your entire party.
Phobia Enemy: There will be an enemy in this dungeon called a Phobia, it will heal every time you attack it. The only way to beat this enemy is to use a healing item/spell on it, so throw an Aquasol at it for an easy win.
Just before the computer room is a door that leads to stairs, head down them next. The next few hallways will be straight forward, the first side door you see will lead to a Black Snake item. Further down there will be a door blocked by another guard, inside will be a Panalphasol item and a Memory Cube for saving your game. Much like before, exit this room and go to the door before it to find stairs that go down, proceed down them.
At the bottom of the stairs the door will ask you to do a manual scan on your party, accept this and then back track to where we found the Black Snake item. The computer we need to 'confirm' this scan is found in here. Once confirmed return to this door to proceed. With Elly in your party, enter the red hallway for a scene. She'll unlock the door during the scene, otherwise (if Elly isn't with you) you'll have to enter the room next to this one and unlock the door using the computer yourself.
When you enter the room with the hologram-looking girl there will be some scenes followed by a boss fight between Tolone and Seraphita. I recommend you focus on Seraphita first since she has the more annoying attacks. My strategy was the usual use your strongest Deathblows until she goes down. If you need to heal, use Billy's Holy Light. It'll heal the entire group for all their HP... out of all the options available it's the best.
Exit the building after the fight, you'll get some scenes as you go followed by another boss fight on the outside bridge just before the entrance. You'll be fighting Id, like the previous boss I recommend you use Billy's Holy Light to heal the group when needed. His Speed up really helps too, Citan will get two or three turns sometimes when I use it on him. Spam your strongest Deathblows and he'll go down eventually.
Once you exit this place you'll be sent back to the Yggdrasil. There will be some scenes after which you're told to find Fei. He's hanging out in the hangar bay near Weltall (pictured below).
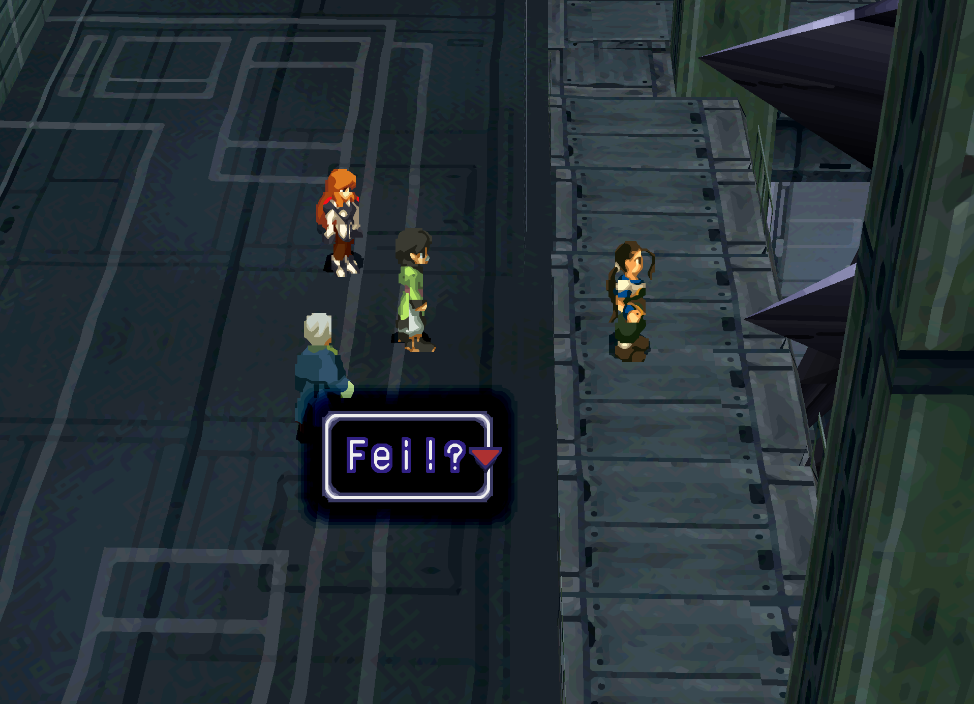
Go through some dialogue with Fei, Citan will leave your party temporarily and you'll be asked to choose a party for the upcoming fights. Billy and Elly are requirements, you can choose between Bart or Rico. To make this next part easier, it helps if you have a Frame HP30 equipped on everyone and if you have a Power Magic/EtherDoubler, you should put them onto Elly. They will strengthen her Aerods attack.
For this next boss, don't unleash any strong attacks for the first few turns because they will all get nullified. Once 3 turns pass you'll get a story segment after which the real fight begins and you can pop Booster then unleash onto the boss. When the boss goes down it will explode and deal 600 damage to all surviving Gears... I lost the fight my first time by eating this explosion...
With the boss fight over you'll have some more scenes during which our next destination is set, Babel Tower. You'll also be given the option to choose your party again, I brought Fei, Elly and Citan with me. Before we leave the Yggdrasil II you'll want to visit the Gear Shop and purchase upgrades for all of our Gears. You only need to do the Gears you plan to use for now, but it won't hurt to upgrade everyone.
Note: This is your last chance to purchase the EtherDoubler item from Nisan!! If you haven't gotten an EtherDoubler for Elly yet you may want to visit Nisan and do that now. This item doubles the Ether cost of whatever you're casting and as a result it will double the damage it deals as well.
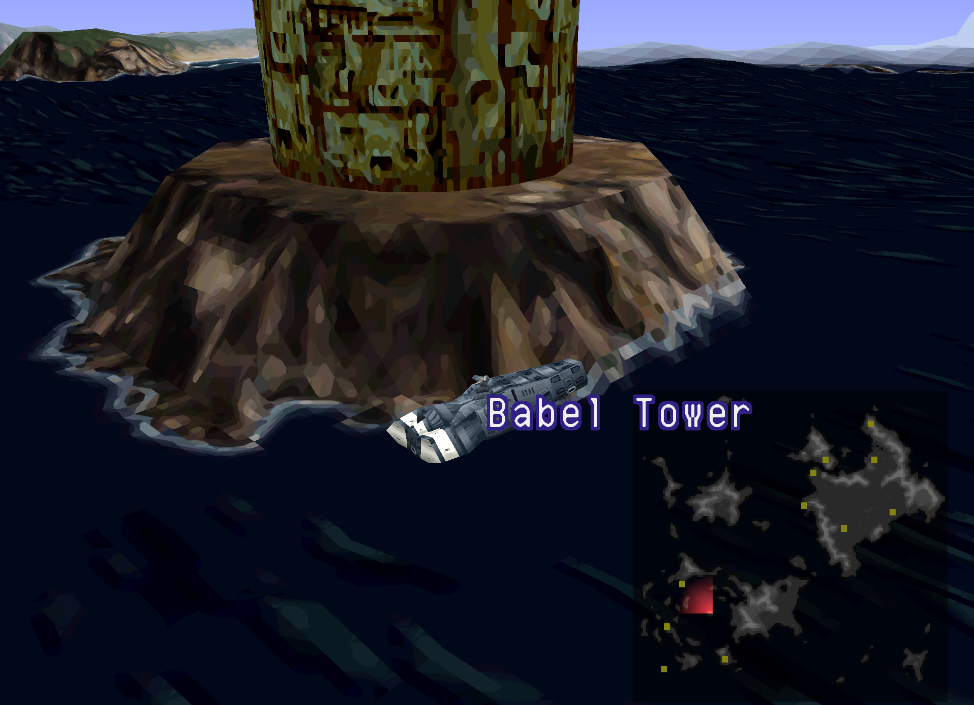
Our next dungeon is Babel Tower, you can find it a little bit south of Ethos H.Q. A picture of where you can find it is shown below.
Go up to the entrance of Babel Tower and interact with the door to open it. The initial path is pretty straight forward, get down to the chest that has an EtherAr inside and jump across the broken platforms to continue. One giant piece of advice I can give you for this part is to try and get into a random encounter before doing a difficult jump. Random encounters will mess up your jumps and they can happen in mid air to totally screw you over too.
Tip: I strongly recommend you use Save States in this dungeon. There are so many jumps where things can go wrong and you're forced to start over again from the start. Just use a Save State before difficult jumps incase you mess up, this will prevent you from wasting tons of time.
The path will split up ahead, one route leads to a chest with Lite Ar+1 and the other route leads to a brown chain/rope you can jump to then climb up. When you grab this rope it'll give you some instructions on how to use it, you'll need to swing towards the other platform and jump to it. This part is a royal pain the ass, if you don't time things just right you'll have to start over again from the start. Climb up the broken robot arm to reach the finger at the top which oscillates up and down. If you're quick enough to reach the top portion there will be a chest that contains a ThunderRodG inside.
Getting up top is optional though, the room below the top which goes through the metal box is what we really need. This leads you to another rope, position yourself under it and jump up to climb to the next area. Thankfully there will be a Memory Cube here. Head to the western end of this platform and you will trigger a scene during which you get out of your Gears. Go inside the small door here to find a computer room and a chest with a Gold Nugget.
Inspect the large screen and the computer with a blinking red light (you have to do a weird jump to reach it) for some scenes, then return to your Gears. This next part is a real pain in the ass. You need to walk off the edge right where you see the red grate (pictured below). Below you is an area with another red grate and some crates, you can jump up them and then access the next room.
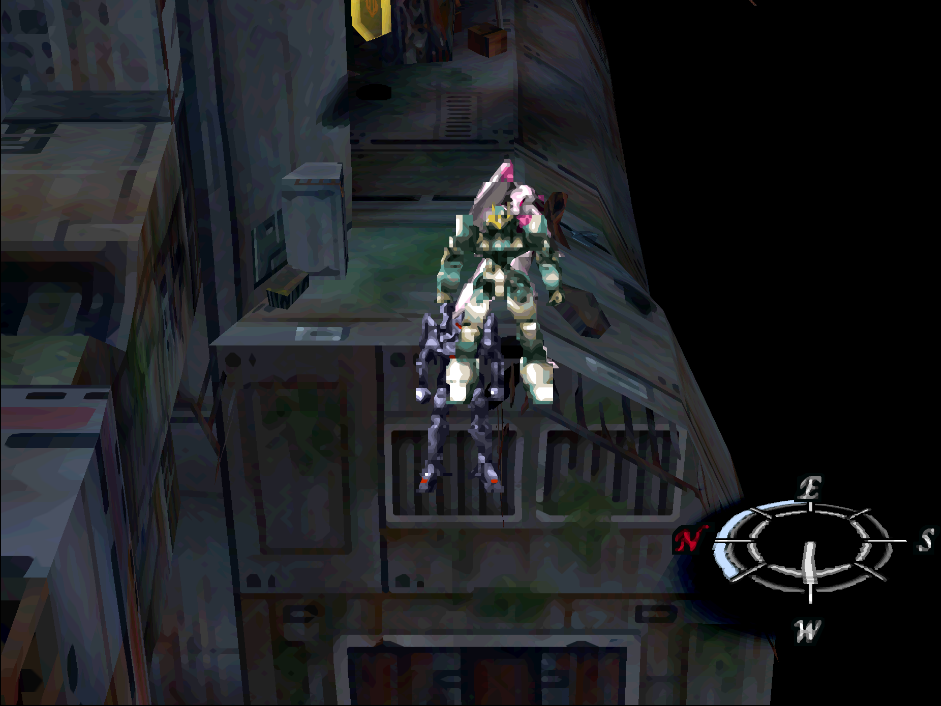
Drop down in the same location you see me drop at
Climb the boxes in the room for an Ether AR and a Beam Jammer. In the same area you find these two chests Fei will comment that you can get to the room above you. Exit your Gears and climb the ladder nearby up to the room above. If you're having trouble, try going up the opposite side of the ladder.
The room above will have two more chests, one has a Gold Nugget and the other an Old Circuit. After grabbing the treasures interact with the computers for a scene (you will have to jump up onto the seat above to reach the computers up there). I had to interact with both computers to get the machine moving, there was a little bit of dialogue followed by another boss fight with Ramsus.
Ramsus is piloting a Gear called Wyvern this time, despite his new Gear the fight works more or less the same as it always does with him. Miang will heal him/cure status throughout the fight and Ramsus will attack or go into Mirror Stance. When he's in Mirror Stance you don't attack him otherwise he'll hit you back with a powerful attack.
When the fight is over use the Memory Cube to save then continue through the open door. Follow the hallway until you find a drop down with a chest that contains a Ground. Inside this same pit you can find a door that leads to a small room with 3 more chests inside. One has an 02 Cylinder another has a Gold Nugget and the final one has an E Circuit. Fiddle with the computers in this room too until one says "Lock Clear", that's all we need from here.
Exit the room and return to your Gears, use them to climb up to the other side of the shaft and continue down the hall until you reach the next hole. Drop down into this new hole and collect the two chests to the north (they have Wind Veil Ar and a Veil Doubler inside of them). Turn around and go straight south until you reach a spot to climb up. Go up to the first area and continue south. You'll drop out onto a pipe with a chest on it (inside the chest is an Ice RodG).
Jump to the circle piece in the middle and walk across to the other side of the room. The chest on this side of the room contains a Fire Veil Ar. Exit through the vent shaft on this side to find yourself in a large outside area. There will be a Repair Bot here which will Refuel your Gears and heal you, there is a chest to the south under the walkway above that has a Stone RodG.
Circle back around to the entrance of this area and climb up to the top. We need to jump down ontop of the green orb thing in the south (pictured below). When you land on it you'll get a fight, then it will work just like an elevator.
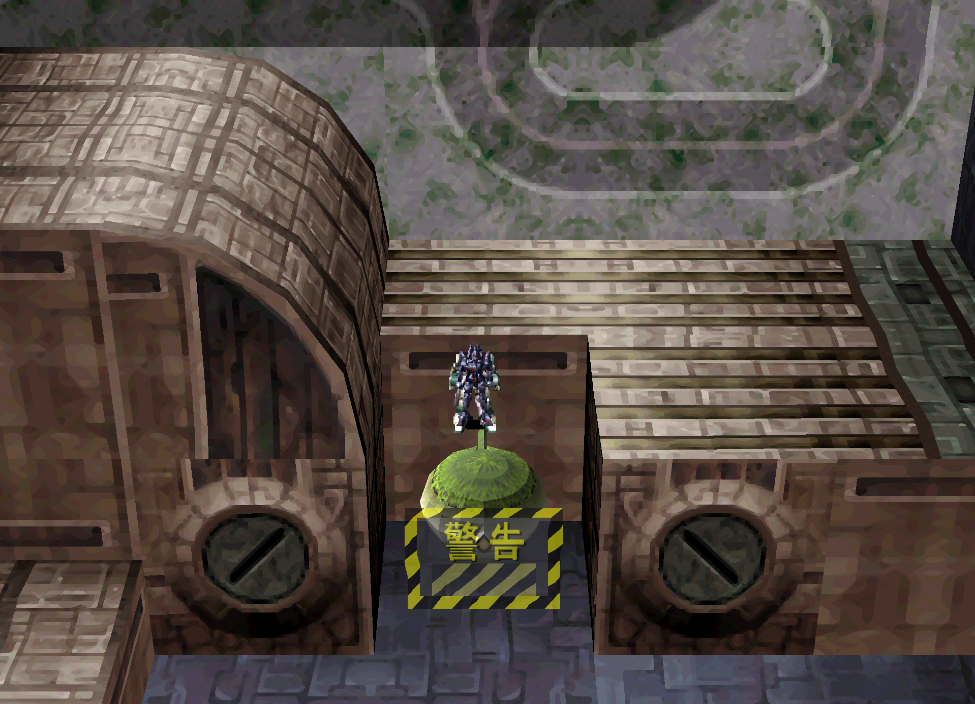
Jump ontop of the green orb to trigger a fight, then it'll work as an elevator
Ride the elevator up to the top and jump off, from here go north until you reach what looks to be an impossible jump ("you can do it!") and jump across. There will be another elevator orb you can jump onto over here as well as a chest you can reach on a nearby platform, the chest has a G-M10S Ammo inside. Jump onto the elevator and ride it up to another floor. There will be a part that obscures the camera bit on this level, search around to find a chest with Gold Bullion inside. At the end of this level there will be another elevator to jump to.
When you ride this elevator up you'll switch screens to another floor above you. There is a hidden chest in an area you can't see on this floor too, inside is a G-GG060 Ammo. If you climb up a bit and go northeast you'll find a chest tucked away in a pit that contains Flare RodG. The next elevator for us is found south of this location.
Tip: Use Save States. I understand how frustrating it is to miss a jump at this point and have to start all over. Don't do that to yourself. Another tip is to use a cheat to disable random encounters. You may be against that sort of thing and that's fine... I'm just trying to save you time and frustration.
On the next level jump down to a chest and open it for a WaterVeil AR. From here you can see the next elevator, it is a long drop down to the southeast of where we're currently at. Climb up to the area above you so you can get a straight jump to the elevator and make sure to use a save state. You can't see where you're aiming so...
This elevator will give you access to the southern end of this floor, jump across the gaps until you reach the end of the path. Climb the pipe up to reach the top and use the Memory Cube to save. When you try to go further you'll have a boss fight against Seibzehn. Your strategy should be to use Elly's Aerods and/or Deathblows against her. Beating her will lead to some scenes, when you regain control of Fei you'll be in a new town known as Shevat.
Shevat is pretty darn big and there is quite a bit to do here. If you collected all the badges for the 3 Badges Side Quest, you're finally able to turn it in here. There's also a 3 Rocks Side Quest which you can do in Shevat, which makes you wonder who liked making things in 3s during the production of this game. 3 Badges gives mediocre loot but the 3 Rocks one is actually worth doing in my opinion. It's pretty easy too once you learn the town.
In order to advance the game you'll want to visit the same house in Aphel Aura that holds the Dusk Rock. Go into the bedroom on the second floor and inspect the rocking horse for a scene, during which Maria will come and get your group.
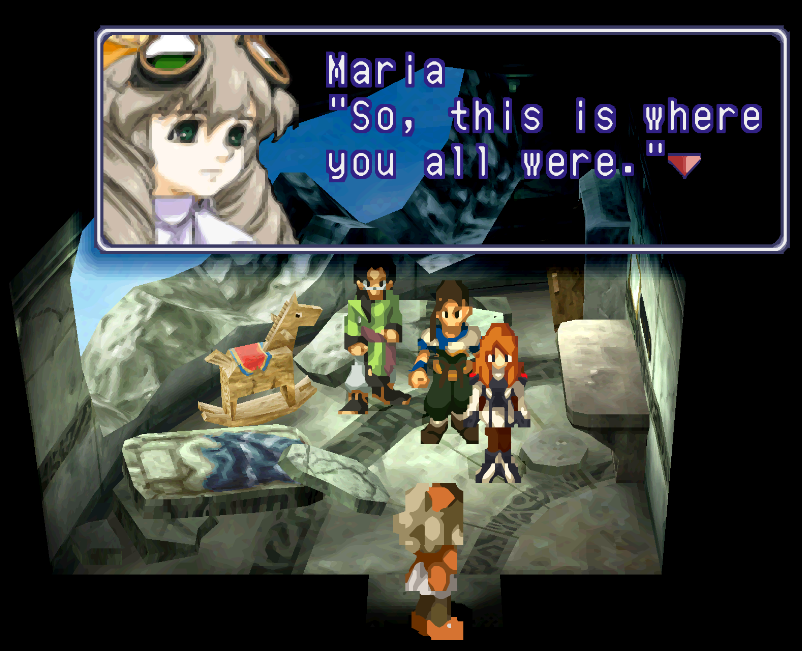
After this scene with Maria you'll get access to Shevat Palace, so head there on the World Map. Follow Maria into the palace and speak with the Queen of Shevat; after your conversation with her return to the room with the elevator and rest in the spare room. You're looking for the area with the Memory Cube, there will be beds in there too. Inspect one of the beds to sleep for the night.
Return to the Queen and tell her 'My heart is set!' to continue with the game. There will be a scene, during which you'll have to pick a party member to leave behind. For this next part we're stuck with Maria who can't do much so you'll want to bring your strongest character with you. I brought Fei, Citan and Maria. Head back to the elevator and ride it to the Shevat World Map, enter the Central Dock for another scene.
Once you're in the new dungeon the first thing you'll want to do is go down the west hall, it will dead end around the corner but you'll find a chest with a Shevat Map here. The enemies in this dungeon are all rather unique with their own strats. Gimmicks take 1 damage from all attacks so just spam Triangle on them and Tears get stronger when there is only one left.
Work your way through this dungeon until you reach a point with a green crystal, Maria will comment about it being used to reverse the direction of the windmill when you hit it. Interact with it then hop onto the platform and ride it to the other side; jump off when you see a ledge we can reach. Below this ledge with be an elevator you can ride back into the dungeon. Remember that map we got earlier? We can use it here (Press Select to bring it up).
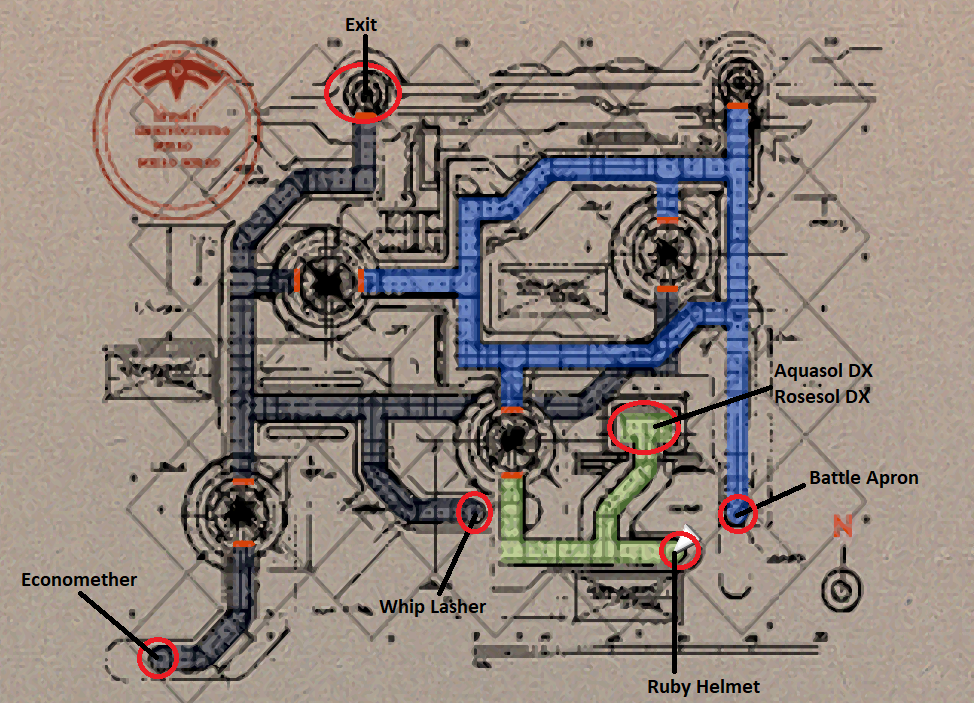
Instead of trying to give you directions through this place, I wrote where all of the treasures are on the map. I've skipped pointing out a few treasures in this dungeon so far, however I will mention the Economether specifically because it is great. This item will halve your EP usage when equipped on a character. North of where the Economether is found is where you'll find the exit.
The next area we're back outside, run east across the top and climb down the ladder to reach another one of those rotating 'windmills' that we need to jump across. On the other side of the two windmills you'll find an elevator that we can ride down into another dungeon area. This area is pretty linear, just follow the path until you reach the ladder and Memory Cube. When you go through the manhole you should start to recognize the area we're in. Head to the room with Maria's Gear and you'll have a scene with Dominia.
You'll be asked to choose a combat party at the end of the scene. The game gives you a long winded explanation of what's going on, more or less just pick your most powerful Gears and send them to the 4 different generators. Generators 1 and 2 are easy but 3 and 4 are very difficult and a bit RNG based. Once those fights are complete you're going to have a boss fight.
Note: If you find this part too hard, upgrade your gears Frame/Armor/Engine more and (if you need money) visit the Central Dock's emergency shaft again.
Generator 1: Send Elly since she has AoE attacks
Generator 2: I sent Billy since I know he's well equipped. His regular Square attack is enough to one shot the enemies.
Generator 3: My choice was Citan. Before the fight equip Silver Ar + Silver Ar +1 on him. This will reduce how much damage he takes and make the fight much easier.
Generator 4: Fei; use Booster at the start and defeat the White Knights first. You should also make sure Fei's HP stays above 4k. If Avalanche uses Def Down on you, use InnerHealing to restore your defense.
Start with Generator 1, it's the easiest of them all and you'll get Silver Ar + Silver Ar +1 items from completing it. You'll need to equip these items on the character you have at Generator 3, it'll make their fight a whole lot easier. The order I see recommended the most online is Generator 1, 2, 4 then 3.
At least for me, these were the hardest Gear fights in the entire game up until this point. I really struggled with Generators 3 and 4 and only beat them because of good RNG. Once you beat all generators there will be some dialogue along with a cute scene involving Chu-Chu. When that's all done you'll be thrown into a 1v1 fight with Achtzehn, you'll be controlling Maria's Gear Seibzehn. Use Booster then spam Deathblows to defeat him.
When you regain control of Fei you should go back to the Central Dock so we can depart to the Yggdrasil, which is now the Yggdrasil III. This new version of the Yggdrasil can fly which means you can dock in both Shevat and Babel Tower on the World Map.
During these scenes you were also told to find someone named Gaspar. You don't actually have to find him, you will automatically unlock the reward he gives which is raising your bar to 7 AP. From what I have read if you're below level 50 you won't get the 7AP until then.
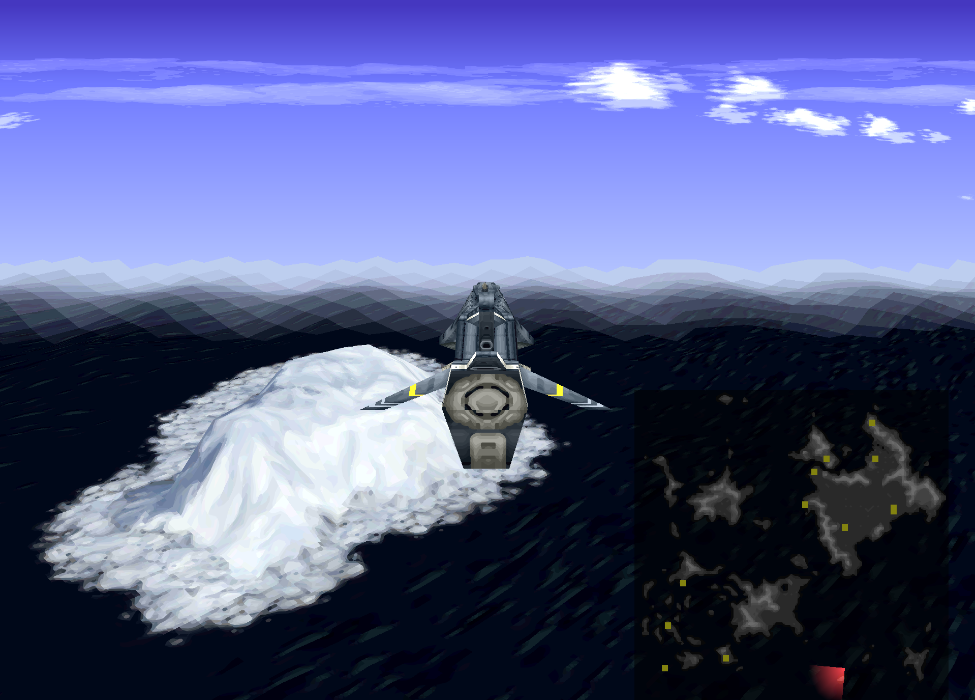
Before we do anything else, you may want to switch Maria out of your party and replace her with someone better. You can do this by visiting Margie inside of the Yggdrasil. The next thing I recommend you do is use the Yggdrasil and fly to a southern snowy island (pictured above). You can encounter two types of enemies on this island, Golems and Dragons.
Golems are what you'll see the most of and they probably have too high of defense to even hit them, so just Escape from them instead. Dragons are what we want to fight because they have a chance of dropping Devil Dress which is a great armor piece for the females in our party.
Tip: Golems have lower Ether defense than normal defense; you may be able to hit them with an attack like Elly's Aerods.
The last thing I will mention right now is about Deathblows. You should spend some time getting into random encounters outside of your Gears to train a few levels of them. If you don't know how they work you should check out my Xenogears Deathblows Guide for more information. Basically a TL;DR is get into battles and use Deathblows with different combos or just spam Square/X/Triangle attacks without any Deathblows.
When you're done with the aforementioned stuff it's time to head over to Nisan and continue with the story. Enter Nisan for a scene after which you'll have a couple of battles against the guards in town. When all of the guards are defeated you will get a scene; if for some reason you aren't getting the scene enter a building then exit and the last guard(s) should come charging.
Before you leave Nisan if you'd like, you can visit the shop. Just interact with the empty desk to buy some items.
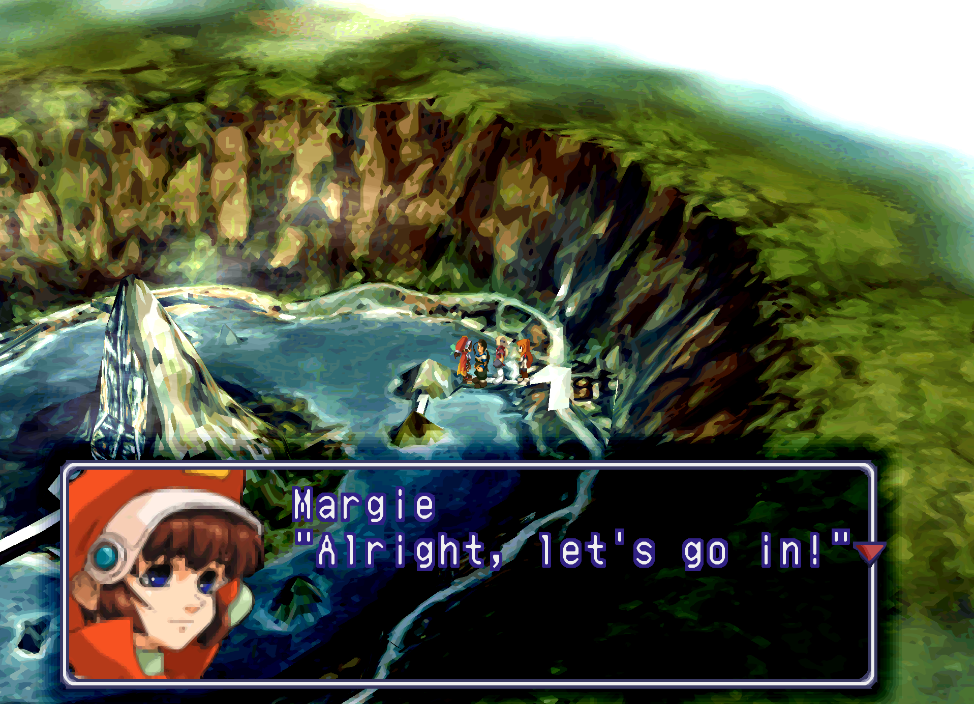
To continue with the story, exit Nisan and circle around to the back where you see Margie standing on the World Map (pictured above). Talk with her and you'll enter the Nisan Mausoleum.
Continue to Walkthrough Chapter 4
Return to Walkthrough Chapter 2