
Dragon Quest IX: Walkthrough Chapter 2
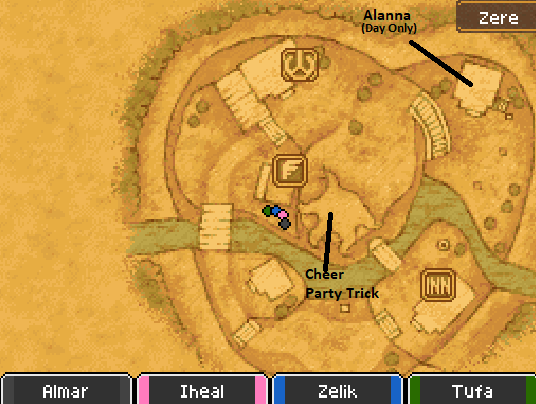

In order to advance the story forward in the town of Zere you'll need to speak with Alanna, found in the northeastern most house during the day. There's other things to do in the town too of course, like collecting all of the treasures and speaking with the lady in the cave (central part of town) to learn the Cheer party trick. This party trick isn't required for progression in the game - but it is used in some side events like side quests and stuff.
Alanna will reveal your next destination to you, which is Brigadoom to the north. When you travel north one screen you'll see a large dark spot near the top of the map; this is our next destination. For additional guidance use my screenshot on the right above.

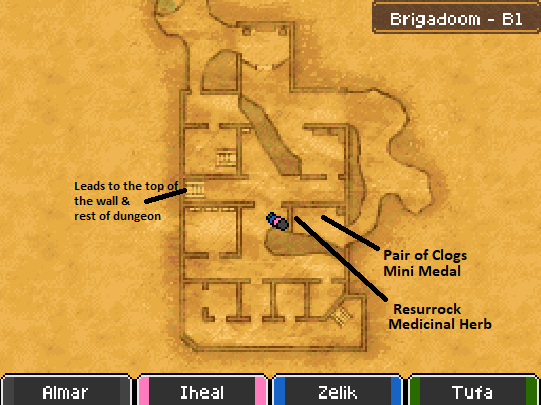
The dungeon of Brigadoom is a lot more complex than the previous dungeons but overall it's still extremely easy to figure out. Use my two screen shots above for some guidance in getting around the dungeon and finding the treasures throughout. There's two items I don't have listed which you find going up the staircase from Brigadoom B1.
You'll find the boss of this dungeon, Morag, by going down the staircase in the northern most section of Brigadoom, shown in my screen shot above on the left. Morag may be a bit of a challenge for you to beat too, her worst attack is an ability which hits your whole party for about 10 - 15 damage and can paralyze. If this puts your healer out of the fight when you need him the most it could spell trouble.
Once you've taken out Morag speak with the Wight Knight to advance the story forward then to Princess Simona. Use Evac, a spell on the Hero and then return to Stornway Castle. If you don't feel like running back to the castle you can always use a Chimera Wing to quick travel there. We've gotten plenty of these so far and they're also sold in Item Shops throughout the game.
Go to the King of Stornway and this time you'll get a reward (he opens up the treasure room for you) and he also informs you of the checkpoint in the northeast being opened up. This is where we're going to be going a bit later - first we have to take care of some side stuff, like visiting the Starflight Express back in the Mountain Pass.
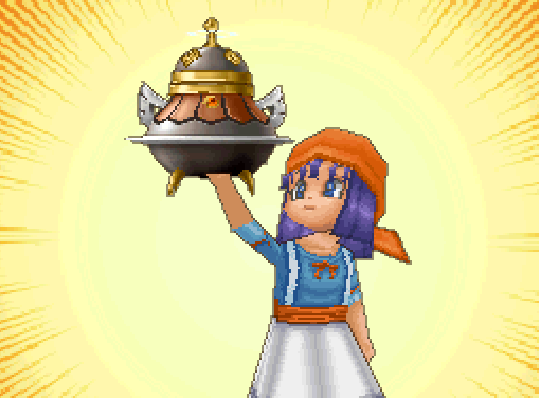
Before leaving Stornway though there's something very important for us to do at the Inn first. Stop by here and speak with Erinn to acquire the Krak Pot Alchemy Pot. With the Alchemy Pot you'll be able to make some of the best gear in the game as well as rare items that you can't get anywhere else.
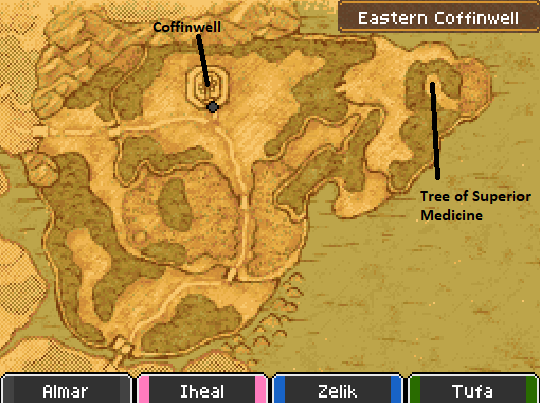
With the Krak Pot in hand, return to Mountain Pass and board the Starflight Express. Watch the scene and then press a button on the control panel before leaving again. Now we're off to Coffinwell, a town located far to the north of Stornway through the previously closed off checkpoint.
The enemies in this new area aren't very tough at all so don't worry about running into them. In the northeast you'll find a tree with strong medicine around it, in the northwest you'll find Coffinwell.
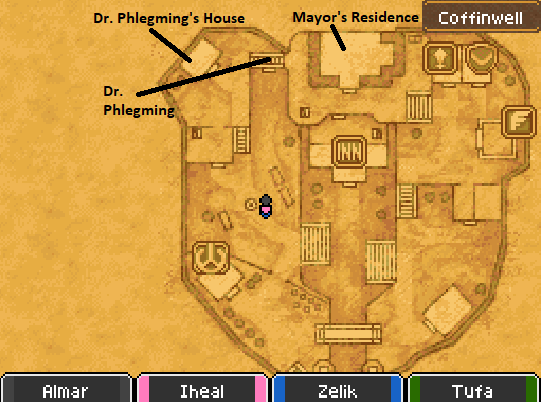
There's plenty of side stuff for you to do inside of Coffinwell, to advance the story forward go into the large building at the northern most part of town and to the second floor. Here you'll find the Mayor standing in the study reading a book, speak with him. Afterwards speak with the lady lying on the bed in the northwestern most building in the town; this is Dr. Phlegming's wife.
Follow her outside of the building and to the door just east of the house, inside is Dr. Phlegming - the man we're looking for. If you're having trouble finding any of these locations use the map above for some better guidance. Also don't forget to search the bookshelves in all of the rooms we go to for Alchemy Recipes!
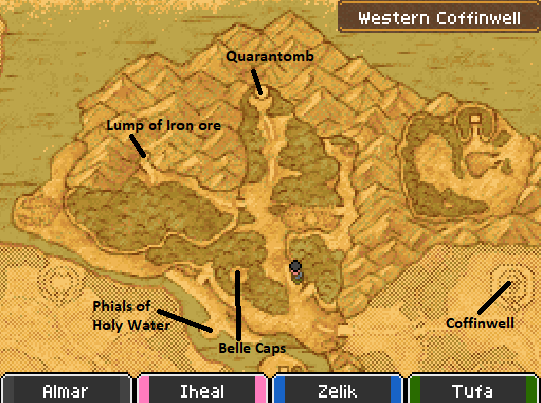
After you've spoken to Dr. Phlegming return to the Mayor again and speak with him for the Key to Quarantomb. Finally we can go back to Phlegming one last time then leave Coffinwell and travel west to Quarantomb - shown on my map below.
Side Quest #017 (You Shouldn't Have... Really)
Location: Angel Falls; Girl inside house near entrance
Task: Bring her 5 Belle Caps & 5 Fisticups; take the lunch to her father
Reward: Prayer Ring
Side Quest #026 (Doug and the Sluggers)
Location: Coffinwell; Old Man near northern house
Task: Defeat 10 Sluggers around Coffinwell
Reward: Mini Medal; Snake-skin when repeated
Quarantomb is a huge jump up in difficulty from the enemies outside of it. In particular the mummy monsters inside of this dungeon pack a real punch, I came here at level 11 and my healer got defeated in one round! Thankfully I quickly leveled up once here - which I recommend you do as well.
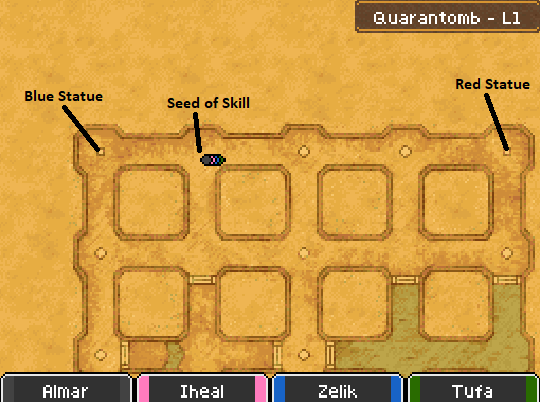
There are chests scattered throughout the whole first floor of this dungeon but in order to advance the story forward you'll need to activate the red and blue statues in the northeast and northwest. Once you've done this the door near the entrance of the dungeon will open up and allow you passage.
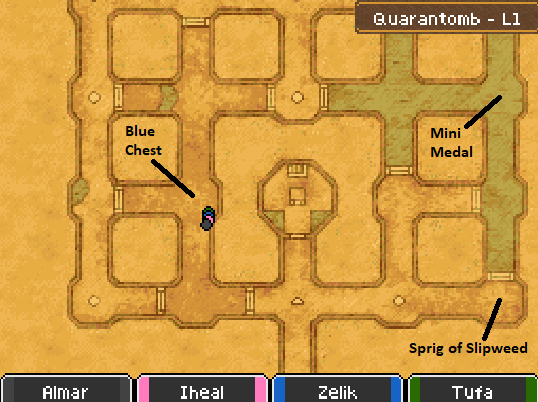
With both of the statues active you'll want to go into the room that's in the center of the area where you'll find a broken jar. Get near it for a scene then speak with the big pink monster for a boss battle with The Ragin' Contagion. This boss will be the first boss we face off against that gets to attack twice during a single round - despite that advantage he's still rather easy. My characters were about level 13 when I faced him.
After the boss fight you'll need to head on back to Coffinwell and much like before you'll need to do a lot of running back and forth talking to people. Here's step by step who you have to talk to in an easier to understand layout:
1. Speak with the Mayor
2. Speak with Catarrhina (Dr Phlegming's wife)
3. Speak with the Mayor
4. Rest at the Inn
5. Speak with the Mayor for a Feather Headband
6. Speak with the Ghost in the Graveyard
7. Examine door at Phlegming's Laboratory
8. Go to the houses in the East of the village and speak with the citizens
9. Go to the houses in the West of the village and speak with the citizens
10. Go to the Inn and speak with the villagers there
Once you're done with the back and forth return to Mountain Pass west of Stornway, we're going to ride the Starflight Express this time back to the Celestrian Observatory! There will be many cutscenes at this point in the game. To progress the story forward at the Celestrian Observatory you'll want to visit the Yggdrasil tree and offer up your prayers to it. You'll be taught Zoom when you do this which is one of the more useful spells in Dragon Quest. It's basically like a Chimera Wing spell.
Return to the Starflight Express when you can and speak with Stella again to advance the story forward. When you regain control of your character you'll find yourself on Newid Isle, just a tad southwest of the next town Alltrades Abbey. If for any reason you need to get back to the previous areas we visited used Zoom or a Chimera Wing.
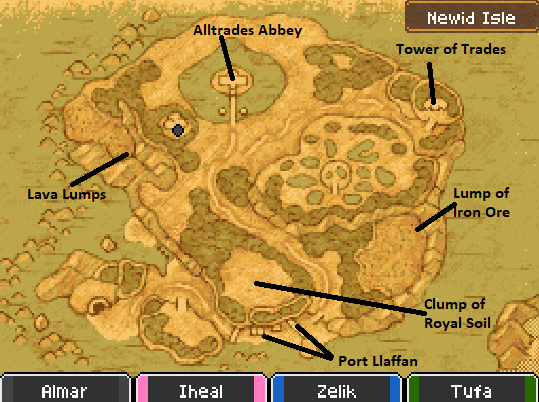
Enter Alltrades Abbey and watch the cutscene to learn about the missing Abbot. In order for us to advance the story forward we'll need to speak with the priest in the northernmost part of Alltrades Abbey then go downstairs and speak with the man and women sitting at the bar.
Now go back up to the Priest on the first floor and speak with him again to be taught the 'Bow' Party Trick. Assign Bow to your list of Party Tricks (under Misc in options) and then head on over to the Tower of Trades in the east. When standing at the front door to this tower Hold B then press whatever button you assigned Bow to.
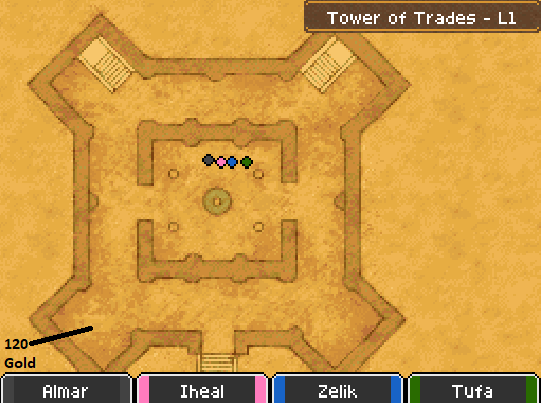
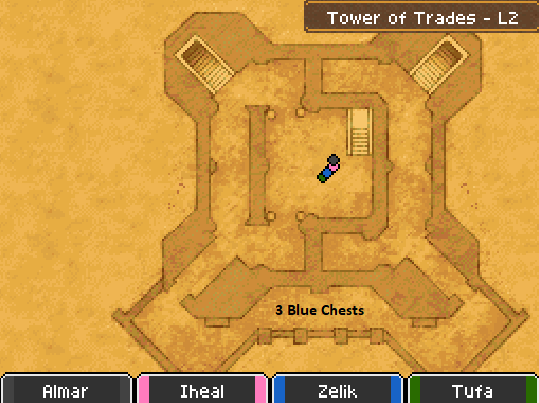
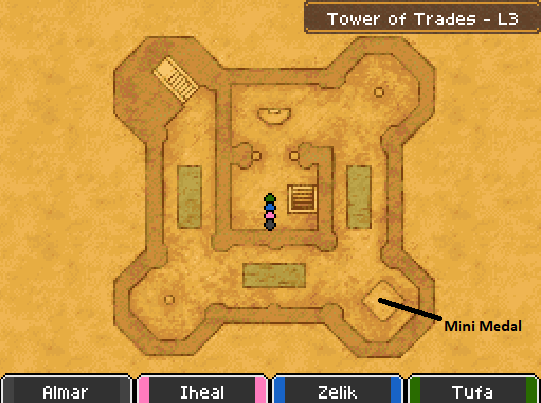
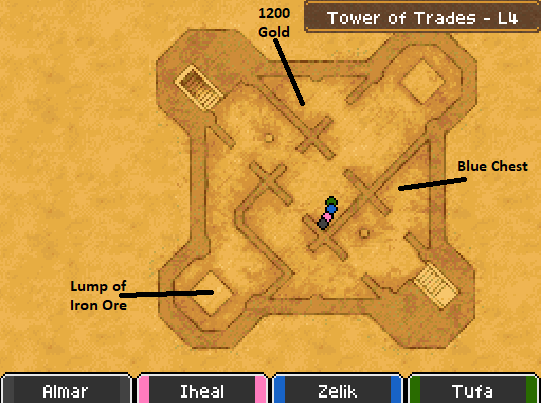
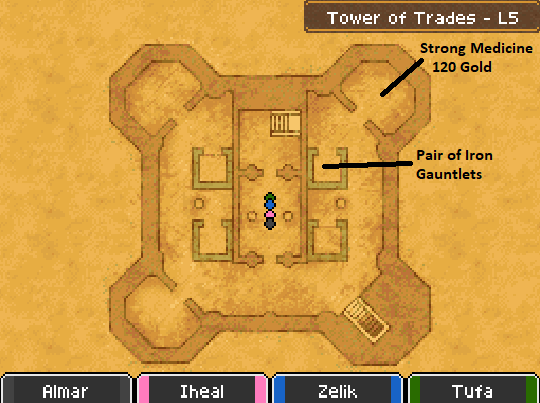
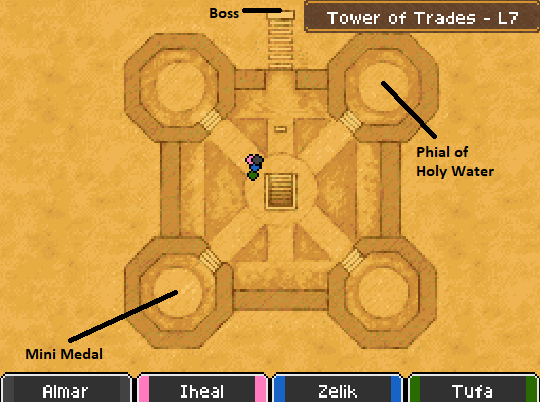
The whole Tower of Trades dungeon is rather straight forward and easy - a bit long too. There's a total of 7 floors you will have to climb up in the tower, the 7th floor will have a shining gate at the northern end of it which is what leads you to the boss of the dungeon.
Master of Nu'un is the boss of this dungeon and depending on your level he'll be a real tough one to deal with. He gets to attack twice during each turn, has the ability to Buff himself increasing his defense and he has more than one AoE attack that you have to deal with. You'll have to heal with most of your party during some rounds and slowly take the boss out using attrition.
After the fight is over return to Alltrades Abbey and speak with Jack of Alltrades in the northern most part of the building to gain the ability to switch your vocations. That's technically all that's left for us to do in this town. Next stop is directly south of Alltrades Abbey, Porth Llaffan. It was marked on my map earlier in the guide of this area so if you're having trouble finding it scroll up a bit!
Side Quest #109 (Elementary Training)
Location: Alltrades Abbey; Man in red inside Alltrades Abbey
Task: Defeat 2 Metal Slimes while under Wizard Ward
Reward: Armamentalist Unlocked
Side Quest #103 (Gladiator Graduator)
Location: Alltrades Abbey; Priest near the Inn on B1
Task: Defeat 3 Slimes with Dragon Slash while you have 100 tension
Reward: Gladiator Vocation Unlocked
To advance the story forward in Porth Llaffan talk to the pink haired girl on the shore during the day time and then try to leave the area, it'll trigger a cutscene. You have to do a few more steps to push the story forward, all of which are listed below.
1. Speak to Jona on the shore
2. Sleep at Inn
3. Speak to Jona at her house
4. Speak to the Ghost on the shore
5. Speak to the Mayor
6. Speak to the Mayor's Son by the west gate
When you leave through the west gate you'll find yourself on the part of the world map that was previously inaccessible, follow the road to the next dungeon.
Return to Walkthrough: Chapter 1 (Celestrian Observatory, Angel Falls, The Hexagon, Stornway)