
Persona 2: Eternal Punishment Walkthrough - Chapter 4
This chapter begins with the Subway Tunnel dungeon which is found in the Narumi Ward. When you enter the Subway for the first time you'll unlock Area 6 in the Bomb Shelter of Kasugayama High. You can leave this dungeon whenever you want and this dungeon funnels into a second one. So, if you need to stock up on items for a long dungeon - you may want to do so now.
Subway Tunnel Demon Dialogue Choices
Subway is pretty linear, the first area is a straight line with a single chest off to the side. In the second area you'll have to press the Switch on the wall to move the bridge. The third area will have two hidden treasures which are worth getting. You'll find the Estoma Card by going directly east through a tunnel, it's in a crate in a dead end. This card is definitely worth getting considering how important Estoma is. Depending on how much you plan to play this game you may want to visit Time Castle and register the card too that way you can buy repeats.
Our second treasure worth grabbing is the Rainbow Piece which is kinda nearby the Estoma Card. In order to get this item you'll need to form a Contract with a Hunab Ku demon. Keep asking for info until you get the rumor about Seker having a powerful Maha Magnus spell. Once you get this dialogue line form a Contract with Seker and select the "Build a bridge." option after raising his happiness 3 times with a Contract active.
After doing all of this, in Area 2 there is/was a bridge south of the dead end that went to the Estoma Card. It's now gone and you can find a Rainbow Piece inside of a chest down that path. Use my map below for better directions to both of these treasures.
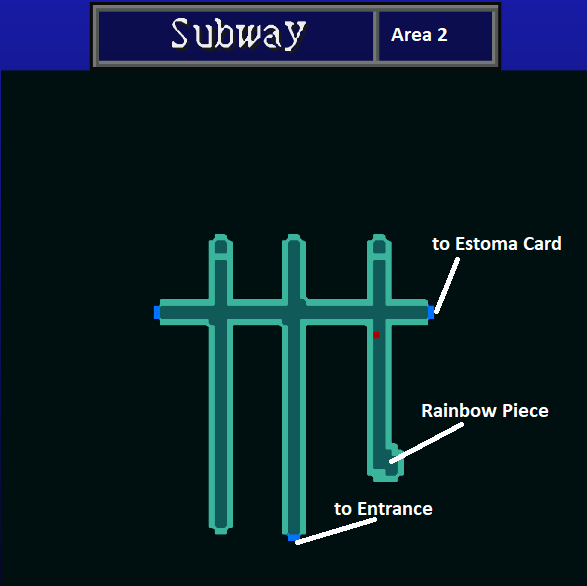
To advance through this dungeon keep riding Lifts up every time you find them. It's a very straight forward path through the dungeon, any twists/turns dead end quickly. Eventually you will come to our next big dungeon, Ameno Torifune. This dungeon is pretty big but thankfully the first few floors are extremely linear. Our first complication is on B4F (pictured below).
Ameno Torifune Demon Dialogue Choices
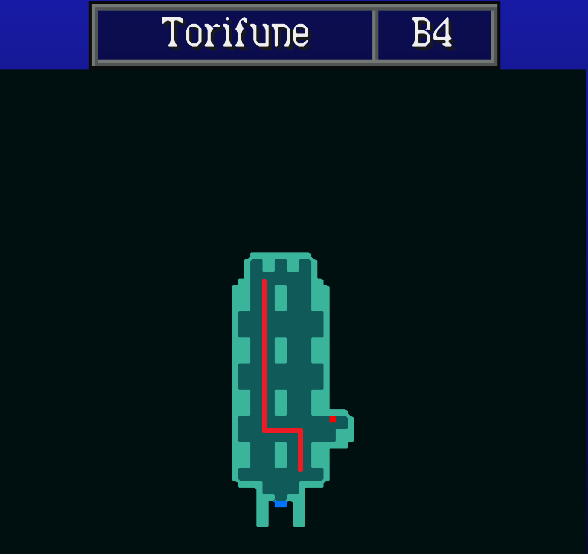
Follow the red line to get through B4F of Torifune
B4F will have energy shields which will disappear if you run in the right pattern through the room. You need to start on the right then make the first left; after doing that you can run straight north to the teleporter. There's a teleporter on B5F that will let you get into the small room on the right too... You only need to do this if you're mapping the dungeon though.
On B5F you can find two chests, one with an Agility Incense and the other with a Tec Incense. If you're not mapping the dungeon, make sure you grab these since they will give you a permanent stat increase. Entering the Room of Damnation on B5F will trigger a scene where Tatsuya leaves your party temporarily. You'll have access to a Velvet Room and a Trish's Fountain in this room, use either if you need it.
You can find two Material Cards on B6F, Urdarbrunn and Scarlet Wing both can be found before you enter the Room of Guilt. Make sure you're ready for a boss fight before entering the Room of Guilt because you'll be getting Tatsuya back and be thrown into a battle.
The boss fight is against the same 3 who took Tatsuya - Metal Lisa, Metal Eikichi and Metal Jun. Each of them have a different weakness and a different one will absorb that same type of damage. Meaning if you nuke them with something like Earth Jun will take a lot of damage but Lisa will absorb it. Single target or non elemental damage will work best. These guys have some really annoying attacks so our goal is to eliminate one as quickly as possible to reduce the chances of losing.
After taking out the bosses make sure you talk to everyone before you continue. Talking may be required to earn the new Contacts, I am not really sure... All I know is I missed a lot of Contacts in this game because I didn't go around talking to my party all the time between dungeons in various places.
B7F will have another room called Room of Transport, this will let you teleport back to Sumaru City if you wish. You can eat, restock or do whatever you need to do before you continue with the dungeon. When you're ready to face the boss you can find him on B8F below us.
The next boss we'll be facing can be a very tough fight depending on what Persona combination you're using. As I have said again and again up to this point, you really want to focus on using good Fusion Spells during combat. Meltdown is one of the better Fusion Spells that tons of people recommend and this boss is also weak to fire so it works out.
Maya: Succubus or any Persona with a Fire Spell.. I made a Phoenix Persona just for this fight since I lacked a different one with a fire spell.
Katsuya: Hunab Ku or Nata (Earth Spell) .. You will have to use a Card on Nata to give him an Earth Spell, but it is a good end game Persona.
Tatsuya: Apollo (Maha Agidyne)
The Fusion Spell we're going to be using is below.
Meltdown: Fire Spell, Earth Spell and Maha Agidyne
Huge damage to all enemies
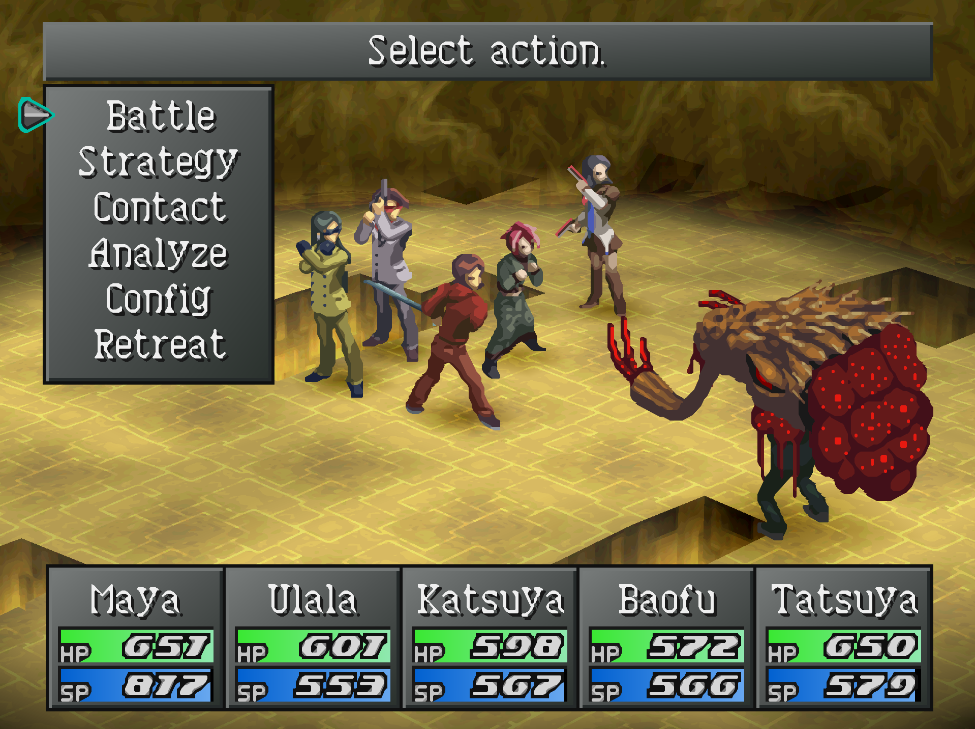
Assuming that you took my advice on how to prepare for this fight before it even began... It should be a piece of cake. The biggest issue with this boss isn't the damage it deals, it's the fact that he heals for 700~ every single turn. What this means is you need your damage every turn to out do his healing, otherwise the fight is impossible.
Realistically the only way you can out damage his heals is by using a Fusion Spell. I recommended Meltdown because this boss is weak to fire damage... but really any high level Fusion Spell will work fine. If you can't use Meltdown then use the Fire Fusion Spell behind it.
Once you beat this boss there will be a short scene after which you'll find yourself back on the Rengedai Ward Map. Narumi Ward is gone along with all of the services it offers... at least until we spread a rumor. The first thing you should do is visit 2x Slash in Aoba and get the rumor about Clair de Lune; we can get the rumor about Padparcha from Johnny Roger in Konan too.
If you have been following the steps to unlock the Ancestor Personas then now is when we do the final step(s). You'll need to speak with Mr. Kashihara at Kizmet Publishing and listen to a story for a rumor about Sumaru Castle. At the end of his story ask what the Warrior's name was for a rumor. Once you get the rumor spread it and head over to the Araya Shrine in Rengedai. Speak with Setsu Nishitani here for another story and another rumor (ask about the name when the story is done). If she isn't giving you a rumor you need to do the Man Searching Quest associated with her.
To be honest, don't feel bad if you missed the rumors above because you didn't talk to someone earlier in the game. We're almost done the game at this point and the Personas they give aren't necessary/aren't best in slot.
You should do Seedy CD or Mu Continent now if you haven't already, this will be the second to last time that I remind you. Also, once you spread the rumor to bring Padparcha to Konan you'll be able to get any Legendary Weapons again (if desired).
If you need armor hit up Toa Armory in Hirasaka or Rosa-Candida in Aoba and make some purchases.
New Rumors:
1. Clair de Lune has reopened for business in Aoba (2x Slash in Aoba)
2. Chamber of Warrior in Sumaru Castle (Kismet Publishing in Aoba)
3. Chamber of Princess appears in Sumaru Castle (Araya Shrine in Rengedai)
4. Padparcha has reopened in Konan (Johnny Roger in Konan)
Note: If you're looking for Salam he now hangs out at Satomi Tadashi in Hirasaka.
Once you're done with everything mentioned above, it's time to visit the Velvet Room and make our final Personas. You should have most of these already made with the exception of Hastur which we're going to get right now. In order to get Hastur you'll want to head over to 2X Slash in Aoba. Speak with the Wang Long Fortune Maniac in the corner and input "HASTURCOMEFORTH' into the dialogue box (as pictured below).
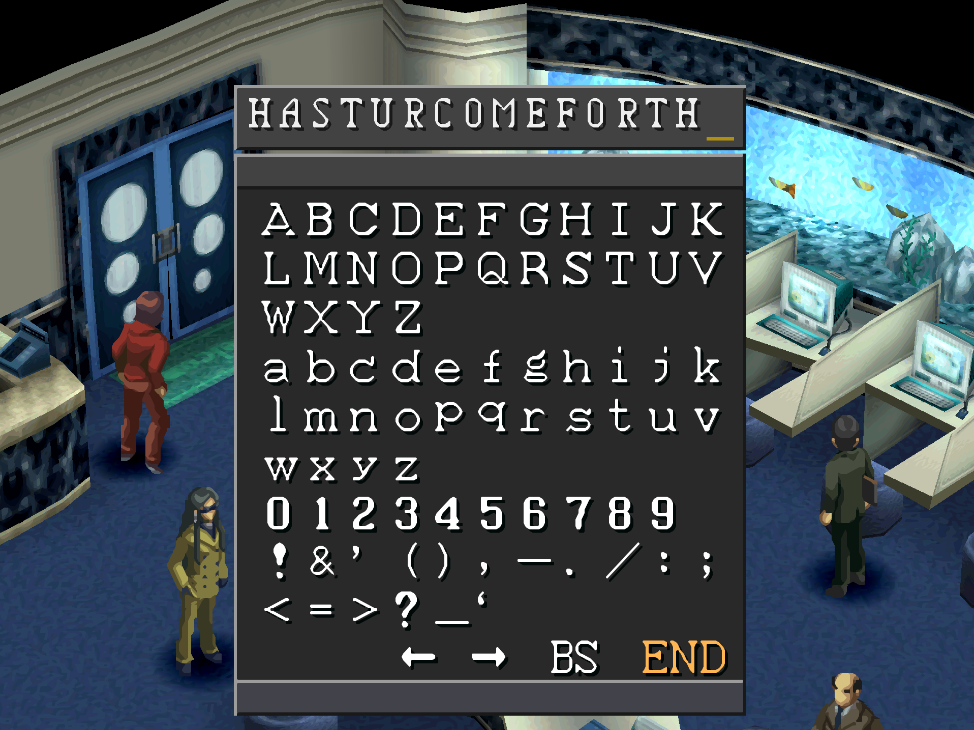
Visit 2x Slash in Aoba and tell the Wang Long Fortune Maniac 'HASTURCOMEFORTH'
After you've input the correct dialogue head over to Kismet Publishing in Aoba and visit Maya's Desk on the 2nd floor. Search the box on the ground in front of it for King in Yellow, the Material Card item that we need to summon Hastur. Now that we have that, let's return to the Velvet Room to make our team.
Maya: Hathor (165 Priestess Cards) .. I put a Fire Spell on him, Maha Agidyne if I can or Maha Agionn as a second choice
Ulala: Izanami (153 Priestess Cards; Path to Hades Material Item)
Katsuya: Nata (114 Justice Cards; Paopei Material Item) .. The best card to put on Nata is an Earth card, if you have a spare one.
Baofu: Hastur (248 Tower Cards; King in Yellow Material Item) .. I usually put an Earth or Wind card on Hastur, depending on what I put on Nata. You want at least 1 Earth Spell on your team.
Tatsuya: Tsukuyomi (204 Moon Cards) .. If you have another available card that can teach a Fire spell I would put it on this Persona. Otherwise Wind/Earth is probably best.
The main reason we chose these Personas is because they come with Light/Dark immunity; this means we're not able to be one shot. You've probably noticed by now how annoying light/dark attacks can be since they can one shot your party members... Well, they become even more of an issue late game. So it's best we protect against them.
With all of that out of the way, let's head over to Sumaru Castle - our second to last dungeon.
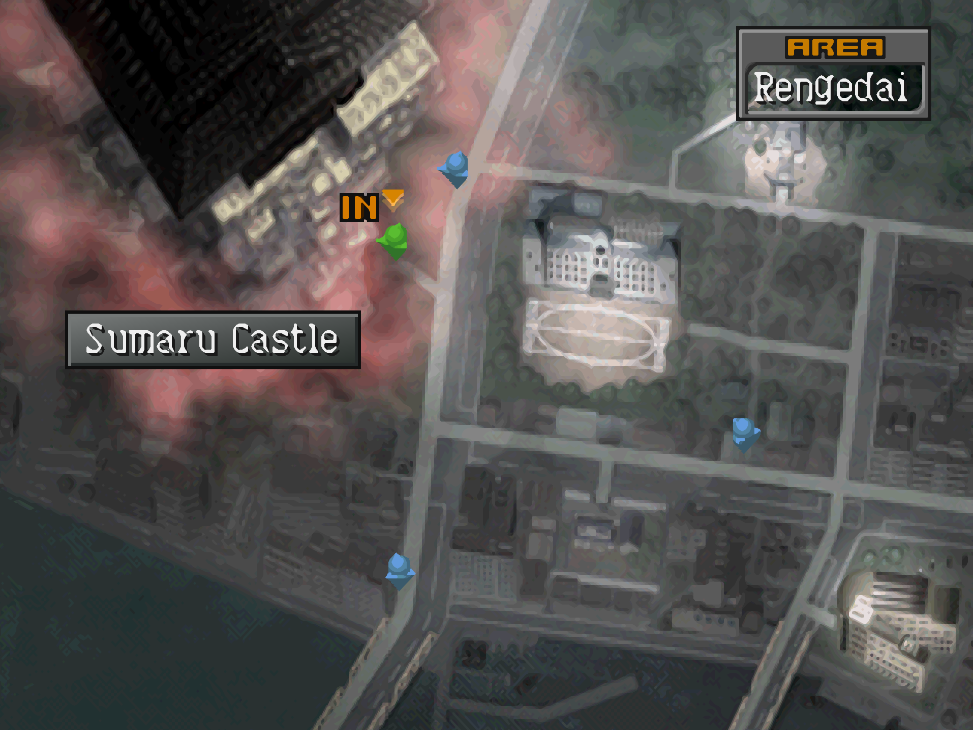
Sumaru Castle Demon Dialogue Choices
This dungeon is a bit unique, you will have access to all 8F right from the start. Basically how it works is there is a constellation on the ground in the main room and when you step on any of the stars you'll be teleported to a floor that corresponds to that star. Each floor has a Lithograph item with a letter that we can read; when you read all 8 and put them together you'll be able to challenge the boss of the dungeon... That's how you're supposed to do this dungeon anyway...
However, if you already know the password that the Lithographs spell out then you don't need to run around collecting them. You can actually go straight to the end of the dungeon and input the password to open the door - then defeat the bosses. If you'd like to do it this way step on the teleporter that is in the back and not connected to the constellation. This will take you to a locked door, the password for this door is PERSEUS.
Ancestral Persona Rumors: If you got the rumors for the Ancestral Personas you can find Maihime Amano on the 3F and you'll find Tatsunoshin Suou on the 7F. The floor layouts will be slightly different depending on if you spread the rumor to unlock these Personas.
After you enter the PERSEUS password and go through the door you'll have one more puzzle before the two bosses. In a room called the Chamber of Henbai you'll find a bunch of pitfalls along with some round floor tiles (pictured below). Our goal in this room is to run from circle to circle on the floor tiles. If you stray from this path you'll fall through the floor. The correct route through is North, East, South, East, North and then East again. Every time you reach a tile with a circle you need to turn to the new direction.
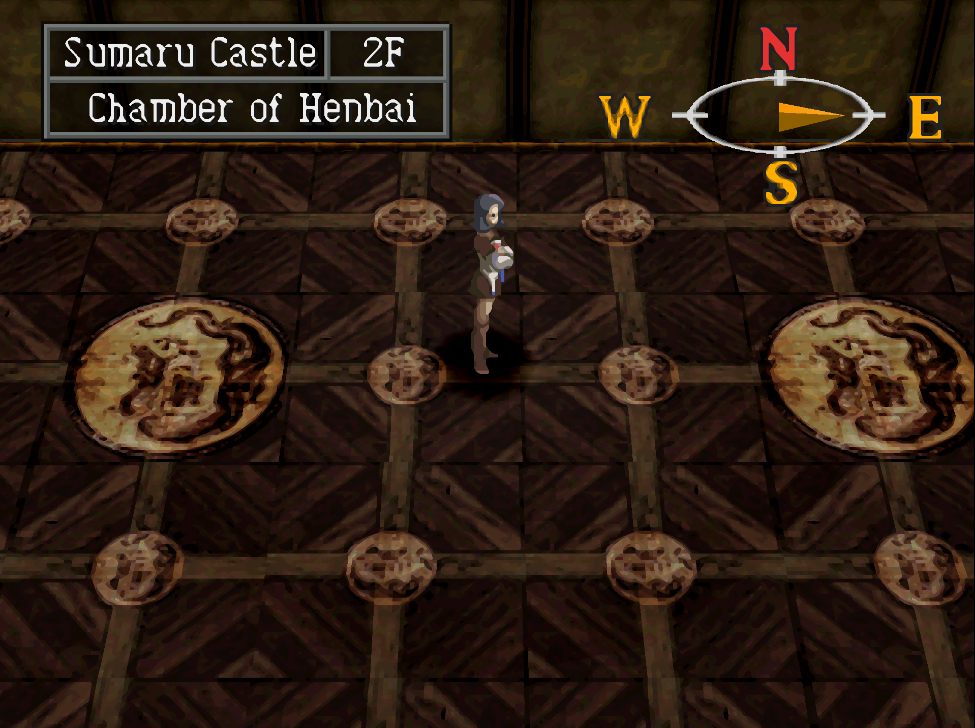
We need to run North, East, South, East, North and East again
The room after this one has the first boss so make sure you're ready before advancing. After beating the first boss you will be immediately thrown into a fight with another boss, the second one being much harder. Our first boss fight is against Detested Hunter, he is weak to Ice and absorbs Wind.
Gozen is the second boss and he's weak to Sword damage. Unfortunately, he is resistant to all magic and absorbs Attack damage. With a total of 8000 HP it's going to take awhile to work through his HP pool with his resistances. To make things even more annoying he has a skill that will remove buffs from a party member and another that will prevent Fusion Spells until his next turn. If you took my advice above about which Personas to use his one shot skill won't be an issue.
When the boss is defeated you will get some scenes, after which you will be thrown directly into the final dungeon... Don't worry though, we can return to Sumaru City very soon. The final dungeon is split into multiple mini dungeons. The most important thing I can mention about this dungeon is there will be dialogue choices during 'story events' in each of these 3 dungeons and depending on how you answer the boss may become more difficult. I will give you the correct answers in each of the areas.
Monado Mandala Demon Dialogue Choices
Our first dungeon is the World of Reason, we need to locate the Room of Reason inside of here. This is where we'll get our first story scene with the first dialogue option. When you're given a choice, choose the first dialogue option. It's the one where Maya tells Katsuya to stop it. Talk with everyone inside of the room then exit the opposite side. Our next task is to interact with a crystal on the western side of the World of Reason. When you interact with it you'll get a notification about the door to the Rest Area opening. The door it's talking about is found in the northern portion of this area.
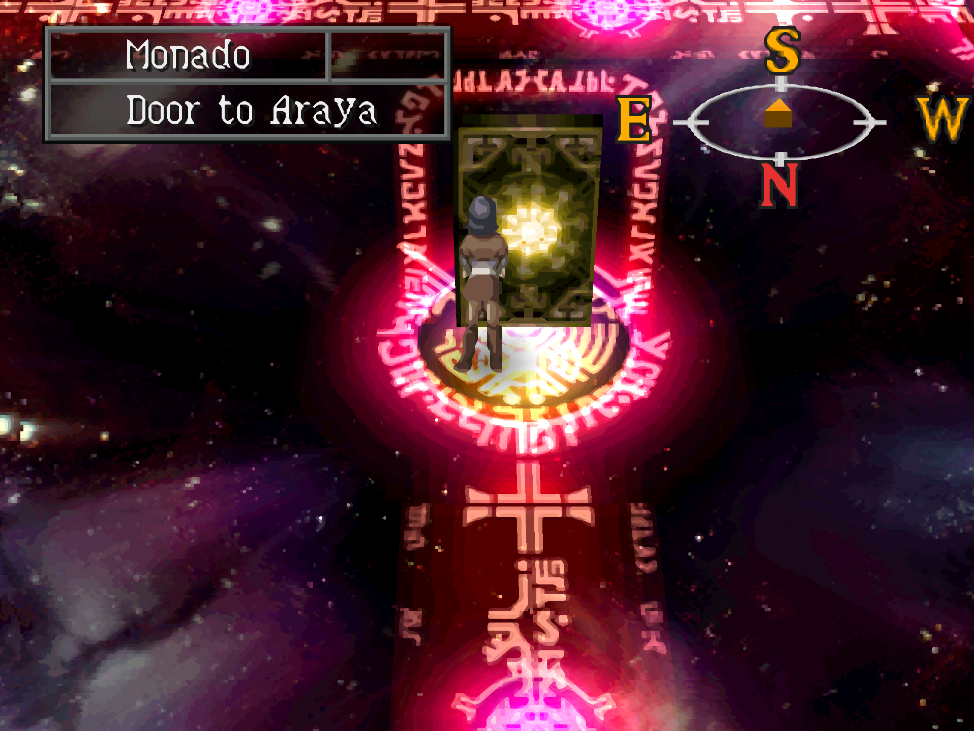
The rest area is a medium sized room with doors that connect to many different places throughout Monado... You'll also find a Velvet Room, Trish's Spring and a Door to Araya (pictured below). The Door to Araya will take you back to Araya Shrine in Sumaru City.
Before we continue with this dungeon, you'll want to head back to Sumaru City. Everyone in town will have some new dialogue, it's up to you how much running around and chatting you want to do. Head over to Clair-de-Lune in Aoba and purchase any weapon upgrades that you need as well. Check Toa Armory for any armor upgrades too. The stock in these stores is the same as last time, but now you have more money.
Now is our last chance to tie up any loose ends we have with the game's various side quests. Incase you've forgotten, below is a list of the available side quests.
Finish the Shiraishi Man Searching Side Quest
Finish the Mu Continent Side Quest
Craft any Legendary Weapons that you want
You may have noticed Kasugayama High isn't on the list and that's because we don't unlock the final area in the Bomb Shelter until we've beaten the second boss in the Monado dungeon. So, at least for right now that's the only side quest that we'll be unable to finish.
When you're done in town head back to the Araya Shrine in Rengedai and return to Monado. Our next area is the World of Instinct, you'll find a room here called the Room of Instinct where you'll have another scene but this time with Ulala. Just like before when we did the scene with Katsuya - you'll want to pick the first dialogue option.
Monado Mandala Demon Dialogue Choices
After the Room of Instinct you will come across another crystal which you can interact with to open the rest area on this floor. You will need to find these crystals on each of the different 'Worlds' to open up the short cut to the Rest Area. Our next world is the World of Judgment; there will be some new demons that start appearing from here on out. This world will also have our first boss of the dungeon, you will be alerted (like usual) when you get close to them.
Our bosses are Shadow Katsuya and Shadow Ulala - if you picked the right answers then they will be level 61 and 62. Picking the wrong answers will make them level 71 and 72. Ulala is weak to Earth and Katsuya is weak to Water/Ice. Focus on taking out Shadow Katsuya first because he has an ability that can one shot a party member. Honestly, this boss fight is pretty easy all things considered. Talk to everyone after the fight then exit the room through the opposite entrance and go up the stairs.
The next world is the World of Knowledge. You're looking for the Room of Knowledge here where you'll have a scene with Baofu and Miki Asai. When you're given a choice during your conversation make sure you choose the first dialogue option.
Tip: If you don't already have a good Fusion Spell picked out for your team I recommend God's Hand.
Just like always, when you're done with the room exit out the opposite side and continue up the stairs to our next world. This time we'll be doing the World of Emotions, some new demons will start to appear here as well. Two of these demons are rather unique, Gaia (Empress) can drop a Cradle of Creation Material Card which allows you to summon her in the Velvet Room. Shu (Devil) will rarely drop Akashic Rings which you can use to make more Legendary Weapons.
You're looking for the Room of Emotion where you'll have some dialogue with Tatsuya and Maya. This time we'll get two dialogue options, pick the second dialogue option each time you're given a choice! For once we actually have to pick option 2 instead of 1! Once you're done in this room continue up the stairs to the World of Conviction. This is the final 'world' of Monado Mandala, so make sure you unlock the Rest Area door for faster travel back here.
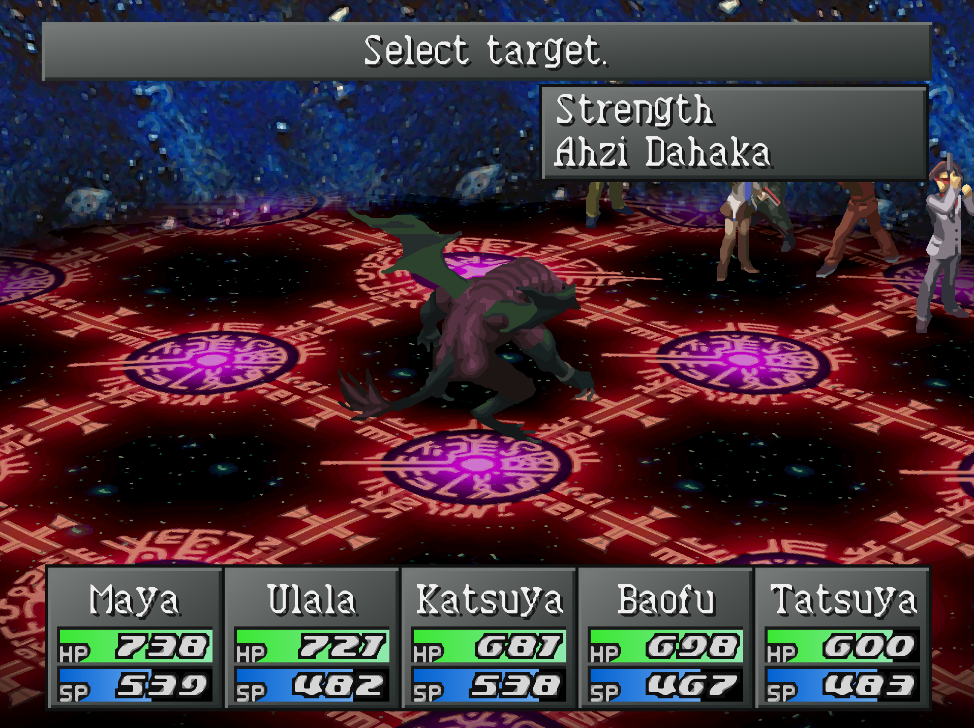
As you're exploring the World of Conviction there's a good chance you may open a door that spawns the enemy shown above, Ahzi Dahaka. This enemy is invulnerable to every single attack, as you may have already figured out if you came to this page wondering what to do... The only way to get past this enemy is to have someone in your party with Fariedone (Star) equipped on them. When you enter combat with this Persona you'll trigger dialogue between your Persona and the demon. Doing this will remove the invulnerability.
With that said, you don't actually have to get by Ahzi Dahaka to beat the game. In the room behind him is a Legenbright item, you only need to visit the room for that item or if you're mapping the dungeon. Ahzi Dahaka isn't blocking your path to the Rest Area or the final bosses of this dungeon. I wanted to mention him anyway though because I had to stop and look up information about him when I first encountered him and there isn't much out there...
Once you're ready for a boss fight visit the Room of Conviction inside of the World of Conviction. If you're having trouble finding it, just use Estoma to navigate easier. Honestly, the whole Monado Mandala dungeon is very linear despite appearing confusing. Every "wrong" route dead ends very quickly. Inside the Room of Conviction you'll have some dialogue before you're thrown into a fight against Shadow Maya and Shadow Baofu.
Shadow Maya is weak to physical attacks and will reflect all magical attacks.
Shadow Baofu is weak to lightning and strong to physical.
After beating them you will get some more dialogue after which you'll have two options. We can exit this dungeon and visit Kasugayama High one last time for the Bomb Shelter Area 8... or we can just beat the game. In the room you fought Shadow Baofu and Maya there will be a teleporter, stepping on this will trigger the final boss fight. You're basically right at the end of the game.
When you step onto the teleporter you'll first be fighting an enemy called Moon Howler. Depending on your choices throughout the dungeon he'll be level 77, 80 or 82 and the attacks he can use will change. Honestly this is a pretty easy fight if you took my advice on which Personas to use earlier on this page. His strongest attacks will be nullified by your Personas.
Once you beat Moon Howler you'll have some more scenes before the true final boss, Nyarlathotep.
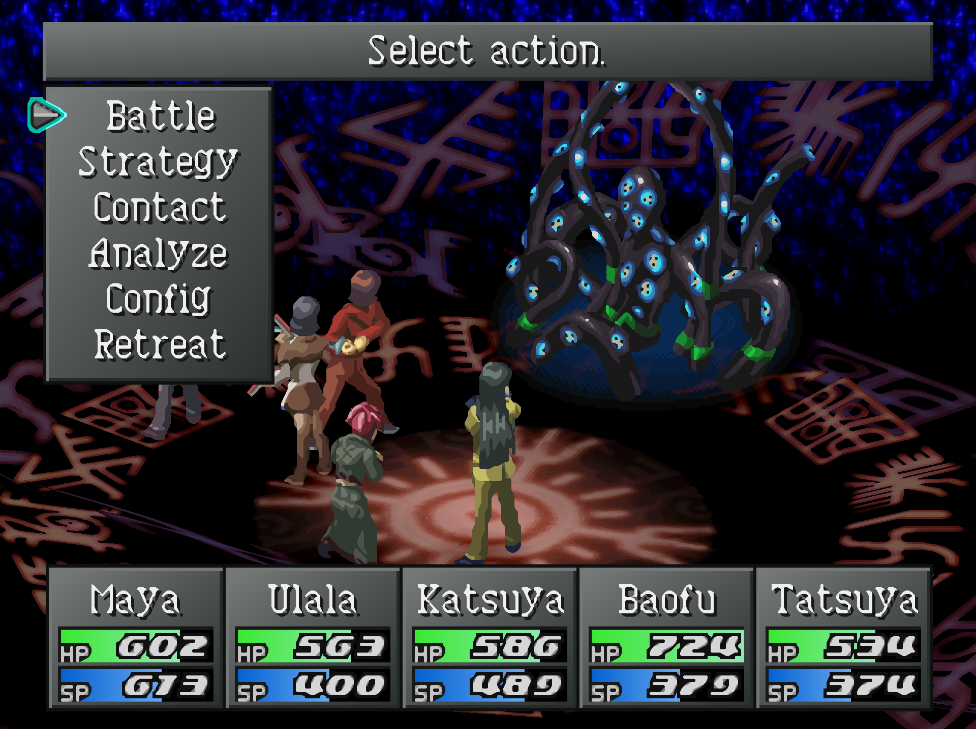
Nyarlathotep is mostly an RNG fight, I beat him twice for this guide and one time half the fight was super easy and another time the entire fight was terrible. The biggest issue for me was the Crawling Chaos ability since it would Mute my entire party. This prevents you from dealing good damage and prevents you from healing unless you switch to items. It's also annoying because you have to switch everyone to regular attacks then back to Personas a turn or two later when they're no longer muted...
The other skill that gave me issue was Shadow Kill; this was always hitting my party for a lot every round it was used. I didn't even bother buffing for this fight because characters were dying so often. Maya had Mediarama for me and Ulala had Affectionate Prayer but both were getting muted so often that I could barely use those skills sometimes.
In total you have 18,000HP to work through, it's a lot but you shouldn't have too much trouble with the fight if you have the right items and Personas. As you can imagine, once you beat the boss you'll be thrown immediately into the final cutscene. How you answer Tatsuya in this final scene will change his dialogue and actions a bit... In my opinion the warmer emotional option "take me with you" is better.
Enjoy the scenes and the ending. You've now completed Persona 2: Eternal Punishment!
Return to Walkthrough Chapter 3