
Breath of Fire 2 Walkthrough - Chapter 3
The previous chapter ended with us visiting SkyTower and liberating Spoor from her boredom. Once you're done fusing Shamans in TownShip it's time to use Warp and return to SimaFort. Travel south of SimaFort until you get to Fog Valley again, which no longer has any fog. Go south through this valley until you come out onto the World Map again, keep going south to find FarmTown.
Note: When I entered FarmTown I lost my Shaman fusions for some odd reason, it's obviously a bug, but worth noting.
Use the Dragon Shrine in town and put Rand at the front of your party. Head into the central house at the northern end of town for a scene. When the scene is finished go inside and talk with Daisy while you have Rand at the front of your party. This will trigger another scene, after which you'll find yourself clearing her field for free. Interact with the stumps, grass and stones for battles. Only one stone will fight back, it'll be an S. Golem boss fight.
Return to Daisy and speak with her after the boss fight, you will rest again. After that rest talk with Daisy in the field and she'll tell you to go west to Namanda and pray for a good harvest. We're done with FarmTown now, so exit town and head west for Namanda. You'll find Namanda by accessing the cave on the plateau.
Tip: Bring Rand along for this trip because he will need to be leveled up and ready for combat later.
Inside Namanda speak with the guy blocking the door to gain access to the dungeon. The whole place is pretty linear, just keep going north until you reach the room pictured below. When you interact with the crate in this room it will ask you to donate 100G. To progress the story you only need to do this one time, however, if you donate 20 times you'll get access to the Earth Shaman in a little bit.
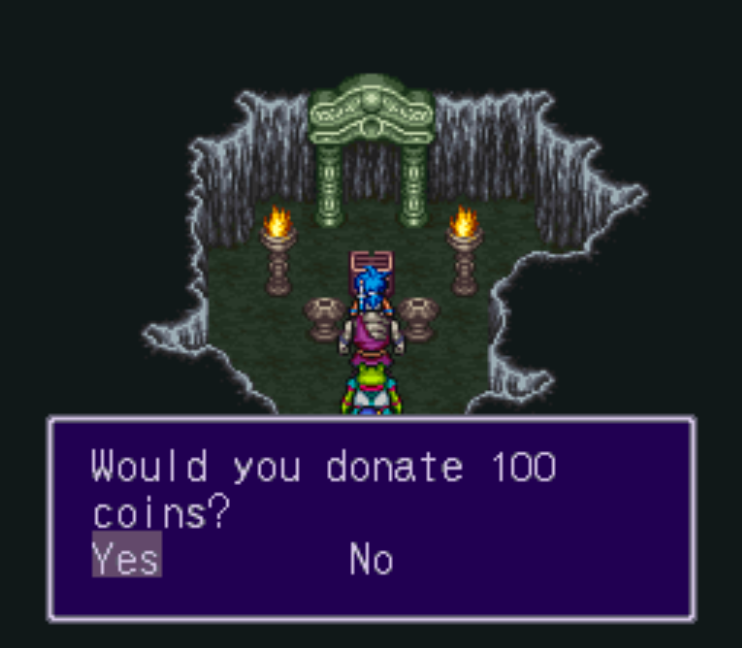
Donate 20 times to unlock the Earth Shaman
One thing to note is you're able to donate more than 2000G in total... So make sure you count how much you've donated as you're doing it and stop once you reach 20 donations. When you're done Warp back to FarmTown and visit Daisy's field. There will be someone here named "Paladin" who will give Rand a letter from Daisy saying she left. Rand won't be happy about this so he'll fight the Paladin 1v1, at the time of this fight my Rand was level 23 and it was a difficult fight. Thankfully the Paladin spends most turns buffing himself instead of attacking, because when he does attack he hit me for almost 100 points of damage each time.
At this point in time you could return to Namanda to learn a secret spell, however, it will require a lot of patience and luck. It's a musical puzzle and you'll basically have to count measures to solve it which probably isn't something everyone reading this guide can do. Inside Namanda there will be a room with some monks standing by bells, talk with these monks to begin the puzzle. Basically you need to hit the bells (A and B on your controller) using the same timing that the NPC does.
The spell reward you get for this is Boombada which is a non-elemental spell that will reduce the enemies HP by half. As you can imagine it doesn't work on bosses, only on trash mobs. In my opinion it's not worth the frustration to get. Before we continue with the story there are a few optional things available to us right now. I strongly recommend you do the things in this section despite them being optional.
Side Activities
We have a lot we can do right now before continuing with the game. There are a couple of new tenants we can recruit for TownShip, some armor to get and cooking in TownShip. If you haven't used TownShip a lot yet or learned about it you should check out my TownShip Guide and do that ASAP. This town is going to start becoming more important in your game very soon and it's even going to tie into the main story in a little bit.
If you have extra gold, you can make your characters a lot stronger too by doing some Cooking in TownShip. You should recruit Hanz and Daiye before doing any cooking. How much you want to do is entirely up to you. Below are the other optional things currently available to us.
Recrut Bleu, an optional character
(If you haven't already) Get your upgraded Dragon Powers
Get the LoveBR item from Fishing
Recruit Hanz for House 5 in TownShip
Recruit Daiye for House 6 in TownShip
Continuing The Main Story
Since we spoke about TownShip so much in the previous section, we'll start there. In the northeastern portion of TownShip you'll find a well, enter this well and walk around the mechanical room that's inside. Looks a bit like that room on Highfort, doesn't it? Entering the room with this machine gets us an important flag that we needed.
Exit TownShip and Warp over to Tunlan. South of Tunlan there will be an island that you can dock Grandpa on, the small town here is called Guntz. East of Guntz you'll find another Wise Tree which you can enter and speak with using Spar. The tree will tell you about a girl in Guntz named Eichichi who likes machinery.
Back in Guntz enter the northern most building in town, go upstairs and behind the northern most bookcase. This will take you down a secret set of stairs into the basement where Eichichi lives. She walks around the bottom of this room, speak with her until she mentions the machine below TownShip and wanting to see it. Exit town and teleport back to TownShip, speak with Eichichi inside the well and she will bring up the great bird in Windia.
If you don't have Nina in your party, put her in it now. You may also want to spend some time grinding her up if you haven't been using her (like me). Nina is going to become very important to the story and mobility around the World Map soon, she can summon a giant bird and fly around on the World Map. For this reason you'll want to make her into a main member of your party from here on out. There will also be a dungeon coming up where you can only control Nina, so you'll want to make sure that she is high enough level to handle it.
When you're ready to proceed head over to Windia and put Nina at the front of your party. Speak with the guard that's blocking your entrance to the castle and you will trigger a scene. Head upstairs to the top floor when you get control back and speak with the King in bed for another scene. After the scene go downstairs to where Nina's mom is, there will be four doors in this room--the door in the top right of this room will lead you into a dungeon called SkyCave.
Not far into the dungeon the path will fork, one route goes north and leads to a chest with a StormRG inside (Equip this to Nina, it's an upgrade). The other path goes deeper into the dungeon; not far in you'll find a statue which you must interact with using Nina (pictured below).
Tip: We're about to have a segment of the game where we only control Nina. I strongly recommend you get her to level 30+ before doing this.
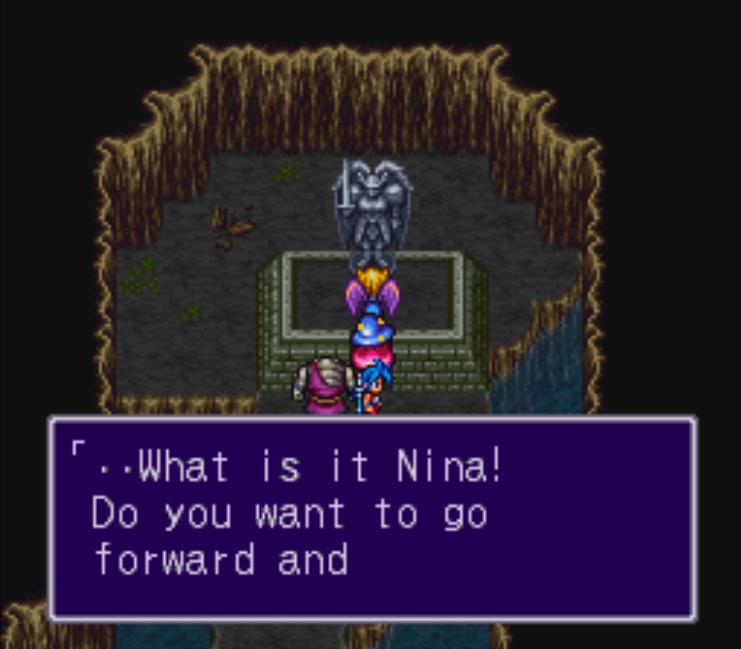
Interact with the Statue using Nina.
If you are struggling in the solo section with Nina buy some Smoke from the shop in Windia, this will reduce the encounter rate. You should also buy HelpBL from a shop, this can be used to heal Nina inbetween battles. When you enter the solo part with Nina go west and follow the path up north to find a chest. This chest contains a WindRB which you should immediately equip to Nina for the boost to defense.
Honestly, I found this to be the worst part of the entire game. Even with a level 30 Nina, battles were highly RNG for me in the dungeon. A single Baracuda enemy could obliterate me since they get 2 attacks per turn and they're the most common enemies you encounter. To be completely honest, I hate how squishy Nina is which is why I went to TownShip and raised her stats with cooking.
For this dungeon you'll need to dodge the rocks and go through the doorway in the north. You'll trigger a scene followed by a battle in here with the Guardian. Thankfully this fight is a piece of cake compared to the other ones, just use Freeze twice and you'll win. The guardian will give you mark of the wing which is the item we came in here for. Let Nina get defeated to return to your party (there is no penalty for Nina going down) and then exit the dungeon.
Return to the King upstairs and talk with him when Nina is at the front of your party for a scene. You will regain control of Nina at night after someone steals the mark from your dresser. Exit the bedroom and go north, in the next area go west to find the Ceremonial Tower. Head up the stairs following Mina for a scene, when it's over you'll be able to summon the great bird at any time on the World Map with Nina. This becomes Nina's World Map Special Ability.
Tip: Land Mina and go back into Windia's castle during the day. In the first room of the castle go into the first door on the left, this will lead you to 3 chests. One has a SilverHT, another a Van. Ext and the final has a MoonDrop.
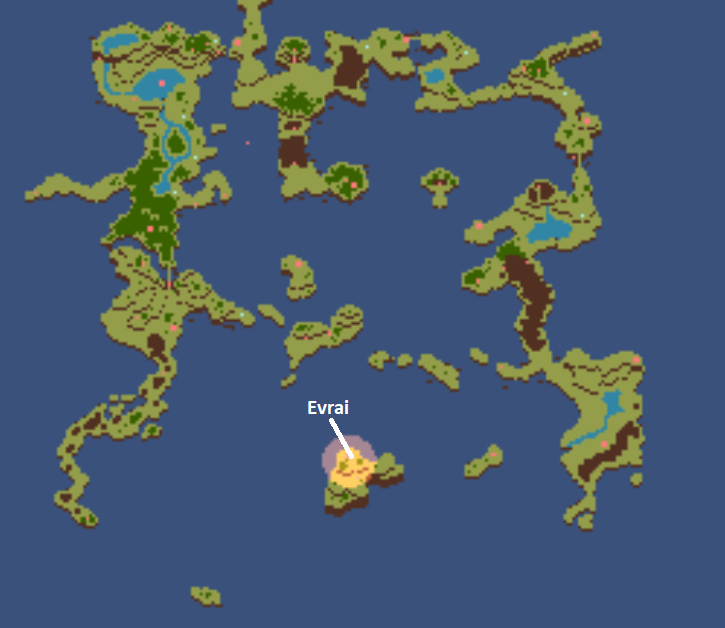
Our next destination is the island in the south-middle of the World Map which can't be accessed via the ocean (pictured below). This is where you'll find the town of Evrai, this is St. Eva's headquarters.
There are two dialogue flags that we need in Evrai, the first person is a priest inside the chapel/house in the center of town. You'll know you have the right person because she says, "Let's praise St. Eva" and the dragon meter will appear on the dialogue box when you talk to her. The second person you need to speak with is the guard at the northern most part of town (he is protecting the church entrance). He'll tell you that only serious believers can go inside.
Once you've got both of those dialogue flags try to leave town and you won't be able to. Return to the priest inside the chapel who asked you to praise St. Eva with her. This time she'll introduce herself as Claris and you'll get a scene. Yet again, we need to go into a toilet to progress the game. This next dungeon is actually pretty tough, my characters were over leveled and I still struggled a bit with some of the enemies.
You won't find any treasure chests in this dungeon, to leave you'll want to go into the first door on the right and drop down into the hole. Keep falling down until you land in a hallway. Go north up the stairs and then go up the brown staircase to find the exit. You'll end up in the building outside of Evrai, before you leave this building go upstairs and grab the CharmRod from the dresser. This is the best fishing rod in the game and you'll be able to catch Ryu's Ultimate Weapon, EmpireSD with it.
Tip: Put Katt in your party, we are going to need her to enter the next town.
If you'd like to get Ryu's Ultimate Weapon right now, follow the link provided. I will bring it up again later too just incase you don't feel like the detour right now. Our next destination is the town of CotLnd which you can reach by Warping to FarmLand and flying a smidge south. You will find a building just on the other side of the mountains south of FarmLand, this is CotLnd.
Put Katt at the front of your party once you zone into CotLnd and use her to smash the boulders that block your path. Talk to the guard then enter the building with the red flag for a scene. Our next objective is to visit Thieves Tomb aka ThvsTomd. You can get here by first Warping to HighFort then flying a little south. Thieves Tomb is the building found in the desert here.
This dungeon is a pain in the ass if you want to collect all of the items, otherwise it's actually very easy. On the first floor you'll find a bunch of moving holes which you can fall through. Dodging them all to collect the chests is difficult; getting to the second floor is easy. The second floor has a weird floor tile face puzzle. If you get into a random encounter while standing on a certain face tile it will do one of four things after a battle. You'll want to avoid the purple faces while traveling north. Purple faces can open up a trap on the ground and send you back to the start of this floor.
Note: The blue face (strange face) can drop the StarSD weapon for Ryu, it has the same exact stats as the GoblinSD which we got earlier in the game.
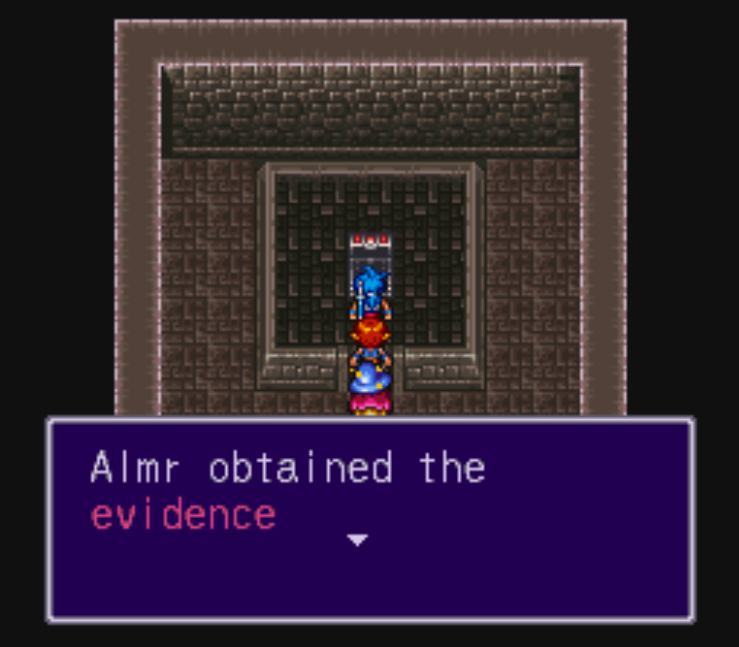
When you reach the room to the north you'll find a girl with blue hair locked up in a cage. Step on the darker tiles in front of the cage to free her, then follow her into the room up north. Inspect the chest that she opened to find a switch, this will open another room to the north which is identical and has another chest. Loot this chest for the Evidence that we need.
Exit this dungeon and return to Cot Land. Back in Cot Land Tiga will instigate a fight with Ryu. If you tell him that you and Katt are just friends and you have no intention of marrying her, he'll let you go. However, if you tell him "no" to either of his question you'll be put into a battle you can't win against him. Either way the result is the same, Tiga will be happy with the outcome and you can proceed with the attack.
In the morning Katt will no longer be in your group, so make sure you address this by adding in someone else. Our next destination is Bando and it's found south of Cot Land at the tip of the peninsula. Use Nina's bird to fly there instead of walking across the land. When you arrive enter the church and speak with Tiga for a scene. Once that's over enter the dungeon that Katt opened.
Head north through this dungeon dodging bones and battling enemies, go down the stairs at the end of the hallway. This next room will have arrows on the floor, one pointing right and one left. Each time you press the arrow it will move the doorway. Press the right arrow once for a chest that has a SnakeST inside, this is a new weapon for Katt. Exit and press the right arrow three more times (or just stand on it for awhile) to move the door to where we need for advancing the story. When the door stops moving, it's in the right spot.
The rest of this dungeon is pretty straight forward, the final boss will be 3 Zombies followed by a fight against Manson aka Necroman. If you're struggling with this fight my best advice is to stock up on items to cure the Zombie ailment that he likes to inflict on you. When the fight is over loot the chest for the EvraiRD and then use Exit to leave the dungeon.
During the next scene Tiga will ask you if you've learned the teachings of St. Eva, if you answer no or if you answer any of his questions wrong you'll have to visit a church and tithe. The answers to Tiga's questions are below.
1. It will..
2. break..
3. Hope..
If you fail this part, visit HomeTown and enter the Church. Talk to the priest and donate 20 times in total, on the final donation you'll get EvansBib, a bible which has the information you need. When you're ready to continue with the story use Nina to fly back to Evrai. Visit Claris' house and speak with Tiga in there for a scene; at the end of this scene you'll be asked what is St. Eva's real name. The answer to this question is Evans. Enter the building and continue straight for another scene.
When the scene is finished you'll be asked to choose a party of four people. Choose whomever you want (we need Rand for this dungeon, so he is a good choice) and then walk towards the top of the room to make the priest flee into the east door. Follow him for a boss fight, our first fight will be against an old friend named Ray. This fight isn't a real boss fight, keep everyone's HP up until Ray uses his AoE attack which hits everyone for 100+ damage. When this happens you'll get a scene with Ryu and a large dragon fading in and out ontop of him.
After you trigger this scene you'll want to use Ryu's brand new G.Drgn spell to instantly defeat Ray. You will get another short scene after which you're free to go upstairs where you'll find Daisy. If Rand isn't in your party you'll have to leave the dungeon and put him into your party because we need him to speak with Daisy and to use his special power to break down the wall. A few floors up from that wall you'll find another that Rand can break down, this time there will be a scene with Rand and his mother which actually is probably the best story moment in the entire game.
Habaruku will be waiting for you in the floors above, follow him and talk to him to continue. When you drop into the hole after Habaruku go straight north and up the stairs, you'll run into a floor tile puzzle with a bunch of arrows (pictured below). There are two combinations we can do here, one leads to a treasure chest with CrmsnCL and the other leads to stairs which let us progress further into the dungeon.
Tip: When you drop down following Habaruku, the stairs in the northwest will lead you to a short cut back to the entrance. You may want to rest up before the final boss of this dungeon after all the fighting we've done.
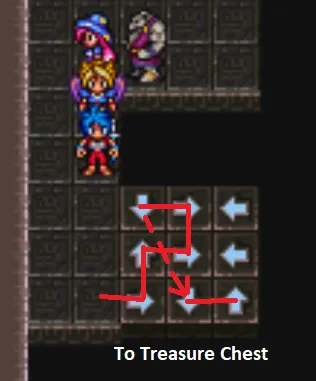
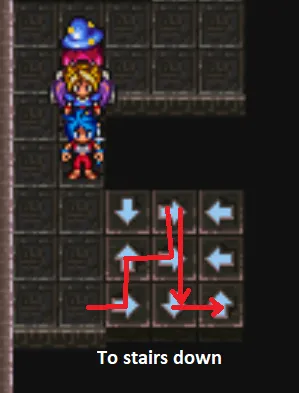
Treasure Chest Combination: Right, Up, Right, Right, Down, Down, Up
Stairs Combination: Right, Up, Right, Right, Down, Up
After going down the stairs you'll find a linear route to a pedestal, as you walk down the path you'll be shot at by the watch towers nearby. Check your health as you go down this road to make sure no one dies from the towers. You should also heal up when you reach the end too, before interacting with the pedestal. There will be a short scene after you interact with the computer panel, when it's done you'll be thrown into our next boss fight.
We'll be fighting against a big machine with an old map trapped inside. For this fight it's strongly recommended you do not kill the old man! He is a very important NPC to your story and if you want the good ending, he needs to remain alive. Instead, attack all of the other NPCs in battle and avoid using any AoE attacks. Your first target should be the eye that heals everyone, then you can take out the other two.
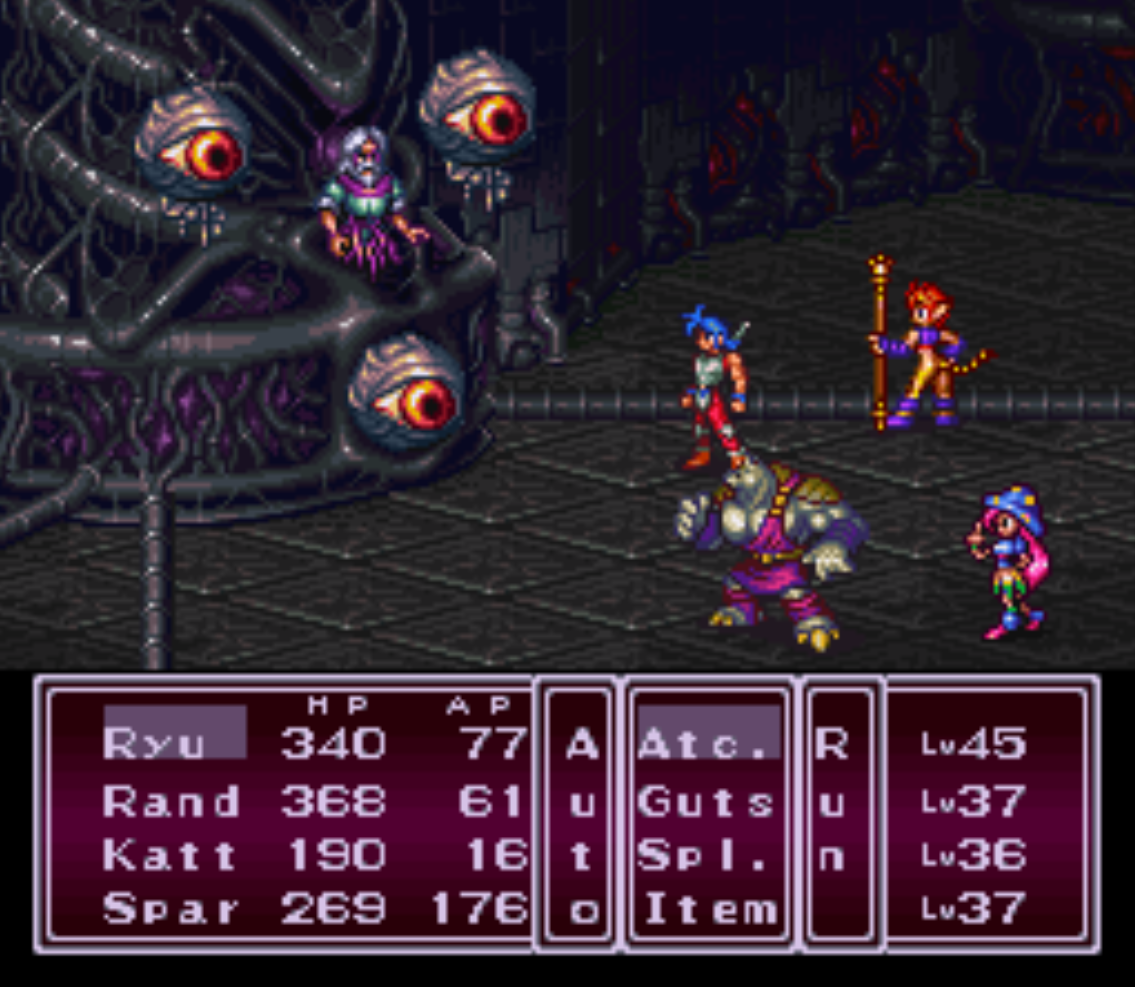
Do not kill the old man!
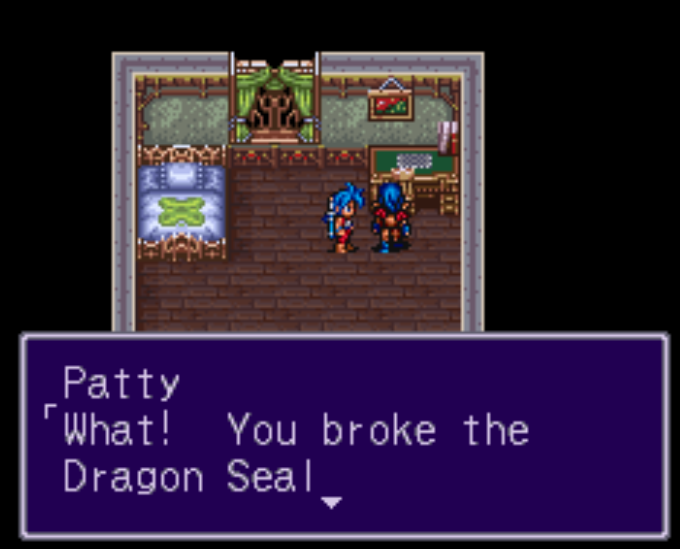
Beating this boss will get you a scene and a teleport back to TownShip. If you saved the old man he'll introduce himself as Ganer, your dad, and you'll get a lot more back story. When you're done with all of that go inside of the well in TownShip for another scene with Eichichi. You'll now be able to fly TownShip around on the World Map.
There are a couple of things we should do before continuing with the main story, below you'll find a list of everything with links to pages with more information.
Recruit Bleu, an optional character
(Last Chance To Get This) Get EmpireSD, Ryu's Ultimate Weapon
Get the LoveBR and LifeAR Equipment from Fishing
Once you've recruited the two new Shamans you should use fusion in TownShip and combine them with characters in your party. I try to prioritize fusions which change the appearance of the character since they're typically the more powerful ones.
Spar: Seso & Seny or Seso & Spoor
Rand: Sana & Solo
When you're ready to continue with the game, use your Warp spell to teleport to the town of Gate. This will be trained for us automatically since we have progressed the game far enough. Alternatively, you can reach Gate by flying northeast of Tunlan. Look for the burned forest and you should have a pretty easy time finding the town.
Enter Gate during the day and head north through the city to find Bush Land, the place we visited as a kid. Head up the central route through BushLnd until you reach the guy named Hulk to start the bombing. You'll have a short scene after which you'll want to go up the west or east paths to recruit our final shaman, Shin the Devil Shaman. Now it's time to leave Gate and find Patty, yet again. It seems like no matter what we do, our adventure always leads us right back to looking for Patty!
Before searching for Patty, if you'd like to use the last Shaman for fusion you can. I normally just fuse Shin and whatever the other left over Shaman is with Nina and call it a day. One fusion worth pointing out is Seny + Shin with Bow, it'll transform him into a Knight!
Now it's time to hunt down Patty, we need to visit four different locations to find her, go in the order I have listed below.
1. Talk with the blue soldier walking around in Cot Land.
2. Warp to SimaFort and go into Wildcat Restaurant; talk with the guy behind the counter.
3. Visit Thieves Tomb again and talk with the guy wearing the white hood.
4. Use Warp again and go to TownShip this time, speak with Patty.
The SNES version of this game tells you to go to HomeTown but Patty is actually in TownShip. You'll find her in the main building where all your companions hang out. Go up to the second floor of this building, Bow is in the first room and Patty is in the second room (pictured below).
Patty will rush back to Bush Land after you speak with her, so exit TownShip and Warp to Gate. You'll find her in the same location we spoke to Hulk at previously, there will be a scene when you arrive after which you'll want to talk with Habaruku to begin the boss fight. It's been awhile since I gave you advice on how to cheese a boss fight, something you can do if you struggle here is use G.Drgn on Ryu then feed him multiple WFruit items to restore his AP, then use the dragon again. Each time you use G.Drgn with full AP it'll do 999 damage.
When the battle is over you'll get a scene during which you're asked if you want to Wait for the gates to open naturally or if you want to go in now to Defeat the demon. Choosing Wait will get you the worst ending for the game and you won't see the final dungeon, so instead choose to defeat the demon now. This will open the gates to the final dungeon and (unfortunately) remove all Shaman transformations. First thing you should do is return to TownShip and re-do your Shaman transformations, below are the ones I recommend.
Spar: Seso & Seny or Seso & Spoor; Just Seso would also work to make Spar into a Sprite
Rand: Sana & Solo
Bow: Seny & Shin
Katt: Sana & Shin or Seso & Shin or Spoor & Shin
Jean: Seny (just Seny makes him into Frogman)
Sten: Sana & Spoor
Since we are on the topic of TownShip, if you haven't already read my TownShip Guide or my Cooking in TownShip Guide, I would strongly recommend you look through them now. Cooking is a great way to raise your character's stats and it will give you something to do other than just straight grinding to make them more powerful.
Before you leave TownShip you should visit Baretta and buy upgrades from her shop. You hopefully recruited her awhile ago because if you did, now is the big pay off. She sells best in slot armor pieces for a couple of different slots for casters and melee. Another thing you can do is get Bleu, she is an optional character who has magic more powerful than Nina. Check out my How To Get Bleu Guide for more information.
When you're finally ready to proceed with the final dungeon return to Gate and go through Bush Land to the door in the north.
The Final Dungeon
As is typical in games like this, I will recommend you explore the final dungeon a bit and collect some chests in your first run. This will give you the opportunity to level up your characters from all of the combat and learn the route through the dungeon for when we are more serious about completing it.
Sten is a good choice for this dungeon because there are many different locations on each floor that you can use his Special Powers to reach across a gap to a pole. Some of these poles lead to chests in the dungeon and some of them are just shortcuts to get down floors faster.
One other tip I can give for this dungeon is to bring two characters with healing spells and (preferably) two characters with the Renew spell. My team was Ryu, Rand, Jean and Spar. I have 3 characters that can cast Renew (Ryu, Rand and Jean) and 3 characters that can heal (Ryu, Rand and Spar). Ryu's heals are lackluster though because he lacks the AP to do many of them, so I mostly just use his AP for Renew.
If you want to use a team comp that's different than mine, you should bring items to make up for your shortcomings. Some of the mobs in this dungeon will use the Death spell so you should be prepared for your healer or Renew character to go down.
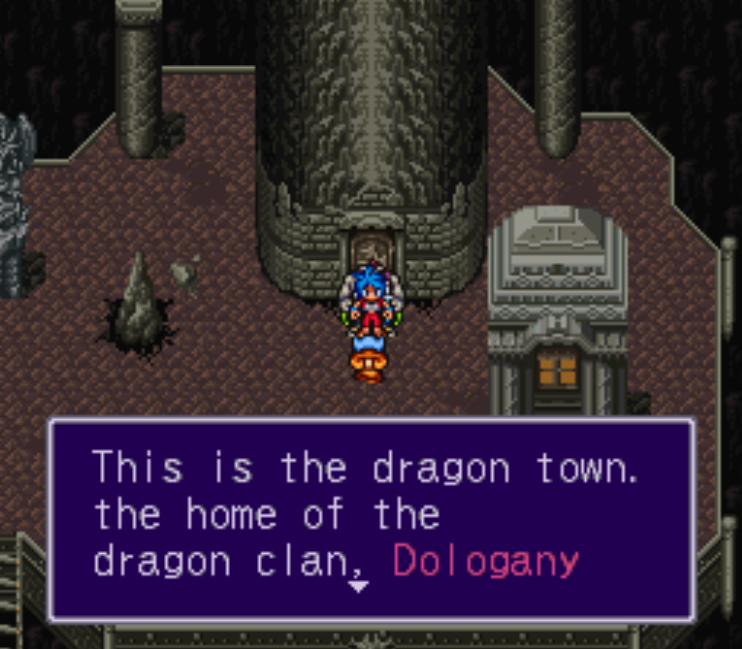
Half way through the final dungeon you'll find a new area called Dologany, when you arrive here you'll be greeted by an elder who gives you some more backstory for the game. When the scene is finished talk to the elder in orange again for another scene, he'll mention Valerie (your mother). Exit this room and you'll be thrown back into time where you're in control of Valerie.
First thing we need to do with Valerie is to go down the ladder and visit her grandmother in the eastern most house. After saying goodbye to your grandmother return to the building where you originally took control of Valerie and enter it for another scene. When you regain control of Valerie you'll be in Bush Land, venture south into Gate and visit the Church to find Ganer. Speaking with Ganer will get you a short scene, when that's done enter the church and speak with Ryu on the second floor. Return to the first floor for another scene.
Gate will now be under attack by demons, our task is to go north through Bush Land to the Dragon Gate which we came from. Inspect the gate for another scene, when this scene is over you'll regain control of Ryu and his team back in Dologany. Speak with the same old man who started the flashback to learn about a hidden power that Ryu can wield called Anfini. Explore the town if you'd like and rest at the Inn since you're probably low on HP/AP by this point in the dungeon. When you're ready to continue enter the tower on the lower floor of Dologany and ride the elevator down into the second portion of Infinity.
Before you go deep into the dungeon, you'll want to get the Anfini spell first. When you ride the elevator down from Dologany you'll notice a doorway under you, your elevator literally lands on top of the tower with the door. Enter this door to find a fountain to restore HP/AP and a group of old people, speak with the old guy with a unique character model. This will begin the event to get Anfini.
You will be teleported to a new area with multiple rooms, each room will have a party member that you need to speak with in it. After you have spoken with all of them return to the old man and talk with him again, he will have you enter the last room and speak with yourself. The game will tell you that someone must be sacrificed in order to proceed, but this is kind of a riddle.
Instead of sacrificing anyone, you'll want to enter Ryu's room a second time and refuse to choose any of your team mates when prompted. You will have to refuse multiple times before you complete this event and wake up back in the real world as Ryu. Refusing to sacrifice anyone will earn you the Anfini spell which is our final dragon transformation (and a requirement to defeating the final boss).
Much like before, my advice is going to be explore the dungeon and collect treasure chests then leave and heal up before trying for your push to the bottom. There is one exception to this though, about half way through Infinity (Part 2) you'll find a fountain which fully restores your HP/AP (pictured below). The best part about this fountain is it's outside of a hallway which is great for grinding. All of the mobs that spawn in the hall connected to this fountain are easy targets. They rarely use AoE damaging abilities and they are great targets for turning on 'Auto' in battle and letting the AI auto attack everything to death. I grinded at this location until my entire team was level 60+.
Tip: Using the Exit spell in the second half of Infinity won't take you out of the entire dungeon. Instead, it will drop you off at Dologany, the dungeon's half way point.
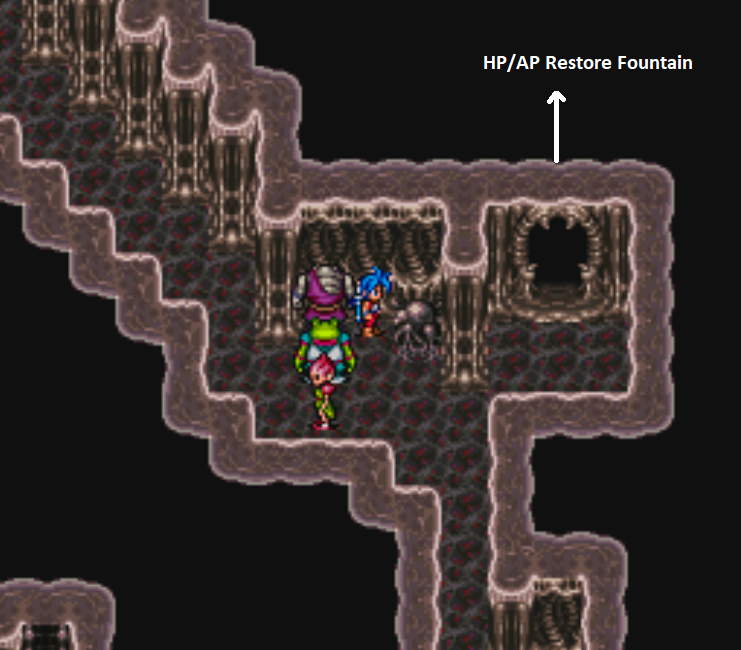
Note: There will be a part of the dungeon which looks exactly like the screen shot above that doesn't have a fountain in it. You'll find the door with the fountain nearby the room with the red orb on the ground that teleports you (and near the pitch black room that Barubary resides in).
When you're comfortable enough to attempt the final push you should first leave the dungeon and visit TownShip again. You'll want to restore all of your Shaman transformations and purchase (or cook) any items that will help us with this final push to defeat the end boss.
To advance through this final dungeon you're looking for a doorway with a glowing orb in front of it. When you step on this glowing orb you'll be ported elsewhere, don't do that. Instead you'll want to go north through the doorway to the pitch black room. Keep going north to find our old nemesis from the start of the game, Barubary. After hitting him a few times he will give you a choice to fight him 1v1 using Ryu. Your only reward for this choice is him telling you about a chest nearby which you can get regardless of what you do here.
Decline to fight him 1v1 and instead beat him up with all 4 of your characters. This is a tough fight, if you want to cheese it bring items that restore your AP and spam G.Drgn on Ryu for maximum damage. I'd also recommend buffing your defense up so you can reduce the damage you're taking.
How To Get Barubary Chest: Exit the room to the north and put Katt and Sten in your party using the Dragon Shrine. Return to Barubary's room and take 3 steps south, put Katt at the lead of your party and use her special power to destroy whatever obstacle is to your right. Follow the path east then south, when you hit a dead end use Sten's special power to pull yourself to the chest. Inside is a LoveBR accessory item. It protects you from instant Death attacks and is useful against the final boss.
In the room after Barubary you'll find a fountain and another red orb on the ground which will teleport you to a very large room. The main exit we need to progress is found directly north. Be prepared before you enter the room at the northern end because it'll throw you into a scene which ends with the final boss fight. During this scene you'll be left with a semi faded screen and Ryu will be reaching out. Use the D-pad and mash all the directional keys to break the hold on Ryu and continue.
When the battle with Deathhaven begins you'll want to immediately use your Anfini spell. This will resurrect your team and give you an actual fighting chance against the final boss.
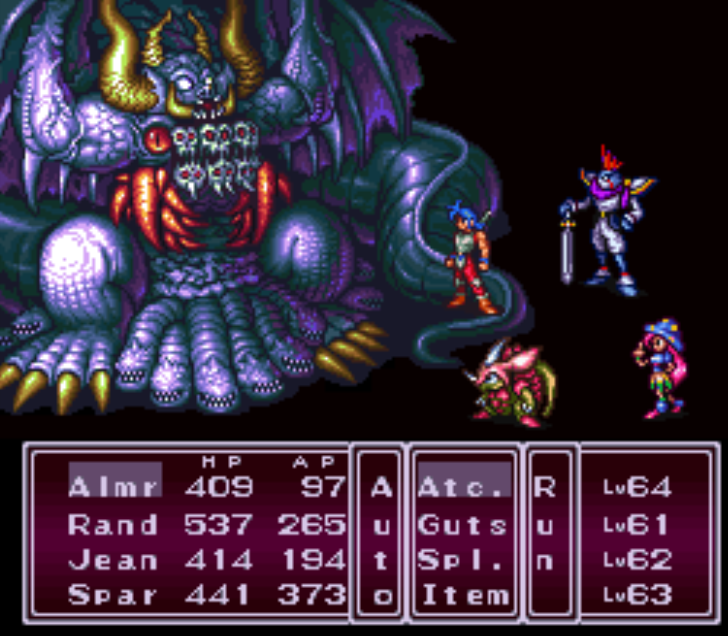
If you're the same level as my group, the battle will be easy. There are two strategies that I think work well, the typical dragon spam using Ryu and restoring his AP with items. Also, this boss has a tendency to dispel all buffs you cast on your group and you can often make him waste a turn dispelling if you rebuff yourself consistently. I had Spar do Attack Up on Ryu and Defense Up on my entire team many times during the battle just to make the boss waste his turns.
Once the battle has been won exit the room to the south for the game's final cutscene.