
Grandia Walkthrough - Chapter 1
The game starts with a couple of cinematic's, when they're finished you're given the task of running around town to collect 3 items. If you press Select you can get an overview of the entire town, it's a very helpful map that we will be using in the future... For now, run around town and collect the following items then return to Gantz and talk to him.
Iron Pot: Go down to the green walkway next to the river and follow it to the Iron Pot.
Pot Lid: Leaning against a warehouse in Parm's port.
After finding the Iron Pot and the Pot Lid you need to talk with Gantz twice to learn the location of the sword. He tells you that it's in a locked chest in his house and you must get the key... His little brother who has been avoiding you is the one we need to find first. You can find him near the alley-like wall in the middle of town (it's in the same area with the bottles/trash on the ground). Talk with him and pick option #2.
Now that you've spoken to Gantz's brother you can find Treasure Chest Key by searching along the river behind where Tentz is standing. It's in the same sectioned off area that he is in. Once you have this key search for the house with Tentz standing outside, this is Gantz's home. Enter and grab the Wooden Sword from the treasure chest then head back to the bridge with Gantz. Some grown ups have broken up the gang, watch the scene then head across the bridge for another scene.
When you regain control of Justin speak with his Mom and go through all 3 dialogue options, at the end she will propose a meal.
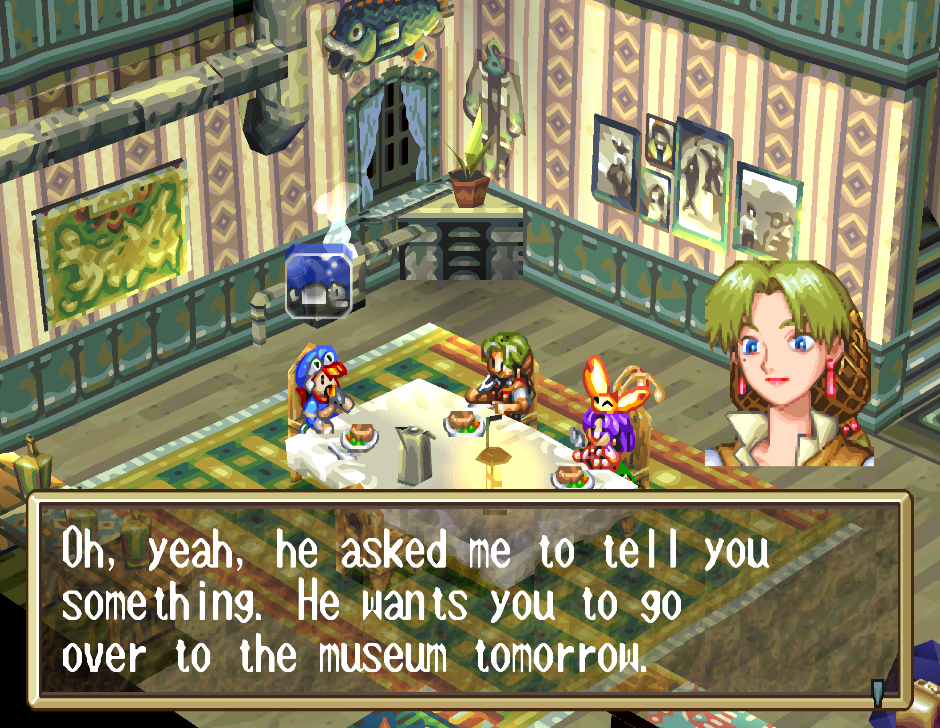
Meals are a way to talk to your companions and get some back story
Meals in Grandia are typically an optional way to talk to your party and learn their thoughts about things that are going on. They can give you some more back story and flavor to bring some life into the world. For this meal you'll have to talk with your mom a bunch of times until she finishes her story. When you're done interact with Justin again and say you're done eating.
You will automatically go to sleep and wake up the next morning, search Justin's room for items and money then head downstairs. You'll find a glowing bag on this floor, when you interact with it you'll see a pop up which calls it Stashing Place. This is an important object in this game because you have very limited inventory space, kind of like the Dragon Quest series. Each character can only hold so many items and there's no overflow inventory outside of this bag.
For now you'll want to put all four of the 'legendary items' we just collected in here. We can't sell them or discard them so the only place to put them is inside of this endless void. Leave your house and head over to the Museum in South Parm (across the bridge that the kids were blocking before), you'll find the Curator in the Exhibit Hall. After some dialogue inspect the statue to break it then head over to the Curator's Office and talk with him again. When that dialogue is finished you're free to exit town and continue to Marna Road.
Marna Road is your first dungeon of the game and it's extremely straightforward (just follow the road and you'll get through the whole thing). I recommend you run around and defeat all the enemies and grab all the treasures you find though... Practice and learn the combat in this game... If you want return to town and buy some better equipment for Sue as well. When you're done in Marna Road exit via the north and go to Sult Ruins.
Show the guard your letter that the Curator gave to you and he will let you inside. There will be a scene when you arrive with three women, when it's done go down to the entrance and talk with them. Choose option 3 in dialogue and show them your letter to get access to the ruins. As you could imagine for it being your first real dungeon in the game it's very straightforward. You will have a short scene every time you encounter a soldier but they won't bother you.
If you'd like to collect the optional treasures make use of the shoulder buttons to spin your camera around. Many of the treasures require you to run up some stairs and across the stones, nothing is very confusing though. Follow the main path through the ruins you'll find yourself in B2 in no time.
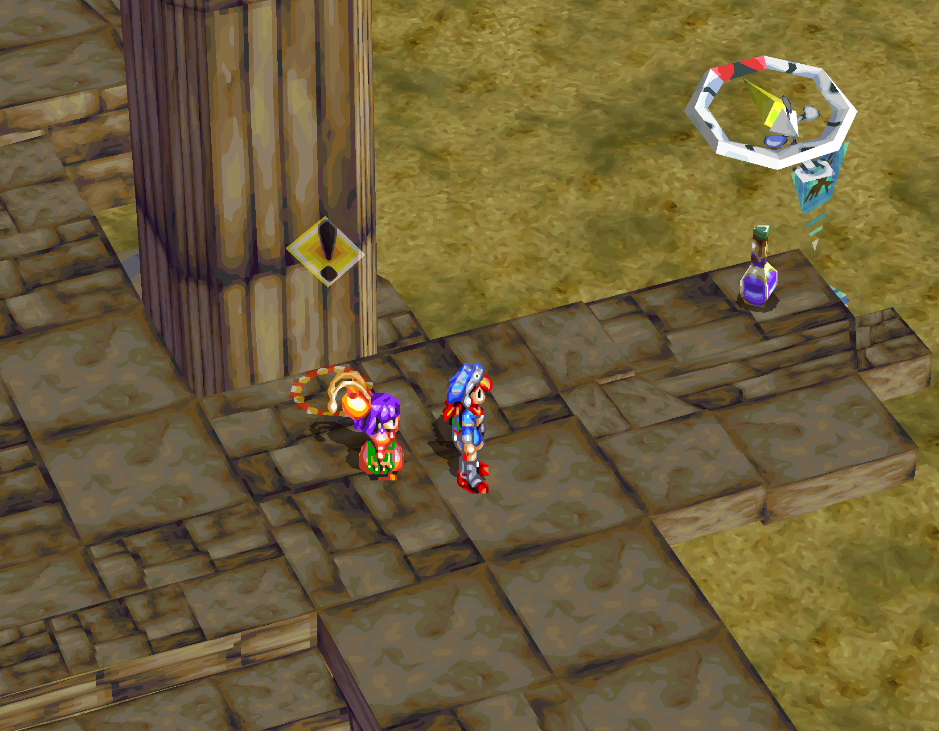
While you're exploring B2 you will encounter the Alert symbol (exclamation point) shown above. This symbol lets you know that you can interact with this location to make something happen. In this case I was able to push the pillar down which made a new path forward. Continue along this new path for another scene and to find a save/recover location.
Approach the statue face when the soldiers leave and you'll have another short scene, your Spirit Stone will trigger and open a door for you... This leads into the final part of the dungeon. You will find two switches in this part of the dungeon, press one and go into the door that opens to reach the room with a red switch on the ground. For this room you may need to press the switch multiple times, our goal is to exit this room to the north. Look at the compass in the top right of your screen, see the red portion? When that is at the top of your screen it means that up is north.
You will have another scene at the end of this hallway involving your Spirit Stone, when it's finished start to exit the dungeon and you'll have another short scene with Colonel Mullen. Pick any dialogue option you want, after trapping him continue out of the dungeon until you trigger our first real boss fight against Rock Bird.
For the first boss fight in the game it is extremely easy, once you beat Rock Bird you'll be placed at the entrance of the dungeon. Exit and return to Parm. The first thing I recommend you do back in town is sell any loot you don't want and purchase any upgrades for Sue or Justin that you can. By now you should have enough money to afford basically everything useful in Parm. When you're done with all of that head back to Lilly's Seagull Restaurant and speak with your mom behind the counter for another meal.
Talk to your mother and Sue at dinner as much as you want, when you're done interact with Justin a few times to conclude the meal. When you wake up the first thing you need to do is visit the Parm Port and speak with a sailor in white clothes to learn about needing a pass for the boat. He will also direct you to someone named Java with a pass inside of Parm.
Remember where we found Gantz's Key earlier? Return to this location and talk to the lady standing outside of the Cafe, she will ask you to help her find a key. We need to go back to the port and talk with the people walking around here until one gives us Key to the Cafe. The guy who gave it to me was in green and wearing a blue cap. Give the key to the lady at the Cafe and then watch the scene with Mullen. When it's finished return to the Cafe and speak with the man in the back to learn that Java is at Leck Mines.
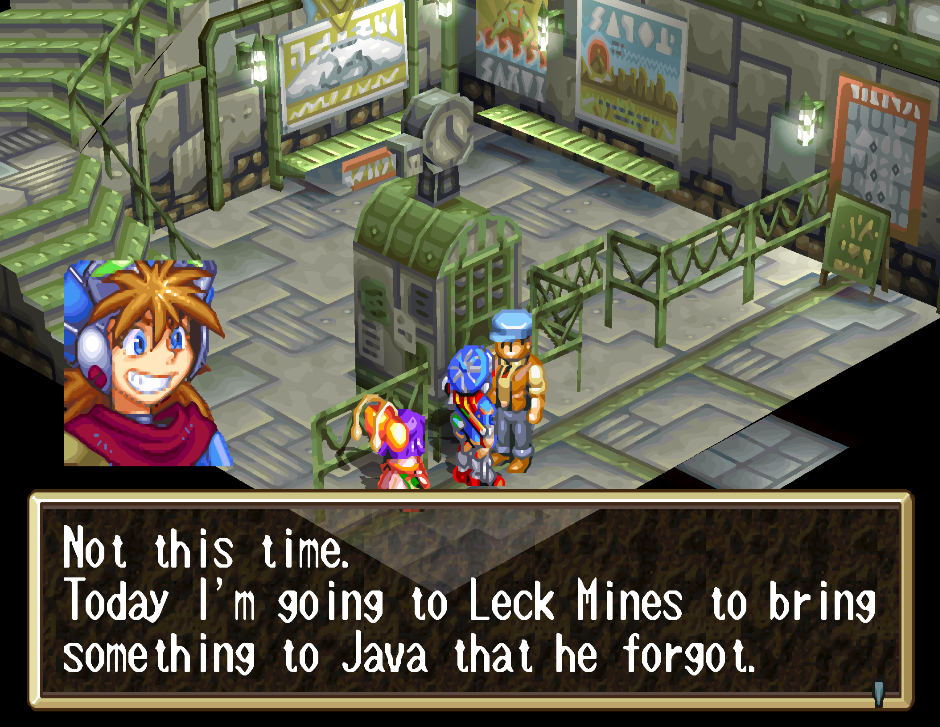
Before you leave talk with the lady behind the counter again for Java's Wallet. With all of that finished return to the Seagull Restaurant and speak with your mom for another meal. It will be the next day after the meal, our next stop is the train station in southern Parm! Speak with the guy pictured below and he'll let you board the train.
Head up the stairs and board the train, you will be automatically taken to Leck Mines. When you arrive the first thing you need to do is find Java's house and talk to him inside. After the scene find him outside of the mine itself and speak with him again. He'll work as a save/rest area if you feel that you need it.
Leck Mine is another straightforward dungeon, all you need to do is follow the train tracks and they will take you to Leck Mine (2) which is where they both go into/over a pit. I recommend you fall into both pits and collect the treasures, when you're ready to proceed you'll want to run over the one set of tracks that isn't broken.
In the back of Leck Mine (2) you'll find one more area called Leck Mine (2) Deepest Depths. You'll find the Orc King and some Orcs in this room, beat them, loot all of their treasure and then leave. There will be a scene with Java as you leave after which he'll give you the Steamer Pass item. We're all done here now so exit the area and head back to Parm.
You will have a scene with Sue when you arrive in town, after that head to the Seagull Restaurant and speak with your mom for dinner and bed. In the morning you will want to visit the port and talk with the guy standing outside of the gate who never let you in before. Show him your pass and now he'll let you into the gated area. From here you can talk to anyone you want for some flavor text or board the ship to continue the game.
We have a lot of dialogue flags and tedious tasks to do on this ship, below is a quick navigation list to help you understand where things are located.
F2: Bridge
F1: Top Deck
B1: Lounge, Engine Room and First Class Cabins
B2: Shop and Crew Quarters
Usually when writing guides I like to give a step-by-step list of what to do for moments like this. We're going to be doing a lot of running back and forth on the boat and paragraph format can be a bit confusing when we have 5 different things to do all in the same area... So instead, below is a list of each step we need to do on the Steamer Ship!
As you are doing the events below, I recommend you visit the shop area and sell things you do not need and stash things we don't need anymore. Steamer P and Lilly Let I stashed right now.
Steamer Ship Order of Events:
(Optional) Go to the Shop on B2 and sell stuff in your inventory you don't want
1. Visit the Crew Quarters and talk with the guy in the blue beanie that tells you about all of the passengers (one of them sounds a lot like Sue).
2. Return to the B1 hallway to find Puffy; follow him to the deck above to find Sue.
3. Speak with Sue twice and then the Captain twice, when you get a prompt choose the second dialogue option.
4. When you wake up talk with the guy by the stairs to get a Key to Quarters (Cabin Key) item.
(Optional) You can talk to 5 different people on this ship to get lesser rewards for doing menial tasks.
5. Visit the top deck and talk to the lady standing in the middle of the ship to start the mini game.
6. You will be playing this mini game a few times, your goal is to keep pressing X to build speed but don't cap your Power.
7. Return to the Crew Quarters and talk with the guy near your bed to sleep.
8. Do the same things the next day, go upstairs and scrub the deck then go downstairs and sleep.
9. Wake up again and go to the top deck and talk to Feena. Go through all 3 dialogue options with her.
Once you're done talking with Feena there will be a scene with some fog setting in. Follow Feena into the bridge and talk with her to learn about the Ghost Ship, some foreshadowing eh? After the conversation with her exit the bridge and watch the scene. When you get control of Justin again talk with Feena and choose dialogue option #3. Climb the rope on this ship and make your way across the crane to end up on the Ghost Ship.
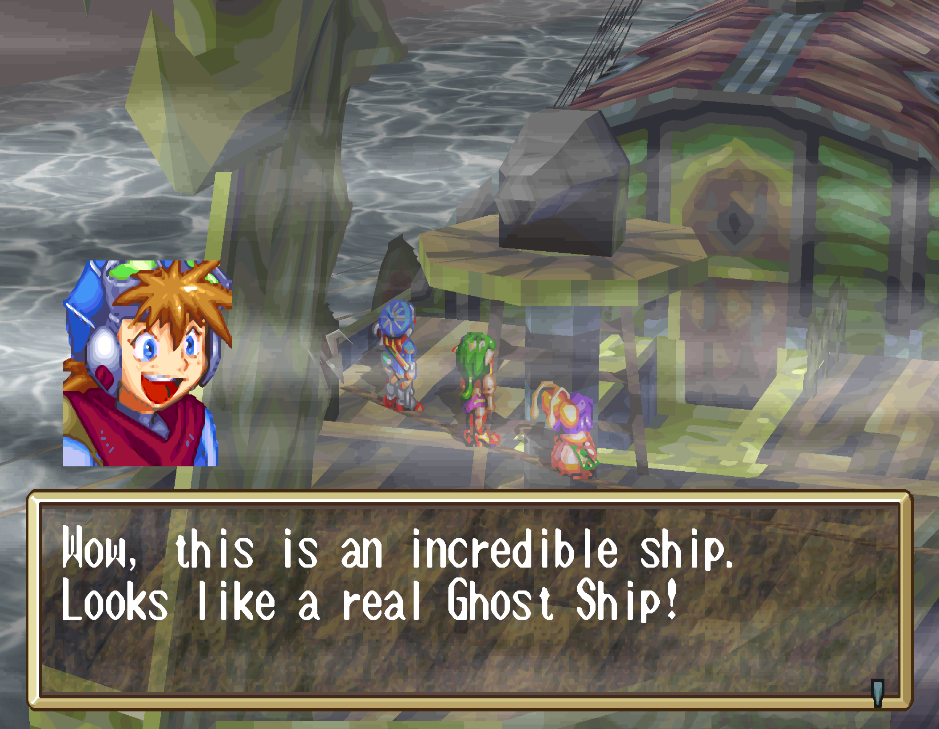
The Ghost Ship is another really easy dungeon to navigate, in the treasure room go through the door with the meat in front of it to advance. Our goal is to reach the Captain's Cabin on the 2F, Feena will stop you and warn you when you reach this location and there will be a save/restore location here too... So you can't really miss it. Inside the Captain's Cabin approach the book on the right side of the desk, it will trigger a scene and throw you into the next boss fight.
Now, the boss on the other hand is much more difficult than the dungeon. You have three targets for this encounter, Right Tentacle, Left Tentacle and Squid King... We need to take out the Right Tentacle first because it will heal the other two targets. The battle will be a bit touch and go initially until you take out the Right Tentacle, once the right one is defeated you'll want to destroy the left one too. By the time the tentacles are dead the fight is easy.
You will probably need to use a couple of restorative items during this boss fight, Sue has an ability called "Rah-rah" which will heal the entire party too. First Aid kits are probably the best thing to use though, they're sold by the shop on the Steamer and you probably already have one or two in your inventory.
Note: If you are struggling with the boss you can grind enemies in the Ghost Ship by saving then exiting the game and loading back up (not with save states). Try using Grenades on the boss too, they will push back attacks for all 3 targets which gives you longer to kill one. Ultimately, my advice is if you fail reload and try again. This is the hardest boss on this entire disc.
After beating the boss exit the ship and watch the scenes with Feena. When you regain control of Justin you'll be in the ship's Crew Quarters, talk with the guy right next to you to go to sleep. Once you wake up go to the ship's deck and watch the scenes. When you're ready to enter New Parm talk with Feena again on the ship's deck and you will be taken into the port.
There isn't much for us to do in the Port, simply exit to the World Map and enter the Town of New Parm for the stuff we need. When you first enter New Parm you'll find a store on the right and a hotel on the left. I recommend you visit the store first, we got a Mana Egg from the previous boss fight which we can use to purchase a spell. Heal (Water) for Sue is a good choice, Sue is in your party for the majority of the game and she is good with magic.
You probably don't need to rest yet, but if you need to stash any items you can do so at the Inn. Once you're ready to proceed with the game head over to the Adventurer's Society in the center of New Parm, it's just off the main road that goes through town.
Speak with the lady behind the counter 3 times to learn the password to Pakon's room in the back. Once you've done that, enter the room and speak with Pakon a couple of times for an unexpected and funny scene.
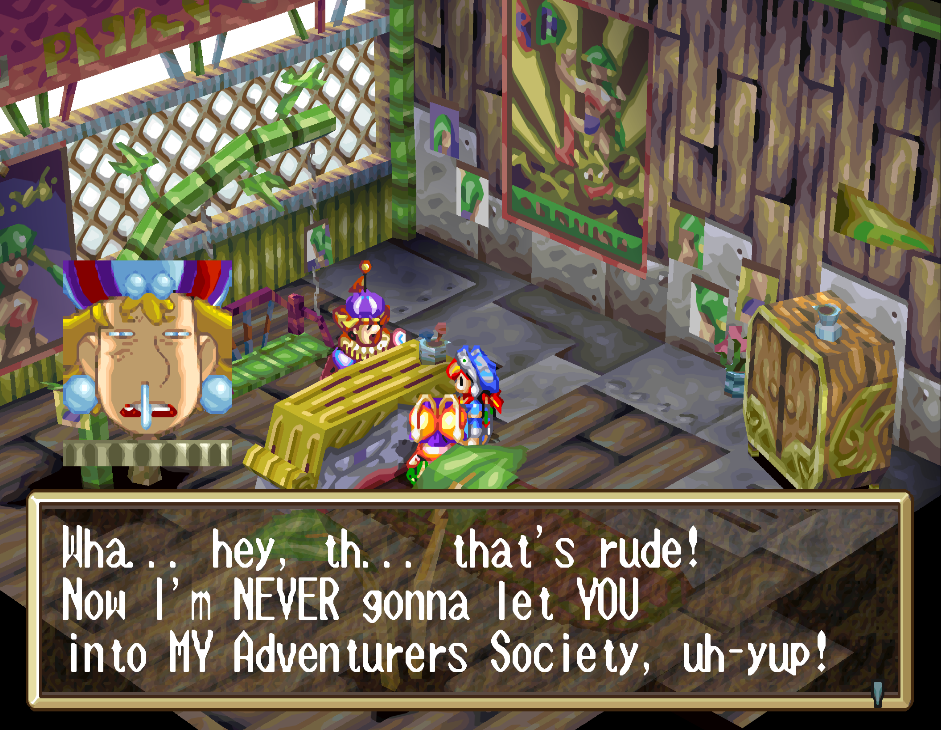
Exhaust all of the dialogue with Pakon and then leave his office. Our next destination is going to be Feena's house; to get there you'll need to visit Merill Road first. Merill Road is a very straightforward area, the only item of importance you'll want to grab from there is the Mana Egg. You can find this egg on the western side of the map. Exit to the north and you can select Feena's house on the World Map.
Go inside of Feena's house and inspect the pink pair of panties hanging up. Feena will enter as you're talking to Sue about them and you'll get a scene with her. Your scene will be interrupted by Pakon, go outside for more dialogue. When you finally regain control of Justin - Feena will be gone and you'll need to return to New Parm to save her!
In the western part of New Parm you'll find a church, the doors are locked though. Head around back and go into the shed building to find a path that leads underground. This dungeon is mostly straightforward, in order to get the Mana Egg here you'll have to use the wheel on the second sluice gate twice. Once to lower the water so you can cross and again to lower the water in the big room for the last time. In the next room don't go down the stairs and instead follow the path around to the third and final sluice gate. Use the wheel on this to drain all of the water.
Follow the route on the bottom level of the big room to the Mana Egg. To exit the dungeon follow the route that goes north on the lower level (pictured below). When you first see this route there will be two squid enemies which run in and out of the hole.
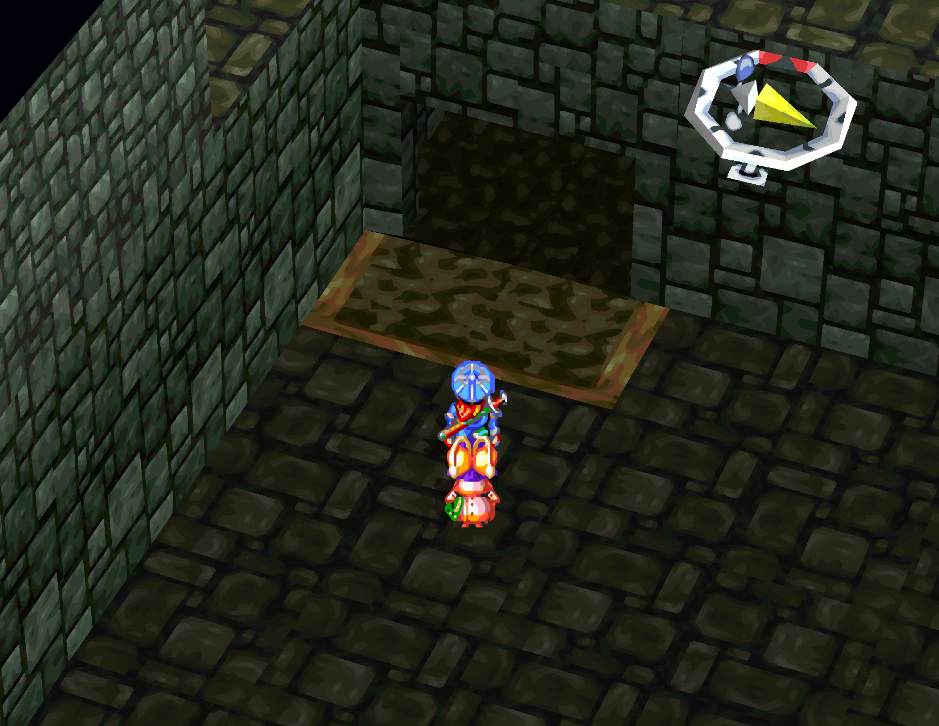
Go through this tunnel in the church basement to reach Feena
When you go this way you will find two sets of stairs, the second set will lead you into the building. Inspect the wall where you see the alert symbol to break it down, the next room will have a save location as well as a big pile of boxes. Save, Recover then run up the pile of boxes to reach the top and enter the church. There is a boss fight coming up against the guy who knocked Justin out before - so be prepared... it's not as hard as the last boss but it still teaches you about an important mechanic in Grandia... knockbacks!
If a character is damaged in combat they will lose action time and will have to wait longer to perform an action... Even worse, if you select a skill to use and you get interrupted before using it - the skill will be cancelled and you will basically lose your entire turn. You probably experienced that on the previous boss too but this boss is even worse for that. Use mostly combos on him since they will execute the fastest once selected. Also, pay attention to when Chang gets an action during battle, use your character furthest away from his action to heal. Since he can interrupt so quickly you want the extra time to make sure your important spells/skills/items go off.
After all the dialogue and scenes you'll wake up the next day, search outside of the tent for Feena and talk to her. Once that's done exit this area and travel to New Parm again. You'll want to purchase some upgrades for Feena and you'll also want to spend the two Mana Eggs that we have. Feena is good with fire, wind and earth magic whereas Justin is good with fire and earth. I don't recommend putting anything but Water on Sue for the time being, just let her be the healer. Eventually you want to put every type of magic on everyone.
Head over to Rangle Mountains on the World Map and clear all of the enemies. Now would be a good time to grind if you haven't already... These three characters will be with you on and off for awhile in this game (with Justin always being your main character) so time spent leveling won't be wasted. While you're in the first part of Rangle Mountains make sure you grab the Mana Egg, Medal of Yore (Y Medal) and the Seed of Moves.
Note: Almost every item in this game has two names, the one you see when you pick it up and the one given in the item menu. It's really annoying sometimes - so the item you see in your menu or that you pick up may not match what I give here. For example, Medal of Yore is Y Medal in your inventory.
Feena will want to camp for the night your first time through the save point area, you will have a meal with everyone where you can hear what's on their mind. Once you're done chatting keep interacting with Justin to conclude the meal. In the second part of the dungeon you'll want to collect a second Mana Egg and Pow Fruit. These Fruits/Seeds will give you permanent stat increases so they're definitely worth getting and using. When you're done in this dungeon exit to the east.
Select Dom Ruins on the map to enter our next dungeon. Before you make it to the ruins you must complete an outside forest area first. The fastest way through here is to go straight south then west. It'll take you right to the entrance for Dom Ruins. You should explore the middle of this map though for the Seed of Speed.
One thing to mention about this forest is you'll encounter Ents here which are highly resistant to physical attacks (except Axes). The game kind of wants you to start using magic at this point (Feena should have Fire attacks which the Ents are weak to).
When you arrive at Dom Ruins you'll find a large open room with a save/recovery station near the bridge. Just a little further into the dungeon you will find the area pictured below.
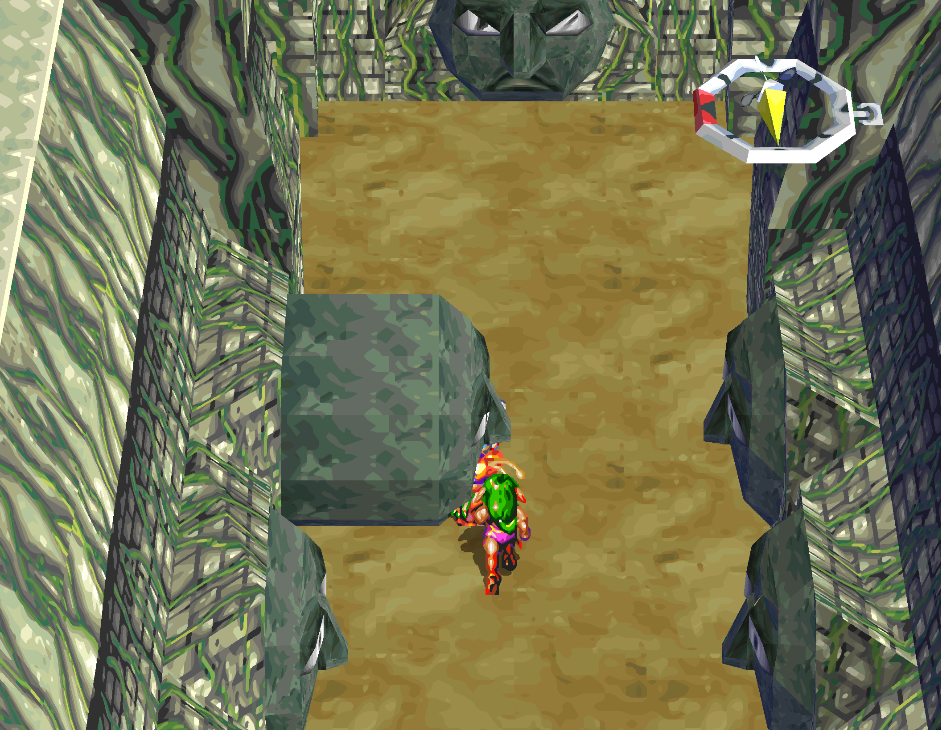
If you haven't already noticed, in Grandia when you use a weapon or magic it will raise the skill of that weapon/magic. So if you want more powerful fire attacks you need to use fire magic. If you want more powerful heals... you need to use Water magic. It doesn't matter if you heal on the field or not, it still gives EXP.
This leads us to our trick, the rock shown above will pop out of the wall and hit you when you run by it... You can run by repeatedly to get hit by this rock then heal yourself using Water magic. Once you're out of MP go south to the save/recover terminal and use the Recover option to restore all of your lost MP. It's up to you how long you want to repeat this, at Water Level 5 you will unlock a group heal called Alheal. I normally grind to get this heal then stop.
Tip: Another easy way to raise healing magic is to burn all your mana healing party members just before you use a recovery shrine.
When you're ready to continue with the dungeon, follow the linear path from the picture above until you reach the outside area with a vine. Dom Ruins is split into two sections and it's divided by a bottomless abyss. Climb the vine and go through the door at the top to continue with the dungeon. You'll find an elevator in the first room you come across, press the button to make it go down or up. Before you ride the elevator down and continue with the dungeon grab the Pow Seed that's on the upper floors.
There's a lot of twists and turns along with items to find but we don't have random encounters so you can explore to your heart's content. You know you're going the right way when you reach the part of the dungeon with a bridge that collapses on you, the room right after the bridge will have a save/recover location. Just before the outside area with the bridge you will find a hallway of murals which all look the same. One mural in an oval room will have its eye closed though, inspect it to open a secret area - inside is a Holy Mace.
Return to the save/recover cone and heal everyone with magic first then use the recovery. Try to get into the habit of doing this since it'll give magic EXP when you do. We're in the final portion of Dom Ruins (1) now, all we need to do to reach the other side is find two buttons and press them (pictured below). One is found on the 1F and the other is found on the 2F, you'll have to ride the nearby elevator to reach it.
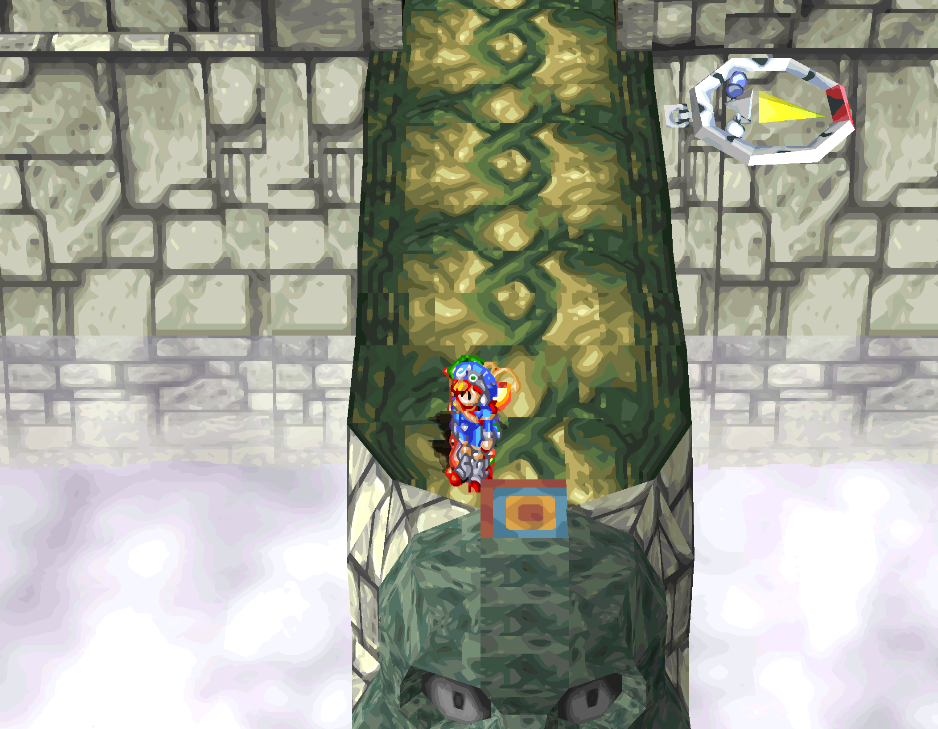
Step on two buttons in Dom Ruins (1) to reach Dom Ruins (2)
After pressing both of the buttons in Dom Ruins (1) you will be able to cross the divide and reach Dom Ruins (2). Look for an outside portion where you climb a vine and go down, this is the way forward. There will be a chest in the room after the vine, this chest has a Mana Egg inside of it. As always, make sure you get it... missing a Mana Egg means 1 less spell.
Keep an eye out while you explore for a room with some Orcs in cages, step on the middle floor panel and press X to release them. Grab the Shell Armor from the cage once they're all dead and equip it. Just past the elevator nearby you'll find another circular room with eye murals. One mural will have a closed eye, inspect the wall to find a big room of enemies with another closed eye mural. Do this again to find a chest with a Magic Lamp. It's an item that restores MP every time you use it, but it can break when used. I recommend you use this sooner rather than later because the game throws a lot of recovery items at you later on.
From here take the nearby elevator downstairs to a save/recover location as well as a Stash. Store anything you don't need to make room for boss loot then head into the next room to face the boss of Dom Ruins. My advice for this boss is to use Earth Magic's Diggin spell to raise your melee defense. That makes things pretty easy, especially if you're around level 9/10 like I was.
Once Ganymede is defeated visit Liete in the adjacent room and learn more about Alent and where we're going. After doing that... you have to backtrack out of this dungeon on foot. When you reach the forest area before the ruins you will get a scene - after that you'll be taken back to Feena's house.
When you regain control of Justin exit Feena's house and inspect the fence behind it. Head through the fence and into the Herb Mountains. This place is a maze, our goal is to find the Red Sulfa Weed, it's in the middle of the mountain (the summit) and in my opinion not very hard to find... the hard part (for me) was getting back out of this area and back to Feena's house. Upon entering Feena's house again you'll get another scene with the kid. When you awake the next morning go outside and talk with the kid for yet another scene.
You'll be captured and taken to the Garlyle Base, when you finally regain control of Justin it will be in jail. Pick up the pipe in the back of the cell and watch the entertaining scene to escape. Speak with Feena down the hall then go into the guard room and knock out the other guard for the Jail Key. Leave the room for another scene.
Captured again, this time though someone named Leen will come by and leave the Jail Key for you. Use that to open the jail cell nearby with Sue and Feena, now we have the party back together! Go up the stairs near the place we got captured and you'll find a save/recover location along with some barrels we can run up to reach the air ducts. You can stop in many locations throughout the air ducts to hear some conversations, just look for the vents.
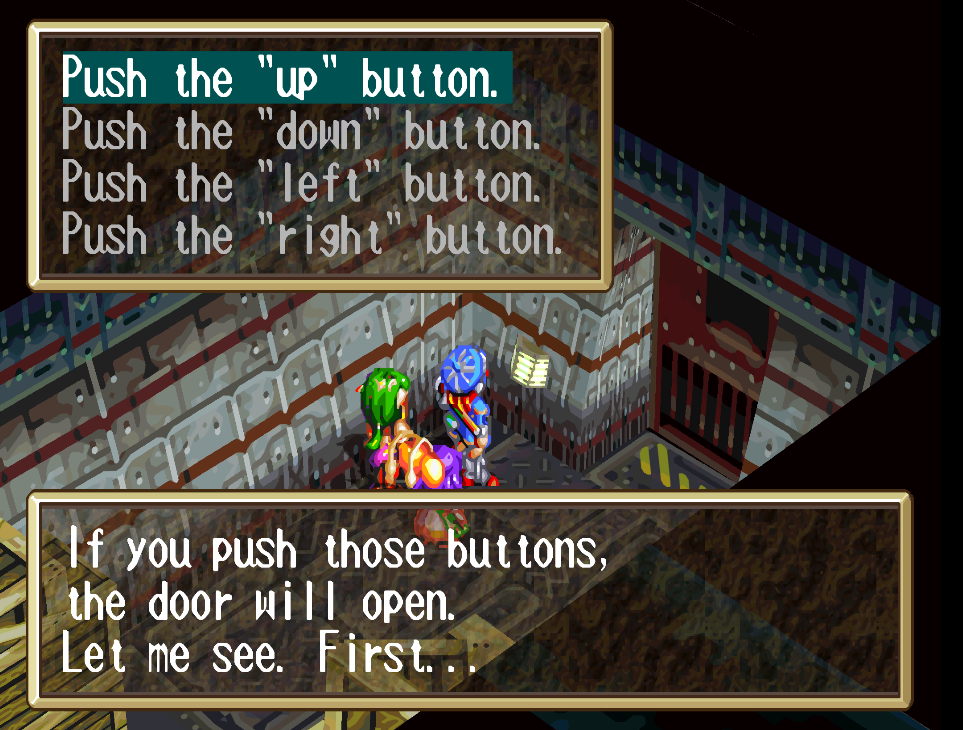
Our destination though is at the very end of the duct, you'll overhear a conversation with Mullen, Leen and the Mutant kid from before. When that's over circle around this room and go through another air duct to reach the locked door shown below. This door requires a certain combination to open... you could just input the combination that I give you below... but I recommend you visit the locker room to see the scene with the combo (pictured below).
Note: Click to enlarge most pictures that you find on my website.
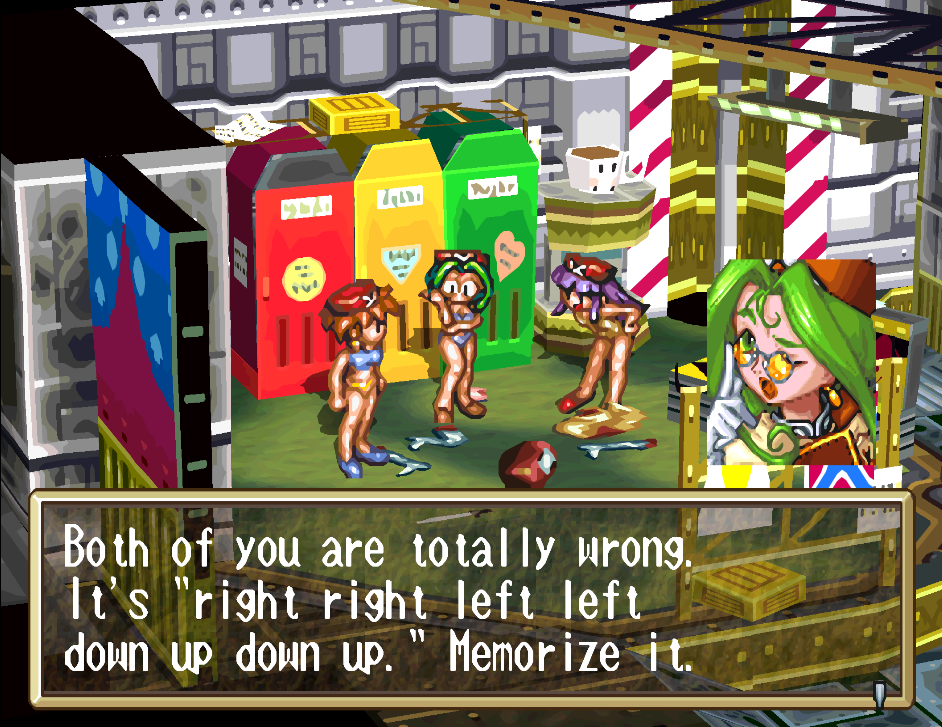
Basically, to get the code you will climb through more air ducts until you find the locker room. Here you'll have a scene with the three female commanders who have been giving you trouble thus far. They'll be getting undressed and during that scene they will reveal the code to the door.
The correct passcode is Right, Right, Left, Left, Down, Up, Down, Up. After inputting it at the locked door head down the stairs to continue with the dungeon.
Continue to Grandia Walkthrough Chapter 2