
SEBEC Route (Chapter 2) - Persona 1 Guides
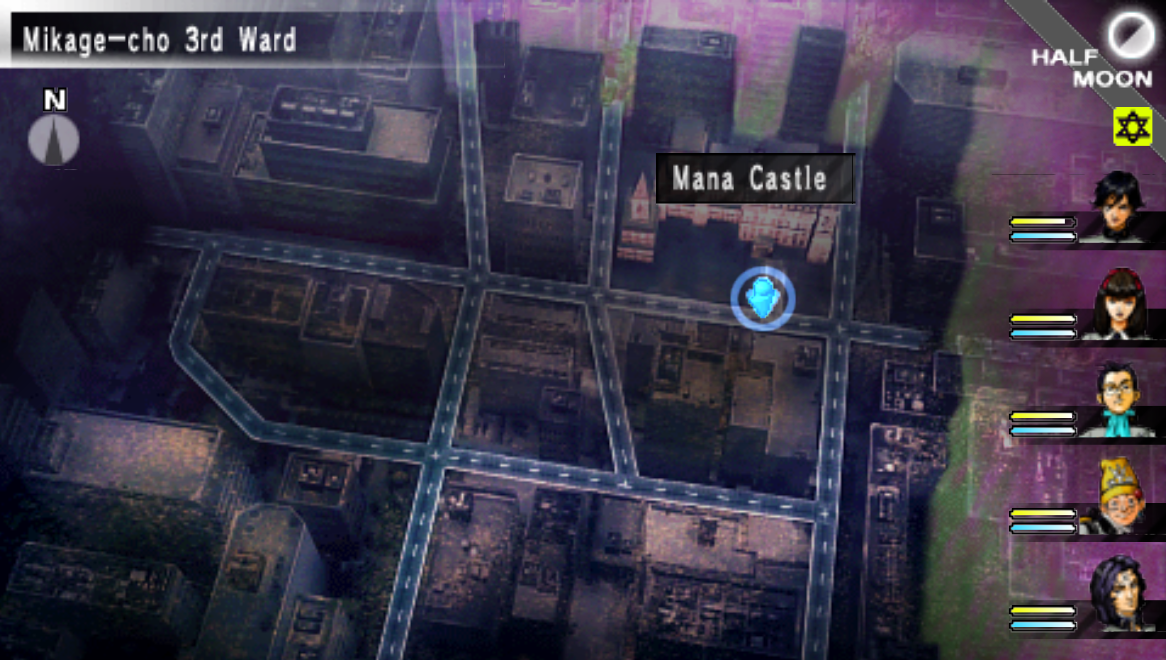
During our conversation with Chisato inside of Kama Palace we learned our next destination, Mana Castle. You can find Mana Castle to the north of the Black Market on the World Map (pictured above). All you need to do inside of Mana Castle right now is watch the short scene involving Aki - we're done here after that.
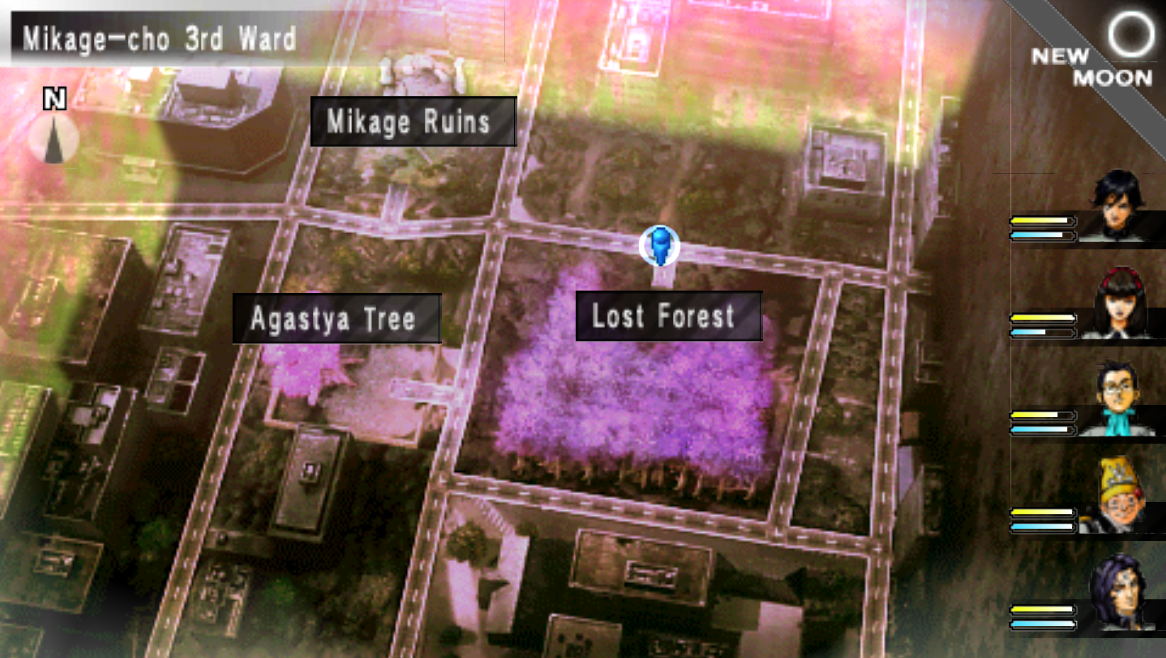
Our next stop is the Lost Forest which is on the other side of the map, you'll have to go through the Subway again in order to get to there. You can find the Lost Forest north of the West Subway Entrance; it's a big pink forest which is difficult to miss. If you haven't spent time recently upgrading your Personas, now would be a good time to do it too.
If you're having trouble understanding the Persona system and what makes a good Persona and why I recommend you check out my Best Personas (Persona 1) Guide. That page will give you a list of the best Personas in the game (in my opinion) and explain why I chose the Personas I did so that you can make these decisions yourself.
When you're ready to proceed with the story enter the Lost Forest dungeon.
Note: You will not be able to get into the Lost Forest unless you watch the scene at the Mana Castle - trust me I tried.
The Lost Forest dungeon will introduce you to a new dungeon mechanics, spinning tiles. At first these tiles may seem a bit confusing but they're actually extremely easy to deal with. Each time you step on this tile it'll rotate you one turn - all you need to do is back up onto the tile repeatedly until you are facing the direction you want to go.
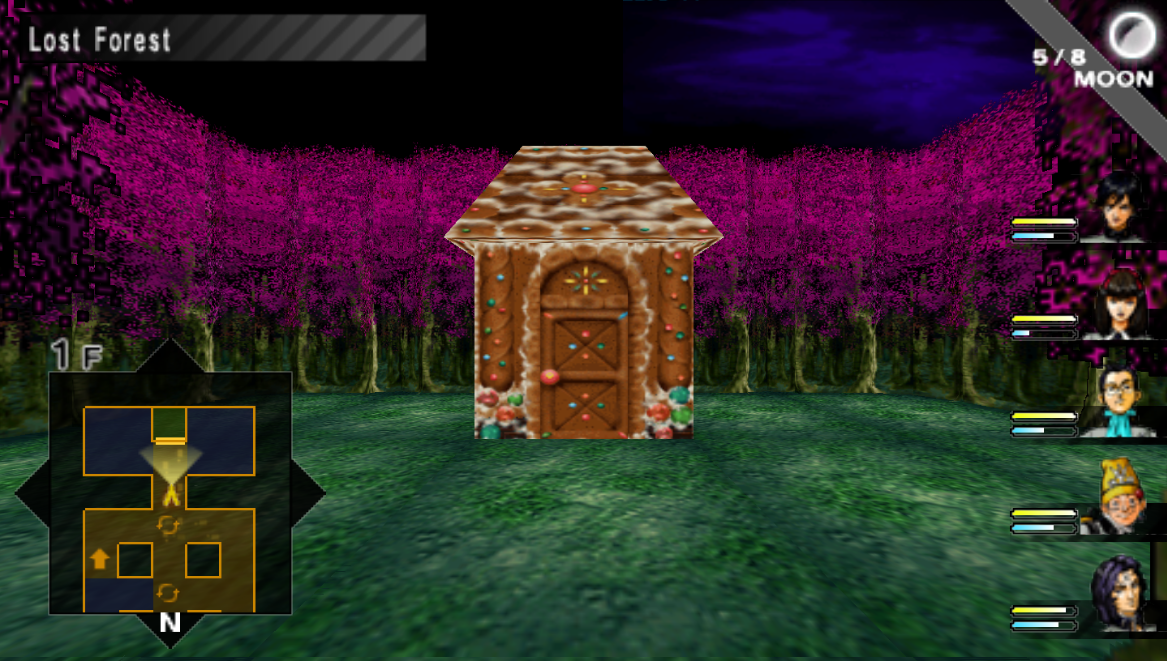
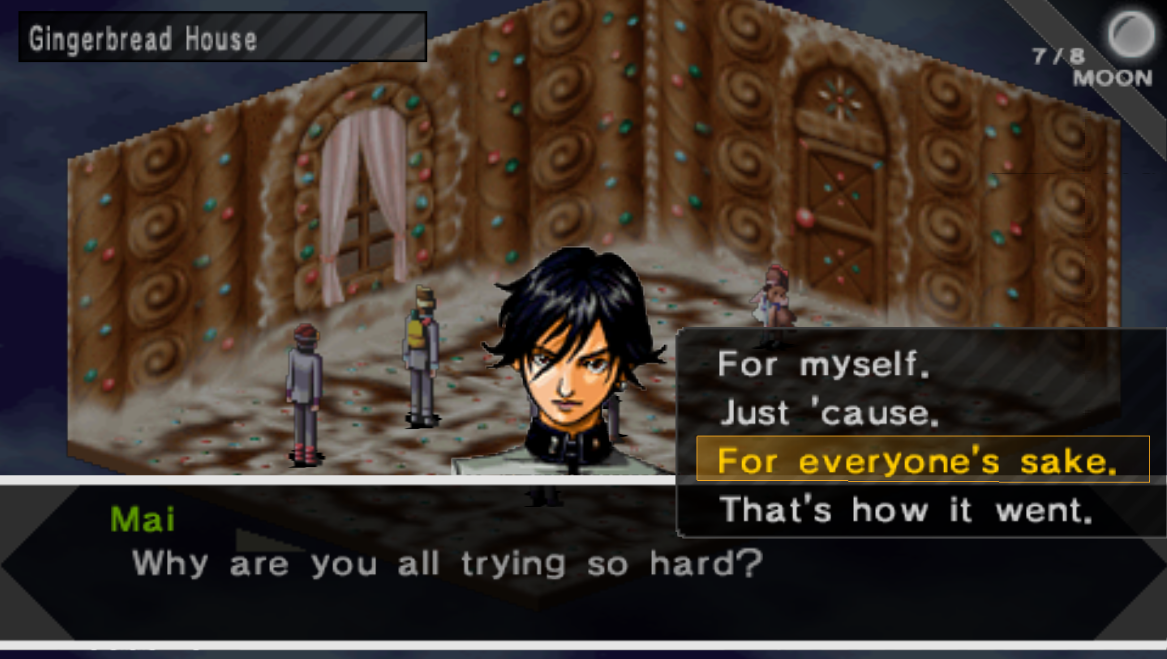
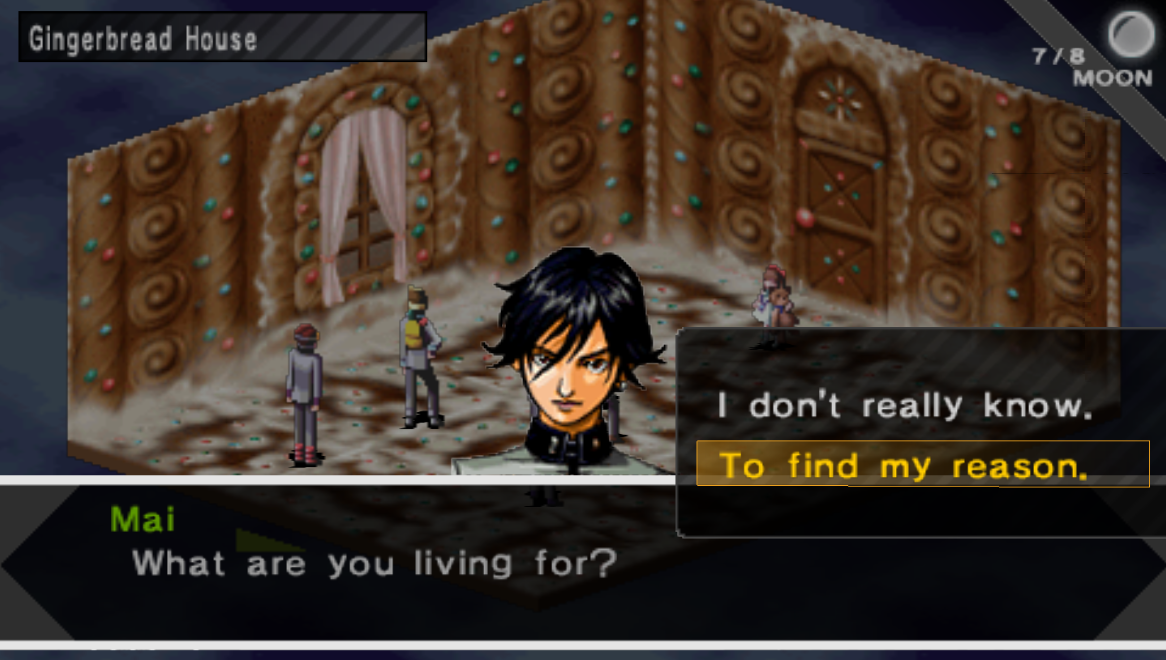
Step on the tile and it'll turn you then spit you out in a new direction, back up once and the tile will turn you again, back up onto it again and you'll turn again. Do this every time until you're facing the direction you want to go. That's all there is to it! At the end of the Lost Forest dungeon you will find a Gingerbread House (pictured below) which has a girl in white named Mai inside.
Important!!! This conversation with Mai is extremely important! If you do not choose the right dialogue options you will have a boss fight here and you'll get the Bad Ending when you reach the Deva Yuga dungeon later on. This means you'll also miss about 6 dungeons of the main story because the game ends prematurely if you choose the wrong dialogue options here.
If you want the Good Ending then make sure you choose the following dialogue lines when talking with Mai inside of the Gingerbread Hut:
Mai Correct Dialogue Options:
1. Stop hiding.
2. For everyone's sake.
3. To find my reason.
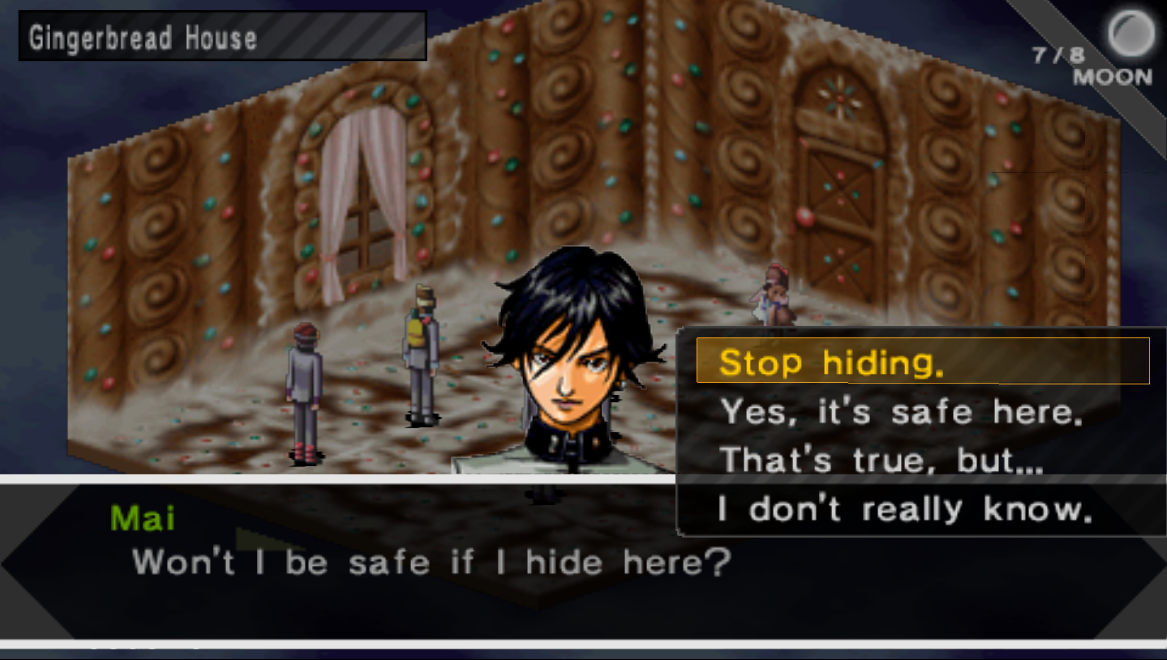
The dialogue option that's highlighted is the correct one.
Doing everything right means Mai will give you the Compact Half item that we came here for and there will be no fighting. If you choose the wrong dialogue options you'll have a boss fight against Mr. Bear after which you'll get the Compact Half item. That's all we need in this dungeon so now it's time to back track out of it and return to the Mana Castle from earlier.
Use the Compact Half at the entrance of the Mana Castle to get inside. Much like nearly every other dungeon in this game, the Mana Castle is pretty straight forward. The dungeons in this game are starting to get a lot larger but they are easy to navigate since they're all one-lane hallways. My advice to you if you're having a hard time navigating the dungeon is to step on every tile once so it's explored on the map. It's no joke how much easier navigating the dungeon gets when the entire map is filled in and you can see every route available.
Our destination is Mana Castle 5F - specifically the part of this floor with the dark rooms that you have to navigate. The path branches on the 3rd floor, one route (southern stairs) will go up to Mana Castle 5F that has a room filled with chests, some damage you and/or lower your HP to 1 and others have loot. Another route will take you to Mana Castle 4F which will have a dark room and leads to the end of this dungeon.
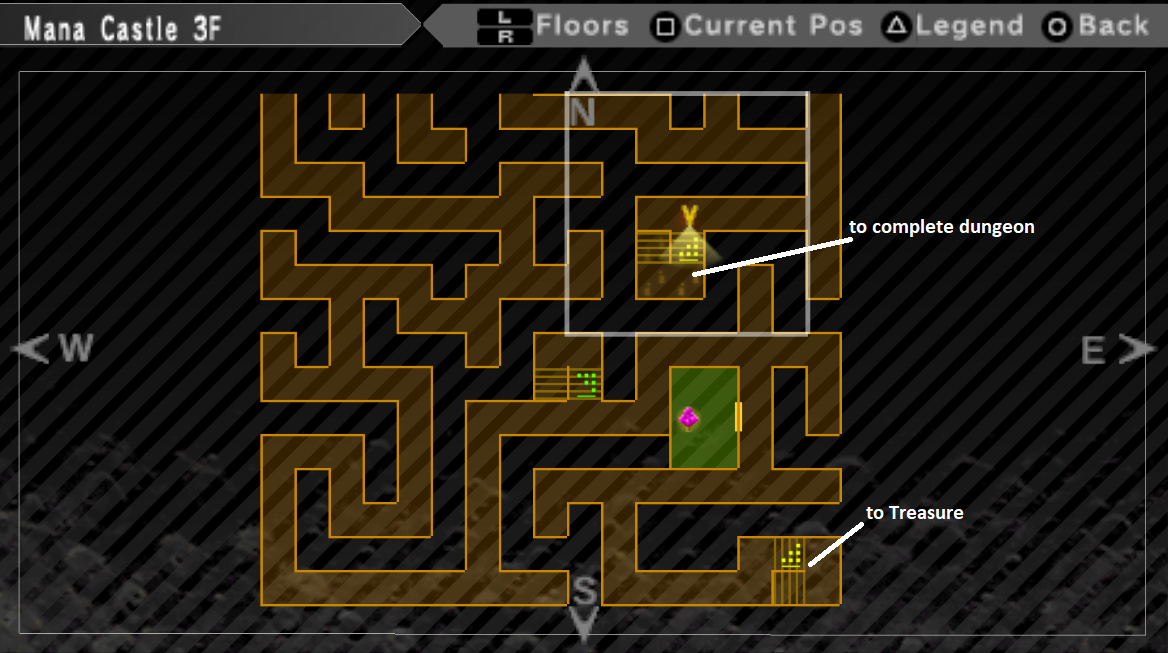
Take the northern set of stairs on Mana Castle 3F to reach the end
At the end of the Mana Castle dungeon you'll find a boss waiting for you named Saurva. You'll start the fight with 3 characters badly wounded, a Media, Mediarahan or Mediarama skill on one of your Personas will help out a lot for situations like this. This boss is weak to both Fire and Wind damage so unload on him with those two elements.
Once Saurva is defeated there will be some scenes after which all that's left to do is exit Mana Castle and head south to the Haunted Mansion. You'll find the Haunted Mansion dungeon on the same map as the Black Market, it's southeast of the Black Market right next to the Agastya Tree.
Tip: The Haunted Mansion is one of the best locations to grind some levels on your characters in my opinion. Not many of the mobs here have one-shot mechanics and they give great EXP. Also many mobs in this dungeon are weak to Gravity, Blast and Nuclear attacks which is likely to be a primary source of damage for your characters in this level range.
Inside of the Haunted Mansion you'll want to climb the stairs in the northwest on the 1F and then climb the central stairs on the 2F. The final room of this dungeon is on the 3F, here is where you'll encounter a demon named Hariti and you'll be given the option to fight or not to fight. You should choose "Lower your weapons." because that will get you more Totems at the end of this game for Ultimate Personas.
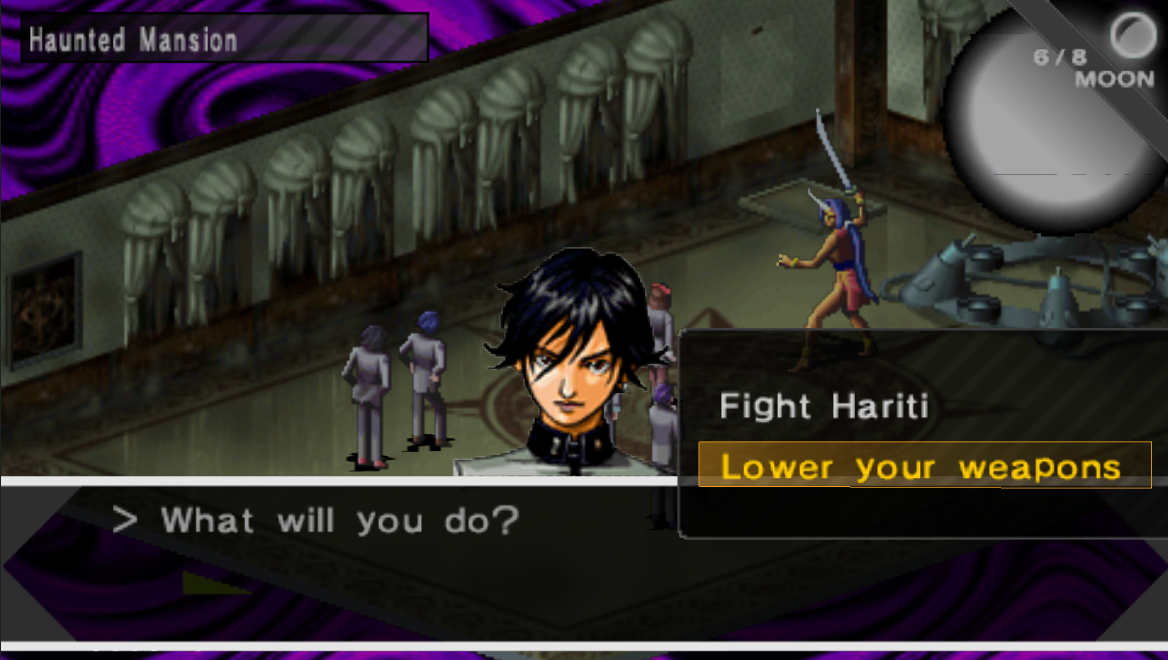
Choosing to fight this demon will result in a very easy boss fight with everyone in your party except Maki. When the fight is over there will be some dialogue after which your entire party will be transported to the next dungeon, Deva Yuga. When you first arrive in this dungeon you'll find a Yin & Yang Shop, Velvet Room, Trish's Fountain and an Agastya Tree to save your game.
Depending on what you want to do, now would be a good time to create new Personas in the Velvet Room and collect Spell Cards from enemies. As per usual, if you'd like more information on the Contact System or if you'd like a complete monster list with information about how to raise Happy and Eager - follow that link instead.
Also, check out my Best Personas in Persona 1 Guide for info about which Personas are even worth making. Not all Personas are made equal in this game and some are significantly better than others. Last but not least check out my Persona Item Fusion Guide if you'd like to know which Totems make which Personas. You've collected a few items thus far that can make unique Personas so giving that list a once over isn't a bad idea.
When you're ready to beat Deva Yuga hop into the elevator and ride it up to Deva Yuga 3F. From here you'll want to take the stairs down to Deva Yuga 1F and then take the stairs back up to Deva Yuga 5F. You'll find numerous side rooms along the way which will have treasures inside of them - all of them are optional. The dungeon itself is quite linear so I don't think you need any guidance as far as direction goes.
On Deva Yuga 5F you'll want to pull the lever found on the wall in the east to unlock the room in the center. In the central room you'll want to pull a second lever which will create a pitfall in the middle of the room; fall through the newly created pitfall to continue. You'll find an Agastya Tree room as well as a Velvet Room - use either of these if you want then continue upstairs.
Upstairs you'll find a light puzzle which requires you to step on the floor tiles and light up the correct ones. You need to make a + shape on the floor with the North/East/South/West rows lit up and the rest dark. To see how this is done check out my Deva Yuga 6F Light Puzzle Video Walkthrough.
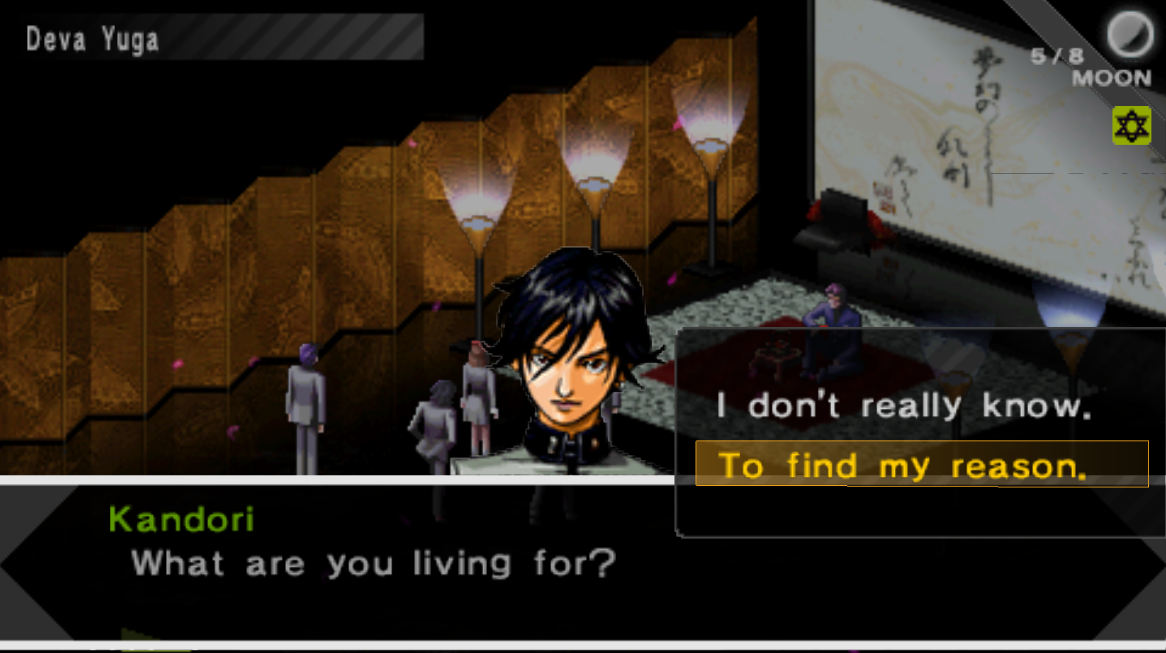
Make sure to choose the "To find my reason" answer when Kandori asks you a question
Inside the final room on Deva Yuga 6F you'll find Kandori. During the dialogue with him you'll want to select "To find my reason." when he asks you a question. This is one of those dialogue lines that matters a lot in the game, choosing this answer will get you additional items that grant Ultimate Personas later in the game.
During round one you'll fight Kandori, once you beat him you'll fight God Kandori who is a bit harder. If you're struggling with this boss I recommend you do some more grinding for extra level ups or consult my Best Personas List for information about which Personas you should be using. Make will temporarily leave your party once you beat this boss.
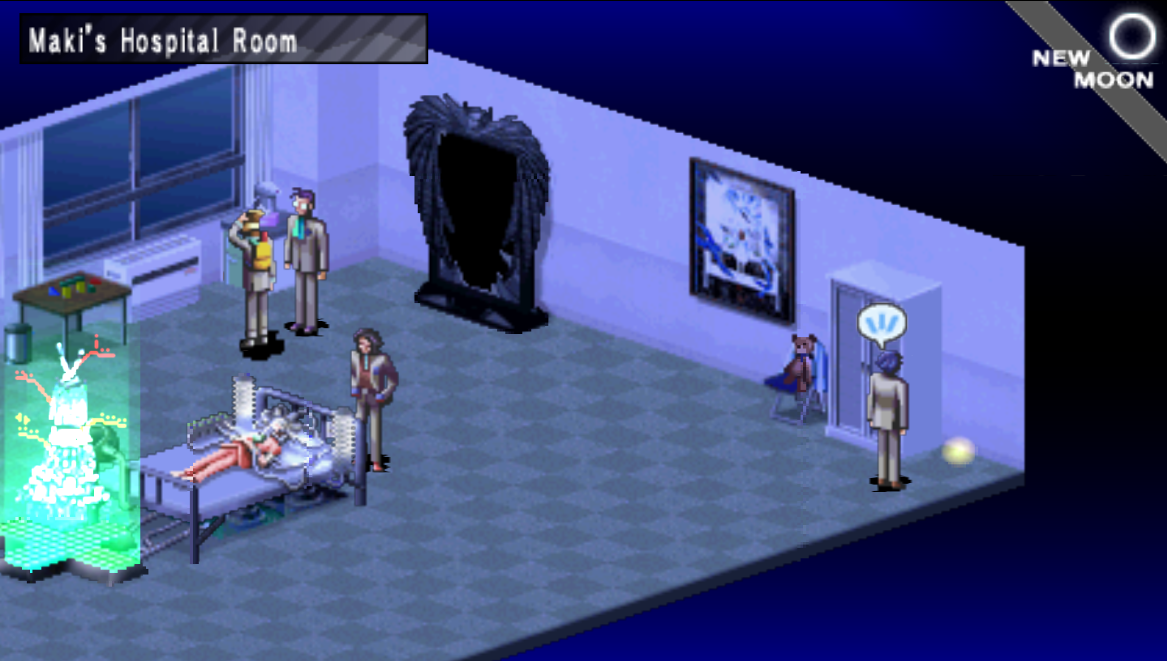
After you defeat both versions of Kandori you'll want to return the way you came until you reach the area on Deva Yuga 4F with the Velvet Room and Agastya Tree room. South of these two rooms you'll find a hallway with a pitfall in it - take this pitfall to return to the 3F. Right in front of where you land after taking this pitfall there will be a room, go inside and you'll find yourself in Maki's Hospital Room.
Use my map screenshot below if you are having trouble finding Maki's Hospital Room.

Inside of the Hospital Room there will be some dialogue, if you fought Mr. Bear earlier in the game when you visited the Lost Forest then this is where your game will end. You'll receive the Bad Ending and you will not be able to continue with the rest of the story. If you're confused about what dialogue I am talking about, it's at the top of this page.
When you enter the Gingerbread House inside of the Lost Forest you'll meet a girl named Mai and you'll have to answer her questions correctly. All 3 of the correct answers are above. If you answer incorrectly to any of those questions then this is where your game ends.
For those of you who did the dialogue right in the Lost Forest earlier, you'll receive the Broken Compact and Green Compact. After you receive these two items you'll regain control of your character inside of Maki's Hospital Room. There will be a sparkle on the right hand side of this room next to the bookshelf (pictured below) - interact with this sparkle to continue with the main story.
When you pick up the Chaos Mirror Shard you'll automatically be teleported to the next dungeon, Lost Forest. Our destination is the Gingerbread House inside of this dungeon where we met Mai earlier. Since you've already been through this place once already I won't go into details about how to navigate it again.
Tip: Various shops have had their wares improved now that we finished Deva Yuga, you can leave the Lost Forest to do some shopping now or wait until we complete this dungeon.
After you speak with Mai inside of the Gingerbread House she will unlock the door behind her for you that leads deeper into the forest. Our destination inside of the Inner Lost Forest is a room in the center which is where you'll find Maki in a hospital bed. You'll get some dialogue with Maki inside this room and there will be another important moment where you must answer correctly.
Make sure you choose the dialogue option, "Don't hide like that." when Maki asks you, this will result in you getting more Totems for Ultimate Personas when we visit the next dungeon. Regardless of your answer Maki will rejoin your party at this time.
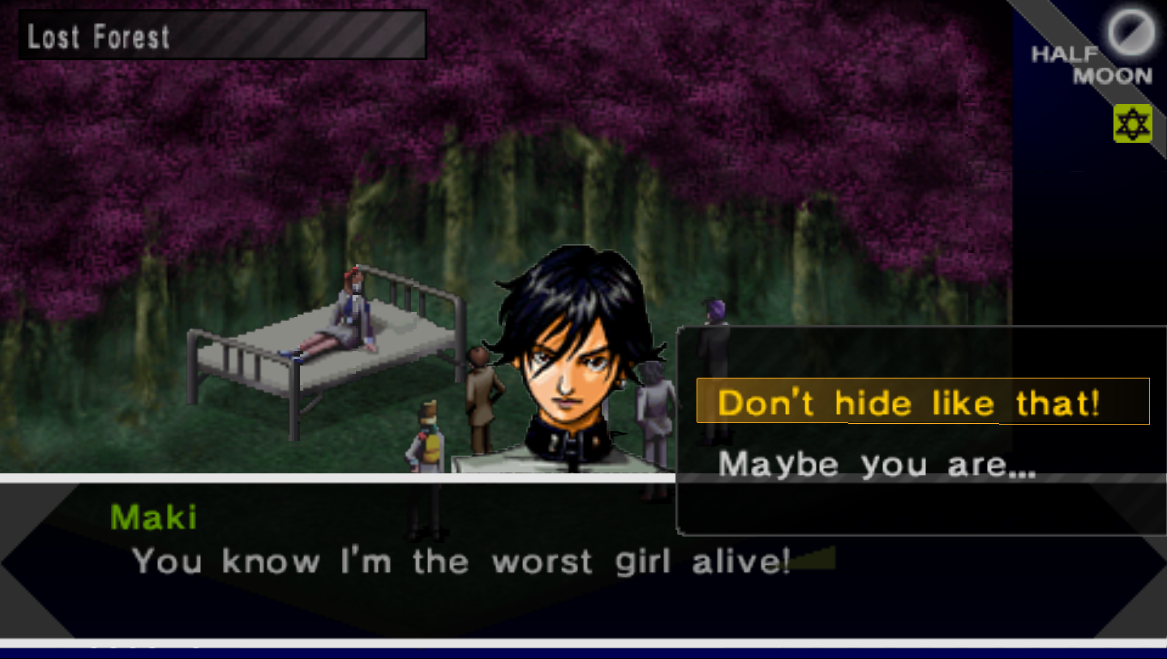
Make sure to choose "Don't hide like that!" as a dialogue option
Return to the Gingerbread House in the Lost Forest and talk with Mai again - once you've done this you can exit the forest for good. Our next destination is Alaya Shrine, we've been here a few times already so it shouldn't be too hard to find. There will be some scenes at the Alaya Shrine after which you'll be tasked with beating the next dungeon, Alaya Cavern, with only Maki and the Main Character.
Since we're limited to only two party members for this dungeon it's going to be quite difficult. There will be many enemies inside of this dungeon that use one-shot mechanics and that will result in an instant game over if they hit both of your characters. You have a few methods of avoiding this happening to you...
How to survive Alaya Cavern:
1. Level up your characters so that they're higher level than the enemies then use Estoma to avoid combat entirely.
2. Use the Contact System to collect Spell Cards of each enemy. Then you can use Contact during battle to make them leave without ever fighting them.
3. Raise your character's Agility and use powerful spells to defeat the enemies before they have a chance to act during battle.
If you find Alaya Cavern too difficult your first time here you should talk with the butterfly inside Alaya Shrine to reform your party and grind some more.
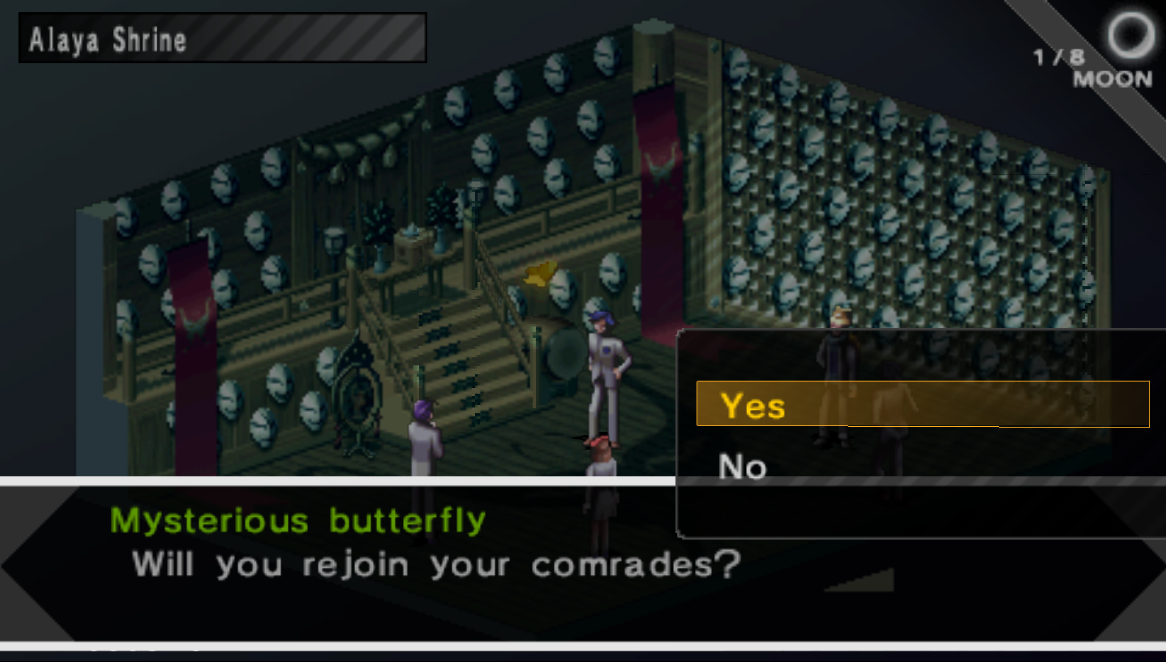
Talk to the Mysterious Butterfly to get back your other party members.
Some other things I recommend you do to prepare for Alaya Shrine is to purchase new gear from the shops inside the malls and also from the Casinos. The Judgment 1999 Casino inside of the Mikage Sun Mall recently restocked with new items, in particular it sells 8 different tablets that will grant your Personas various skills during fusions.
Below are all 8 Tablets that are available inside the Mikage Sun Mall Judgment 1999 Casino:
Evil Fire Tablet: Deals heavy Fire damage to all foes.
Evil Ice Tablet: Deals heavy Ice damage to all foes.
Evil Wind Tablet: Deals heavy Wind damage to all foes.
Evil Quake Tablet: Deals heavy Earth damage to all foes.
Scorching Tablet: Deals heavy Nuclear damage to all foes.
Gale Tablet: Deals heavy Blast damage to all foes.
Wall Tablet: Deals heavy Gravity damage to all foes.
Flash Tablet: Deals heavy Elec damage to all foes.
Half Moon Tablet: Restores full HP to all allies.
The 9th Tablet mentioned above, Half Moon Tablet, isn't sold at the Casino. It's actually sold at the Satomi Tadashi item store inside of the Mikage Sun Mall. You can also buy this item at various other stores throughout the game too, it's one I buy with every playthrough to fuse into at least one Persona.
Hopefully this is enough information to make the Alaya Cavern dungeon easier for you - it's a very difficult dungeon that will require more than just level grinding to beat. Our destination inside of the Alaya Cavern dungeon is going to be Alaya Cavern B8F, here you'll find an Agastya Tree Room along with a room that has... you inside of it.
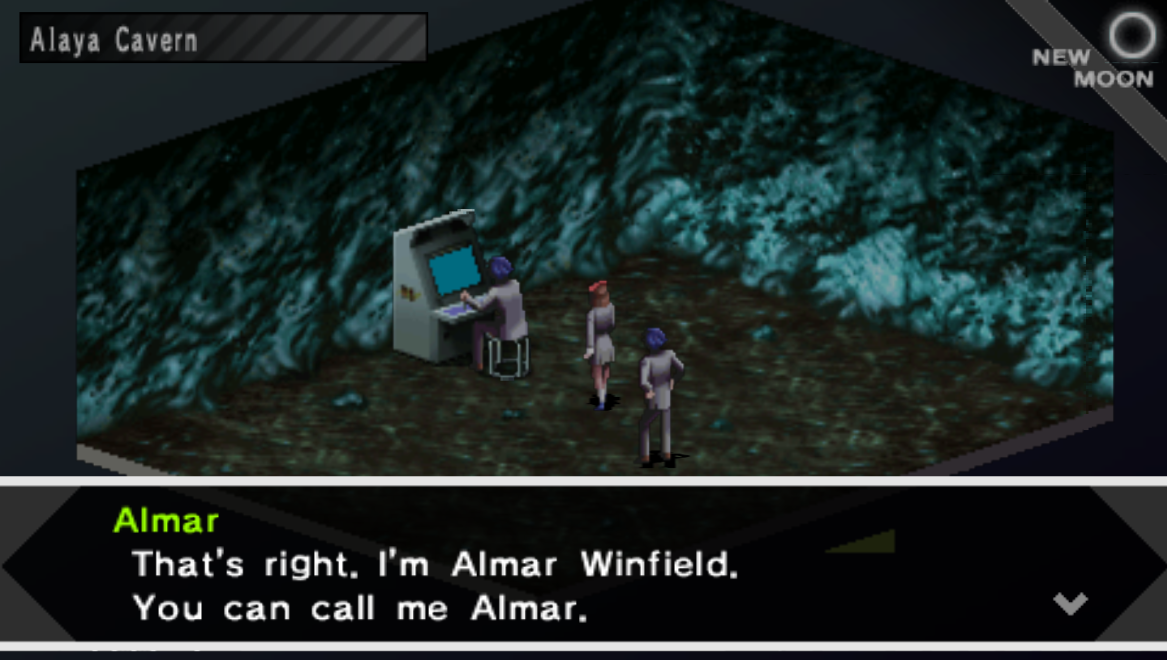
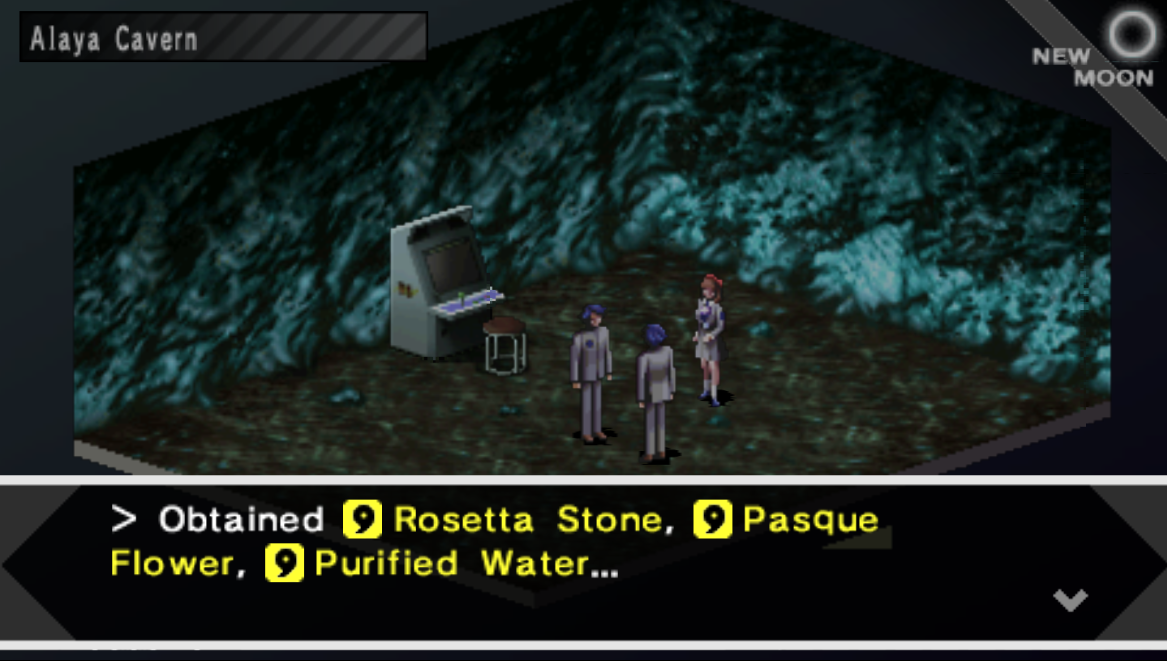
There will be some dialogue in this room during which you will get some scenes involving each of the six events I have listed below. You'll witness your answers to each of these events and you will be given a reward if you chose the correct path. One of the rewards is tied to 2 of these events I believe because you only get 5 items in total, not 6.
1. Helped the nurse at the Reception Desk during Mikage Hospital dungeon.
2. Pressed the red button and saved Dr. Nicholai inside the Deva System Chamber of the SEBEC Building.
3. You told the Harem Queen that "Maki's is better" when asked about the paintings.
4. Inside the Haunted Mansion you chose not to fight Hariti, who turned out to be Maki's mother.
5. You told Kandori that your reason or living was, "To find my reason" when he asked you in Deva Yuga.
6. You told Maki "Don't hide like that" when she asked you a question inside the Inner Lost Forest.
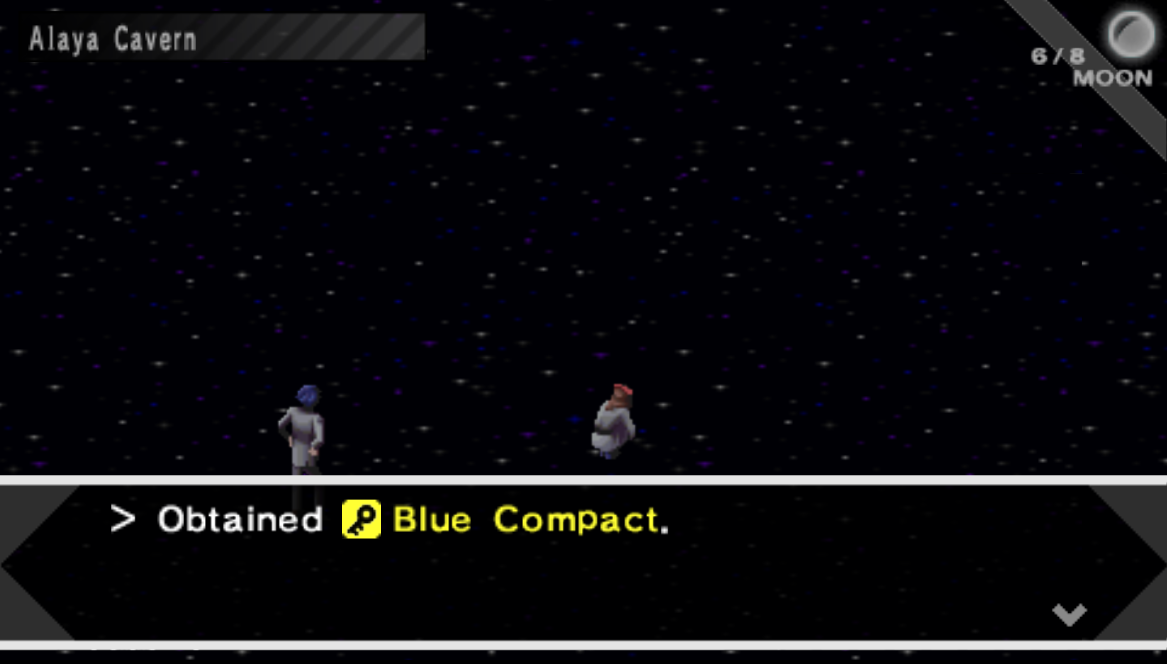
Once you get what you need out of this room you'll want to go down one more floor to Alaya Cavern B9F. There will be a big room on this floor where you'll have a scene and some dialogue. After all is said and done Maki will get the Blue Compact which is the final item we need from this dungeon.
Make your way out of the Alaya Cavern and join up with your other party members. The next dungeon is going to be the last dungeon of the main story so you'll want to make sure you're prepared for it before going in. Of course if you go in and realize it's too hard you can always leave to grind then come back.
Since we're very close to the end of this game now is a great time to get some better Personas, gear and whatever else you need. I recommend that you visit every mall available and check each of the armor/weapon shops. Those of you who don't mind gambling should also hit up Judgment 1999 because each of them have some great items for sale. Keep in mind that every Judgment 1999 sells a different set of wares so you should check all of them.
The Mikage Sun Mall Judgement 1999 Casino will sell a bunch of Totems which can be used in the fusion process to get some rare Personas. For more information about each of the Totems and what Personas they make you should check out my Persona Item Fusion Guide.
If you need more information about which are the best Personas in Persona 1 or how the contact system in this game works follow the links provided. Alternatively if you want a list of all the monsters in this game and which dialogue options you need to choose to raise their Eager/Happy emotions check out my Demon Contact Dialogue Choices Guide.
With all of that said, whenever you're ready to continue with the final dungeon you'll want to head over to St. Hermelin High and into the Library on the third floor.
Continue to SEBEC Route Chapter 3 Walkthrough
Return to SEBEC Route Chapter 1 Walkthrough