
Mega Man Legends Walkthrough Chapter 3
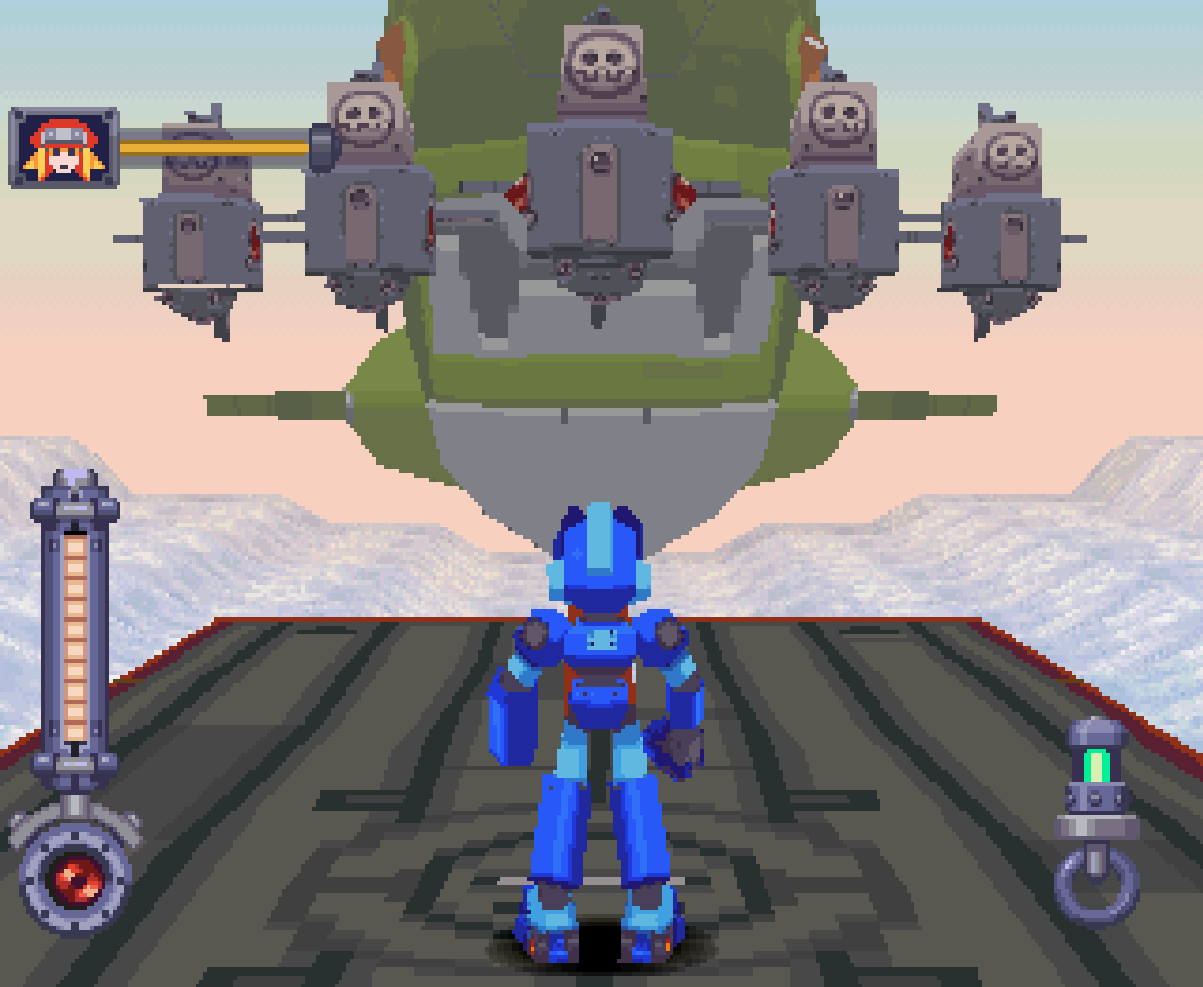
Your first aerial battle is going to be against a pack of 5 robots (pictured above). There isn't much to say except for lock onto them and shoot at them to eliminate them. If it's not already obvious you'll want to protect the Flutter to the best of your ability - we're going to be fighting a few boss battles in the sky right now and your HP will carry over from one battle to the next.
Once you've eliminated the 5 robot ships you'll have to fight against the Gesselshaft itself. In order to damage this big ship you will have to hit specific parts of it. The hull, the wings and the skull marking on the ship are the vulnerable parts that you should be aiming at. Roll will move the Flutter around during this entire fight giving you an opportunity to shoot at various parts of the ship.
If you're having trouble hitting the vulnerable parts of this ship don't forget to hold down R2 which will allow you to aim much more accurately. Also you can always swap out your Buster Parts during combat if you need some extra range on your attacks.
Destroying the cannons on the side of the Gesselshaft
When Roll moves the Flutter to the sides of the Gesselshaft I recommend you destroy the cannons first before shooting at the wings. This will drastically reduce the damage that the Gesselshaft can do to you and since we can't heal in between these boss fights it's very important to keep our health up.
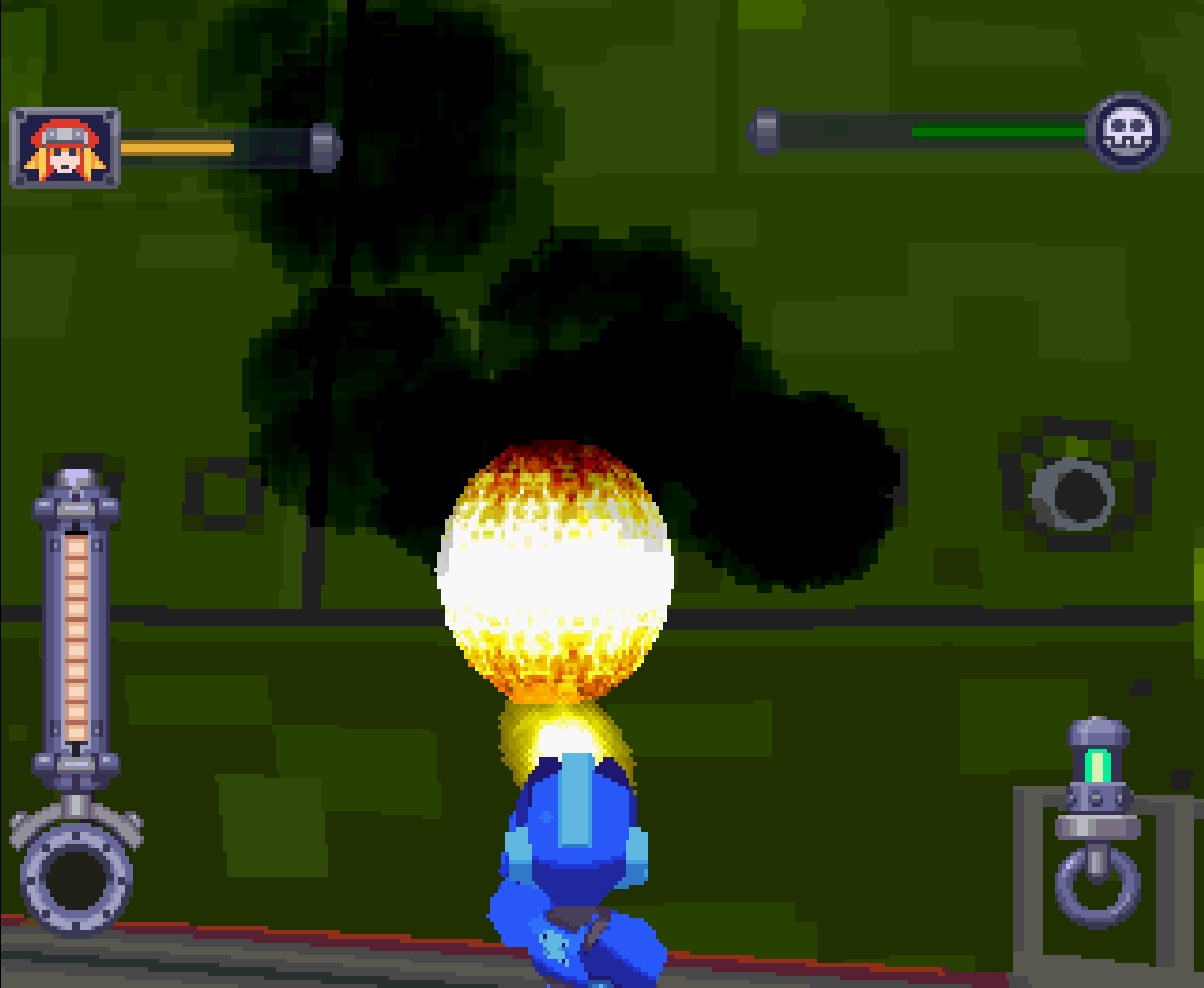
Keep in mind too that you can shoot the bombs out of the air that are being shot at you if you absolutely need to. Ideally you'll want to keep the Flutter's health above half before entering into the next and final battle. After you defeat the Gesselshaft you'll get a short cutscene after which you'll be thrown into the last of 3 battles against Fokkerwolf (pictured below).
This boss fight will be the hardest of the 3 and you should expect the Flutter to take some serious damage throughout. When the boss circles the Flutter he'll launch 3 rockets at you which you can shoot out of the sky - this is the only avoidable damage during the whole fight.
What I recommend you do for this fight is to focus entirely on dealing damage to the boss and ignore everything else. You will have 2 opportunities to deal a lot of damage to the boss, during one attack he will fly over top of the ship while firing machine guns (pictured above). With the right aiming you can hit him a few times while he flies overhead.
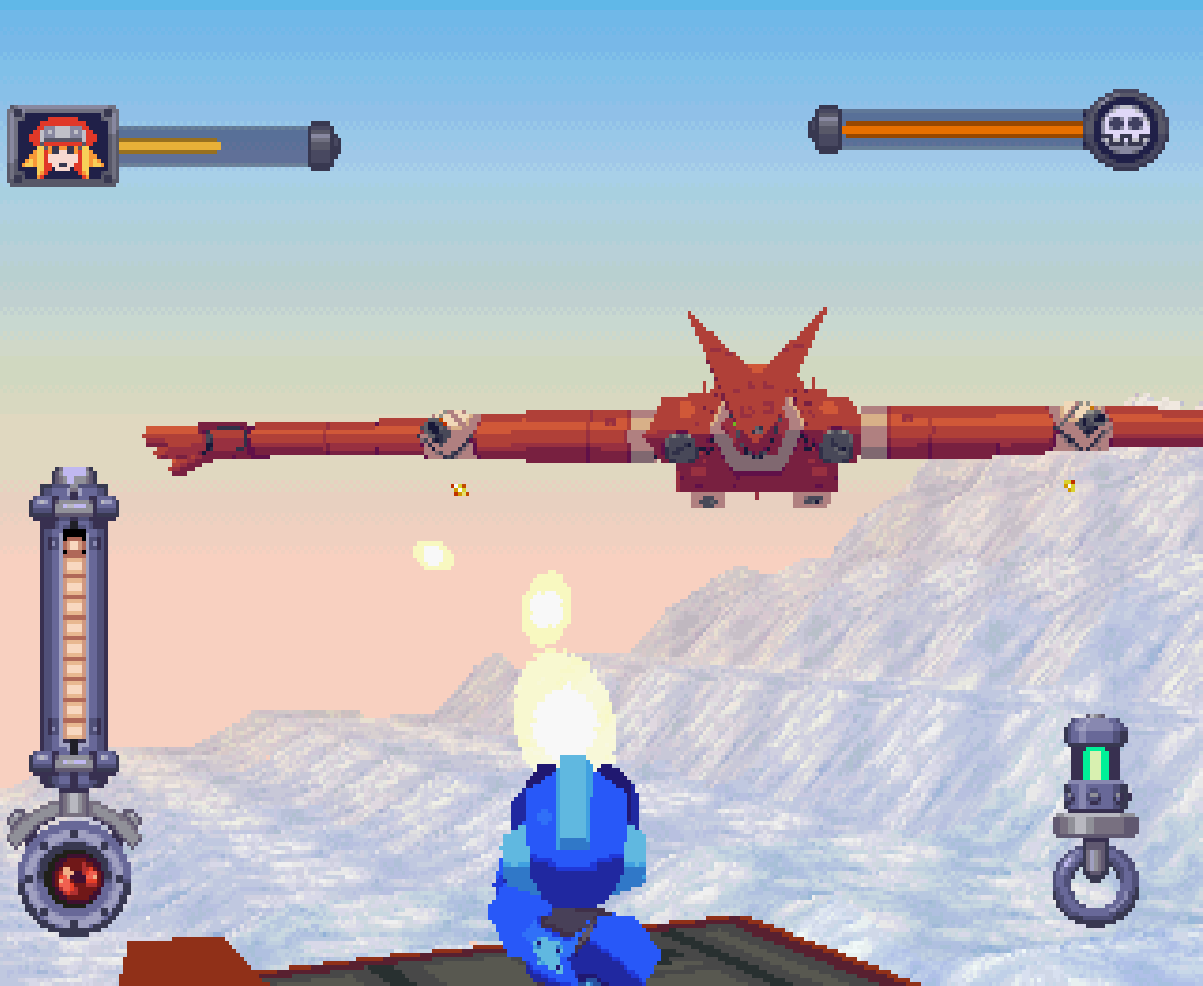
The second opportunity you'll have is when Fokkerwolf flies above your ship and hovers there for a little bit; during this attack he will unload on the Flutter with machine guns but he will be stationary the whole time. It's during this attack that you'll have the most opportunity to deal damage to Fokkerwolf.
If you aim ahead of Fokkerwolf you'll be able to hit him as he circles your ship and launches rockets at it too... However depending on the amount of HP the Flutter has you may or may not want to focus on destroying the rockets instead. When the fight is over you'll get a cutscene after which you'll regain control of Mega Man on the Flutter.
Easter Egg: Right after you regain control of Mega Man enter Rolls room and you'll get a cutscene of Mega Man being yelled at as Roll is (allegedly) changing clothes.
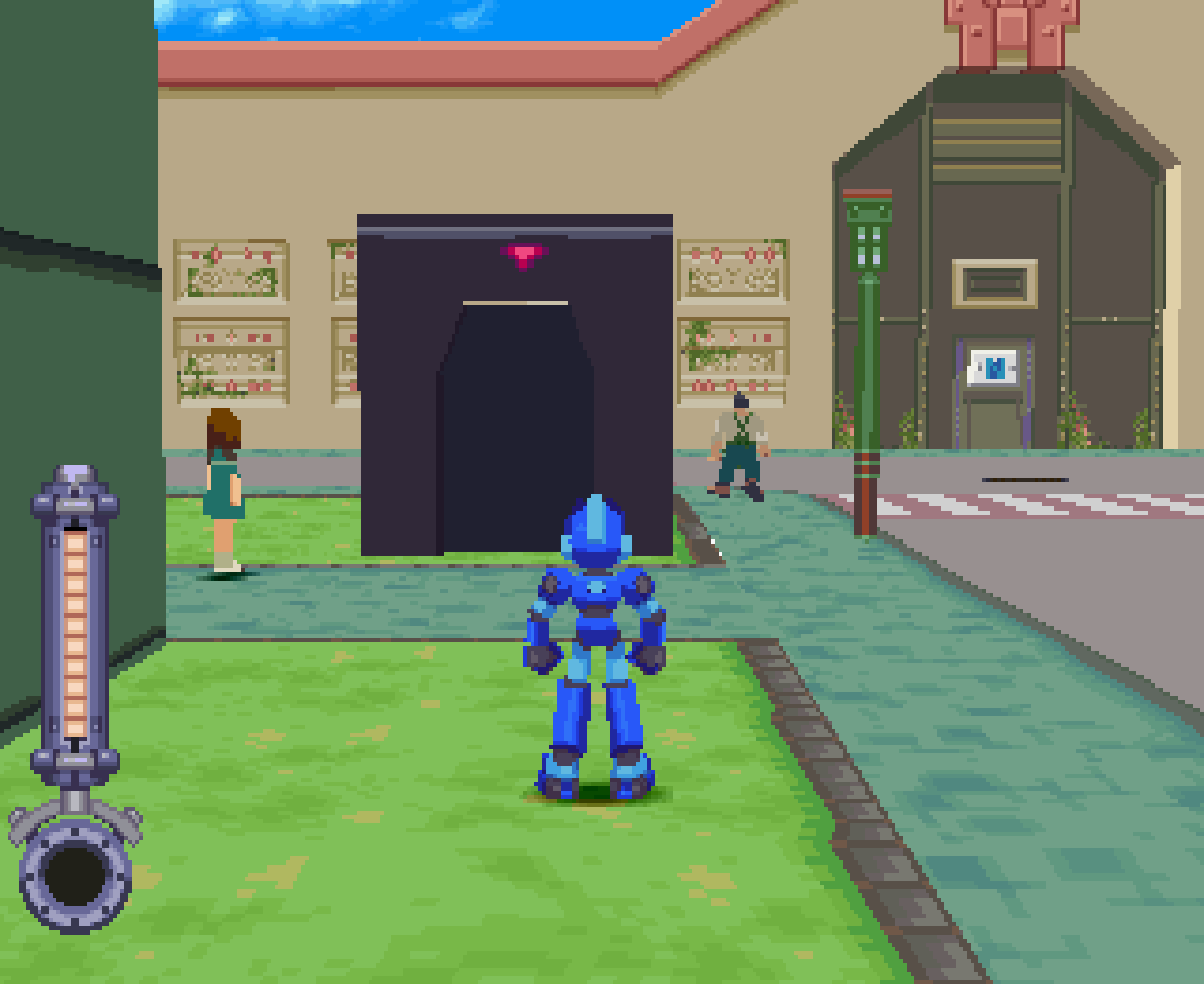
There is nothing new to do on the Flutter so exit the ship and then enter the Support Car nearby. Have Roll take you to the Main Gate if that option is available - it was for me and I haven't been there yet on this file. If it's not an option for you then have Roll go to Downtown and exit the area to the east, this will put you into Old City. From Old City you'll want to take the southern exit to reach the Main Gate (pictured below).
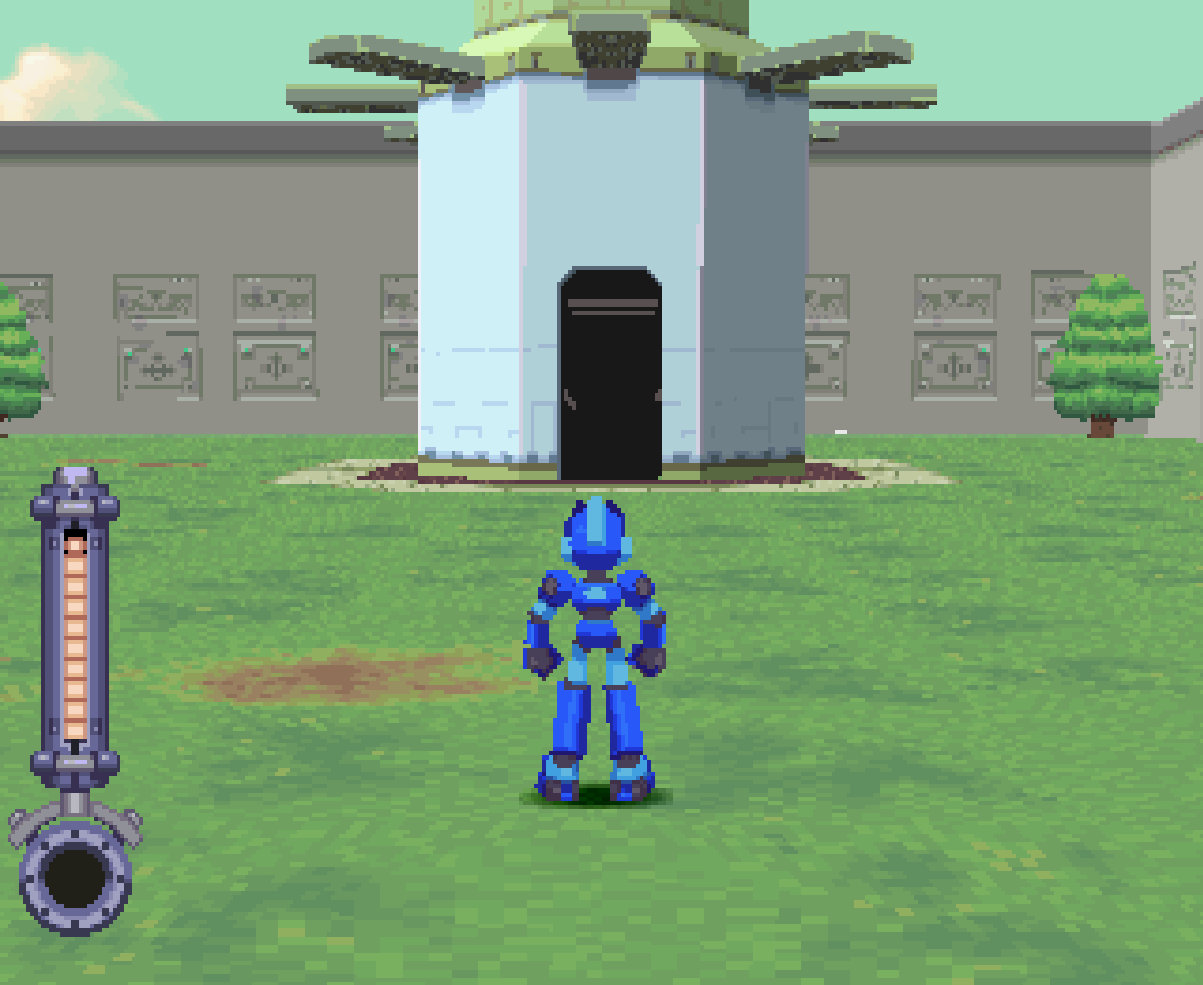
Main Gate Entrance
The Main Gate dungeon is pretty straight forward, there are a few things you'll want to do inside here other than collect all of the loot. First, you'll want to find the main computer and use it to unlock all of the Sub-Cities. How this dungeon works is we can only explore part of it now, we need to unlock the Sub-Cities then collect 3 keys from each of them before coming back here to finish the dungeon.
If you'd like to see a map of the Main Gate check out the screenshot below. It will give you all the details you need to know for completing this dungeon. Once you've fully explored everything in the Main Gate you'll want to go to the large room marked "Section Two" on the map below. In the big room that has one of the dog robots you'll notice that there is an exit on the western and eastern side. Use the eastern exit in this room to quickly get out of this dungeon and return to town.
Important Loot: While you're in the Main Gate make sure you collect the Blunted Drill item. This will allow you to craft the Drill Arm Special Weapon which is required for breaking down walls throughout the various Ruins we've already explored. You will need this Special Weapon to collect some of the remaining items as well as create various shortcuts throughout the various dungeons.
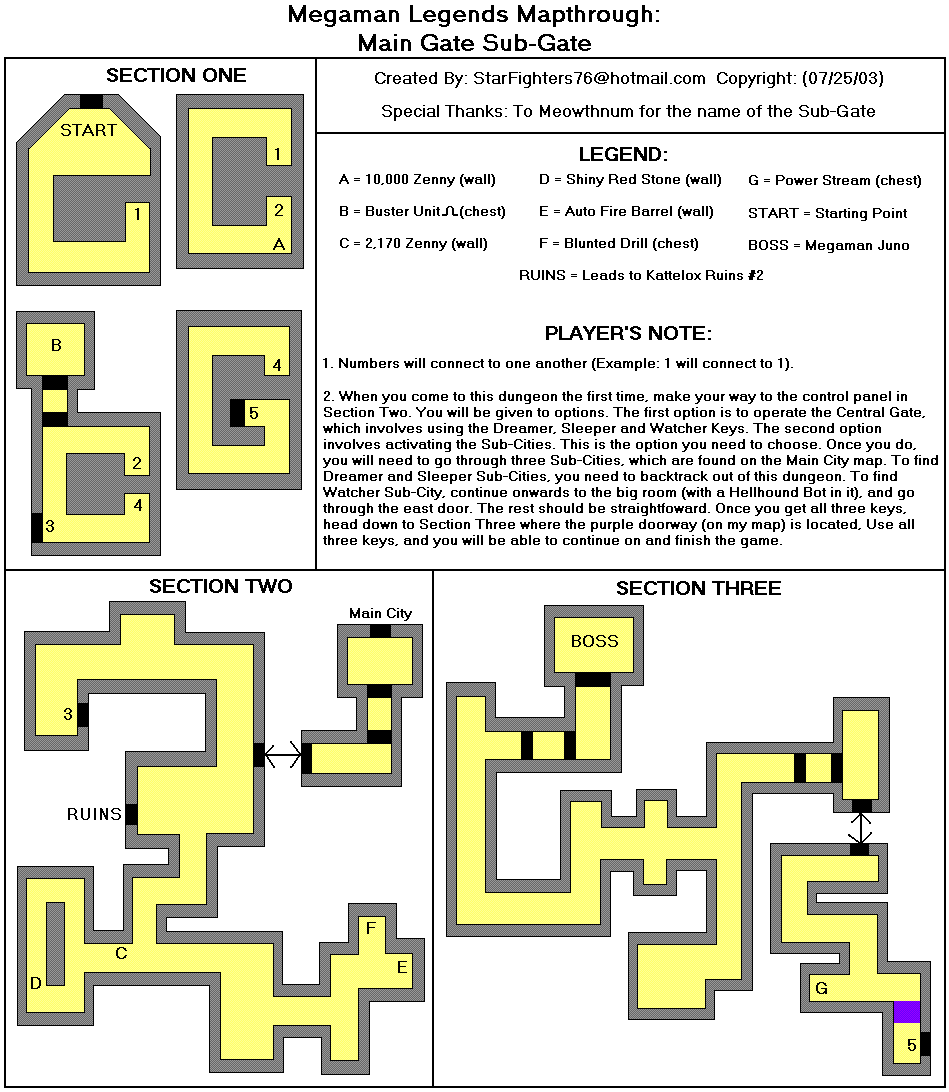
Full credit goes to the original author of this map. Click to enlarge it.
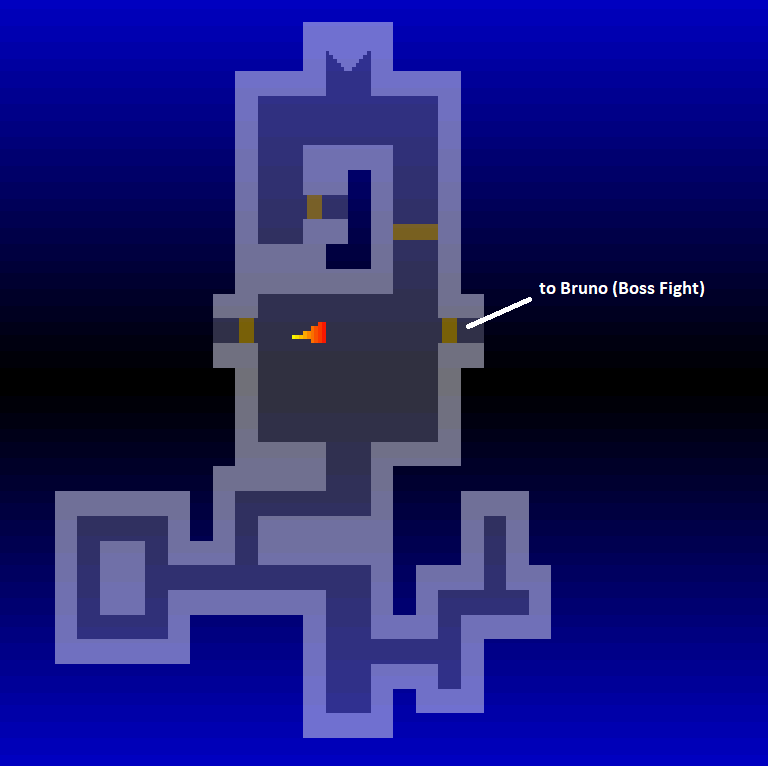
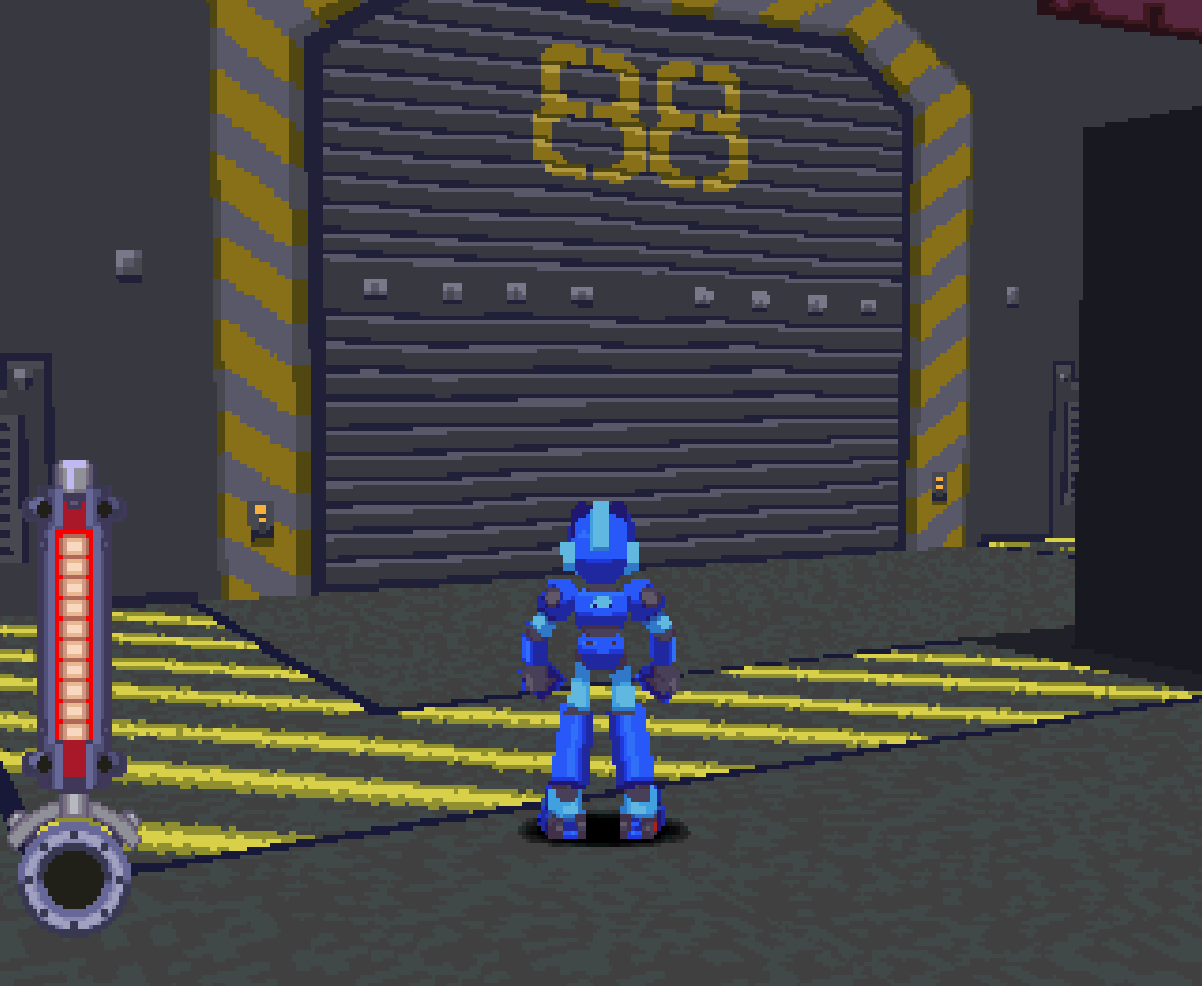
Important! In order for the Sub-Cities to truly be unlocked you'll first need to enter Building 88 in Old City and defeat Bruno. Until you accomplish this task you won't be able to access the various Sub-Cities throughout the town.
For those of you that are lost and trying to find Building 88 or Bruno, check out my map screenshot below. The room I am standing in is the one with the sleeping dog that has 2 exits. West takes you to the Kattlelox Ruins #2 Map and the eastern exit takes you to Old City inside of an enclosure where you'll find Building 88 and Bruno.
Depending on your preference you may want to return to Data first and heal up/save before fighting Bruno. Ultimately it'll be your call depending on how prepared you feel that you are.

All in all the boss fight with Bruno isn't too difficult considering it's one of the final battles in the game and he's a giant robot. You can shoot at various parts of its body to deal damage and most of its attacks can be avoided by standing behind buildings in the area. I recommend aiming mostly at the robot's back to deal the most damage to it, most attacks seem to hit it when shooting there.
Something to keep in mind is the Main Gate and Sub-City entrances are both indestructible which means you can hide behind them as much as you want without any worry. Usually what I do for this fight is I jump on top of various buildings throughout the area and shoot from atop them until they get destroyed then I use the Main Gate and/or Sub-City entrances for cover until eventually the robot is defeated.
Last piece of advice I can give you for this boss is to hold down R2 for more control over where you're aiming. Once you defeat Bruno you'll get a cutscene after which you're free to do some exploring again. The first thing you should do is to visit Data and Roll, restore your Energy/Ammo at Data and have Roll turn the Blunted Drill item we found into the Drill Arm Special Weapon.
Equip the Drill Arm and then head to the Kattlelox Ruins #3 entrance. You will be able to get to Ruins #6 from this location which is the first place we're going to visit for some treasures. Once you collect the goodies here you'll want to visit Ruins #5 for the treasures here... Also if you want you should swing by Ruins #2 to destroy the wall that's here just incase you ever come through this way in the future.
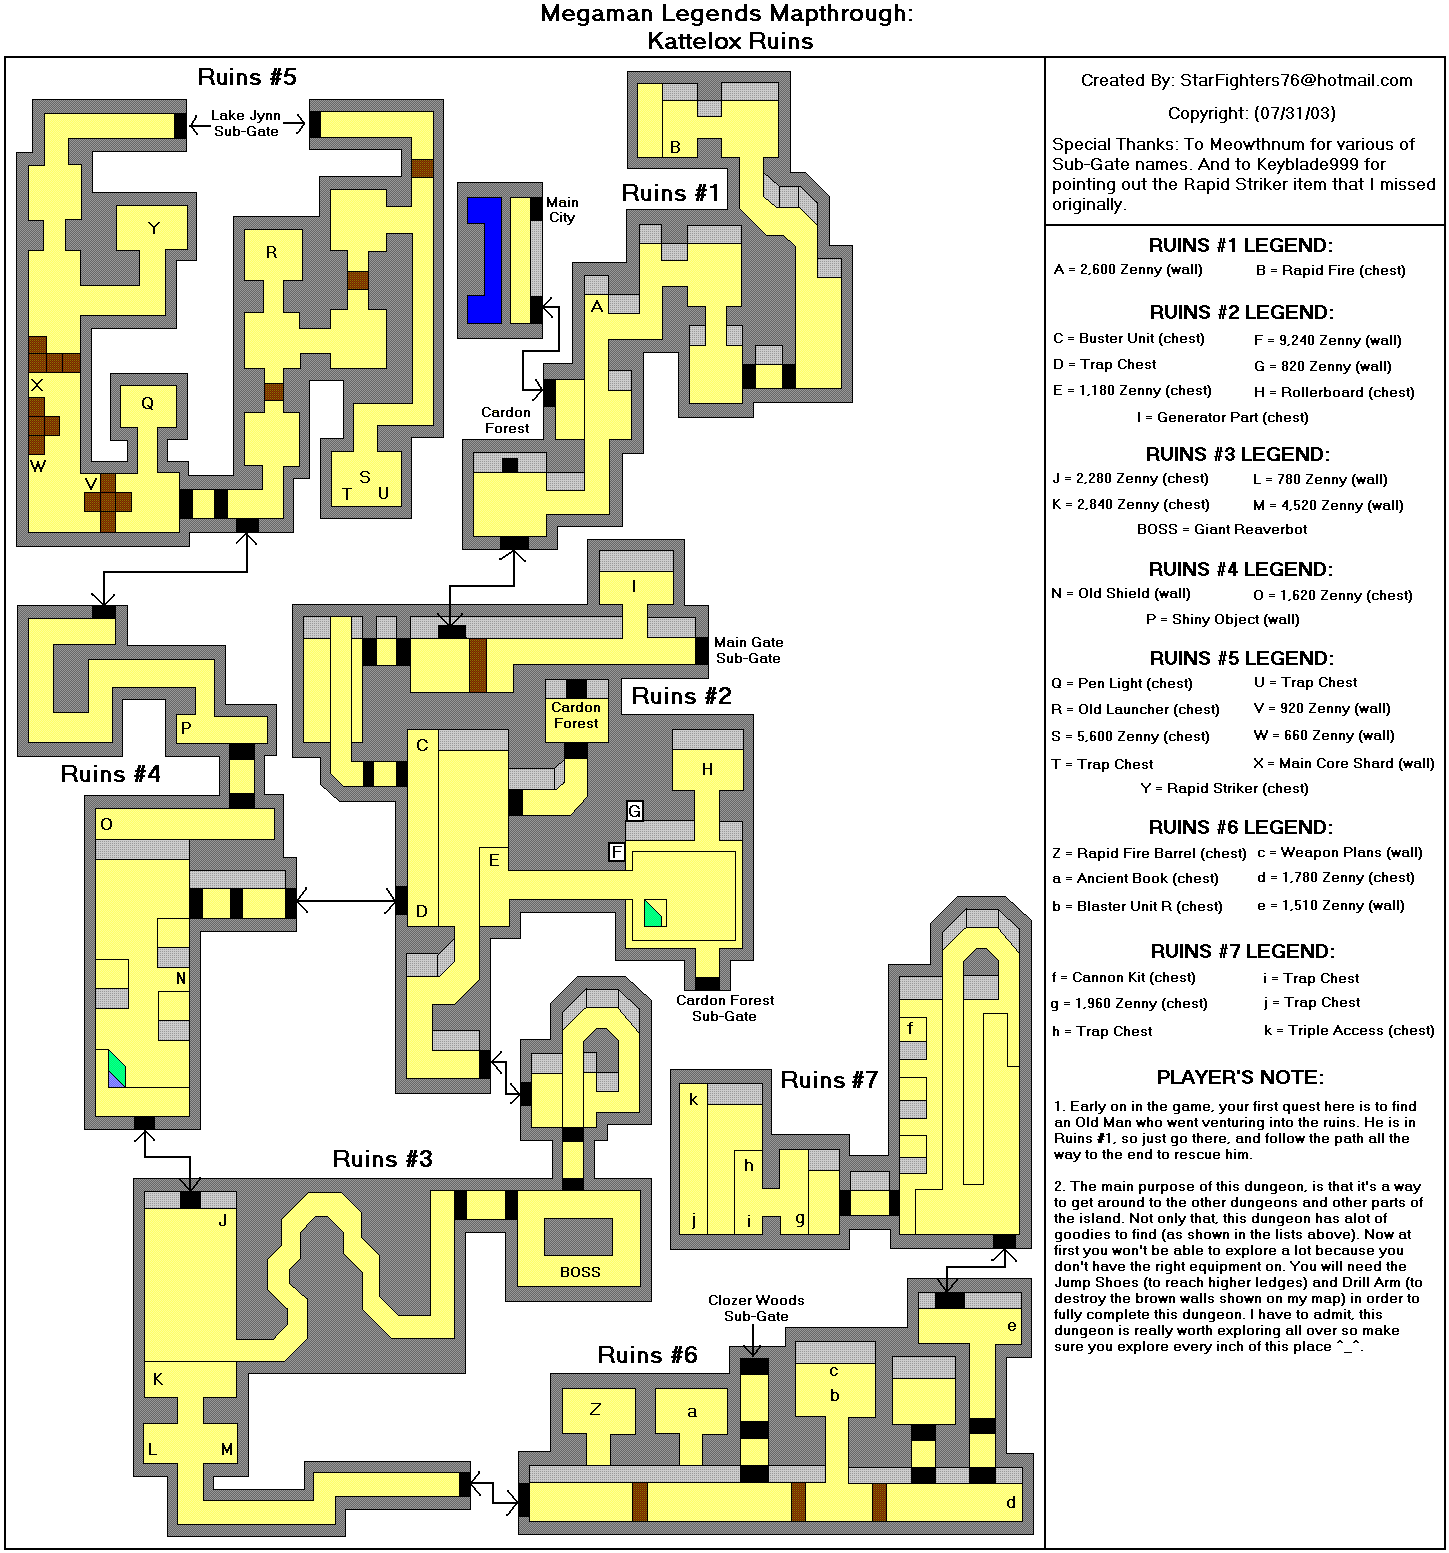
Full credit goes to the original author of this map. Click to enlarge map.
All of the treasures that you can access now that you have the Drill Arm are listed below. If you need help finding the locations of them use the map screenshot above for guidance. Note: There are a handful of Zenny locations that I didn't mention below. Much like with the entire walkthrough for this game I leave most of the exploration up to you.
Ruins #6 Treasures:
Blaster Unit R
Weapon Plans
Ruins #5 Treasures:
Old Launcher
Main Core Shard
Rapid Striker
In addition to the aforementioned loot you also have 2 new Side Quests that are now available. The Pregnant Woman Side Quest can be started by talking to the man in charge of the Vegetable Store in the Apple Market and you also have The Robbery Side Quest which starts by watching the TV aboard the Flutter.
Both of these quests are fairly easy to complete and shouldn't take you too long. The Robbery is a nice source of Zenny this late in the game and The Pregnant Woman will reward you with an item that's used to make one of the best Buster Parts in the entire game.
When you're ready to continue with the story and beat this game it's time to start knocking out the Sub-Cities which spawned throughout the town. A screenshot of the Downtown Sub-City is shown below so you know what it is you're looking for. Each of the Sub-City entrances are essentially large black boxes with a door you can enter.
All of the Sub-City dungeons are very straight forward, they require you to defeat some enemies inside of them and then claim the key which will be your reward. If you remember in the Main Gate dungeon when we inspected the computer one of the options asked us to collect 3 keys before we were able to activate it... There are 3 Sub-City dungeons and 3 keys that we need to collect, see where this is going?
Below you'll find quick lists of information detailing where you can find each of the Sub-Cities and any other relevant information about them that I felt was worth mentioning. Like I said before, this part is all very straight forward so there is not much I can say.
Sub-City #1: Old City nearby where Building 88 was
Sub-City #2: Downtown near the N door leading to City Hall
Sub-City #3: Uptown just outside of the KTOX TV Building
Old City: Defeat all of the enemies inside of this Sub-City and then enter the largest building in the area to claim the Watcher Key.
Downtown: This Sub-City works the same as the one in Old City, defeat all of the enemies here and then enter the largest building in the area to get the Sleeper Key.
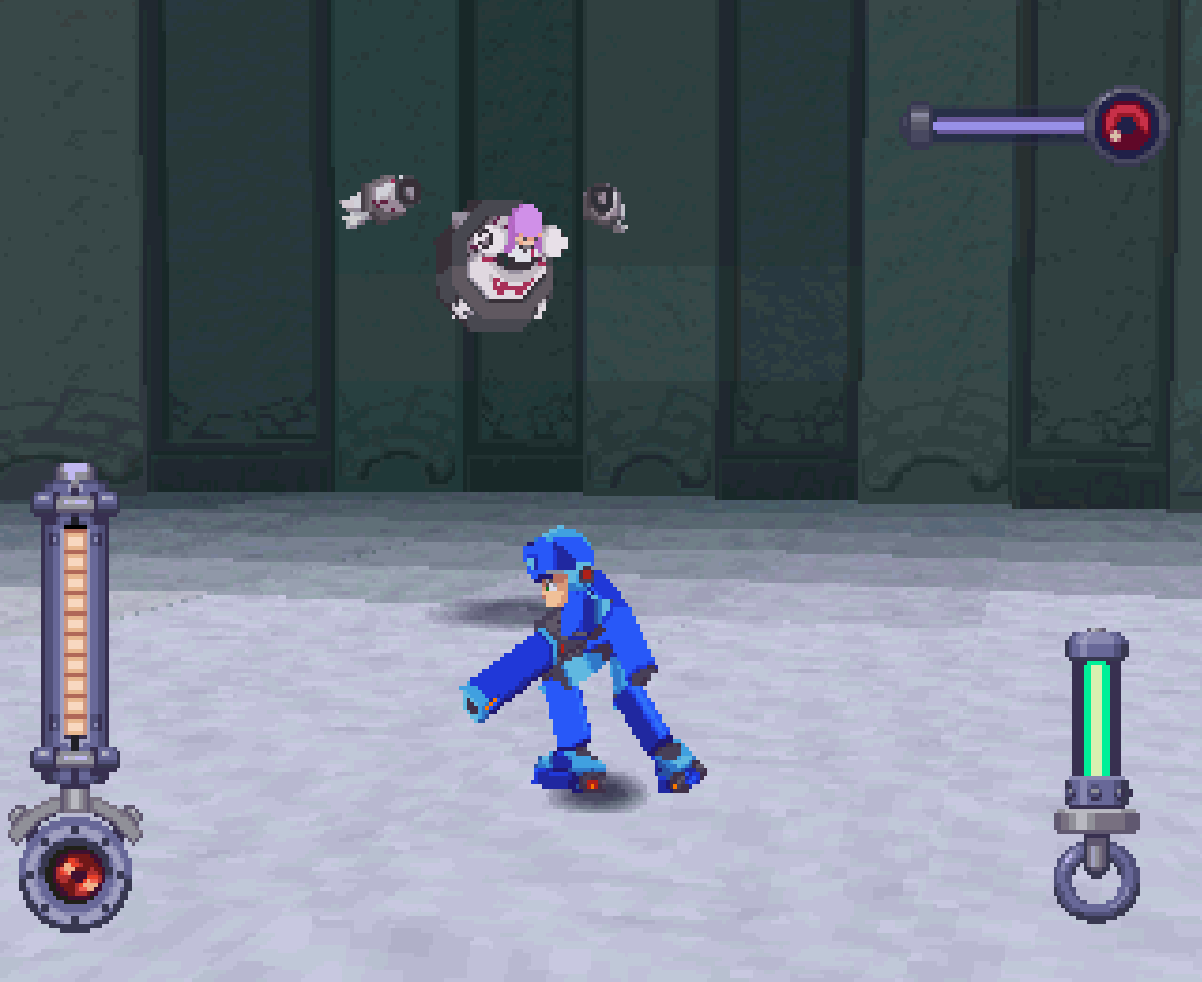
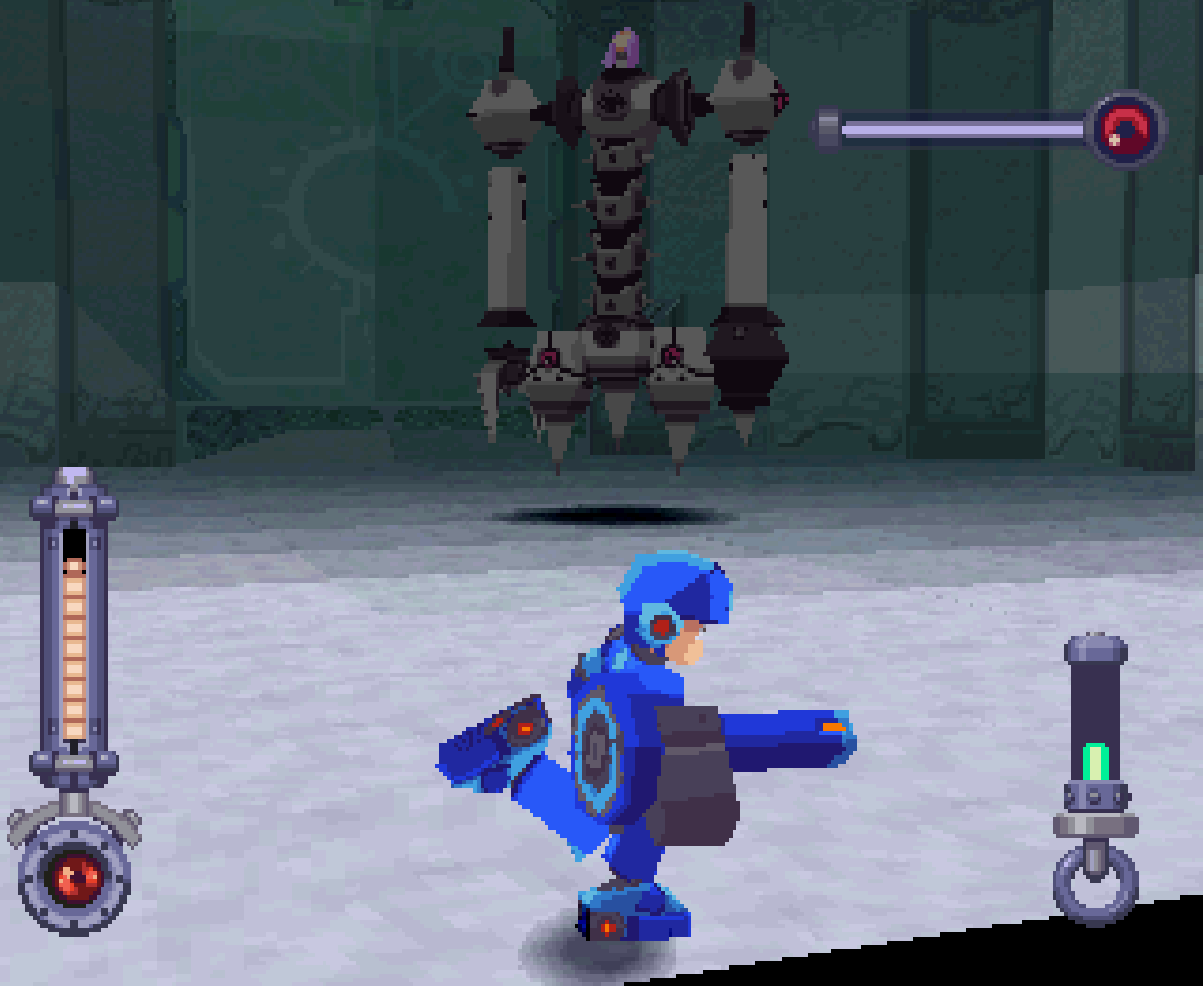
Uptown: In this Sub-City you'll be fighting a boss! The boss is a giant worm like creature that deploys Reaverbots from its butt as it moves around the area. You'll want to focus most of your attention onto the boss itself and ignore the Reaverbots that it poops out - to damage this boss you'll want to shoot at the hatch on its butt when it opens up. Once the boss is defeated enter the large building and claim your prize, the Dreamer Key!
Once you've collected all 3 of the keys it's time to return to the Main Gate and beat the game! If it wasn't already obvious you should visit Data to restore your Health, Ammo and of course save your game. We're going to be clearing part of the Main Gate again and then fighting the final boss so you'll want to make sure you're in tip top shape.
Use the Walkie-Talkie to call up Roll and have her drive you over to the Main Gate when you're ready to beat this game. This time inside the Main Gate you'll want to follow the spiral staircase all the way down to the very bottom where you will find 3 doors - each of which require one of the 3 keys that we just got.
I'm not going to hold your hand through these next few rooms as it's all fairly straight forward. Suffice to say there will be some cutscenes that reveal more of the plot, a few enemies for you to fight and a bunch of linear hallways and rooms you must navigate. Eventually you will come across Data who managed to make it down here somehow. Refill your health and ammo as well as save your game for the last time then proceed into the final room where the boss fight will take place.
When the fight starts my recommendation is to run forward a tad and unload on Mega Man Juno with your Special Weapon. You will not get many opportunities to deal a lot of damage to him like this one so make the most of what we have. This fight doesn't have much unique strategy and is more or less a traditional Mega Man fight in the sense that you'll mostly be dodging and shooting.
Usually in games like this what I do for these fights is to spend the first minute or two focusing solely on dodging attacks until I see the bosses attack patterns and how they operate. This allows you to understand how much time you have to deal some damage between the attacks. In particular for this boss you have the largest window between his "energy line" attacks where he says "Ready?" then throws one line of energy at you followed by another.
As far as Special Weapons go I strongly recommend the Active Buster, depending on how much you upgraded this weapon it could make very short work of the boss. If you're struggling a lot with this boss my two biggest pieces of advice would be to buy more Energy Canteen upgrades so that you can heal yourself during the battle and also spend some time upgrading the Active Buster so that you can deal tons of damage really quick to this boss.
I'd recommend you focus mostly on surviving throughout this fight and also try not to use all of your Special Weapon ammo either because once we beat this boss we're going to have a round 2.
Best Tip: Don't use R2 to lock onto the boss unless you are using your Special Weapon. When you use R2 to lock on you have to stop and stand in place which makes you vulnerable. What I recommend instead is to hold either R1 or L1 and run around the room in a circle while firing your buster at the boss. This allows you to stay mobile the entire fight which makes dodging most attacks easy and still deal damage to the boss.
Considering this is the final boss of the game, as you can probably imagine it's going to be a tough fight. Almost all of this bosses attacks hurt... a lot. From my experience the attacks that deal fire damage will do the most damage, typically knocking off 2 - 4 health with each hit. As with the previous fight you will want to focus on avoiding as many of his attacks as possible and attacking during the small windows of opportunity that you get.
During this fight my favorite window of opportunity to deal some damage is while the boss is lifting his giant fire ball attack and after his charge attack. There is a few second window as he is charging up his giant fire ball that you can unload on him - the fireball moves quite slow and is easy to dodge unless you're standing too close to the boss.
His charge attack is pretty easy to dodge too, right after he charges at you he'll put his machine into reverse and slowly back up for a second or two which gives you a great opportunity to deal some damage. Imagine the beeping in your head like the big tractor trailers do when they back up to make this fight less frustrating.
That's really all of the advice I can give you for this fight outside of keep dodging and shooting until he's dead. I had a bit of trouble with this fight and if I wasn't able to use Save States on my emulator I most likely would of spent a few hours grinding to upgrade my Active Buster/Energy Canteen so that I could survive all of the damage he puts out.
Once you defeat the boss there will be a cutscene followed by the epilogue which is essentially just you running around the island and talking to a bunch of people to say your final goodbyes. When you're done return to Roll near the Flutter and talk to her for the final cutscene and the end credits. Congrats! You've now beaten Mega Man Legends!
Return to Chapter 2 of my Mega Man Legends Walkthrough