
Esthar (Part 2) and Lunatic Pandora (Part 1) - FF8 Guide
At the top of every page of my Final Fantasy 8 Walkthrough I will have a list of the most important GF Abilities for you to learn as well as my personal preference for who to junction GFs to for this part of the story. The game's auto order for GFs learning abilities is extremely terrible so it's strongly recommended you interfere and do the abilities in the order I provide here.
Throughout the game you can also refine Cards into Items and then those Items into magic. I've provided a list of the refinements that you can do for the cards that you will most likely have in your possession at this time during the story below as well. This same information will be provided at the top of every page during the full walkthrough, keep checking it as it'll change as the story progresses.
GF Abilities to Learn:
Carbuncle: Vit+20%, Vit+40%, Vit Bonus, Boost, Mag-J, HP-J, Vit-J, ST-Def-J, ST-Atk-J, Counter, Recov Med-RF
Leviathan: Supt Mag-RF, Spr+20%, Spr+40%, Spr Bonus, Mag-J, Spr-J, Elem-Defx2, Boost, GF Recov Med-RF
Pandemona: Spd-J, Elem-Defx2, Boost, Spd+20%, Spd+40%, Str+20%, Str+40%
King Tonberry: Familiar, Haggle, Sell-High, Call Shop, Initiative, Boost
Cerberus: Spd-J, Spr-J, Mag-J, ST-Def-J, ST-Atk-J, Spd+20%, Spd+40%, Auto-Haste, ST-Def-Jx2, ST-Def-Jx4
Alexander: Med Data, Med LV Up, High Mag-RF, Elem-Defx4, Elem-Atk-J, Boost, Revive, Spr+20%
Doomtrain: Forbid Med-RF, ST-Def-Jx4, Elem-Defx4, Auto-Shell, Boost
GF Junctioning:
Squall: Siren, Brothers, Carbuncle, Leviathan, Tonberry
Zell: Shiva, Diablos, Pandemona, Doomtrain
Quistis: Ifrit, Quezacotl, Cerberus, Alexander
(Or whomever you choose as your party; junction them as you see above)
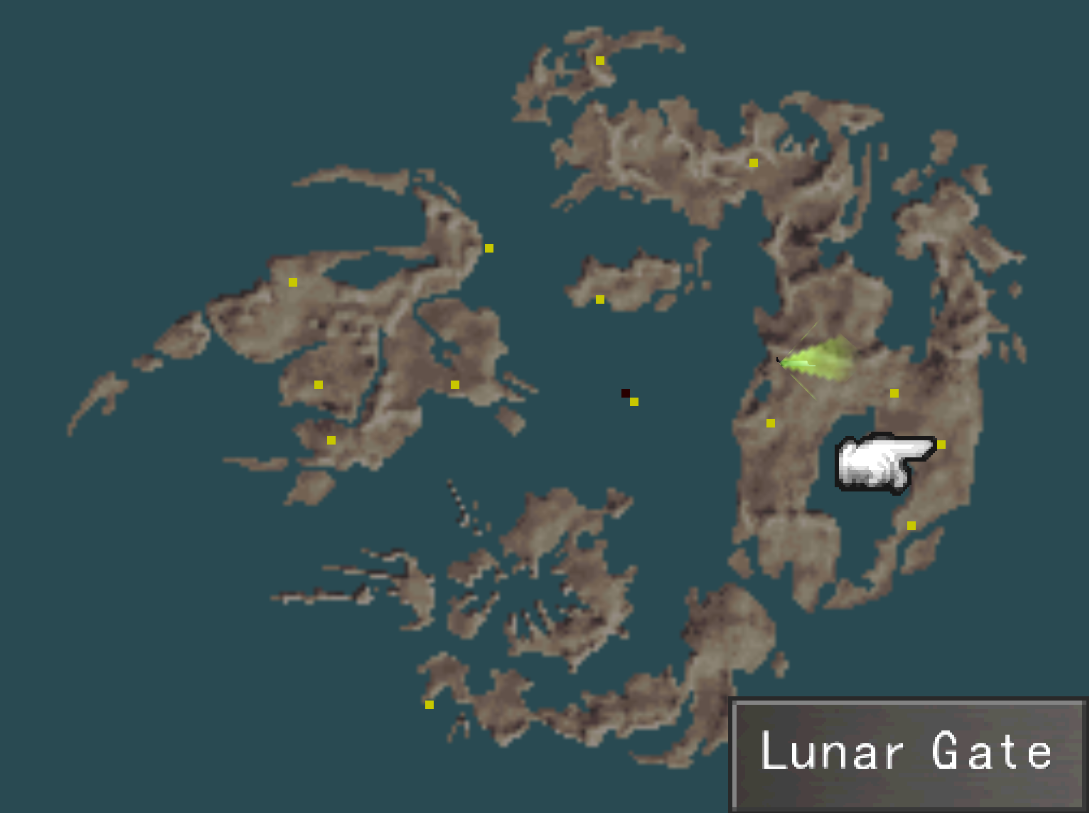
There is one "optional" thing to do before going to the Lunar Gate, visiting Tears' Point to pickup the Solomon Ring for the Doomtrain GF Side Quest. Assuming you took my advice earlier on Disc 3 you'll be able to complete the quest for this GF right after visiting this location.
Doomtrain is one of the best GFs in the game too with ST-Def-Jx4 and Elem-Defx4 Junctions. Don't pass this GF up!! You can find Tears' Point just south of Lunar Gate - it's impossible to miss. Use the map above if you need guidance locating either.
Once you've collected Doomtrain head north to Lunar Gate to proceed with the story. Talk to the girl at the entrance of Lunar Gate and follow her inside. After a few scenes you'll be asked to pick a party of 3 that are getting shot into space. Rinoa and Squall are part of this party as default, whomever you pick as the third should be a character you don't plan to use as they don't fight once joining you.
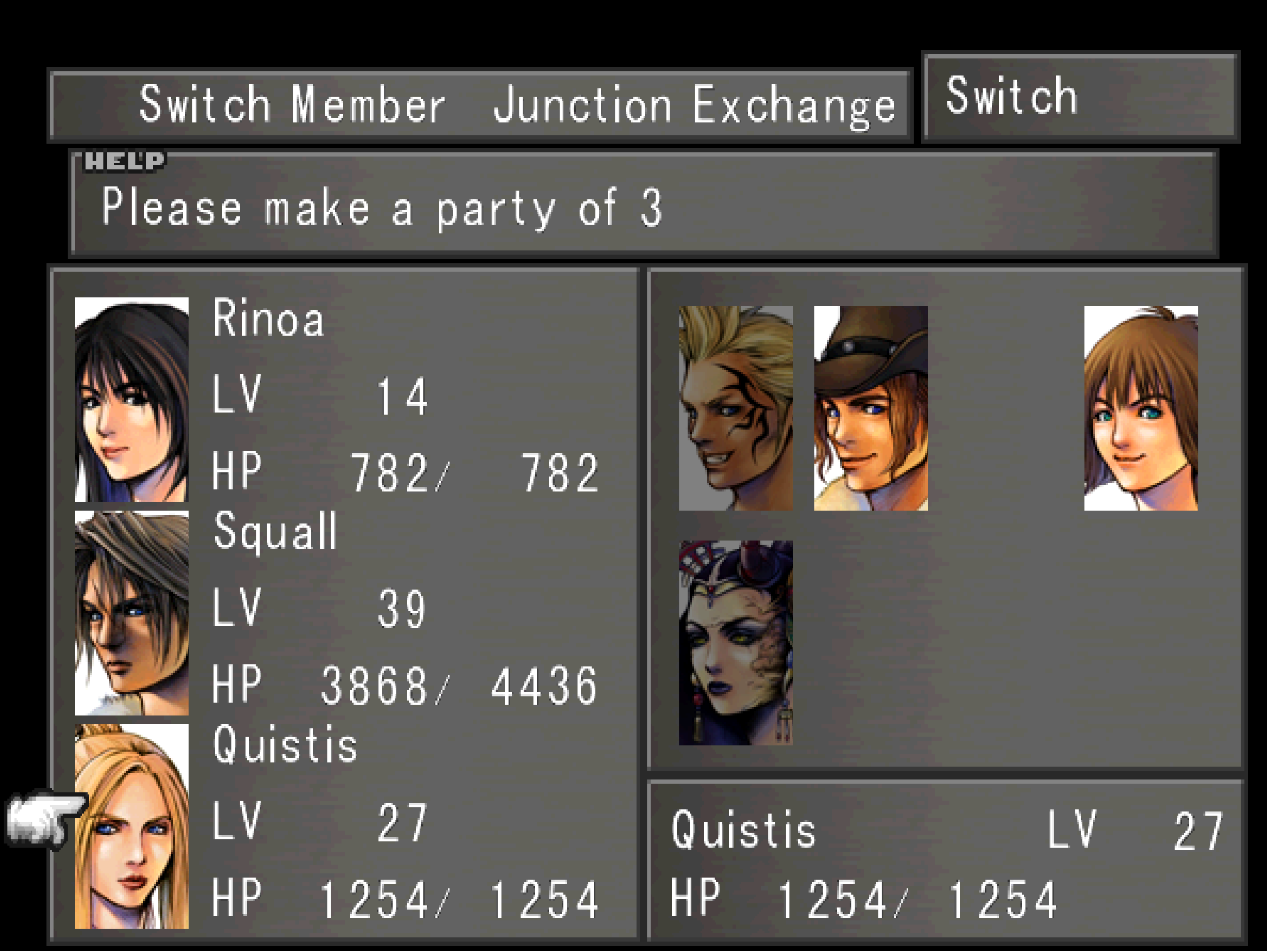
The team that goes with Zell is your main team for the part coming up. Save when you get an opportunity as there's a chance you could miss a whole dungeon coming up. Return to Esthar and once inside the city go to Dr Odine's Laboratory.
Inside the Laboratory you'll want to speak with Dr. Odine, pay attention to the scene as he tells you each of the three locations that you can intercept the Lunatic Pandora dungeon (pictured below). If you don't enter this dungeon at the first point you won't be able to do much of anything there.
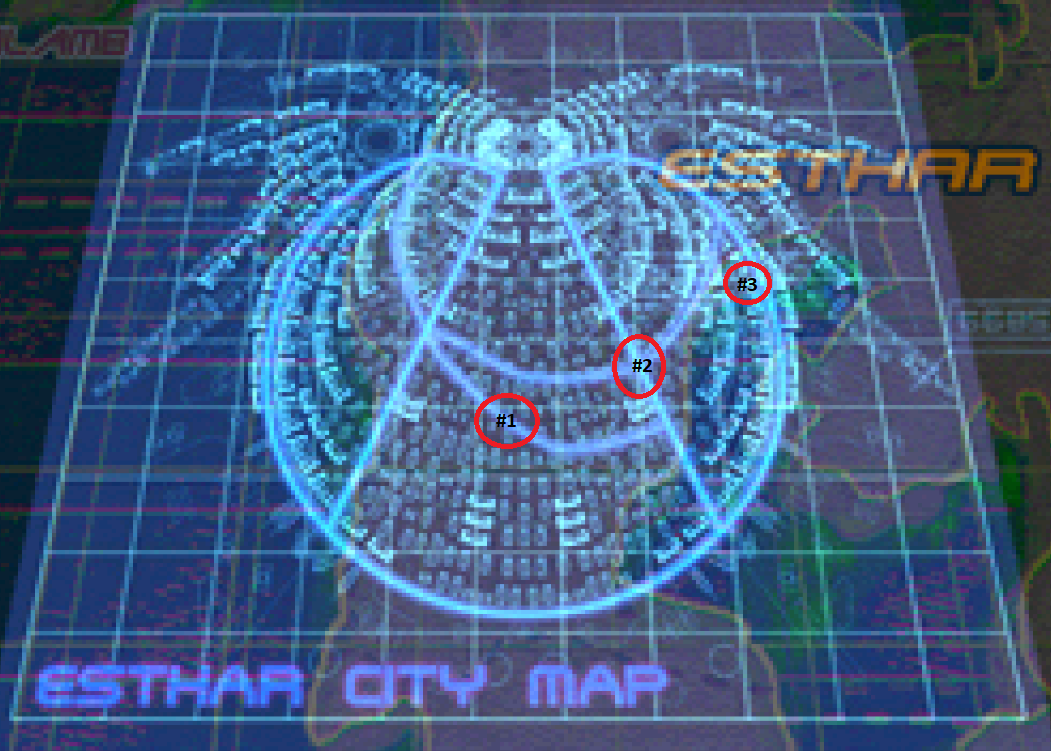
Point One: (15:00 - 12:00) The location is just to the right of the place we visited the last time in Esthar to talk to the Soldier for Combat King 004
Point Two: (10:00 - 5:00)
Point One: (3:00 - 0:00)
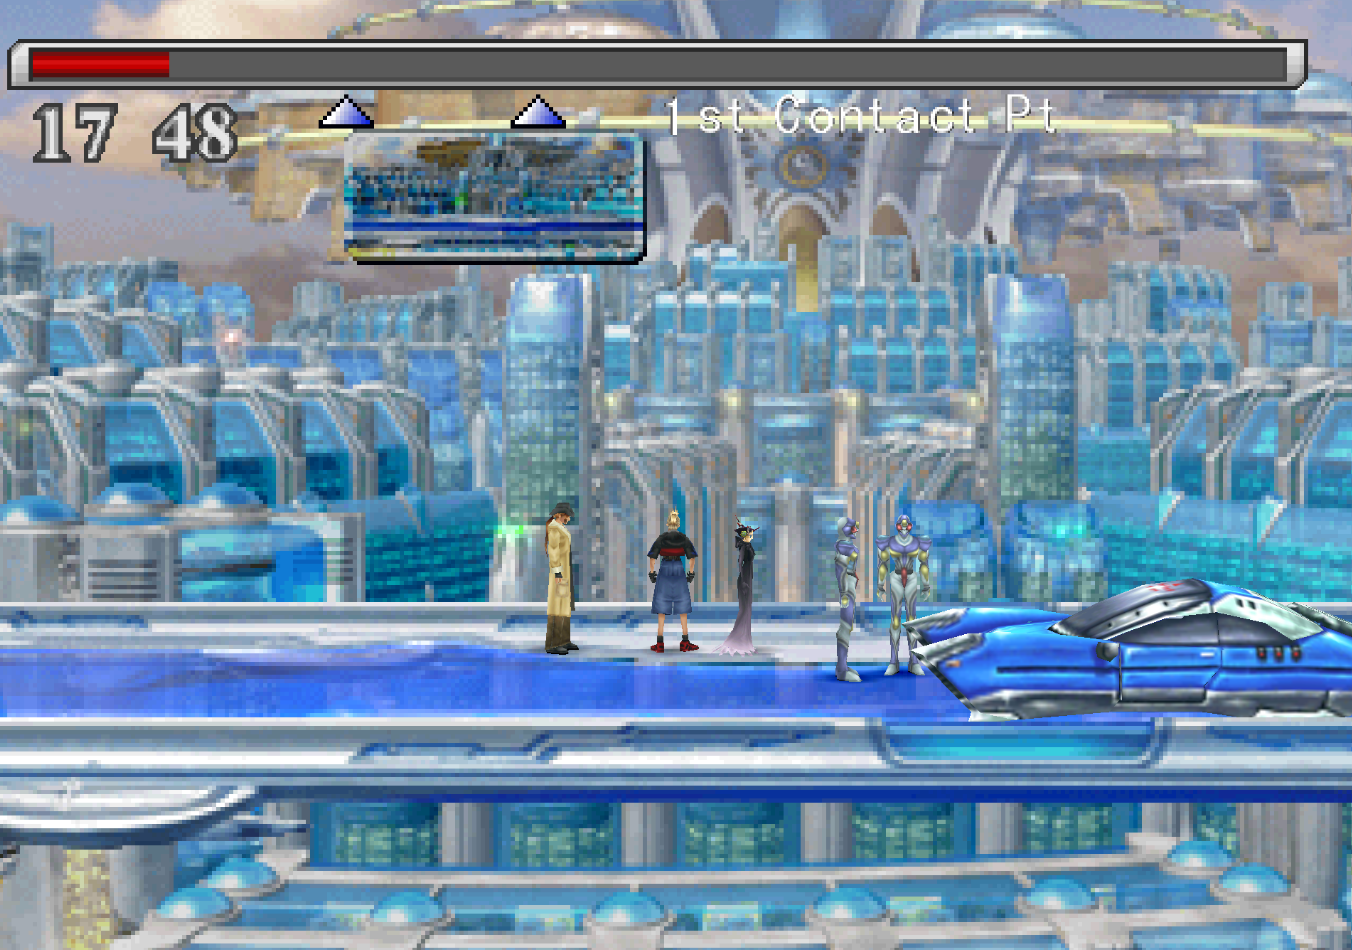
For those of you still confused on where the entry point one is, use the screenshot below. Basically once 15:00 rolls around on the clock you'll get a quick scene of the Lunatic Pandora box driving by and a door on the side will open. You'll be thrown into combat with a few Galbadian Soldiers which are extremely weak (as always) after which you'll board the "dungeon".
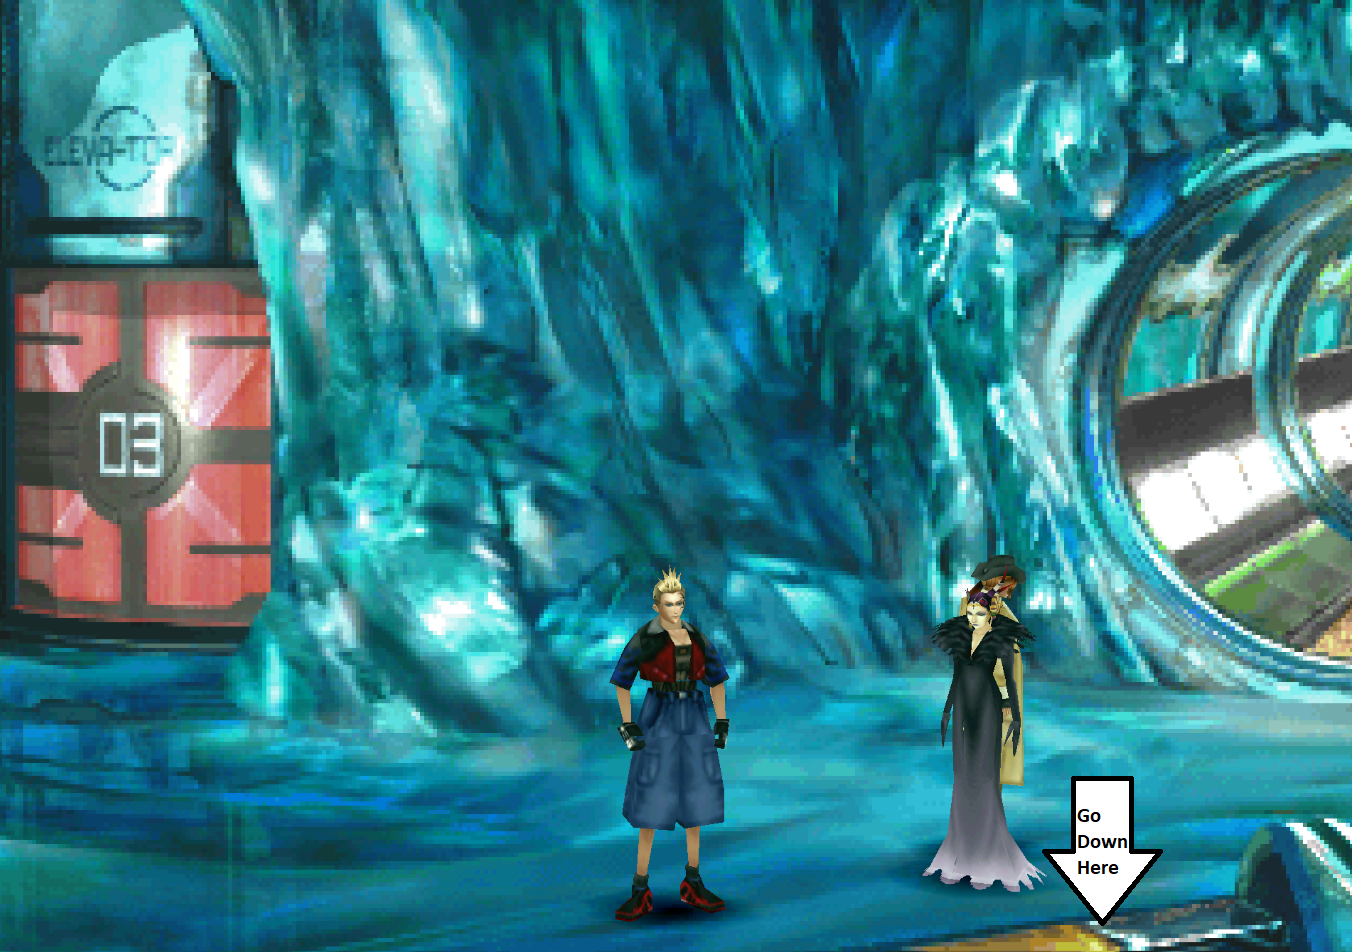
The first thing you will notice on the Lunatic Pandora is the Meteor Draw Point to your right. Grab this then proceed up the stairs until you come to the room with three elevators. Ignore Elevators 1 and 2 for right now and go down Elevator #3, this is the one that leads to all of the treasures!
You may notice that this dungeon looks familiar, it's the same place we visited during the very first Laguna Flashback during Disc 1. Depending on how much you did here during your visit with Laguna determines how many treasures are currently available. This guide assumes all are available to you but if you can't access one that I have listed, I guess you made an oopsie before.
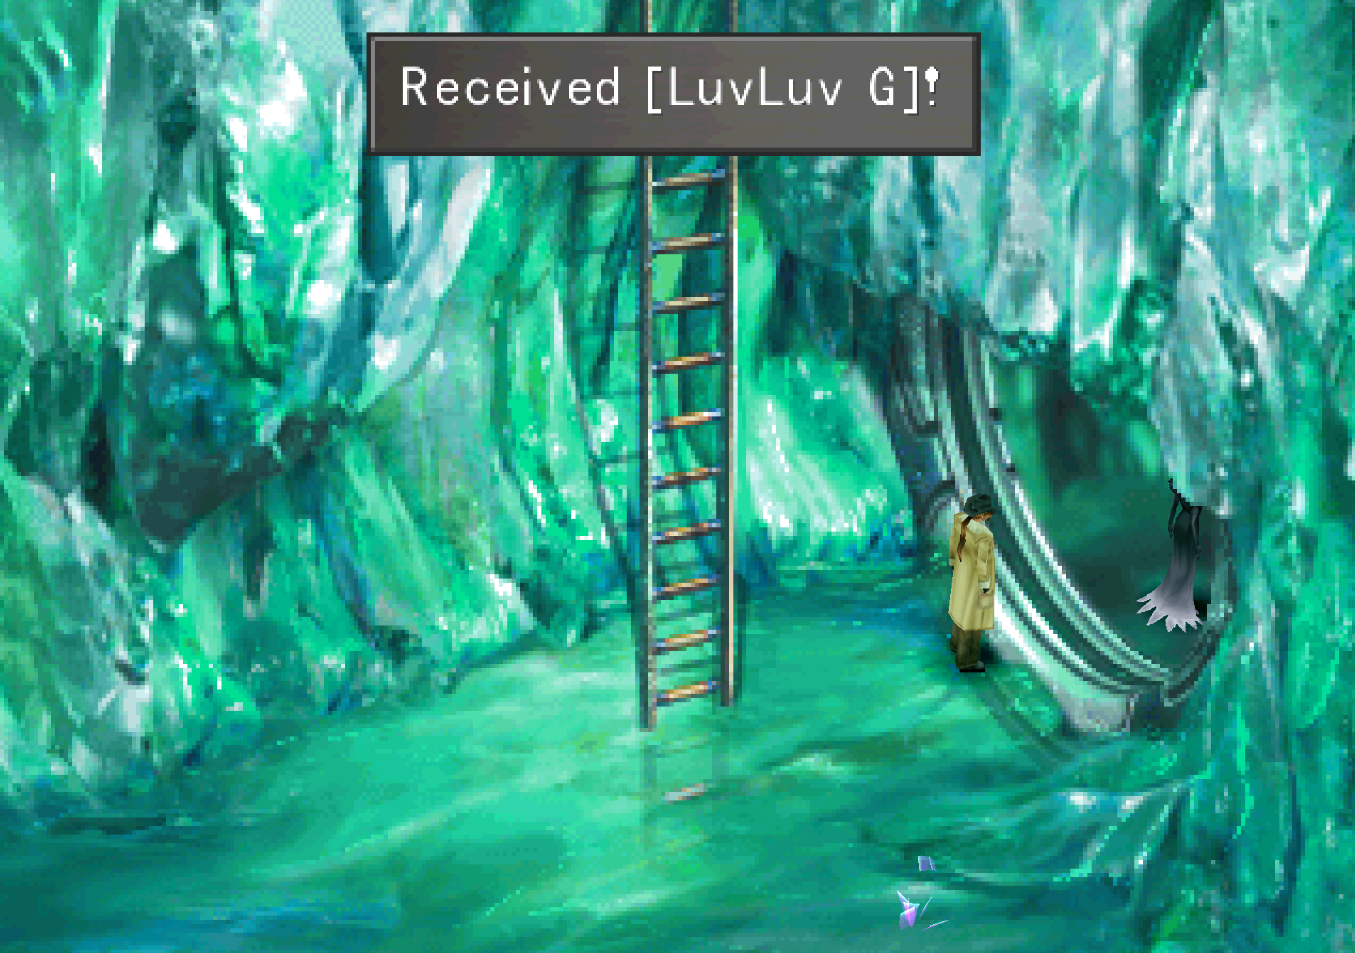
Go to the right and down the stairs once you get off the elevator (same direction pictured below) then down the ladder. In the small cave next to the ladder you'll find the LuvLuv G Item. With this in hand head south across the boulder until you come to the room with three open panels (shown below too).
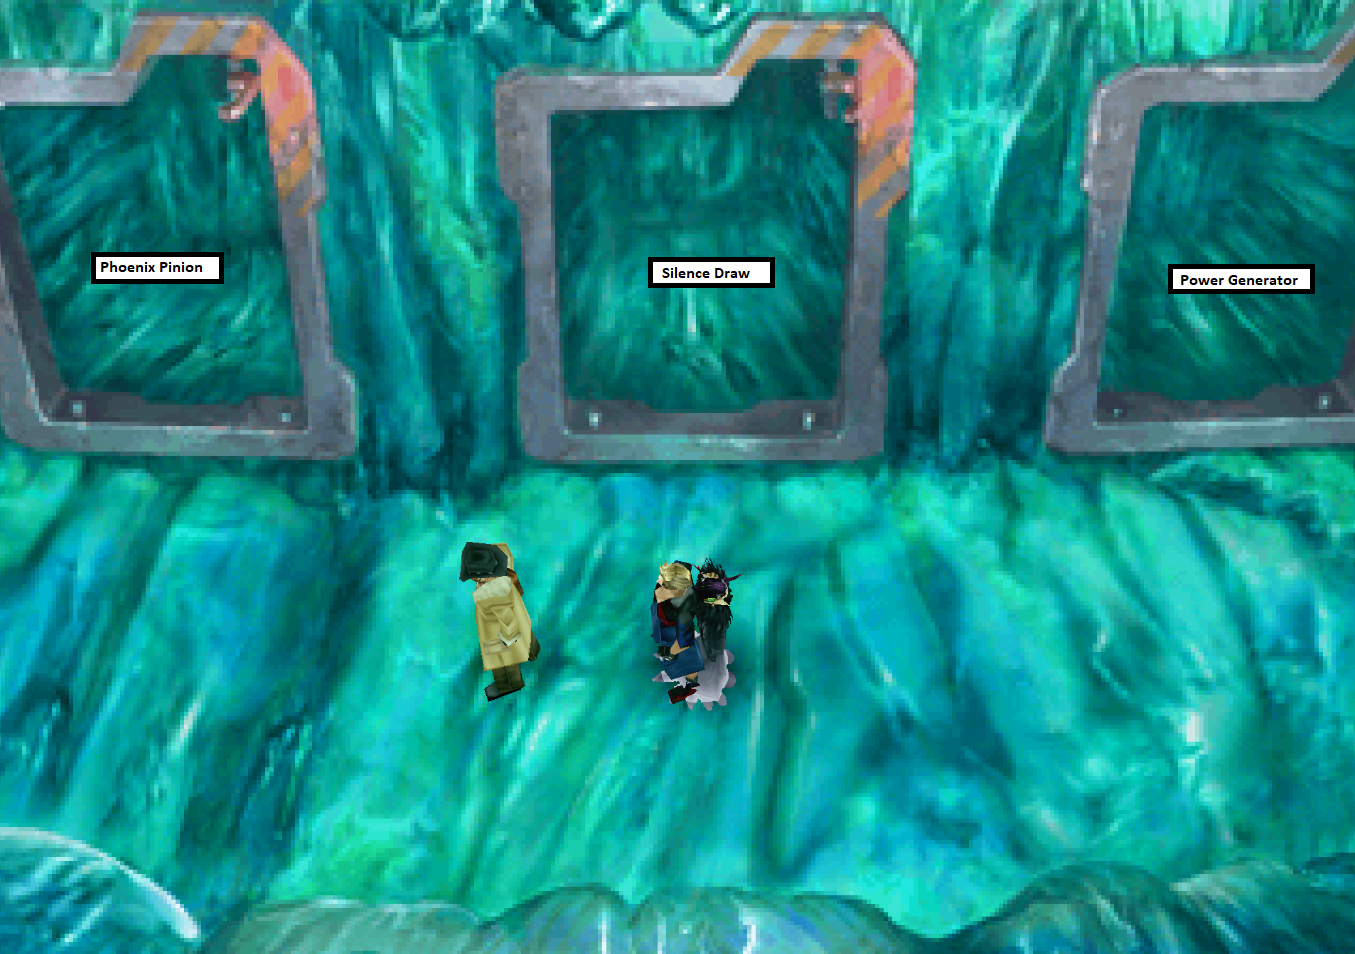
In each of the three rooms there is some treasure to be found; once you've gotten all the items continue south to the next area where you will find Combat King 005 on the ground (pictured below). You probably already purchased this in Esthar but if you didn't you can grab it now.
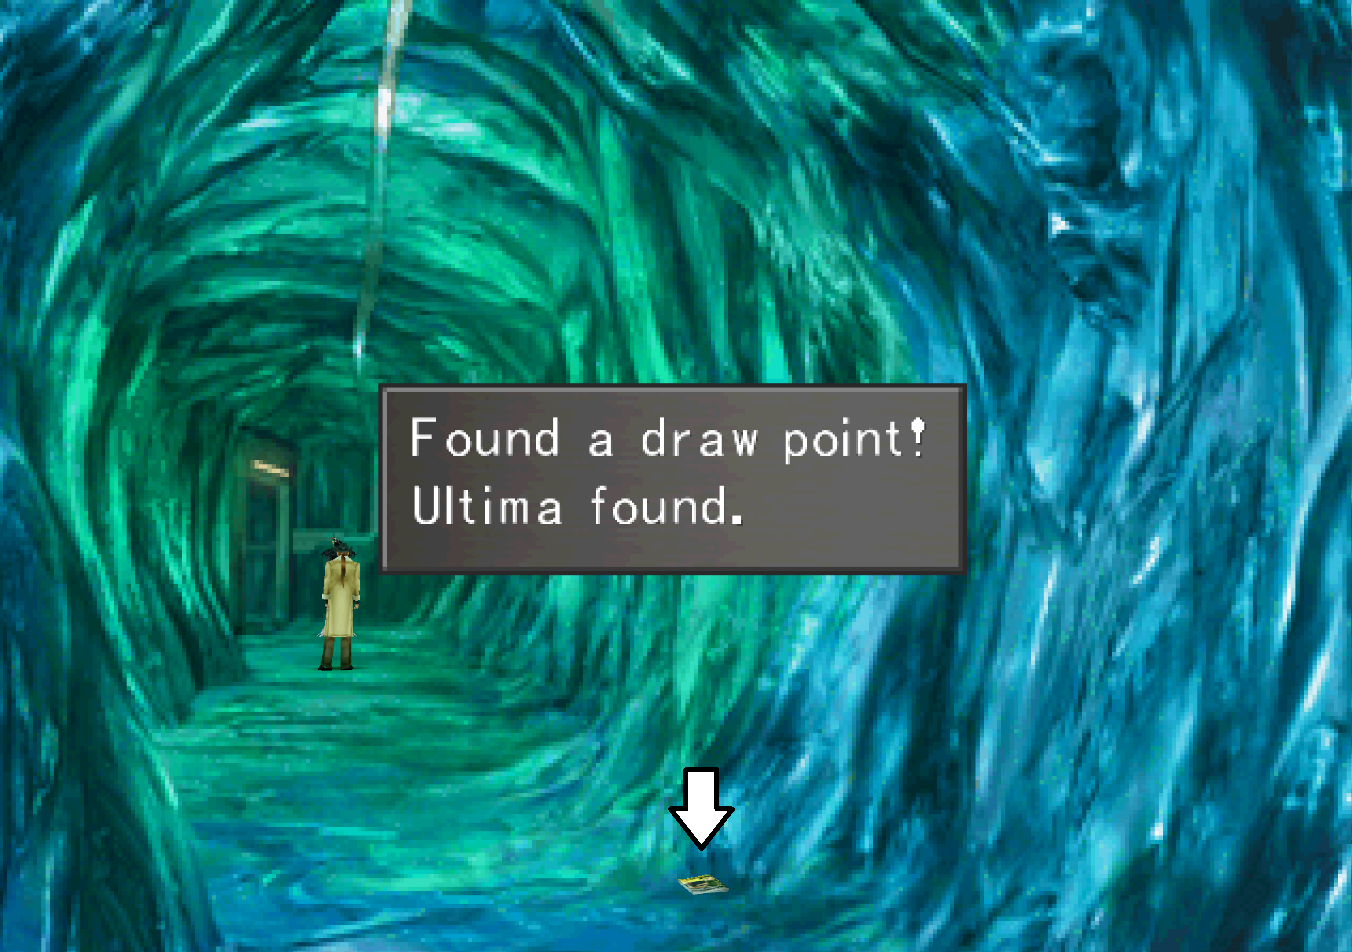
There's also an Ultima Draw Point in the back of the hallway, shown in the screenshot below. This is all there is to grab in this area, with all these items in hand you can return to the entrance of Lunatic Pandora where we first saw the three elevators and this time take Elevator #1. The second elevator leads to a dead end so it's not even worth our time.
Follow the linear path after taking Elevator #1 until you're almost at the exit. Here you will find a Spd-J Scroll assuming you pushed the rock earlier in the game as Laguna. Continue up on the next screen and keep following the linear path for another scene.
Continue to Lunar Base & Ragnarok (Disc 3) Walkthrough
Return to Esthar (Part 1) (Disc 3) Walkthrough