
Cave of the Gi - FF7 Walkthrough
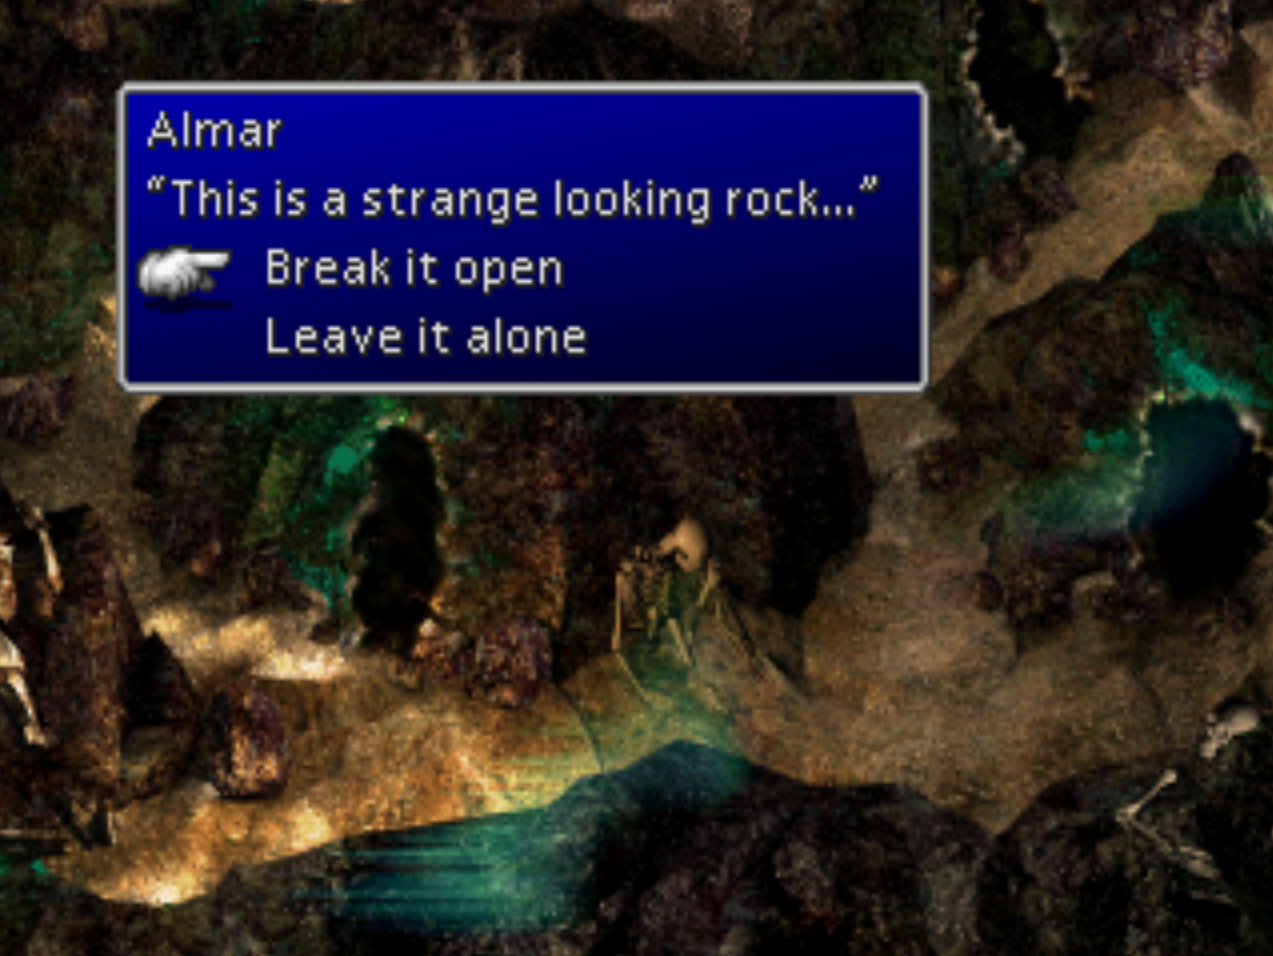
For the first part of this dungeon you're going to want to go into all of the small caves near the entrance and break open the rocks that you find inside of them. An example of one of these caves is shown in the screen shot above.
**Enemy Skill Tip** The Gi Spector and Sneaky Step enemies in this dungeon will teach you the Death Sentence Enemy Skill. They're fairly common in this place and they use this skill all the time so you probably won't have to go out of your way to learn it. Just make sure you have Enemy Skill Materia equipped.
Every rock you break that triggers a battle is the 'wrong' one. When you hear a clicking sound instead of getting a battle forced on you, that will let you know you've found the correct rock and opened the door to the next part.
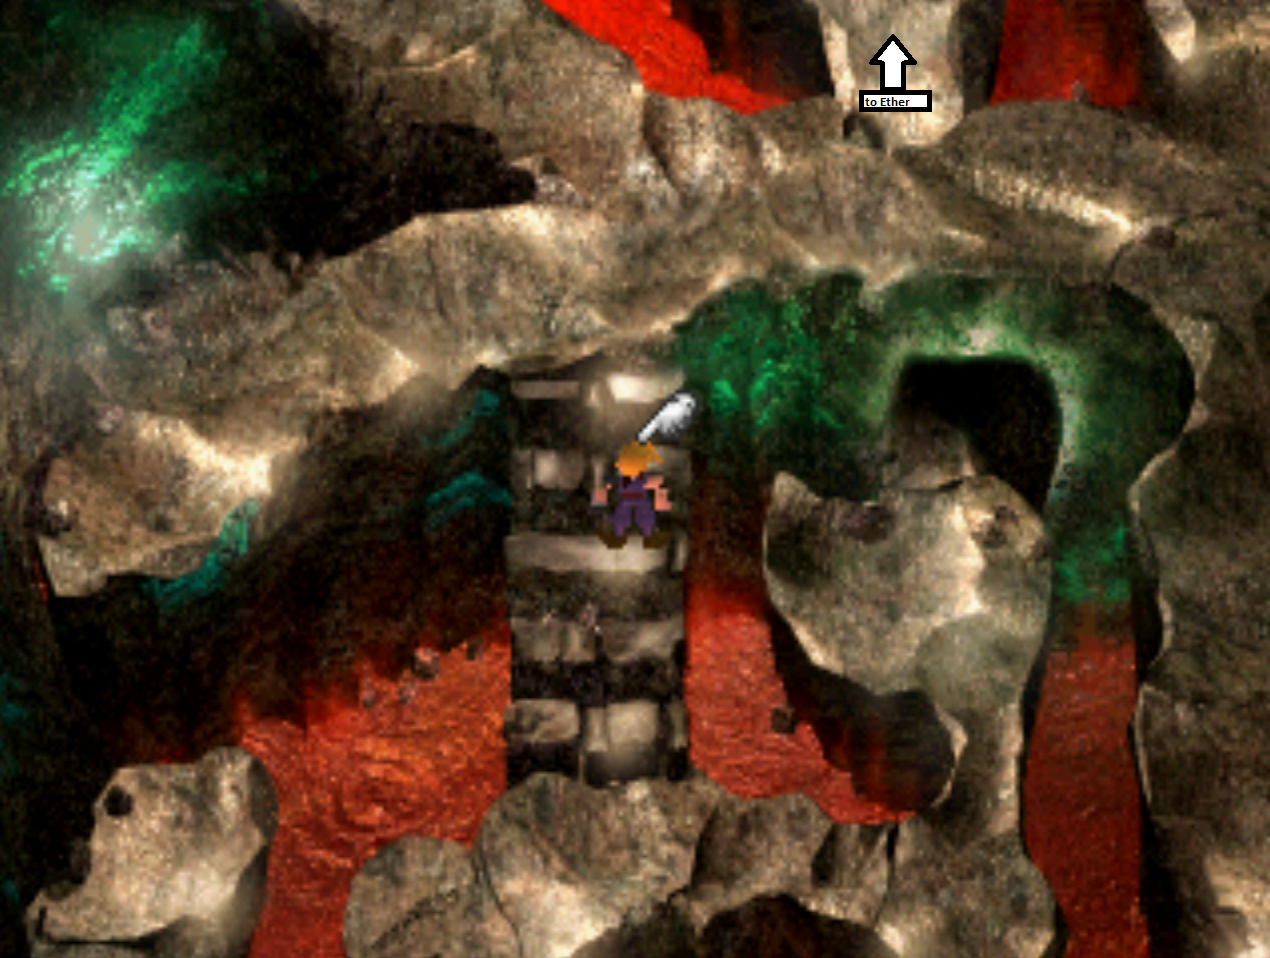
In the next room you'll want to immediately go to the right where the oil slick is on the ground. Walk, don't run over the oil - if you run you'll slide into the spike trap on the wall. South of the oil slick is where you will find the Materia we saw when we first entered. Aside from that Materia there are two more items you'll want to grab, all three are listed below. Use my pictures below if you need any additional guidance.
Added Effect Materia
Ether
Black M-phone
**Important Missable Item** Make 100% sure you grab the Added Effect Materia as you'll never be able to return to this dungeon and this is the only one in the entire game. If you need some advice on what to pair the Added Effect Materia with I recommend checking out my Materia Combinations.
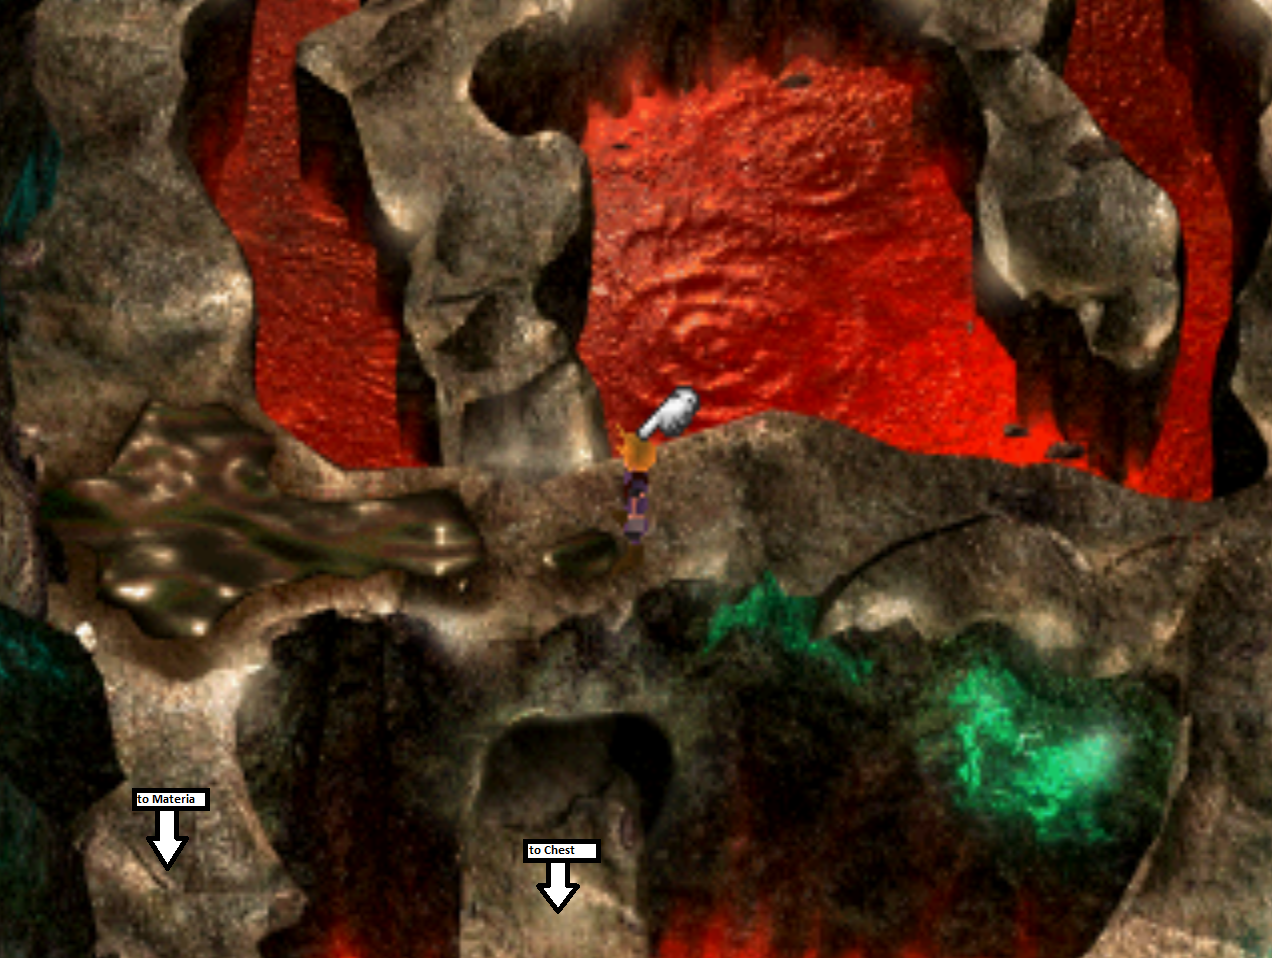
When you're ready to proceed to the next part of the dungeon go through the northern most exit into the next room. In this room you will find 5 cave entrances, the majority of them are dead ends but two of them aren't. Take the path on the right first to a treasure chest with an X-Potion and a spider web. When you walk through a spider web in this area it'll trigger a fight with a rather tough enemy.
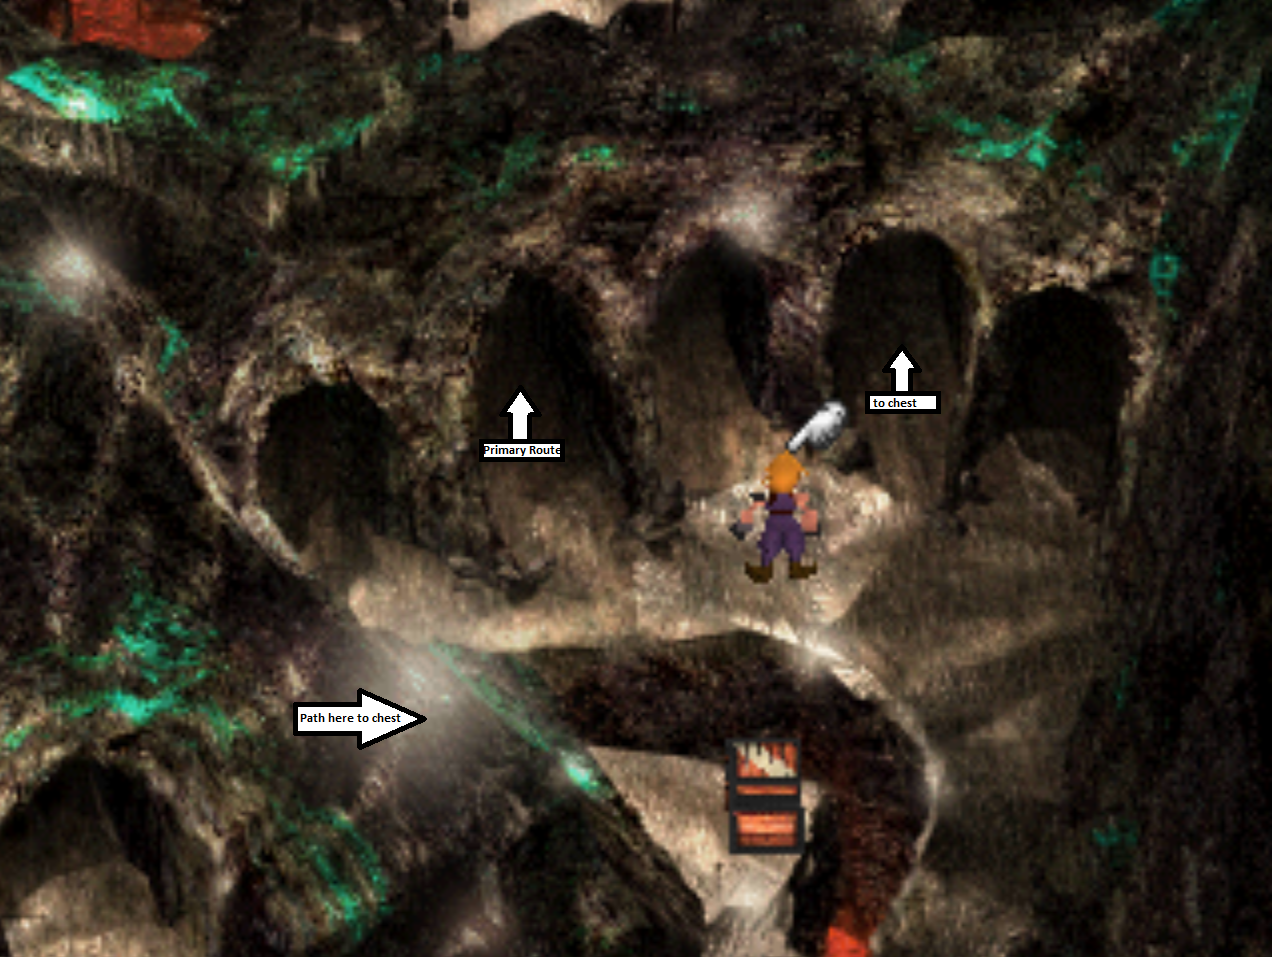
Once you've obtained the X-Potion take the path marked primary route on my map, this leads to the rest of the treasures and the way forward to the next part of the dungeon. To reach the treasure chest displayed in my picture above that's you'll want to take the primary route up north until you can get over to the western most path.
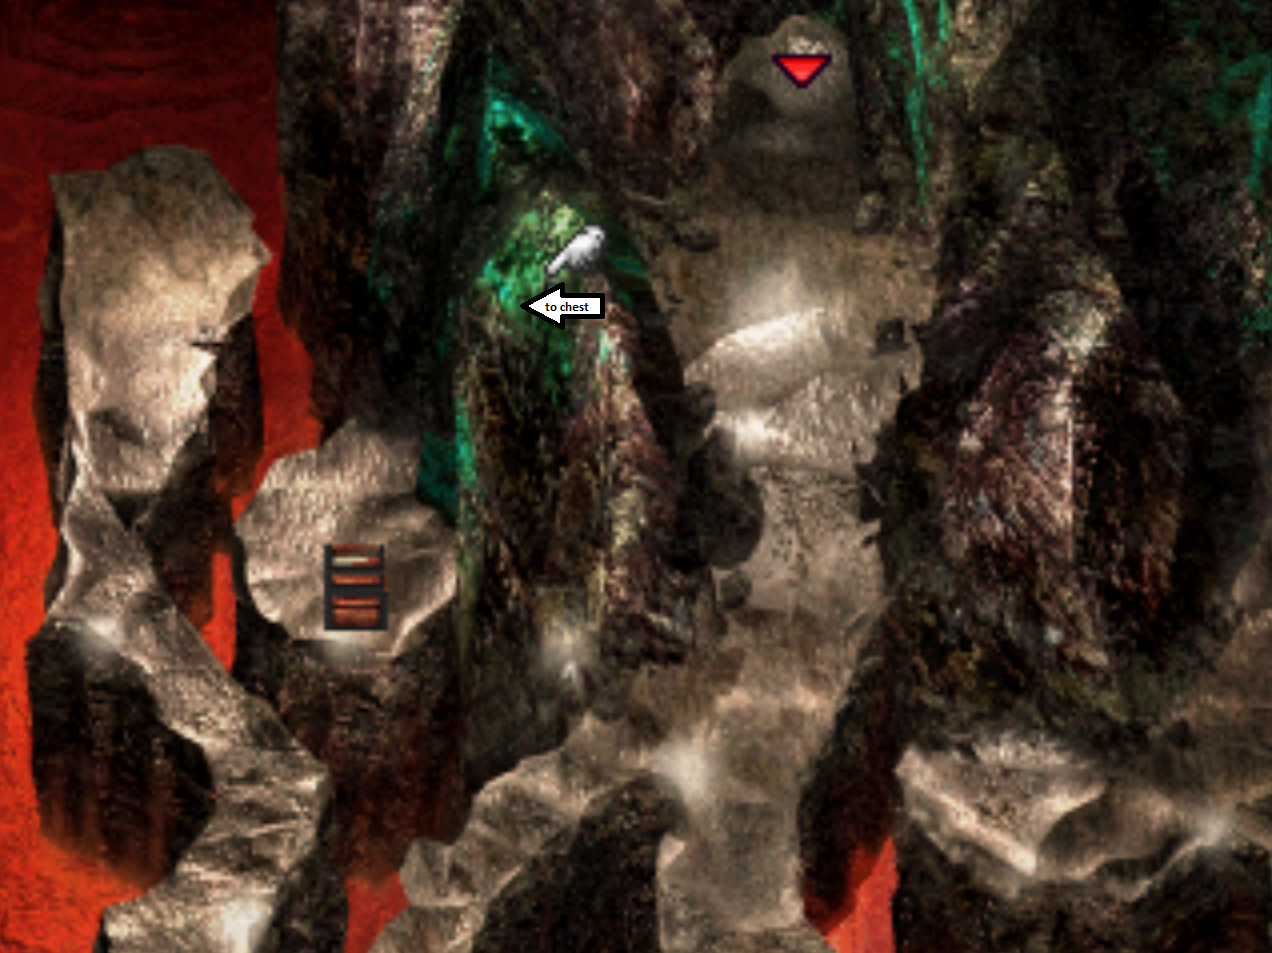
Take this path south until you find yourself in the same area where you see the arrow in my screen shot that says 'Path here to chest'. In this area there will be a little hidden path you can take over to the chest. This chest contains a Fairy Ring. That's two of three!
X-Potion
Fairy Ring
Turbo Ether
To reach the final chest all you have to do is make a left after busting apart the final spider web in the northern most portion of this area. There's a hole in the wall that will loop around to the final chest, shown in the screen shot below.
The boss of this dungeon is an undead boss named Gi Nattak - and you can cheese the hell out of this fight! Use a Phoenix Down on the boss for a 1/4 chance to instantly defeat him or an X-Potion for a 100% chance to instantly defeat him. Seriously, it's as easy as that. Once he's dead pick up the Gravity Materia and follow Bugenhagen for a scene.
After the scene you'll find yourself around the campfire again with your party, when you try to exit the town Red XIII will join you again. Hop back in your Buggy and take it north across the stream to Nibelheim, the next town/dungeon.
Fort Condor Battle #6: This Fort Condor Battle is available now that you have access to Nibelheim. I'm not sure when it becomes unavailable, I would assume sometime in Mount Nibel.
Continue to Nibelheim (Disc 1) Walkthrough
Return to Cosmo Canyon (Disc 1) Walkthrough