
Dragon Quest IX: Walkthrough Chapter 8
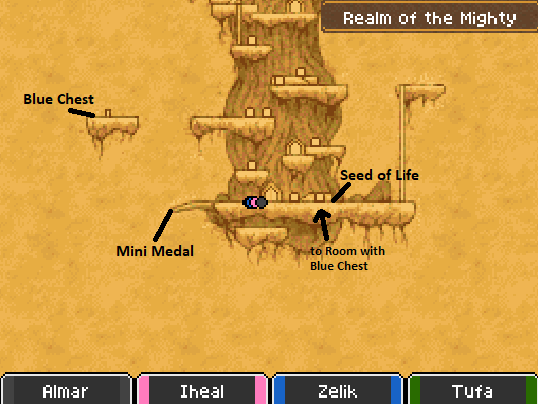
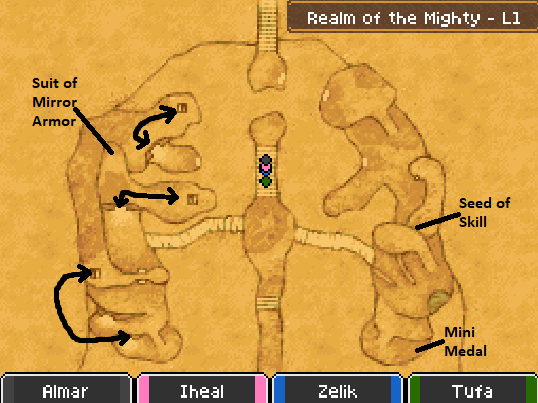
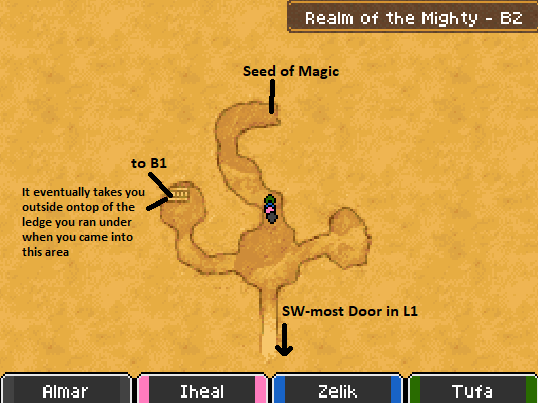
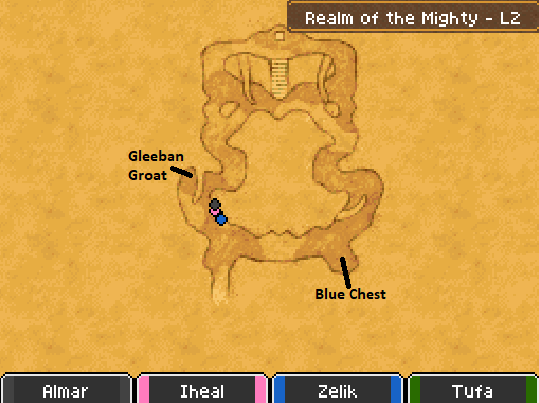
This chapter covers the final dungeon of the game, Realm of the Mighty. As I have said throughout this guide there is still more to do after we've beaten the game - but this is where the main storyline ends. You'll want to be well prepared before coming here, level 43+ when you enter is recommended but 45 - 50 would be recommended for the end boss.
Don't forget as well (I mentioned this in a previous chapter) the way this game is designed is similar to Final Fantasy V. It expects you to switch classes a few times throughout the game and do a fair bit of grinding in the process. When you do this you'll earn more skill points and be able to increase your Health, MP, Deftness, Resilience and more which carries over into the other classes when you change them in the future.
Speaking of changing classes, if you grabbed the Sage Class Unlock Sidequest from Gittingham Palace, this is the dungeon that you'll have to complete it in.
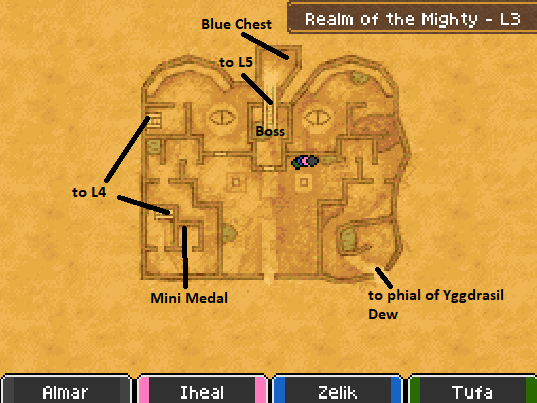
Lieutenant Goreham-Hogg is waiting for you on L3 of Realm of the Mighty and you'll have to defeat him to continue through the dungeon, the fight with him is exactly the same as in Gortress.
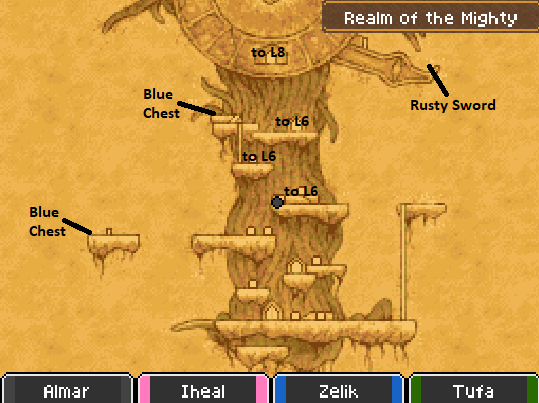
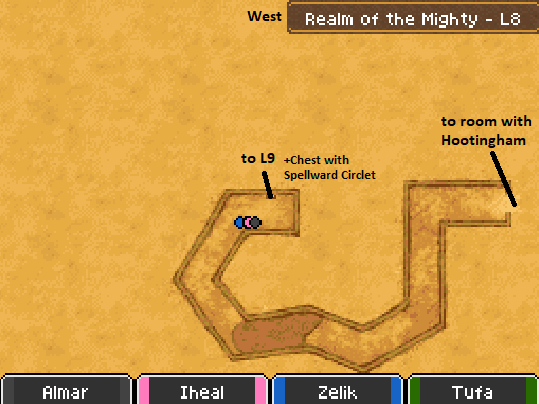
Lieutenant Hootingham-Gore is waiting for you on L8 of Realm of the Mighty and much like Goreham before him, you must defeat him to continue. Again, much like Goreham this fight is exactly the same as the last time we saw him in Gittingham Palace.
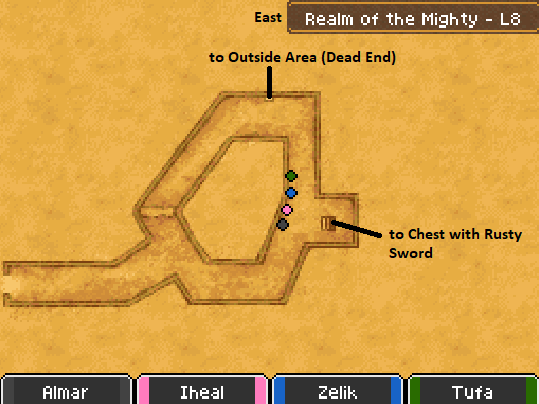
After defeating Hootingham-Gore the dungeon forks, go east for some treasure chests first then back track west to proceed with the rest of the dungeon. Only a little bit more left! We're going to be seeing another familiar face in a few floors as well...
When you find yourself in the room with the purple pit and the red carpet running into it (screen shot above) you'll want to jump down into the to be launched up to a new area. Here you'll find Lieutenant Goresby-Purrvis waiting for you blocking your entrance to the final rooms of the dungeon.
Lieutenant Goresby-Purrvis fights basically the same way as the last time we saw him, much like the previous two bosses did. Once he's defeated head through the door and up the glowing stairs to find Corvus sitting on the throne. Speaking to him will trigger a boss fight - but not the final boss fight. No strategy for this fight since it's a piece of cake - just make sure you have Multiheal on at least one character... If not the upcoming fights are gonna be a real pain in the butt!
After you defeat him exit through the double red doors and keep proceeding down, backtracking your previous steps. When you go through the second double red door where the path of light is a scene will trigger and show you falling down into the central part of the Realm of the Mighty.
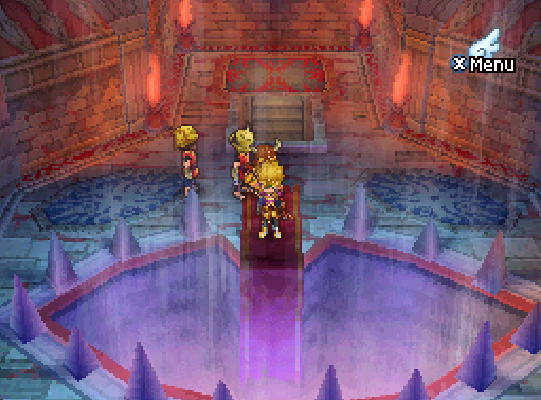
Now we're finally about to challenge the second to last boss, Barbarus. When you're ready approach and interact with the large glowing red ball in the central part of this area (screen shot below).

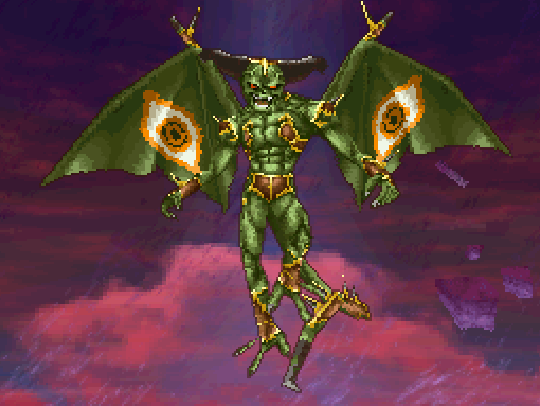
Barbarus will come out and attack you when you interact with this red/black ball. This fight is basically just as easy as Corvus before him, Barbarus has a single target melee attack which does about 40 - 50 damage and a Claw Slash attack which can deal upwards of 80 - 100 damage. Kazam is another single target spell he has which hits for about 60 damage.
The only AoE attack Barbarus has is Cloud of Malevolent Darkness which hits all party members for about 50 damage and Wave of Panic which has a low chance of decreasing your character's agility and defense. He also has an intimidating scream attack which has a chance of paralyzing a character with fear too.
If you struggle on this boss even slightly you will want to leave this dungeon and level up some before challenging Corvus next. Before interacting with the red orb again take this time to heal up, put any useful items into your character's inventories and so on. This is the last opportunity you'll get!
Corvus can be extremely challenging if you're under leveled or under prepared. With a team in their mid to late 40s you should be able to take Corvus out - even if you've never spent time changing vocations and leveling different classes.
There are four AoE attacks that Corvus has which you need to worry about, Chilly Breath, Burning Breath and Bolt which all hit your party for 70 - 80 damage each. Burning Breath has a chance of also paralyze one of your characters ontop of dealing damage. Corvus has one more extremely deadly AoE attack called Magic Burst. This bad boy deals close to 200 damage to your whole party; if Corvus uses Psyche Up before hand it's gonna hurt even worse...
The last AoE attack he has which can put a real damper on your parade is Disruptive Wave - one you're probably familiar with already. It dispels all buffs from your whole party. He doesn't start using this towards the end of the fight though.
Your strategy for this fight is going to be pretty straight forward... Multiheal every time Corvus does an AoE attack and try to keep Magic Barrier on your characters at all times to prevent Magic Burst from killing anyone. Corvus has an ability called Pray that'll fully heal him as well as Meditate which heals him for about 500 HP. For this reason you should be prepared for a long fight, use Psyche Up/Egg On to increase tension of your DPS characters and unload everything you've got onto Corvus to take him out.
Wait until the credits are finished to save your game then you'll find yourself back at Alltrades Abbey next to the glowing tree. Everything from here on out is post game content; follow the link below to be taken to the next part of the guide.
Continue to Chapter 9 (Post Game Content)