
Halo 3 (Mission 7) The Ark Walkthrough

Video Walkthrough: Halo 3 (Mission 7) The Ark Walkthrough
Skull Location: Famine Skull Location and Cowbell Skull Location
Terminal Location: Terminal 1 Location; Terminal 2 Location and Terminal 3 Location
The Ark is our next mission and it begins with us being dropped off via Pelican in a desert area. We start this mission with a Sniper Rifle and Battle Rifle, such a beautiful combination that's needed for the areas ahead. Your first two battle arenas on this map will have you with great sniping vantage points overlooking the Covenant camps.
Clear out all of the Covenant in your way and proceed through the area until you come across a large building (which you go inside). If you are interested in getting the first Terminal on this mission and the Achievement associated with it you can find it inside this building here. For more information about exactly where to find it I recommend you check out my The Ark Terminal 1 Location Youtube Video.
After passing through the building with the Terminal you'll find yourself in another outside battle arena - this one has vehicles! Eliminate the Covenant in the area and more will pull up in a Brute Prowler, it's kind of like a Chopper except it has a turret gunner seat. Search the area beneath the crashed Pelican for some supplies and grab whatever vehicle you want before continuing with the level.
It's easy to get turned around during this next part of the mission because you have to turn around and go the opposite direction to go "the right" way. What I am talking about is - you will drive your vehicle through a canyon until you hit a drop off. After dropping down into the new area you will need to turn around instead of going straight.
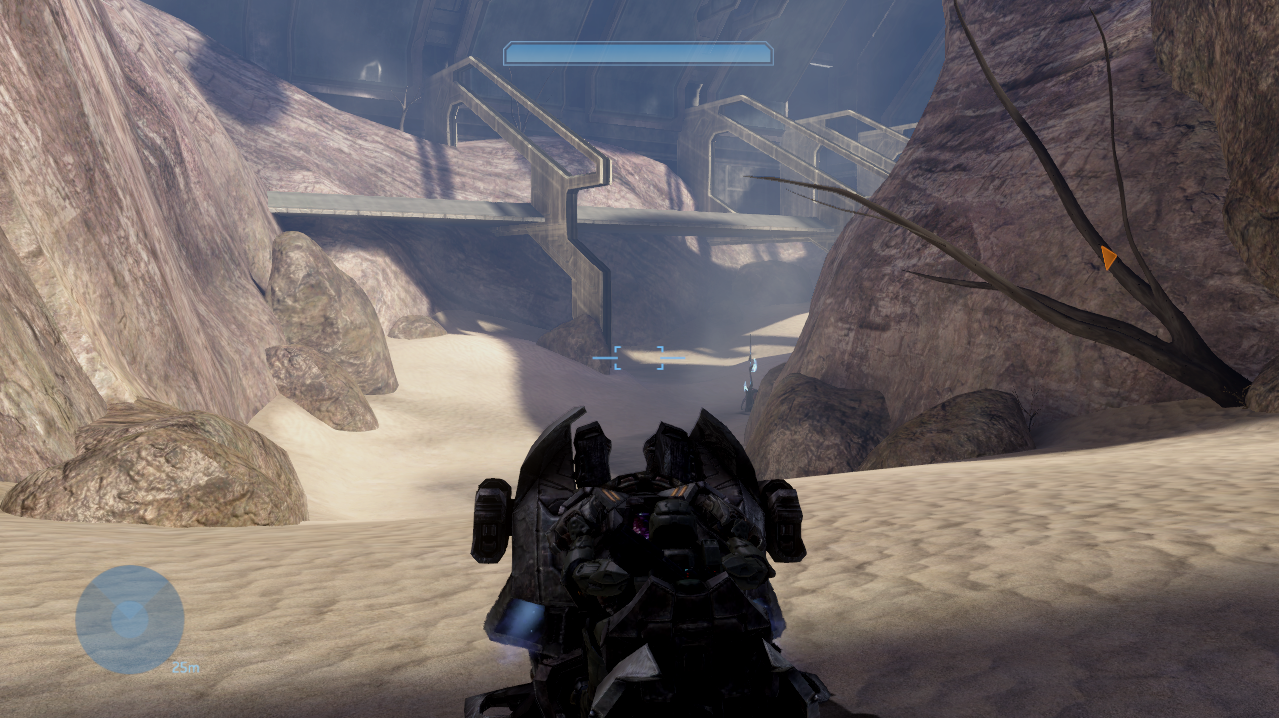
After dropping down turn to the right and go down the path shown above.
Going straight will take you to a giant building with a lot of Covenant - we need to go to this location too but not yet. Instead, you'll want to drop down and turn to the right so you can go down the path pictured above. If you're interested in getting the Famine Skull on this mission now is the time to do it. You can find it nearby on a ledge, check out my Halo 3 Famine Skull Location Youtube Video for the exact location.
The next few parts of this mission are very linear. Clear out the Covenant in the next two battle arenas to trigger an event where the UNSC deliver a bunch of Marines and vehicles (including a Scorpion Tank)! I strongly recommend you use the Scorpion because it will make the next battles significantly easier.
Our destination is that large building I mentioned before. You've probably already been there but incase you haven't I've included a picture of what I am talking about below.

When you arrive head up to the front door on the ledge and you will get a brief scene with 343 Guilty Spark after which the door will be open. If you're interested in getting the second Terminal on this mission you can get it inside this building behind the switch you need to press to proceed. Check out my The Ark Terminal 2 Location Youtube Video for the exact location.
As aforementioned, all you need to do in this building is press the switch to make the light bridge appear allowing your UNSC comrades to cross. You can find the switch on the platform overlooking the area below, 343 makes it obvious. I recommend you stick around and watch the UNSC cross the light bridge, about 10% of the time one of them drives off and it's always great entertainment.
343 will open the door for you after the button is pressed and you'll come to our final outdoor battle arena for this mission. This area is huge and you'll have to take out over a dozen vehicles along with a Scarab. Which vehicle you want to use is totally up to you, I recommend getting a Scorpion Tank when they come out of the large building and into the battle arena.
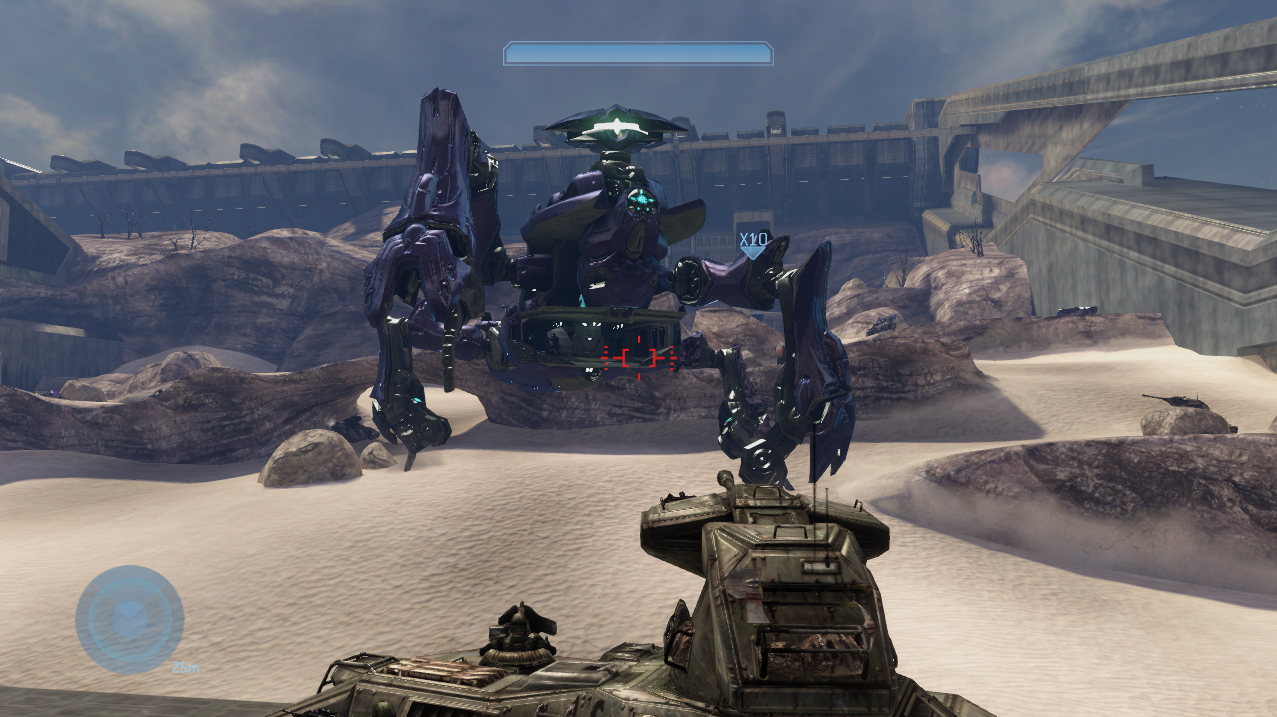
Scorpion Tank vs Scarab
Much like the previous Scarab what you will need to do here is shoot at the legs over and over until the armor on them is destroyed. Once you've destroyed the armor on all four legs pick one of the legs at random and keep shooting at it. Eventually the Scarab's body will be lowered to the ground and it will start beeping letting you know that now is the time to board it or destroy the power core.
Just like before in The Storm Mission you can destroy the power core of this Scarab from the ground. If you're having a hard time hitting the power core because of the armor in the way - that can be destroyed too if you shoot it enough. Those of you reading this who are interested in getting the next skull in this mission will need to grab a Gravity Lift from nearby before going up the slope and into the next building. You can find Gravity Lifts inside of the building in the middle of the battle arena near where you fought the Scarab.
For more information about how to get the Cowbell Skull I recommend you check out my Halo 3 Cowbell Skull Location Youtube Video. One thing I feel important to note is you can't get either of these skulls if you start the mission from a Rally Point. You have to go through the entire mission to get them.
Once you have the Gravity Lift in your possession (or if you don't care about the Skull) continue up the slope fighting the various Covenant as you go until you make it to a door at the top. 343 Guilty Spark will open the two doors at the top allowing you access to the inner sanctum.
In my opinion the rest of this mission is as straight forward as you can get. You'll be running through various hallways and rooms killing tons of Covenant. After you pass the room with all of the explosives, Grunts and Brutes you'll find the stairwell with the Cowbell Skull. Further into the facility you'll find a large outside portion with a computer terminal near the door you can activate (pictured below).
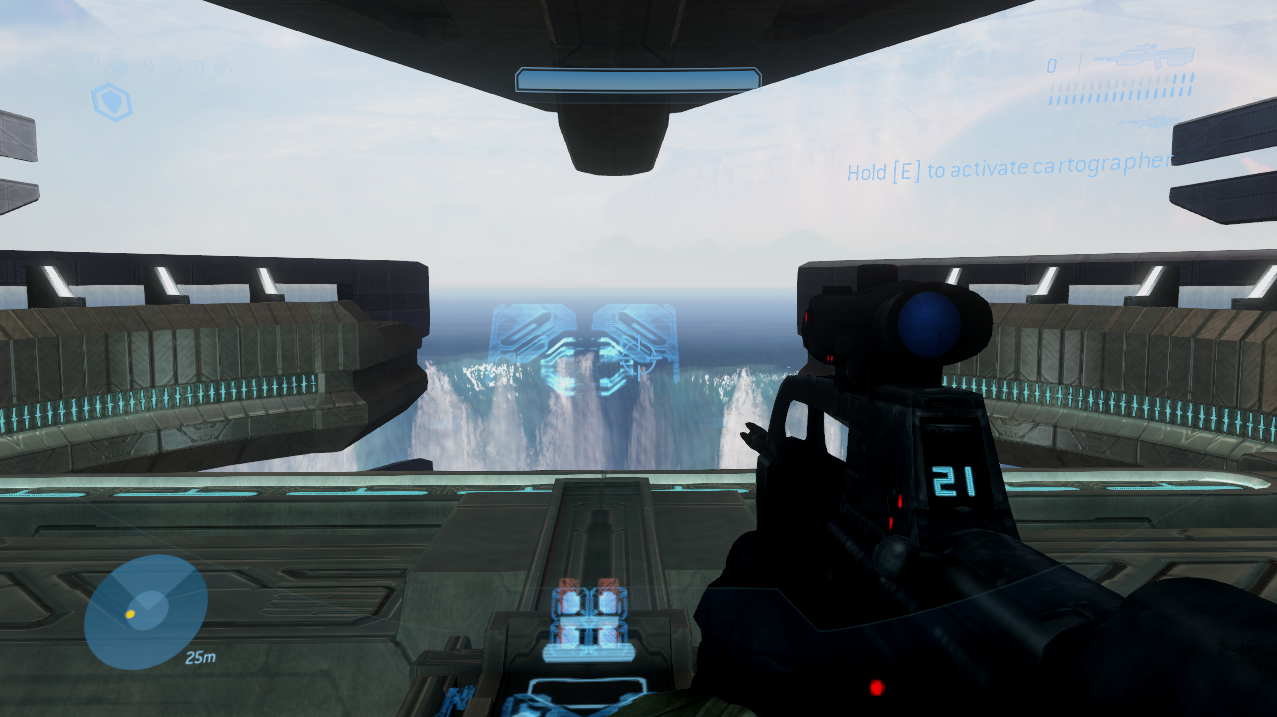
The Cartographer Terminal
This is the Cartographer which is the penultimate objective of this mission. Activate the computer terminal, watch the cutscene then flee back inside as quick as possible when the scene is over. Now, all that's left of this mission is for us to head downstairs for evac. There will be some more linear hallways and rooms along the way filled with Covenant.
Eventually when you reach the bottom platform you'll see one of the coolest scripted events of the game. There will be a bunch of jetpack Brutes spaced out to make a half circle and a Brute Chieftain with a Gravity Hammer in the middle. None of the jetpack Brutes will attack you until the Chieftain is dead or until you attack them. You have a 1v1 fight with the Chieftain... for the most part.
Hidden in this battle arena are two Jackals with Carbines which will shoot at you before the Chieftain is dead. This whole area is a fake 1v1 fight with the Chieftain which is kind of cool in how it is designed and scripted. Once the Chieftain is dead all of the Brutes become hostile and attack you. After killing everything here you'll get a cutscene and the mission will be completed.
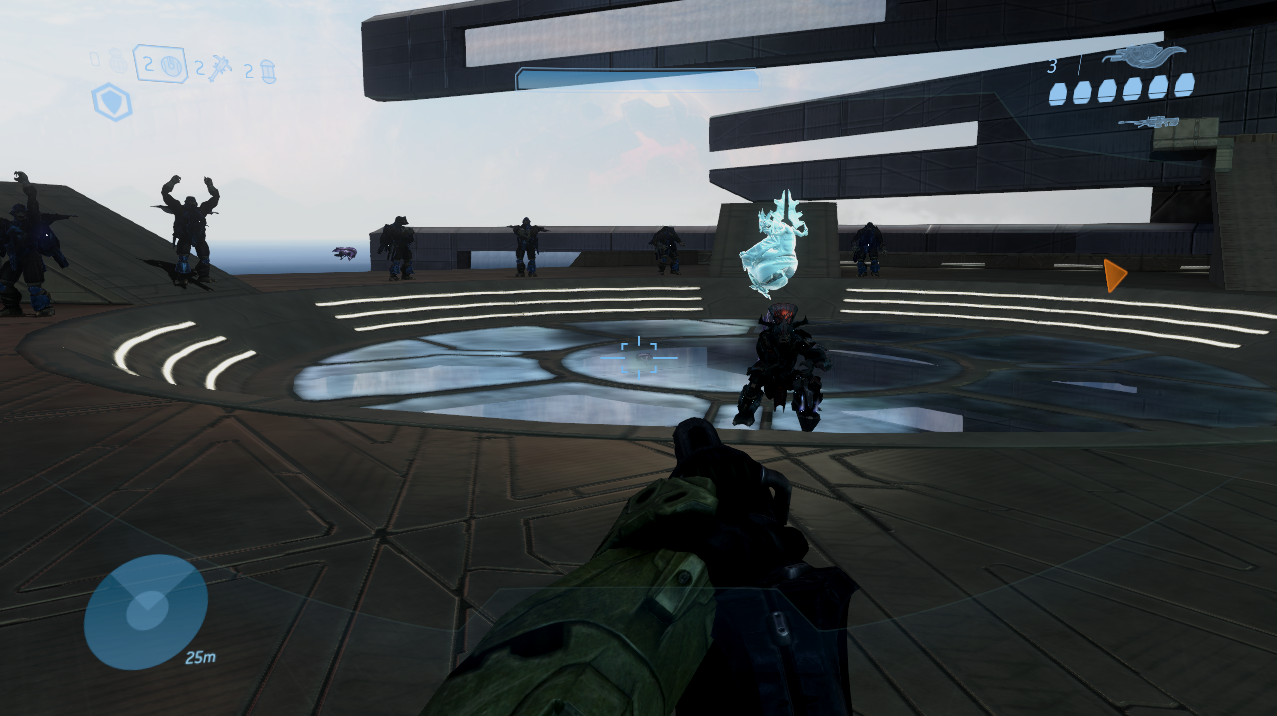
Brute Chieftain Solo Fight
Continue to Mission 8: The Covenant Walkthrough
Return to Mission 6: Floodgate Walkthrough