
Halo CE (Mission 8) Two Betrayals Walkthrough
Video Walkthrough: Halo CE Mission 8 Two Betrayals Walkthrough
Skull Location: Pinata Skull Location
Terminal Location: Two Betrayals Terminal Location
Two Betrayals starts in the exact same spot the previous mission ended; at the start you will immediately be under attack by a group of Sentinels. If you're interested in getting the Terminal on this level you can find it in the same location you start - turn around and check the area behind you for it. Check out my Two Betrayals Terminal Location Youtube Video for the exact location.
Exit this room and you will find yourself in the same hallways & area as the previous mission Assault on the Control Room. You'll have to hit the computer terminals in this area again to open the doors.
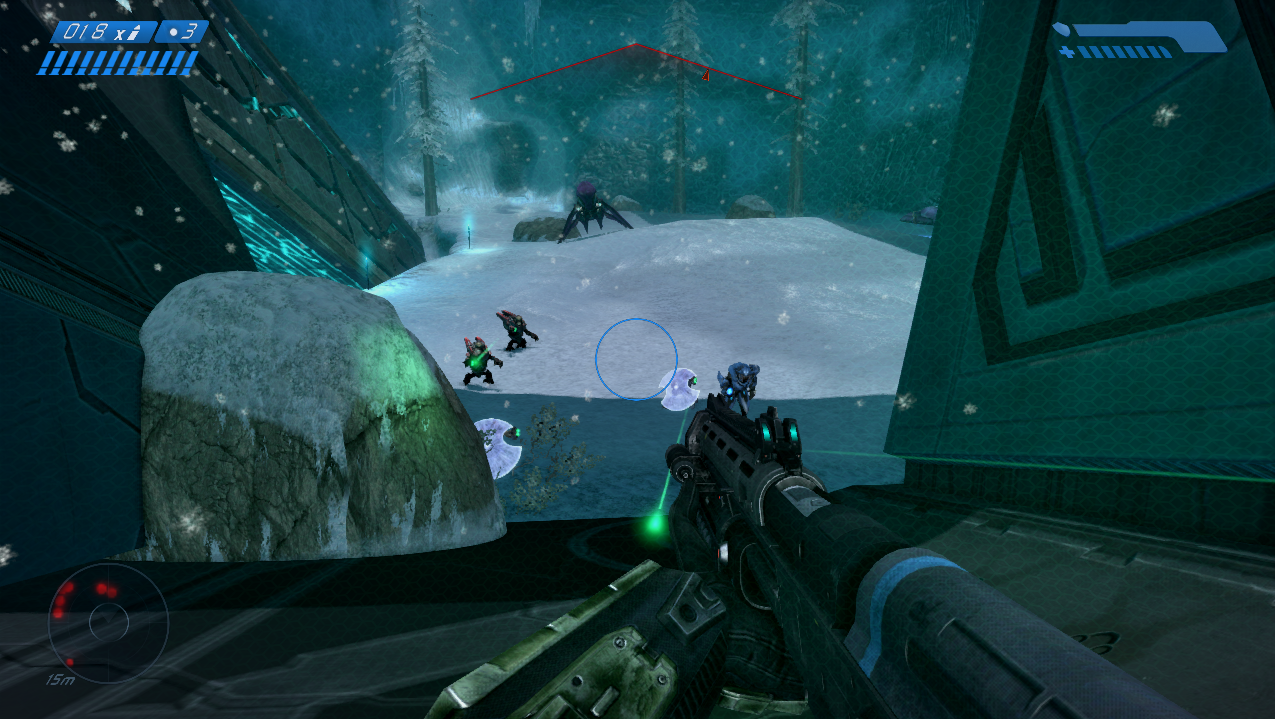
Tip: When you get outside and find yourself in the snowy canyon from Assault on the Control Room - be sure to check the tower immediately in front of you. There will be health and ammo up here including a sniper rifle.
Our destination is the bottom of the canyon where you'll find two Banshees, hop into one of these Banshees then fly it straight up into the sky towards the HUD. Before you land the Banshee on the designated platform make sure you clear it out because the Covenant here will have rocket launchers and other weapons that can make quick work of you.
Inside of the large Covenant structure you'll find something Cortana calls the Pulse Generator. All you need to do is run into the large beam of light in the center of this room and you'll deactivate/destroy our objective. One word of warning though, when you get close to the large beam of light you'll lose your shields. This wouldn't be a big deal if enemies didn't immediately spawn once you lost your shields.
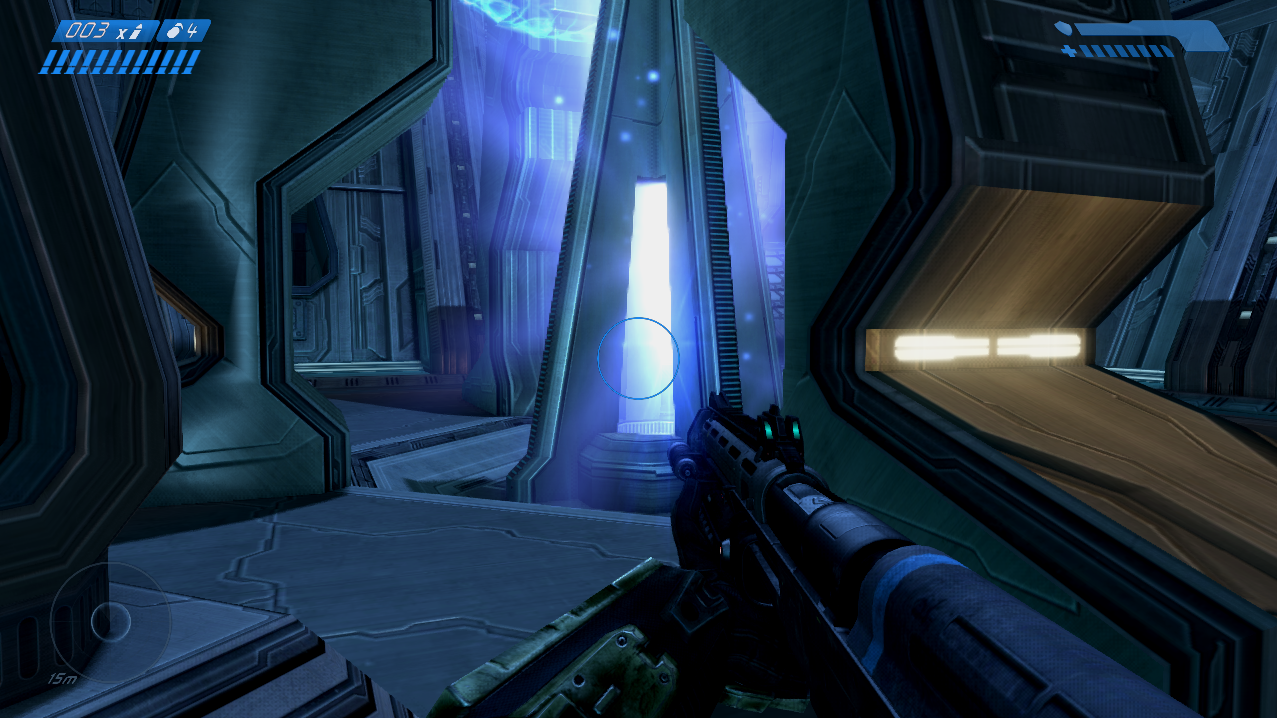
Step into the Pulse Generator to disable it
Exit the Covenant structure we were just inside of and board the Banshee again. Fly it down to the land bridge below you and follow the HUD into the appropriate door. This is going to be one of the very rare times where the arrows on the floor do not mark the correct route for you to go. Instead, you'll want to ignore the arrows on the floor and backtrack (to the best of your ability) through these areas the same way we did previously.
One thing to note is that if you find enemies - you're probably going in the right direction. Enemies almost never spawn in the areas you're not supposed to go so I recommend you use that as your gauge of whether or not you're going the right direction. Eventually you will come out to the part of this map with two bridges that run side by side.
Like last time there will be enemies on both bridges shooting at you - unlike last time one bridge will have Flood and the other will have Covenant. Also, just like last time, we're going to have to cross both of these bridges. Once you cross both bridges you'll want to ride the elevator down and follow the linear routes until you come to another snowy field. This one should look familiar to you too since we have already been through here once.
When you step out into this snowy field Cortana will mark the next Pulse Generator on your HUD. Steal a Ghost and back track through the entire snowy canyon area that we went through during the Assault on the Control Room mission. When you reach the canyon that's below the next Pulse Generator you'll find a group of Banshees that you can take and fly up to it (pictured below).
Much like last time you will want to fly around with the Banshee a bit before landing and take out the enemies in your docking area. There will be a lot up here that you need to take out, a couple of Grunts with rocket launchers, turrets and some other Banshees flying around. A tip when using the Banshee, hold down and it will kind of float in the air assuming you're looking down at your target.
Once you've eliminated all of the enemies dock your Banshee on the platform then head inside of the building. Just like last time you'll want to step into the large beam of light (the Pulse Generator) and deactivate it using your shields as an EMP. Also, just like last time, enemies will immediately spawn and attack you once you do this.
Now that we've gotten rid of this Pulse Generator exit the building, get into a Banshee and fly down the canyon towards the next HUD. If you haven't been able to tell already, we're basically back tracking through the entire previous level Assault on the Control Room.
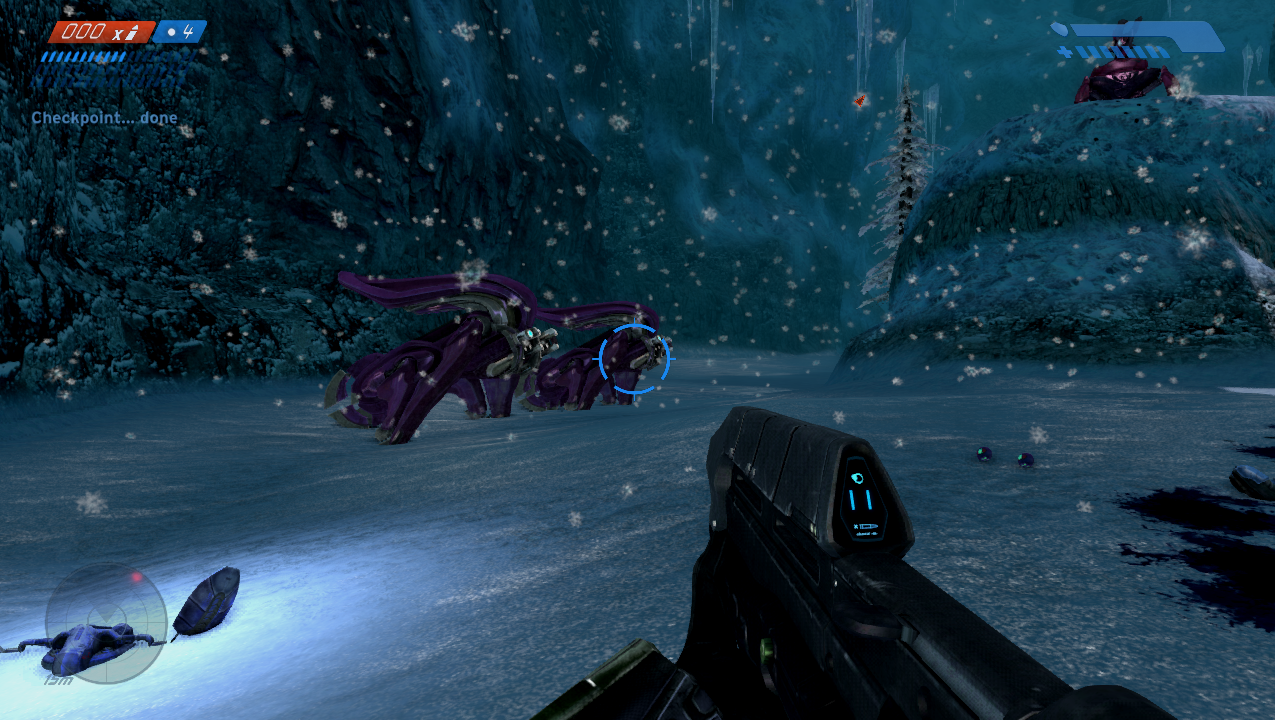
Warning! From this point onward you should be very wary of Rocket Launcher Flood. These guys spawn in many places throughout this level and they are insanely annoying to deal with because they can and will one shot you.
While you are flying through the hallways towards the next HUD you'll have to exit the Banshee and activate a computer terminal. Doing this will cause the door to "open" in front of you - just large enough for Master Chief to fit through but not your vehicle.
Continue through the large room and the linear hallways on the opposite side of it. When you come across a locked door use the available terminals to open it. You'll eventually come out to a large snowy field that should look familiar since we went through this area previously too.
Rocket Launcher Flood are going to be an issue in this area so keep an eye out and make sure you move slow and calculated - otherwise you're going to be blown away. Our destination is the end of this canyon - there you'll find a large group of Covenant fighting a large group of Flood. Inside the large group of Covenant will be a pair of Banshees which is what we need.

Pinata Skull: You can find the Pinata Skull in the final portion of this level. Fly the Banshee to the ledge above the tunnel that you came out of and you'll find the skull sitting up here. Check out my Pinata Skull Location Youtube Video for better directions on where to find it.
This battle is going to be one of the hardest you've had to deal with in all of Halo thus far. Start by using any Sniper Rifle ammo you have remaining to pick off Covenant enemies from a distance (focus on the Elites). Then start eliminating the Rocket Launcher Flood and using their Rocket Launchers against the Covenant tanks and Hunters.
Eventually you'll clear enough Covenant so that you can safely grab a Banshee and fly away with it. Once you have the Banshee our destination is going to be the marked location on your HUD which we'll have to back track a little bit to reach. At this final Pulse Generator you'll find many Sentinels flying around guarding it so make sure you take them out first before landing the Banshee.
Once you run into the final Pulse Generator and disable it you'll get a cutscene which completes the mission.
Continue to (Mission 9) Keyes Walkthrough
Return to (Mission 7) The Library Walkthrough