
Everquest Leveling Guide 85 - 88 Toskirakk
***Notice*** Everyone reading this guide in 2018 or later should note that this guide was written in 2009 or so when Underfoot was the current expansion pack. As you can imagine a lot has changed in the game since that time and some of what you read in this guide may be inaccurate or misleading. This page *does* still have some useful info which is why my newer leveling guides link here - but you should understand that most of the information here is outdated, I've taken what's correct and incorporated it into my newer leveling guides.
If you're here from one of my older links then head over to my new Everquest Leveling Guides Index page as you'll find guides for each expansion for you to choose from. I strongly urge you to use these newer leveling guides instead.
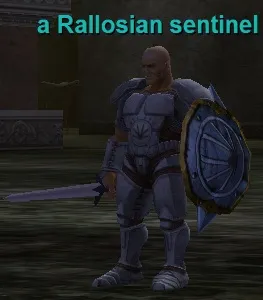
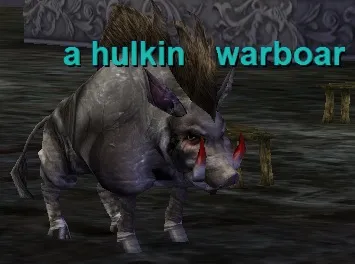
Toskirakk is one of the hardest zones off of The Void, home to mobs that hit on average for 2.5k or more. If you have reached this part of my leveling guide and you do not have at least 1.7k AAs (spent VERY well I might add) you are going to get your butt whooped here (Unless... read on...). Of course you can probably still handle this zone with 800 AAs and some really good gear, but, you will be restricted to the blue circled camp and to only fighting the "a hulking warboar"s.
As for the unless part... There might be one saving grace if you are short on AAs and still want to hunt here, this saving grace is the hulking warboars. These are relatively weak mobs which means they are pretty much level 85s with level 60 equipment and AAs. That's the best way I can explain it. They have significantly less HP, armor and deal about a quarter of the damage that all other mobs do for their level. You will be able to kill these mobs with a small amount of AAs (maybe 500 could do these with no problem) however if you get a Rallosian add on you, you're going to die quick.
If you have been following my leveling guide this entire time than relatively weak mobs won't be anything new to you, you should remember them quite well from Field of Scale. If you haven't been following this guide, well, that's why I just explained what they were! Anyway, below is a map of exactly where you will want to make camp at in Toskirakk. A warning to everyone coming here thinking it is going to be vacant... Since we are finally getting into higher level content these zones aren't going to be deserted. You may actually have to go somewhere else, which is why I have links at the bottom of all my leveling guides now with additional places to level.
Map of Camp in Toskirakk
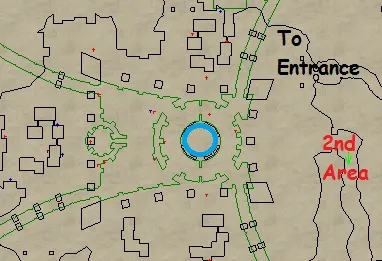
On the map above, you will want to stay in the little blue circle in the middle of the map. This will be the safest area for you and also surrounding this blue circle has the most single pulls of the whole zone. If you want to play things extremely safe pull all the mobs into the circle area or at least onto the outter rim of the circle before the ground switches back to what it is all over the zone. Once you are here you will know exactly what I am talking about.
Although I have already brought it up, it bears repeating, the little boars all around this camp in Toskirakk are relatively weak mobs, meaning they are extremely easy to kill. For anyone with a low amount of AAs or anyone leveling here period, you'll want to be sure to kill these little buggers. At level 90 they were giving my Beastlord about 10% of an AA which is actually really good for how quickly they can be killed. Usually I run around and pull 3 or 4 boars at a single time, since they are so easy I let them wack on me and have my damage shield do quite a bit of damage to them as I kill their friends.
In closing, before I get to the actual loot you will be finding here I would like to bring your attention to a few augs that you find. I don't know if both of them are hotzone augs or maybe just one is, doesn't really matter but you will find two really unique augs here, both of which are probably worth using (as long as you're not a Free to Play player that is). You'll know it when you find these augs. As for all of the other loot, most of it is just vendor trash but assuming you leveled your character yourself you should probably have a good idea of what to keep to sell in The Bazaar by now and what to trash. Also, of course, you have all of my handy dandy loot pages below to help you with such decisions!
The Second Area marked on the map is a more advanced area that is specifically there for players that have well over the 800 AA mark (closer to 1250 - 1500 AAs) and good gear that can handle the Rallosian mobs on their own and even two at a time. This little hallway usually has quite a few singles and they continue all the way to the Korascian Warrens entrance.
Toskirakk Loot Table


Augs - Quite a few actually
Continue to Korascian Warrens Leveling Guide
Return to Blackburrow Leveling Guide
Alternate Locations Where You Can Level
***Notice*** Everyone reading this guide in 2018 or later should note that this guide was written in 2009 or so when Underfoot was the current expansion pack. As you can imagine a lot has changed in the game since that time and some of what you read in this guide may be inaccurate or misleading. This page *does* still have some useful info which is why my newer leveling guides link here - but you should understand that most of the information here is outdated, I've taken what's correct and incorporated it into my newer leveling guides.
If you're here from one of my older links then head over to my new Everquest Leveling Guides Index page as you'll find guides for each expansion for you to choose from. I strongly urge you to use these newer leveling guides instead.