
Dragovian Trials Walkthrough
The Dragovian Trials dungeon can only be accessed once you beat the game and save your file after the credits. You're actually shown a short scene at the very end of the game of this location 'lighting up'. Next time you load the game you'll see that your save file has a star next to it, this is the only requirement for accessing the Dragovian Trials and the end portion of the game.
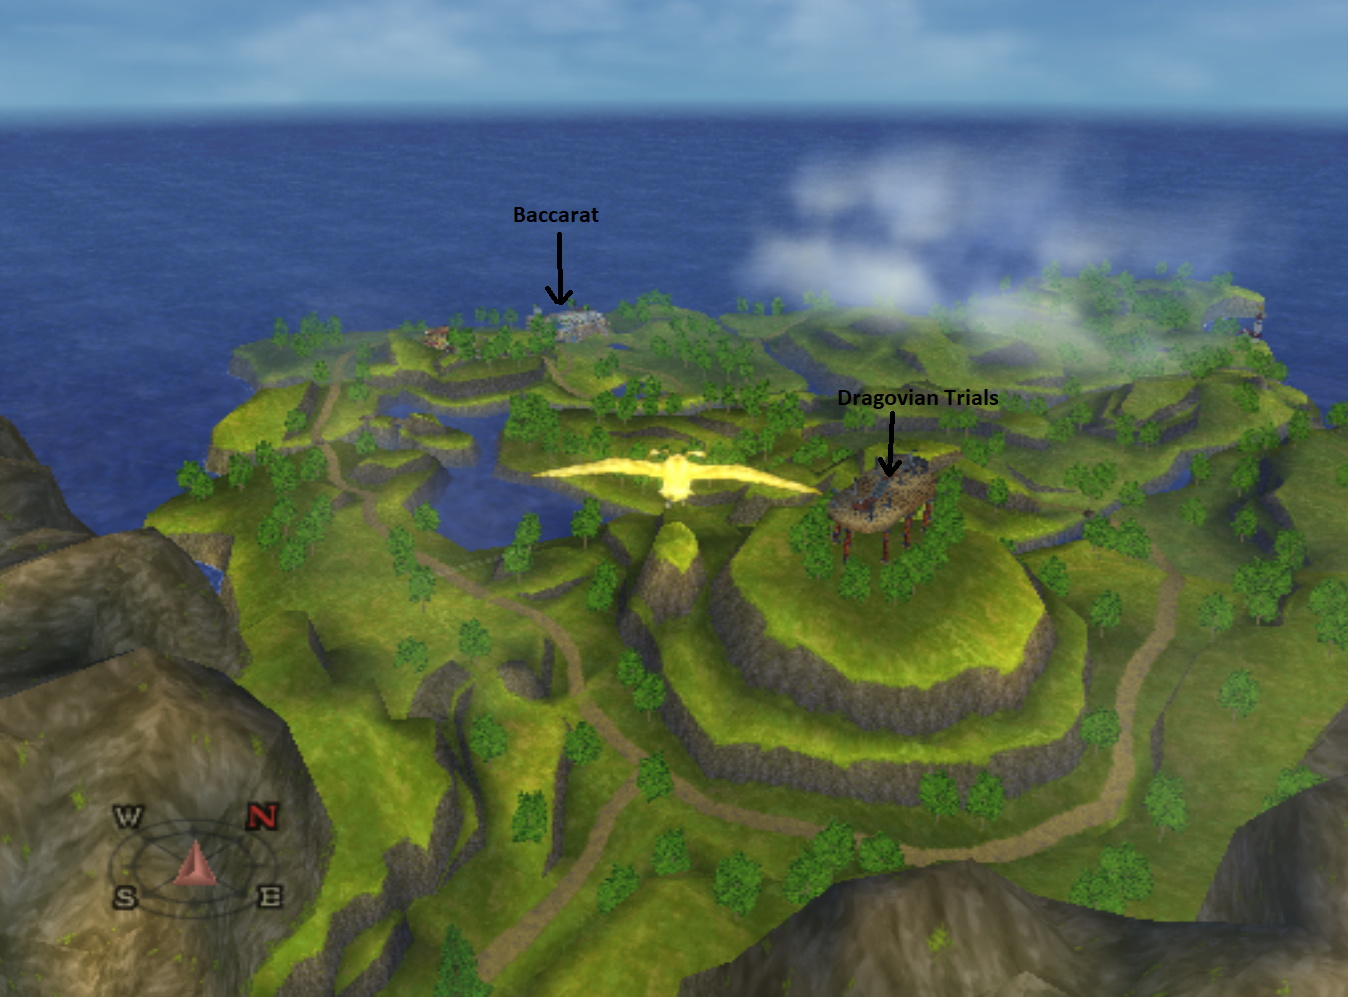
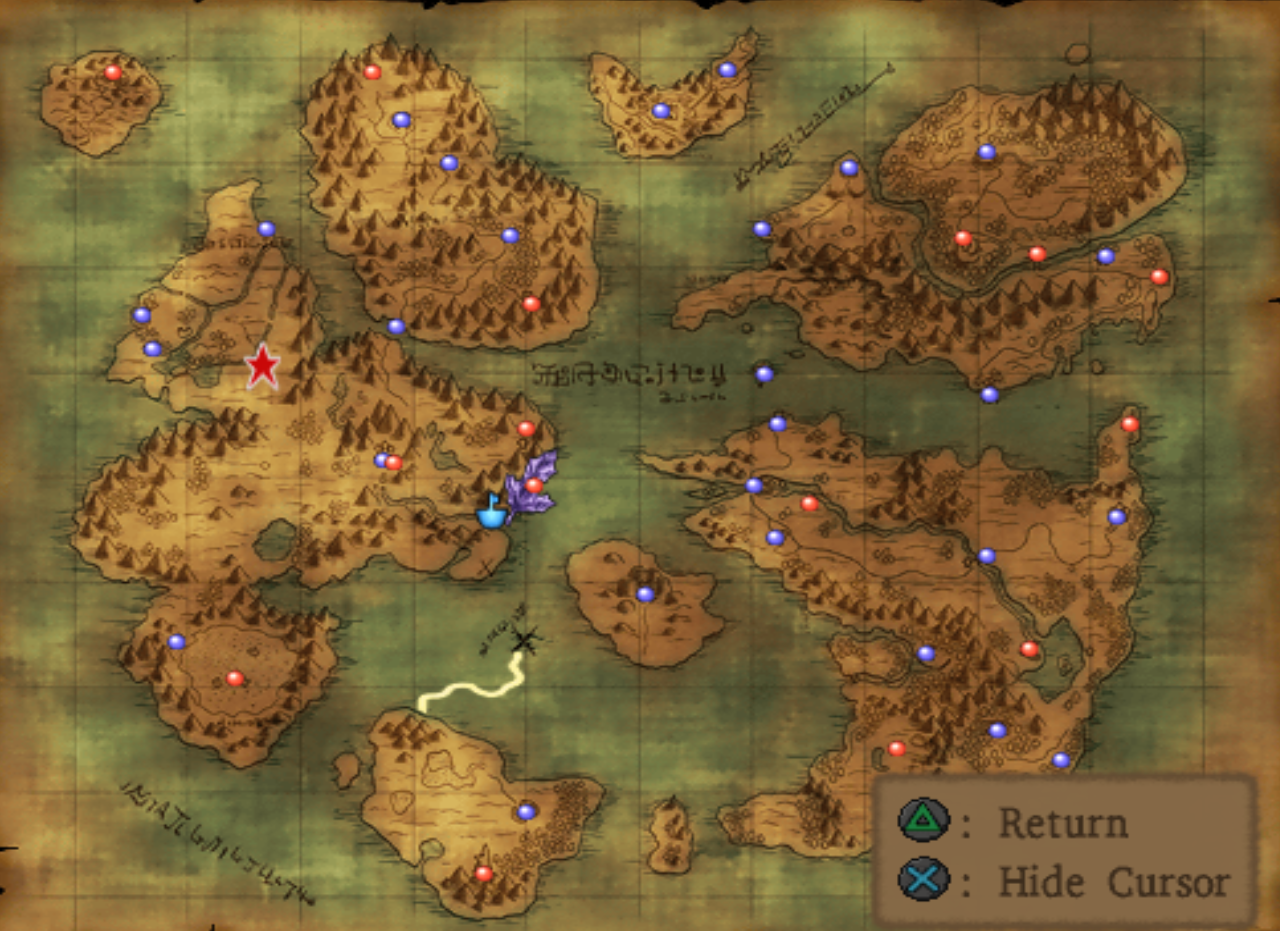
You can find the Dragovian Trials dungeon northwest of Argonia, it's a short flight and you've probably seen this location before - maybe even landed here before; it's easy to find. Despite being easy to find, initially, this dungeon isn't easy to navigate. Unlike all the other dungeons throughout the game, there's no map given to you for this place. At least on the Ps2 version of the game. This means you'll have to actually run around for a bit a learn the paths and where they take you, just like the good ol days of gaming.
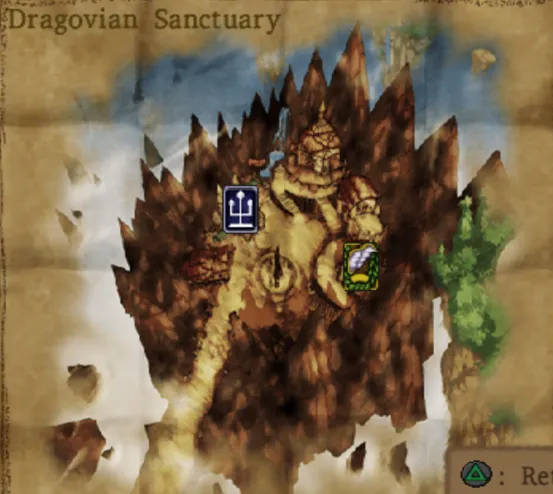
Map of Dragovian Trials entrance.
A little way into the dungeon you'll pass a large oval room with a pillar in the middle surrounded by water - the path forks to the left and right after this room. First you'll want to follow the left fork, this takes us to a dead end with a treasure chests that contains Liquid Metal Armour. You can either backtrack the way we just came or use Evac.
Now it's time to go to the right at the fork as that takes us to the treasure chests which contain a Seed of Skill and Thanatos' Shield as well as the path that goes to the next part of the dungeon. The next part of this dungeon takes place mostly in a large outside area. There's a chest in a large room with poison puddles that is actually a Pandora's Box mimic.
The last two treasure chests that contain the Metal King Spear and the Elfin Elixir are found on islands which are on either side of the main path leading up to the Dragovian Sanctuary, which is the final town of the game. If my directions aren't good enough for you, I would recommend leveling up to about level 50 then using Holy Water. You'll avoid every encounter in this entire dungeon and you can run around freely grabbing all the loot. You'll most likely need to level up anyway to take on the bosses that are coming up.
Dragovian Trials Treasure Chest Loot:
Liquid Metal Armor
Thanatos' Shield
Seed of Skill
Pandora's Box (Fake Chest in room with Poison)
Elfin Elixir
Metal King Spear
After completing the first areas and collecting all of the treasure chests you'll find yourself in the town of Dragovian Sanctuary. I won't share much about the cutscenes that happen here but you figure out the Hero's origin in this town and the subsequent dungeon. As aforementioned this is the final dungeon/town in the Ps2 version; however the 3DS version has a little bit more content.
When you first arrive in town you'll want to go to the Elders' Building which is the largest building at the northern most end of town. Watch the scenes and when you're done you'll want to go to Munchie's house to rest. Open your map, the building to the bottom right of the Elders' is where you're heading. You'll find the entrance under the bridge.
Rest the night in here and in the morning you'll be able to go to the Heavenly Dias dungeon which is located in the same building that the Elders are in, just in the basement. Prior to leaving town it's worth mentioning that the Item Shop here contains some goodies that aren't sold anywhere else, such as Dragon Dung, Devil's Tail and Premium Mould. It's worth stopping in to stock up on some of the items especially since we're not very far away from getting the instant Alchemy Pot.
Dragovian Sanctuary Loot:
Angel Cheese
Chunky Cheese
2 Fresh Milk
Highly-Strung Cheese
6 Mini Medals
Nook Grass
Premium Mould
Rock Salt
Saint's Ashes
Yggdrasil Dew
The Heavenly Dais dungeon is actually really easy unless you're unlucky. The enemies in here can be annoying, they can instant death your entire party and have a variety of annoying status ailments but they don't hit that hard and they're not too tough. Only in the situations where you get unlucky will things be a challenge.
Throughout this dungeon there is absolutely no reason for you to conserve your MP. There is a boss at the end of the Heavenly Dais, a few in fact, but he fully restores your HP/MP before facing off against him. You also only face one boss at a time then he ports you out and you have to run all the way back through the dungeon to face the next boss. So, unload everything you got on the trash enemies, AoE every pack of them with your strongest attacks and just annihilate them.
I'm not going to guide you through this dungeon because you'll literally be running through this dungeon 7 - 10 times to face all of the different bosses at the end. You'll eventually learn the layout by heart unless you're aimlessly running through not paying attention at all and you find your way to the end each time purely through luck.
Heavenly Dais Loot:
Dangerous Bustier
2 Mini Medals
Orichalcum
Skull Helm
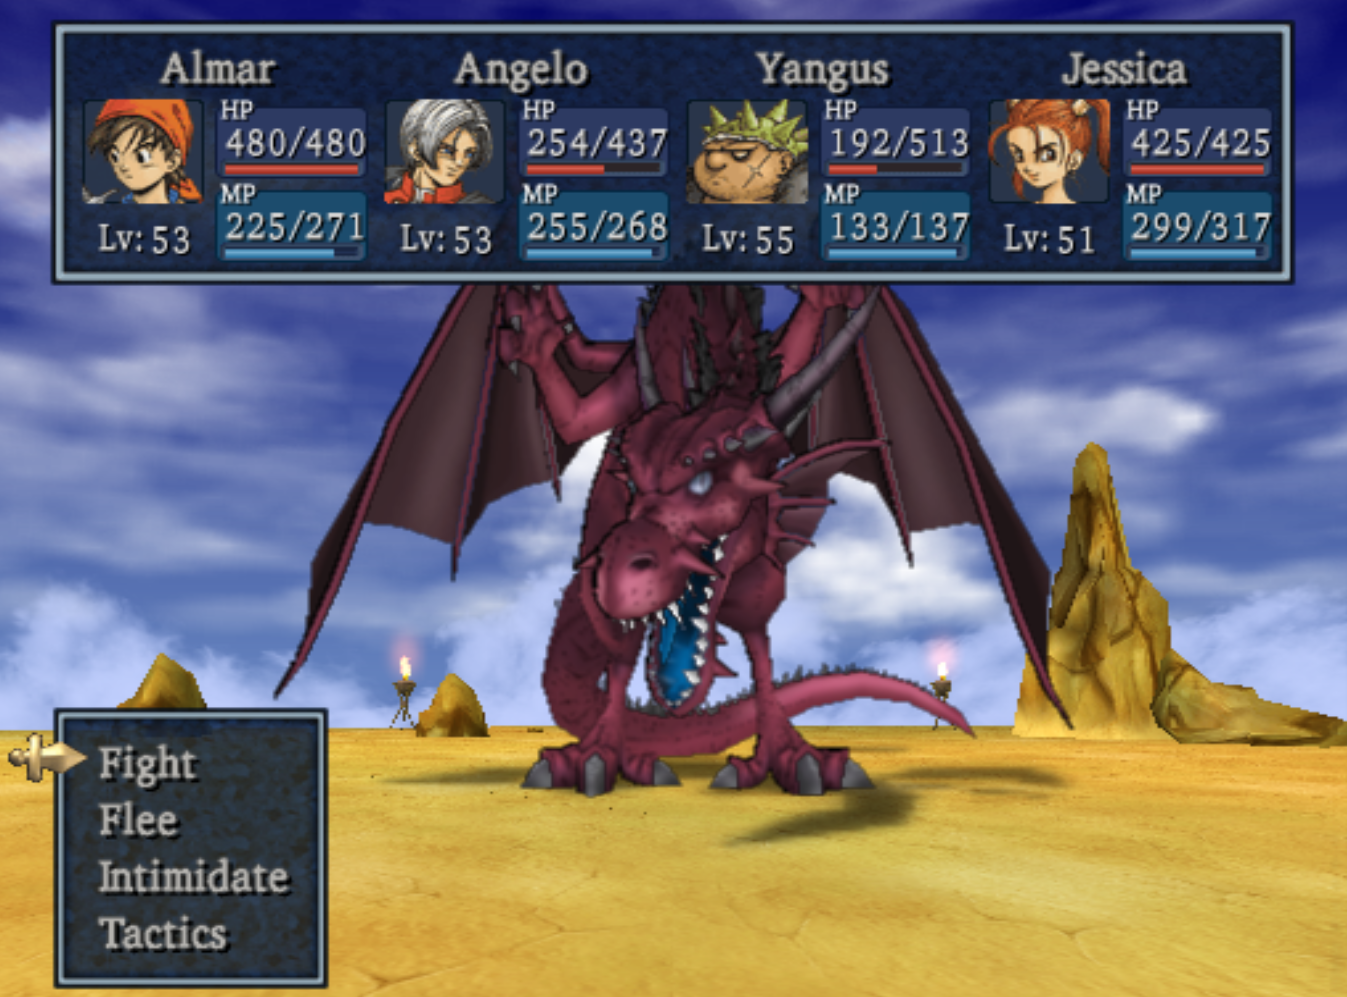
The first time you reach the end of the Heavenly Dais dungeon you'll be facing off against the Lord of the Dragovians. This is the first dragon in a line of many but the only one we're going to be facing off against this time. One thing to keep in mind about this encounter as well as every other dragon you face here is that they do not use the wave of ice ability that dispells your buffs and tension that many bosses before have.
All of these dragons have their own quirks and abilities but our general strategy for each battle is going to be relatively the same. Your main goal of course is going to be staying alive with dealing damage being the second most important thing.
Strategy for Trial of Dragovians Bosses:
- At the start of the battle use Call Team
- Keep your whole group 3/4 HP or above
- Kabuff, Magic Barrier, Acceleratle at the start of every battle (I use Timbrel of Tension then Magic Barrier then Timbrel of Tension again then Acceleratle on Jessica)
- Use Timbrel of Tension each round; don't attack unless you have above 20 tension
- Use Psyche Up each turn you're not buffing or attacking when you're 20 tension or below
- Attack once you've built up at least 50 tension
Dragovian Trials Bosses Walkthrough (Incomplete)