
Walkthrough Act 2 - Baldur's Gate Dark Alliance
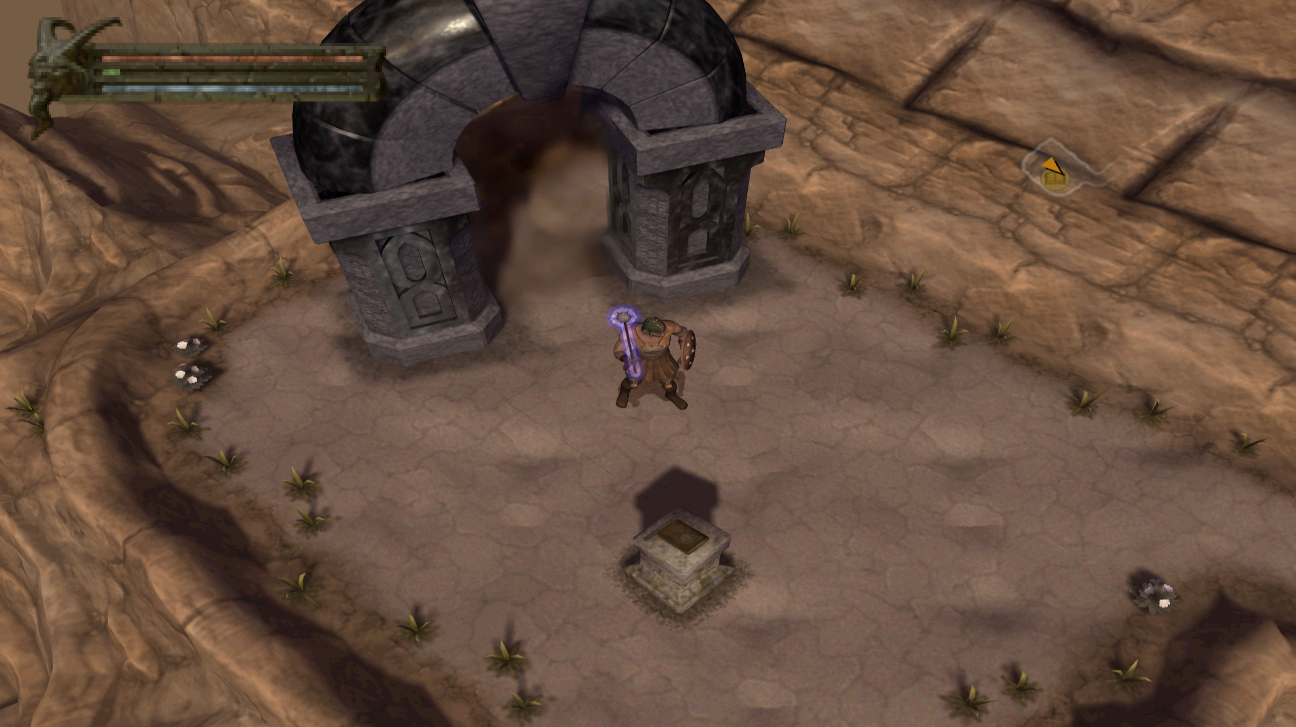
After going through the portal at the end of Act 1 you'll find yourself in a desert next to a Save Game podium. From now until you reach the next town you'll be unable to use Recall so I recommend you go very slowly and try to take as little damage as possible for the upcoming areas. If you run out of potions you're going to have to do a lot of standing around waiting to regen since there is nothing else you can do.
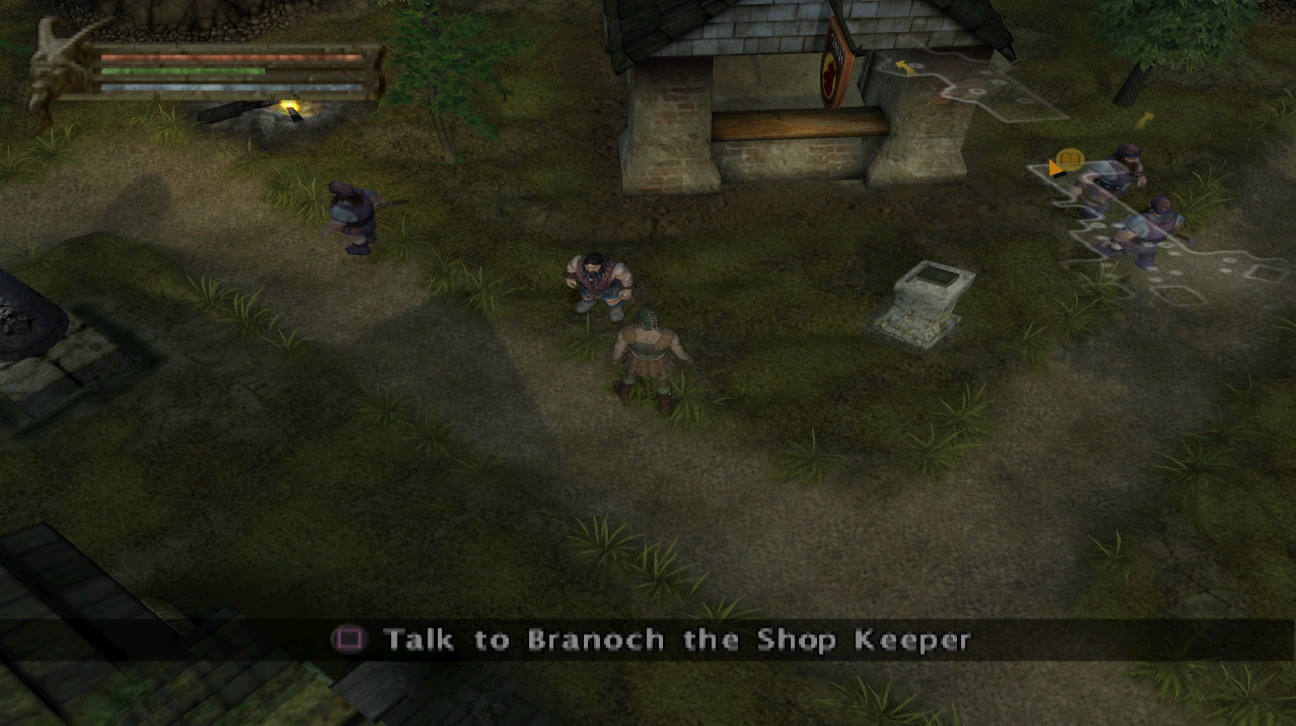
It isn't long until you run into a town of dwarves which is going to be your next hub as you spend time clearing this Act. Branoch the Shop Keeper is going to be your vendor during this Act and Torrgeir is who you'll want to talk to in order to update your main story quest. Actually, Torrgeir will talk to you when you get close enough to him.
When you are done in town and ready to continue go to the eastern part of town and exit into the Burning Eye Base map. At first you'll find yourself in a forest area until eventually that will switch to snow. It's a long and linear path but eventually you'll find yourself at a path that splits into 3 directions at the Burning Eye Summit.
You entered this intersection from the south which means you have the North, East and Western portions still left to explore. All 3 paths lead you to important quest items that you need to advancing the main story. Start with either the West or East paths since you'll need all of the items in order to light The Signal Tower which is to the north.
Burning Eye Summit Quest Items:
East: Torch
West: Flint
North(Cave): Oil Flask
The Torch which you find in Burning Eye Summit - East is the easiest item to get out of the 3. You'll find this item next to a Dwarf's corpse in the southern portion of the area next to the abandoned camp. A screenshot of the exact location is shown below.
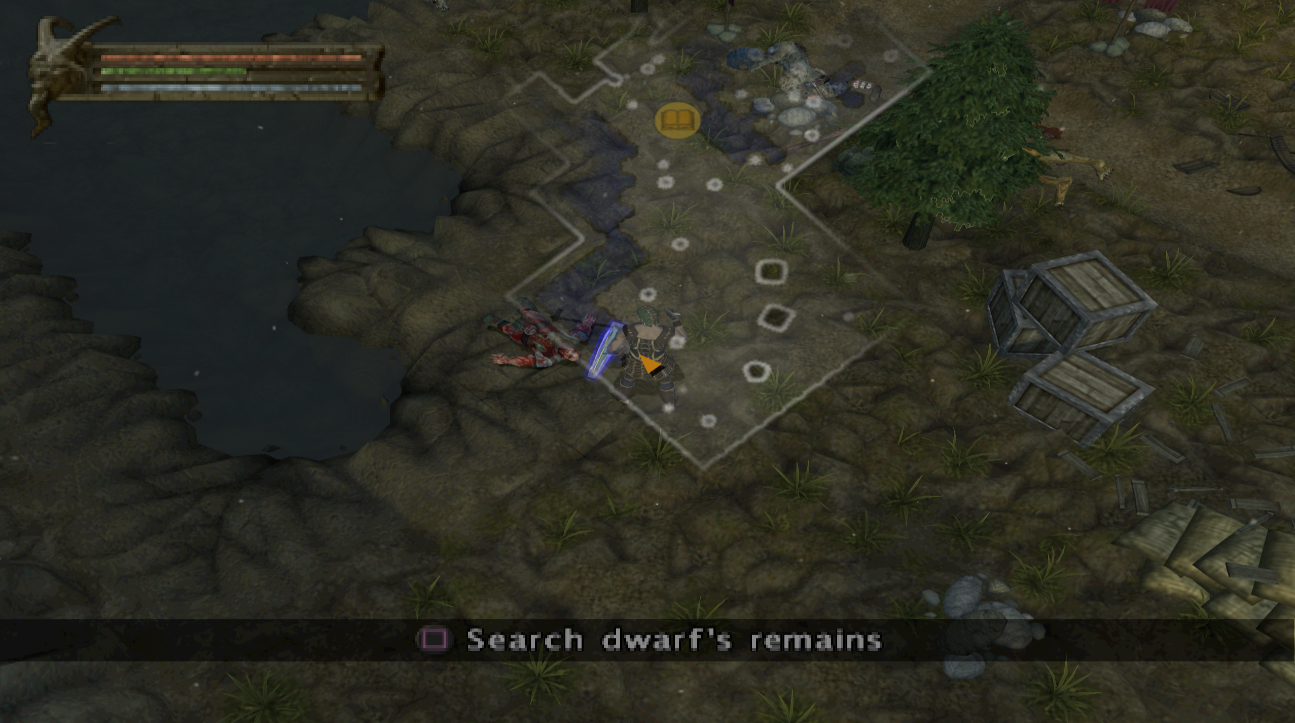
Location of the Torch item in Burning Eye Summit - East.
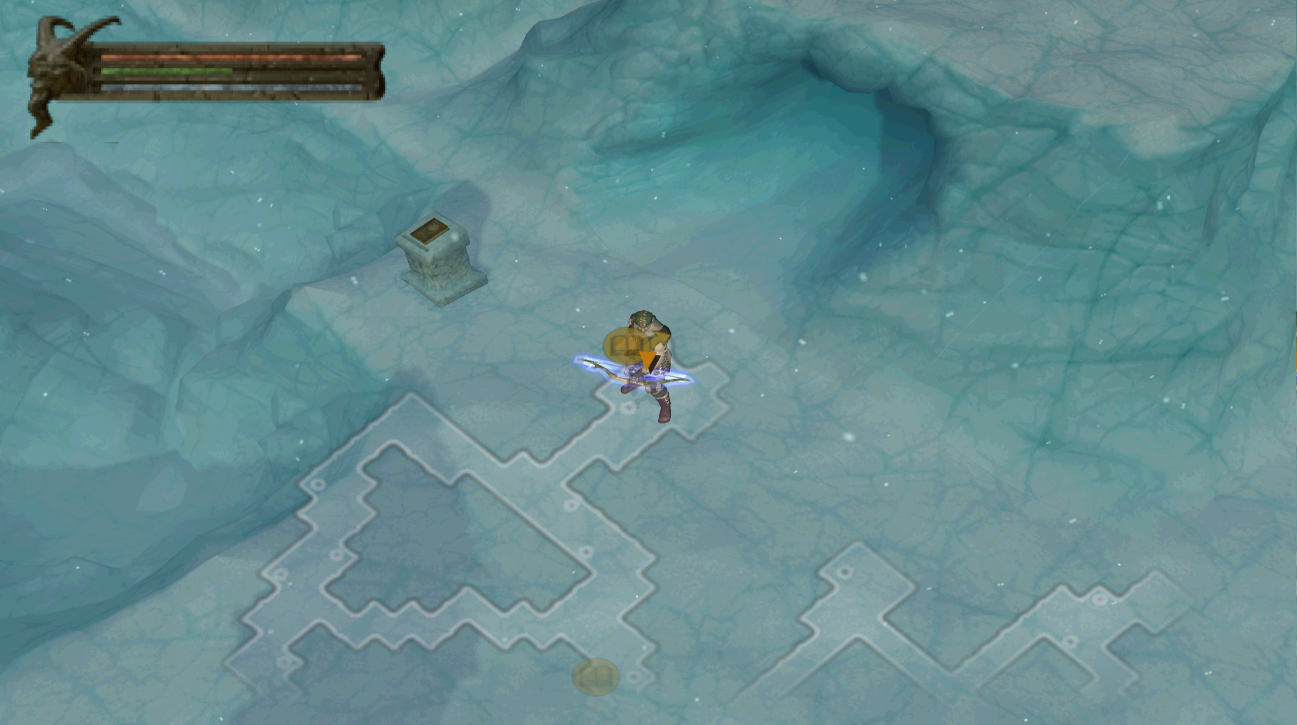
The first quest item (Flint) is found inside this cave in Burning Eye Summit - West
In Burning Eye Summit - West you will find a cave (pictured above); inside this cave you'll find a dwarf body with a Flint item that you can pick up next to it. This is the second item that we need to collect for advancing the main story, once you have this it's time to return to the 3 way intersection at the Burning Eye Summit.
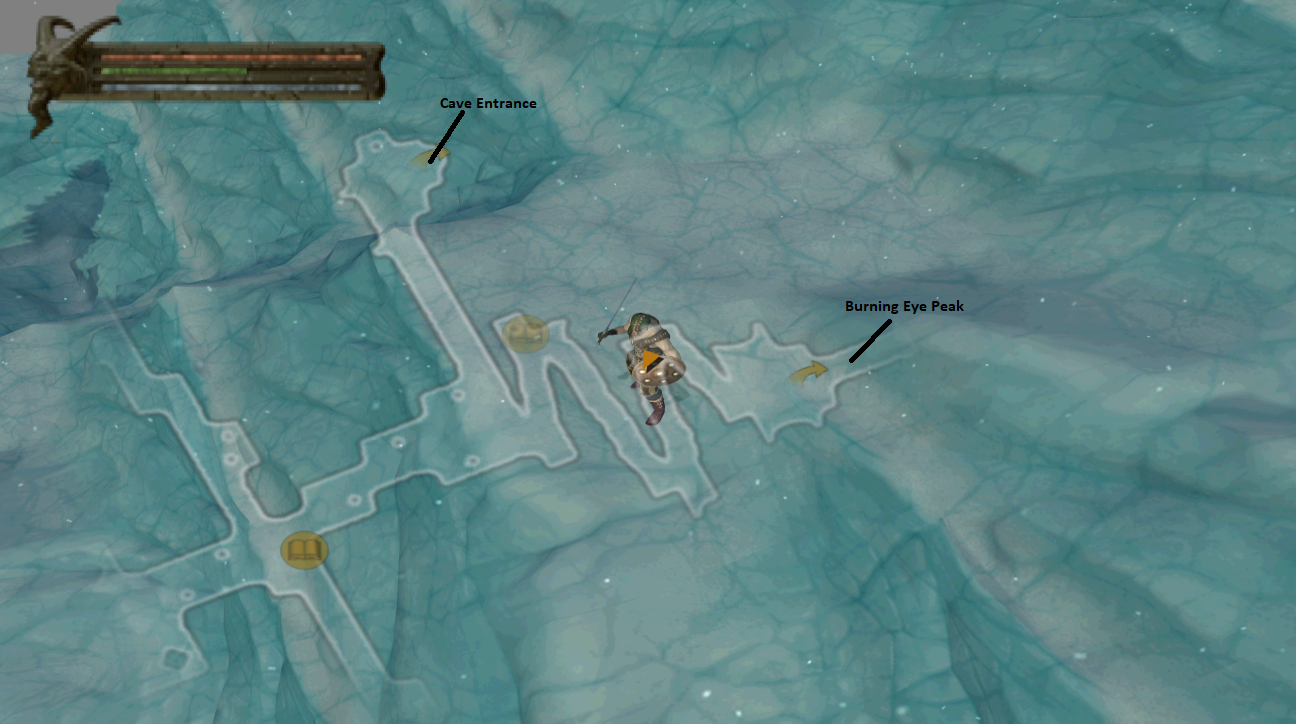
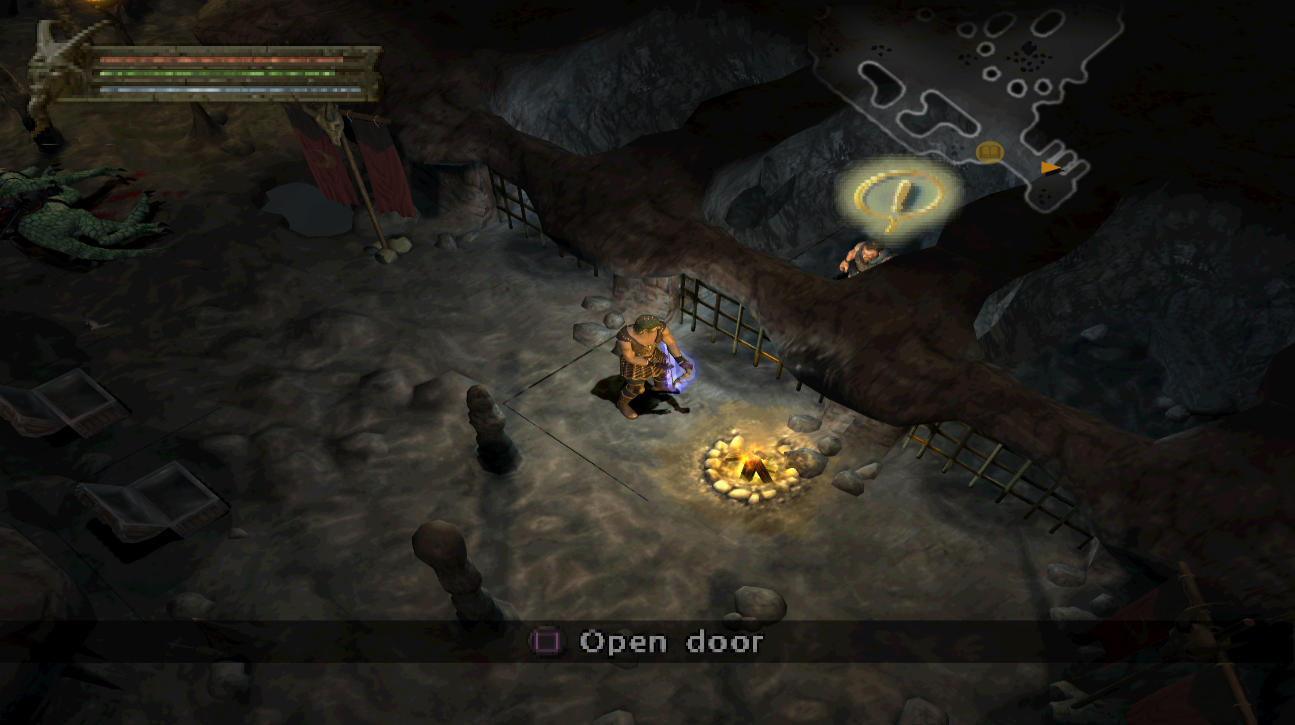
At the intersection this time you will have to go north; shortly after taking the northern path you'll see that it splits again. One path leads up the mountain to the Burning Eye Peak and another leads down a short path and to a cave. You're going to want to head over to the cave first and inside of it for another quest item. We need this quest item before we're able to advance the story on the Burning Eye Peak so make sure you don't miss it! A screenshot of this cave's entrance is shown below.
Inside of the cave you'll find the only surviving dwarf, Kolgrim. He will start another story quest called Find Kolgrim's Party which we'll finish once we reach the Burning Eye Peak and do this next part. Next to Kolgrim you'll find the Oil Flask which is the next item we need to advance the main story and the item we came to this cave to get.
Now that you got the Flask and talked with Kolgrim you'll want to exit this cave and continue to the Burning Eye Peak.
The second quest item we need (Oil Flask) can be obtained from Kolgrim inside the cave nearby the entrance to Burning Eye Peak
On the Burning Eye Peak you'll find really annoying orbs that float around and zap you if you get near them. You'll want to do your best to avoid these since they can't be defeated and they'll just waste your Health Potions if you get hit by any of them. The path you'll be following throughout the Burning Eye Peak is quite linear so follow it until you reach the summit which is where you'll find a frozen dwarf and The Signal Tower that we have to ignite.
Approach The Signal Tower and light it for a cutscene - when the cutscene is over you'll retrieve the Mine Key from the newly thawed dwarf. We're all done on the Burning Eye Peak for the time being, use Recall to return to town and speak with Torrgeir a second time. Hit up the vendor and sell/buy whatever you need to then go a tad bit east of Torrgeir where you'll find the entrance to the mines.
The first floor of the mines is going to be the most annoying since we'll have to collect 3 Shaft Gears in total before we're able to advance to Level 2. Explaining to you where each of these 3 Shaft Gears can be found through text sounds like a total nightmare so instead I am going to provide you with a picture of where each of the 3 gears can be found.
If you need help seeing any of the pictures below click on them to enlarge them.
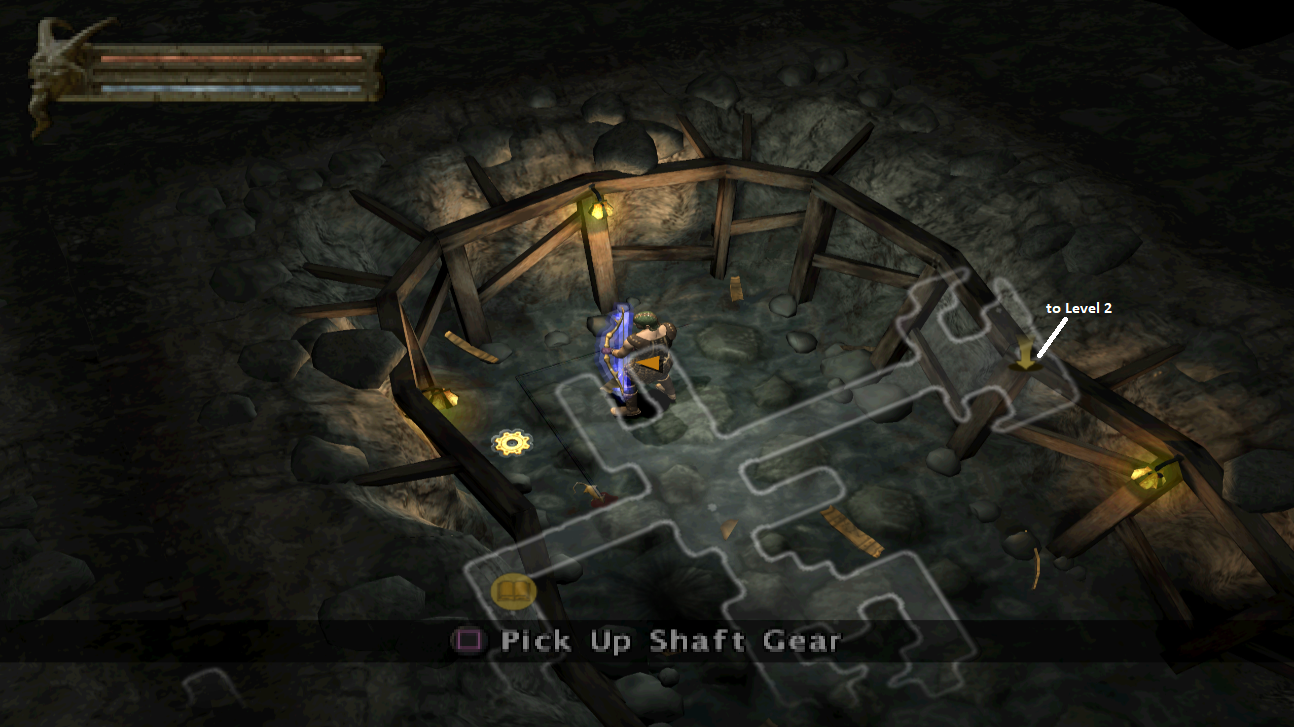
Shaft Gear 1 Map Location
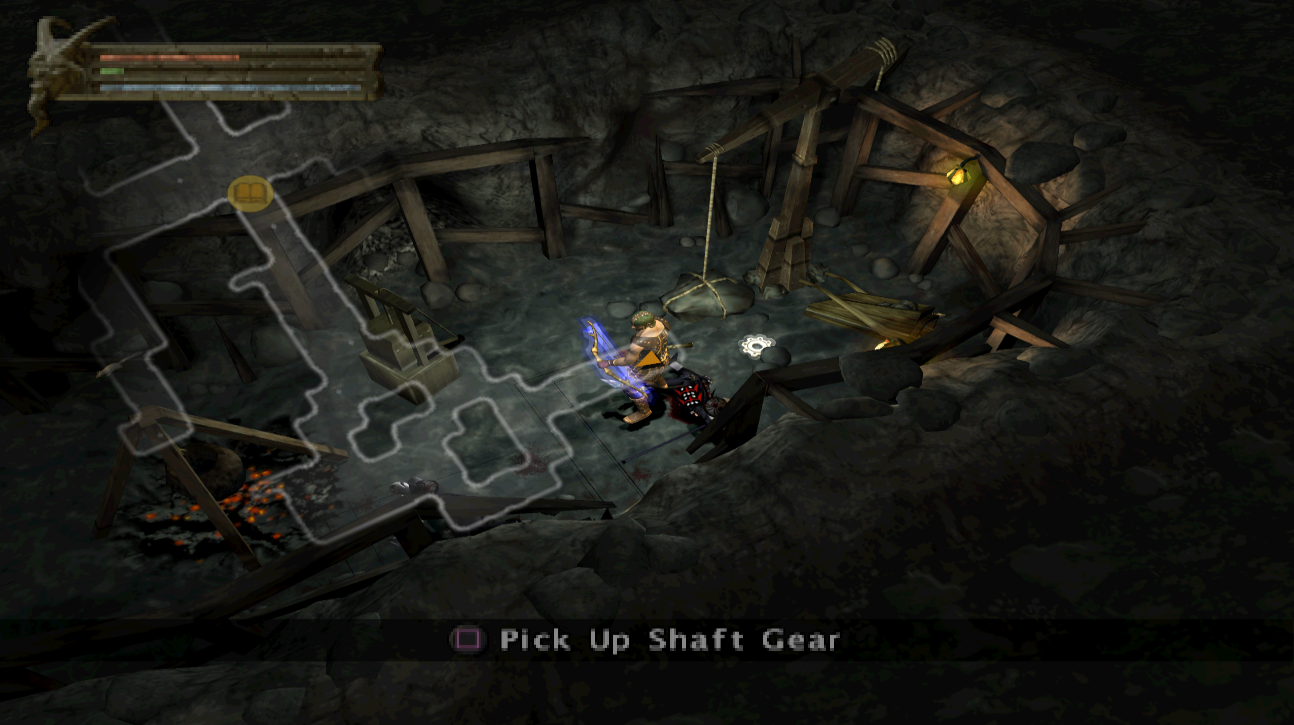
Shaft Gear 2 Map Location
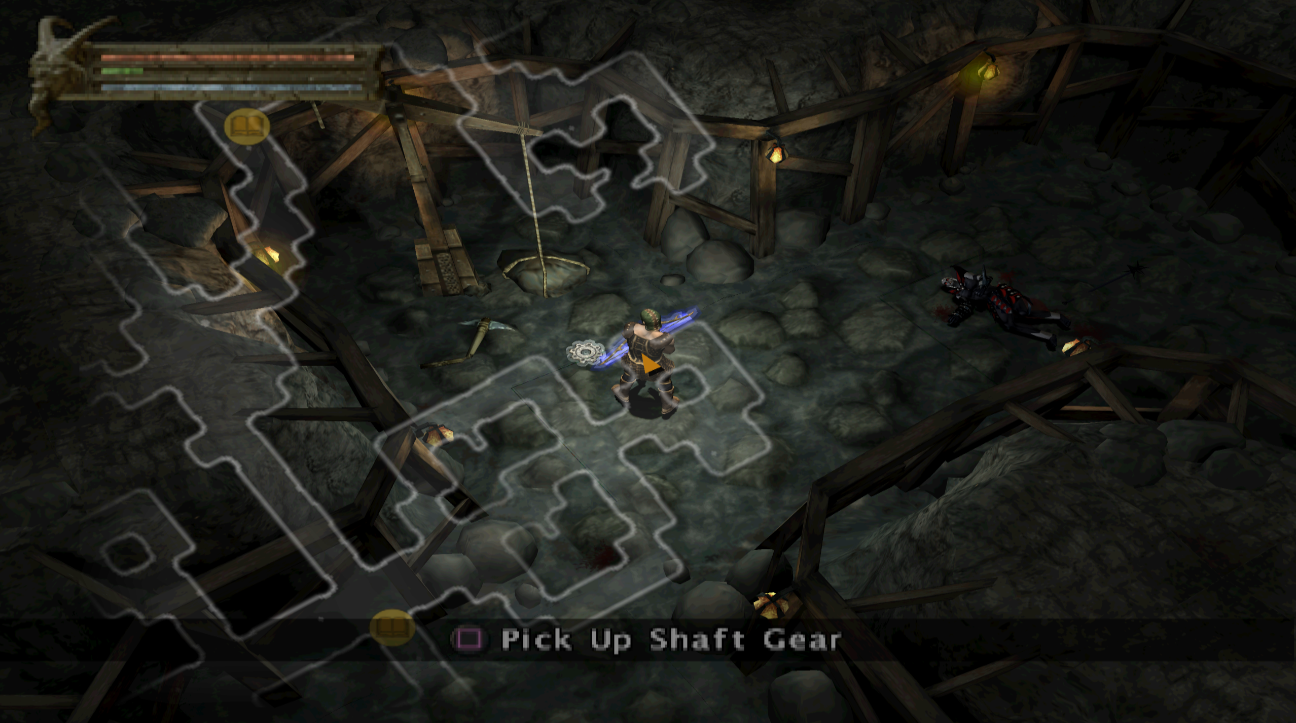
Shaft Gear 3 Map Location
Floor 2 is filled with enemies but straight forward as far as navigation goes. All you need to do is clear your way through this floor until you find the stairs that will take you down to Level 3. You'll find Level 3 is much of the same as the previous level, it's infested with Dark Elves and is pretty long and linear. There are a few offshoots that I recommend you visit for both loot and EXP but it's optional.
At the end of Level 3 you'll come across a very big room, in the southeastern section of this room you'll find a dwarf locked in a prison cage with an exclamation point over his head. He's who we need to speak with once we've defeated the boss lady of this dungeon. You'll find boss lady in the northern portion of this area, when you get close enough to her battle arena you'll initiate dialogue with her automatically.
Once the battle begins you can't use Recall so I strongly recommend you return to town and stock up on whatever you think you may need now. This boss does mostly magical damage so an armor upgrade won't help you as much for this fight as a bunch of Healing Potions would. Don't forget Arrows too if you're an Archer!
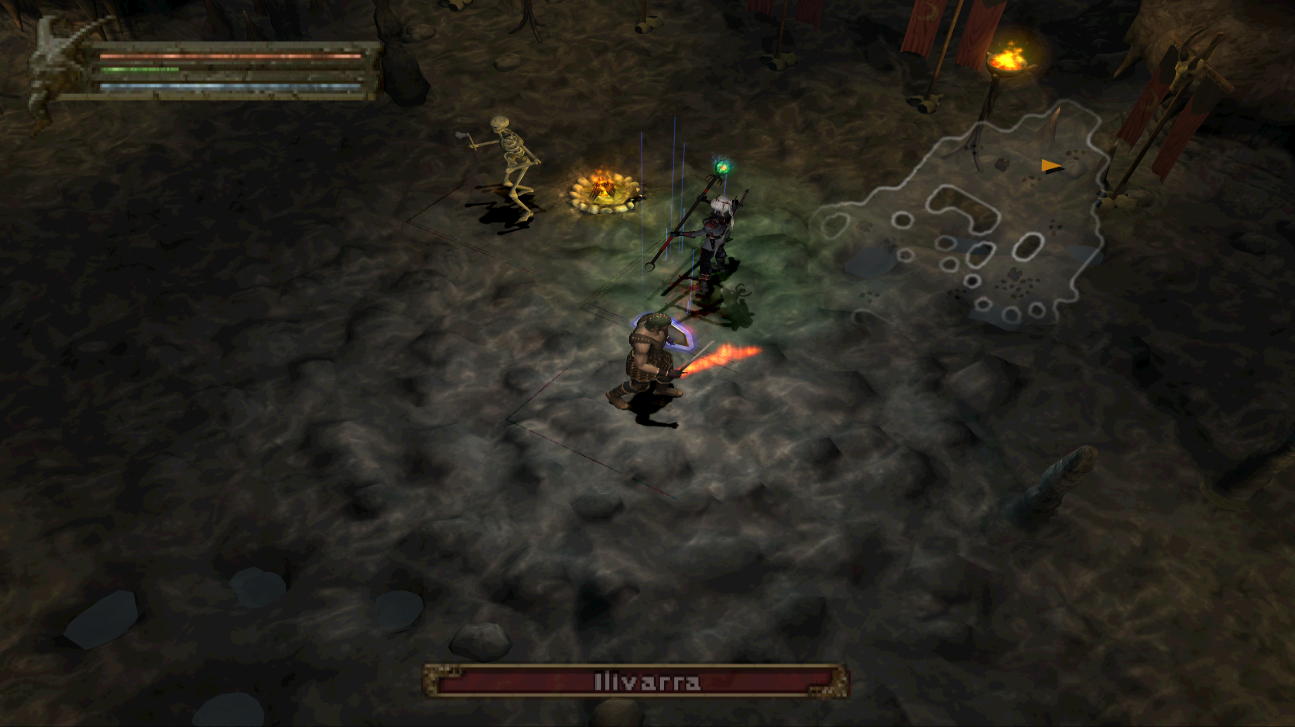
Ilivarra will use some Wizard spells on you like Magic Missile and Melf's Acid Arrow. She'll also summon Skeletons as the fight drags on, sometimes they're melee and sometimes they're ranged. If you defeat them she doesn't immediately summon them again so that is an option for you.
All in all she isn't a tough fight, if you struggle with her just buy more Potions before starting the fight next time. Make sure to grab all of the loot she drops since she'll drop a Cell Key and Ilivarra's Horn, both of these are story items and required for progression. First you'll want to use the Cell Key in the southeastern portion of this area to free the Dwarf locked in the cell (pictured below).
The Dwarf is named Brogan and he'll update your main quest after which you'll need to return to town and speak with Torrgeir again.
See the black box around my character on the ground? That's actually my hit box, for some reason it's showing for me.
Once you've spoken to Torrgeir in town you'll now be able to enter the Dark Forest map in the northern portion of town. Since Torrgeir gave you the map for this area it will start out completely discovered for you which will be quite annoying since you can't see where you have and haven't been to.
In the northern portion of the Dark Forest you will find an ice wall where you'll be able to blow Ilivarra's Horn of Sahri to remove the ice from your path. This will allow you to enter into the Ice Cave which is going to be the final dungeon for us to clear during Act 2. Ice Cave consists of 3 Levels, the first 2 are monster grinds and Ice Cave Level 3 is where you'll fight the next boss.
For the most part this entire dungeon is linear so I am not going to provide you with any direction. Loot all you can, vendor whatever you don't need and be sure to completely restock on Health Potions/Mana Potions and Arrows (whatever your character needs) before facing off against this next boss.
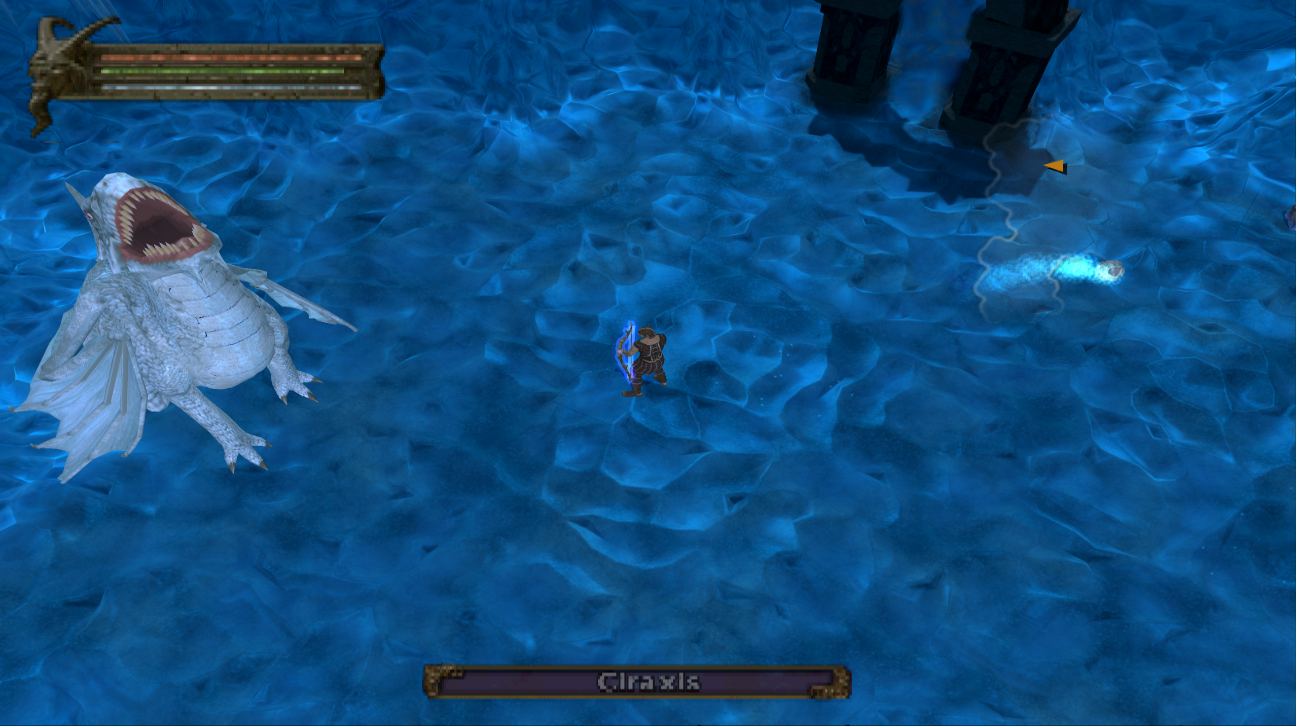
Ciraxis is the final boss of Act 2 and he can be quite an annoying one. Throughout this entire fight ice boulders will rain from the sky that you'll have to avoid - I think they inflict Chilled on you when they hit you but from my experience it's actually pretty hard to get hit by them.
The boss will move around the room occasionally when you get out of his line of sight, each time he lands he'll do an ice breath ability which creates boulders that bounce further than his ice breath. I think these boulders are designed to hit us pesky ranged characters that stay far enough back to avoid the ice breath!
What you'll want to do for this fight is circle around Ciraxis each time he lands and chip away some health. He'll be unable to hit you with his Ice Breath attack unless you're standing in a frontal cone in front of him - avoid that and the falling boulders and you're golden!
Continue to Walkthrough (Act 3)