
Ultimecia Castle (Part 2) - FF8 Guide
At the top of every page of my Final Fantasy 8 Walkthrough I will have a list of the most important GF Abilities for you to learn as well as my personal preference for who to junction GFs to for this part of the story. The game's auto order for GFs learning abilities is extremely terrible so it's strongly recommended you interfere and do the abilities in the order I provide here.
Throughout the game you can also refine Cards into Items and then those Items into magic. I've provided a list of the refinements that you can do for the cards that you will most likely have in your possession at this time during the story below as well. This same information will be provided at the top of every page during the full walkthrough, keep checking it as it'll change as the story progresses.
GF Abilities to Learn:
Cactuar: Luck-J, Eva-J, Defend, Luck+50%, Auto-Potion, Kamikaze, Eva+30%
Bahamut: Boost, Mug, Auto-Protect, Rare Item
Eden: GFAbl Med-RF, Boost, Luck+50%, Expendx3-1, Mad Rush, Darkside, SumMag+% Abilities
GF Junctioning:
Squall: Siren, Brothers, Carbuncle, Leviathan, Tonberry, Eden
Zell: Shiva, Diablos, Pandemona, Doomtrain, Bahamut
Irvine: Ifrit, Quezacotl, Cerberus, Alexander, Cactuar
(Or whomever you choose as your party; junction them as you see above)
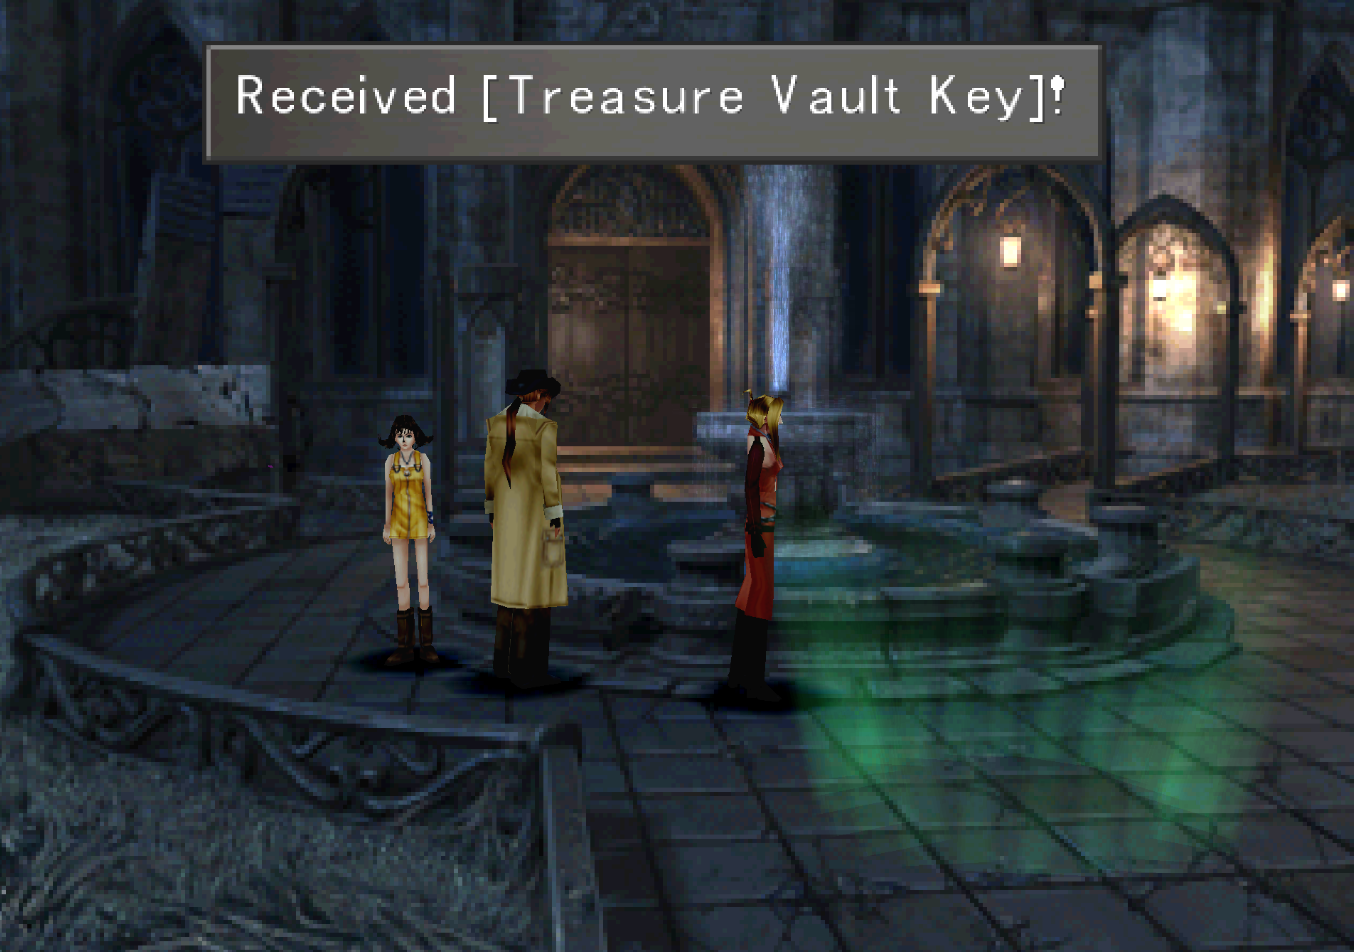
When you are ready to continue with Ultimecia Castle you'll want to switch back to your first party (with Squall) and continue north through the chandelier room. You'll find yourself in the courtyard shown in the screenshot above.
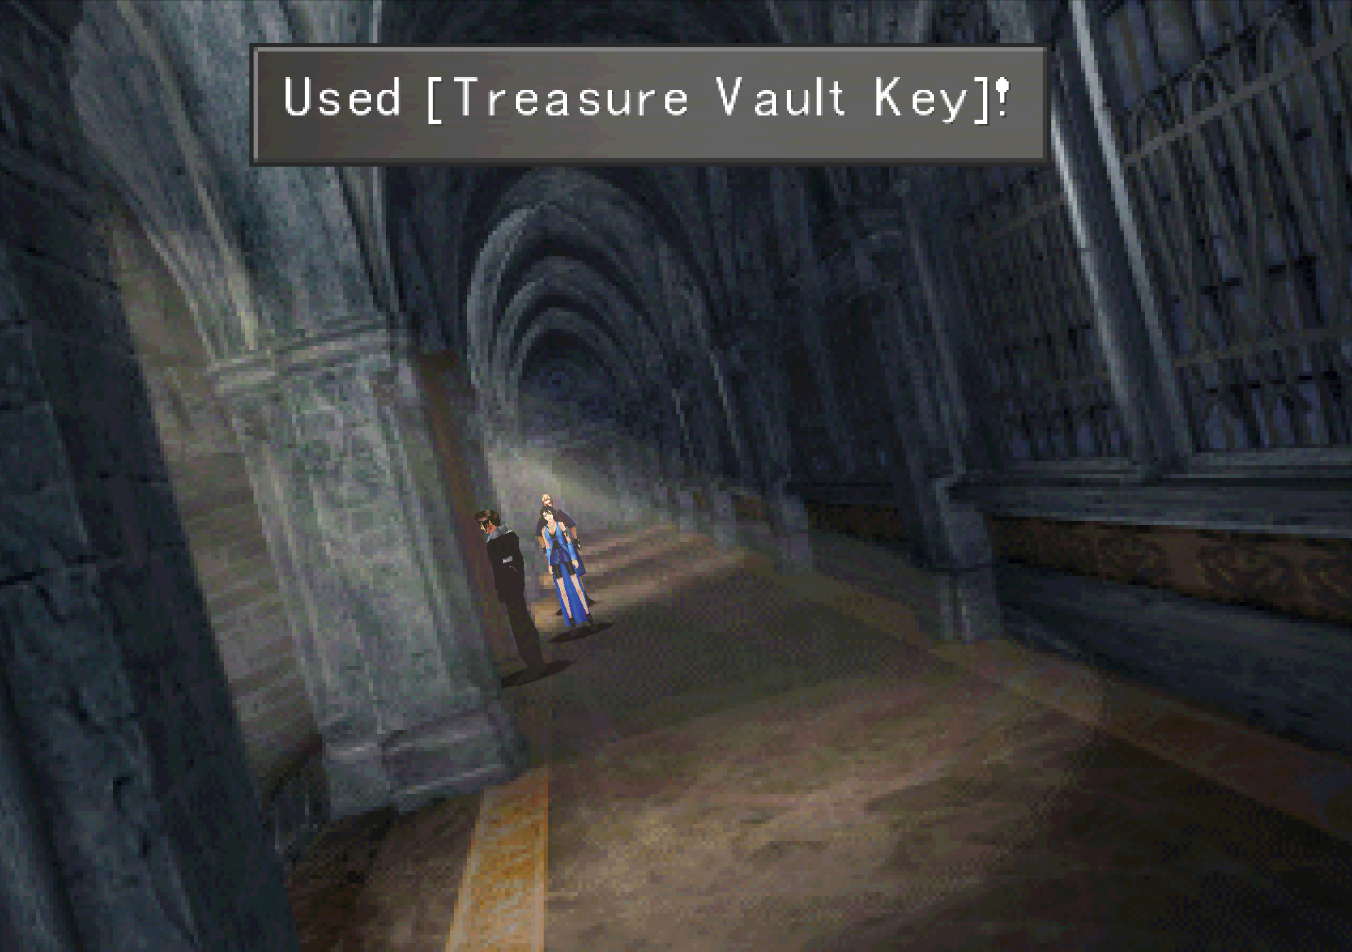
Grab the Treasure Vault Key from inspecting the crack in the fountain just above the green circle. We need this key for a later part of the dungeon. Head through the door at the northern end of the courtyard to find yourself in a chapel after which you'll want to go upstairs which is where you will find an area with a rickety old bridge (pictured below).
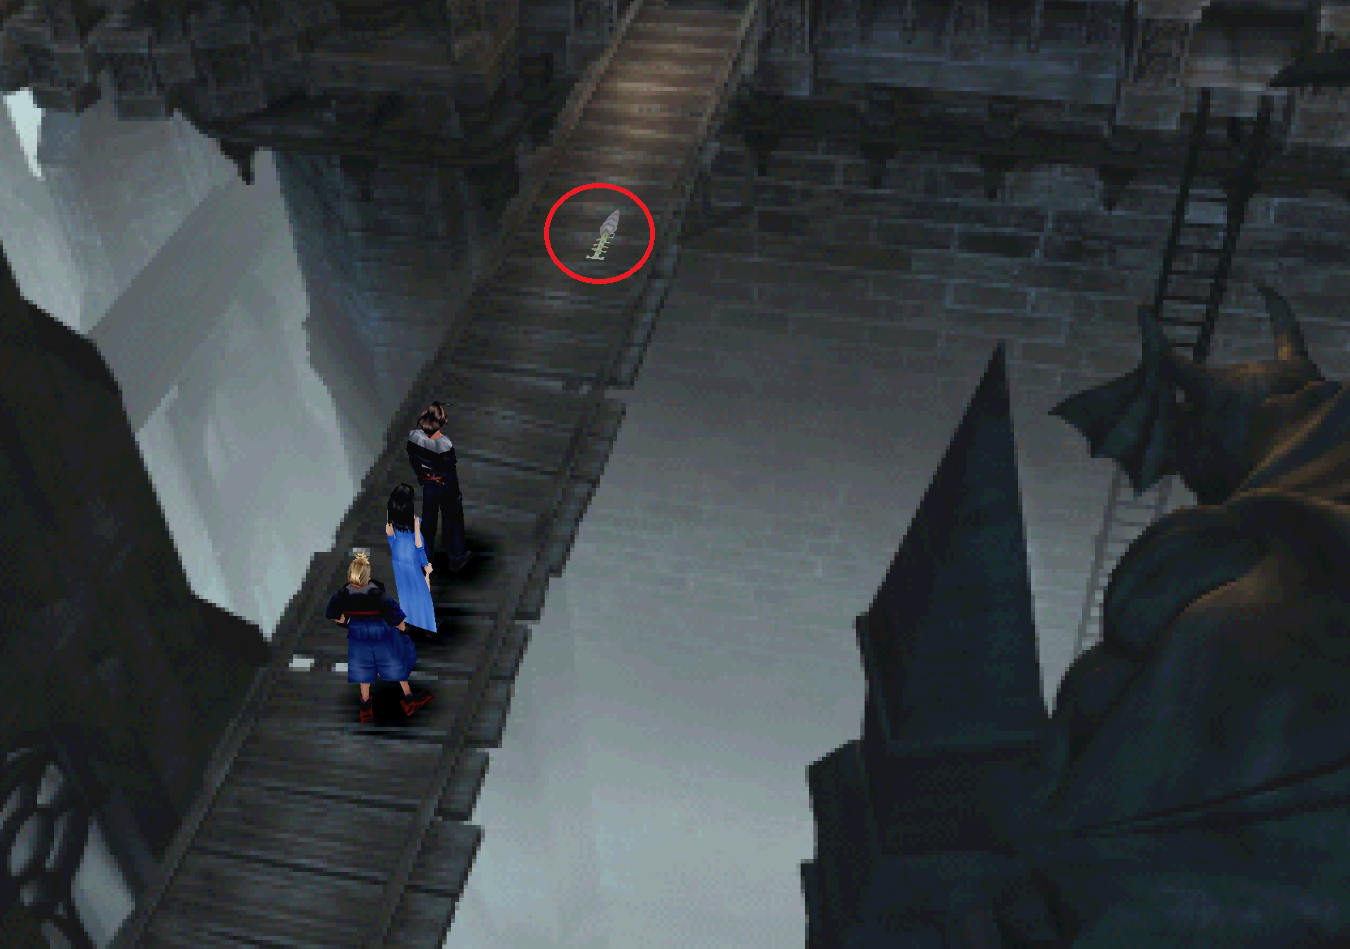
If you run across this bridge the Armory Key will fall to the floor below - which isn't too much of an issue since we need to go down to that room anyway. If you WALK while on the bridge then you can pick up the key without it falling off. A picture of the key in both locations is shown below.
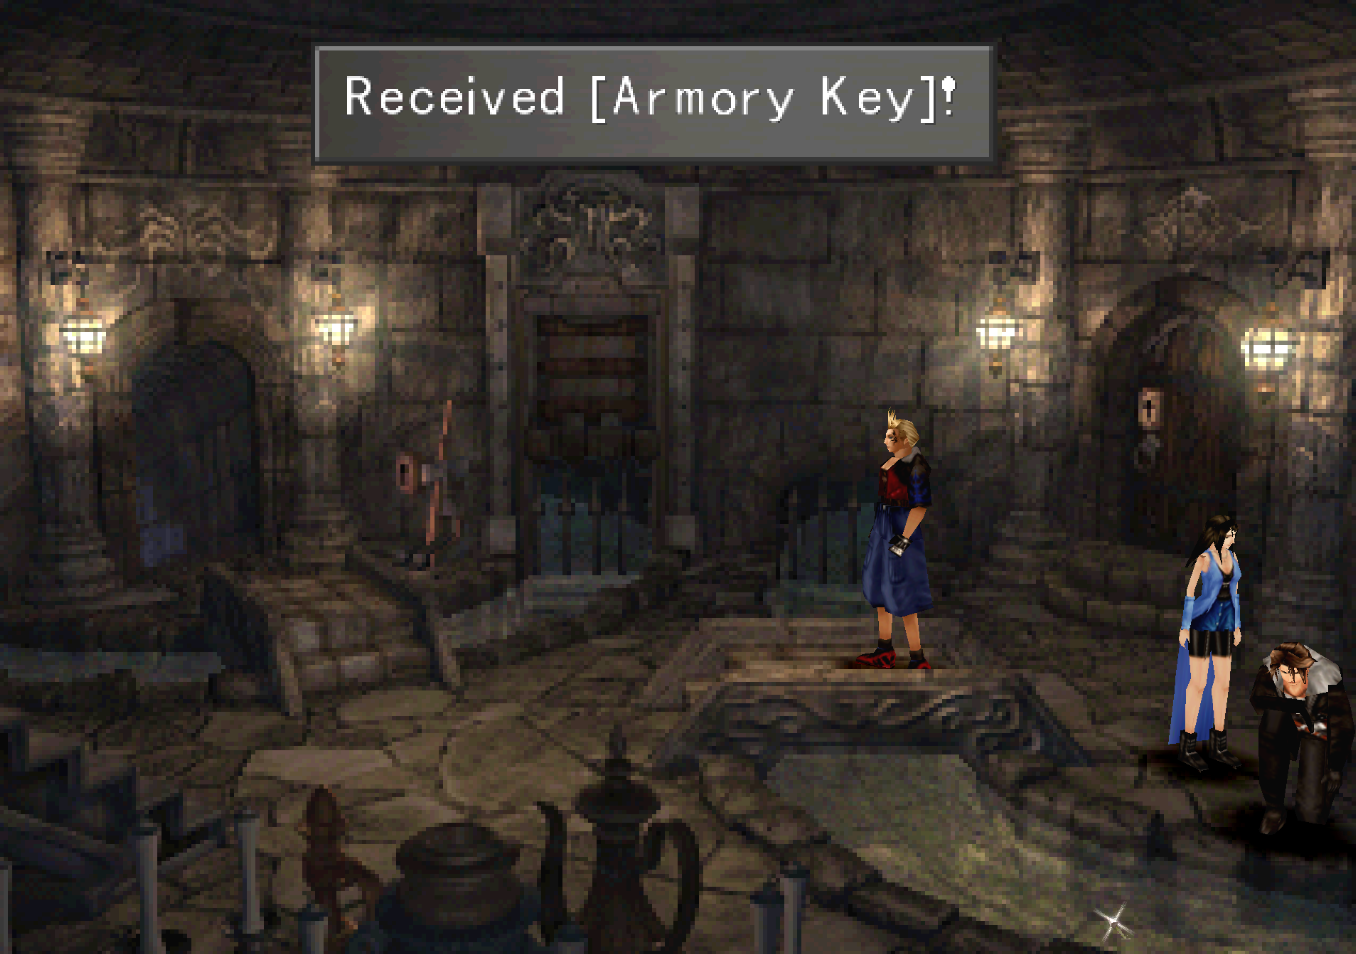
Either way, once you've obtained the Armory Key you will want to go through the door to the right of the path that lead to the Red Giant earlier. It's the same door behind where Squall is crouching in the screenshot above. Inside this room you'll find the next boss of the dungeon, Gargantua!
Junction Tips: Earth to Elem-Def and Berserk, Silence, Curse and Slow to St-Def you'll also want to give someone the Revive command or make sure you have Item enabled on two or more party members. You can also Junction KO to your St-Atk which has a 20% chance of working against this boss.
Important Draw Tip: Make sure you Draw Cerberus from Gargantua if you did not get him earlier in the game
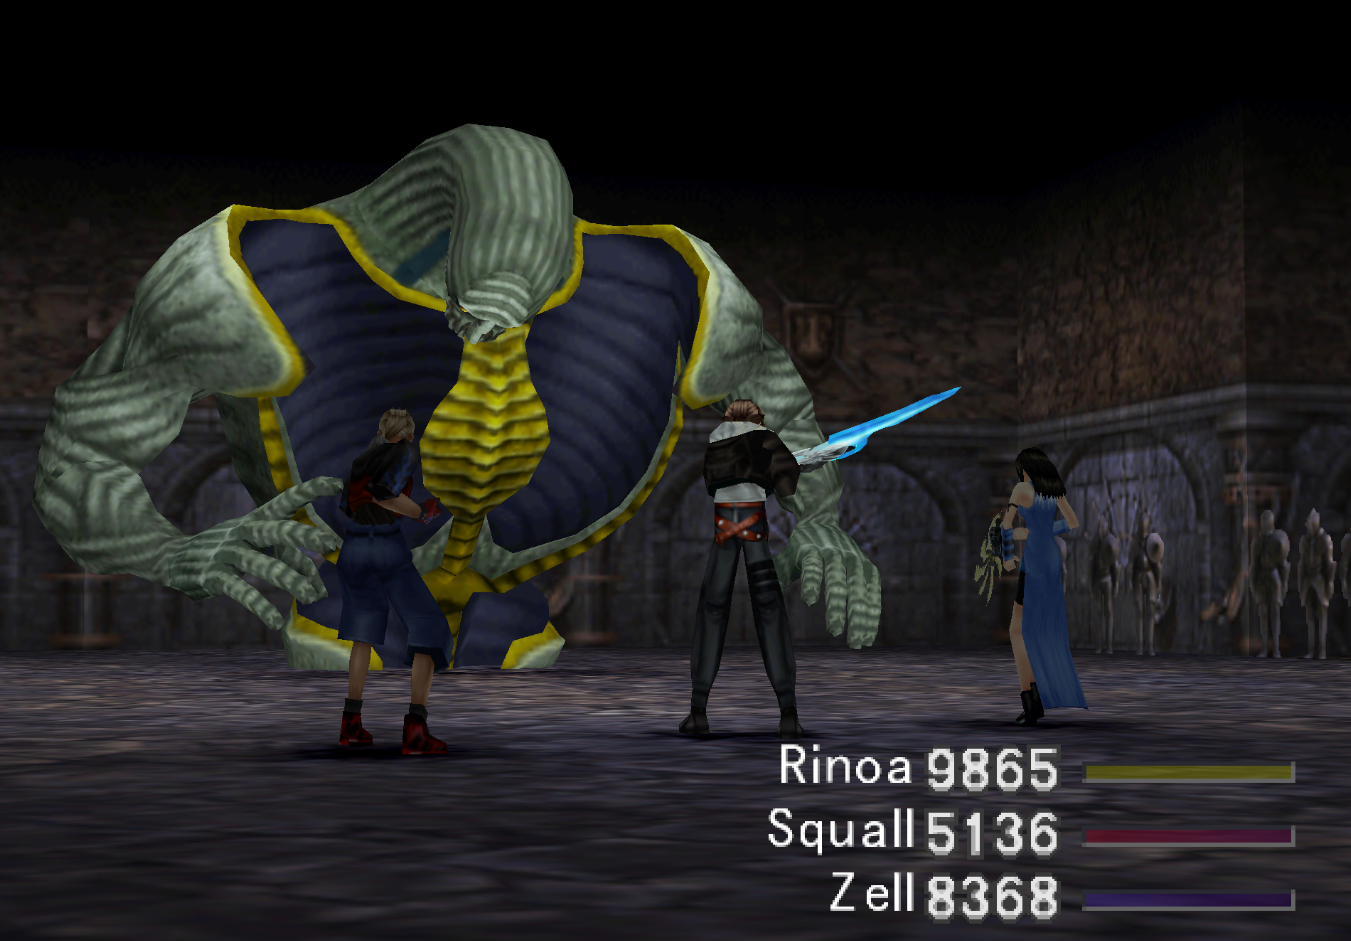
The fight begins against three enemies, Vysage, Lefty and Righty. They all have very little HP and aren't at all threats. Defeating them will bring out Gargantua, the actual boss. Gargantua will use Berserk, Silence, Demi and Quake throughout the fight, so long as you Junctioned properly none of this should be an issue.
Much like all of the other bosses, every time you attack Gargantua he will retaliate with an ability, this one is called Counter Twist and it can deal almost 2000 damage. One strategy you can use for defeating this boss too is inflict Zombie on it then use an X-Potion, Revive or Recover ability.
Our next stop is the hallway south of the elevator room. To get to the room with the elevators leave the basement area with Gargantua and go up the stairs near the green circle. Through the door on the left of the screen will be a long hallway with a Draw Point and Save Point which will lead you to the room with the elevators.
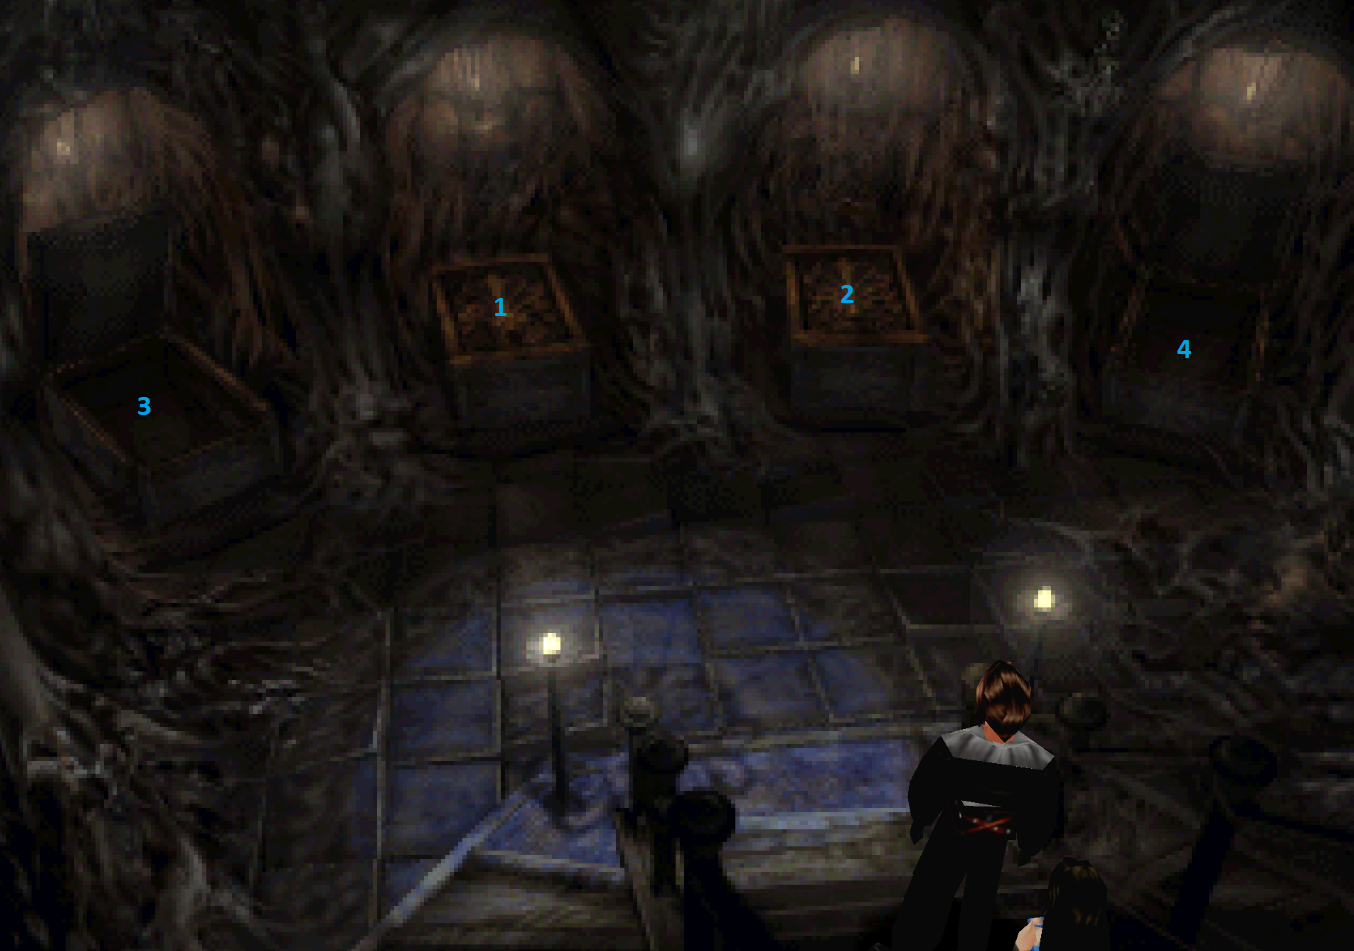
South of the room with elevators you'll find the hallway shown in the screenshot above. You won't be able to see the door but on the left side of the screen you'll find a locked door that you can use the Treasure Vault Key on. Inside this room you'll have to solve a brief puzzle that requires you to get all the caskets open at once.
The order you have to open them in is shown in the screenshot above, once you complete this puzzle you'll spawn a red and silver Behemoth enemy which is the next boss.
Junction Tips: Lightning to Elem-Def and put Water or Quake to Elem-Atk. Also if you have someone who can cast Blind that will be a big help for the upcoming fight too.
Important Draw Tip: If you didn't get Alexander earlier in the game from Edea on Disc 2 you will want to Draw him now.
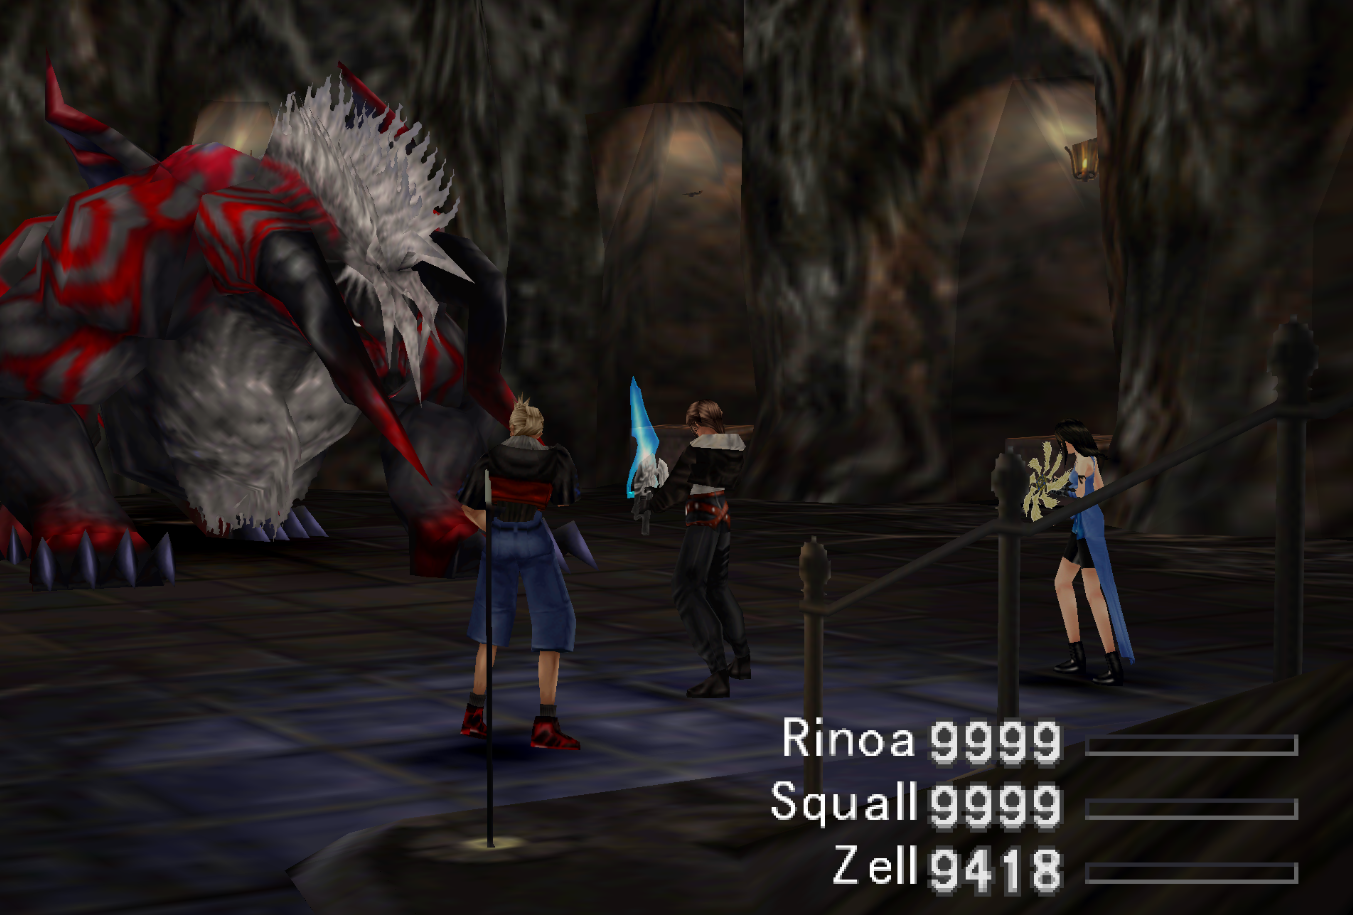
Unlike many of the previous bosses, Catoblepas does not counter any of your attacks and he has very low defense in comparison to the previous enemies too. For attacks he has a basic claw swipe and an ability called Deadly Horn which is a guaranteed critical hit when it connects.
He also likes to use Thundaga, after using Thundaga three times he'll use a much more powerful version which hits everyone with Lightning damage and ignores your defenses. Once you deal the final blow to Catoblepas he'll end the fight with a Meteor spell.
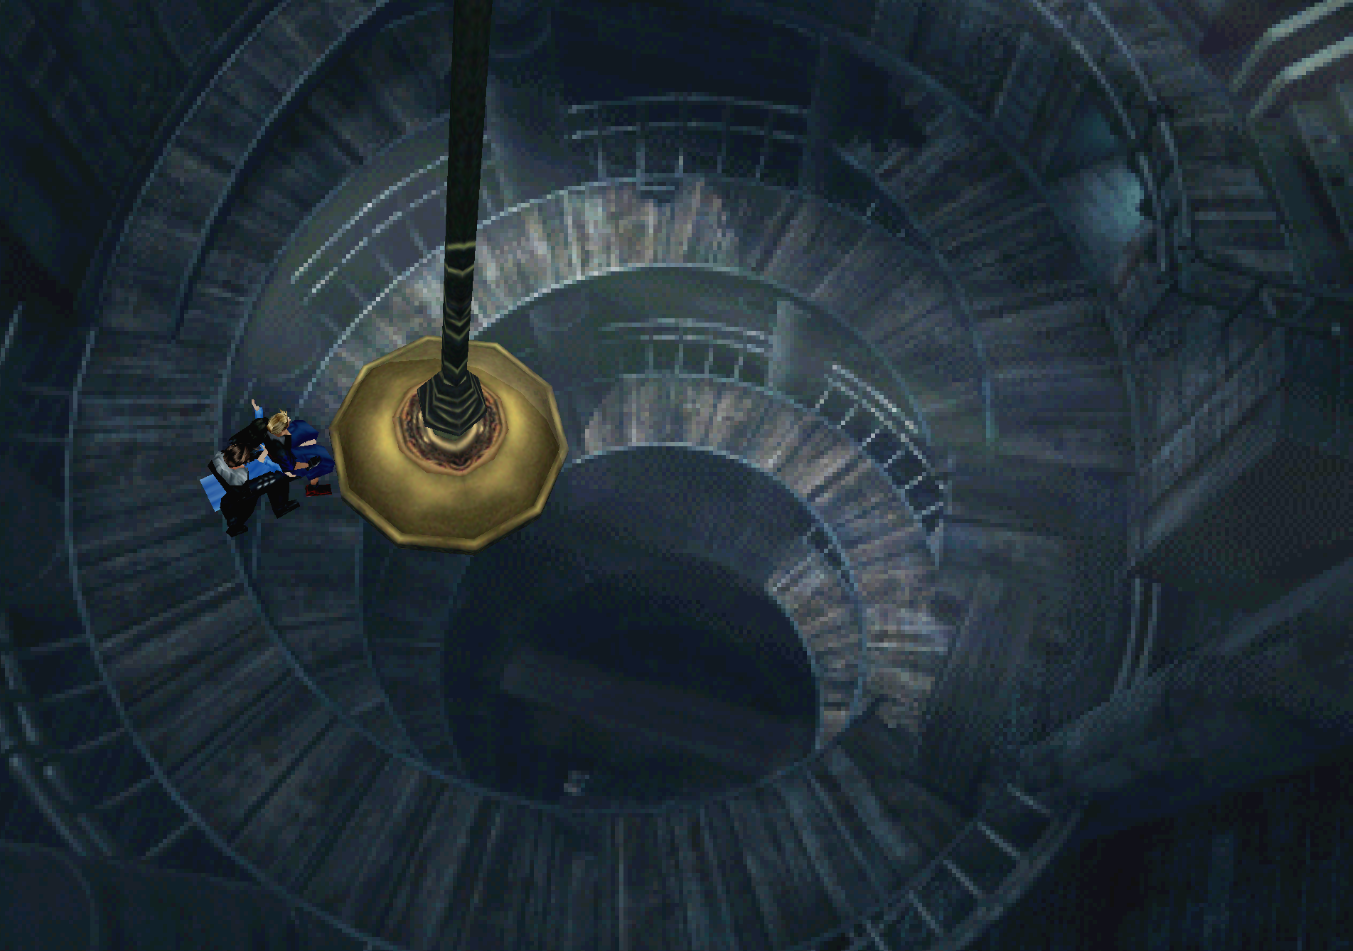
Our next destination is the clock tower with Tiamat, to reach it you will need to cross the bridge that we found the Armory Key on earlier in the dungeon. Go into the door to the left of the bridge and up the clock tower. Almost all the way at the top of the clock tower you'll find a swinging bell that you can jump onto and ride across the gap (pictured above).
Tiamat Junction Tips: Thundaga, Blizzaga, Firaga to Elem-Def and Slow to St-Atk if desired. Also if you don't have the Eden GF from the Deep Sea Research Center make sure you Draw it from Tiamat
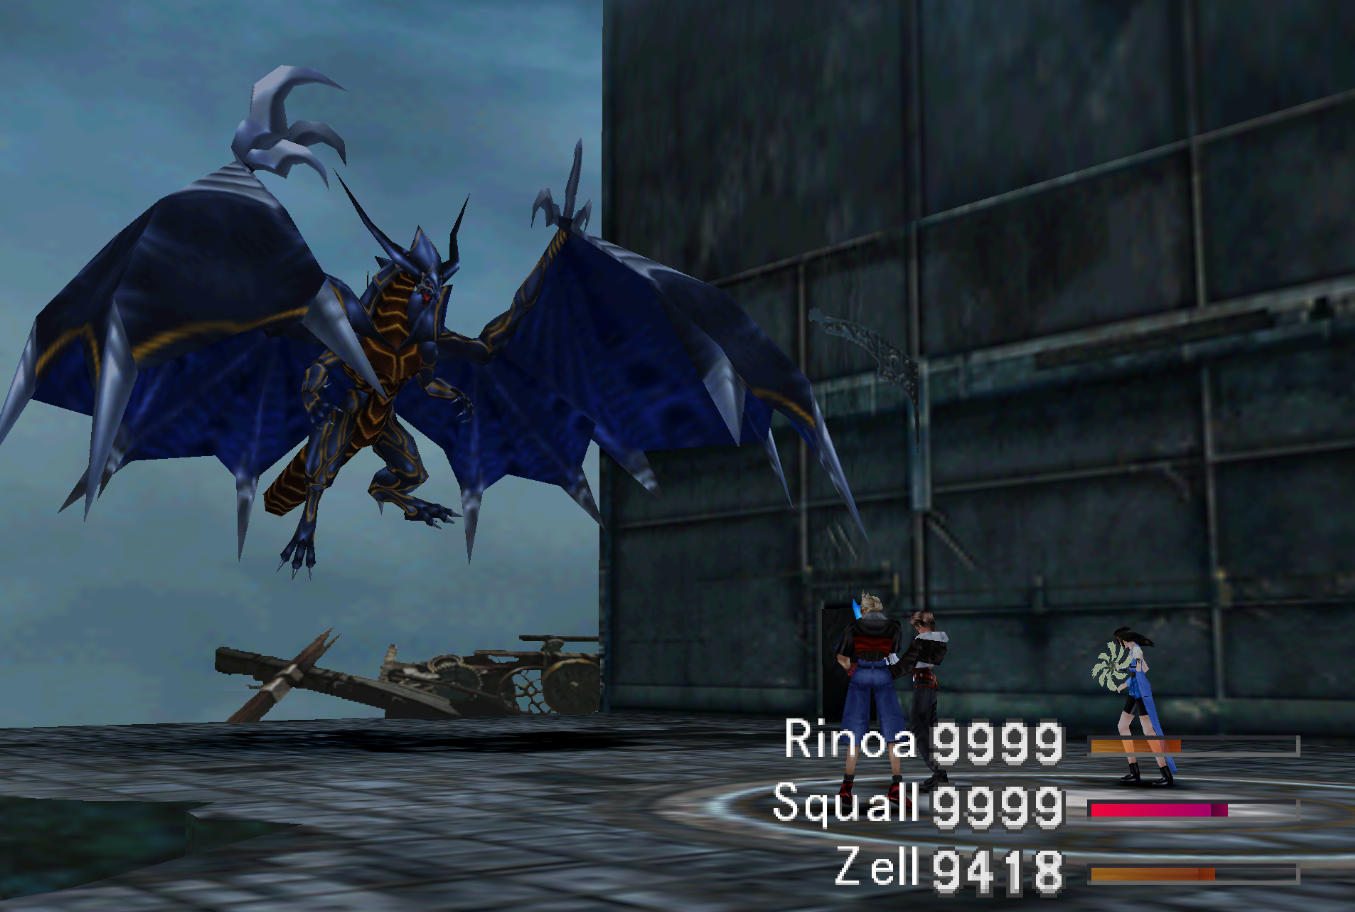
Open the fight with Doomtrain which will double the damage Tiamat takes. Also if you didn't Junction Slow to St-Atk then you may want to cast it on Tiamat yourself, it has a low chance of landing but it's the only status ailment you can hit him with.
Tiamat only has a single ability which is called Dark Flare, how this ability works is throughout the fight you'll see a bar at the top of the screen and it'll slowly add letter by letter to Dark Flare. Once the ability's name is complete Tiamat will use it against your party, then the process repeats.
Return to Ultimecia Castle (Part 1) Walkthrough
Continue to Final Bosses Walkthrough