
Dollet: The SeeD Mission - FF8 Guide
At the top of every page of my Final Fantasy 8 Walkthrough I will have a list of the most important GF Abilities for you to learn as well as my personal preference for who to junction GFs to for this part of the story. The game's auto order for GFs learning abilities is extremely terrible so it's strongly recommended you interfere and do the abilities in the order I provide here.
Throughout the game you can also refine Cards into Items and then those Items into magic. I've provided a list of the refinements that you can do for the cards that you will most likely have in your possession at this time during the story below as well. This same information will be provided at the top of every page during the full walkthrough, keep checking it as it'll change as the story progresses.
GF Abilities to Learn:
Quezacotl: Card, Card Mod, T Mag-RF, Mid Mag-RF, Boost, Vit-J, Elem-Def-J, Elem-Defx2, Mag+20%, Mag+40%, Mag Bonus
Shiva: I Mag-RF, Str-J, Elem-Atk-J, Elem-Def-J, Elem-Defx2, Vit-J, Spr+20%, Spr+40%, Spr Bonus, Boost
Ifrit: F Mag-RF, Str+20%, Str+40%, Str Bonus, HP-J, Str-J, Ammo-RF, Elem-Atk-J, Elem-Def-J, Mad Rush, Boost
Siren: Tool-RF, L Mag-RF, Mag+20%, Mag+40%, Mag+60%, Mag Bonus, Move-Find, St Med-RF, Boost, Junctions
She's acquired during the Dollet mission.
GF Junctioning:
Squall: Ifrit, Siren (once acquired)
Zell: Shiva
Seifer/Selphie: Quezacotl
Card-Mods and Item/Magic Refinements for this part of the game
**Important** Do not speak to anyone unless I specifically say to in this guide until I say it's ok to speak to someone again. Speaking to someone while on the SeeD mission decreases how much SeeD Experience you will get at the end of this mission.
After exiting the Dormitory the first thing you'll want to do is head over to Quistis at the front of Balamb Garden. Once Quistis and Cid are finished talking head to the entrance of Balamb Garden without speaking to anyone and you'll get in a car headed for Balamb Town. You'll have to drive the car to Balamb Town, once there you'll board the ship headed for Dollet.
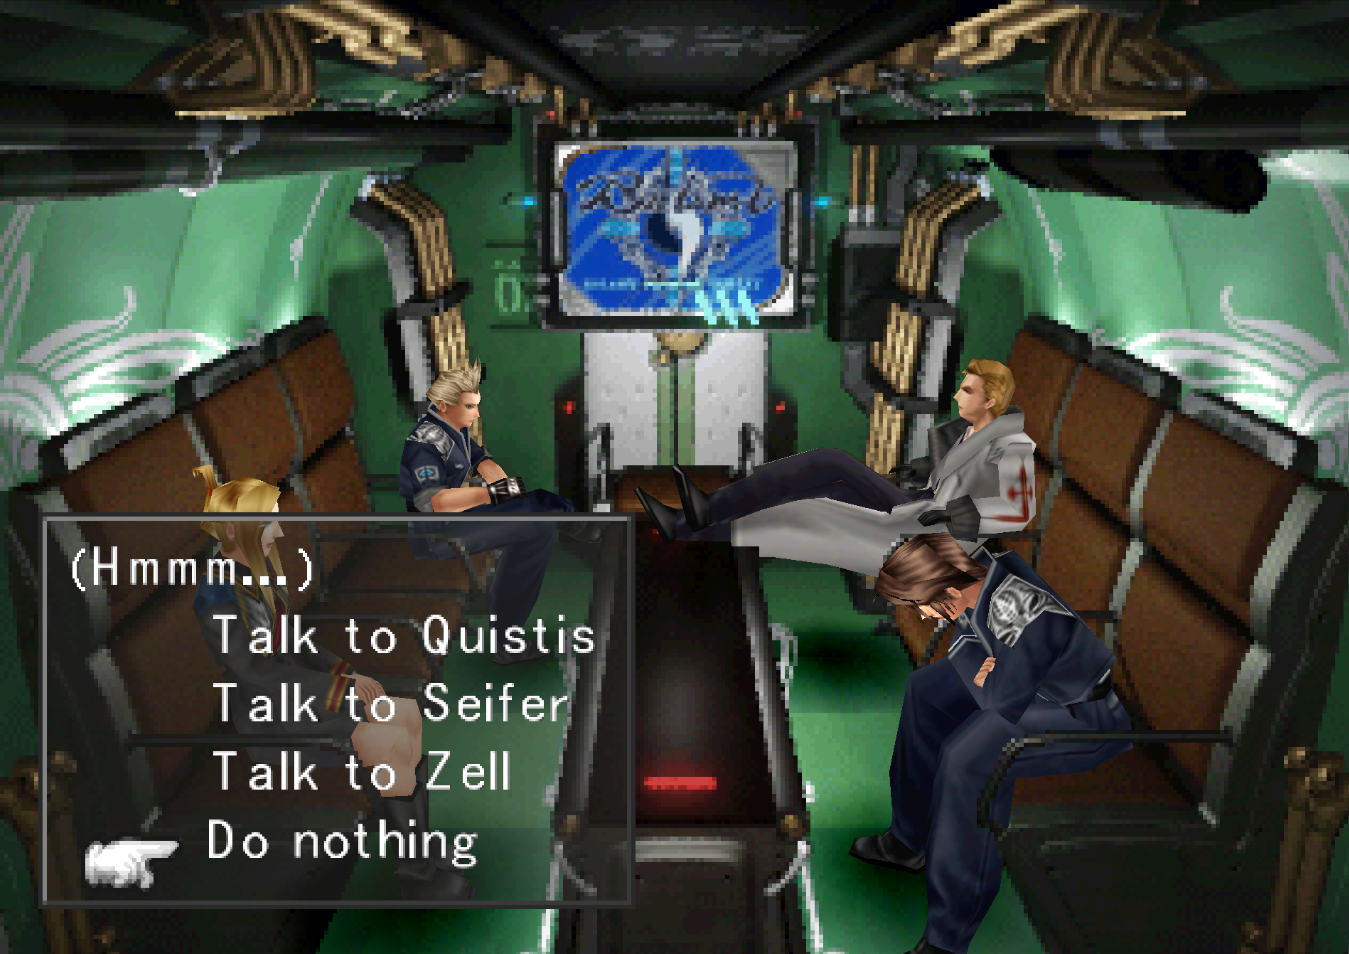
On the ship when you're prompted with the options to talk to everyone else (as pictured above) - select no one. Shortly after Seifer will tell you to go outside, you do want to say ".....Ok" to him in order to advance the story forward.
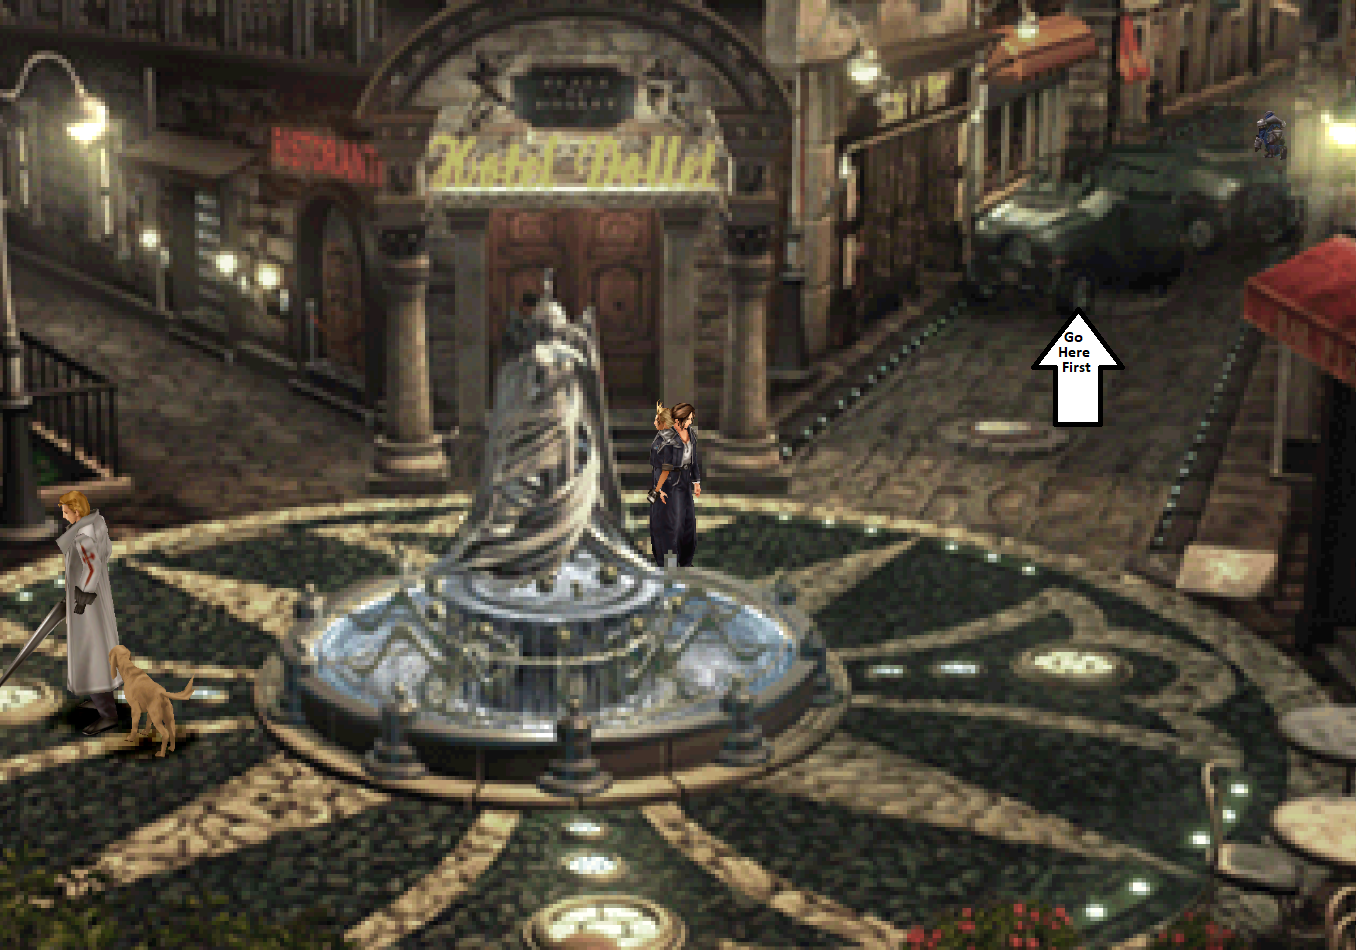
When the ship docks you'll find yourself in Dollet with a party of Squall, Zell and Seifer. From here all you have to do is run north into the Town Square (Follow Seifer). At this point in the game you'll be able to do the Seifer Grind if you wish. It's a method of getting your GFs EXP and AP as well as acquiring high end items without leveling any of your main party members.
The reason for doing this is in Final Fantasy 8 leveling your characters increases the levels of the monsters too. The Seifer Grind will make you more powerful but keep the enemies you fight at the same level, thus giving you an even larger advantage.
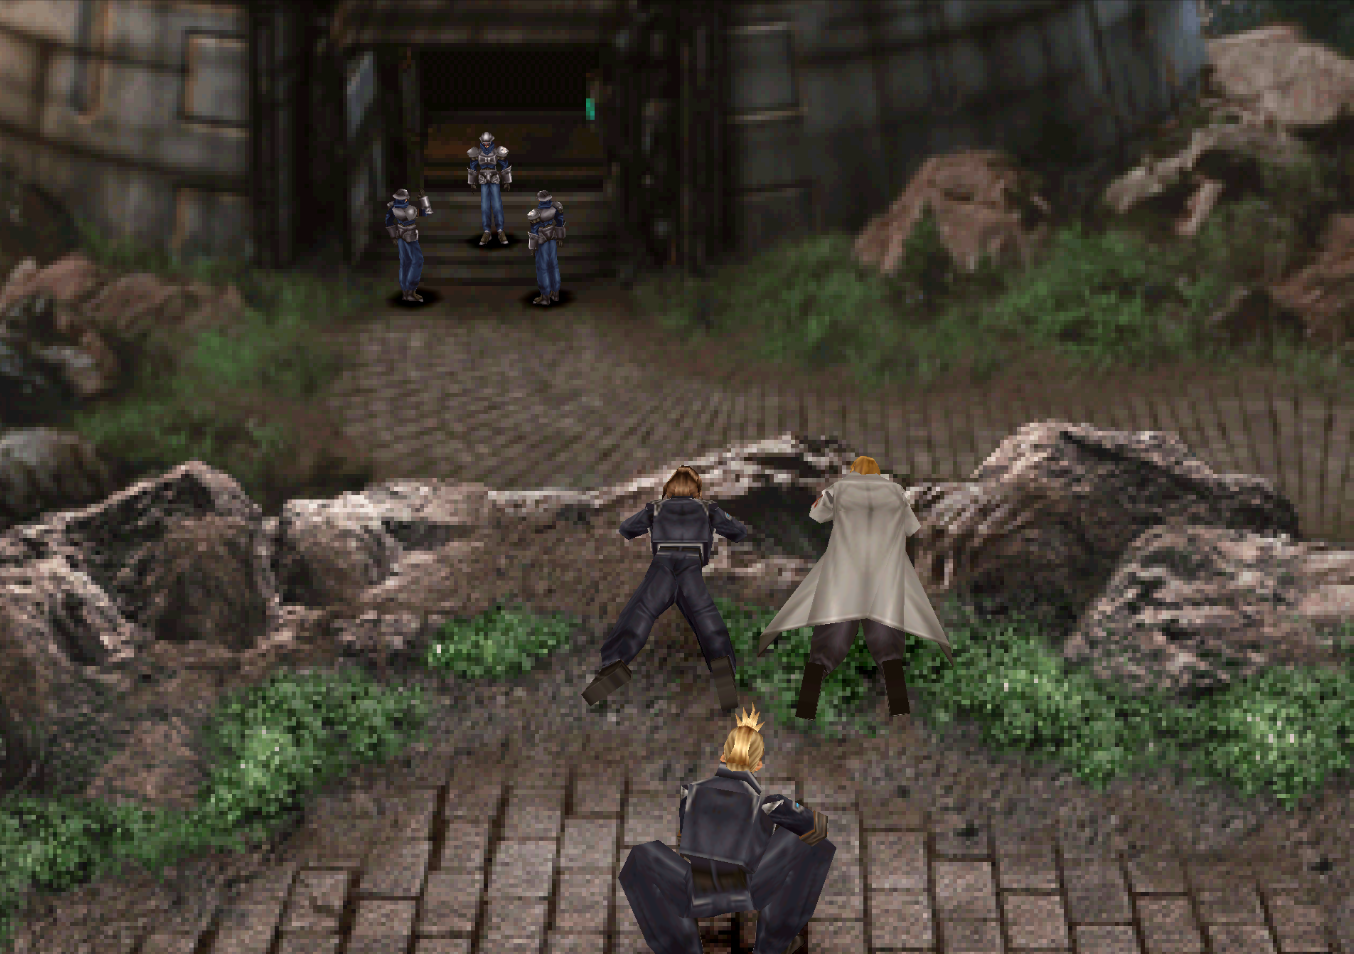
At the Dollet Town Square (pictured above) you'll want to first try going up the right path, you'll be ambushed when you try. Going up the left path first will result in a loss of SeeD experience. Once you've defeated the soldiers you'll have to speak with Seifer three times to trigger another scene.
When the camera angle changes speak with Zell then to Seifer. Run away from Seifer then approach him again for another scene. Now is when you'll want to travel up the northwest path, following Seifer. This is the area where the Seifer Grind will mostly take place. Also where another grind will take place later when we're leaving Dollet... But we'll get to that.
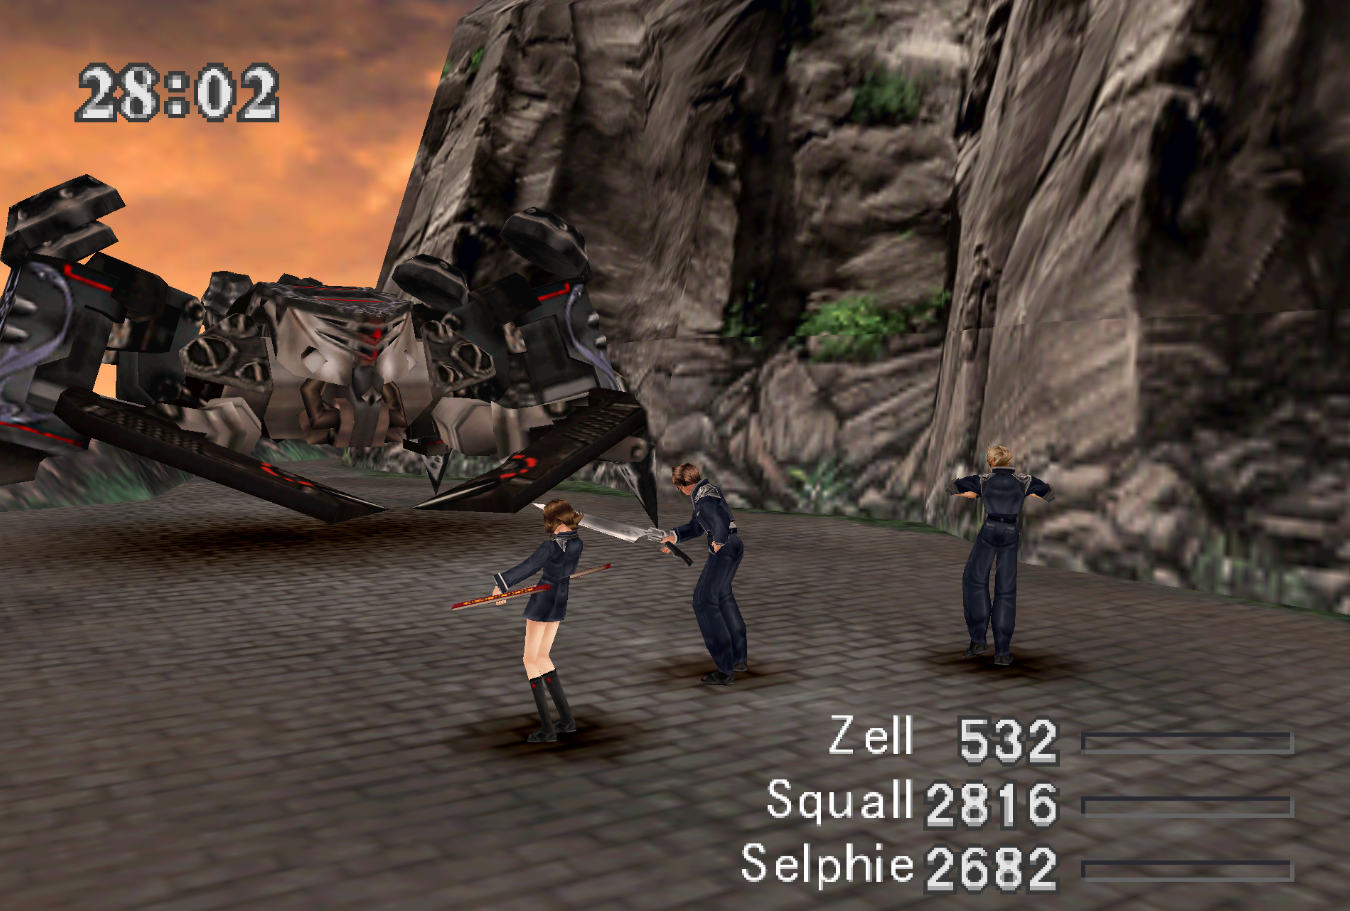
If you didn't spend time on the beach after we got Ifrit then I highly recommend you grind at this location with Seifer. At least long enough to get all of the Junctions for your current GFs. When you're ready to push the story forward you'll just want to follow the linear path to the Com Tower. When you get close enough to the Com Tower you'll trigger a scene (pictured below).
When you regain control of Squall DON'T jump off the cliff and follow her or you'll lose out on SeeD Experience. Instead go around the long way. Also if you were doing the Seifer Grind trick make sure to heal Squall/Zell and Junction them appropriately before proceeding. Also give Selphie a GF when she joins your party in front of the com tower.
GF Junctioning:
Squall: Ifrit, Siren (once acquired)
Zell: Shiva
Seifer/Selphie: Quezacotl
Important Junction Info: Make sure at least one character has the Draw command Junctioned to them. The upcoming boss has a GF that you need to Draw from it
Important Auto Junction Tip: Two of the upcoming bosses, Elvoret and X-ATM092 are immune to poison. FF8 Junctions Bio as an Auto Junction to Elem-Atk - you will want to go into Junctions and change this Junction to Thunder (preferably) or anything other than Bio.
Inside of the Comm Tower the first thing you will want to do is use the Save Point to the right of the elevator. If you miss the upcoming GF you'll definitely want to reload your save and try again. The Draw Point in the corner here contains Blind, if you used the Steam Magic Booster you probably already have plenty of it and won't need to Draw it.
When you're ready to proceed with the story and fight the boss of this area head up the elevator. There will be some scenes before you're thrown into a battle against Biggs and Wedge. After defeating Biggs and Wedge you'll be immediately thrown into another battle against Elvoret, the real boss of this area.
Biggs Draw Tip: Biggs has the Esuna spell which you can Draw from him if you want
Important Draw Information: If you do not Draw Siren from Elvoret then reset your game. You won't get another opportunity until Disc 4 to get this GF
Elvoret Draw Tip: This is the first enemy in the game that you can Draw Double Magic from as well

If you plan on Drawing a lot of Double from Elvoret I would recommend using Blind on him. This will inflict Darkness on him and cause him to miss the majority of his melee attacks - which is the majority of his damage. He hits pretty hard and having to heal through it all will drastically slow you down.
Important Auto Junction Tip: The upcoming boss, X-ATM092 is immune to poison. If you have Bio Junctioned to your weapon you'll hit the boss for 0. FF8 Junctions Bio as an Auto Junction to Elem-Atk - you will want to go into Junctions and change this Junction to Thunder (preferably) or anything other than Bio.
After the fight Junction Siren to Squall and use the Save Point at the bottom of the elevator again. This next part coming up is timed and you have two options of beating it. Basically what happens is Biggs unleashes X-ATM092 on you and you have to run back to the beach with this in pursuit of you the entire time.
How this part is intended to be completed is you let the machine chase you all the way to the beach and then in a cool cinematic cutscene Quistis blasts away at the machine as Squall just barely makes it back in time. However, you can also defeat the X-ATM092 and score some really awesome items for doing so.
If you'd like to defeat this enemy I recommend you check out my X-ATM Trick Guide which will go over the details you need to know to beat it. Otherwise all you need to do is keep running from this enemy both in battle and outside of it. You can basically ignore everything else until you get back to the Dollet Town Square.
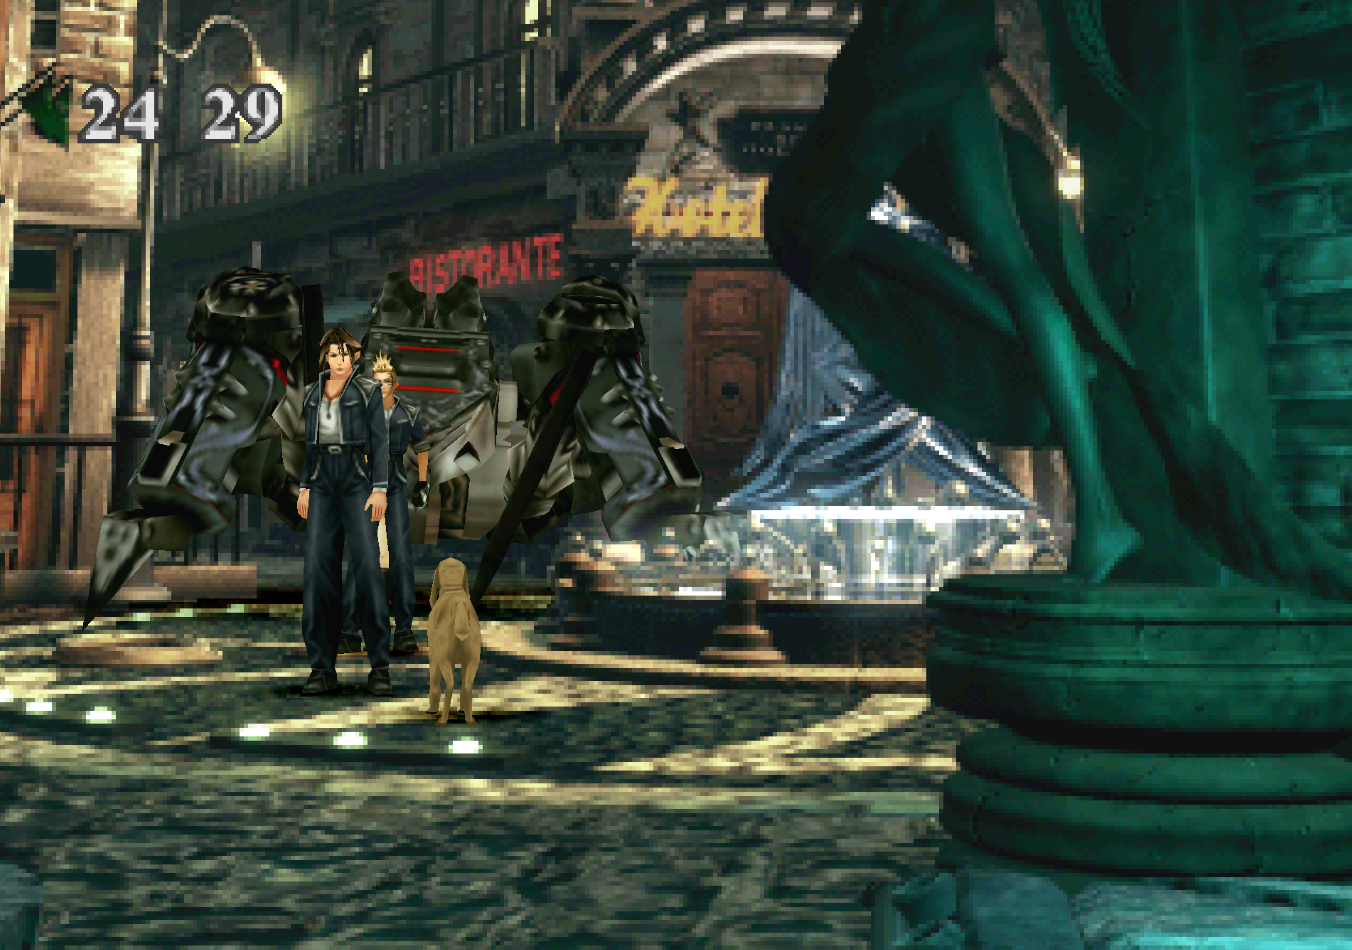
In the Town Square it's extremely important that you interact with the dog while running by otherwise you'll suffer a large hit to your SeeD Experience at the end of this mission. After the dog there's nothing else left to do but flee to the beach for the cutscene.
Once you're back in Balamb Town the SeeD exam is officially over and you can talk to whomever you'd like again and do whatever you want. In order to progress the story forward you'll want to head to Balamb Garden again.
Note: At this point in time you can win the Zell Card if you want, but I recommend waiting a little instead.
Continue to Balamb Garden (Part 2) Walkthrough
Return to Fire Cavern Walkthrough