
Midgar Raid (Disc 2) - FF7 Walkthrough
When you are ready to begin the Midgar assault all you have to do is fly the Highwind over Midgar and a cutscene will commence. Keep in mind that this is the last time you're ever going to be able to visit these parts of Midgar in Final Fantasy 7. Many of the items on this page will be permanently missable once you pass them including Barret & Cait Sith's Ultimate Weapons.
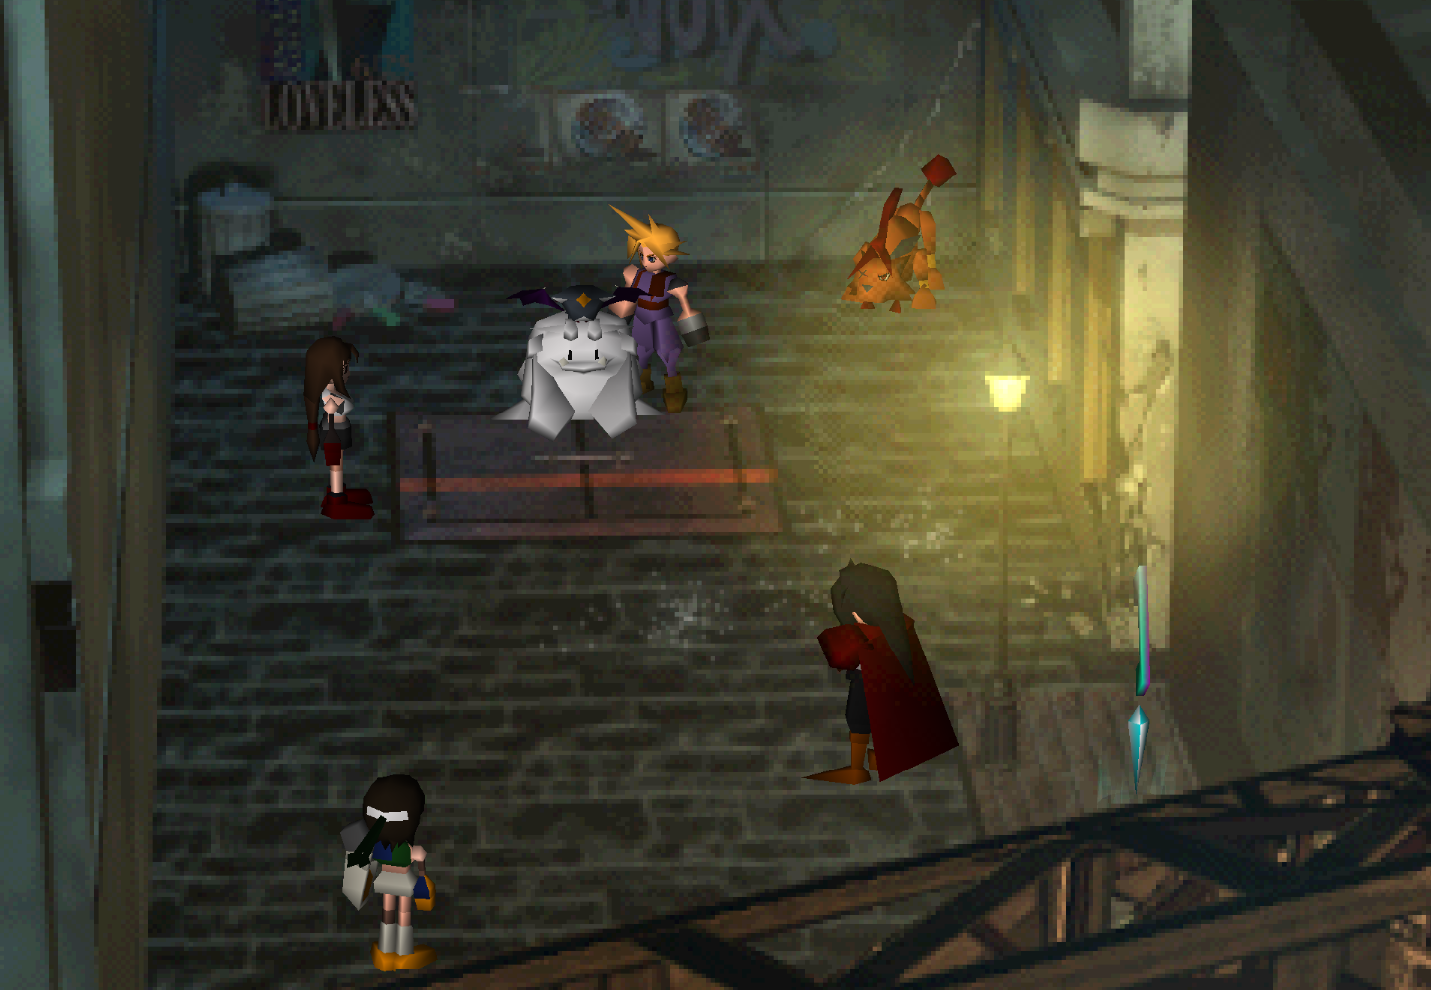
Other side quests like the Turtle's Paradise Flyers also can never be completed if you've missed the flyer in the Shinra Building both times you are in Midgar. With these warnings out of the way, let's get back to the guide! When you land in Midgar the first thing you'll want to do to advance the story forward is speak to Cait Sith.
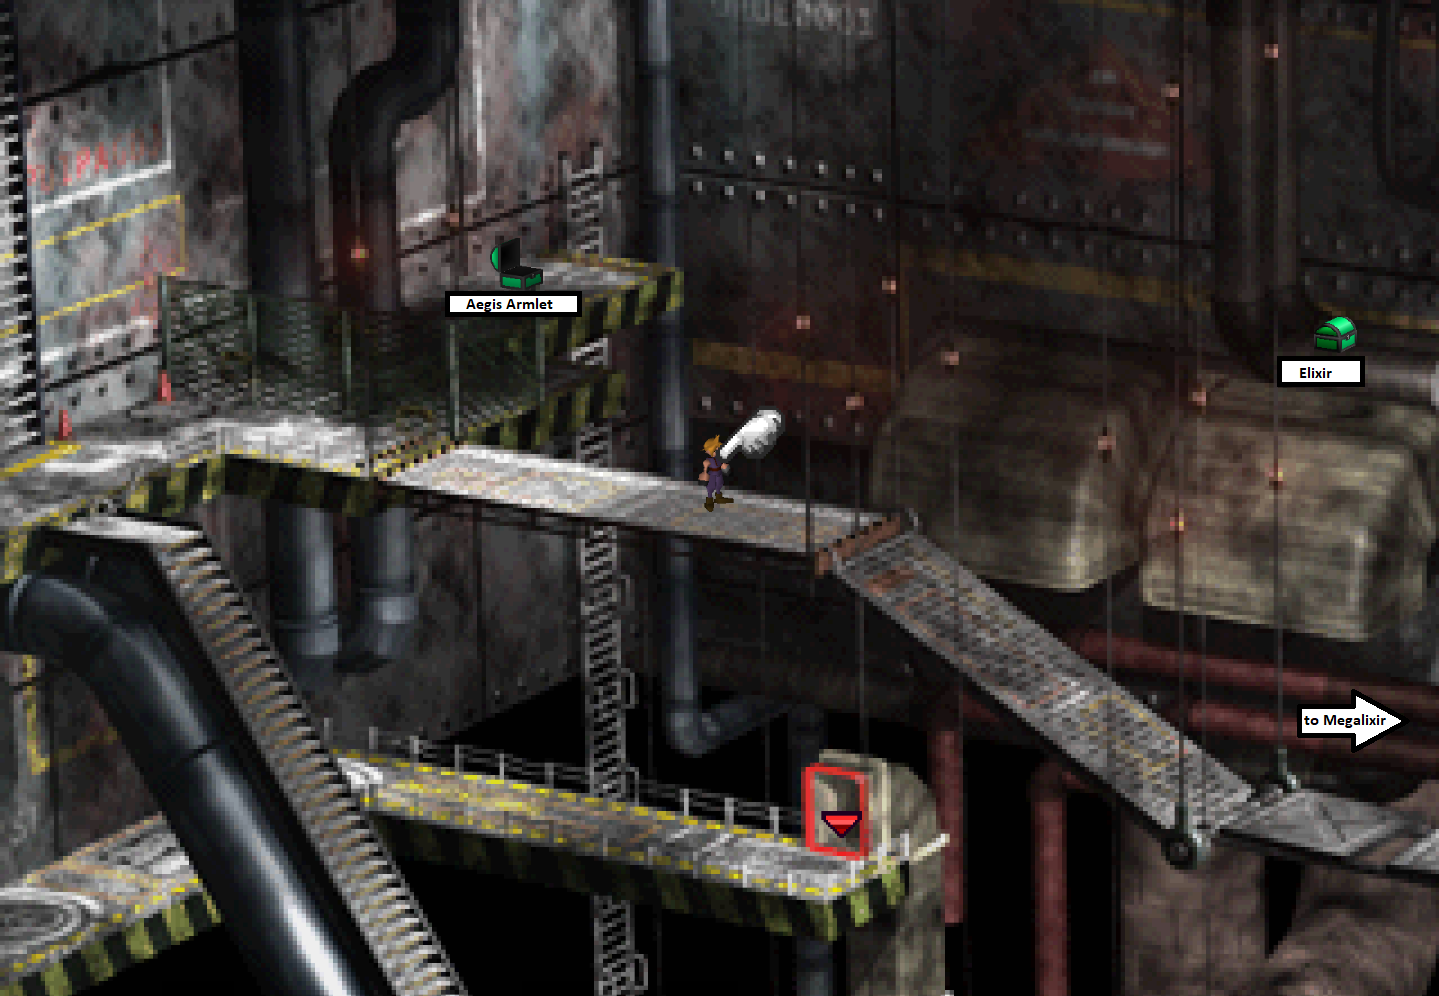
After going down the ladder the first thing you're going to wanna do is go down the path that appears to be fenced off... It's not and you'll find an Elixir and Megalixir by going this way. This area is pictured in my screenshots above. Once you've collected both of these treasures return to where we entered and go down the long flight of stairs then the ladder.
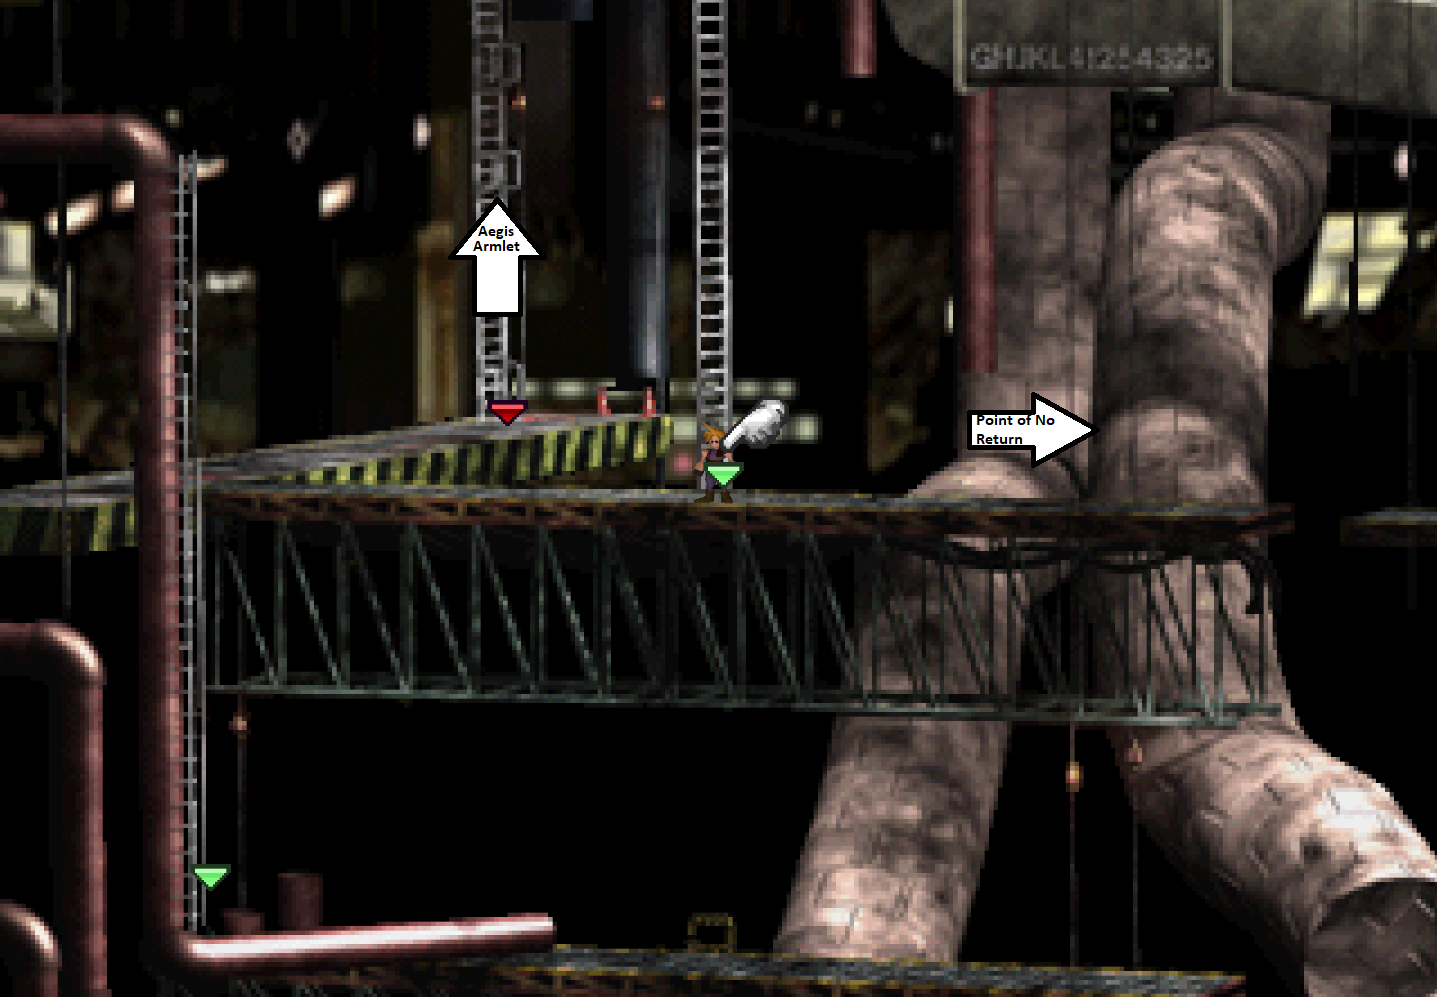
In this next area it's very important you go to the left first and up the super long ladder to get the Aegis Armlet, the chest that we saw when we first entered. When you go right the bridge you run across collapses on you and you can never return to the area with these three items. Follow the linear path from this area until you reach the spot shown in my screenshot below.
Elixir
Megalixir
Aegis Armlet
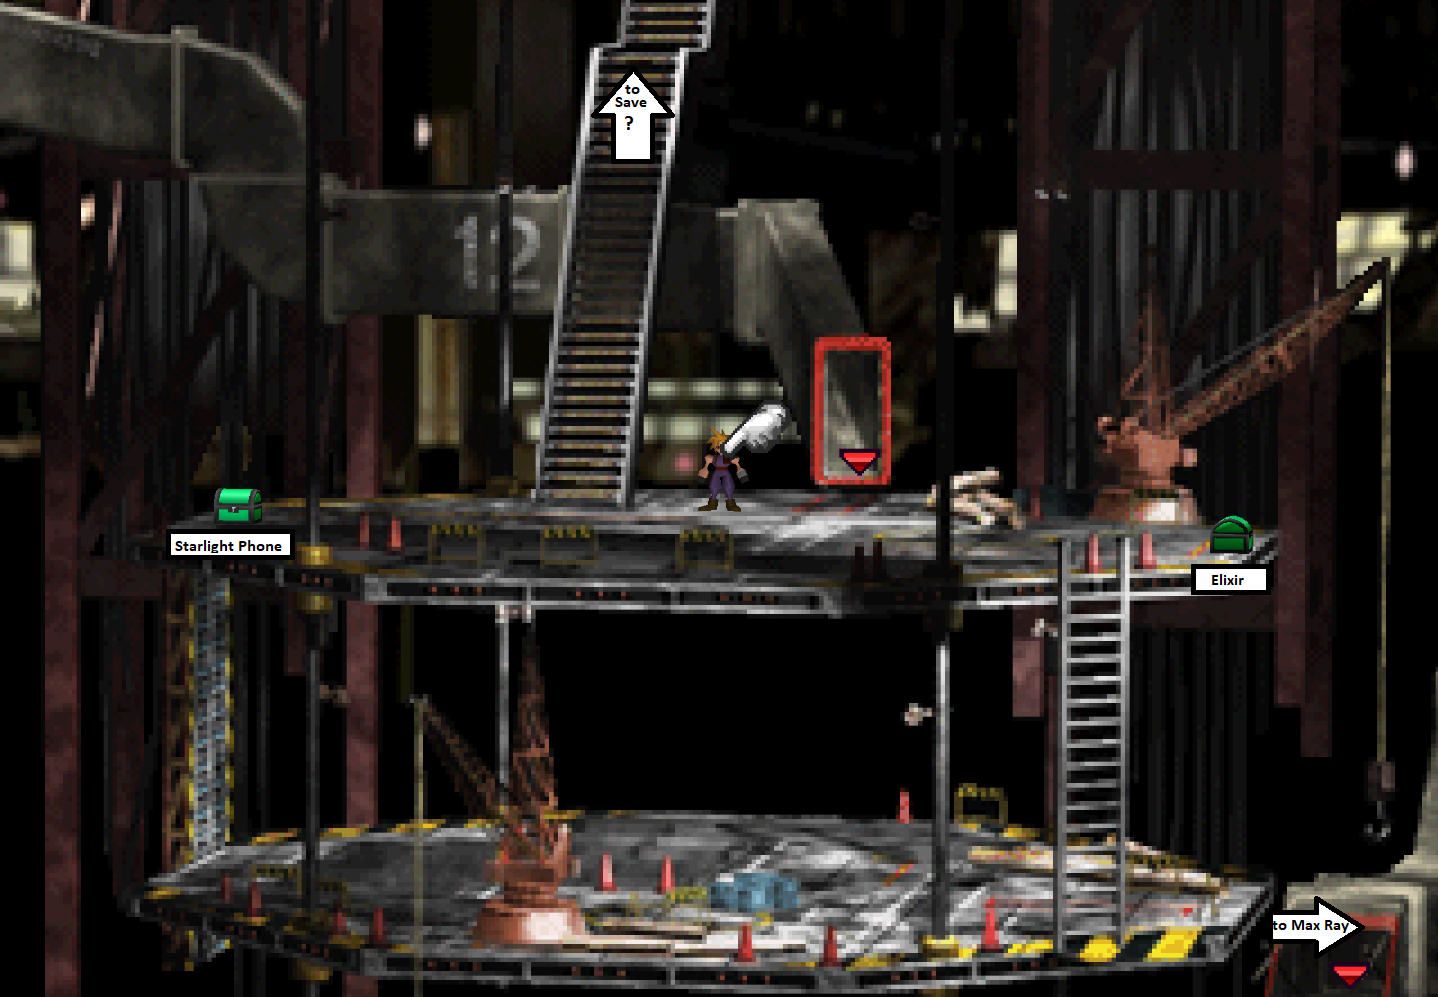
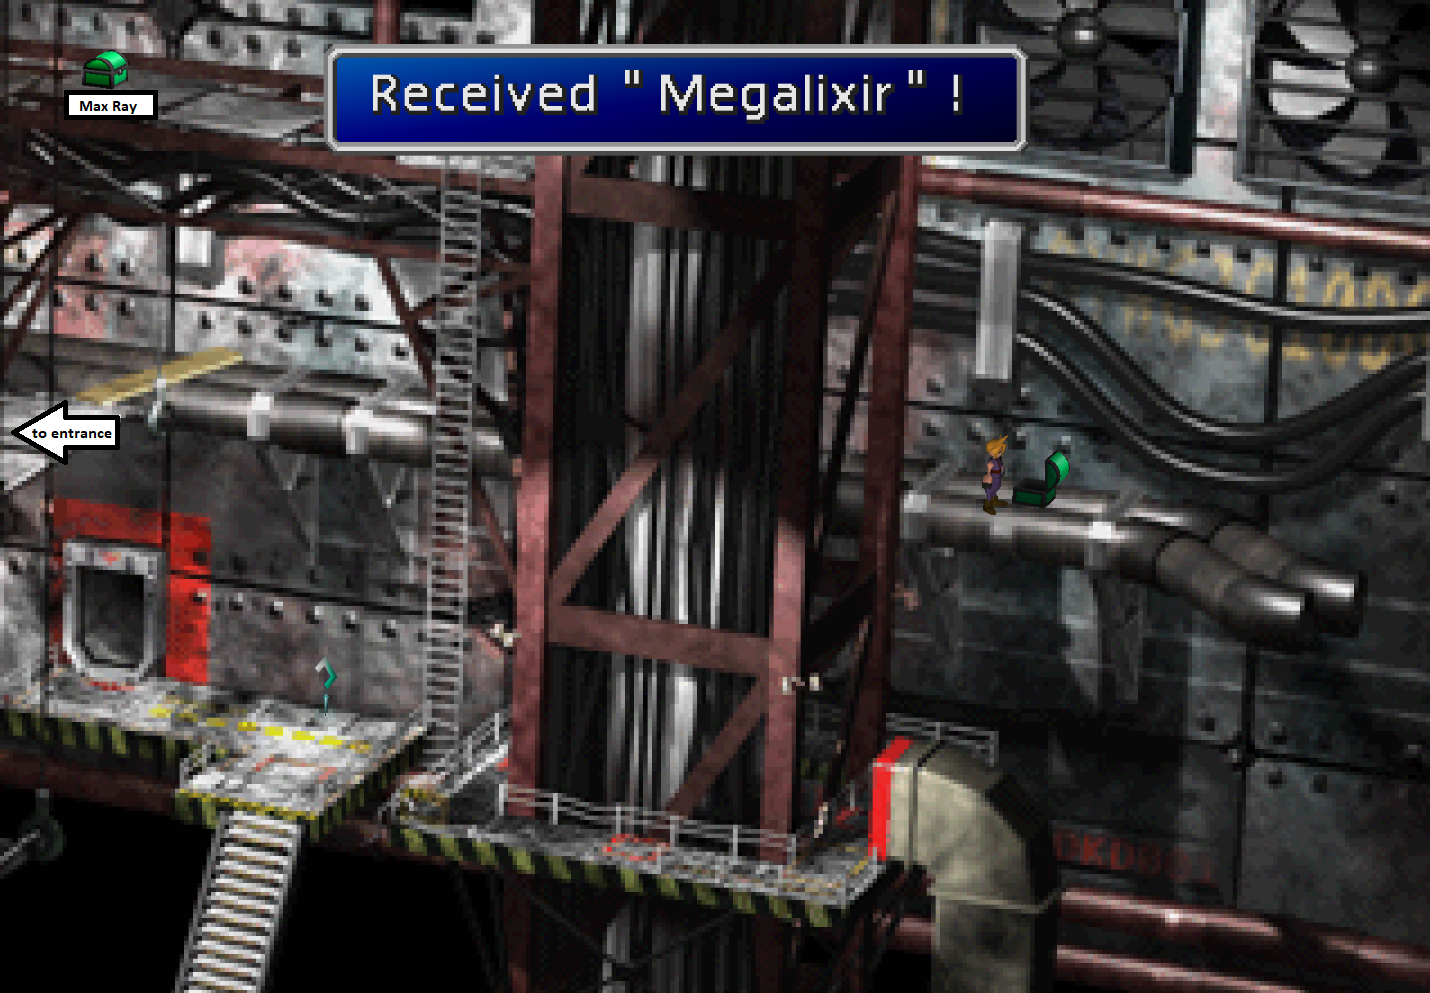
When you go through one of the air duct looking things marked with the number 12 you'll find yourself on the same platform as shown in my screenshot above. On this platform you'll find a Starlight Phone (weapon for Cait Sith) and an Elixir. If you go down the ladder and into the air duct you'll come out next to the platform with the Save Point.
Climb up the ladder in this area to reach the Max Ray treasure which we saw earlier. Return to the area shown in the screenshot above and then up the stairs to proceed with the dungeon.
Starlight Phone
Elixir
Max Ray
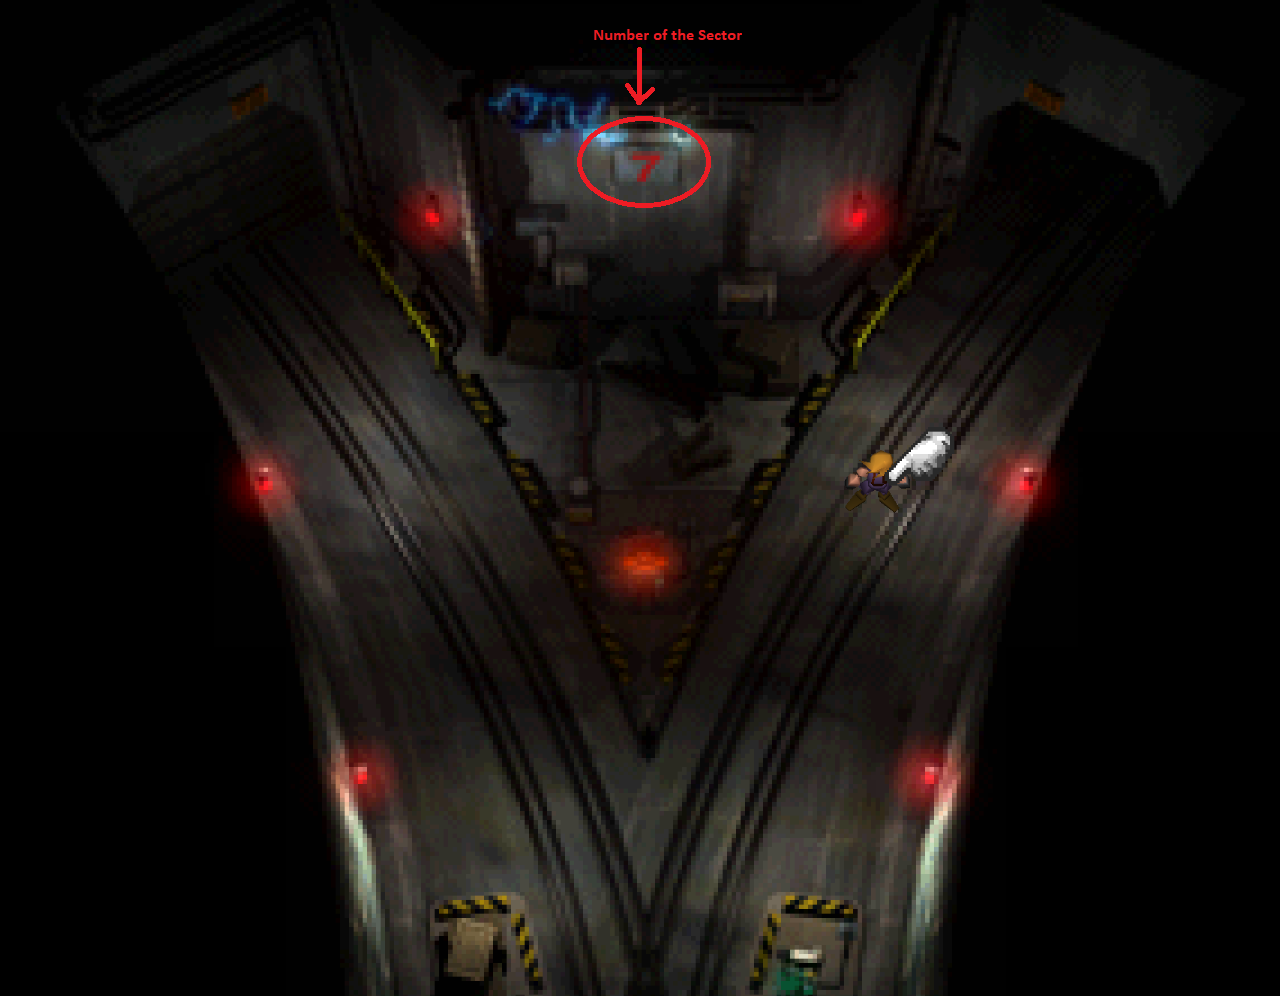
How to tell what sector junction you're at.
This next area is the same sort of tunnel system we did at the very start of the game during our second AVALANCHE raid. When you first arrive you're going to want to go south to collect some valuable treasures. Note: If you miss the W-Item Materia here you can dig it up later in Bone Village, but you should get it here anyway as there's more than just that to grab.
If you look at my screenshot above you'll be able to see that I have put a circle around the large red number at the center of the junction. This is how you identify which junction you're at - below you'll also find a list of all the treasures and which junctions you can find them at.
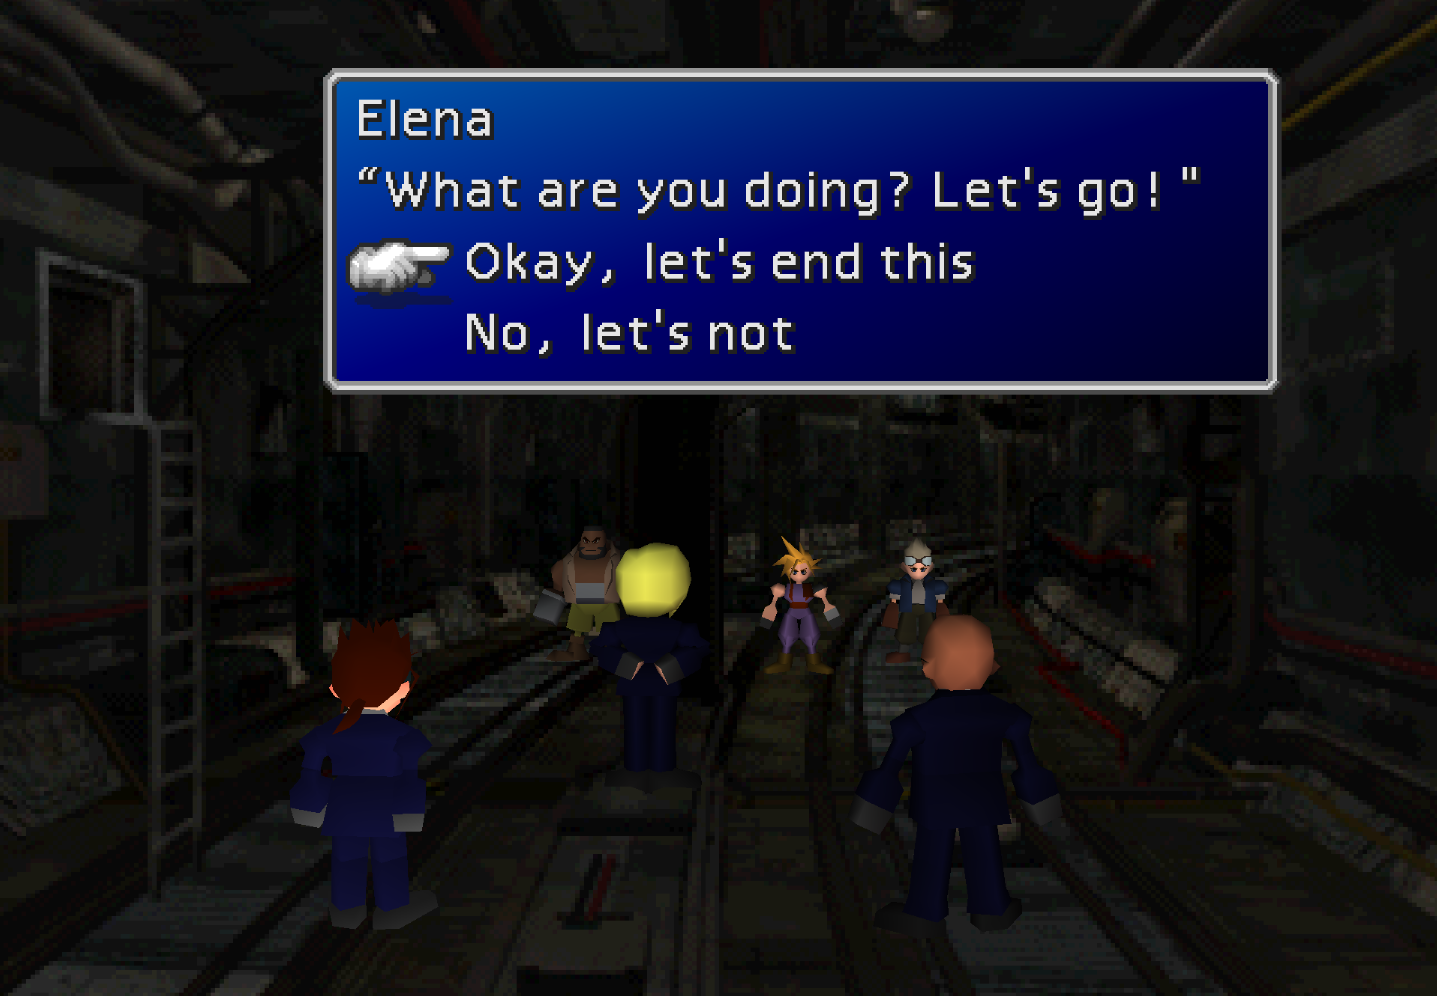
At the same area we entered these tunnels if you go a tad bit to the north you'll bump into the Turks, you have the option of fighting them or talking them out of fighting if you did the Wutai Side Quest. This is your last chance to Steal their items if you decide to fight them.
Sector 3 Junction: Power Source
Sector 2 Junction: Guard Source
Sector 1 Junction: Mind Source & Magic Source
End of the Tunnel: W-Item Materia & Save Point

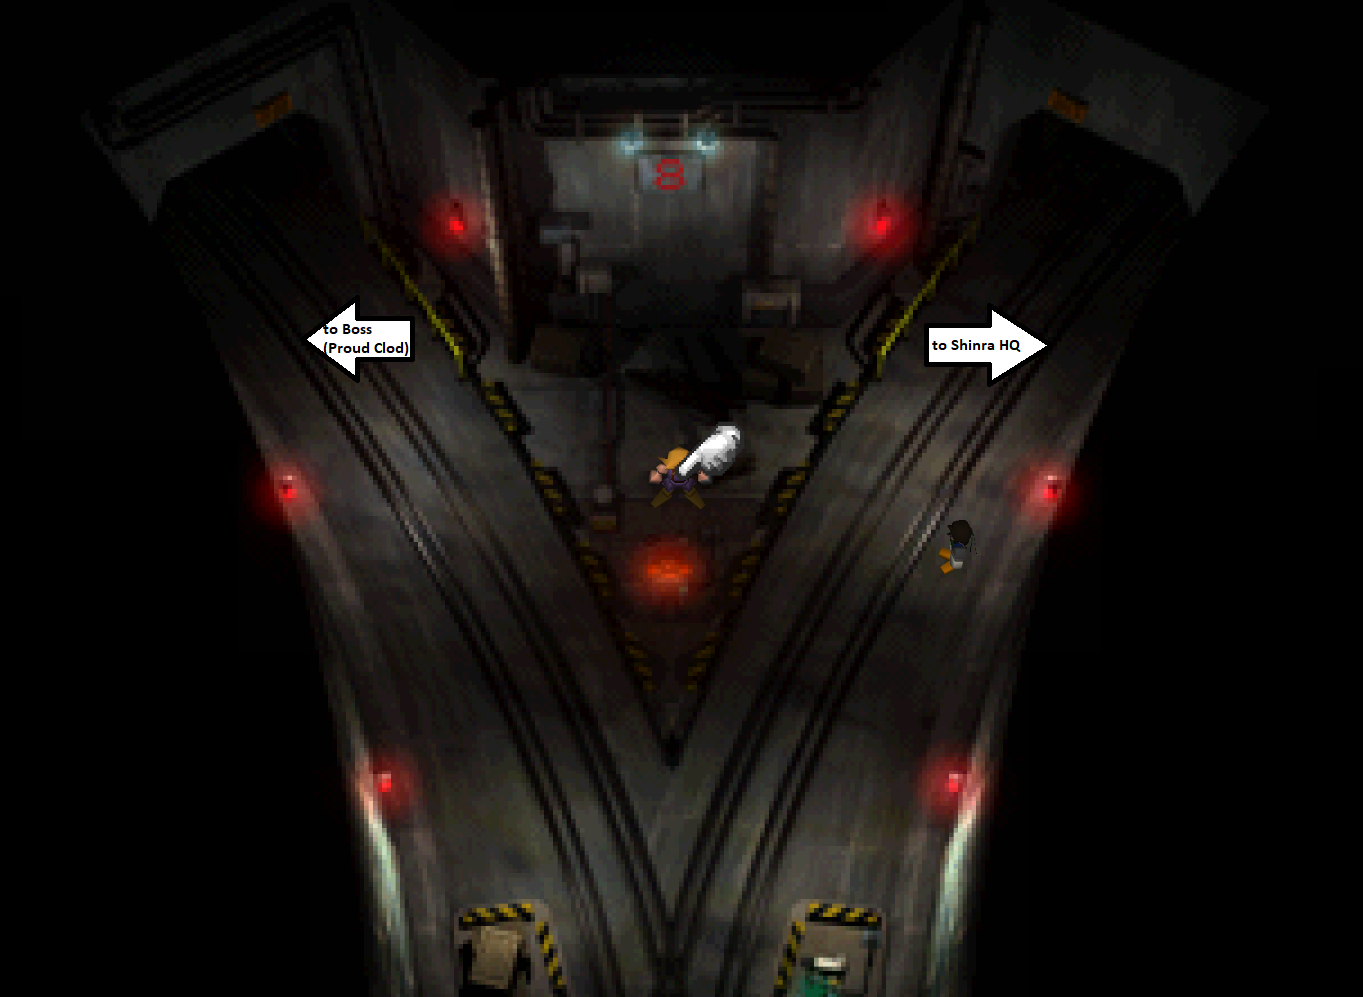
After the confrontation with the Turks you'll come to another junction with both paths open. DO NOT GO LEFT!!! Shortly after going left you'll encounter the Proud Clod boss and you can't come back down this way which means you can't revisit the Shinra Building and you will miss Cait Sith's Ultimate Weapon along with many other treasures. Obviously, to get to the Shinra Building you'll want to go to the right.
When entering the Shinra Building I recommend you go through the front doors, just like I instructed you to do last time. Before going up the elevator or doing anything else in the Shinra Building, if you didn't read the Turtle's Paradise News Letter the last time we were here do that immediately.
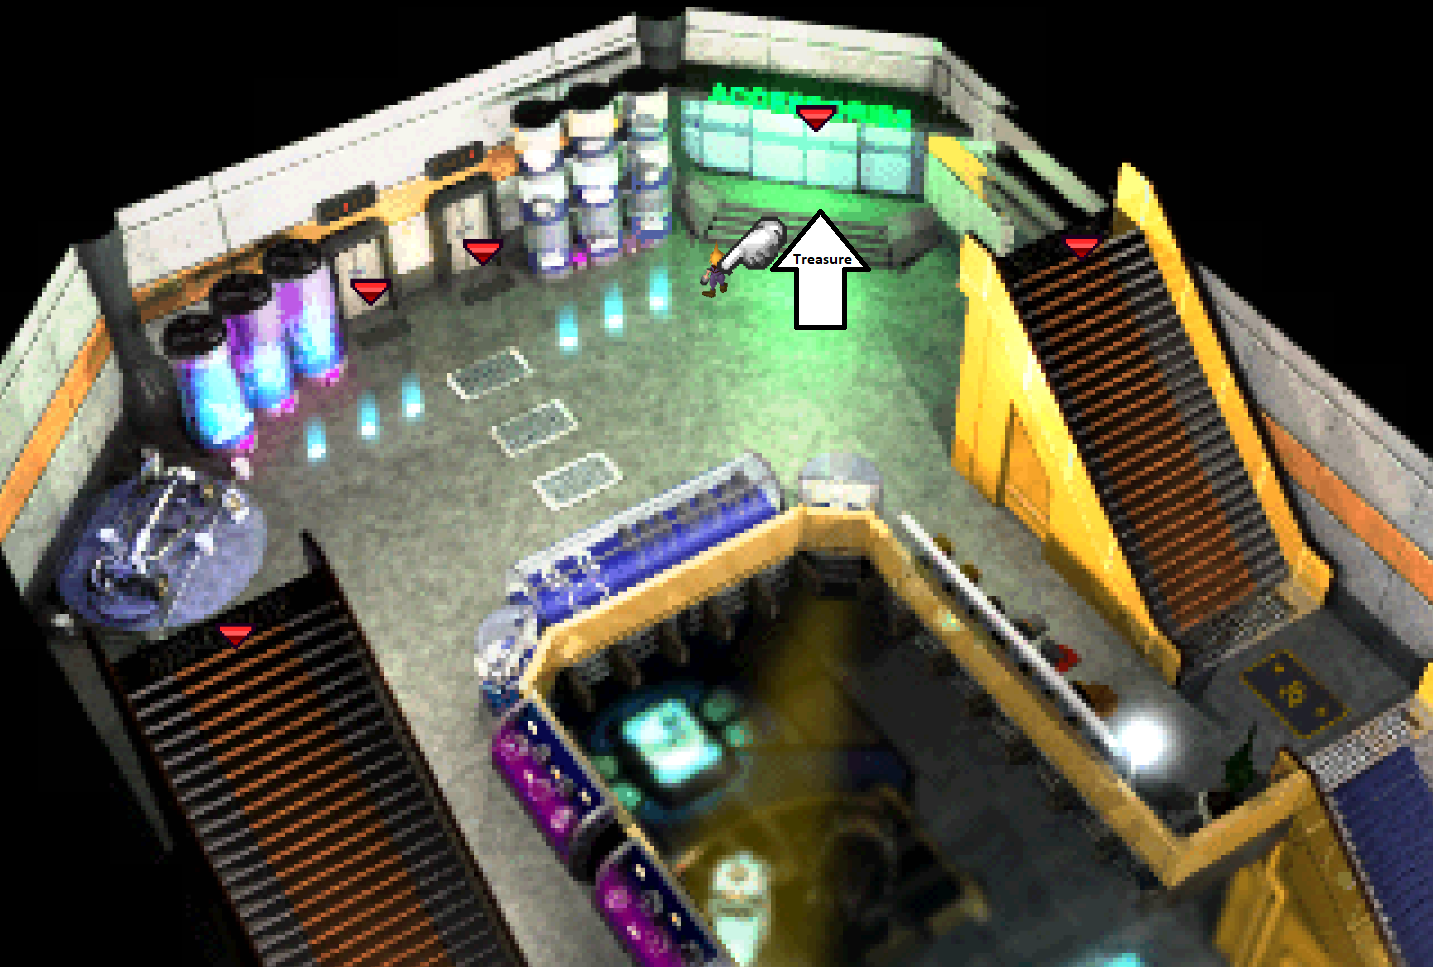
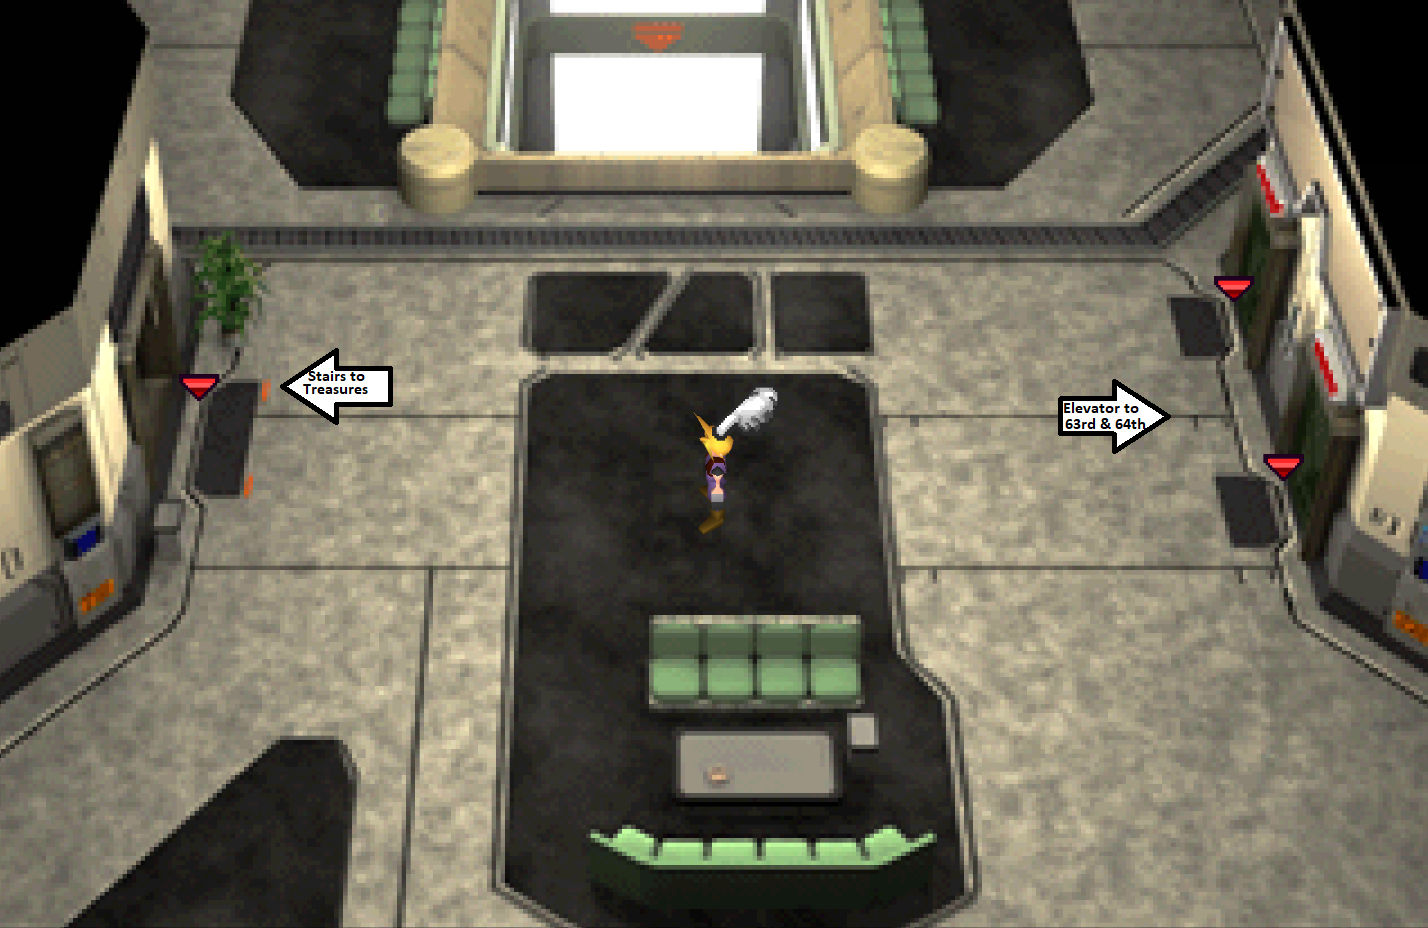
On the second floor in the northeastern most room (pictured below) you'll find two treasure chests with weapons for Tifa and Barret. Once you've got both of these hop in the elevator on the first floor and take it up to the 63rd and 64th floor for the treasures there. If you're having trouble locating these treasures use the pictures provided below.
If you take the elevator on the 2nd floor up you'll end up on the 59th floor, if that's the case, no big deal - just work your way backwards while collecting the treasures instead.
2nd Floor Treasures: Pile Bunker and Master Fist
63rd Floor Treasures: Grow Lance
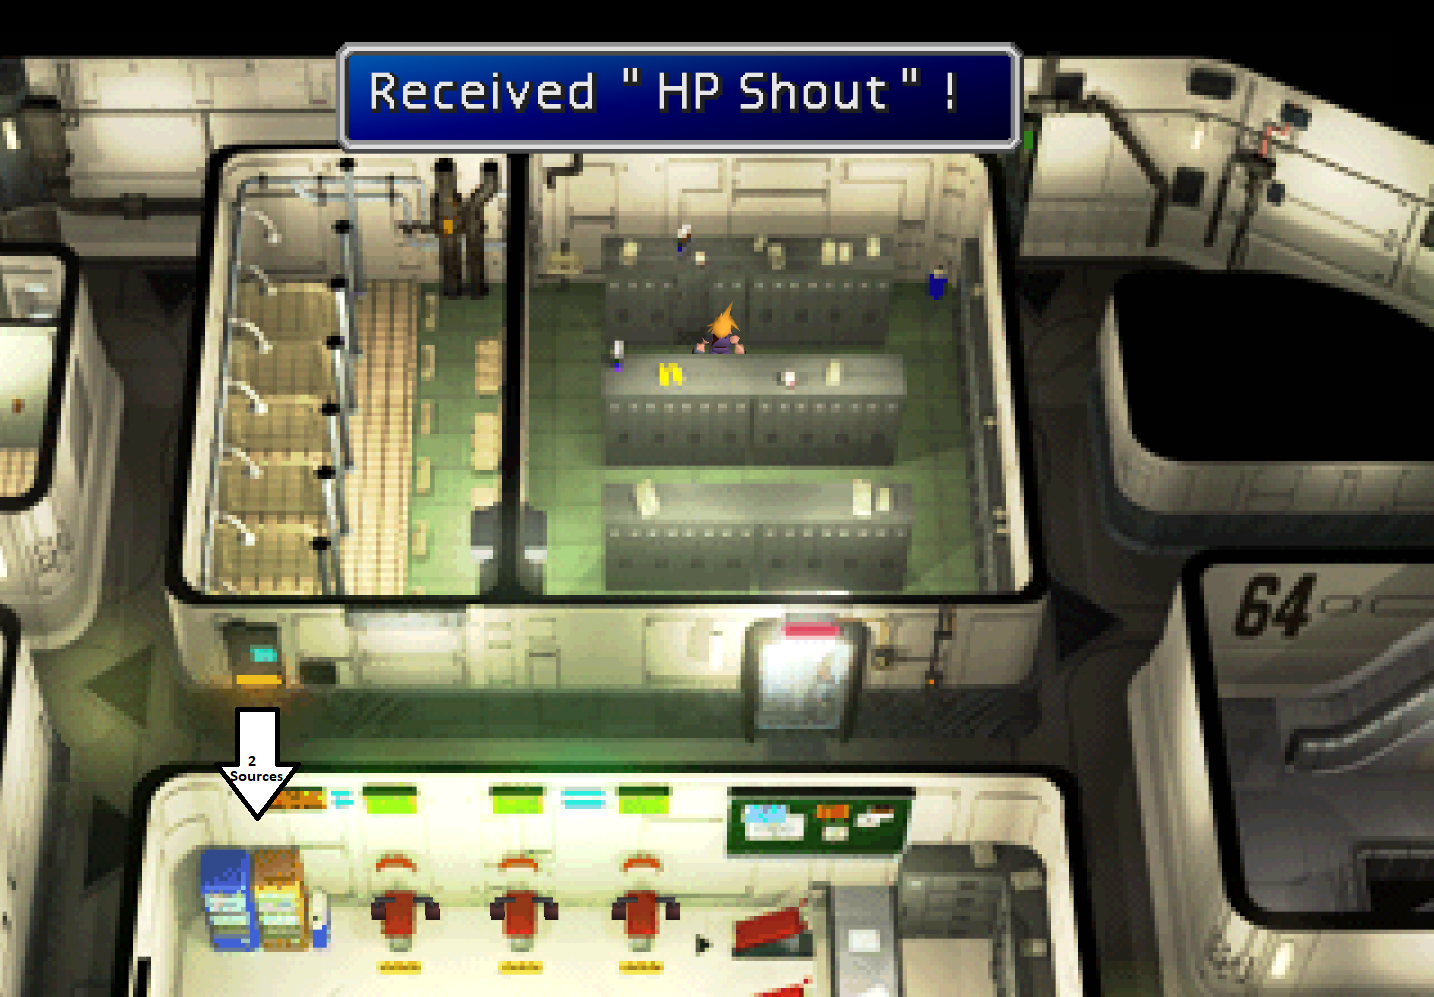
64th Floor Treasures: HP Shout (Cait Sith's Ultimate Weapon); Mind Source and Speed Source (if you tried to buy the Shinra Gym Drink last time you were here)
Once you've obtained all of the above mentioned treasures you'll want to hop in the elevator and ride it down to the 59th floor. Run across the hallway and into the stairwell (pictured above). Go down until you find both the Behemoth Horn and Elixir treasures then turn around and return to the 59th floor and ride the elevator back down to the 1st floor.
Note: If you took the sneak into the Shinra Building option on Disc 1 then you probably already got the Elixir which means only the Behemoth Horn will be here.
Treasures in Shinra Building Stairwell:
Elixir
Behemoth Horn
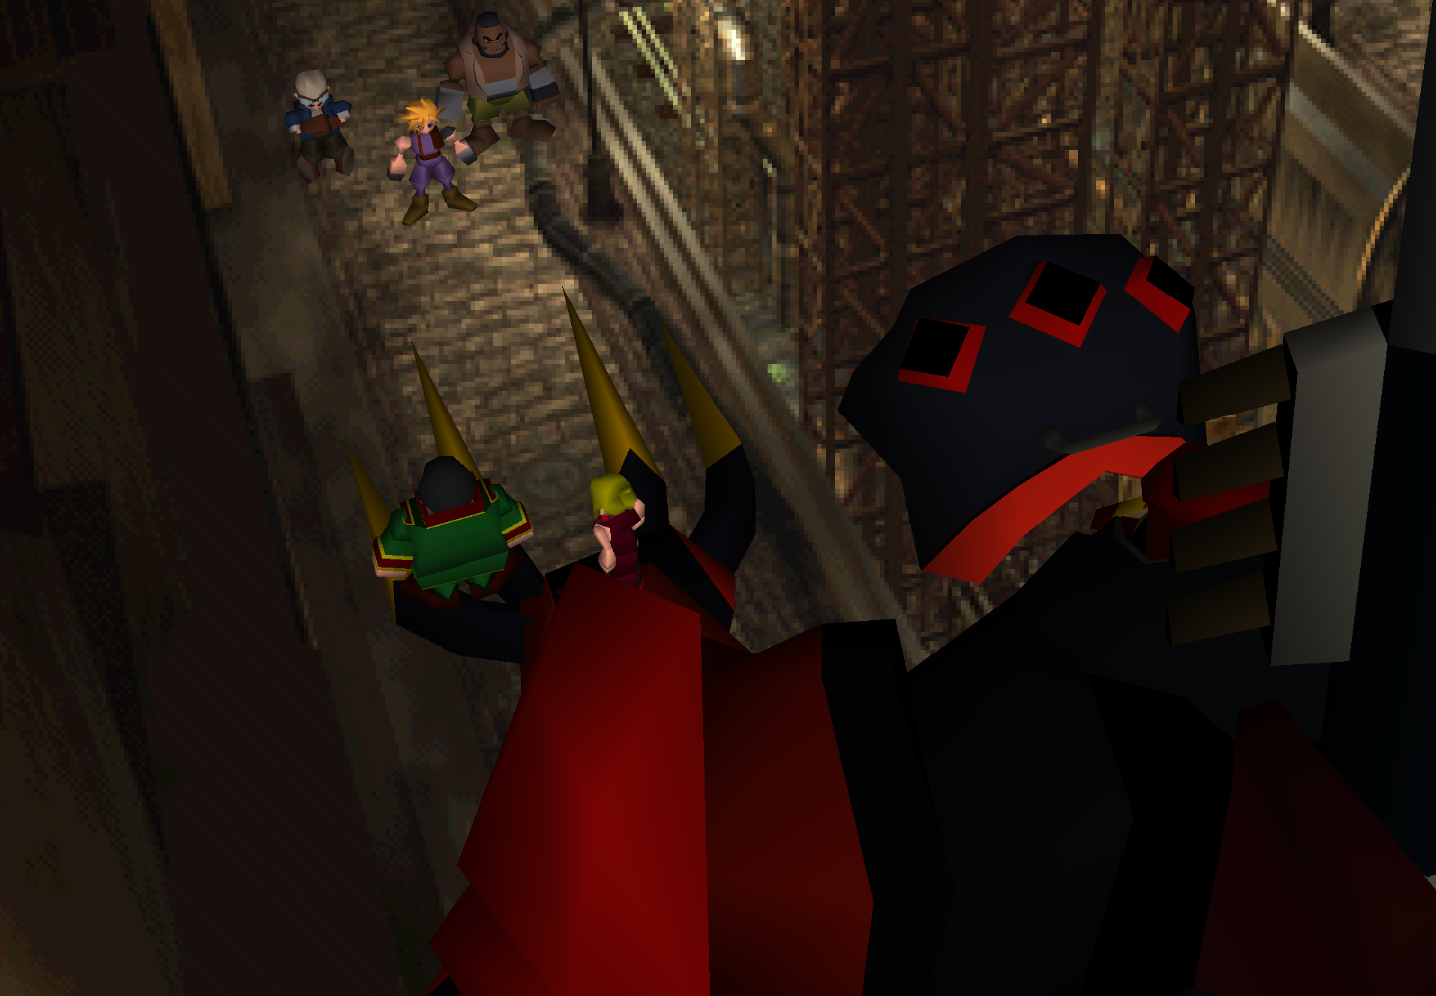
That completes our return visit to the Shinra Building! Leave the way you came in and back to the same area that we encountered the Turks. Instead of going right at the junction this time go left and you'll find yourself up against the Proud Clod boss.
After the battle equip Cloud with the Ragnarok (it's the best weapon you've found for him thus far by a long shot and it's his third best weapon) then go north. You'll find two treasure chests and a Save Point on the next screen. One treasure chest has an Elixir and the other has a Mystile inside.
**Important Missable Item Alert** If Barret isn't in your party then you won't see the chest with his Ultimate Weapon Missing Score inside of it. Use this Save Point to put Barret in your party before proceeding any further with the dungeon.
Once Barret's in your party continue north up the stairwell, you'll find the Missing Score on a flight of stairs on your way up (pictured below). At the top of the stairs you'll have to face off against Hojo. I highly recommend equipping every character in your party that you can with a Ribbon as Hojo likes to use a lot of status ailment magic.

Hojo has a total of three forms that you will have to beat, none of which should really be that difficult for you if you use your Materia properly. If you're struggling on figuring out what makes a good Materia setup I recommend you read over my Materia Combinations Guide.
Continue to The Beginning of the End (Disc 3) Walkthrough
Return to Rocket Town, Cosmo Canyon, Forgotten City & Diamond Weapon (Disc 2) Walkthrough