
Breath of Fire III Walkthrough - Chapter 4
There will be a scene with Momo when you enter the Colony, take her up the stairs to the room at the top and investigate the teleporter. Grab the Key in the bag on top the teleporter then leave. Next up, grab the Dragon Failure Gene from nearby, it's to the west of the room with the teleporter. From here our next destination is a window that we have to jump through.
Finding the window is a piece of cake (you pass it when going up the main stairs through the dungeon)... Reaching the window is another story entirely though. From where you got the Dragon Failure Gene you need to follow the south wall down until you reach a door. This leads to a small room that cuts under the main staircase and takes you to the window we can jump through on the other side (pictured below).
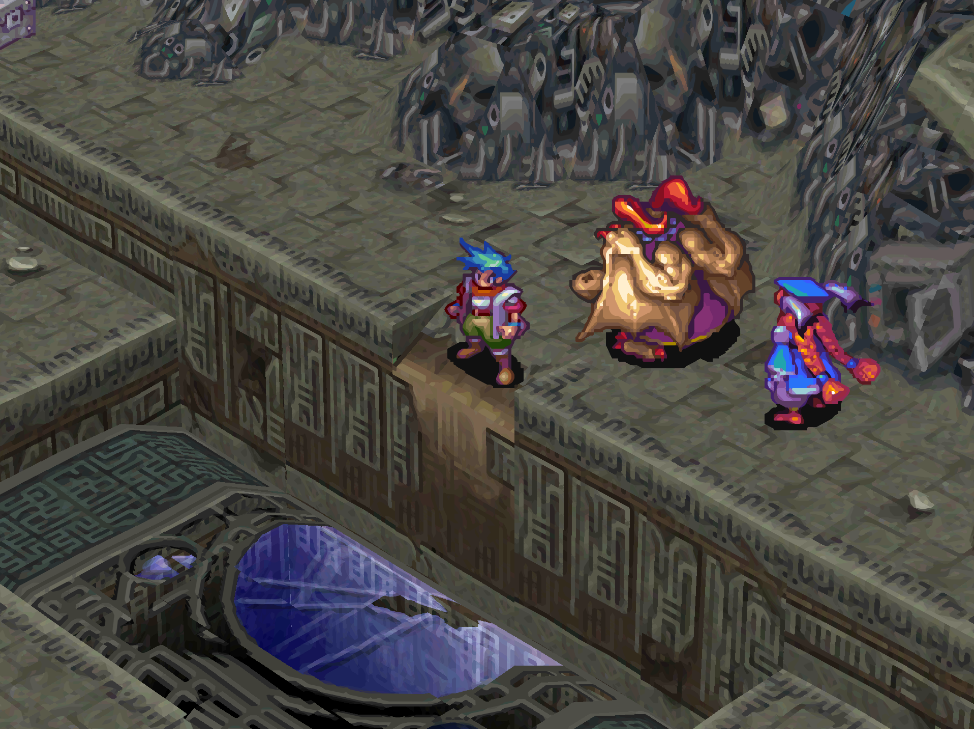
Jump through the window in the picture to advance
Put Momo at the lead of your party and inspect the writing next to the red switch in this room. Insert the Key that we got from the room with the teleporter and Momo will explain how this puzzle works. Basically, we need to adjust the mirrors to properly reflect the light off them and to where we need it. To properly align the mirrors inspect the switch on their base to turn them. Below are the amount of turns you need for each one...
Mirror Turns: Turn the south mirror twice, turn the east mirror twice and turn the west mirror three times
With the portal now fixed and working head upstairs and step onto it. Exit the room and then follow Honey through the hallways until you have a scene with Momo and Nina where they figure out we're back in Steel Beach. After the scenes you'll be asked to choose your party again, once that's done return to the room with the teleporter and go down the opposite hallway this time.
This will lead you to a room with four switches in it. Each of the switches are color coded and they need to be pulled in a specific order to advance. Other combinations may lead to treasures/bonus items but the combination to advance is:
Four Switch Room Combination: Blue (East), Light Blue (South) and Brown (North)
After pressing the correct 3 switches you will be able to walk across 3 beams and then under the beam blocking the stairs. Go up the next flight of stairs and you'll find yet another puzzle room. This one requires us to reach the small square platform in the middle of the pit. To do that, we need to ride the platforms around the square area until we can use one to reach the middle.
Honestly, this puzzle is way easier than it looks or sounds. Our goal is going to be to stack up platforms on the same side of the room with the diagram on the wall (pictured below). When you push the platform in the top right down it will stay near the middle on this side. You can then push the platform on the other side across to this side and into the previous one we just got stuck. This will be on the same path as the platform in the middle, so all we have to do is ride it across. Confused? I got different instructions below with a video.
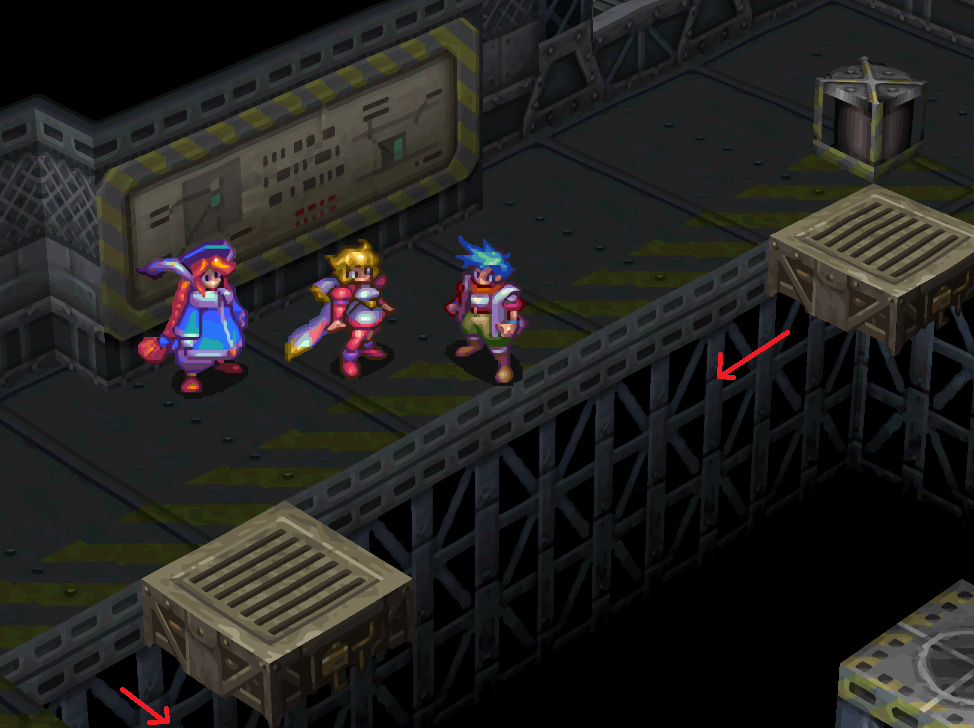
You'll want to start with the platform in the top right, move this down until it hits the other platform shown in my picture. Once you've done that move the second platform across the bottom to the other side. The arrows show you which direction to move them. Go to the other side of the box and move the platform on that side up to the top (you'll need to step on the platform we just moved to reach that one). Once it's at the top move it across to the same location where we moved the first platform from and then move it down. It will be aligned with the central platform now and we can ride it across to the middle.
If you'd like to see all of these steps happen in a video check out my Relay Point A Platform Puzzle Video. From here there are no more puzzles, we can make our way to the Antenna up top just by navigating the dungeon the good old-fashion way. When you reach the antenna interact with the computer to align the antenna (point it in the direction where you hear no static) then return to the teleporter room.
Use the computer near the teleporter pad and go to the Container Yard location first, you can find a Dragon Radiance Gene here. There are no more Dragon Genes for us to find in the world anymore, this is the last one. All remaining genes will come through story events.
When you are ready to continue with the story set the teleporter pad to Dragnier and step onto it. There will be a long scene when you first arrive, when you regain control of Ryu go outside and talk to Garr for another scene. After that's finished go into the well and find the room with the Elder. Ryu will talk to him first then he'll want to speak with Garr. After that it's a girl's turn, I used Nina.
After he's done talking with Nina he'll want to speak with Ryu again. Before you talk with him on Ryu you may want to change party members to something more battle oriented because it's going to turn into a boss fight once he's done speaking. This fight is probably the most difficult fight you've had so far since Ryu can't transform into a dragon. The boss will also lay into you with AoE attacks which will take weaker party members like Nina out almost every round they're used. I think the best party for this fight is probably Ryu, Garr and Rei.
Beating the Elder will get you the Infinity Dragon Gene which is the last Dragon Gene in the game. You will also have access to Master Ladon, he's a useful Master for higher level characters. When you are ready to continue with the story speak with Horis at the entrance of Dragnier, then exit town and head north on the World Map to the Factory.
The Factory is a pretty big dungeon, the first puzzle you come across will be an easy one... it's a room with 3 switches. Each time you press a switch electricity will flow, you have a certain amount of time to run around the obstacle before it resets. To advance you need to press the switch in the top left and then the one nearby where you entered. A picture of the area I am describing is below.
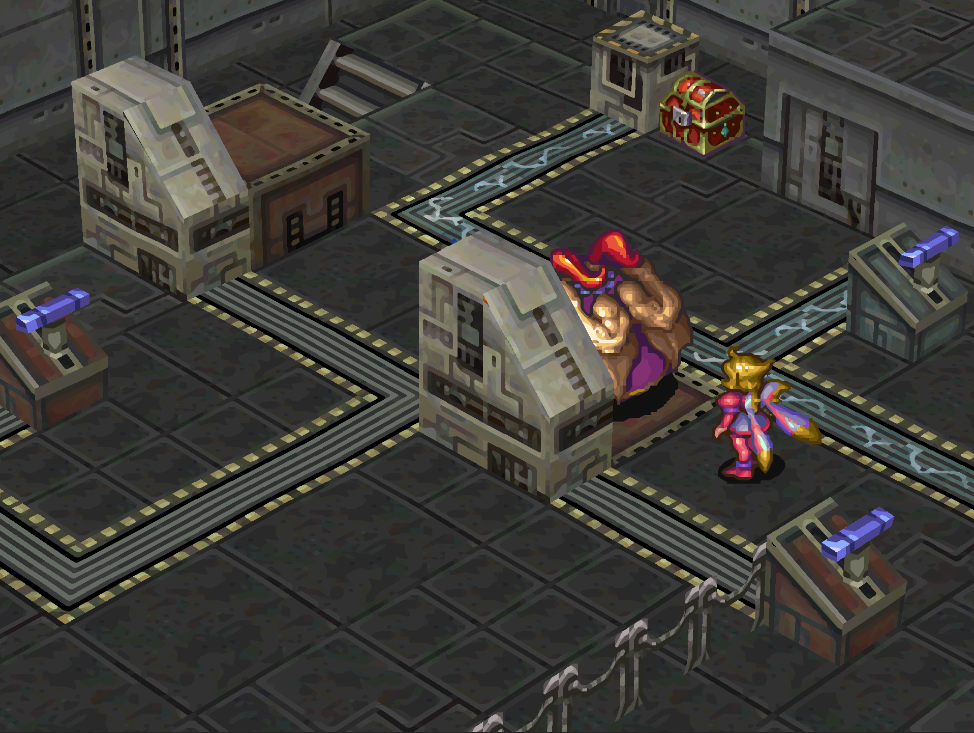
After completing this part you can go through the door in the top left of the area. If you explore around a bit you can make some shortcuts for yourself if you ever needed to back track.. For example the other switch you see in my picture above can only be reached from the other half of this room (which is also where our next puzzle is). Pulling this switch will permanently disable the electricity that blocks us from the switch and the chest.
Eventually as you're exploring you will come to the area shown below. In order to get up here you'll have to pull two switches to raise the platform for the stairs but nothing is timed so it's easy. When you interact with the terminal here you will get instructions about how to use the workbot. Basically what we need to do is use the workbot to pull the three switches in this area. You will need to run into some walls with the workbot and position Ryu better to reach the last switch.
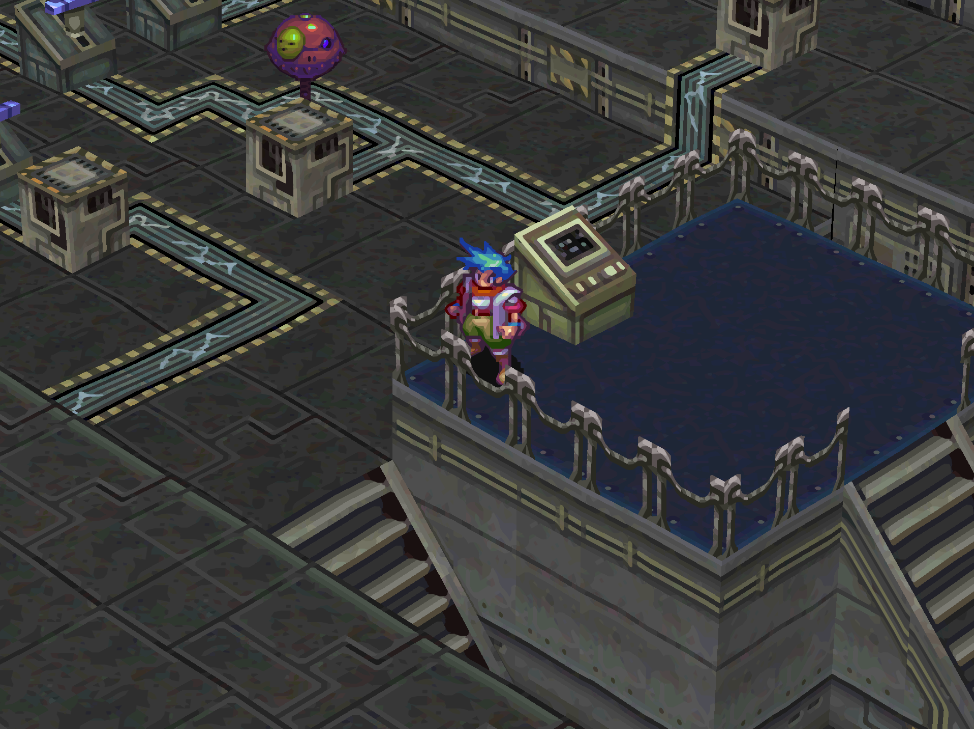
Trying to explain puzzles like this through text is difficult so I made a video demonstrating what I did. Check out my Factory Workbot Puzzle Video. Once you've disabled all electricity you can leave the workbot platform. Climb up the ladder and exit through the door in the north. This leads you to a long staircase and a locked door. Use Ryu's Triangle attack to break the panel next to the door, this will unlock it.
You will exit to the World Map but not for long because you've arrived at the Desert of Death!! Such an ominous name... When you arrive talk with Horis to learn all about the desert and the stupid stuff you'll have to deal with while you are here. Make sure you grab water from the vase at Horis' camp too, we'll be needing it as we navigate the desert.
One thing to note is Horis' instructions about how to navigate the desert are wrong. They got messed up in the translation of the game.
Tip: When you get a pop up message about being thirsty you will need to go into your inventory and use a Water Jug item to quench your thirst.
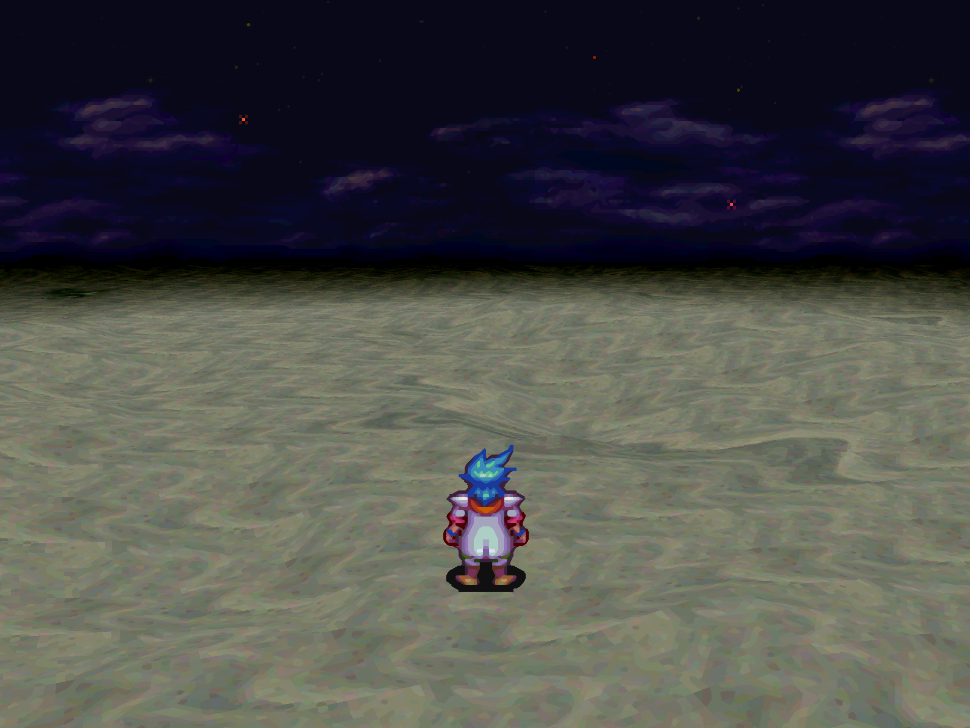
Position yourself with the North Star on the left and the Fake North Star on the right
Luckily for us there is an easy way to get through this place, when you enter it turn one turn to the right so that you have the North Star on your left and the Fake North Star on your right (pictured above). Always travel at night and always keep an eye on these two stars, travel directly between them. It will take about 5 nights of travel, as you reach the end you'll start to see blue dots slowly drift up into the middle area between these two stars. Keep going and eventually you'll run into our next boss fight, Manmo.
Want to see a video of me navigating this desert? Check out my Breath of Fire 3 - Desert of Death Video Walkthrough.
If you use the Force and Trance Dragon Genes you'll get a transformation with the Aura ability. This will do 1.1-1.5k damage per hit which will make quick work of Manmo. Our victory is short lived though because Nina is currently having a heat stroke. After a scene with her head outside and kill the Rakda for the meat (use Ryu's Triangle attack to hit it). Return to Nina with the meat for some more scenes.
Eventually you will be asked to pick a party of 3 (make sure Garr is one of the 3), after which you'll regain control of Ryu. There's not much to do in town so exit to the World Map instead; head northeast to the ? area. Go into the building here and with Garr in the lead push the crate into the wall to destroy it. This will give you access to the teleporter up above... You've probably been here before, it's the Container Yard location on the teleportation list (and also where we got the Radiance Gene).
Now that you destroyed the crate here you'll be able to back track to all different parts of the world... just in case you need to visit any of your Masters or the Faerie Village. When you are ready to continue with the game head up the road to Caer Xhan. When you first arrive there will be 3 doors on the right, two of these are shops. I strongly recommend hitting up the Weapon/Armor shop because it'll have some nice upgrades for everyone.
When you're ready for the next dungeon head to the building in the northern portion of town. You will run by the corpse of something that looks just like Honey before you reach an area with some invisible lasers that hit you when you get close. You need to go down the stairs and pull the switch in a room to turn off the lights, this will let you see the lasers around the tiled floors.
Continue through the dungeon until you find a computer room where you can Deactivate Emergency Mode (pictured below).
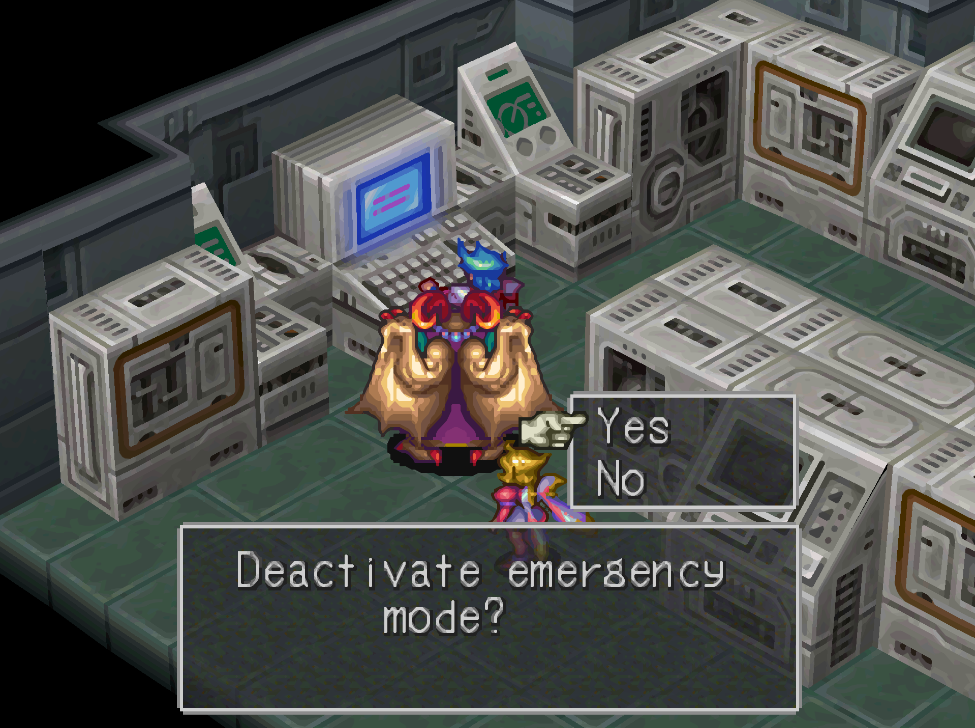
After deactivating Emergency Mode exit this room and jump off the platform. Head south then east to find another building with a computer inside, interact with it to open the doors for Platform 1 then follow the path to the platform. Step onto the platform and you'll get a short scene while you ride it up to Orbital Station Myria.
In the Worker's Entrance there is a central room with a terminal and a hole for an elevator. Above this computer is a switch and the elevator, pull the switch then at the terminal in the room below select a location to call the elevator. Our destination is going to be the Maintenance Deck (if you go up to the Arrival Platform first you can get a Wisdom Fruit from the chest here).
Run across the entire Maintenance Deck to another terminal, select Worker's Area and ride the elevator back inside. Go through two rooms and you'll find a T junction, to your right is stairs that lead to two computer terminals, these are important because they will release the main entrance and laser locks.
The other route at the T junction will lead you to a room with beds (and a book that we can change party members/save at) as well as the Laboratory. You can find the room with beds right around the corner from the T junction. Make sure you're prepared for the Laboratory ahead, it's got some tough encounters!
Our first objective in the Laboratory is to go to the end of the hallway and disable the gas in the room with the Chimera. After doing that, return to the hallway and find the room with the electric floor (pictured below). We can actually walk right across this floor with Ryu, just make sure to switch directions on the controller when you get Confused. Make sure to use a Panacea item when you make it to the other side too, you don't need Confusion dragging you back across the floor!
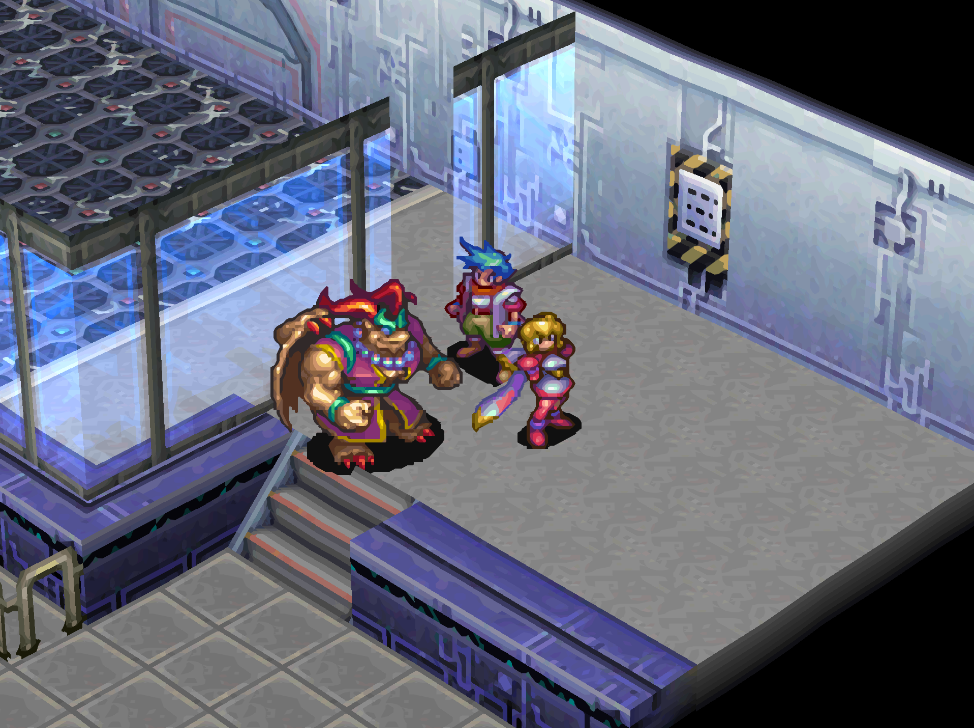
Step on the platform on the other side of the electric floor and you will ride it down into an underground area. There are a few branching paths for items but what we're looking for to advance is another elevator. Ride the second elevator up and you'll be in the room right next to the Chimera, make sure you're ready for a fight before entering.
We're going to make this fight super easy by using our Myrmidon Transformation. If you haven't already, I strongly encourage you to check out my Favorite Dragon Transformations page. That page lists most of the best transformations that I have found. With Myrmidon you can spam the Aura skill to hit for over 1k multiple times. Tiamat is an ok transformation too, depending on your AP.
Once you defeat the boss pick up Key Card B and ride the elevator in this area down. It leads you to a room with a chest right out in the open that contains HE Shells. As the ingame pop up says, these will let Momo destroy plant life. If she isn't already in your party you'll have to add her in for this next part. You should also put Rei into your party, he is required to get through a locked door.
Tip: If you have Rei in your party you can pick a lock to a door under where the Chimera was resting that leads to multiple treasure chests. They have Giant Shield, Dragon Shield and Dragon Helm.
Backtrack out of the Laboratory until you get to the area nearby the beds/book from earlier. A few rooms before that you will come across an area with two stairwells, one will be yellow (the one we went up to get to the lab) and the other will be green. Go up the green stairs and follow it to a door. Ride the escalator up and you'll now be in a new area. We couldn't do anything in here before because we needed Momo to blast the vines away from the door.
Note: You have a rare chance of encountering Goo Kings in this area, they can drop the Goo King Sword which is Ryu's ultimate weapon. This is both a rare encounter as well as a rare drop so it isn't something you'll want to sit down and farm. Goo Kings will run from battles pretty quickly, you can change this by using Rei's Pilfer on them. Stealing their apple will enrage them.
The next area is a huge lush garden, we'll need Rei to pick a lock in the middle of this area to advance through all of it. In the room that Rei opens for you, search the cabinet on the far side by the exit for a Wisdom Fruit. Items that restore AP are few and far between and we may need it for the final boss!
Exit this room and go up the stairs nearby, you'll be led to an elevator, the only destination is 'Eden' so choose that and board it. In the western portion of this room you'll meet an old friend.
There will be some dialogue with Teepo after which Ryu will be whisked away (alone) to dream land. Dream land is basically a maze that you must work your way through bit by bit. The first part of this maze has us running around an area that is poorly lit up to talk with our party members. Below are the step by step instructions to advance through here.
1. Go northwest to find Nina
2. Interact with the Dragon Statue one light circle past Nina; it tells you to go back
3. Return to Nina's circle to have some dialogue with Rei
4. Use the Dragon Statue after Rei leaves to heal and save (if desired)
5. Continue northwest to find a Dragon Statue with two podiums on either side. Interact with the statue until it tells you to bow then stand in front of it for about 20 seconds to light up the next path
6. Northwest of here you'll have a scene with Momo. You can run through the darkness to the north or south to collect chests
7. Enter the portal to advance to the next area
Really the only hard part of the path above is the Dragon Statue you need to pray in front of. Most people mess up on this part because you need to stand in front of the statue motionless for like 15-20 seconds before it triggers. The next part is a true maze though. Each area you go to will have multiple portals you can take, luckily for us the portals are color coded though which makes it easier.
From where you start you need to take the portals in this colored order:
1. Yellow Portal
2. Purple Portal
3. Green Portal
4. Blue Portal
You will have a boss fight against Arwan at the end of this. It's an easy fight but you'll probably want to conserve your AP during it because you'll have an even harder fight coming up with Teepo. Luckily when we go to fight Teepo we'll be able to use our whole party, for this fight it's just Ryu. If you have some extra Wisdom Fruit then you can avoid worrying about your AP and go all out on both these fights... Just save a fruit for the final boss!
Teepo will transform into a Dragon Lord opponent, the first thing you'll want to do is use Rei to Pilfer the Dragon Blade from him. You can equip this onto Ryu during battle to increase how much damage he does. This is also the best weapon that is 'easily' obtainable in the game for Ryu. Goo King Sword is better but it's a nightmare to farm.
My advice for the Teepo fight is to abuse Ryu's Dragon Transformation. I personally used the Warrior Transformation and spammed the Aura skill on the boss but you can use whatever you want. Just remember that when/if Ryu runs out of AP use some items on him to restore the AP then transform again.
When Teepo finally dies he will drop Card Key A, pick it up and backtrack out of this whole garden area. Return to the room that has multiple colored floor tiles, you're looking for the door shown below (it was locked up until this point).
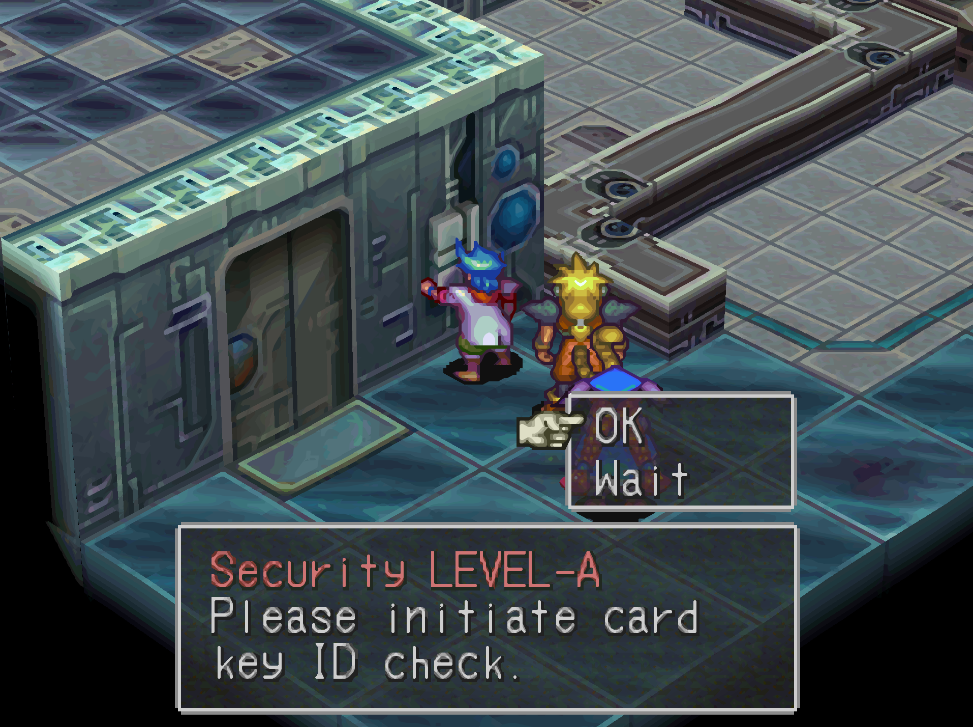
This door leads to the last part of the final dungeon
When you enter the door you'll have some basic hallways after which will be a maze. Luckily you can see where you've been before and haven't been by looking at the lights above the doors. A white light means you have gone into that room before and a red light means you've never been to that room.
I personally didn't find this area difficult to navigate, the encounters were the hardest part. Both the random encounters and the bosses in each of the rooms. What you're looking for in this maze is stairs going down to a room with a save book. In the adjacent room you'll also find two beds which you can sleep at. This is the last resting and save opportunity you'll get before the final boss.
Continue down the ladder in the save room and follow the Myria holograms listening to the story about the world. Eventually you will come to an elevator which leads to a platform with Myria herself. You will have some dialogue with her, then you'll have to talk with your party and with her again before you can start the fight.
Upon talking to Myria the second time you'll be asked to give up your powers or to choose your own path. Giving up your powers will pretty much just fail the game and give you the bad ending. Choosing your own path will start the final boss fight.
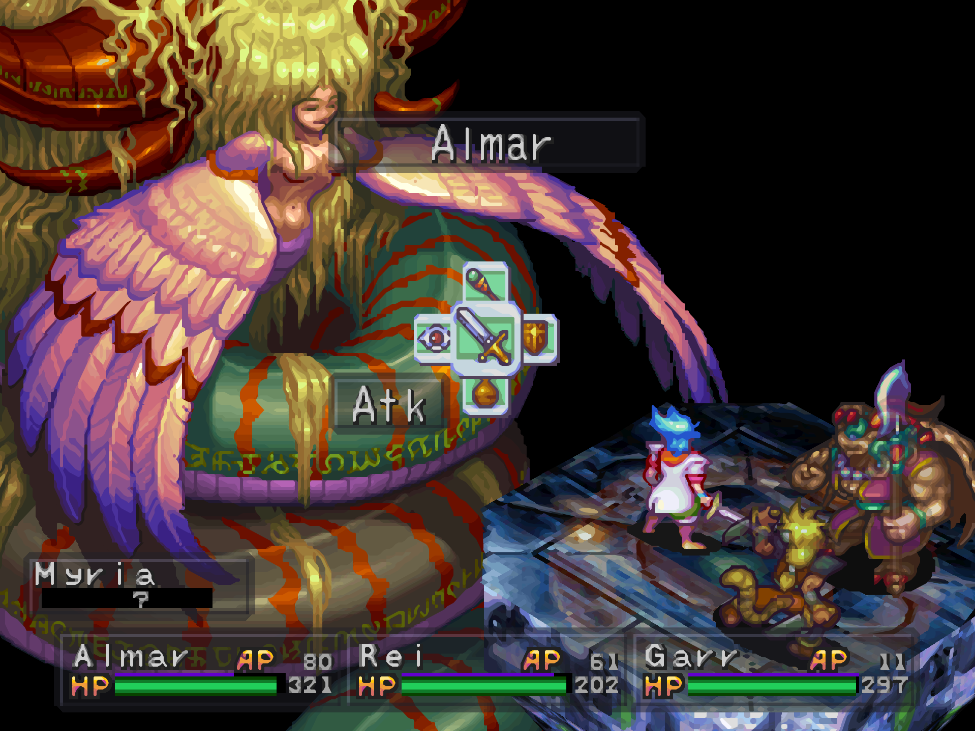
My recommendation for this fight is to abuse Ryu's Dragon Transformation, I personally did a Warrior (Flame, Force, Thorn) transformation and spammed Aura on the boss. When Ryu got to about 20 AP I would use Wisdom Fruit on him to give him 100 AP again. Garr and Rei were there mostly to use items because Myria obliterates them pretty quickly with her AoE spells. As long as I had someone alive to feed Ryu some Wisdom Fruit, that's all that mattered.
Once Myria has been defeated you'll get to see the credits and the game's conclusion.
Return to Breath of Fire III Walkthrough (Chapter 3)