
Dragon Quest 6 Walkthrough - Chapter 9
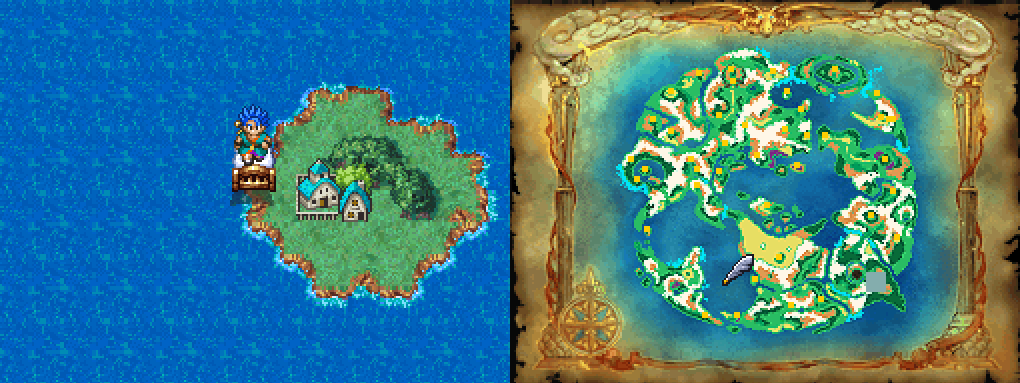
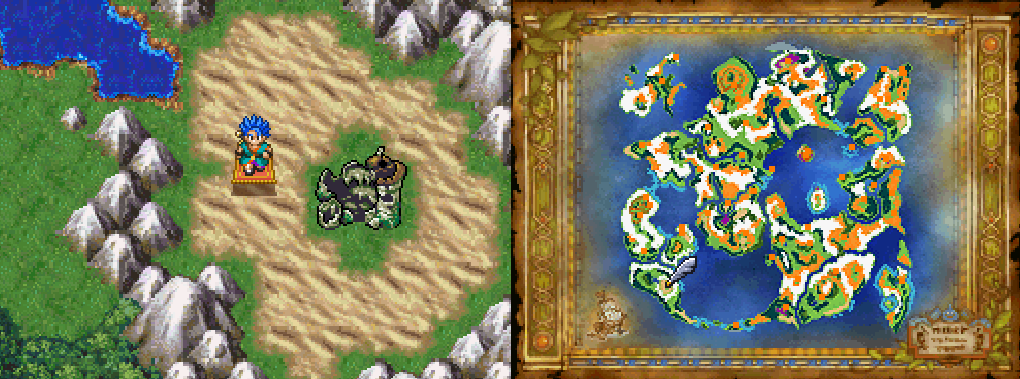
Sorceria is found in the southern sea of the Dream World (pictured above) and is easily accessible with the Flying Bed. If there is still a large open hole here for you it means you've yet to complete the Seabed Shrine in the previous part of my walkthrough.
Prior to entering Sorceria make sure that Ashlynn is in your party and you have the Sand Urn in her inventory. In the town of Sorceria you'll want to enter the large central building and go down the stairs in the center of it. Follow the linear path and you'll come to a building (pictured below) that keeps repeating itself. Every time you try to go through the door in this room you'll find yourself back in the same room.
In this room you'll want to use the Sand Urn in Ashlynn's inventory while standing in the pile of sand between the two doors. Once you've collected the sand you'll be able to go into the northern room to speak with the lady in here and learn Magic Burst.

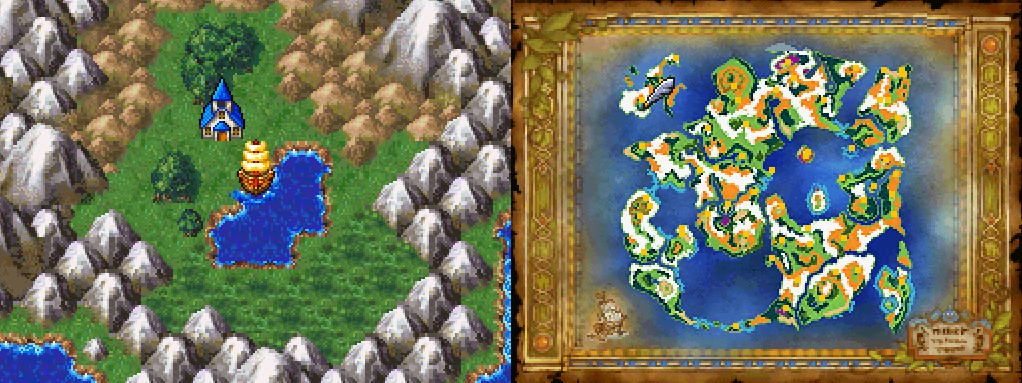
We're now done in Sorceria for right now but we'll be coming back here in a little bit. Our next destination is Château de Sass which is a town in the northwest portion of the Real World and only accessible by underwater boat at this point. If you're having trouble locating this town use my screenshot below.
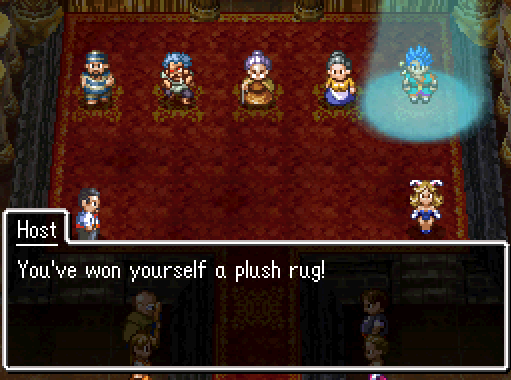
Depending on what you want to do, there are two items that you should get here. Only the Plush Rug is required for the story, however, the Sage's Stone is one of the best items in the entire game and I strongly recommend you get it. Anyone who has played a Dragon Quest game before probably already knows what this item does; essentially it gives you a no MP Multiheal which you can use an unlimited amount of times.
You probably will not be able to get the Sage's Stone right now since it requires a lot of Style on a monster in your party. However, with the right gear combinations you may be able to pull it off. For more information about how the Best-Dressed Contest works and the best ways to raise your Style, follow the link provided.
Since all we need right now is the Plush Rug we only need a total of 220 Style to win it. Hopefully you haven't been selling all of your old gear because some of it may come into handy for this. If you are struggling to reach 220 Style here are some gear combinations and piece of gear that will help you get there.
Hero Style Gear Choices
Miracle Sword (51) + Sacred Armour (55): These two items combined will give you a total of 146 Style. Both are obtained from the Mini Medal Side Quest
Dragon Shield (47): Purchase from Port Haven's Casino for 2000 Tokens
Thinking Cap (16): Purchased from the hidden shop in a well south of Alltrades Abbey
Turnscote Pendant (45): Acquired from Ali Kazam when you complete the Mt Snowhere part of the story
Total = 254 Style
Platinum Mail, Shield and Weapon are also really good choices for boosting your Style if you have them; you can use a different Helm than the one listed above as well. Some helms, like an Iron Mask, you can upgrade at the Fashion Forge which will increase the item's Style.
The Fashion Forge is an area in the southern portion of the Real World and appears as nothing more than a Well on the World Map with a Bard vendor inside of it. This Bard will allow you to pay large amounts of Gold to increase an item's Style ranking. Not all items can have their Style increased but many can. Some items when used as a pair give you a Style bonus too! The Miracle Sword and Sacred Armour used above is one of those sets.
Last but not least you can also change your Vocation to increase your Style, Dancer and hero Vocations get a 10% bonus to style whereas the Luminary Vocation gets a 15% bonus. In addition to the 15% bonus that Luminary gets they'll also get a +15 Style bonus when you master the Vocation. For more information and more detail about all of this check out my Best Dressed Contest (Château de Sass) Side Quest Guide.
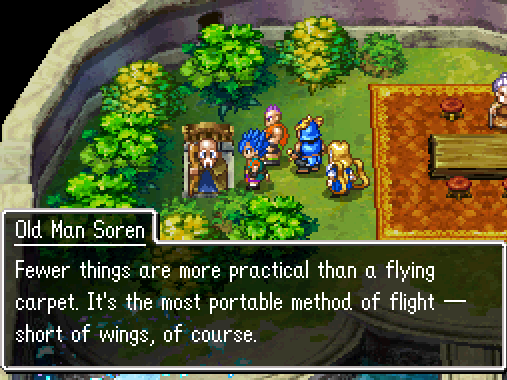
Once you've obtained the Plush Rug you're done with the Best-Dressed Contest and you can head back to Sorceria. In the northwestern most house of Sorceria you'll want to speak with the old man and he'll turn your Plush Rug into a Flying Carpet. The Flying Carpet works the same way as the Flying Bed except it can be used in the Real World and it stays in your inventory.
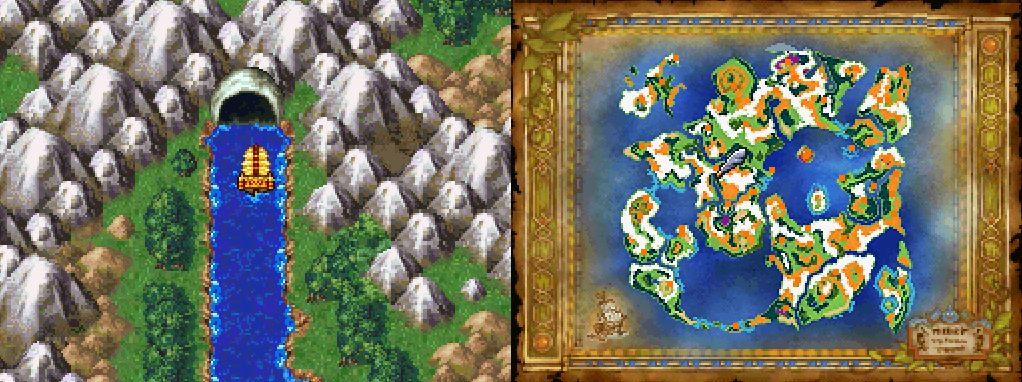
With the Flying Carpet you'll be able to reach our next destination, Castle Graceskull. You can find Castle Graceskull on the southwestern continent of the world map in the Real World and in order to reach it you'll need to first sail to this continent using your boat and then cross the forested area.
Then you'll be able to use your Flying Carpet and cross the lake that blocks your path on foot to Castle Graceskull. In the Real World version of this castle everything is destroyed and there is nothing to do. You'll want to inspect the Well on the western side of the castle to be teleported to the Dream World version of this place.
After arriving prior to continuing with the story, pillage the castle for all it's worth. There are a decent amount of goodies here for you to collect.
Inside of Castle Graceskull you'll need to do a few things in order to advance the story forward. Each step is included in my list below. While you're in Castle Graceskull you're also able to obtain another optional party member by the name of Spot. He's a mottle Slime and found in the southeastern portion of Castle Graceskull. For more information check out my Spot Optional Character Guide.
1. Speak with the guard on the fourth floor outside the Ceremonial Chamber
2. Talk to the old woman in the kitchen on the 1st floor for the Ceremonial Offering
3. Return to the guard on the fourth floor and give him the offering
4. Speak with the guard after he places the offering
5. Go to the throne room to witness a scene then return upstairs
6. Talk to the guard outside the Ceremonial Room then watch the scene
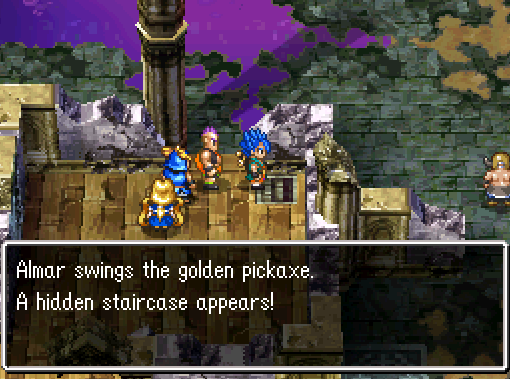
When the scene is over you'll find yourself back at Castle Graceskull in the Real World. If you were paying attention to the final scene in the castle you'll learn that there is a secret stairwell in the Training Room & that you'll need a pickaxe to open it. Go over to the spot you saw the guard go down in the scene and use the Golden Pickaxe. Alternatively use my screenshot below to learn the location.
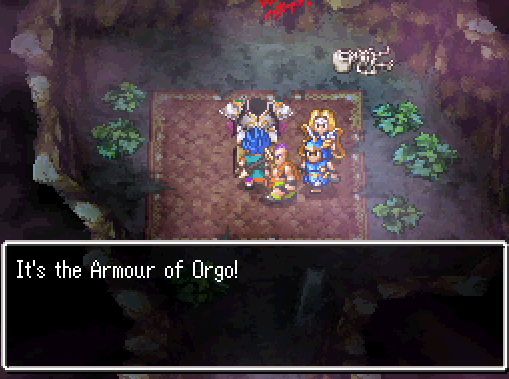
In the treasure room you'll find 3 empty treasure chests as well as a boulder south of the middle chest that you can move to reveal another hidden staircase. The Armour of Orgo aka the Legedary Armor is found in the back of the tunnel (pictured below).
Next up we'll want to do the Cryptic Catacombs for the Legendary Shield. The Cryptics Catacombs is a dungeon just south of Somnia Castle in the Real World. You'll need to be in your ship to reach this dungeon since the entrance is connected to water rather than land. The fastest way here is to Zoom to Amor then go south, east then back north until you come to the entrance in my screenshot below.
Cryptic Catacombs can be an extremely confusing dungeon to navigate due how it is setup. It's one of those dungeons where you have to go the correct route every time to get where you want to go or you'll find yourself back at the start. On the first floor of the dungeon there will be optional routes you can go in order to discover some treasures, how to reach each of them is below as is how to get to the next floor.
Also there is a picture below too which will help guide you if needed.
To Treasure Chests with Seed of Resilience & 1900G (1F): From the first room with a four way split go Up then Left
To Treasure Chest with Mini Medal (1F): From the first room with the four way split go Up, Right, Down
To Next Floor: From the first room with the four way split go Up, Right, Up, Left, Down

Each of the directions given assume you're starting at the same location I am in the screenshot.
If you don't do very well with text based directions I recommend you use my How to navigate Cryptic Catacombs Dungeon video. Everything you need to know about the dungeon is shown in that video and it will hopefully be easier to follow for some people than text. I've also provided you with a screenshot (above) that can hopefully make things a little easier to understand than just text too.
On the floor with the Golden Dragon Statue (pictured below) you'll want to inspect the grassy area to the south of it to discover the hidden stairs. This will lead you to yet another puzzle which is similar to the one on the first floor of the dungeon.

After going down the stairs south of the Golden Dragon Statue you'll find the final puzzle of the dungeon. In this area you will need to down Down 3 times then go Up 2 times. Once you've done this you'll find an opening in the southern portion of the room that leads you to the final floor of the dungeon.
On the final floor of the dungeon you'll find a Mini Medal inside of a treasure chest in the south and the Shield of Valora, the Legendary Shield that we're after in the north. With the shield in hand you can Evac out of the dungeon and move onto the next piece of Legendary Equipment!


Return to Chapter 8 - Mt. Snowhere, Everfrost Grotto, Turnscote, Seabed Shrine