
Golden Sun Walkthrough - Chapter 3
Before we head over to Kolima Forest you'll want to return to Imil and hit up the weapon/armor shop as well as the Inn. You can buy whatever upgrades you want from these shops, there are quite a few available and you probably have a bit of extra Coins by this point in the game. Make sure to sleep at the Inn before departing because we have a long journey ahead of us.
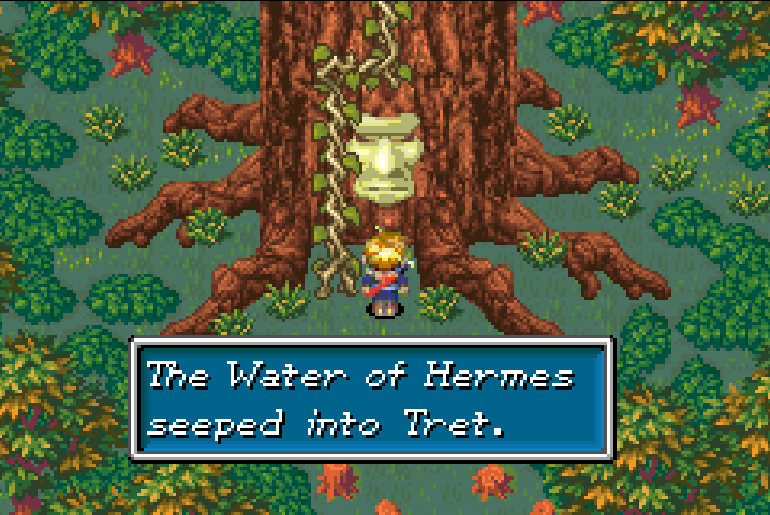
Kolima Forest is our first stop, you'll need to pass through Biliban Cave again to get here. Make your way through the dungeon until you reach Tret's face again. Interact with Tret and use Hermes' Water when you're prompted to restore him to normal. He'll lift the curse on the people in Kolima and you'll now be able to talk to people in that village, use its shops and the like.
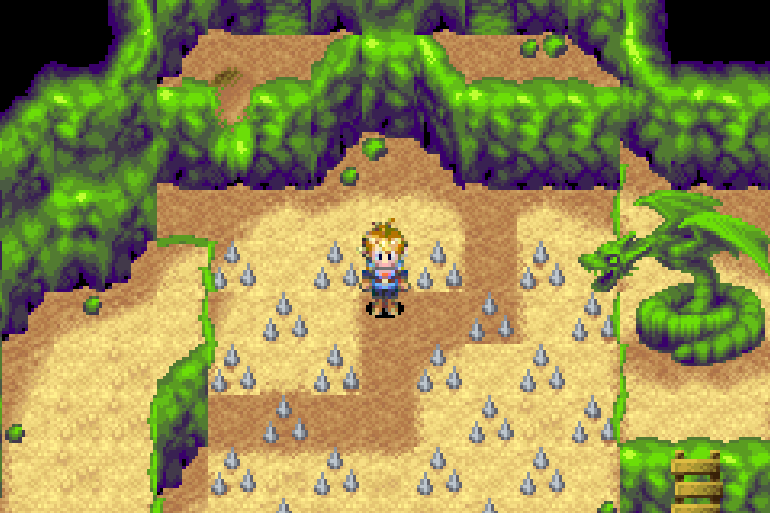
Use your Return Psynergy skill to teleport out of this dungeon and head over to Kolima. Do whatever you'd like in town, everything here is optional. One thing I would recommend you do though is speak with the 3 people inside the tree house in the bottom of town (pictured below). There will be a husband, a wife and a child - I think you may have to use Mind Read on the father too but I am unsure.
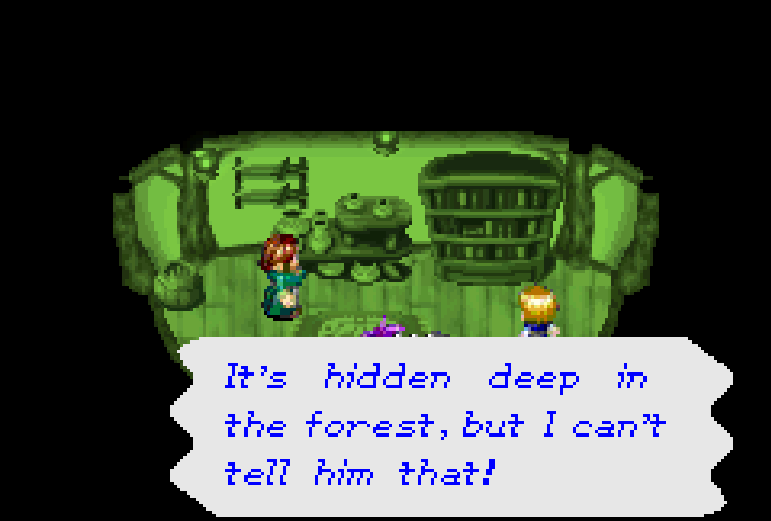
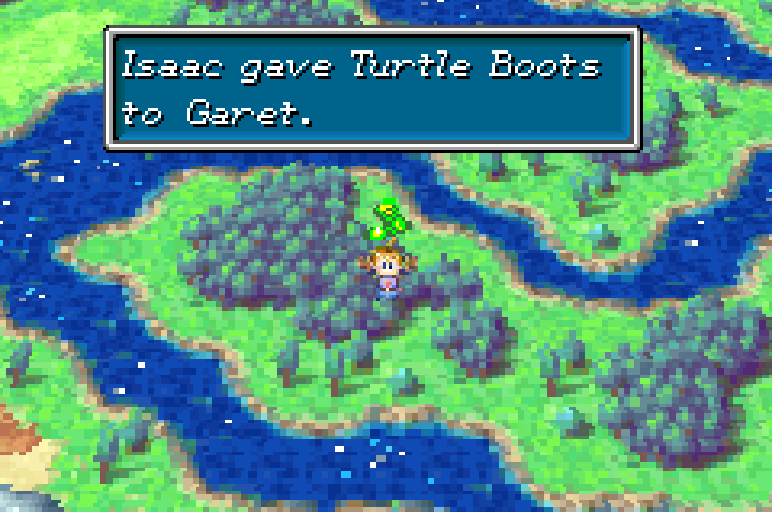
They will tell you about a secret to the west of the village, if you use the Mind Read Psynergy on them you'll get more information such as it's in a forest. Head east of Kolima and search around the forests north of the Bilibin Barricade (pictured above). You'll uncover Turtle Boots in the same location you see me standing. Spam the A button to uncover them.
Once you're done collecting the Turtle Boots you'll want to head over to Bilibin again and return to McCoy who is in the northern portion of town at McCoy's Palace. He will thank you for saving the people in Kolima and offers you an additional reward. You get to choose one treasure from his treasure room - I will list each of the treasures below so you know what is what.
From left to right the treasures are: Vial, Potion, Psy Crystal, Water of Life
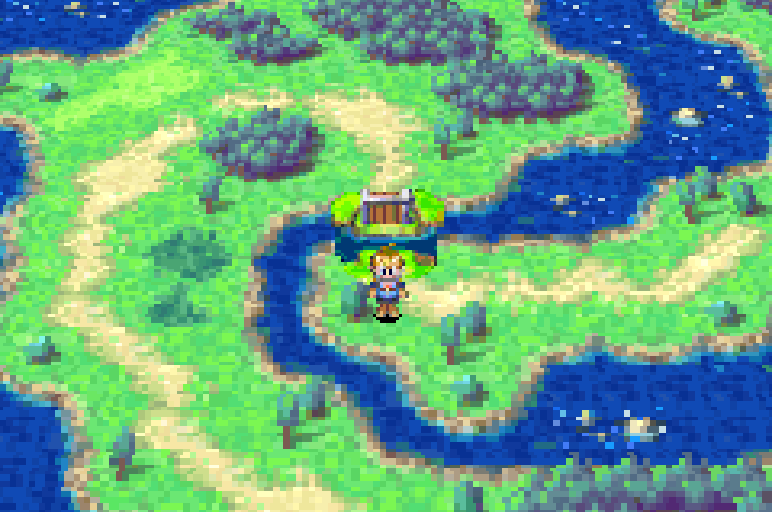
Water of Life is usually the item I choose because it revives a downed character and that saves me a lot of time finding a temple if someone dies. It's also one of the more expensive items if you wanted to sell it instead. Regardless of your choice once you're done here you'll want to head all the way back to Kolima. This time though we're going past Kolima and heading east over to a location called Kolima Bridge (pictured below).
Approach the bridge and the man here will lower it for you allowing you to pass. Once you're on the other side of the bridge our next destination is to the southeast so start heading there!
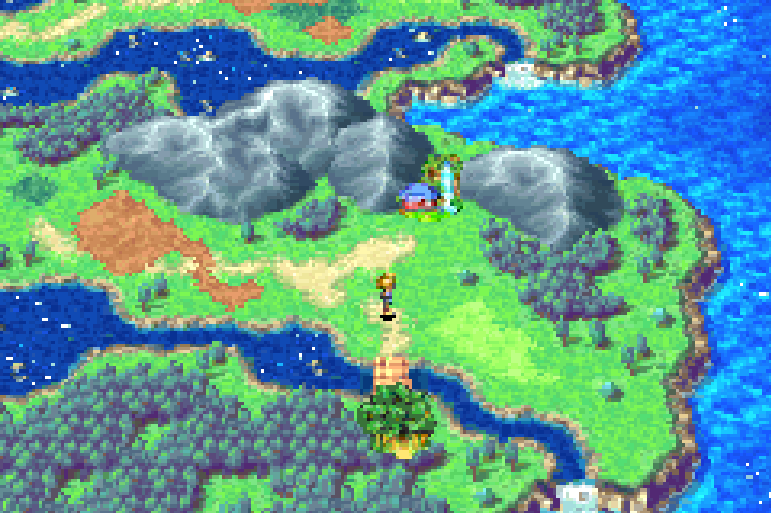
You will come across two new locations on the World Map, the northern one is Fuchin Temple and the southern is Mogall Forest (pictured above). Fuchin Temple will be our first destination so head inside. Go up the stairs in Fuchin Temple and into the building at the top. In the center of this building you'll find a man meditating - you'll want to use your Mind Read Psynergy on him to trigger a scene.
Agree to take the test inside of the waterfall then exit the building. Go back down the stairs and jump across the stumps to reach the man standing in front of the waterfall - talk with him and he'll move out of the way allowing you to enter. The first room of this dungeon will introduce you to the mechanic that we'll be using here - spinning logs! When you step on a log and walk in the opposite direction it will roll across the water with you on it.
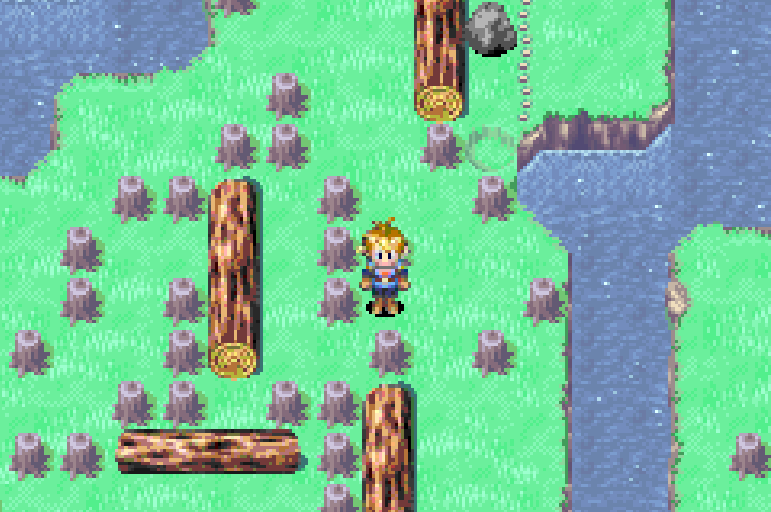
In the main room of this dungeon the log on the right will take you to a treasure chest with a Mimic inside of it and the log on the left will take you further into the dungeon. Eventually you'll come across a room with 3 different doors that you can go through and a lot of stumps in the water for you to jump across (pictured below).

You'll want to exit this room through the western door, the same one I am standing next to in the picture. Follow the linear path and you'll eventually come across a room with two logs you can roll across the water, one is horizontal and the other vertical. Take the vertical one across the water first and you'll be able to grab the treasure chest with Arctic Blade inside.
Ride the other log down to the south and then exit this room. You'll come to a room with some spikes on the floor - you can ride the log at the bottom of the screen to avoid the spikes entirely or walk across them for minor damage. Exit the spike room via the doorway in the east and you'll find yourself back in the first room of the dungeon. Ride the log across the water and enter the doorway on the opposite end of the room.
Inside this room you'll be able to get another Djinni, this one is named Zephyr and it's a Jupiter Djinni. You'll find Zephyr in the southern portion of this room and you'll have to solve an easy log puzzle to reach him. Check out my Djinni Locations (Part 1) for more information about how to get him. After you get this Djinni ride the log up to the top of the room and exit through the door.

For this next room you'll want to ride the logs and position them in the same way my screenshot shows above. This will give you access to the room on the left hand side which is where you'll get the Dragon's Eye key item that we need. Go through the doorway in the northern portion of the room with logs and continue north until you come across the dark room.
Climb up the ladder in the dark room and place the Dragon's Eye that you just got into the Dragon Statue. This will illuminate the room and show you an invisible bridge that you can walk across. You'll need to backtrack through the dungeon a bit to return to the opposite side of this room and walk across the bridge (pictured below).
Slide down the cliff in the next room and enter the door to find the Orb of Force item. Once you've gotten the Orb of Force you're free to use the Retreat Psynergy to leave the dungeon.
Outside you'll be stopped by the monk who previously guarded the waterfall. He'll tell you to speak with Master Nyunpa in the temple above - so head up the flights of stairs and do that. Master Nyunpa will have some dialogue for you, once you've spoken to him you're free to leave Fuchin Temple and head south to Mogall Forest.
Mogall Forest is one of those dungeons where you have to go the correct direction otherwise you'll "get lost" and run through the same screen multiple times before ending back in the same location you started. The best comparison I can come up with is the Lost Woods in Ocarina of Time, this place works very similarly.
Like all dungeons in video games with this gimmick, there is one thing you can do to figure out the correct direction when you get confused. Almost all of the maps in this dungeon have a hollowed out stump like what you see in my screenshot below. Equip the Force Orb item from the previous dungeon and use the Force Psynergy skill on these stumps to make a greenish battletoad looking creature jump out.
If you take a look at my screenshot below you can see the battletoad hoping off the screen to the right. That tells me following the right path will take me forward in this dungeon.
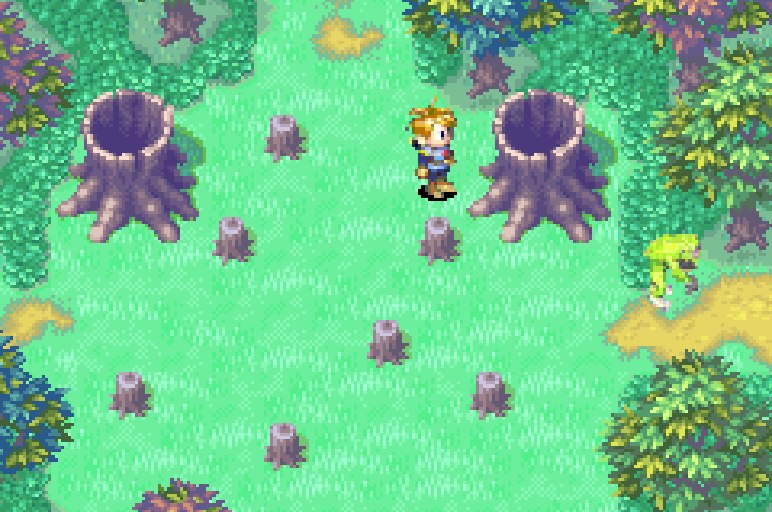
Use the Force Psynergy skill on a hollowed stump to summon a battletoad
Any time you get lost in Mogall Forest what you'll want to do is use Force Psynergy on one of the hollowed out stumps to summon that green battletoad. Watch what direction he runs and then follow him. Keep this in mind while progressing through the rest of the dungeon.
When you enter Mogall Forest you'll want to go south first, you'll eventually find yourself on a screen with some logs that you can push (pictured below). Our goal here is to push the log on the bottom up and into the water. After you push the log into the water use it to jump across the river. Take the path on the right to proceed with the dungeon.
Tip: You can use Catch on the Nut that's swinging on the nearby tree.
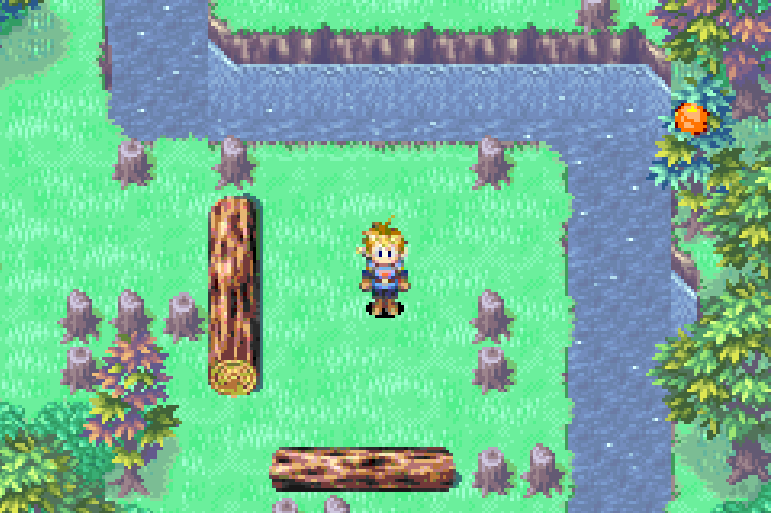
Push the log on the bottom into the water up top
You'll want to keep going right on every screen until you run into a dead end that has a treasure chest with an Apple inside of it. Return to the previous screen with the two stumps and go down until you reach a new area with more logs for us to push and a Djinni. For more information about how to get the Djinni check out my Djinni Locations (Part 2) Guide.
Once you obtain Quartz, the Djinni, you'll want to exit this screen to the left and continue left three more times. You'll run into a dead end with a log, a rock and a treasure chest. What you need to do here is move the rock up once then over twice using the Move Psynergy skill. This will allow you to grab the treasure chest which contains an Elven Shirt.
Return to the previous screen with the 3 hollowed logs and go down until you reach the area shown in my screenshot below. This area may be a bit daunting at first but the puzzle here is very linear, you can only do things in a specific order anyway. Your goal is going to be pushing both of the vertical logs into the river on the right hand side of the screen. This will give you access to hollowed stumps and the other half of the map.
If you hit both hollowed stumps with the Force Psynergy you'll see that the battletoad runs off to the south so that's where we're going too! Head down to the next screen and make your way through it. Before you get to the southern exit you will be ambushed by the boss of this dungeon, Killer Ape.
Killer Ape isn't too hard of a boss, unload on him with your strongest Psynergy attacks and use Mia to keep your party alive. Once defeated you can exit Mogall Forest to the south to find yourself back on the World Map. Head northwest and make your way over to the next town, Xian.

The only important thing for us to do in the town of Xian is collect the Djinni here. Check out my Djinni Locations (Part 2) Guide for more information about how to capture this Djinni. You can also do some shopping in Xian for better equipment or items too if you're interested. Be sure to check the shops regular wares as well as their Artifacts if you want to see all of the options.
Once you've obtained this Djinni and did your shopping you'll want to exit Xian and head north. There is another Djinni that we can obtain north of Xian on the World Map. As per usual, check out my Djinni Locations (Part 2) Guide for more information about how to get this Djinni.
After you've obtained both Mist from Xian and Corona from the Overworld near Xian you're good to go and able to progress further into the story. Our next stop is a place called Alpine Crossing which is northwest of Xian. This location isn't actually marked on your World Map, as you're traveling across the Overworld you'll suddenly just zone into this map when you get close enough.


The map of Alpine Crossing is very small and completely optional. You'll see a plant growing near a ledge and a puddle of water below it when you enter. Use your Growth Psynergy on the plant and Frost on the puddle of water - then climb the vine and jump across the ice pillar to reach the treasure chest on the other side. You'll find a Power Bread item inside the chest.
Tip: If you don't have Growth on any of your characters try giving an Earth/Venus Djinni to Ivan. The combination of Venus (Earth) and Jupiter (Wind) will teach him the Growth Psynergy.
After you've obtained the Power Bread exit Alpine Crossing to the north to find yourself back on the World Map. Enter into the nearby town of Altin to continue with the story. The first thing you'll want to do in the town of Altin is head over to the west end of town, climb down the ladder and follow the ledge south. You'll come across a monster that is spitting water into the pit in town and it'll flee into the nearby cave as you approach it.
Follow the monster into the cave and you'll find yourself in the next dungeon, Altin Peak. You'll have some scenes involving the monster when you enter this dungeon, follow it and interact with it to fight it. The Living Statue isn't too difficult of a fight, unload on it with your most powerful spells and it'll go down quickly. Once defeated exit the dungeon and you'll notice that the water level dropped a bit in town.
Next, you'll want to enter into the mine which is now accessible thanks to the water level dropping. Inside the mine you'll want to follow the train tracks until you reach a room with a very large pool of water and a mine cart inside (pictured below). Before getting into the mine cart you'll want to pull the nearby lever to switch the tracks - after you do that hop into the mine cart and it'll take you over to the next Living Statue that we have to defeat.
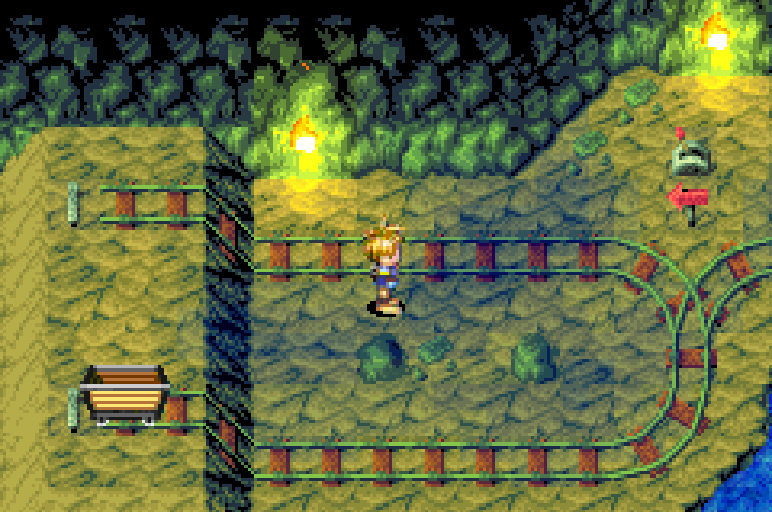
Switch the mine cart tracks with the nearby lever
Once you've defeated this Living Statue you'll want to exit this room and follow the mine cart tracks all the way back to the entrance of the dungeon. North of the entrance there will be a doorway leading to a new room - this is our next destination. Head through the door, climb down the ladder and go through the next doorway to find yourself in another part of the mine with more mine cart tracks.
Follow these tracks left and down until you reach another switch that you can pull to change the direction of the tracks. Once you've hit the switch follow the tracks in the opposite direction until you reach the mine cart. Hop in and ride it across the water then enter the doorway that it stops next to. The path splits here, the left path leads you to a treasure chest which is actually a Mimic. Defeating it will get you EXP, Coins and a Game Ticket item.
The other path (south) is the one we need to follow to progress through the dungeon. Use the Frost Psynergy on the puddle you find and then jump across the ice pillar to reach the nearby doorway.
In the next room you come across you'll find another mine cart with a nearby puddle (pictured above). Turn the puddle into an ice pillar, jump across it to the mine cart then ride the mine cart to our next destination. Next to where the mine cart lands you'll find a treasure with a Dragon Shield inside of it. Equip that bad boy then ride the mine cart back to its original position.
Now what you need to do is pull the lever that we passed while riding the mine cart to switch the direction of the tracks. You'll find this lever in the northwestern portion of this screen - hit it then return to the mine cart again and hop inside. This time the mine cart will take you to an area with another Living Statue enemy. Defeat it then use the Retreat Psynergy skill to teleport to the entrance of the dungeon.
Head outside of the dungeon and you'll notice that the water level in the town has dropped again. Now you have access to the weapon and armor shops which you can shop at for some upgrades if you'd like. When you're done shopping head into the final mine entrance at the lowest point in town.
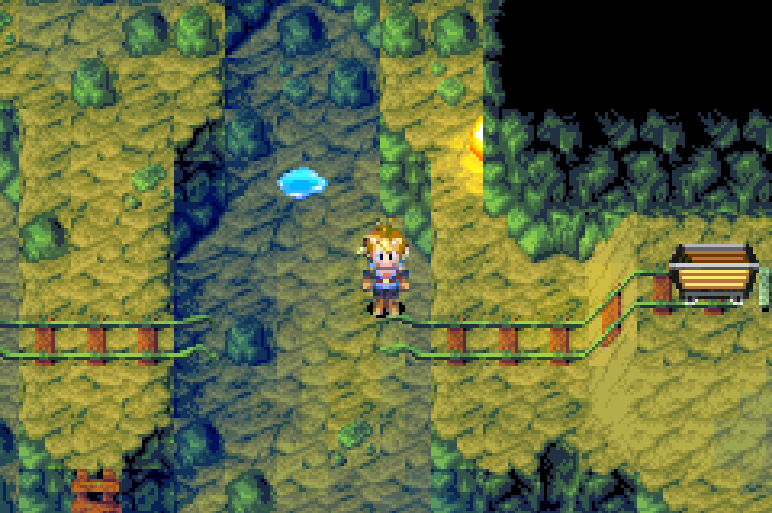
Follow the mine cart tracks east until you reach the room that they end in. Go directly south from this location and you'll find a treasure chest with a Lucky Medal inside of it. Continue through the dungeon and you'll eventually come to a room with a Djinni and a mine cart in it (pictured below).

The first thing you should do in this room is get the Djinni that you see. Check out my Djinni Locations (Part 2) Guide for more information on how to do that. As far as progressing through this dungeon goes, you'll want to use Mia's Frost Psynergy on each of the water puddles in this room.
Climb up the ladder in the top right of this area and jump across each ice pillar to reach a doorway in the top left of the area; this will lead you into a new room. Follow the long and linear path through this room until you eventually come to the next room. Here you'll find a ladder on the left hand side which leads you back down to where we started - so instead you'll want to go up!
At the top of this area you'll find a sign that says to watch out for falling rocks and warns you not to strike the nearby walls. So, of course we're going to strike the nearby walls. Use the Force Psynergy on the nearby log pillar to strike it and make a noise. This will result in a massive boulder falling from the sky and chasing you down.

The boulder smashes a large hold in the ground that we now are going to climb down. Climb down the ladder, slide down the ledge and use the broken mine cart tracks to climb down into the hole. This will lead you into an area with a new layout and the final boss of this dungeon, Hydros Statue.
Hydros Statue is just a harder version of the Living Statues that we've been fighting up til now. Unload on him with all of your strongest attacks until you take him out. Once defeated a treasure chest will appear where the boss once stood, open it and you'll get a Lifting Gem.
Lifting Gem is an item that you can equip to one of your characters, it'll allow you to use the Lift Psynergy which means you'll now be able to move giant boulders that block your path. There are a few treasures you can backtrack to get throughout the mines if you want - the best of which is a Cookie.
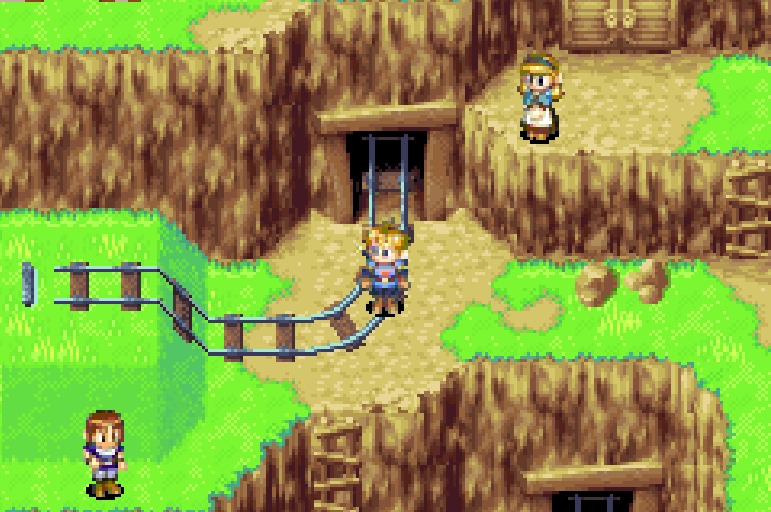

If you're interested in collecting the Cookie you'll want to enter into the mine entrance shown in my screenshot above. This is the second entrance in the middle level of town. You'll find the small room with the Cookie in the back, that is also shown in my screenshot above. All in all I don't think this is a detour that's worth your time - however the Cookie does give you a permanent increase to PP so keep that in mind.
When you're ready to continue with the story you'll want to enter into the mine at the bottom of town.
Continue to Golden Sun Walkthrough (Chapter 4)
Return to Golden Sun Walkthrough (Chapter 2)