
Golden Sun Walkthrough - Chapter 2
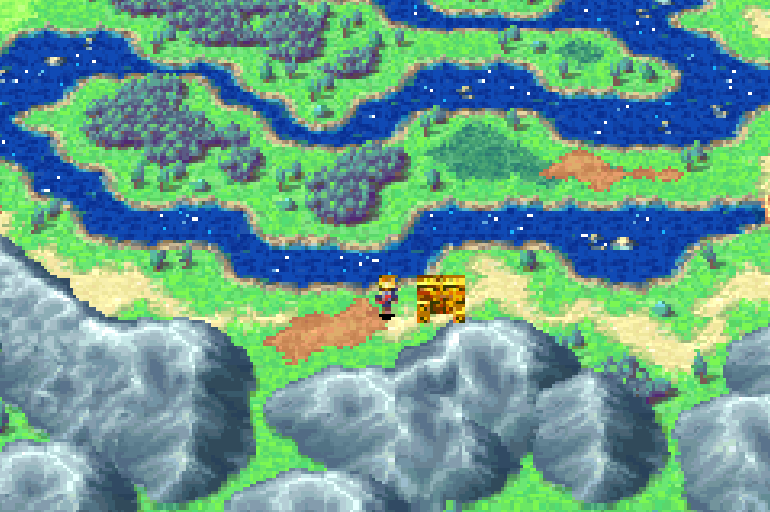
Our next destination is going to be southeast of Bilibin, it's a small dilapidated wood structure on the World Map (pictured above) that's called Bilibin Barricade. It's up to you if you'd like to stick around the town of Bilibin a bit to level up before heading to our next destination. Just don't forget to get the Gust Djinni before you leave Bilibin! For more information about how to get Gust check out Djinni Locations (Part 1) Guide.
When you're ready to proceed past the Bilibin Barricade all you need to do is use Isaac's Move Psynergy on the large crate to the left of the door (pictured below). Scoot the crate down one tile and you'll be able to squeeze through the newly opened hole in the wall.
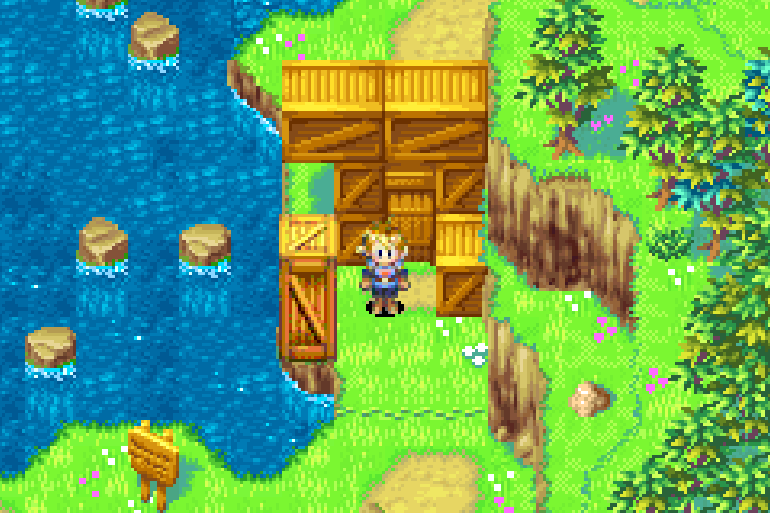
Move the crate at the Bilibin Barricade to get past.
After passing through Bilibin Barricade you'll have two choices on the World Map, one is Kolima and the other is Kolima Forest. I recommend you visit Kolima first so you can get the Djinni that's here and learn what's happened to this town. Check out my Djinni Locations (Part 1) Guide for more information on how to get Granite inside Kolima.
There isn't much else to do inside Kolima right now outside of exploring town and collecting various hidden items throughout. Once you're done with Kolima exit and go northwest to find Kolima Forest - our next dungeon. For the first two screens of this dungeon you'll have to push some logs around to navigate the area. There are multiple ways to do this part so I won't give you specifics, essentially the game is introducing you to this mechanic for a harder puzzle later.
You'll eventually reach the area with 3 moving logs that's shown in my screenshot below. This will be your first real puzzle of the dungeon.
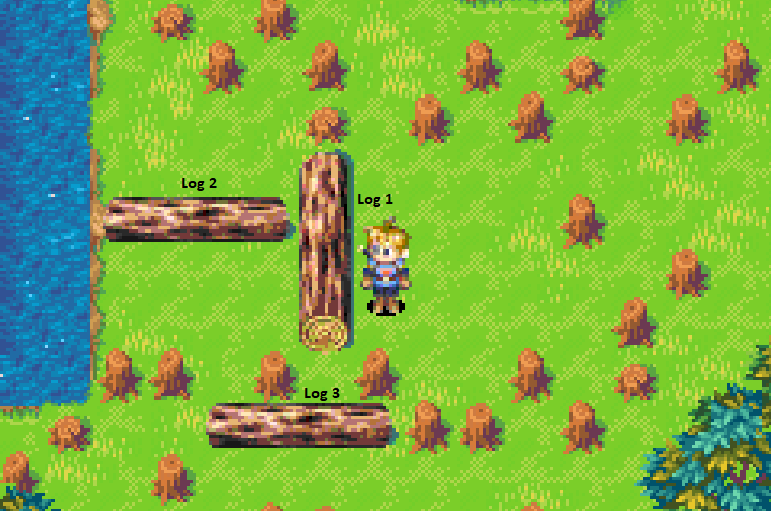
As you can see from my screenshot above I have numbered each of the three logs. I've repeated their numbers below with a brief description of each log as well. This will make it easier for me to explain how you'll want to complete this puzzle.
Log 1: Vertical
Log 2: Top Horizontal
Log 3: Bottom Horizontal
For this puzzle you're going to have to perform the following steps with each of the logs in the order I specify.
1. Move Log 1 to the left
2. Circle around to the top of Log 2 and push it down
3. Push Log 1 to the right again back to where it originally was
4. Push Log 3 down an inch
5. Push Log 2 up
6. Push Log 1 into the water
Once you've moved Log 1 into the water you'll be able to jump across the river using it and proceed to the next screen. The next screen has another log puzzle, this one is a bit more complicated if you want the optional treasure. What you need to do for this puzzle is pull the Floodgate Switch to lower the water level then organize the logs in such a way that you'll be able to proceed to the treasure chest or the exit.

You only need to move a single log to proceed to the exit for this puzzle; the one with the arrow above.
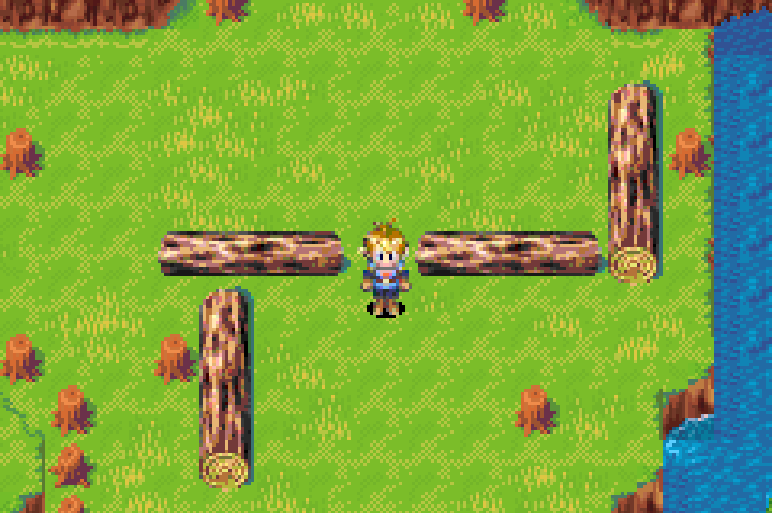
To reach the treasure you'll need to move all of the logs at least once to get them into the positions shown in this picture.
If you'd like to reach the treasure chest on this screen I recommend you check out my Kolima Forest Floodgate Log Puzzle Solutions Youtube Video. It's a short 2minute video that shows you how to reach the treasure chest and how to reach the exit by moving the logs around. The item inside of the treasure chest is a Fur Coat, for those curious.
On the next screen you'll find two trees that you can talk to and interact with. Climb inside of the tree on the right (Tret) using the vines, this will put you into a new area called Tret Tree. Inside Tret Tree climb the vines in the top left to reach a screen with some spiderwebs and golden leaves.
Jump across the golden leaves on the bottom of the screen to reach the door on the right hand side. The door leads to the branches of Tret Tree which you'll need to run across, climb a vine then enter the tree again one level above where you were.
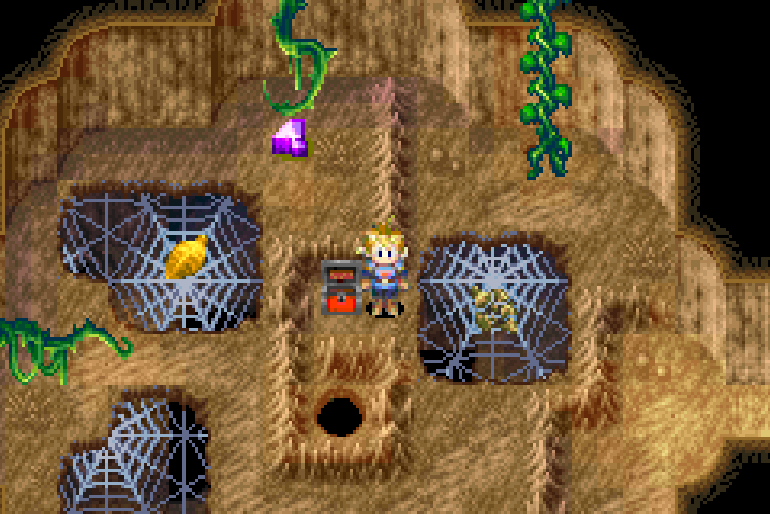
This room will have a Psynergy Stone and a treasure inside of it (pictured below). Collect the loot you want then proceed up the vine in the top right of the room.
In the next part of this dungeon you'll be able to acquire another Djinni, this one is named Breeze. As always I will recommend you check out my Djinni Locations (Part 1) Guide for more information about how to get this Djinni. To the west of where this Djinni is located you'll find a large room with a bunch of leaves you can jump on and a treasure inside which contains a Nut.
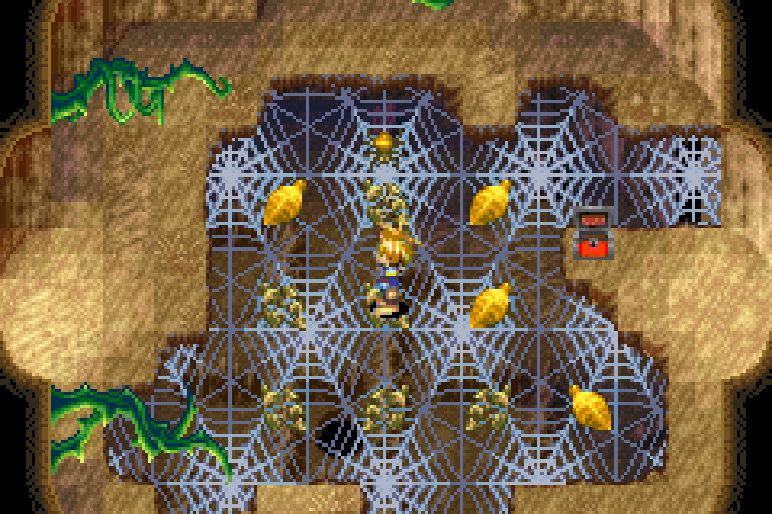
Grab the treasure then fall through the spider webs to the room below. This time you'll want to exit through the door on the left instead of the door at the bottom of the screen. Our goal is to circle around to the other side of this room and enter it from the opposite side. Entering from this side will allow us to jump to the leaf in the middle (pictured below) which is how we reach the boss of this dungeon.
What you need to do is jump ontop of the leaf in the middle of the spiderweb twice so that it crumbles and you fall through it. You'll fall through the hole in the middle of every floor in this dungeon until you finally land in the room with the boss, Tret.
Once you fall through all of the holes and find yourself in the bottom of this dungeon you'll want to interact with Tret's face at the top of the screen. This will trigger some dialogue followed by the boss battle of this dungeon. All in all this fight isn't too difficult, hit the boss with your strongest attacks and keep your characters healed to win.
When the fight is over you'll get some more dialogue and Tret will create vines for you to climb out of the dungeon. Alternatively, you can use the Retreat Psynergy skill too in order to quickly leave the dungeon. For right now we're done with Kolima and Kolima Forest so head back to Bilibin on the World Map.
Stop at Bilibin and use the Inn if you need to. When you're ready to continue with the story head northwest of Bilibin to find another cave, this one is aptly named Bilibin Cave.
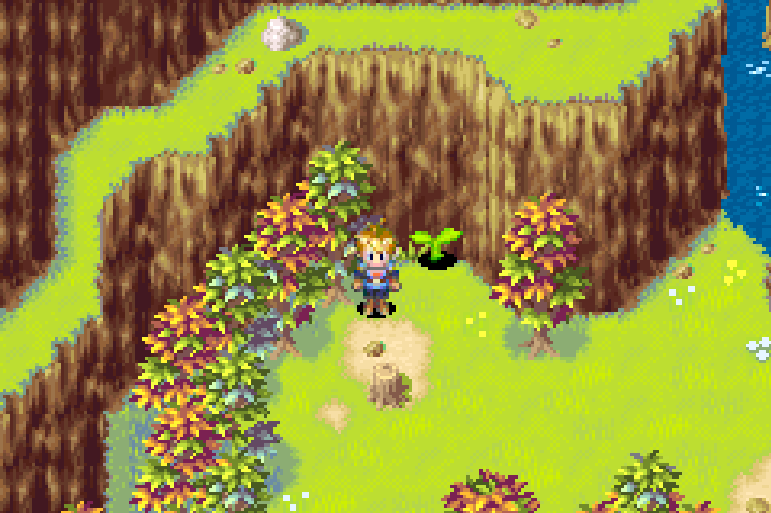
Use Growth on this Vine to reach the upper ledge
Near the entrance of this cave you'll find a small plant growing alongside the wall (pictured above). You can use the Growth Psynergy on this plant to turn it into a vine that you can climb. This will allow you to reach a chest up top that contains an Elven Rapier. If your character's don't have the Growth Psynergy my advice to you is to put a Venus and Jupiter Djinni onto Ivan. The ones I picked were Granite and Gust, this combo allowed him to learn Growth.
The rest of Bilibin Cave is very straight forward - you can run past everything to reach the exit to the World Map that we need right now. You have one optional thing you can do inside of the dungeon if you want, as you travel through this dungeon keep an eye out for two torches that you can move around in a room filled with Ice Pillars. When you find these torches move one of them next to the Ice Pillar to melt it. This will give you access to a chest with a Vial inside of it.
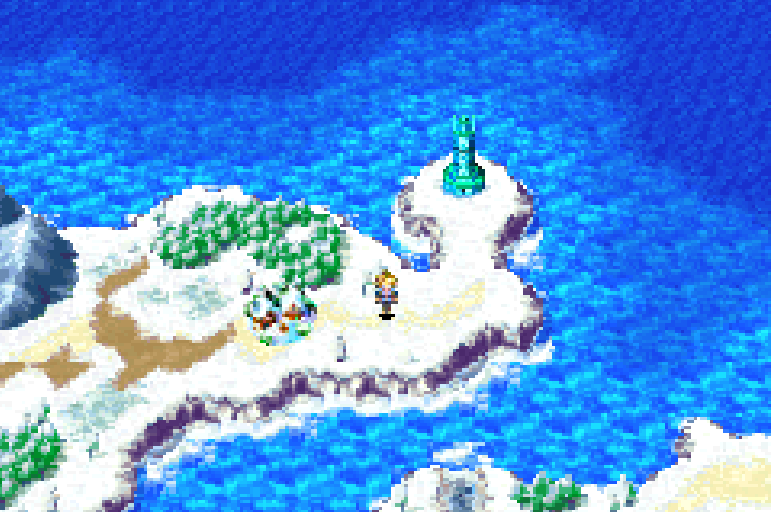
You'll find the exit we need south of the two torches that you can move around. Once you're out on the World Map our next destination is going to be the town of Imil which is to the north, it's found near the coast next to the Mercury Lighthouse (pictured below).
First you'll want to stop by the town of Imil because we need to do a few story things there and there's also a new Djinni for us to collect. We have a couple different things to do here and I feel that explaining it with a list format is probably the best way. Below are each of the steps you'll have to complete in Imil to progress the story.
Imil Objectives:
1. Obtain the Mars Djinni Fever from inside the cave.
2. Grab the Empty Bottle from inside the first house you see after entering the village.
3. Speak with the old couple inside the building with the Empty Bottle; they'll ask you to get Mia
4. Go into the Church building which is to the west of the Graveyard; speak with the little girl inside
5. Return to the old couple and there will be a scene with Mia
There is also an optional chest containing a Vial that you can collect by skating across the ice and then climbing the ladder in the middle of town. You can find various other items by searching crates, boxes and things of the like throughout town too - usually what you can find from doing that is minor items though and not worth your time.
After you finish up in Imil you'll want to follow Mia to the nearby lighthouse. One thing to note is that Mia will be joining our party soon and she also will come with a Djinni, Fizz. That's how you'll obtain your next Djinni in the game. Inside of the Mercury Lighthouse you'll find Mia blocking the road forward, speak with her and she'll move a bit for you.
You'll then have to move the statue blocking Mia's path with your Psynergy. This will trigger a scene with Mia after which she'll go through the door you opened. Follow Mia and defeat the enemy blocking her path in the next room. Continue along the linear path until you run into Mia again, this time she's standing on a ledge near a hole with a statue next to it (pictured below).
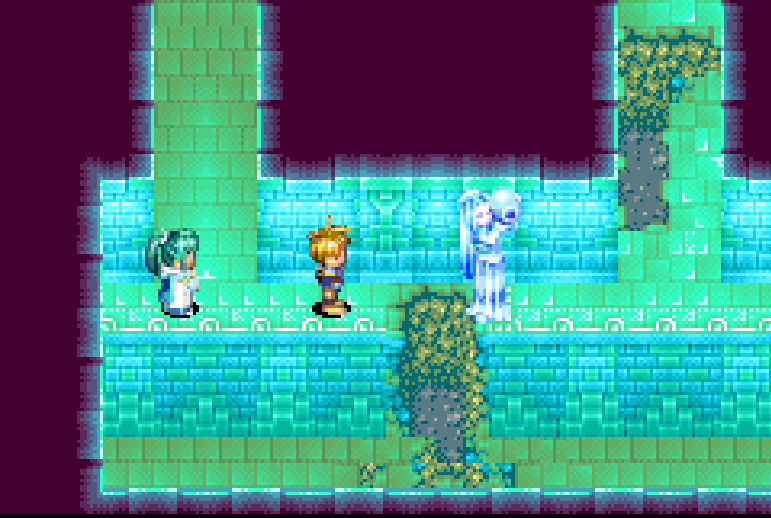
Move the statue using your Psynergy and Mia will finally join your party. Continue through the dungeon until you reach a room with a bunch of pipes and water spouts. This room is actually quite linear, you move a pipe originally and it turns on all of the water spouts in the room. You then take a very round-about way around the room until you get back to this original pipe, then you push it again - this time to deactivate it.
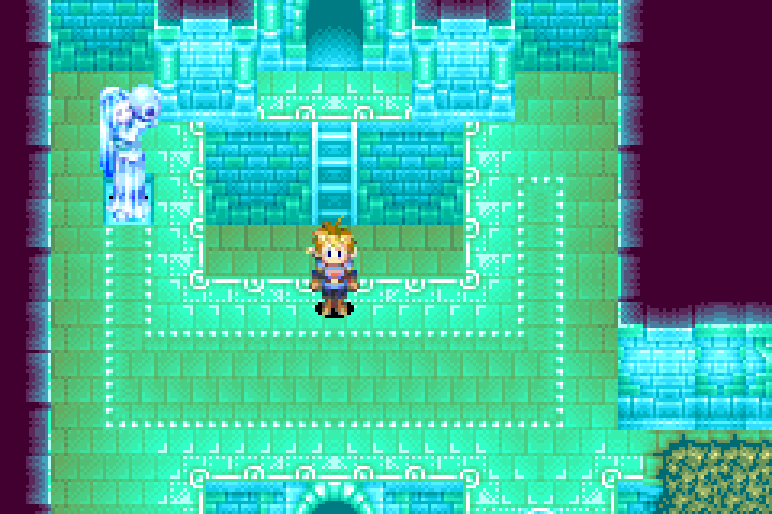
Once you've deactivated the pipe you can safely grab the treasure chest in the top right of this room, it's contains a Psy Crystal. Exit the room in the bottom left of the screen. The next eventful room you come across will be one with a statue and a locked door (pictured below). One path in this room leads you to the statue and the other path to the door, you'll have to take both to progress.
In the next room you'll find a slide on the wall which is an indication that you can fall down here. Slide down the wall and fall through the hole in the floor, you'll land in a previous room near the entrance of this dungeon.
When you land in the room with the glowing red jewel you'll get a cryptic message letting you know how to proceed. Jump across the water over to the jewel and use Mia's Ply skill on it to activate the panel behind you. When you stand on the panel you'll get a buff of sorts that allows you to jump across water.
Exit the room with the glowing red jewel to the north and you'll find yourself in a room with more tiles that you can use to jump across water. Use the tile on the right hand side of this room to jump across the water to another tile then go south through a doorway. You'll enter into a new room from behind the waterfall on the left; there is a treasure in this room that turns out to be a Mimic enemy.
If you go through the waterfall next to the Mimic you'll find a room with another chest, this one has Psynergy Armor inside. Equip the armor, beat the Mimic then return to the room with the two tiles we originally came across. North of this room you'll find the room shown in my screenshot below with multiple tiles.
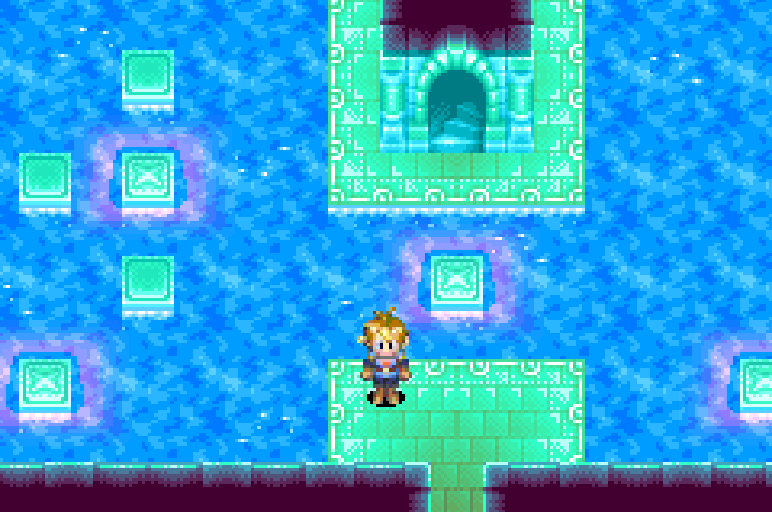
Our destination in this room is the bottom left hand side, however in order to get over here you'll have to go around the entire room counter clockwise. In the northwestern portion of the main room you'll find a chest with a Sleep Bomb item inside of it. You'll have to take a short detour to collect this chest if you're interested.
The next room of importance is the one I have pictured below with different pipes that you can push across the floor. You'll need to push each of these pipes in the direction that my arrows below show. Two of them get pushed up and one of them is pushed over to the left. Doing this will flood the previous room with water and activate the floor tiles inside of it allowing you to jump across.

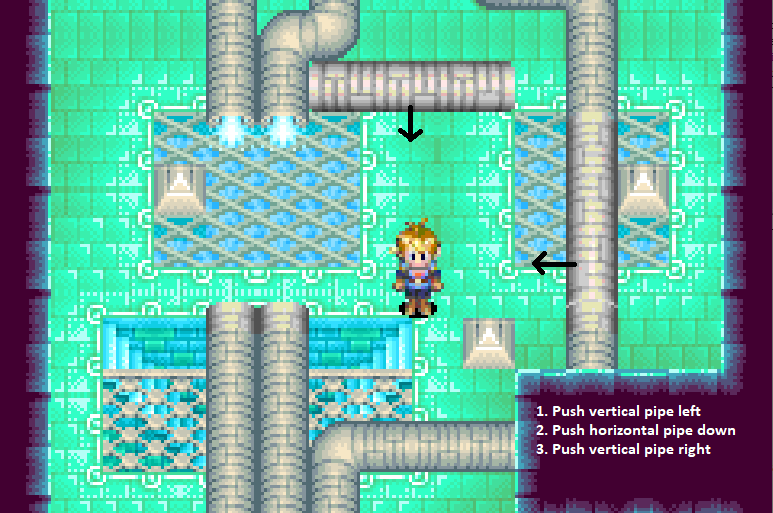
You will come across a room with a button in the middle - the button opens the door when you stand on it but when you move the door closes. Go up the nearby stairs to find another room with water pipes, a statue and a hole in the floor next to that statue. What we need to do for this puzzle is to activate different water pipes to push the statue into the hole.
This puzzle is pretty easy too - I typed up the solution on the screenshot above but for the sake of argument here it is again below.
How to drop Statue down hole:
1. Push the vertical pipe to the left
2. Push the horizontal pipe down
3. Push the vertical pipe to the right
Now that you've successfully dropped the statue through the hole - head downstairs and move it ontop of the button to open the door. Go through the door and you'll find a line of 4 statues - move the 3rd one to the side and you'll find a doorway that leads to a treasure containing a Nut. Return to the room with all of the statues and this time move the one on the right hand side of the room - there will be a doorway behind it.
The doorway behind this statue leads you into the room where you found the Nut except this time you're on the other side. Move the pipe piece forward and you'll unveil another doorway at the top of the room. Inside this next room you'll find a long line of waterfalls - go all the way over to the left hand side of the room then count 3 waterfalls to the right. You'll find a Mercury Djinni named Sleet inside a room behind this waterfall.
After you beat Sleet and claim him as your own make sure you assign him to one of your characters. Head through the doorway in the bottom left of the room with all of the waterfalls and continue through the dungeon. You'll eventually come to another room with a bunch of waterfalls. This time you'll want to enter the waterfall on the right hand side of the room.
Use Ply on the statue in the room with a rainbow
Eventually you will come to the room with a statue and rainbow shown in my screenshot above. What you need to do in this room is stand in front of the statue and use Mia's Ply Psynergy skill on it. Doing this will teleport you up to the top of the dungeon in front of a Psynergy Stone. Heal up using spells then grab the Psynergy Stone to restore all of your PP.
Head over to the center of the lighthouse and you will get a scene during which some old acquaintances show up. After some dialogue you'll face off against Saturos! This may or may not be a difficult fight depending on how much time you spent leveling up your characters.
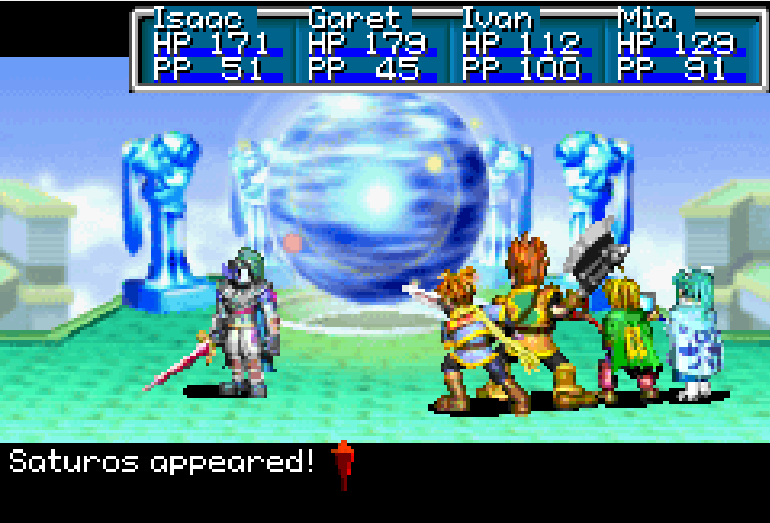
My best advice for you when it comes to this fight and many others is don't use Djinn during battle and use your strongest Psynergy attacks. A lot of different walkthroughs for this game tell you to use your Djinn but this is not a good tactic because it'll make your characters significantly weaker. You're better off blasting him with your strongest attacks and getting the passive bonuses from your Djinn.
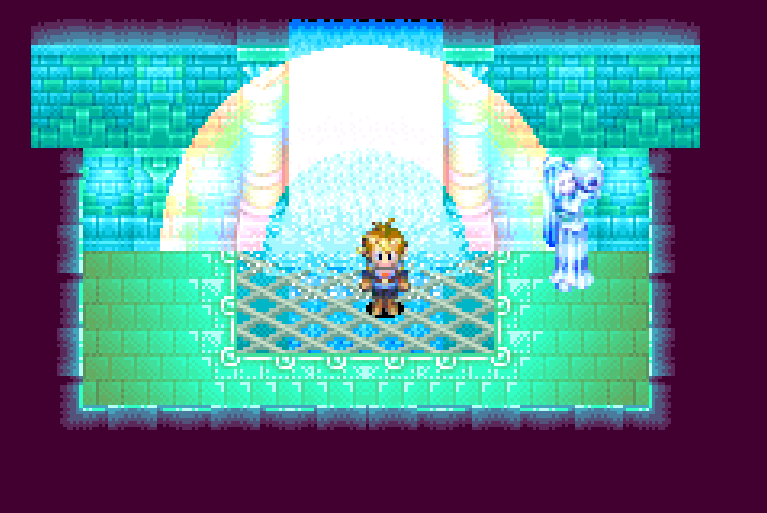
After you beat Saturos you'll have some dialogue after which you'll want to ride the same elevator down that everyone else did. The last thing you need to do inside of the Mercury Lighthouse is to use the Empty Bottle that you acquired earlier on the fountain of water near the entrance. The area I am talking about is shown in my screenshot below, there is an old lady standing right next to it.
Filling up the Empty Bottle with water will get you a very important item - Hermes' Water. You'll be using this item in the Kolima Forest to restore Tret to his original self.
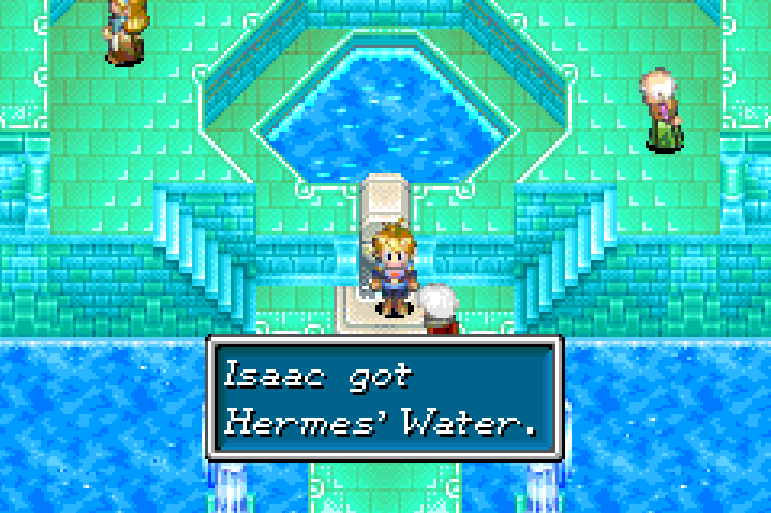
Make sure to fill the Empty Bottle with Hermes' Water before leaving
Once you got the Hermes' Water from the Mercury Lighthouse you're officially done here and free to leave. Our next destination is going to be Kolima Forest and the town of Kolima but first you should head back to Imil to do some shopping and also sleep at the Inn.
Continue to Golden Sun Walkthrough (Chapter 3)
Return to Golden Sun Walkthrough (Chapter 1)