
Final Fantasy IV Walkthrough - Chapter 11 (The Moon & Giant of Babel)
In order to reach the moon in Final Fantasy 4 you will want to examine the crystal that's in the center of the Lunar Whale. After you do this, you'll find yourself flying around on the moon, or if you're on the moon then you'll find yourself back on the planet.
**Important** If you've been doing the Excalibur Side Quest up until this point, traveling to the moon completed it. Return to the smith in the Underworld and speak to him for your weapon.
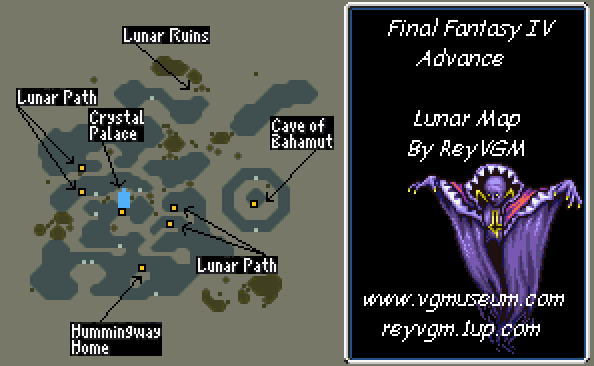
Before advancing the story forward there are a few things you should do on the moon first. The first thing you should do is visit Hummingway's home in the south-central portion of the area (use the map above for guidance). You can change your character's names here as well as shop.
The vendor in Hummingway's House is one of the guys who runs around at the entrance of the area. At this shop you'll be able to buy items that you can't get anywhere else such as Dry Ethers and Elixirs. There is also a whistle here that you can use to summon the Fat Chocobo anywhere you go, which will allow you to basically carry unlimited items.
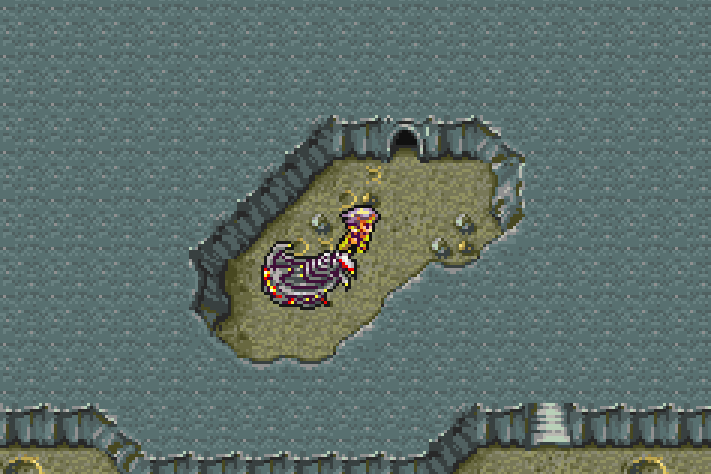
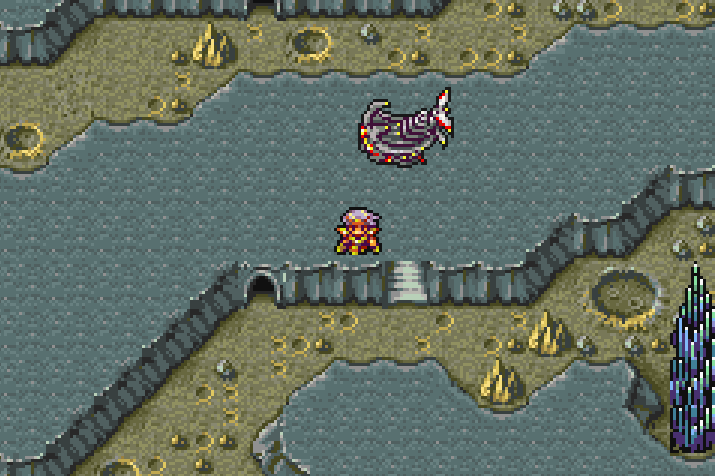
Aside from Hummingway's Home and the Crystal Palace the last location you can visit right now is The Cave of Bahamut. If you've got Reflect on Rosa then you can definitely take out Bahamut and get the final summon. The only requirement to fight Bahamut is that you've first complete the Asura and Leviathan Summon quests. For more information about obtaining Bahamut, use the guide below.
How to obtain the Bahamut Summon
Complete the Excalibur Side Quest
For anyone still confused about what is where on the moon, I have provided screen shots of each of the important locations below and what the entrance looks like. Only a single location has been left out which is the Lunar Ruins, used in the "bonus" content of FF4 on the GBA.
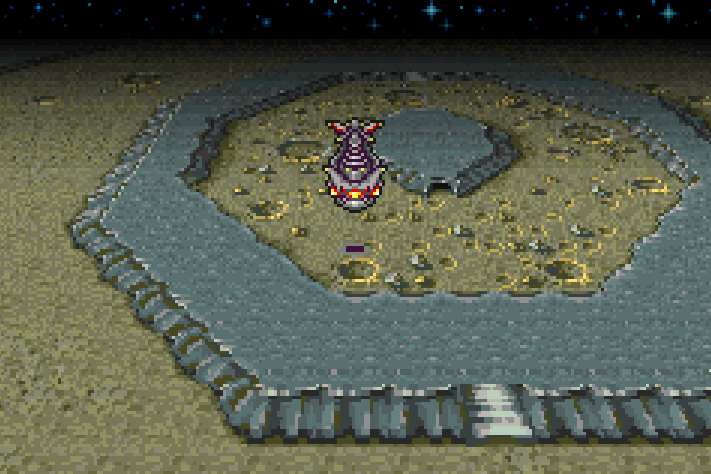
Hummingway's Home Entrance.
The Cave of Bahamut Entrance.
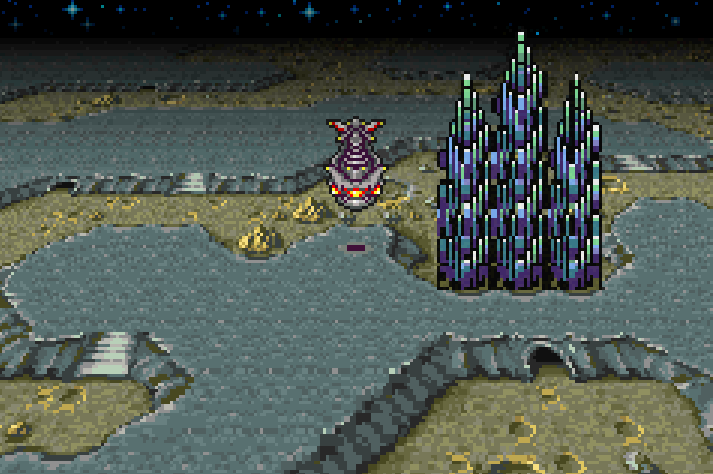
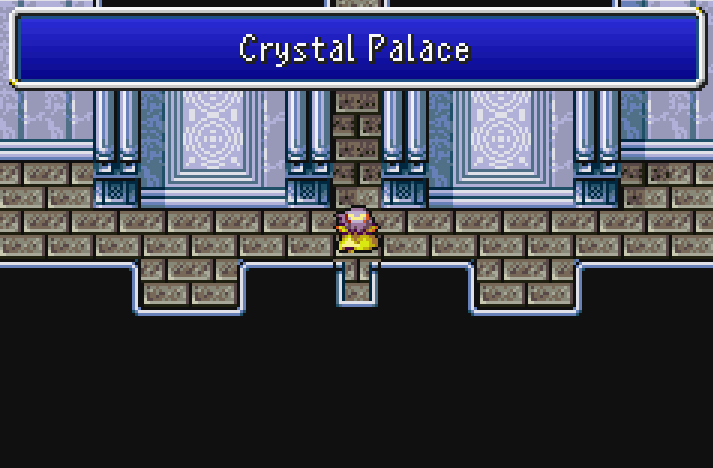
The Crystal Palace Entrance.
Once you're ready to advance the story forward you'll want to land the Lunar Whale in the area shown in my screen shot below. This will allow you to enter the Lunar Path which is the brief dungeon right before the Crystal Palace.
There are a few different parts to the Lunar Path, you enter and exit the Lunar Path dungeon a few times while circling the Crystal Palace. It may be confusing at first but the route you follow is pretty linear. As usual, all of the treasures are listed below.
Lunar Path (Part 1) Treasure Chests:
Golden Apple (Chest with Monsters)
Lunar Curtain
Stardust
The only treasures you'll find are in the first Lunar Path dungeon of the area. The rest of it is just in and out of caves until you find yourself at the Crystal Palace in the center. Inside the Crystal Palace the path will split into three. Going right or left will lead you to panels that restore your HP/status ailments and the other restores your MP.
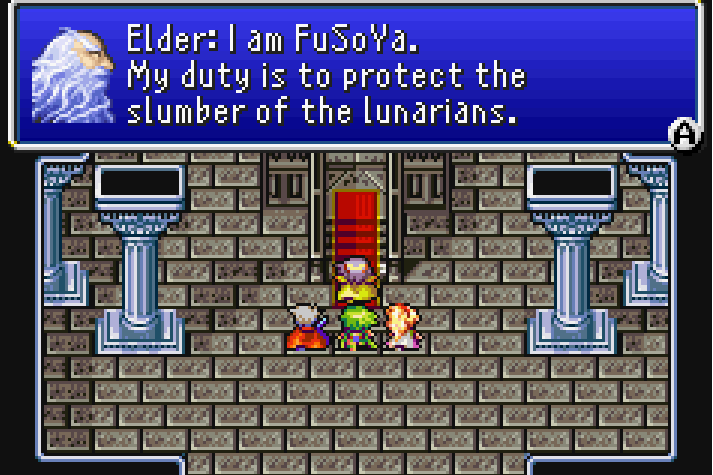
Taking the central path leads you to FuSoYa, a Lunarian who explains a lot of the backstory to you about Cecil and Golbez. After he explains many of the plot holes up until now he'll join your party... but only for a short time. With FuSoYa in your party, you're now ready to leave both the Crystal Palace and the moon. Return to the Lunar Whale and examine the crystal to return to the Overworld.
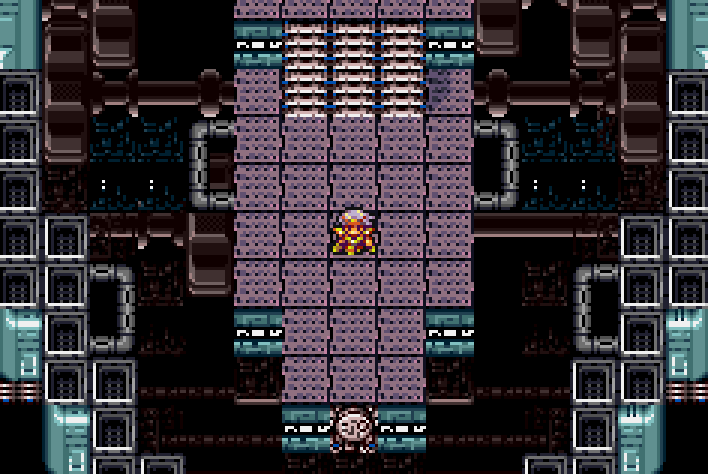
When to land on the Overworld there will be a long scene after which you find yourself inside of the Giant of Babel.
Throughout this dungeon there are two random encounters which you'll want to keep an eye out for, Searchers and Last Arms. With Edge you can steal an item, Siren, from them. Later on in the game in the Lunar Subterrane you can use this item to fight a rare Flan Princess which drops the extremely rare Pink Tail item. You can swap this item for the legendary Adamant Armor after a quick side quest.
In order to guarantee that you can get the Adamant Armor later you'll want to steal at least 50 Sirens. Or if you're playing on an emulator with Save States, 10 - 15 will work just fine.
Chest of Babel Treasure Chests:
Shuriken
Hi-Potion
Ether
Yoichi Arrow
Siren
Stomach of the Giant Treasure Chests:
Silver Apple
Soma Drop
Inner Path of the Giant Treasure Chests:
Elixir
**Save Point**
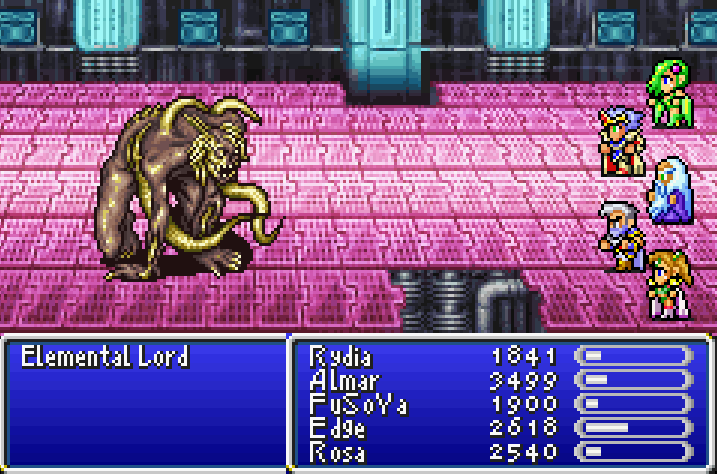
When you encounter the Elemental Lord bosses there will be a short scene during which your HP and MP are fully restored. For this boss you'll be fighting every single Elemental Lord that you fought throughout the game all in one single fight.
They're much easier this time around since they don't have any of their special quirks anymore, you can unload on them with all of your strongest abilities and not worry about any death-dealing counter attacks. Don't use any magic on the first boss as he absorbs most of it, the rest of the bosses are vulnerable to the obvious magics (Ice on fire; Thunder on Water).
Once all three of the bosses are dead I recommend that you return to the Save Point and use a Tent/Cottage. There is another boss coming up after which FuSoYa will leave your party called CPU; if you have equipped anything on FuSoYa that you wish to keep - make sure you remove it before facing this boss.
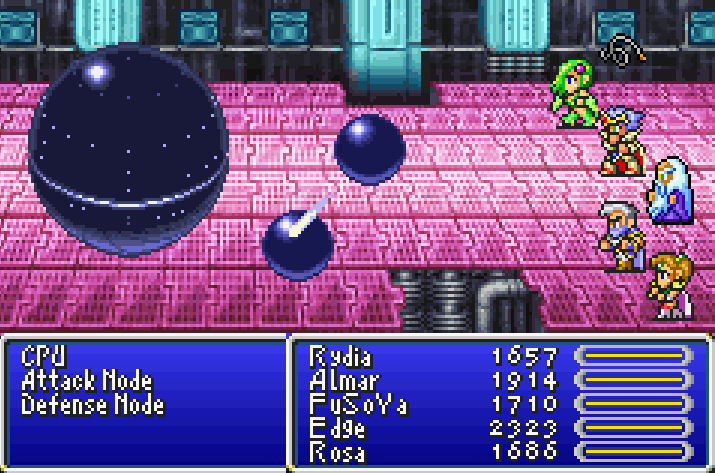
CPU can be a very difficult fight if you're not familiar with the strategy for it. Two very weak enemies appear in battle with the CPU boss, Attack Node and Defense Node. You'll want to destroy the Defense Node as quickly as possible and leave the Attack Node alive.
The Defense Node heals the boss for a substantial amount of damage so long as it is alive. The Attack Node hits you with rather weak attacks - nothing as bad as what happens when you destroy it. When you defeat both the Attack and Defense Node the boss will use an ability called Globe 199 which will hit a character for 9999, instantly defeating them.
Avoid using Summons on Rydia or any AoE spells as they'll likely destroy the Nodes with one attack resulting in a guaranteed two character death from Globe 199. I'd actually recommend you avoid using any magic spells unless you're paying close attention to when the CPU uses Reflect. Throughout the fight it will buff itself periodically with this so keep an eye out if you plan to utilize Rydia - otherwise just Defend on her.
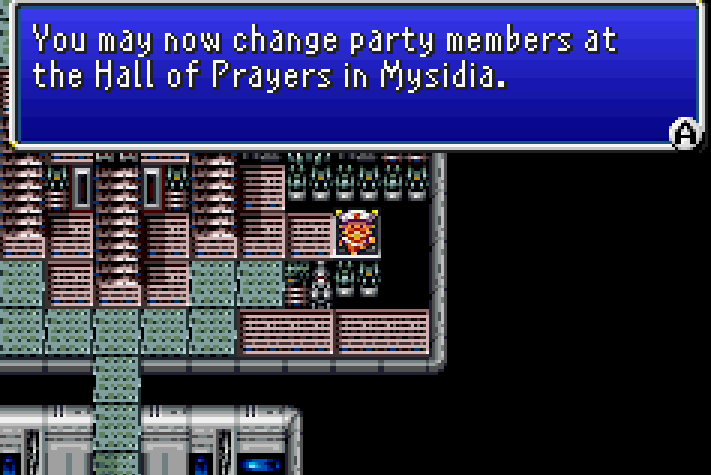
Once you defeat the boss there will be another long scene after which you'll have a few things available to do... Depending on which version of the game you're playing will determine what you're able to do next. Players on the GBA version will see the same screen shown below and you'll gain access to all of the previous characters that were in your party before.
Those of you playing on the SNES or any version prior to the GBA remaster, you won't have the next dungeon available to you, so you'll want to skip ahead to Chapter 13 of my walkthrough. I'll pick back up with the official story during that chapter. The next chapter will be covering the Cave of Trials only, one of the optional GBA version dungeons.
Continue to Chapter 12 (Cave of Trials - GBA Content)
Continue to Chapter 13 (Lunar Subterrane & Final Boss)
Return to Chapter 10 (Sealed Cavern & Leaving the Underworld)