
Koudelka Disc 3 Walkthrough
For the first part of this disc we're only going to have control of Koudelka, usually you want to be level 25+ on her at this time. If you're any lower than that you may want to spend a little bit of time leveling her up so that you don't get destroyed by any encounters. While you're leveling her up you should also focus on raising her magics. Tornado is one you'll want to be at least level 2 (but preferably level 3) for an upcoming encounter.
This first area of Disc 3 can be rather confusing, I strongly recommend you find the save/recover location (pictured below) before doing anything else. At least if things are too difficult you always know a safe spot that you can return to to heal up.
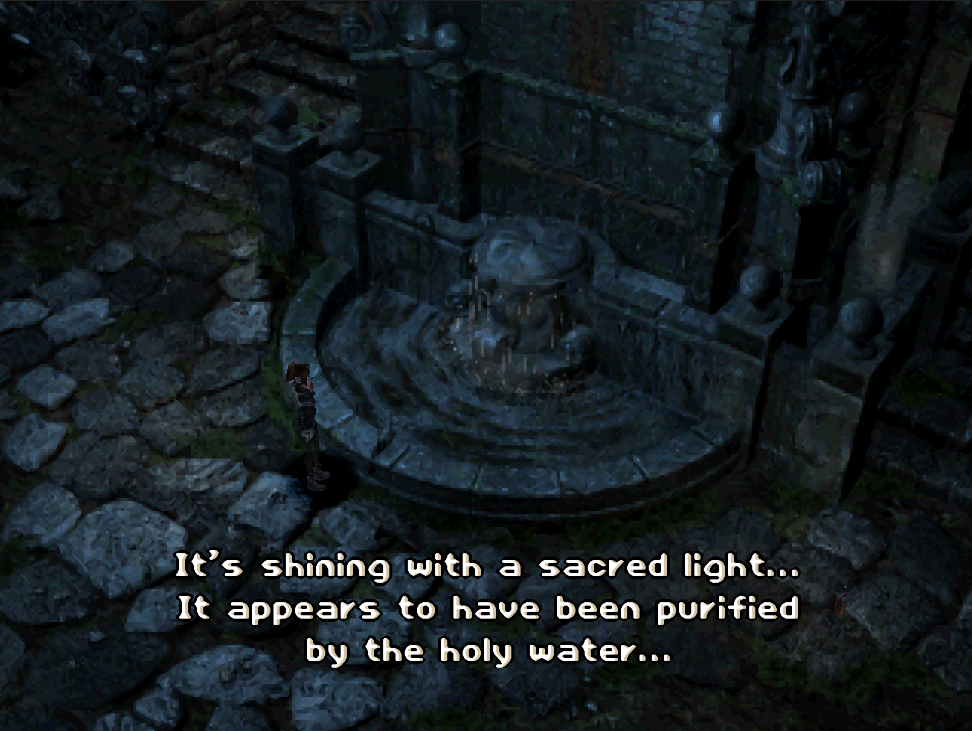
Our goal in this area is to find 4 statues and put the Icon Key Items that we've gotten throughout the game onto them. The statues are spread out amongst the whole courtyard but you can see their rough location by opening the map from the menu. Keep an eye out for a soft blue glow, all of the statues will have that emanating from them letting you know that it's a unique location. Below is some guidance for finding the statues.
Statue 1 (Icon's Crown): Go two screens left of the save/recover fountain that's pictured above.
Statue 2 (Icon's Necklace): This one is found on the northern side of the courtyard in a place called Inner Grounds, Patrick's Quarters. You can reach it by going out the exit at the top of the screen in Inner Grounds, Arbor Side. Exit out of the bottom-left side of this screen to find the next statue.
Statue 3 (Icon's Ring): Also found in Inner Grounds, Patrick's Quarters. This statue gives us a better vantage of Statue 2, you can see it in the distance from this screen.
Statue 4 (Icon's Earrings): If you look at the map, it's the statue in the southwest, the one furthest from the save/recovery shrine pictured above.
After you've placed the Icon's object in all four of the statues return to the save/heal fountain to find it disabled. Interact with it anyway to pick up the Pendant that Koudelka dropped at the start of the game. Equip this for a giant stat boost to Koudelka's magical stats, it's like +10 to all magic stats and +15 to Luck. This item is also essential in beating the game. If you miss this Pendant you can return to this location and pick it up again up until Disc 4 when you use Daniel's Arm.
Next to the fountain you can also find a High Listel item on the ground. Our next destination is up the stairs from the fountain, this will put you into the Inner Grounds, Arbor Side area. There's no longer running water here so you can go into the door in the middle of the screen that we previously couldn't access.
This room is probably best described as the guillotine room. Circle around to the back of the guillotine and grab the Pistol Rounds from the ground before climbing down the ladder. You will get another FMV cutscene at the bottom of the ladder... Well that one's a doozy. Pick up the Rifle RD from the ground when you regain control of Koudelka and make sure to grab the Blue Key from Bessy's body. Head back downstairs and this time we can explore the room.
Immediately to the right of the ladder you'll find an altar, inspect it for Bottle of Blood. There's also Rifle Rounds on the ground to your right; to the right of those rifle rounds is a door with a green light coming from it... Inspect this door for a scene when you are ready. After talking with Edward and James, exit through the door on the other side of this room. You'll end up in the Underground Corridor.
Make sure you save your game because you are coming up on a difficult boss encounter. At the end of this hall go through the double doors and in the next room you'll have your first real 1v1 boss with Koudelka.
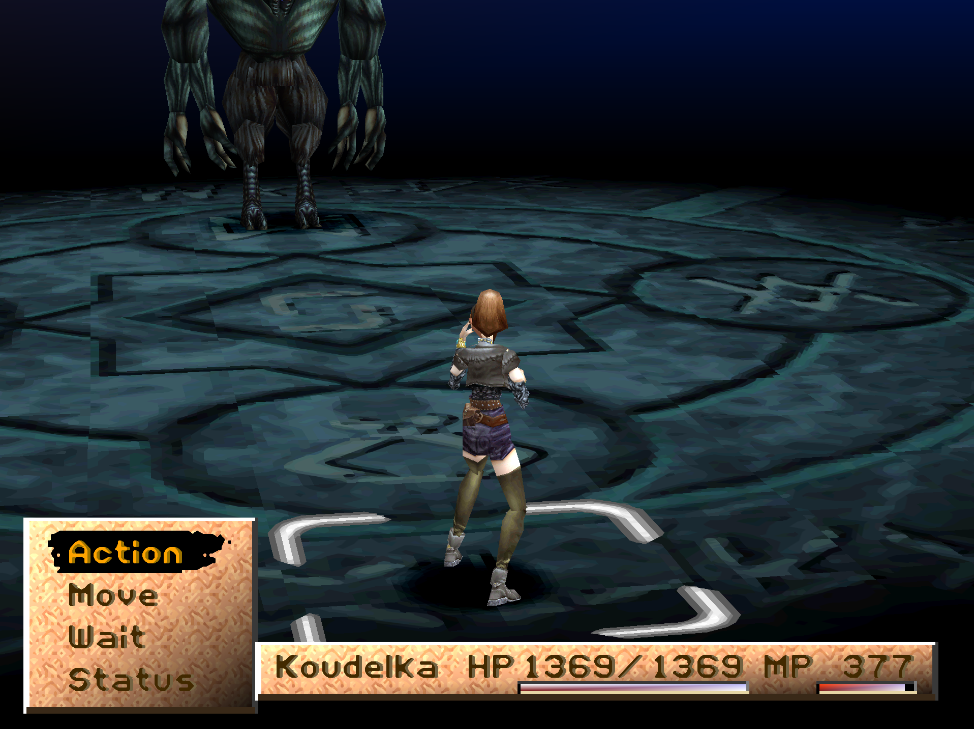
Depending on how you spent your stats this will either be difficult or extremely easy. I defeated the boss by using Tornado 2 times, each hit did 2.5k or more damage. Despite only being level 24 on Koudelka, my weapon (Cat's Eye) and my accessories buff my stats significantly.
After the fight is over heal up and save then exit this room through the door on the left. Grab the Roman Nuts from the ground in this area and then interact with the statue on the left side of the screen. Assuming you grabbed the Bottle of Blood from earlier you can pour it on the statue here to open up a hidden area.
The only thing you can really do in this room is chat with 'the oracle' thing that is here. It's basically something that gives you hints or tips on what you need to do next or things you've forgotten to do. Exit the room and return to hear different dialogue lines. When you're done having fun with that continue through the door at the other end of the hallway to find another Underground Corridor area. Run across the rickety bridge and pick up the Pistol Rounds on the ground... then go up the stairs behind you.
You'll find yourself in the Graveyard, go left a screen and through the gates into the graveyard. In the back of this area you'll find Charlotte's Grave (pictured below). Pray at this grave for a story flag that's needed to get the Flare Brooch item later.
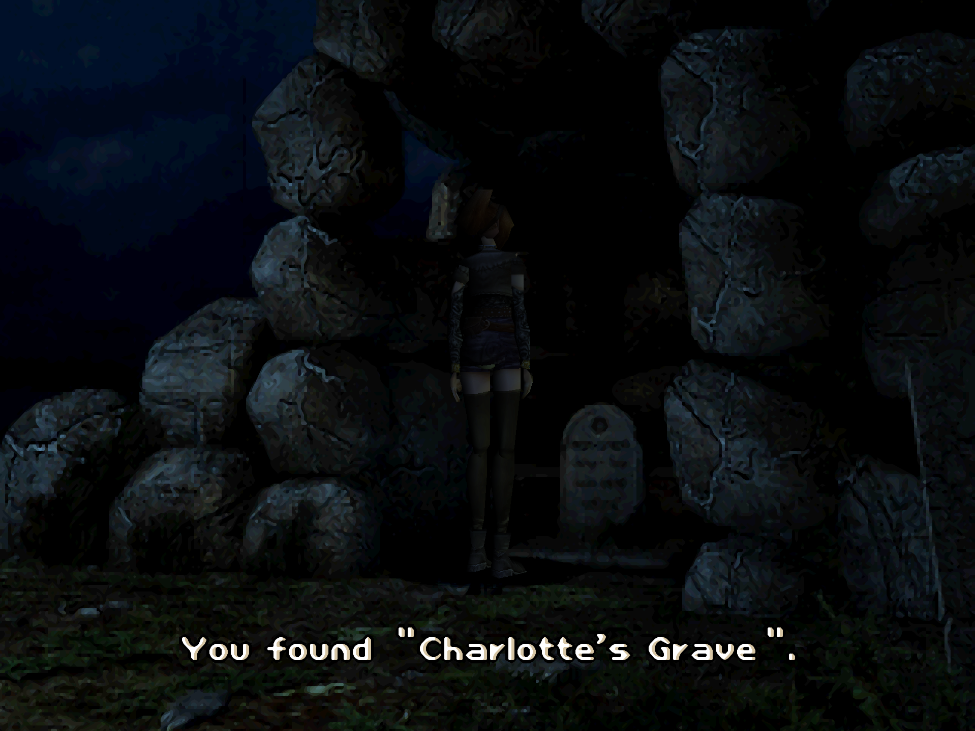
Pray at Charlotte's Grave for a story flag
In the area outside of where you found Charlotte's Grave, search the cliff to the west. You'll find another grave here, St. Daniel's Grave, in front of it is Vigna's Doll. It's another grave you can pray at, do this for a scene with the weird guy we met before. Thankfully despite being weird, he is helpful. He unlocks the gate for us when we go up the stairs, which lets us get back inside of the monastery. Return to the room with the printing press and you'll reunite with Edward and James.
When you regain control of Koudelka you'll have a lot more backtracking to do. We need to return to the place where we found Valna and Vigna earlier during Disc 2. From where we are go up to the 2nd floor of the library and follow the original route that led us here all the way back to B1 where Disc 2 began. The room with the X on it in the picture below marked Green Key is where you need to go.
If you never got Sophie's Letters from the Library at the end of Disc 2 you may want to get them now... You need these letters and to pray at Charlotte's grave for the best outcome to a boss fight coming up.
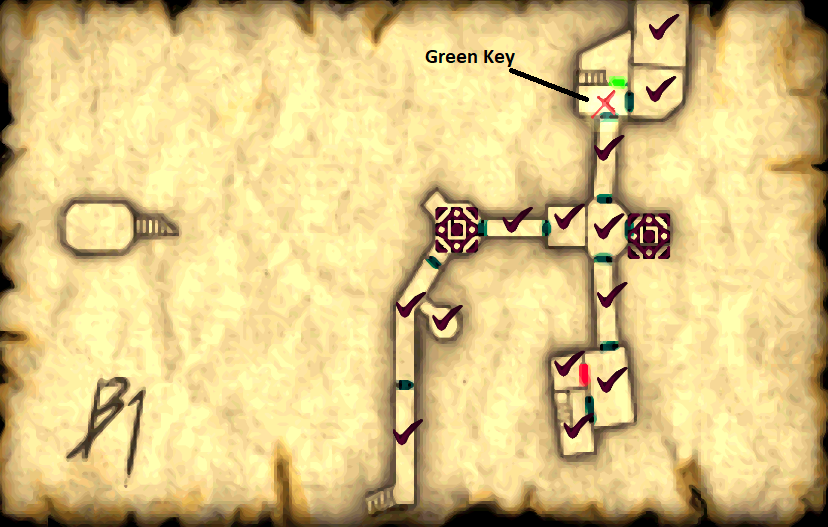
Green Key Map Location; click to enlarge
For a picture of what this room looks like return to my Disc 2 Walkthrough and check the first image on the page. Just incase you have forgotten exactly what it is we're looking for...
Tip: If you'd like to raise your magic/weapon levels fight Valna and Vigna for a bit. They will very rarely attack you and you will never hit them so it gives you a great opportunity to raise your skills.
Once you manage to find these two, interact with them and give them the two dolls that we've found in exchange for the Green Key. The Green Key is only used to open one door, the one that's next to Valna and Vigna. After the door has been opened it'll vanish from your inventory (nice)!
You may notice the area we're in, it's the other side of the jail cell from the start of Disc 2. Grab the Potion on the ground then head up the stairs nearby, you'll find another Potion in the small room above. Head through the door in the top left of this screen to enter Charlotte's Cell, 1st Floor.
There's going to be a boss battle in this room so heal up if you need to and save the game. Go one screen to the left to start the encounter. Our first (and maybe only) battle is against some flying furniture, they have a lot of HP but other than that they're not all that special.
Depending on your actions in the game up until now there may or may not be a second encounter. If you prayed at Charlotte's grave earlier on this Disc and you collected Sophie's Letters from the safe in the library then you will not have to fight Charlotte and you'll be rewarded with the Flare Brooch (it's on the ground in the room when the cutscene is done). If you have to fight Charlotte, she has a lot of HP but is a pretty easy fight. You'll be rewarded with the Star Brooch when you beat her.
Now that we've taken care of Charlotte, exit her room through the door nearby where we entered. This will put you into an area called Dungeon, 1st Floor - a Temporary Save location. The door we need is at the end of this hallway, if you'd like some Pistol Rounds and Listel though climb onto the pile of bodies and search around to find both. Otherwise, use the Blue Key on the door and go through.
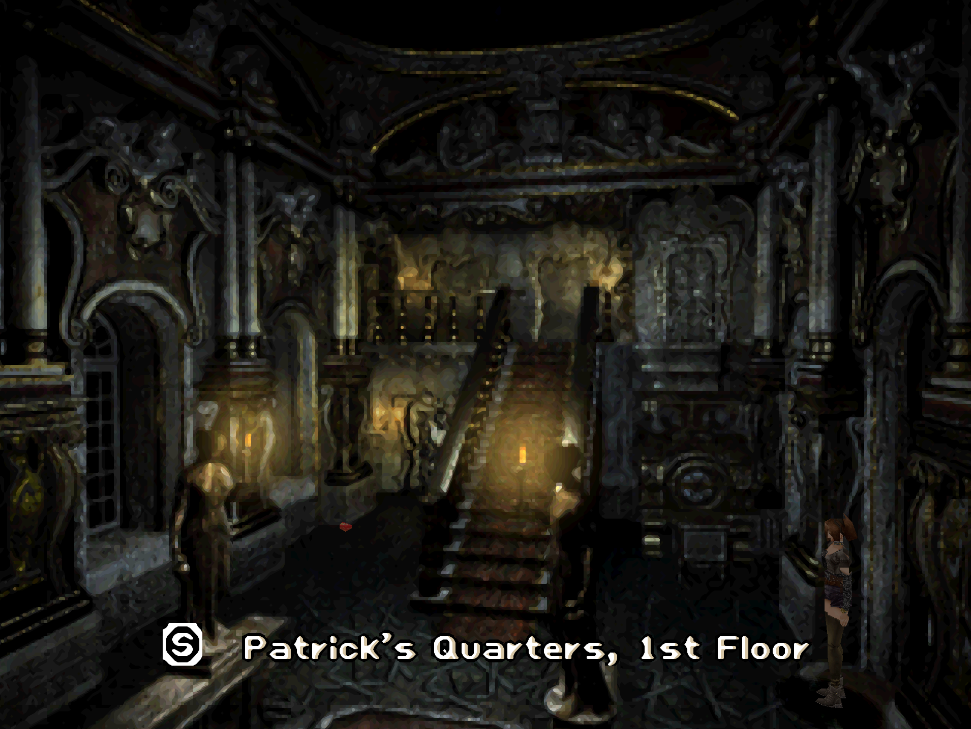
We're now in an area that looks like a gothic castle instead of a falling apart mansion. The first thing you will want to do is go out the front door so we can undo the bolt and make a shortcut. Grab the red item on the left side of the screen if you want some Shotgun Shells, otherwise climb the four large steps to the right of the stairs.
In the picture above go to the right of the stairs and you'll find four large steps that you can climb up one by one. They lead to a door which goes into a new area; head inside and unbolt the door at the top of the screen to find yourself back in the same room pictured above. We only wanted to make this shortcut, go back into the previous room (apparently a bedroom) and this time interact with the statue across from the bed at the bottom left of the screen.
You will be given the option to move the statue when you do this, the lights will go out and you will open up a hidden passage to a new room with the old guy we talked to earlier. Apparently his name is Roger Bacon, there will be a long scene in here with him... When it's all finished exit the room the same way you came in. Return to the main hall pictured above and this time go into the room to the left of the stairs. It's the same area where you found the Shotgun Shells earlier.
On the left hand side of this room you'll find the gramophone, put in the Disk that you found previously to unlock a drawer with Research Notes. After collecting them go through the door at the far end of this room to get our familiar ...Something's not right... message. You can find the boss waiting for us on the far side of this room, step up onto the raised platform on the right hand side of the room to trigger the fight.
Scapegoat is the name of the boss and it's strong to water damage so don't use the Geyser spell or you'll just miss. Other than that, treat it like a normal battle. You'll be able to restore your HP/MP and save at this location after the boss is defeated. Head to the other side of this hallway and you will have a scene with Elaine and James before you're able to leave.
Return to the main room pictured above again... This time we're going up the stairs in the middle and through the door on the left. You will find yourself in Patrick's Study - we have a very important clue to get here which flags us to advance the story... inspect the bookshelf in the middle of the room to learn about the hearth clue (pictured below).
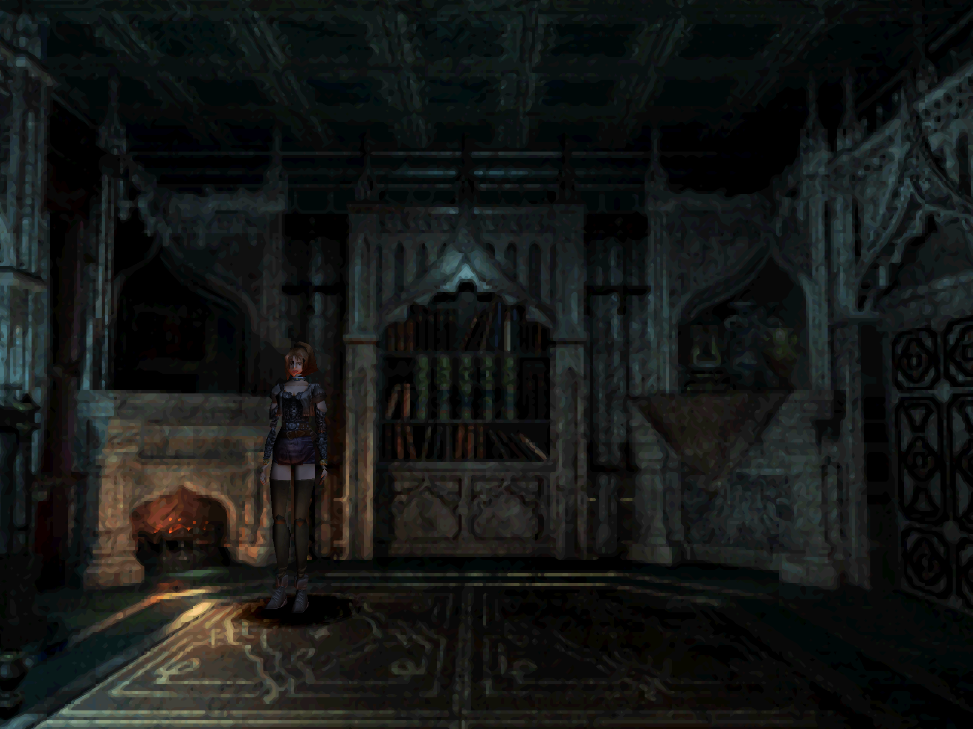
Inspect the bookshelf in Patrick's Study for a story flag
After you get this clue go into the door on the opposite side of the room to find a laboratory of sorts. Grab the Empty Bottle on the shelf near the door and Patrick's Memo from the next screen (it's sitting on the table). On the same table as the memo you'll find Roman Nuts and Rifle Rounds. Return to the previous screen where we found the Empty Bottle and step onto the scale to learn that Koudelka weighs 45kg. We need this information for our next puzzle.
On the screen where we found Patrick's Memo inspect the fireplace to find a ladder. If you didn't get the hearth clue from the previous room you will not find anything in the fireplace. Downstairs you will find a Panacea on the ground and the weight 'puzzle'. Koudelka's weight is 45kg and we need the scale to read 70kg which means the solution is 25. Setting the counterweight to 25 will get you a click sound after you do it; this is how you know you were correct. Step off the scale and before we go through the door in front of us we need to return to Roger and talk with him again.
There will be another long scene with Roger, when it's finished return to the scale in the basement and go through the door across from it. You'll find yourself in an outside area with some nice wind ambiance. Before you cross the wooden bridge inspect the body on the ground to find Tinderbox, Shotgun 6 and Shotgun Shells. Keep searching the body until you get all of the items it offers. When you're done head across to the other side and go through the door to reach the Vestry, 1st Floor. We've finally made it back to the church that we fled at the end of Disc 2!
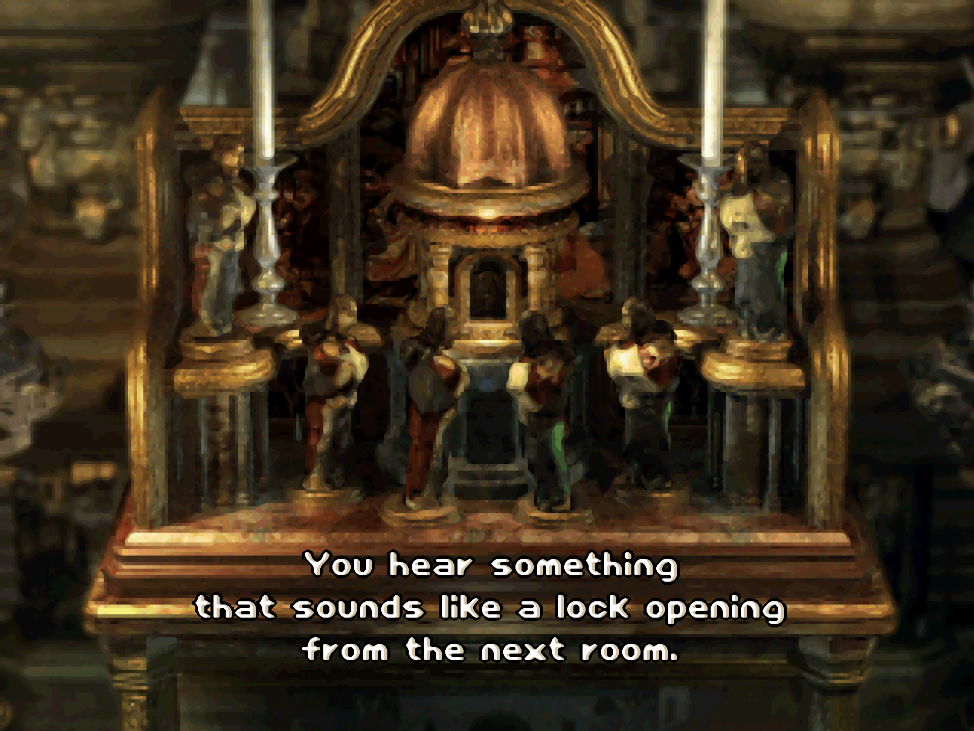
In the far end of the Vestry you'll find a table lit by some candles, there's some Roman Nuts on it. You will also find some Pistol Rounds out of sight on the table to the right. Inspect the table inbetween these two items to find another puzzle. There's four doll statues that we can move... the goal is to make all four of the statues face inward towards the center (shown in the picture below).
After solving the puzzle go through the door on the left side of the room. Grab the Shotgun Shells on the desk and go up one screen to a large metal double door. Head through the metal door and then go to the right to find another door. This takes you to a small room with a circular area at the top of the screen, step into this area and use the Tinderbox that we got earlier to light the candles. You will need to climb on top of a box between the two candles to do this. I also had to interact with the area between the candles, not them individually (it was very wonky in this area; I literally spun around in a circle spamming X).
Once they're lit the game will ask if you want to pick up 'the item', choose yes to get the Lifedrinker sword. This is a great weapon for any character you're using that does melee damage. If you feel ready for the final boss of Disc 3, exit this room and go through the door at the top of the screen. You'll get the familiar ...Something's not right... when you enter the room. The boss we want is on the far side.
The name of this boss is Apostle and it can be the first really annoying boss of the game. Apostle has an annoying mechanic that causes any damage he takes to heal him during certain phases. Pay attention to him and watch for when he starts twitching, this is when he will heal from any damage he takes. It takes a bit of getting used to because it's a very subtle difference in movement... Normally he rocks back and forth but he kind of starts to twitch instead.
It's best to use physical attacks against him because they will execute immediately after you select them. With magical attacks you have to wait before they fire off and this will result in you healing him a lot of the time. So my strategy was to send everyone up to him as a frontline fighter and punch him.
When the fight is over you'll want to exit the room we're in and turn left in the hallway. Right got us the Lifedrinker sword earlier, left will get us the Disc 4 scene.
Return to Koudelka Disc 2 Walkthrough
Continue to Koudelka Disc 4 Walkthrough