
Halo Reach (Mission 6) Long Night of Solace Walkthrough
Video Walkthrough: (Mission 6) Long Night of Solace Walkthrough
Datapad Locations: Datapad #5 Location and Datapad #14 Location
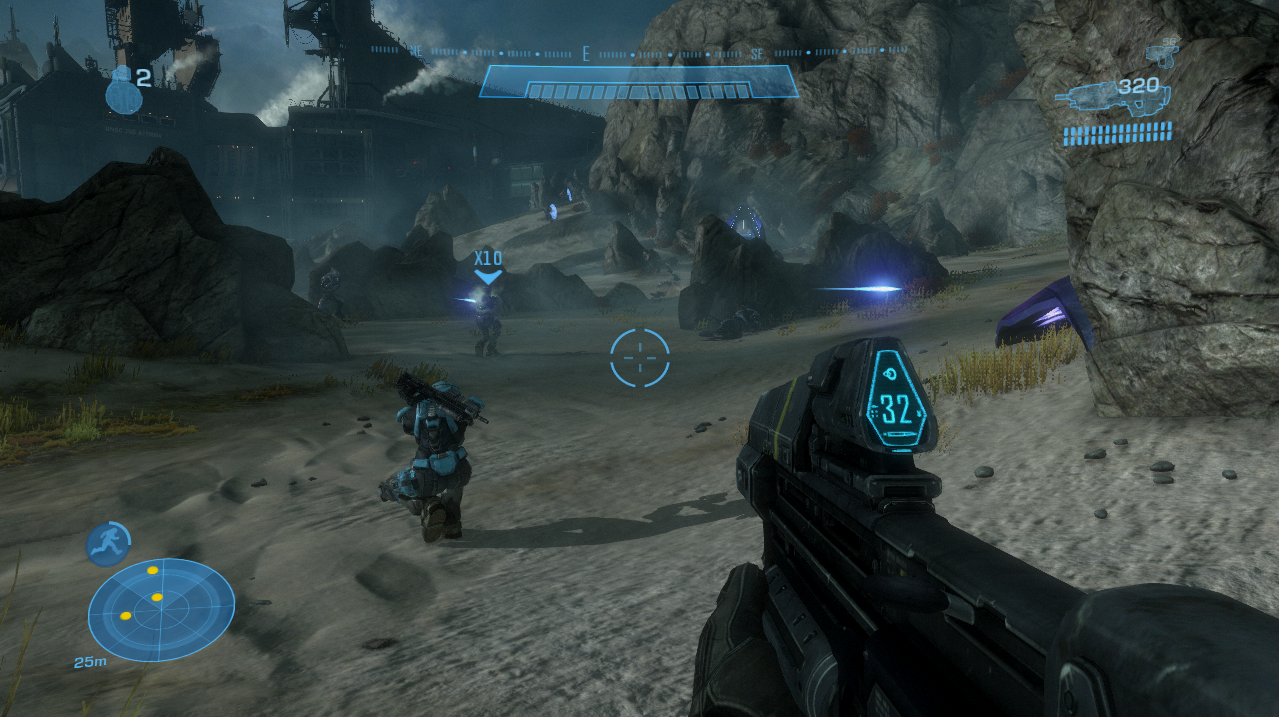
Long Night of Solace starts off as one of the best missions in Halo Reach then turns into a total shit show. You start on a beach just like in The Silent Cartographer (the best mission of Halo 1) and it does a good job recapturing that magic. Fight your way across the beach while jamming out to the music and get inside of the nearby facility.
Once you're in the nearby facility you can collect both Datapads on this level if you're interested. Datapad #5 is available on all difficulties and you find that in the large room on the floor, check out my Datapad #5 Location Youtube Video for more information. For Datapad #14 which can only be obtained on Legendary difficulty - you'll want to watch my Datapad #14 Location Youtube Video. Even if you're not good on Legendary or good with jumping you can still easily get this Datapad with a few tricks.
When you are ready to continue with the mission head through the doors that open up to the launch pad. Approach the launch ship to begin the next part of this mission, a space battle!
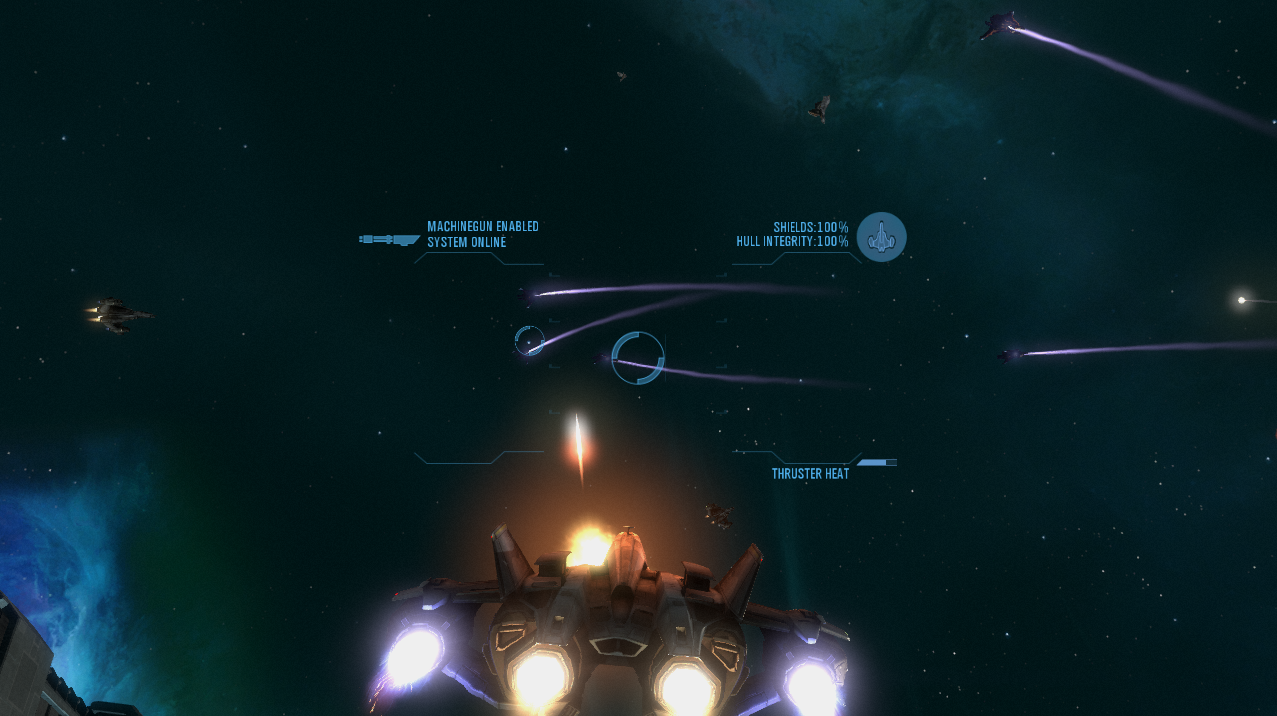
This part of the mission is extremely difficult on Heroic and Legendary, especially Legendary. During the first part of this mission you don't get any Checkpoints so you have to complete this entire battle without dying. You'll be fighting Banshee and Seraphs in the sky throughout this part.
It's typically best to use your Machine Guns on the Banshees and on the Seraphs you'll start with using your Machine Guns until their shields are down. Once a Seraph's shields are down you'll hit them with missiles to finish them off. You get this advice during the mission over the radio.
For harder difficulties (like Legendary) one piece of advice that I see a lot online and that worked well for me is to hide behind the space station. Not many enemies fly around behind the space station and you can hide behind here and pick off any enemies you can grab. This will allow you to fight enemies one at a time and on your terms. If you need to move really slow while flying hold down on the thumb stick; this will make your flying slow to a crawl.
Once all enemies are defeated you'll be contacted over the radio about landing in the open bay of our space ship. There will be a cutscene when you return to the ship explaining what's going to happen next. After clearing the first space battle you'll have a second one that takes place outside of a Covenant ship which is called a Corvette. You get a Checkpoint between these two battles but the second one is just as hard as the first - if not harder!
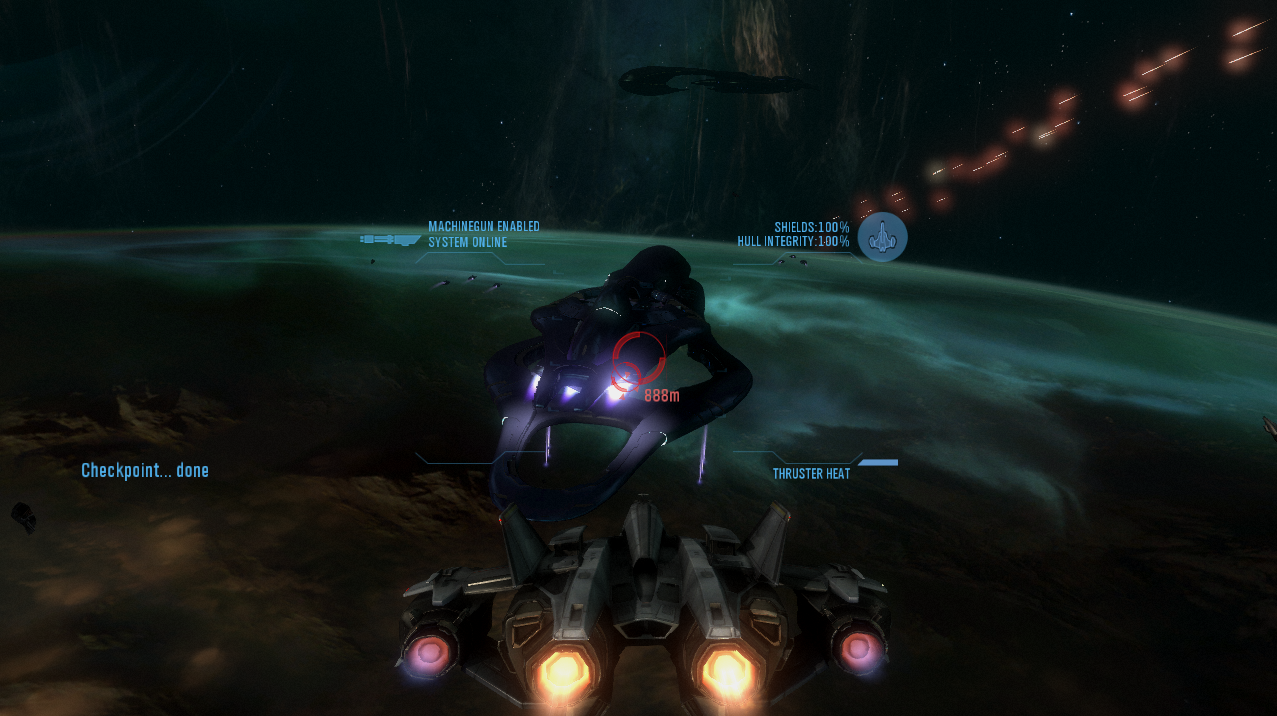
During this next space battle there will be more enemies and less places for you to safely hide. From what I have seen the best place to hide for this part is directly under the Covenant's Corvette. You'll need to pop out occasionally to take out the engines on the Covenant ship to advance the story but other than that you can pick off enemies from underneath.
My advice is to pick off as many enemies as possible while you're still safely under the ship. Once you've whittled down their numbers you can safely destroy the engines to advance the story. Wait until you're told that it's safe to land on the roof of the Corvette then fly around and land safely on it to continue.
You will have a brief firefight ontop of the Corvette in zero gravity with some Elites. To proceed you'll have to jump down into the circle in the center of the area and disable the shields by pressing the switch. The location of the switch will be added to your HUD when it's ready to be pressed so don't worry about finding it. If you've ever played the Firefight map Corvette before then you probably recognize this area.
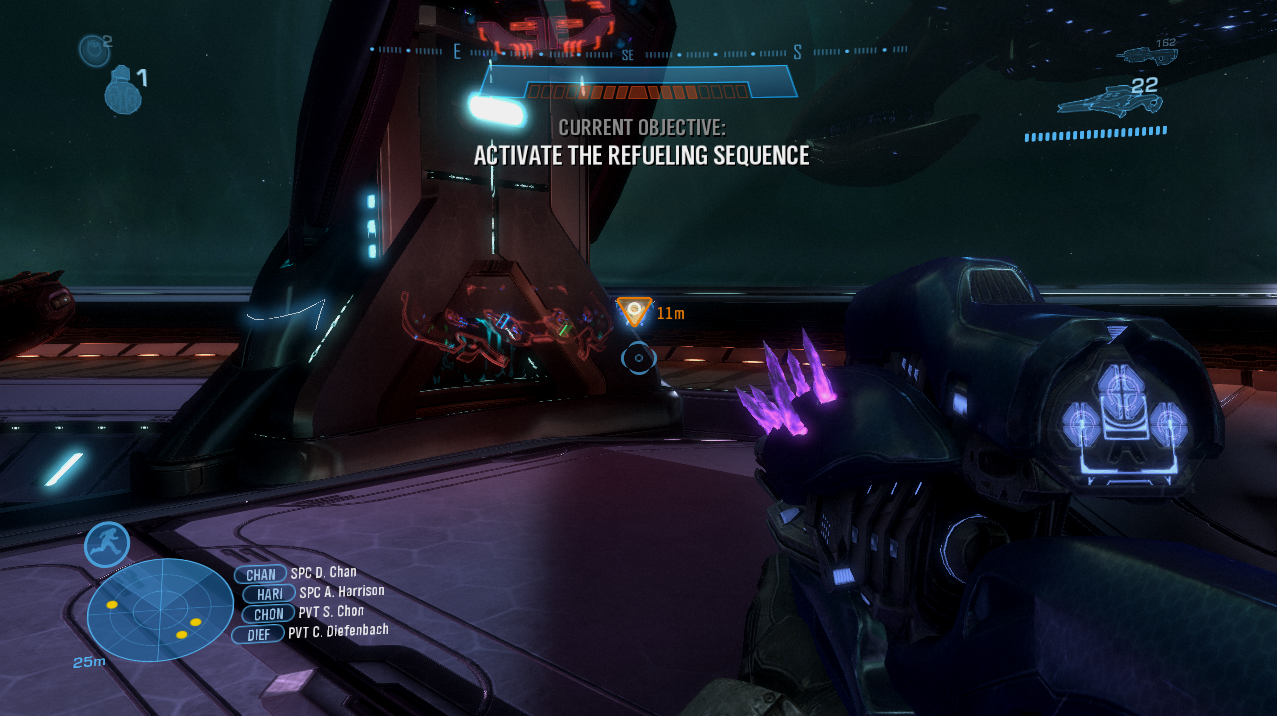
There will be a cutscene after pressing the switch, once it's over you'll need to take your group of Marines over to the Corvette's bridge (pictured below). You'll have to kill all of the Covenant on the bridge and then activate the switch that's here. As always the location of the switch will be added to your HUD so it won't be hard to find.
Return to the hangar after pressing the switch and protect the bomb and Jorge against the waves of Covenant. Search the area around the bomb and you'll find lots of ammo and weapons for you to grab if you're interested. All you have to do for this part is kill all of the Covenant then return to the bomb when Jorge tells you to. There will be one final cutscene with Jorge after which the level will be completed.
A moment of silence for all those lost...
Return to Mission 5: Tip of the Spear