
Chapter 3 (Bodhi) Walkthrough - Baldur's Gate 2
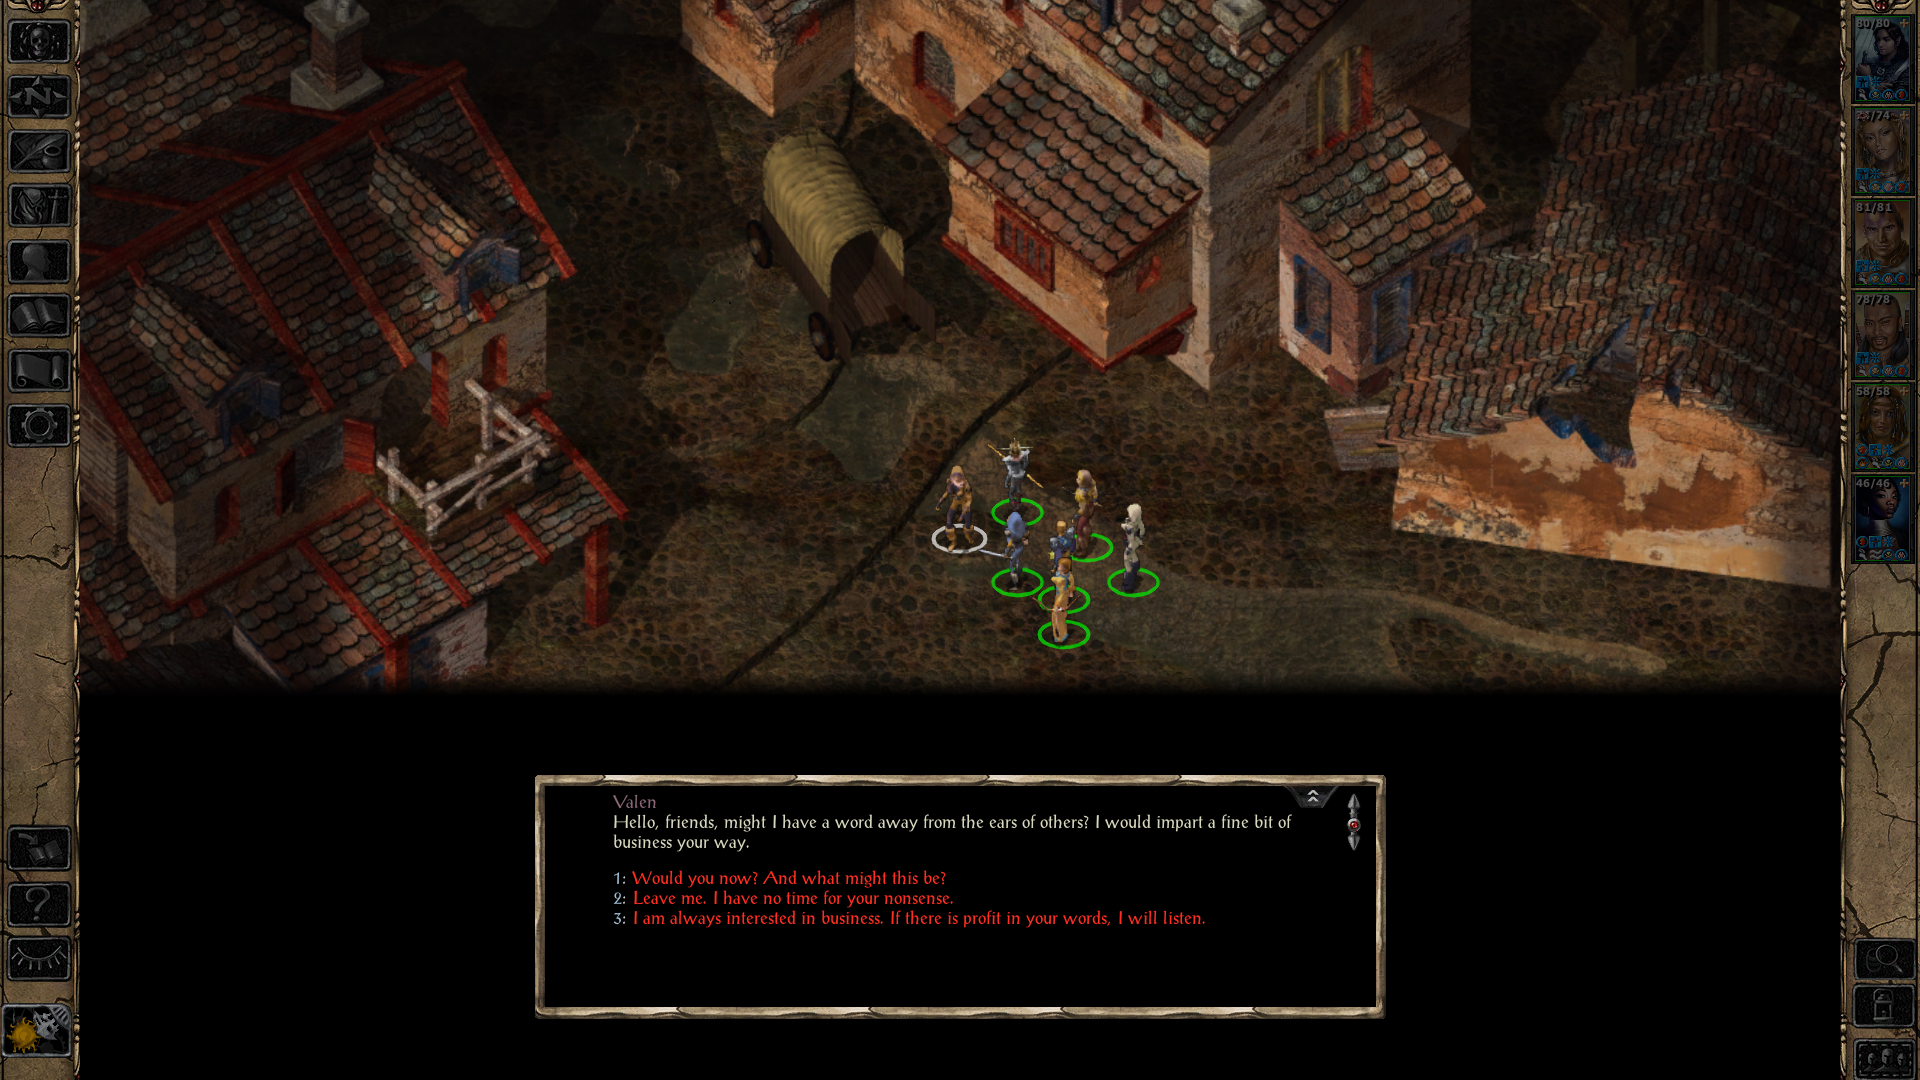
During Chapter 2 you will eventually be approached in Athkatla by someone named Valen (pictured above). She will ask you to meet with her mistress Bodhi in the Graveyard District to discuss a better deal than the Shadow Thieves are offering. When you visit the Graveyard District you'll find Bodhi waiting for you; she will make you the same deal that the Shadow Thieves did and ask for 15,000G.
As aforementioned in my Chapter 3 Walkthrough you should keep in mind that this is the "evil" route. If you accept Bodhi's offer and decide to work with her Keldorn and Mazzy will leave your party permanently (until Throne of Bhaal at least) and many of the other good aligned characters will whine about your choice.
If you choose to refuse Bodhi's offer that will count as a rejection and she will not make the offer a second time. So, be sure that you've made up your mind before visiting Bodhi in the Graveyard District. Choosing to work with Bodhi will earn you access to the Lower Tombs; you'll be able to collect the Mace of Disruption from the Pool of Blood in here during this Chapter only so I recommend you do it.
Note: If your main character is a Thief Bodhi will refuse to work with you.
Steal the Shipment from Mook & the Shadow Thieves
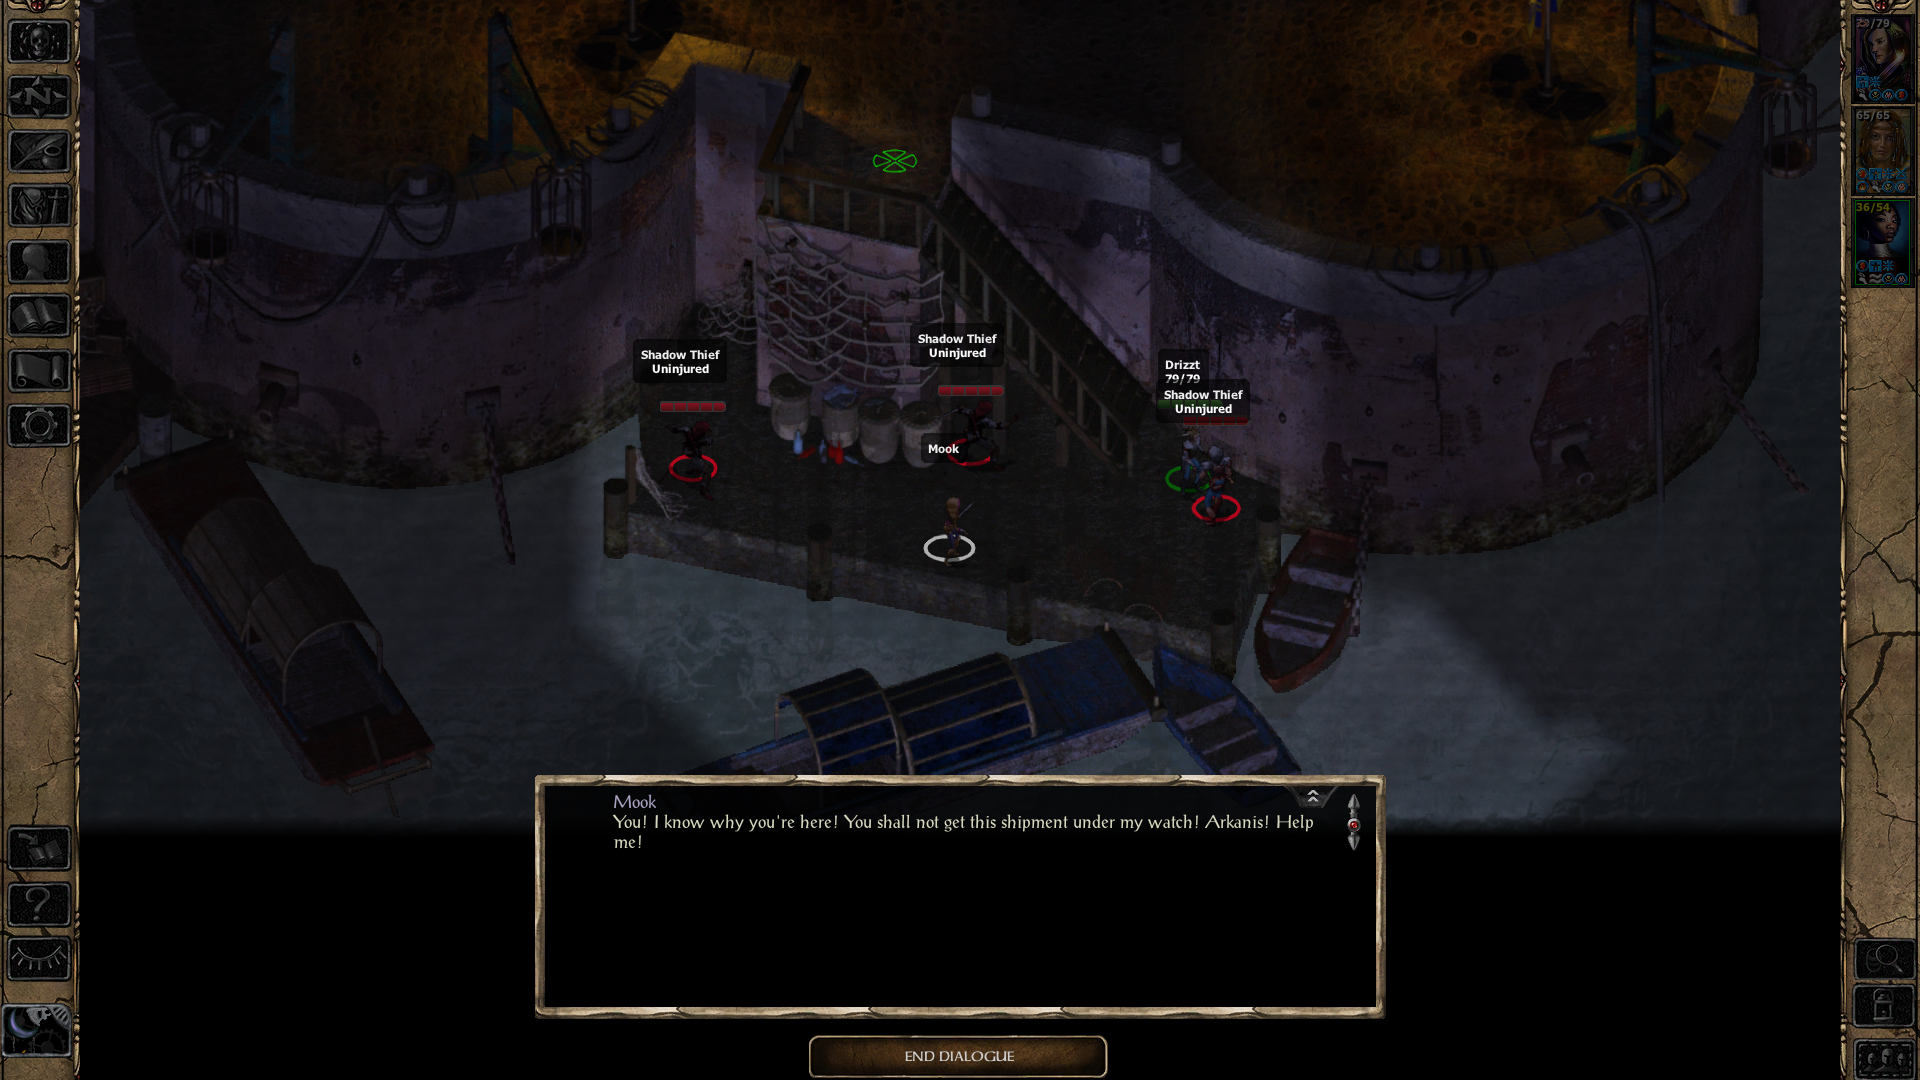
The first task Bodhi gives you requires you to go to the Docks District and steal a shipment from the Shadow Thieves. You'll find the area with this shipment in the southern most portion of the Docks District, the exact area is pictured above. There will be 5 Shadow Thieves guarding this shipment and you'll have to defeat them all to steal the items we need.
You'll find a Smuggled Shipment on the ground after taking them out along with Rifthome Axe +3 and Short Sword +2. Loot all of the items you want then return to Bodhi in the Lower Tombs to complete this first quest.
Perform a "sickly" Hero's Task or an Unseemly One
For this next quest Bodhi will give you 2 choices, you can choose the "good" path or the "bad" path. The good task involves rescuing a traitor from the Shadow Thief Guild Hall whereas the bad task involves assassinating someone in the Government District and planting items to frame the Shadow Thieves.
Good Path: Go to the Shadow Thief Guildhall in the Docks District and rescue Palern Flynn. The location of Palern Flynn is on the 2nd floor of the Shadow Thief Guild Hall, it's the same part of the building that you can find Renal Bloodscalp in. A picture of the exact location is shown below.
Evil Path: You will have to go to the Government District and kill Senior Armagaran Vulova. His house is located in the northern portion of the Government District, the exact location is marked on your map as the "Vulova Estate" which means it should be easy to locate. All you need to do is eliminate Armagaran Vulova and plant the items Bodhi gave you into the fountain of his house.
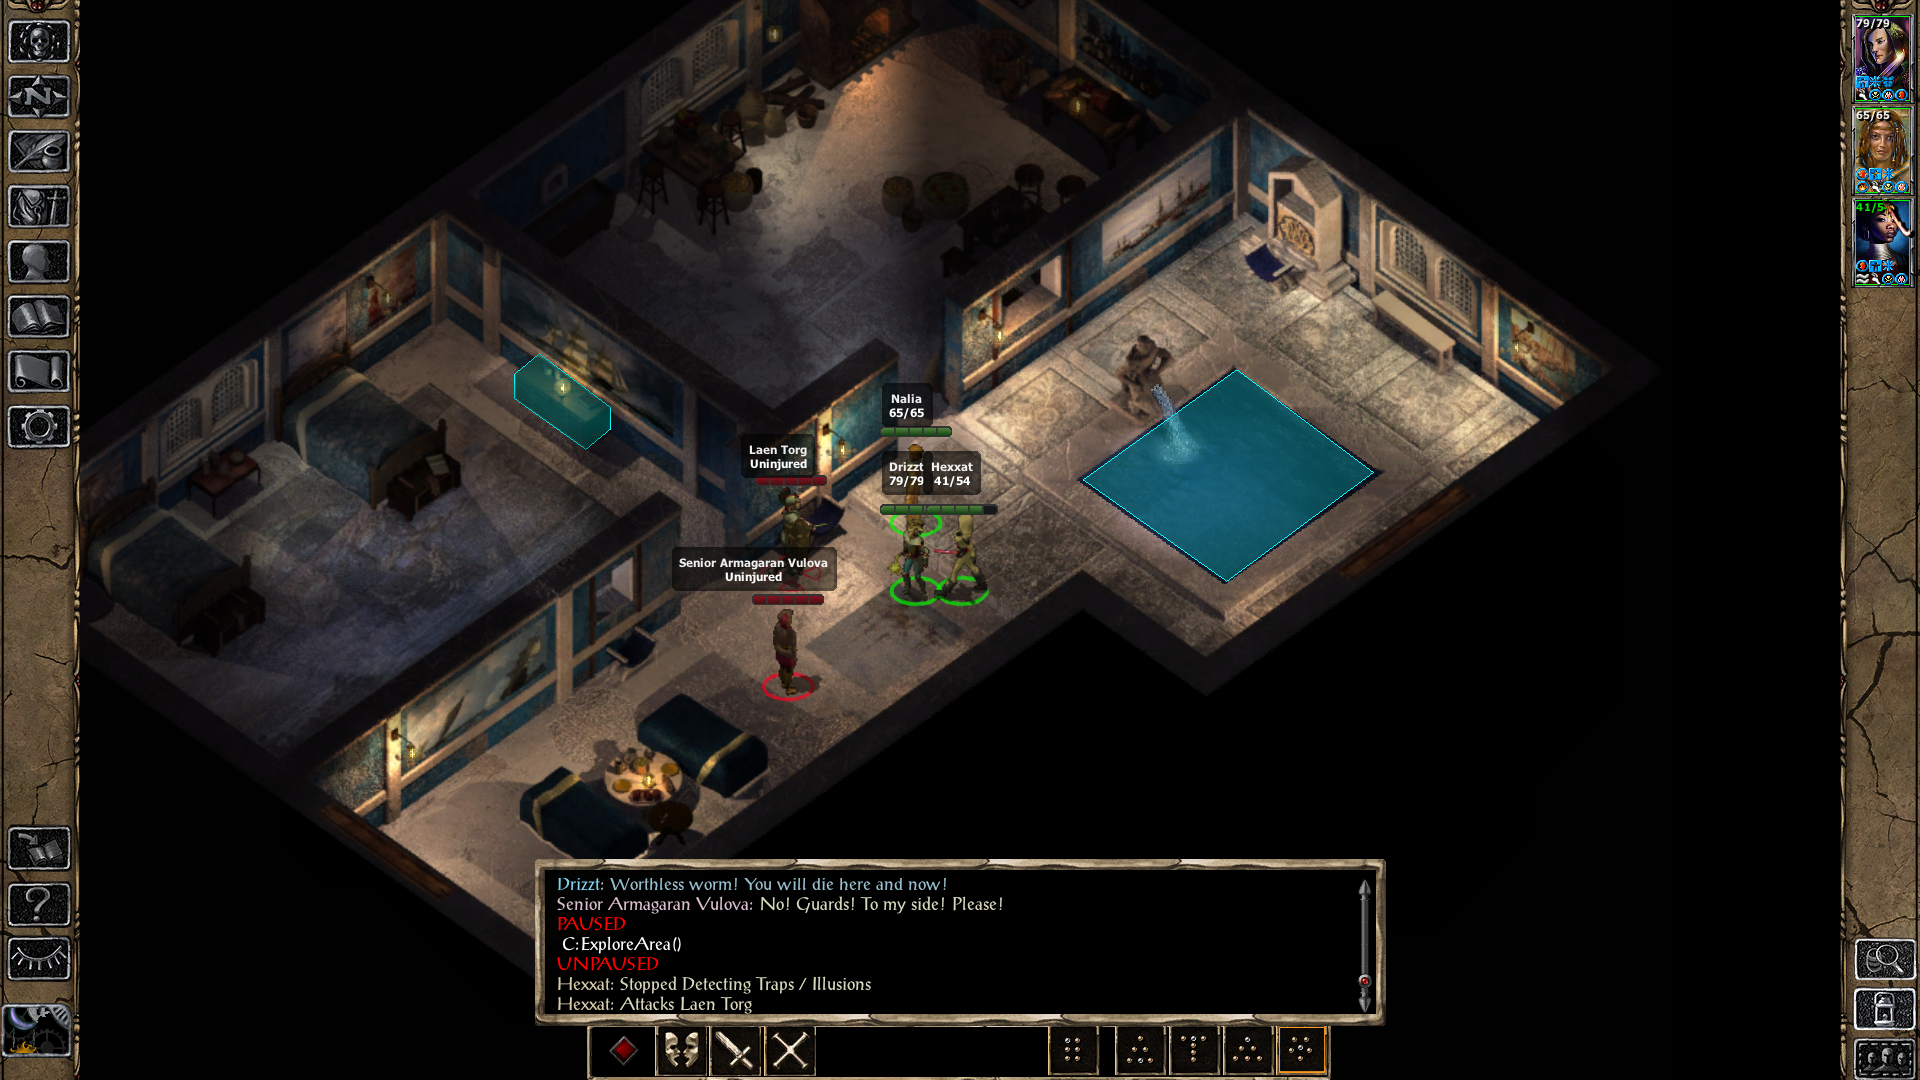
Vulova's Residence in the Government District
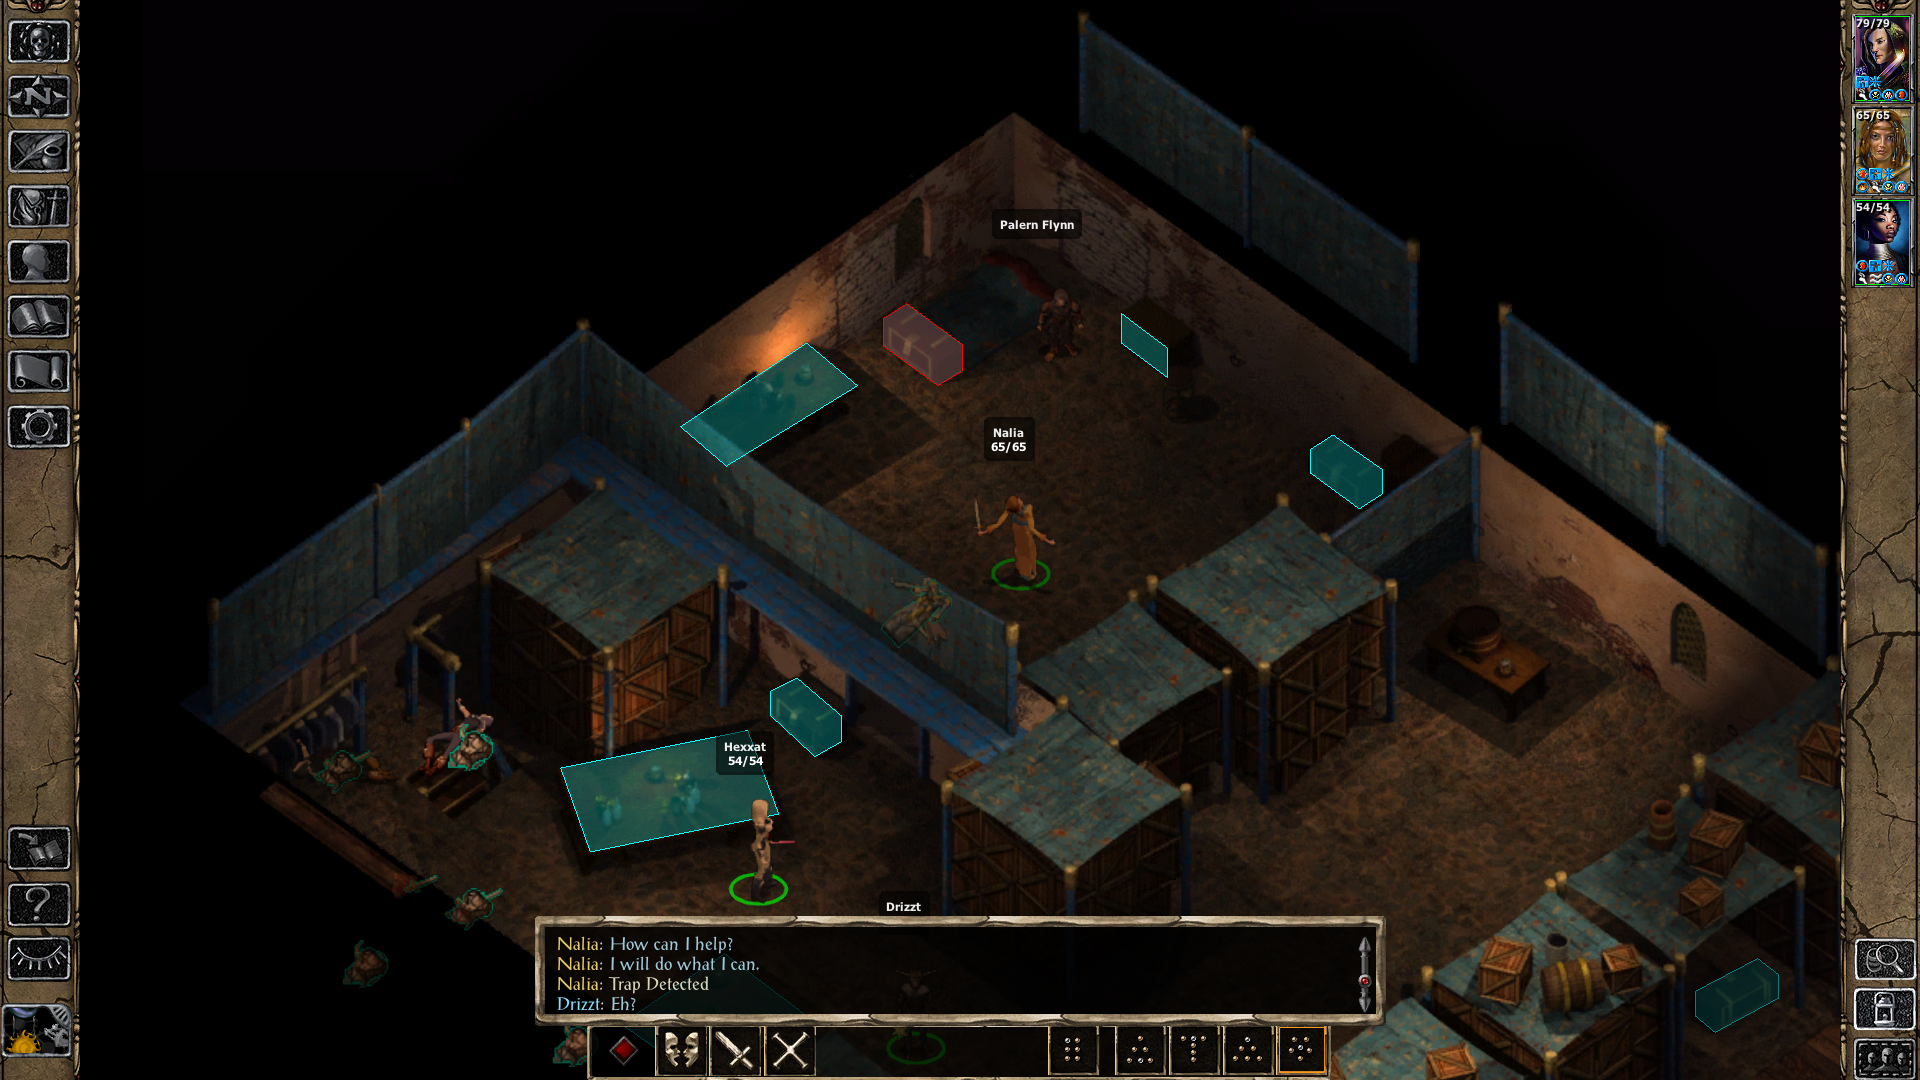
Palern Flynn 2nd floor of Shadow Thief Guild
Eliminate Aran Linvail in the Shadow Thief Guild Hall
Our final task from Bodhi is to eliminate Aran Linvail, the leader of the Shadow Thief Guild. Before we head to the Shadow Thief Guild in the western portion of the Docks District you'll first have to visit Gaelan Bayle in the Slums District. Gaelan is found in the same place you met him, his house in the northeastern portion of the Slums. Eliminate Gaelan and loot the Shadow Thief Cellar Key which we'll need to reach Aran Linvail.
With the Shadow Thief Cellar Key in hand you'll want to head over to the Shadow Thief Guild in Docks District. You can find the entrance to the cellar that holds Aran in the northeastern portion of the 1st floor of the Guild Hall. There will be a hidden door in the wall that the key will open. Once you're downstairs you'll have to accomplish 2 things before you can challenge Aran...
The 2 doors leading to Aran are locked and each are opened in different ways.
Button for Door: A button that opens one of the doors can be found in the northeastern most portion of this area. There will be a rotating pillar with spikes on it that you'll have to run across to press the button. Check my map screenshot below for the exact location.
Haz for Key: In a room to the south of the button you'll find Haz who holds the Key to Aran's Lair that we need. To reach Haz you'll have to travel down the adjacent hallway and through the 2 doors in the circular room with pipes. If you need help figuring out where everything is use my screenshot below.
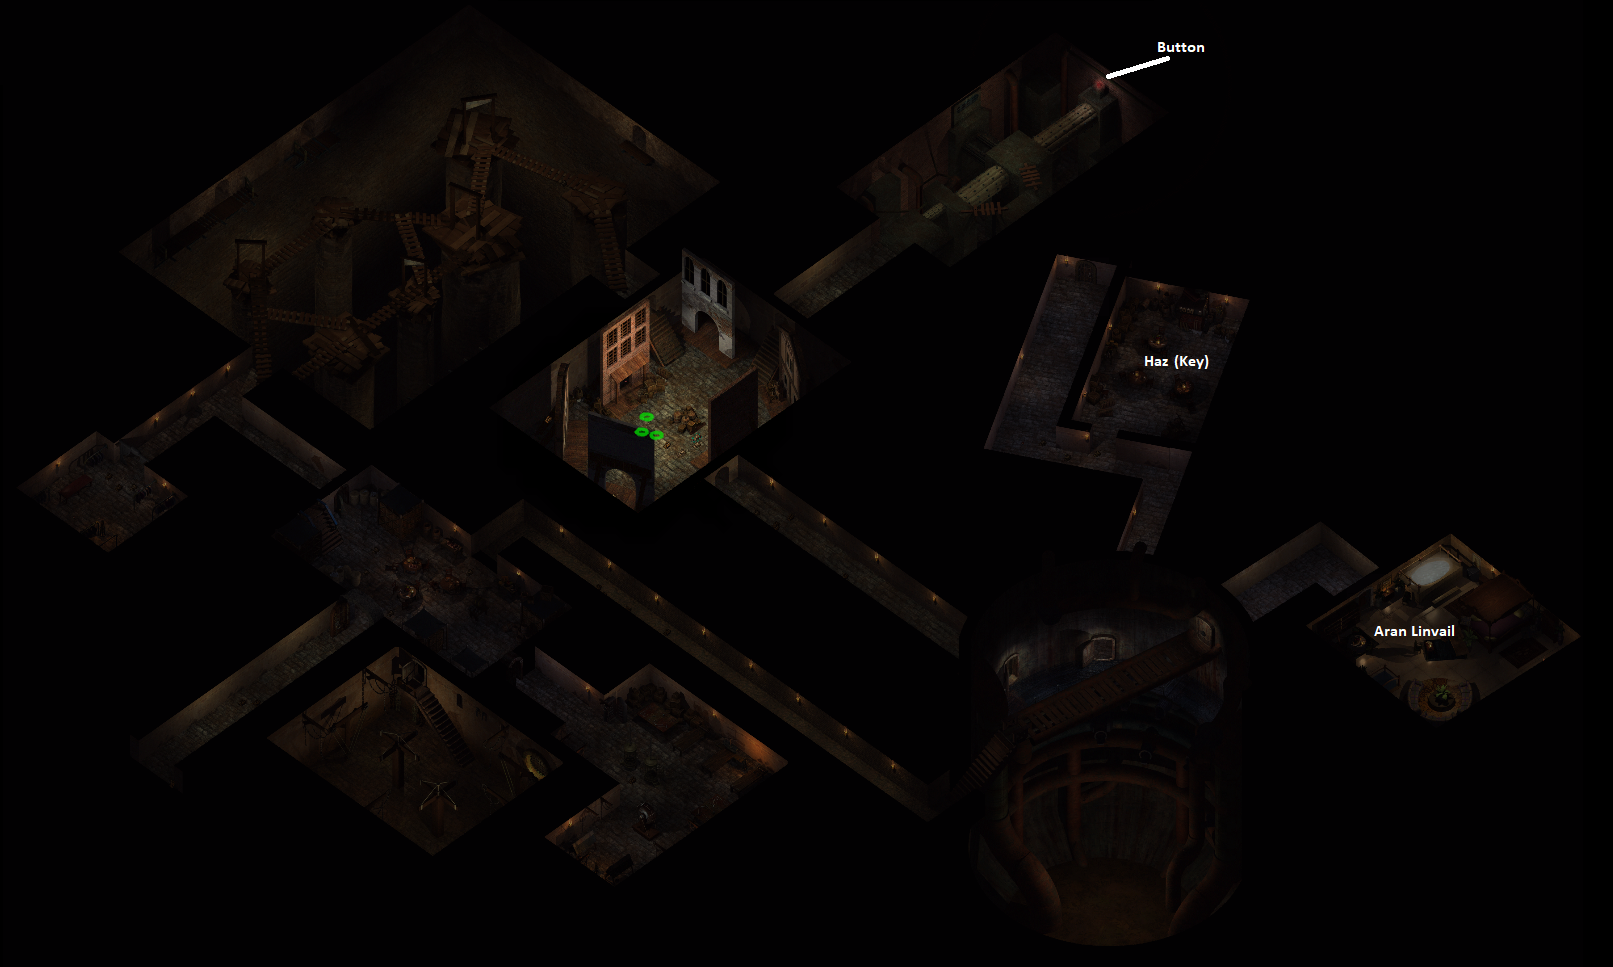
Map locations of everything important in the Shadow Thief Guild Hall
After pressing the button and obtaining the key it's time to eliminate Aran Linvail himself. You'll find Aran in the southeastern portion of this area, use my map screenshot above if you need help locating him. The fight with Aran will be a tough one as he has multiple protectors. Make sure you're buffed up and ready before entering the room.
With Aran Linvail defeated all that's left is to return to Bodhi and tell her the good news. During this conversation with Bodhi you'll have the opportunity to leave for Spellhold right now if that is what you wish to do. Just keep in mind that once you leave for Spellhold you will not be able to return to Athkatla until Chapter 6.
Continue to Walkthrough Chapter 4
Continue to (Shadow Thief) Walkthrough Chapter 3
Return to Walkthrough Chapter 3
Return to Walkthrough Chapter 2