Terranigma Walkthrough - Chapter 3 (Part 3)
At the end of the previous walkthrough section we arrived back in Nirlake after finishing Mermaid Tower and all of the subareas/side quests we could. If you missed those side quests and you'd like to complete them before you proceed you should return to Chapter 3 (Part 2) of my Walkthrough.
Tip: If you don't have any Serums in your inventory you should visit Freedom and purchase some! You will 100% need them for this dungeon and you'll most likely go through quite a few depending on how much fighting and exploring you do.
This part of the walkthrough picks up at the start of the Great Lakes Cave which is the next dungeon on our list to conquer. Once you show the Engagement Ring to Servas out front you will gain access to this dungeon. Head straight when you get inside, swim/jump across the strips of water and go west to find a chest with and Air Herb inside of it. This fills your final key item slot in the inventory.
Exit this room and look for the air bubbles in the bottom right corner of the top pool of water. Get into the water and press A while you're on top of these bubbles and you will travel underwater to a new area. Try to remember that you have this ability now that you've used it once.
Continue a bit further into the dungeon until you find a room with a big waterfall. At the top of this water fall you'll find a plant on a small island that shoots poison and a plant on the ledge on the right that also shoots poison. if you try to swim around in this water you will be pushed south and it will be very hard to escape.
Thankfully, there is an item for this! Position yourself far to the left at the top of this waterfall then let yourself fall down. If you position correctly you'll land on the ledge shown below that has a treasure chest. Inside of this chest you'll find the Magic Anchor item which allows you to swim in water with a current without being swept away! You'll need this item to complete the dungeon too so make sure you get it.
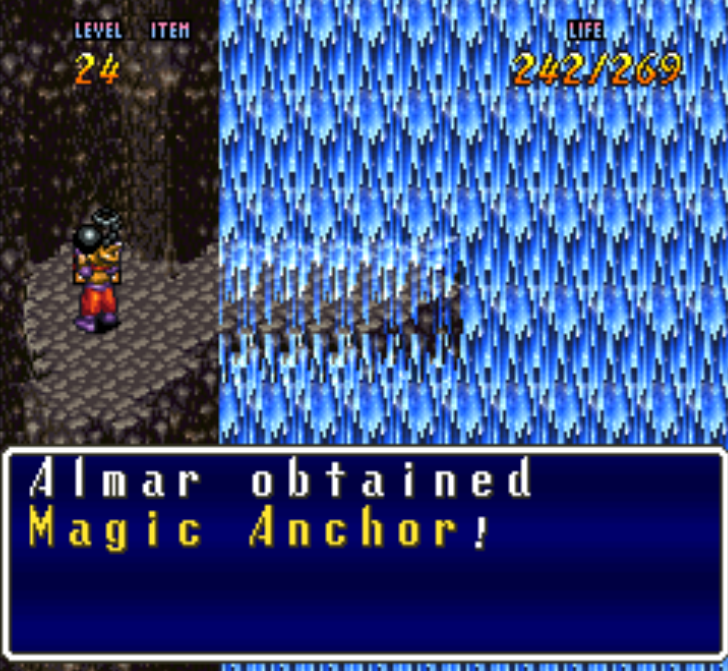
Make sure you get the Magic Anchor, we need it to advance the dungeon
At the bottom of this waterfall you'll meet a new type of enemy called Pupila. For the most part I try to avoid these enemies because they take far too long to kill. In order to defeat them you need to hit them when their eyes are open, don't use the Run+A attacks that you frequently use on other monsters. To defeat the Pupila you need to wait until they open their eye and then use your normal attack.
Keep progressing through the dungeon and you will eventually come across a chest with a GeoStaff inside, this is an upgrade for us. Go up the stairs near where you got this weapon and you'll find a small room with a drop down (pictured below). If you drop down here without doing anything you'll fall down to the previous room. To advance the dungeon what you need to do is pick up a rock and throw it at the wall with the running water - this will cause a rush of water to go down below and fill the room with water.
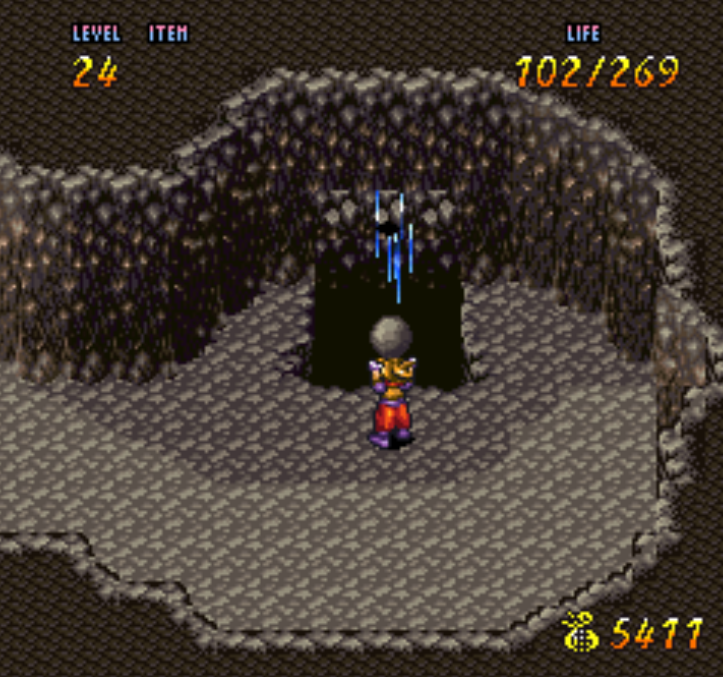
Throw a rock at the wall that is leaking water to fill the room below you with water
Fall down into the hole with the water and swim to the south to collect the Magirock on the small island. Continue east from this Magirock and you'll find a new portion of the dungeon. You'll eventually come to a very large room with a massive river going through it. Without the Magic Anchor item from earlier you won't be able to navigate through this area.
On the eastern side of this room (the same side you entered) you can find some bubbles in the water. When you press A on top of them you'll be taken to a small room with a single chest, inside is the DrgnMail item which probably isn't an upgrade for you if you did the side questing in the previous chapter.
Keep traveling through the dungeon and you will eventually come to a room with a waterfall that looks to be a dead end. However, if you look at the bottom right of the waterfall you'll notice a small opening that you can climb up into to continue. We're getting close to the boss at this point so make sure you're prepared for what is coming.
Eventually you will come to a large room with many hallways - all of which are filled with water. You enter in the middle of this room but our exit is actually a waterfall in the bottom right. When you take this waterfall down you will fall right into the next boss room (pictured below).
This boss is an interesting one, you don't actually fight the big creature at the top instead you fight a bunch of starfish enemies. Most of these are super easy to defeat, the only difficult starfish is the one that launches at you from the boss. In order to damage this one you will need to WALK across the log and have the starfish launch at you, when it misses you tap A a few times while facing its direction.
If you're having trouble with this last starfish it's very likely because you aren't WALKING! Trust me, I know, I love running too and it's a habit to always hit the button... However that won't help you for this fight, you'll just miss and miss and miss and have to eat lots of bulbs like I did. When you're victorious you'll get a HornPin, after you accept you'll be transported to a room with Will.
Speak with Will for a scene, when you regain control of your character you'll be in Nirlake. To solve the metal problem for Will you'll need to visit Yunkou which is the town in China. If you did the side quest part during the previous chapter you've already been here. Also, if you did the Chija's parent's side quest you'll be able to collect a Magirock at this time too from the family. This quest requires you to give a Pretty Flower to Chija to learn her name, tell her parents, then go back to Chija's camp and ask about her, then return here. Not all that worth it for a single Magirock.
As I said before, Yunkou is our next destination. You can find a picture of where this town is below, use the mini map if you need help locating this spot.
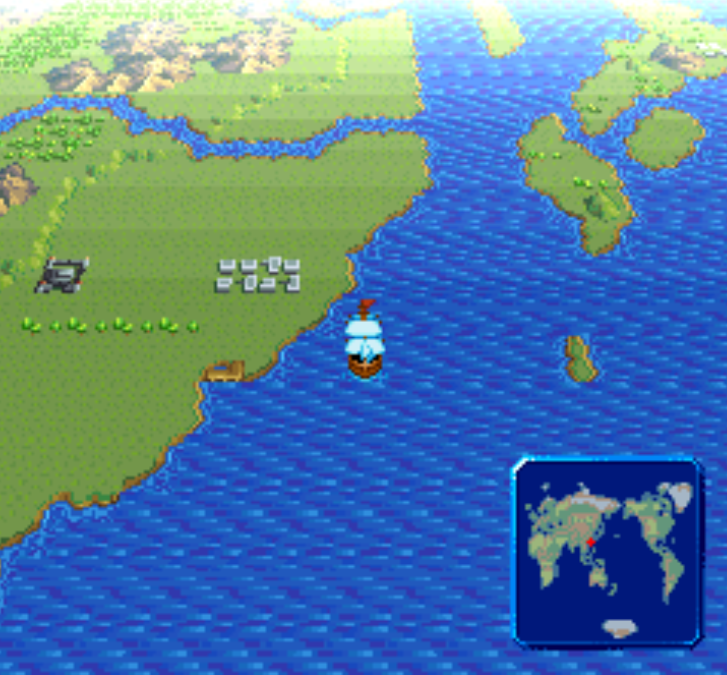
Yunkou location on the World Map
We have a few things to do in Yunkou and inside of the adjacent castle. First, visit the Inn inside of Yunkou and speak with Fyda in the bed. This starts a chain of dialogue flags which are tedious and I think it's best to explain it in a list format. A few locations can be hard to find so I go into detail below.
Yunkou Dialogue Flags:
1. Talk with Fyda and the girl next to her bed inside of the Inn
2. Visit the Doctor's building in the northern part of town and speak with him
3. Go to Lon's house in the northern part of town; to the right of the stall vendors near the doctor's you'll see a door next to a trash can. Enter here. Talk with Lon to get the Ginseng.
4. Return to the Doctor's building and speak with him again to learn how to use the Ginseng.
5. Finally, return to Fyda and equip/give her the Ginseng, you will enter her dream to cure her nightmares too
That covers the bulk of the dialogue flags we need. I got to admit too that I am totally digging the dialogue for this part of the game... At least on the original SNES the translation is... very bad but it's also very funny. But I would argue that's part of the charm, right? Aiyeah!
Inside of Fyda's dreams you'll learn the truth of what haunts her. After the scene go outside and speak with Perel who is riding his skateboard around on the road. There will be a bit of dialogue with him and as he says, "Yo bro! Let's go hit Dragoon Castle!"
Head over to Dragoon Castle and Perel will distract a guard so that you can enter. For this part of the game you won't be doing any combat, instead you'll have to play Mr. Secret Agent Man and sneak around the castle. If you didn't get the Speed Shoes which I talk about during Chapter 3 (Part 2) of my Walkthrough then you need to go back and do that now. Without these shoes you can't complete this dungeon.
Upon first entering Dragoon Castle, I recommend you use the NE and NW exits first. Both of these routes will lead to a lot of optional treasure. When you're ready to tackle the story objectives - from the entrance go straight. There will be multiple guards in your way along this route and it will be difficult to dodge them all. Eventually you will get to the room shown in my screenshot below.
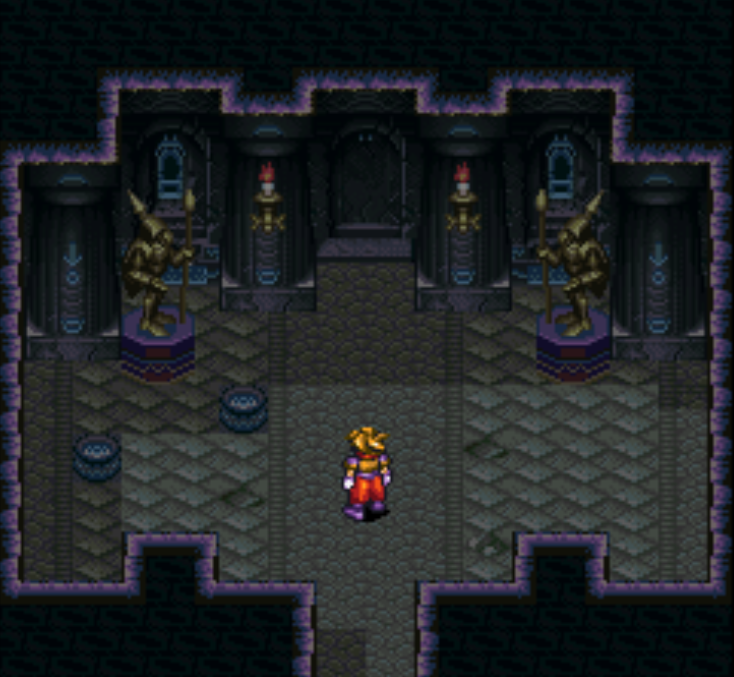
Equip Speed Shoes and charge at the wall in the north to open a passageway
What you need to do here is equip your Speed Shoes and then hold X to charge at the wall in the north. Hitting the wall will open up a new passage and you'll have to dodge some guards again, thankfully this time it's pretty easy. Exit through the doors in the north to find a large castle basement, this area is the same boss arena from the first part of the Bloody Mary fight.
A Magirock is found down south and our story objective is found in the north-central part. There will be a long scene and when you regain control of your character you'll be in a jail cell. Go north and Fyda will save you, jump to the chain and when you regain control exit this room. You'll want to get caught by the guards so that we can go back to the beginning of this dungeon.
Fyda said to check out the east side of the castle and this is where we're going too! Start at the entrance of the dungeon and go northeast, you'll have to dodge a really annoying guard on the second floor up here. What I recommend is to bait him down (keep the cone of his vision in your sight) and wait until he turns to the left (facing the wall). This made it easier for me to cross.
The path from here is pretty linear, you'll see illusions of Princess Elle and you'll be lead down the only path which wasn't open previously. Here you'll have a scene with Meilin and Fyda during which Meilin gets a lesson in love. Exit the room and speak with Meilin in the previous room for another scene during which Perel comes to your rescue. Well, there is a turn of events I did not see coming.
Return to the entrance of the castle again and this time you'll want to go west. If you follow the linear path you'll come to the area shown in my screenshot below. Here you will need to throw pots at the candlesticks to extinguish them, doing this to all of the candles will open the door in the north.
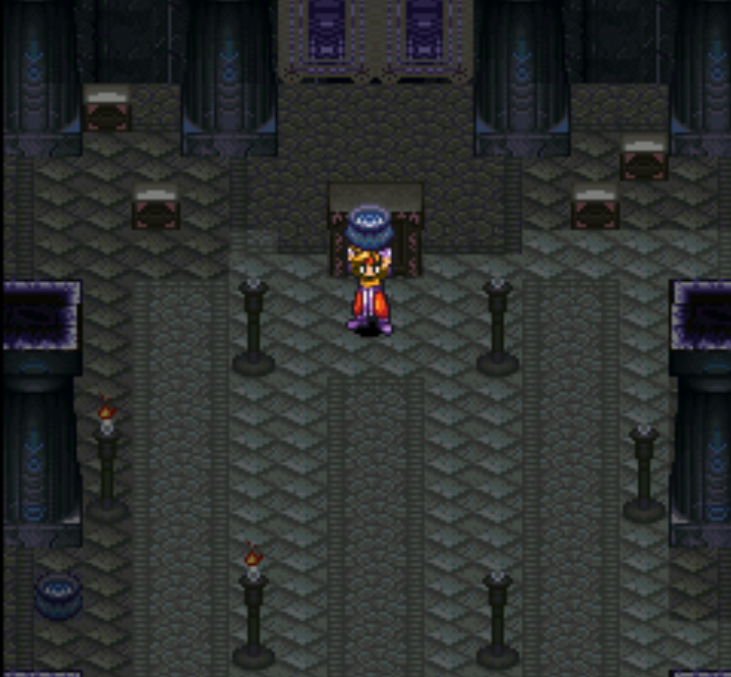
Throw pots at each of the candles to put them out
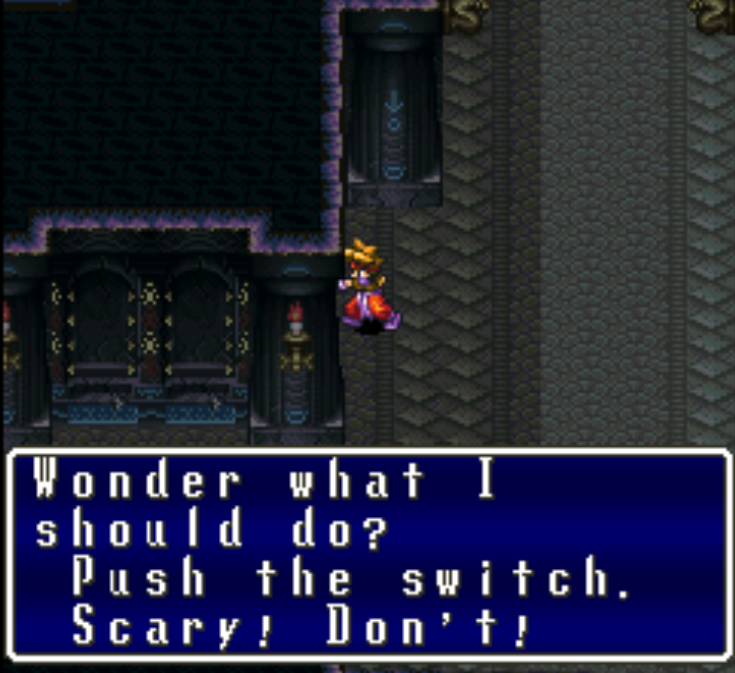
The switch is found on the wall opposite of the statue right when you enter
In the next room you'll have yet another puzzle, for this one you will need to find the switch on the opposite wall of the unpaired maiden statue. Remember what Meilin told you? When you enter this room the unpaired statue is the very first one that you see. A screenshot of where you can find the switch is shown above.
Push the switch and then run into the room far to the north. Inside of this next room you'll want to use the speed shoes to dash into the wall to open up another path forward. Go straight and you'll find Princess Elle, speak with here for a scene after which you'll need to make your escape. Talk to and follow Meilin when you run into her, she will take you to our exit.
After a little bit of running Elle will ask to be left behind, strange, but there isn't much we can do about it. Continue onward and you will have a few more scenes before you're done with the dungeon. Return to Nirlake and speak with Will, he will have completed the Airplane and this will allow you to fly around the world instead of sailing!
Exit Nirlake and go south to Freedom, you'll see a long runway next to it now. While standing on the runway press A and you will take off and be able to fly around. You can only land on other runways - but thankfully where we're going there is a runway! To continue with the story you'll want to fly to the middle-northern portion of the large central continent. Use my screenshot below if you need guidance for an exact location.
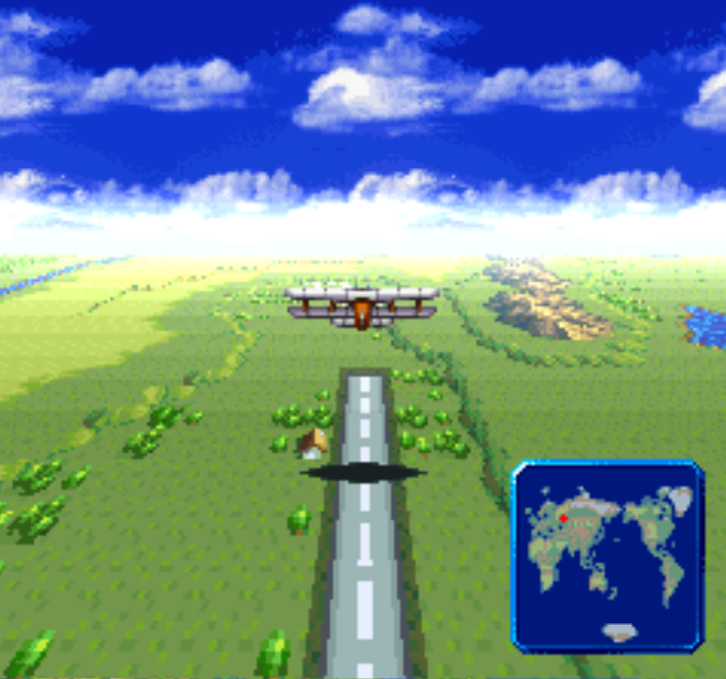
Mosque & Dr. Beruga's Lab Map Location
When you land there will be 3 different places for you to check out, we'll start with the two optional ones first. The first is a subarea to the east of here, it's a small cave entrance located in Siberia. Inside of this cave you'll find the BlockRod weapon which is a unique weapon (it fills one of the four middle slots in your weapon inventory). When using the BlockRod every 5 STR becomes 5 DEF instead; the EnbuPike does the opposite.
Mosque is the second optional area, you'll find this town north of the runway that we landed on. The only notable loot inside of here is a Magirock. Directly south of Mosque you'll find our next dungeon, Dr. Beruga's Lab. When you first enter the lab you'll have to follow the path right until you reach a large room. Go south a little bit and make sure you go left at your first opportunity; this will put you in a room with a switch that you can press to turn on the lights in here.
Return to the main path and follow it to what seems like a dead end. You can actually crawl under the pipes here to a new part of the dungeon. Pick up and throw away the brown cork-looking thing here and crawl under the machinery to reach a chest with SoulArmr inside of it.
Defeat the robots and follow the linear path to another machine with a switch that you can press. This one restores the main power to the facility. Return to the long hallway near the entrance and board the elevator to the south. In order to make the elevator go you'll need to press both switches on it. In the next area you'll have to crawl under another tank, just like we did to reach the SoulArmr earlier. A picture of where you have to crawl is shown below for anyone stuck.
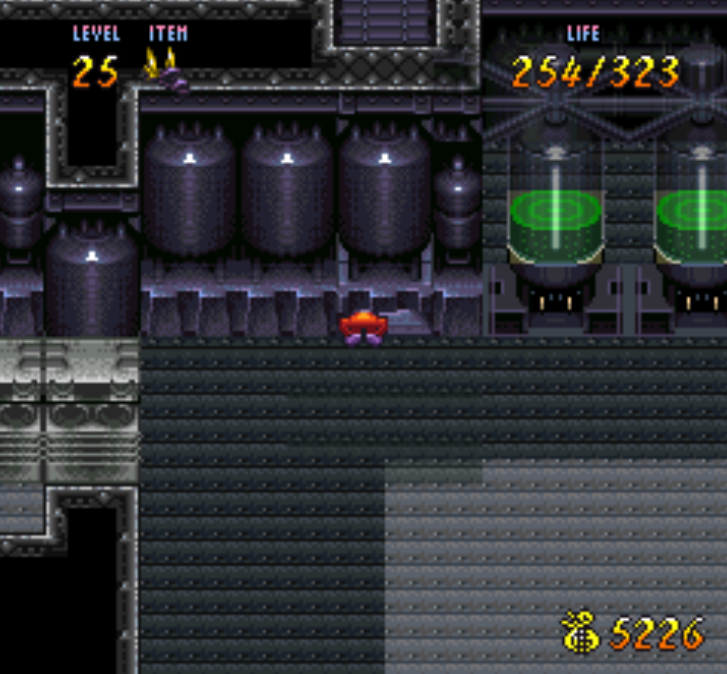
Crawl under the tanks to advance
After you crawl under the tanks follow the path until you reach a teleporter - you'll have to literally jump to get inside of it. This teleporter will take you to the left hand side of this room, follow the route forward until you reach the room shown in my screenshot below.
This room is arguably one of the best grinding locations in the entire game. It's a small room with four enemies, each will give you about 100 EXP per kill. You can go from right to left and then left to right in the room and reset it from each side. Another reason this makes such a good grinding location is because this is where you're forced to grind!
We have another boss coming up that will require you to be at least level 30 for you to stand a real chance. Unless you have done a lot of grinding previously you'll probably have to stop now to catch up. Thankfully it should only take you about 30min of grinding but it's still a lot of time doing the same exact thing over and over, I know.
Beruga's Lab Best Grinding Location
Once you're done grinding and ready to advance the story you'll want to hit the switch in the room pictured above and then exit to the east. Return to the elevator and hit the switch on it to ride it down further. In the next area jump onto the conveyor belt and take the left teleporter to a DEF Potion. Return to the room with the conveyor belts and go through the right teleporter to continue with the dungeon.
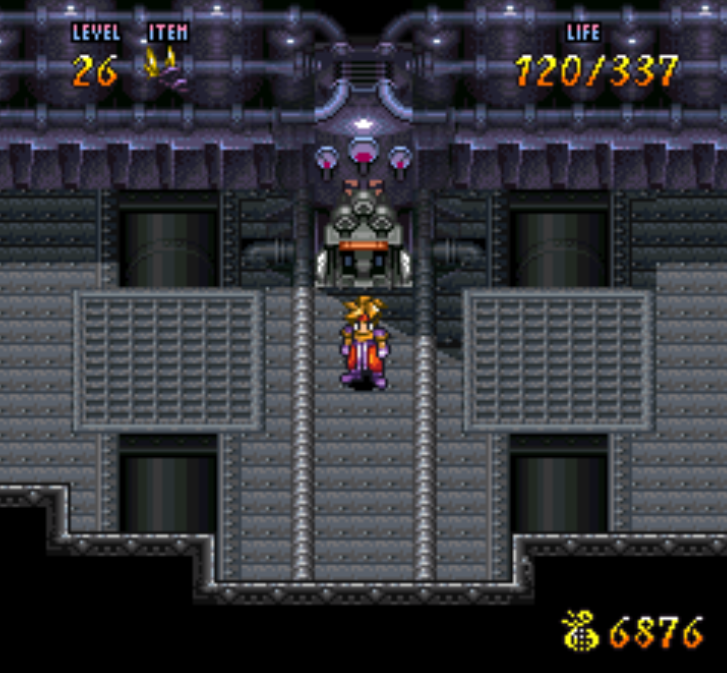
Follow the path to find a computer, when you interact with it you'll get a scene with Yomi. After the scene is over interact with the computer again and then return to the elevator and ride it down to the final floor. This is where you'll fight the boss of this dungeon - which is a giant robot.
The main attack from this boss that you need to be worried about is the whiplash attack which will reduce your STR to 1 for a little bit of time. I was level 32 at the time and I ate the boss alive. Just do the Run+A attack repeatedly and you'll win. Continue north when it's over and speak with Beruga, you'll have to follow him south a bit and then talk with him and a zombie.
When you approach him again he will have some robots attack you and there will be a short scene. You'll regain control of your character in Lhasa.
Return to Chapter 3 of my Terranigma Walkthrough
Return to Chapter 3 (Part 2) of my Terranigma Walkthrough
Continue to Chapter 3 (Part 4) of my Terranigma Walkthrough

