E.V.O: The Search For Eden - Walkthrough
EVO is an incredibly unique game and is quite challenging - as most games of this era can be. The English release of this game is actually significantly more challenging than the Japanese one due to one major change... In the English release the amount you get knocked back after each hit is very small. This results in you getting stun locked by enemies very often (especially bosses). Once a boss gets on top of you it's almost guaranteed game over.
I imagine that the majority of you playing this game today (2024) are doing it on an Emulator. This is good because it means you have codes which I think are required for enjoyment of this game. Normally I won't encourage code usage in a Walkthrough like this but for this game I kinda think I have to.
The difficulty of the bosses in this game and the changes to the mechanics on the English release make it a frustrating experience and not an enjoyable one. Nowadays we don't have time to spend 2 - 4 hours retrying a boss over and over because we keep dying to cheap/broken mechanics. We got other games to play and better stuff to do! At the end of the day, you do you though. If you disagree with me feel free to play without them!
You should expect a lot of grinding from this game too, you will be repeating the same few levels over and over many times until you get the EVO Points (EXP) needed to level up your creature. Choosing the right evolution paths are very important and they will make or break your creature.
Before we jump into the walkthrough/guide for the game I felt that I should break down the various evolution types and explain to you what they all do and what their value is.
Jaws: For the most part, this is the most important evolution of them all because it determines how much damage you deal with each hit. You'll always want to get the most powerful jaws first when you're evolving your creature.
Horns: As most guides will say, these are quite worthless if you use them to attack. The only horn I liked was the Angler Horn from Chapter 1 since that let you farm EVO very quickly in one of the maps. Most people who use horns use them to heal up during a fight because if you evolve during a fight you'll fully heal.
Body: Pretty much all body types decrease your movement speed but increase your HP. This trade off is typically well worth the cost. You can also increase or decrease your body size after buying the best body type available; this uses the same logic. Smaller body = more agility & less HP. Larger body = less agility & more HP.
Dorsal Fin: In each Chapter these do something different. In Chapter 1 (when you're a fish) they increase Speed and HP. Once you get to Chapter 2 they increase HP and jumping power. Finally, during Chapter 3 they increase defense and HP. In my opinion these are typically worth the cost, they're less important during Chapter 3 but as a whole they're an important evolution to make you more powerful.
Tail: Much like the Dorsal Fin, tails change what they do from Chapter to Chapter. They almost always provide you with some HP and Jump height/Speed/Agility. When you're a fish they make you go faster, Reptiles they will make you jump higher and for Birds you'll be able to fly longer.
Back of the Head: These transformations typically give you small bonuses to a variety of stats. Definitely worth getting but it isn't always clear which is the best - read what each one does and make your decision (or use my guide below).
Neck: You can shorten and extend your neck through evolution. This is regarded as one of the best ways to heal yourself during the game.
Chapter 1: The World Before Land
Grind EVO points for the Kuraselache's Jaws as soon as possible, this will be your first upgrade. All of the early levels are very straight forward, progress through them all as far as possible until you reach the Ocean of Terodus level. Unlock the Angler Horn and then farm this mission until you have all of the upgrades that you need for your fish. This level will give you tons of EVO points if you have the Angler Horn, it's by far the best farming level in Chapter 1.
Tip: On the Cave of Zinichtys level keep going straight after you enter the cave until you reach the Blue Crystal. After that keep going down until you cross the volcano area to the exit.
All in all this is a rather easy chapter, the hardest part will come at the end when you face off against the boss. You'll understand why I encourage code usage when you fight him.
Important Evolutions:
Kuraselache's & Zinichthy's Jaws: These two evolutions will be your primary forms of damage during this chapter, you will want to get the Kuraselache's Jaws first and then a few body/fin upgrades. After you get the important basic body/fin upgrades you'll then buy the best jaw.
Angler Horn: This evolution is only useful for the Ocean of Terodus level. You'll be able to use the Angler Horn to attract enemies to you and this will let you farm EVO Points better than any other level during this chapter. I strongly recommend you get this upgrade for that level specifically.
The rest of the evolutions are obvious, just pick the most expensive/best in each category and that's what you'll use. Cave of Origin is the final level for this chapter and you will fight your first boss here. You can reach the boss by traveling through the cave at the start of the level and then through the open ocean and back into another cave. Believe it or not, this is a rather easy boss in the game despite how hard it is!
Kuraselache is the name of the boss for this Chapter and he's a giant extremely fast shark. I have two pieces of advice for you when it comes to this boss, the first is to try and make the boss run into the wall when he charges after you. Position yourself with a rock between you and the boss and he will slam into that instead of you! This will stun him for a second and allow you to get a hit.
My second and better piece of advice is the same advice that I am going to give for every boss in this game. During the fight you can evolve parts of your fish to regain your lost HP. For example, growing any Horn will restore your HP. This means you can rotate between two crappy upgrades each time you need to heal.
Considering how difficult this game is, I can't imagine beating it without using this healing tactic. I will bring this up for every boss, but you should keep it in mind for the rest of the game too.
Chapter 2: Early Creatures of Land
The first map you'll want to grind is called Land of Bull Ikustega. You should get the first jaw upgrade here along with some of the other first upgrades. I recommend you get the Thorny Spring Tail as well because it will make the next boss much easier. Grinding extra EVO Points wouldn't be a bad idea too incase you need to upgrade during the boss fight to heal.
Our second grinding map will be the Domain of Profasu which has cockroach enemies. Many cockroaches will charge at you and so long as you have the Fierce Jaws you'll one shot all of them. I strongly recommend you grind out all remaining evolutions on this map before proceeding further into the Chapter.
Important Evolutions:
Tusking Jaws & Fierce Jaws: You'll want to get the Tusking Jaws as fast as possible (and typically as your first upgrade). I recommend purchasing the Fierce Jaws after getting a few more upgrades and advancing past the first grinding zone.
Scaly & Armor Body (+Increased Body Size): Scaly is the first body upgrade you'll want to get, Armor is the best body upgrade. I recommend you get Scaly before leaving your first grinding zone - do Armor later on when you need it. Once you're done with Armor get the Increased Body Size.
Thorn or Jumping Dorsal Fin: Thorn Dorsal Fin will give you more HP and the Jumping Dorsal Fin will let you jump higher. I prefer the Thorn Dorsal Fin personally because the spring tail gives you enough jump boost.
Thorny Spring Tail: For the tail I go straight to the best one, which is definitely the Thorny Spring Tail.
Back of the Head: Each of these do something different, the Jeprol is one of my favorites since it makes your bites do more damage. However, I kinda like Kerll a lot too because it makes you move faster and that makes it easier to dodge and avoid damage etc.
Your first boss of this era will be Debustega - a giant frog who will spit and jump around. You'll face this boss in the Land of Boss Ikustega which is only the 6th map that you come across in this chapter. My advice for this boss is to deal damage by jumping on top of him instead of trying to bite him. If you need to heal during the fight purchase a cheap Fin/Horn upgrade for an instant heal.
After beating this boss you will come across the Domain of Profasu which has a bunch of cockroach enemies that come at you. Each one will give you 40 EVO points per meat and if you have the Fierce Jaws you can defeat them in one shot. Farm here for a long time, until you get all of the upgrades you need.
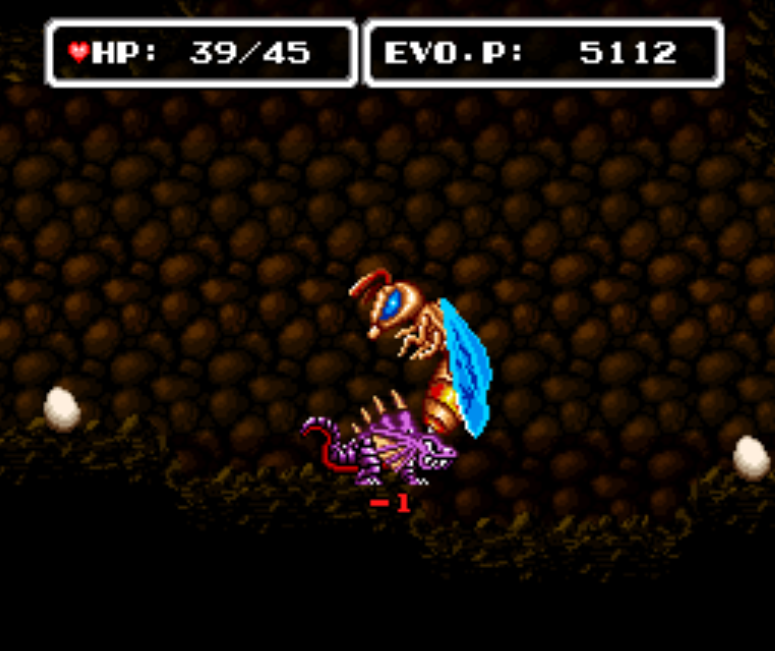
The next boss you'll be fighting is the King Bee (pictured below). For this boss what I recommend is avoid the stingers it shoots at you and then wait for it to dive bomb you. When this happens you can jump onto the back of the boss and deal some damage. From my experience, trying to bite this boss and deal damage that way is a fool's errand.
Once you beat the King Bee you'll have a few more levels to complete and then you'll have to challenge the Queen Bee. The Queen fight is exactly the same as the King - just like before my advice is to pounce on her back to deal damage instead of trying to bite her. If you're going to try biting my advice is to wait for the bee to lunge at you and bite when it pauses briefly post-lunge.
Like always my biggest piece of advice for this is to save some EVO points so that you can heal during battle. These bosses are hard and this game is not easy so it's best to have a way to heal yourself if you're not using codes. Even if you are using codes, having a way to heal yourself is still important.
Chapter 3: Age of Dinosaurs
This chapter throws the first real quirk into the game - the ability to transform into a bird! If you're interested in becoming a bird you will have to wait until you reach the Mt. Brave area which comes a bit later in this chapter after beating the boss. Before you get to that area you'll have to first tackle the boss in the Domain of Prime Frog map.
I recommend you stop in the Domain of Polsaurus map and do some initial grinding here for better jaws and something that will improve your movement speed. Honestly, there aren't many better EXP grinding locations until much later in this chapter; this is kind of the best you'll get for awhile.
Important Evolutions:
Tyrasaurus Jaws: These jaws cost 5000 EVO Points but they offer the strongest attack power.
Pronesaurus Dorsal Fin: Increases your defense and HP. Doesn't do anything for movement speed.
Nautilon's Body: This is the best body for defense and HP.
Ptenodon's Crest: Back of the Head transformation that increases your speed. Tritops increases Def/HP and Horned increases Strength & HP. I prefer speed because you go too slow in reptile form and you need more speed.
Invincible Tail: Out of all the tails, this is the best. I recommend you save up just for this one.
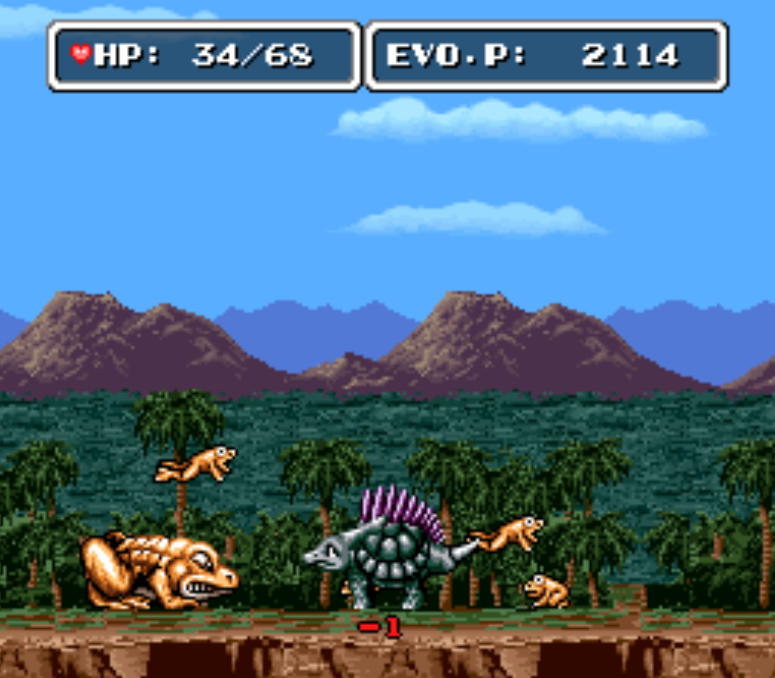
When you get far enough into this chapter you'll find the first boss, Prime Frog. This boss leaps very high and spawns tons of smaller frogs which will attack you. It's easy to take out the smaller frogs with bite attacks but it's harder to hit the boss with a bite. Much like before, I recommend jump attacks to damage this boss - but if you're better at the game than me and you can time bites properly... go for it!
If you get low on health during this fight I recommend you extend or shorten your neck over and over to reset your HP. For those of you who decide to play this game legitimately, I would recommend you farm 10,000 EVO points prior to this boss fight so you have enough to extend and shorten your neck as much as you need.
The next big thing that takes place during this chapter is the bird transformation which happens in Mt. Brave. When you reach the Mt. Brave map you'll need to jump up to the very top of the mountain, you will actually zone into a whole new area while doing this. When you reach this new area you will get a text pop up letting you know exactly how to transform into a bird.
From the top of the mountain you'll want to sprint west and jump off into the sky. As you're falling to the ground you will transform into a very weak bird. You'll start with 0 EVO points and life will be quite difficult for you, I recommend you go back to the original map that you grinded points in because you'll have to start all over again.
Once you become a bird you can also unlock a secret level during this chapter. Wait for the cloud that bounces around the World Map to go over top of one of the areas - when it does enter the area and you will fly up to the cloud instead. There is one Red Crystal to find inside of this cloud, go straight up to the second junction then all the way over to the right. You'll find the Red Crystal that lets you transform into a Dragon (pictured below).

Full credit goes to original author of the image
After transforming into the Dragon you should record it in your journal because it's a useful transformation for boss fights. If you need help finding the Dragon transformation, use the screenshot above. Full credit goes to the original author as this definitely helps navigating the area.
There is another area that comes after the Cloud Maze too, it's called the River of Asteroids. There is another red crystal here, you can find it inside of the middle asteroid. Eating this red crystal will transform you into a Gargoyle. Inside the asteroid on the far left you will be able to find a blue crystal which will give you 9999 EVO Points when you eat it. There is also an alien inside this asteroid, it's pretty funny.
When you're done exploring the maze and the asteroid belt you can exit back to the World Map by pressing L or R. All that's left of this chapter is a few more levels, the final level will be called Domain of Tyrasaurus. You will be given the option of joining the T-rex which will result in a funny cutscene if you say yes.
Saying no is the only way to progress forward, once you say no you'll have to defeat a total of 10 Tyrasaurus to advance. After defeating 10 T-rex the sky will begin to fall and the extinction of the dinosaurs will begin.
Chapter 4: Ice Age
At the start of this chapter you will be given the choice to stay a reptile/bird or to evolve into a mammal. You can technically beat the game as a reptile/bird if you'd like but I would recommend you become a mammal so that you can experience the entire mammal evolution chain and (if you'd like) transform into a human.
Of course, if you choose to go the mammal route you will have a lot of grinding to do; the first place you'll have to grind is the Cave of Deltadium. Creatures here don't reward many EVO Points but they're easy to defeat. Like always, start with Jaw upgrades to increase your damage then move into other upgrades.
Important Upgrades:
Fierce Jaws: This is the best set of jaws that you can use for your mammal. You'll have to use other jaws depending on what you'd like to transform into as well.
Horse & Rhinoceros Shaped Body: In my opinion these are the two best bodies. Choose the Horse if you want more speed and choose the Rhinoceros if you'd like to be as tanky as possible.
Back of the Head: Typically the Mane is what's best to get. Getting a Mane means you can't get any horns though.
Human Evolution: Get Cat Like Jaws and Rabbit Like Body evolved onto your mammal. Once you've done that choose the Ramothecus Body evolution (warning - this is permanent). You'll have to go through a few more evolutions but it's permanent once you choose Ramothecus Body.
Mermaid Evolution: This transformation is unavailable until Chapter 5 but I am bringing it up now because if you transform into a human you'll lock yourself out from getting this. I'll tell you how to become a Mermaid later during that chapter.
The EVO farming locations for this chapter aren't the best; the best one available is Domain of Balrium. You'll find rhinos in the desert here that give 90 EVO each. If you're someone who doesn't mind using codes then I recommend the T-rex mobs instead since they give 250 EVO points per kill. You do you.
As you explore during this chapter you will very likely reach a level with an ice wall that you can't by pass. You'll have to wait until you beat the Mammoths and the Bird-man Fortress to pass through this area. The Mammoths will be the first boss you fight of this chapter and it's going to be a tough fight... but not nearly as tough as the Yeti fight that is coming up.
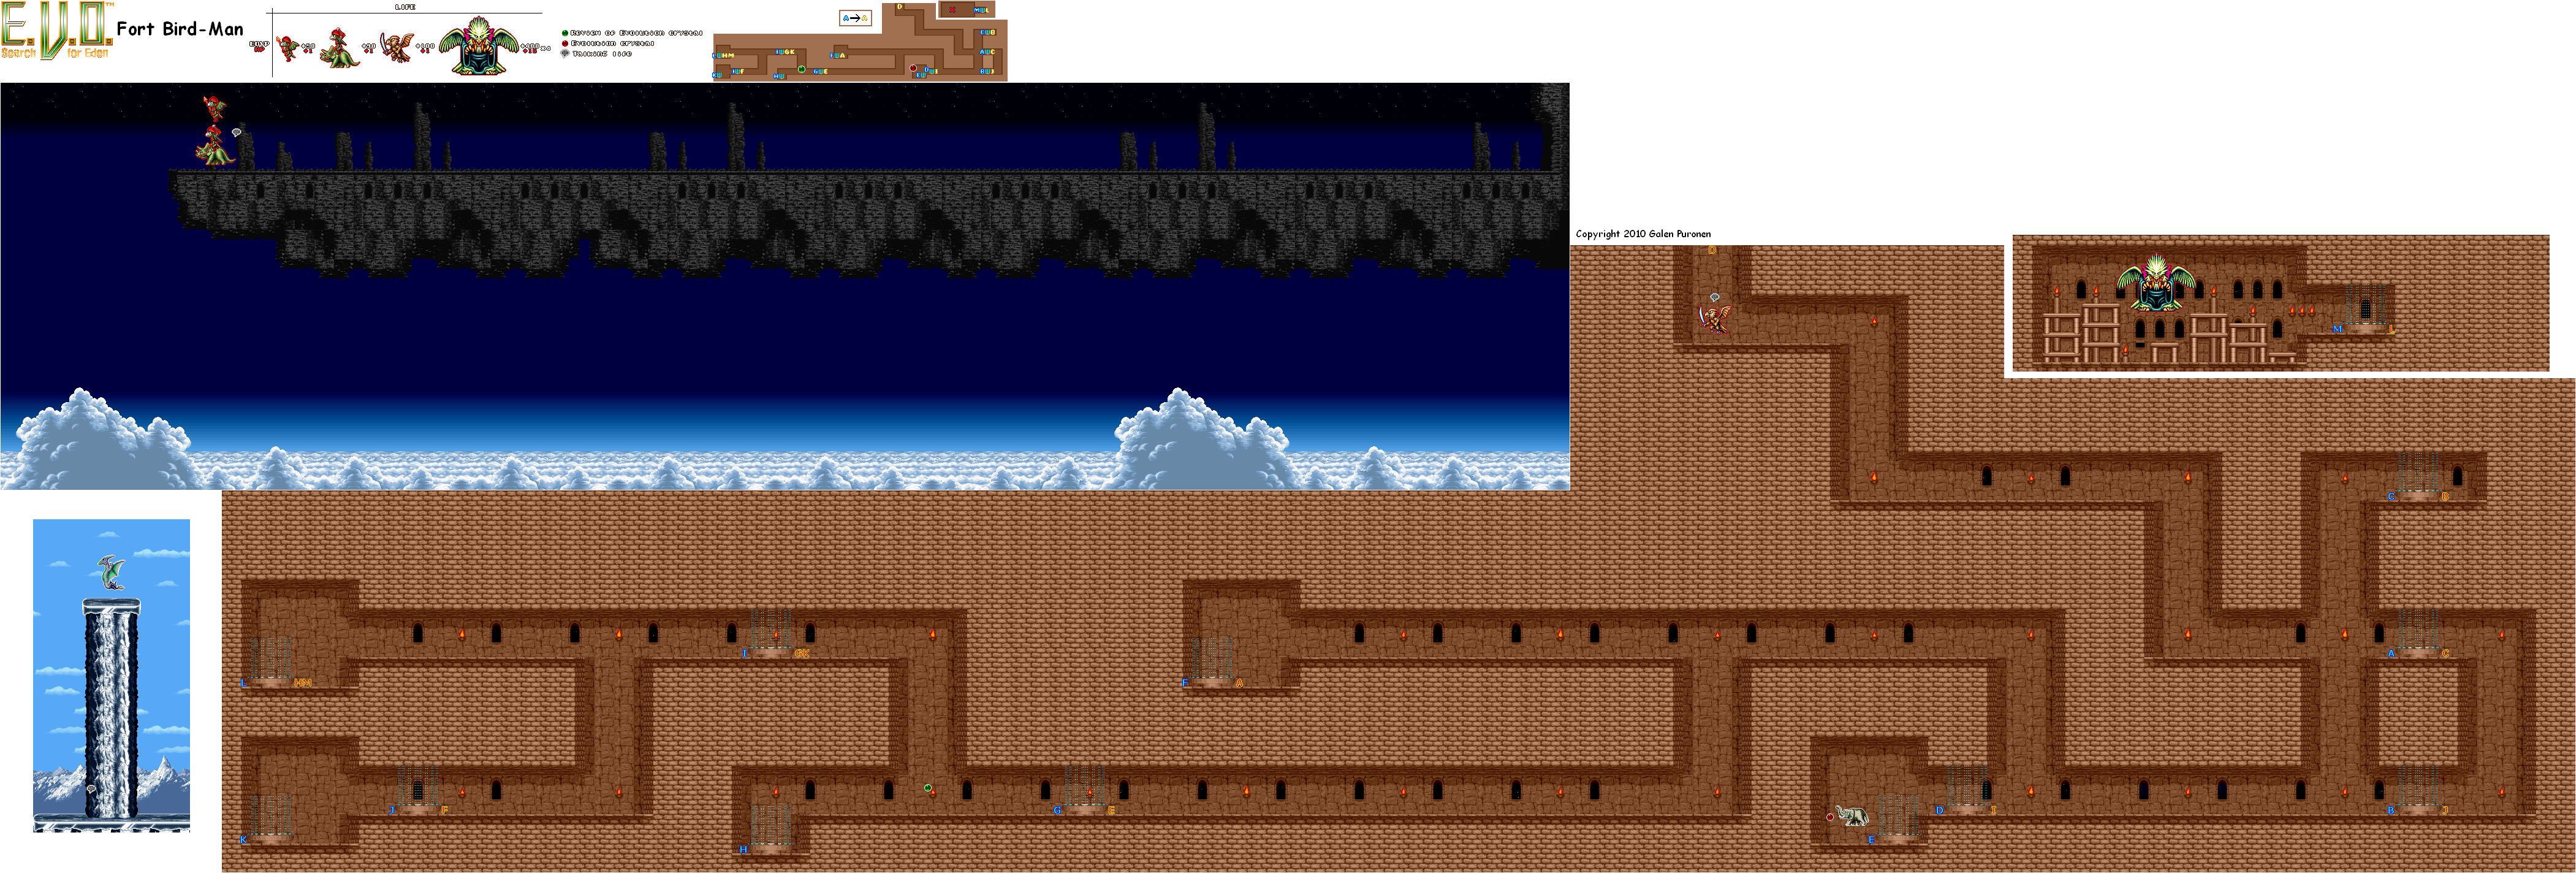
For the Mammoth bosses, there isn't much to say. I damage them by jumping on them because timing bites is something I am not good at. After defeating the Mammoths you have the most annoying level of the entire game, Fort Bird-man. Below is a picture to help you navigate it.
Note: If you forgot how to reach Fort Bird-man first head to the mountain area on the map, walk into the large pillar in the middle and you'll be kidnapped.

Fort bird-man Small Map
If you'd like to see a larger version of the picture above follow this link or click on the pic that's above. To make it through the Fort Bird-man dungeon you need to step into the same teleporter multiple times then switch to another teleporter. It's rather difficult to explain, use the map above for guidance.
Maybe you still find the map confusing and would prefer a video... Well, I got you covered. Check out my EVO The Search for Eden - How to Navigate Fort Bird-man & Reach the boss Youtube Video. You can follow my route in that video step by step and you'll be able to reach the boss very easily.
The big bird boss inside of Fort Bird-man isn't too big of a challenge, try and get next to him and you can lock him down with bite attacks. If you get low on health use the extend and shorten neck feature to heal yourself, I talk more about that below.
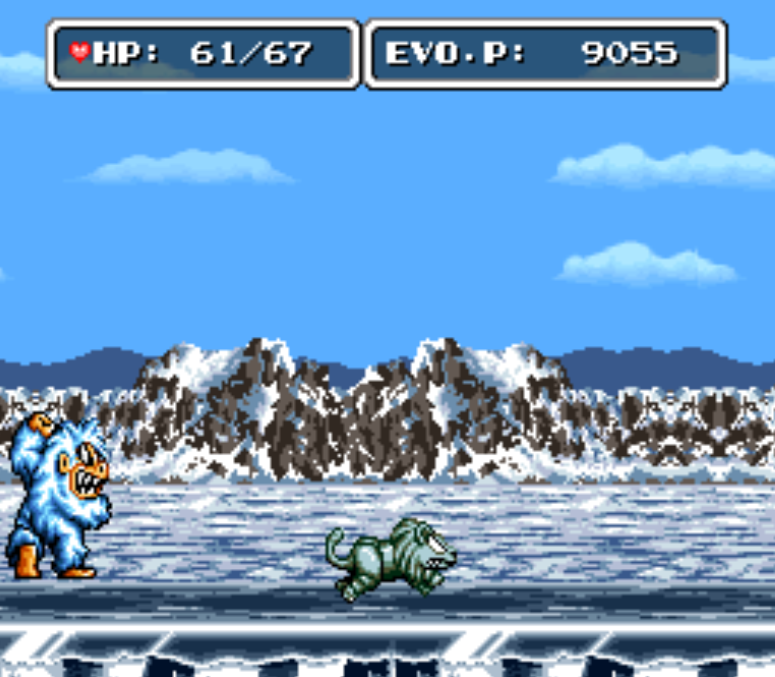
For those of you who scoffed at me when I encourage code usage - the Yeti may have you change your mind. To beat the Yeti you should farm 5 - 10k EVO Points because you can use these during battle to heal yourself. Extend and shorten your neck over and over each time you get low on health to heal. It costs 200 EVO Points each time so you'll have to figure out how many you need in total to win.
While it's nice being able to heal using this trick, trying to play with an extended neck when you're not used to it is very difficult. So, for some players using this trick you'll become significantly worse half the time. I guess that's the cost of cheesing things.
Chapter 5: Early Man
The important evolutions in this chapter are the same as they were during the previous. By now you've most likely fully evolved whatever it is you're playing anyway. Assuming that you didn't turn into a human, you'll be able to evolve into a Mermaid during this chapter when you reach the ocean levels.
You'll find a few more secrets during this chapter, I have all that I know of mentioned below.
Domain of Condor: Climb to the top of the mountain and eat the blue EVO Crystal. If you're a bird you can fly straight up from here and meet with the aliens.
Final Ocean (Mermaid): You're able to evolve into a mermaid in the ocean, assuming that you haven't evolved into a human on land first. Evolve your hands and feet to become a Seal, from here keep selecting "Evolve Further" when you go into the body tab. Eventually you will become a Mermaid.
Human Evolution: Get Cat Like Jaws and Rabbit Like Body evolved onto your mammal. Once you've done that choose the Ramothecus Body evolution (warning - this is permanent). You'll have to go through a few more evolutions but it's permanent once you choose Ramothecus Body.
During this chapter you will encounter a few dungeon like maps, the first difficult one will be the Cave of Monkey Human. To progress through this dungeon go up the elevators and keep going right when you're able to, it's easy to get through. You will find another Yeti boss at the end of this dungeon which comes with different mechanics than the previous Yeti.
Much like before, if you need to heal use the extend/shorten neck upgrades. Not too long after the Yeti map you will come to another map called Domain of Ditryma. There will be birds here crying about their loss of wings, on the far right side of this map you'll find a circle of stones. Press any button in the middle of this circle and you will be transported to the other side of the map.
On the other side of the map you'll have to fight the Queen Bee again, this fight is the same as it was previously. After you beat the Queen Bee you'll be able to use the circle of stones on her map to travel back across to the other side. There is one more difficult boss you must defeat before the final boss - this one is found in the Final Ocean map.
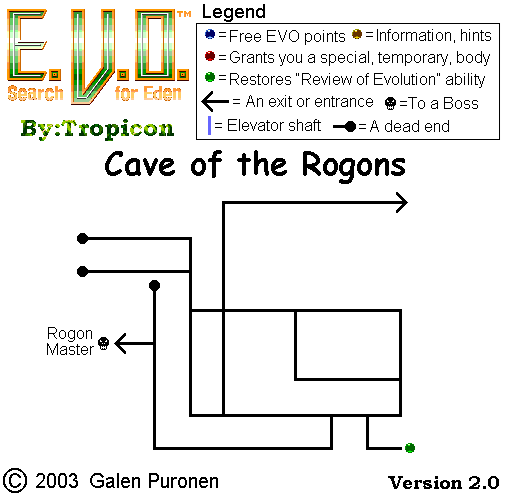
South of where you found the Yeti is where you'll find the Final Ocean. Assuming you haven't transformed into a human yet, you can turn into a Mermaid when you're underwater. Once you turn into a Mermaid though you can't do the evolve body part/shorten body part trick to heal. You're stuck with 100 health, but the Mermaid is pretty powerful. You choose what you'd like to do.
Full credit goes to original author of the image
The boss in the ocean is called King Rogon and he is actually a bit easier than the previous bosses we faced. He has a couple of basic attacks, the first of which is a globe of light which will blind and slow you when it hits you. When you get close enough to the boss he will also do two close-range attacks. One is a claw swipe which will hit you at a medium-to-close range and the other is a head butt which he only seems to do when you miss a bite attack.
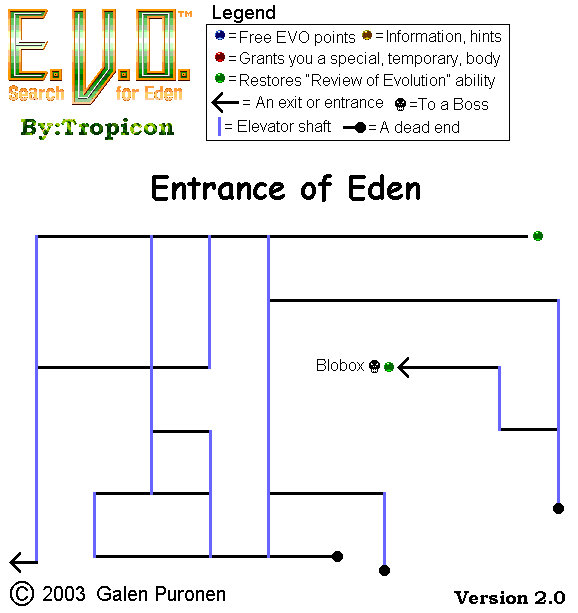
After King Rogon and Queen Bee have been defeated you'll be able to access the final part of this Chapter, aka the end boss of the game. Continue across the World Map until you reach the Entrance to Eden where you'll have another boss fight - this time against a cave man. His name is Cro-Maine and it's not as hard of a boss as you'd think.
I recommend trying to hit him with leap attacks, if you time it right you will bite him. Otherwise he will hit you with his bat and knock you back. Behind Cro-Maine is the final dungeon before the boss. Use the map below if you need help navigating this dungeon and figuring out how to reach Bolbox.
Full credit goes to original author of the image
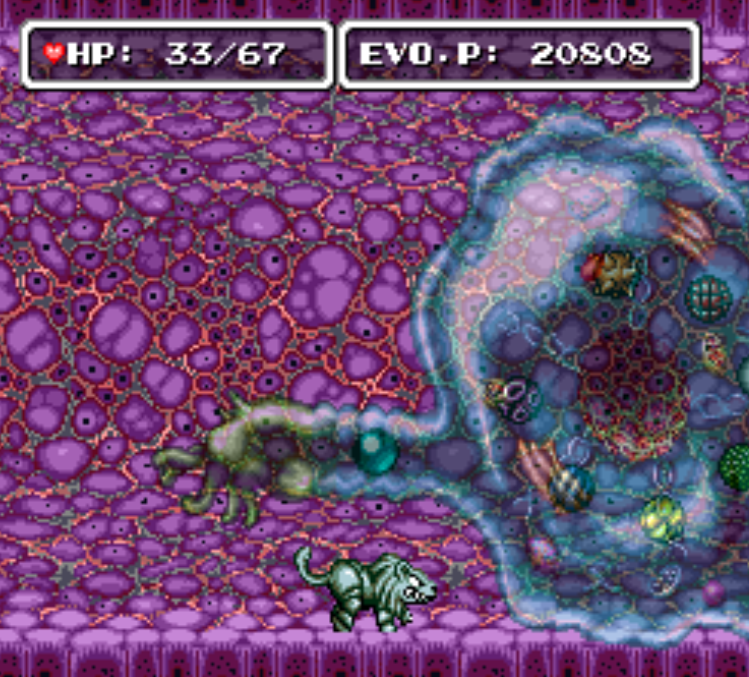
In order to damage Bolbox you will need to hit the tentacle like thing that sticks out from its body; the same tentacle you see me standing under in the picture above. This boss fight is very straight forward but also quite challenging. Throughout the fight you need to deal enough damage to Bolbox to make it spit out an object from inside it.
When it spits out an object you'll have to (typically) fight the creature that it hatches. Defeat all objects that it spits out then keep attacking it to defeat the boss. Below is a list of each orb that the boss spits out and what you should expect to hatch from it.
Child Ikustega (White): It will run off the screen and won't attack you. Killing it and eating the meat will damage you.
Pink Debustega (Yellow): Fights exactly like the same enemy from Chapter 2, this version has more health though.
Falcon Warrior (Purple): It's a flying bird enemy from Fort Bird-man earlier in the game. Same attack patterns and everything.
Giant Profasu (Red): This turns into a cockroach, it will run right and left until it's attacked. Once attacked it will fly in the direction it's facing in circles. The best way to defeat it is to attack from behind and/or from max range.
Jellyfish (Blue): Starts as a small Jellyfish, after a few hits will grow to a larger Jellyfish. Not much to fear.
Giant Prasauro (Spiked Ball): A medium sized dinosaur who damages you by roaring. You can easily lock down this mob in the left corner.
Zinichthy (Green): Definitely the toughest enemy you'll fight here, it can fly around which means it will easily avoid your attacks.
Once you force Bolbox to eject all of the orbs it carries keep damaging it and you will very quickly win. Continue east to your reward and the end credits.


