
Dragon Quest 2 Walkthrough - Chapter 1
When you gain control of your character go down the stairs to the south and open the chest near the king. You'll get a Copper Sword and some gold for your journey; for right now there isn't anything else to do in town. Exit the castle and start grinding on the Overworld. Your goal is to get to level 3 at minimum - we also need some gold to make some gear upgrade purchases.
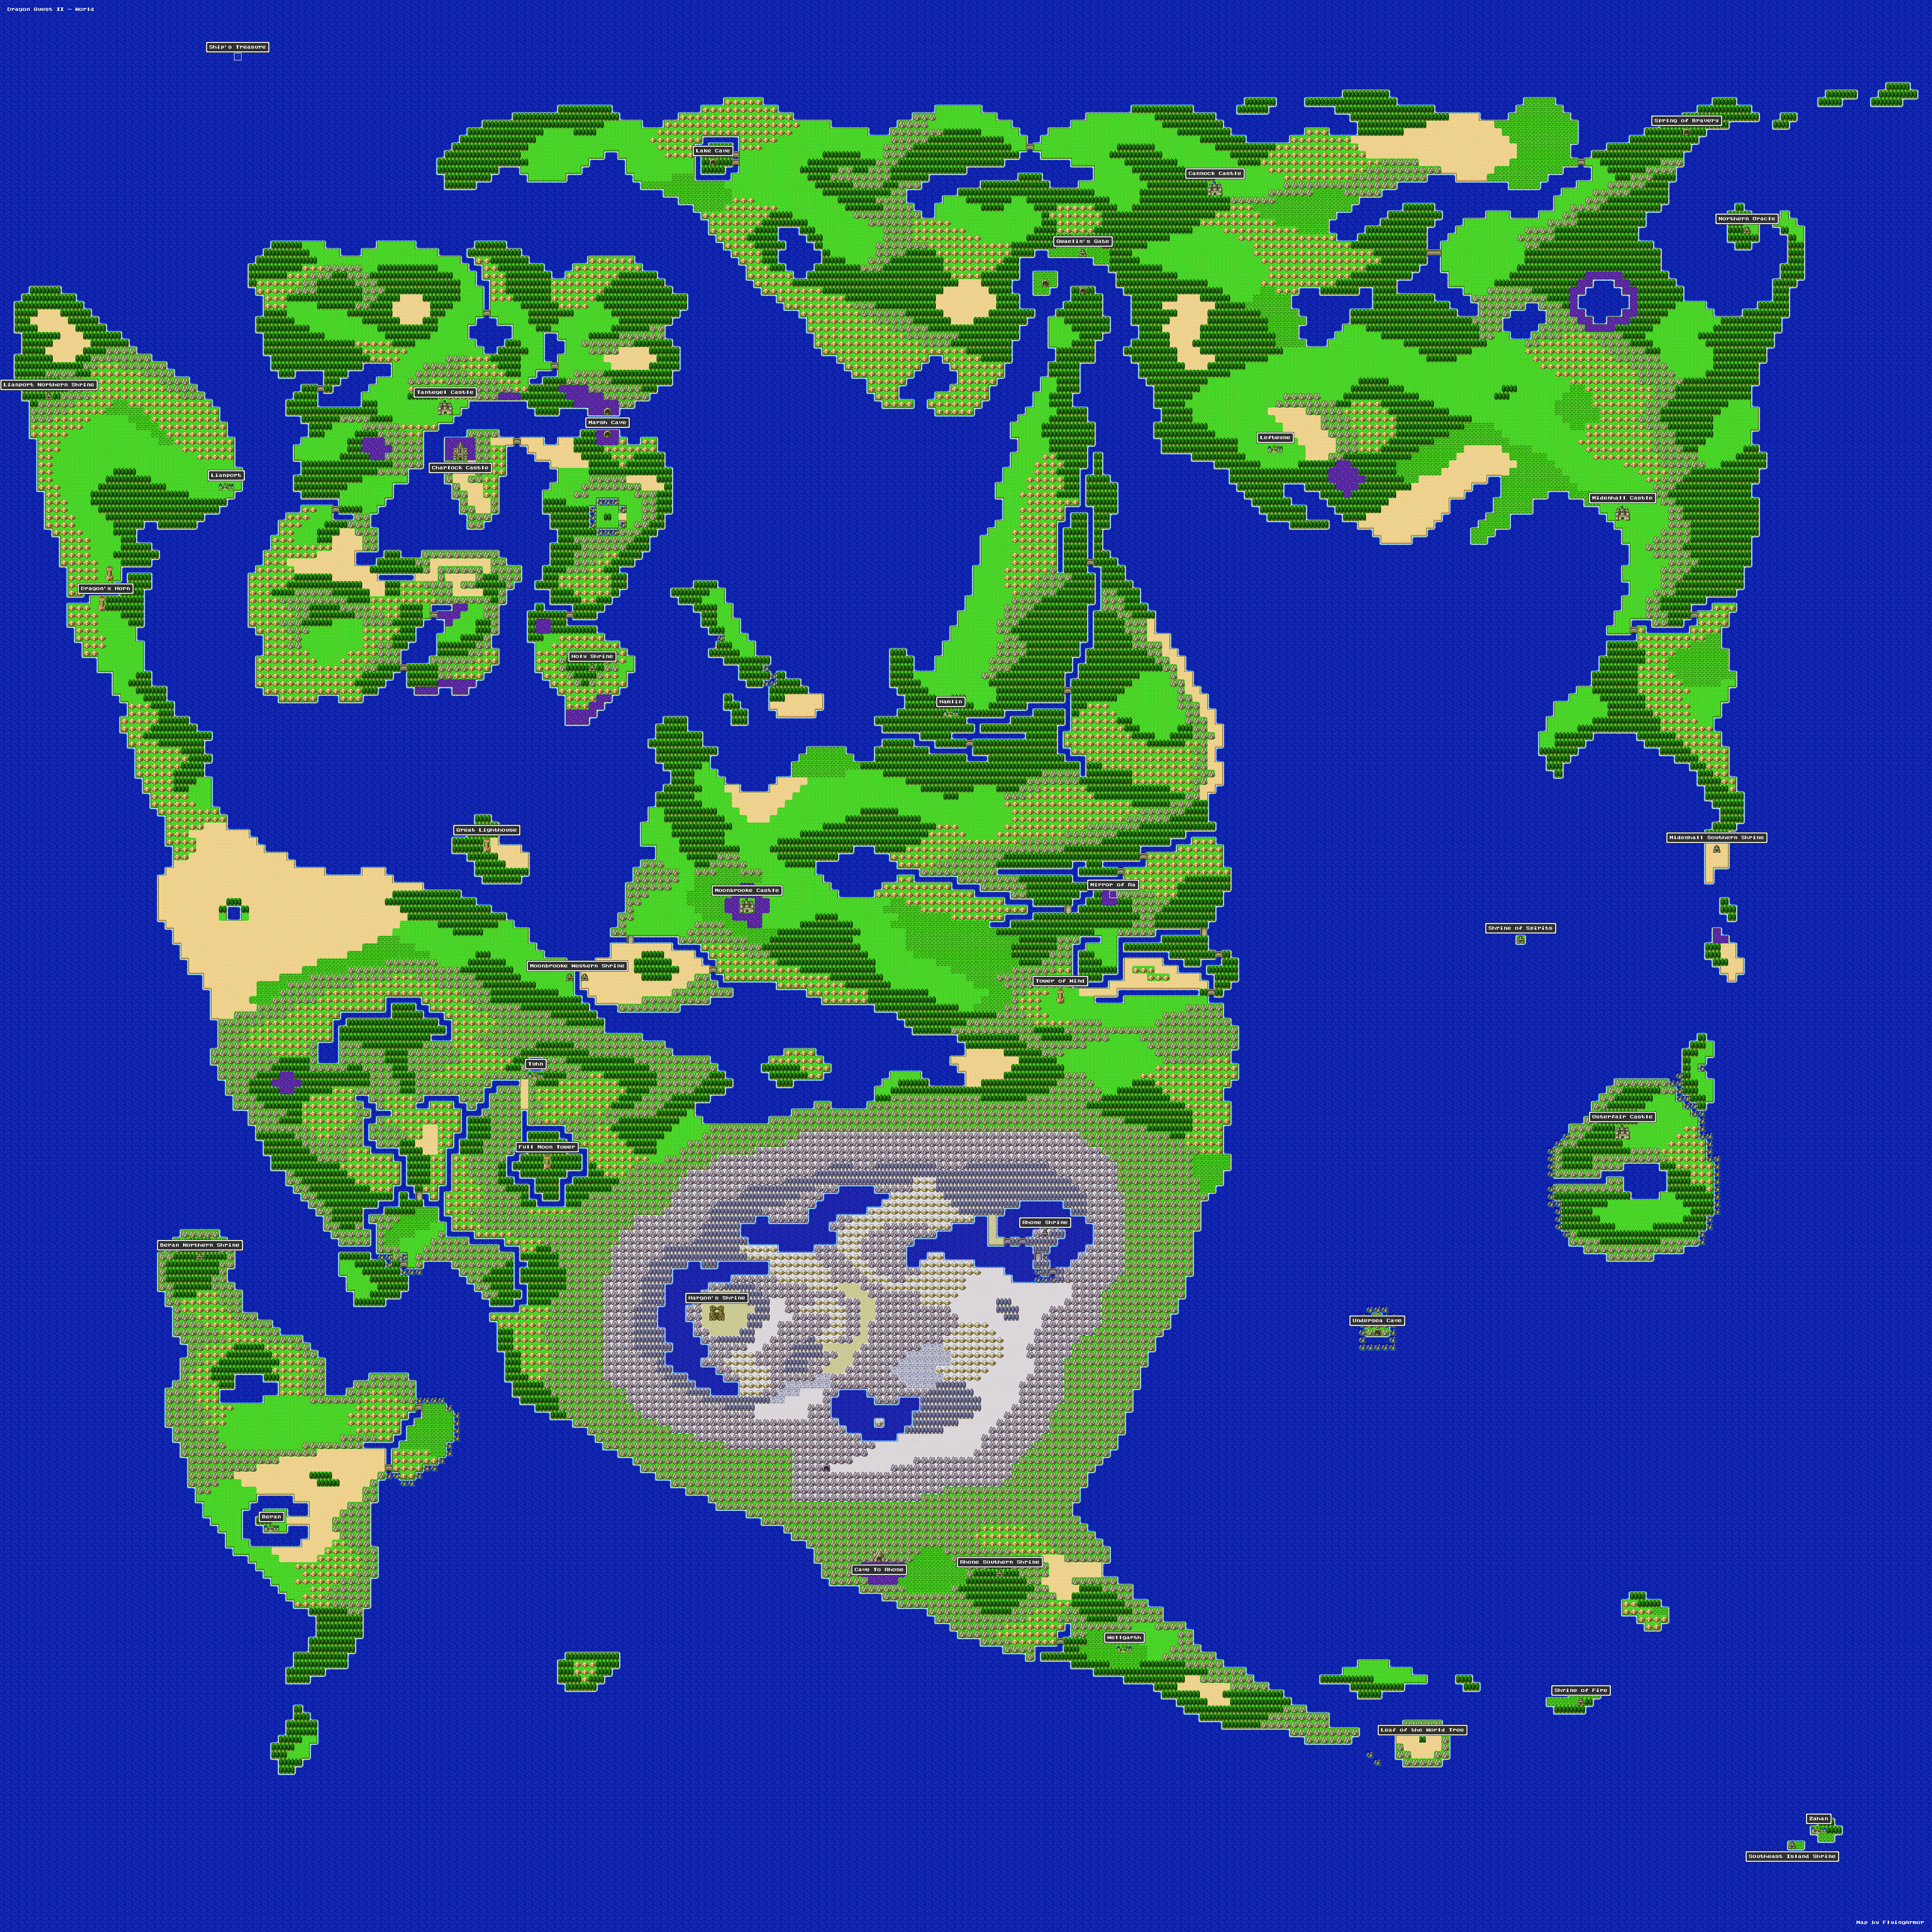
After you're done grinding you'll want to travel northwest of Midenhall until you reach the next town, Leftwyne (called Liriza on SNES). If you need help finding this town or any of the other towns/dungeons in this game I recommend you use the maps that I have provided below. Full credit goes to the original author of these maps. One of them is massive and the other is petite.
In Leftwyne you'll want to purchase 2 Medicinal Herbs and 2 Antidotal Herbs - you may or may not need them but it's better to be safe than dead. My advice when you reach Leftwyne is to do more grinding until you get to about level 6. Once you're level 6 and you've purchased some new upgrades you'll want to leave Leftwyne and travel north to the next destination, Cannock. This town is where our first story objectives finally take place.
Note: For this game most of the towns have two different names because the original translations for the NES/SNES Versions were incorrect. When the Switch versions came out the towns were named with their correct Japanese names and it has caused confusion ever since.
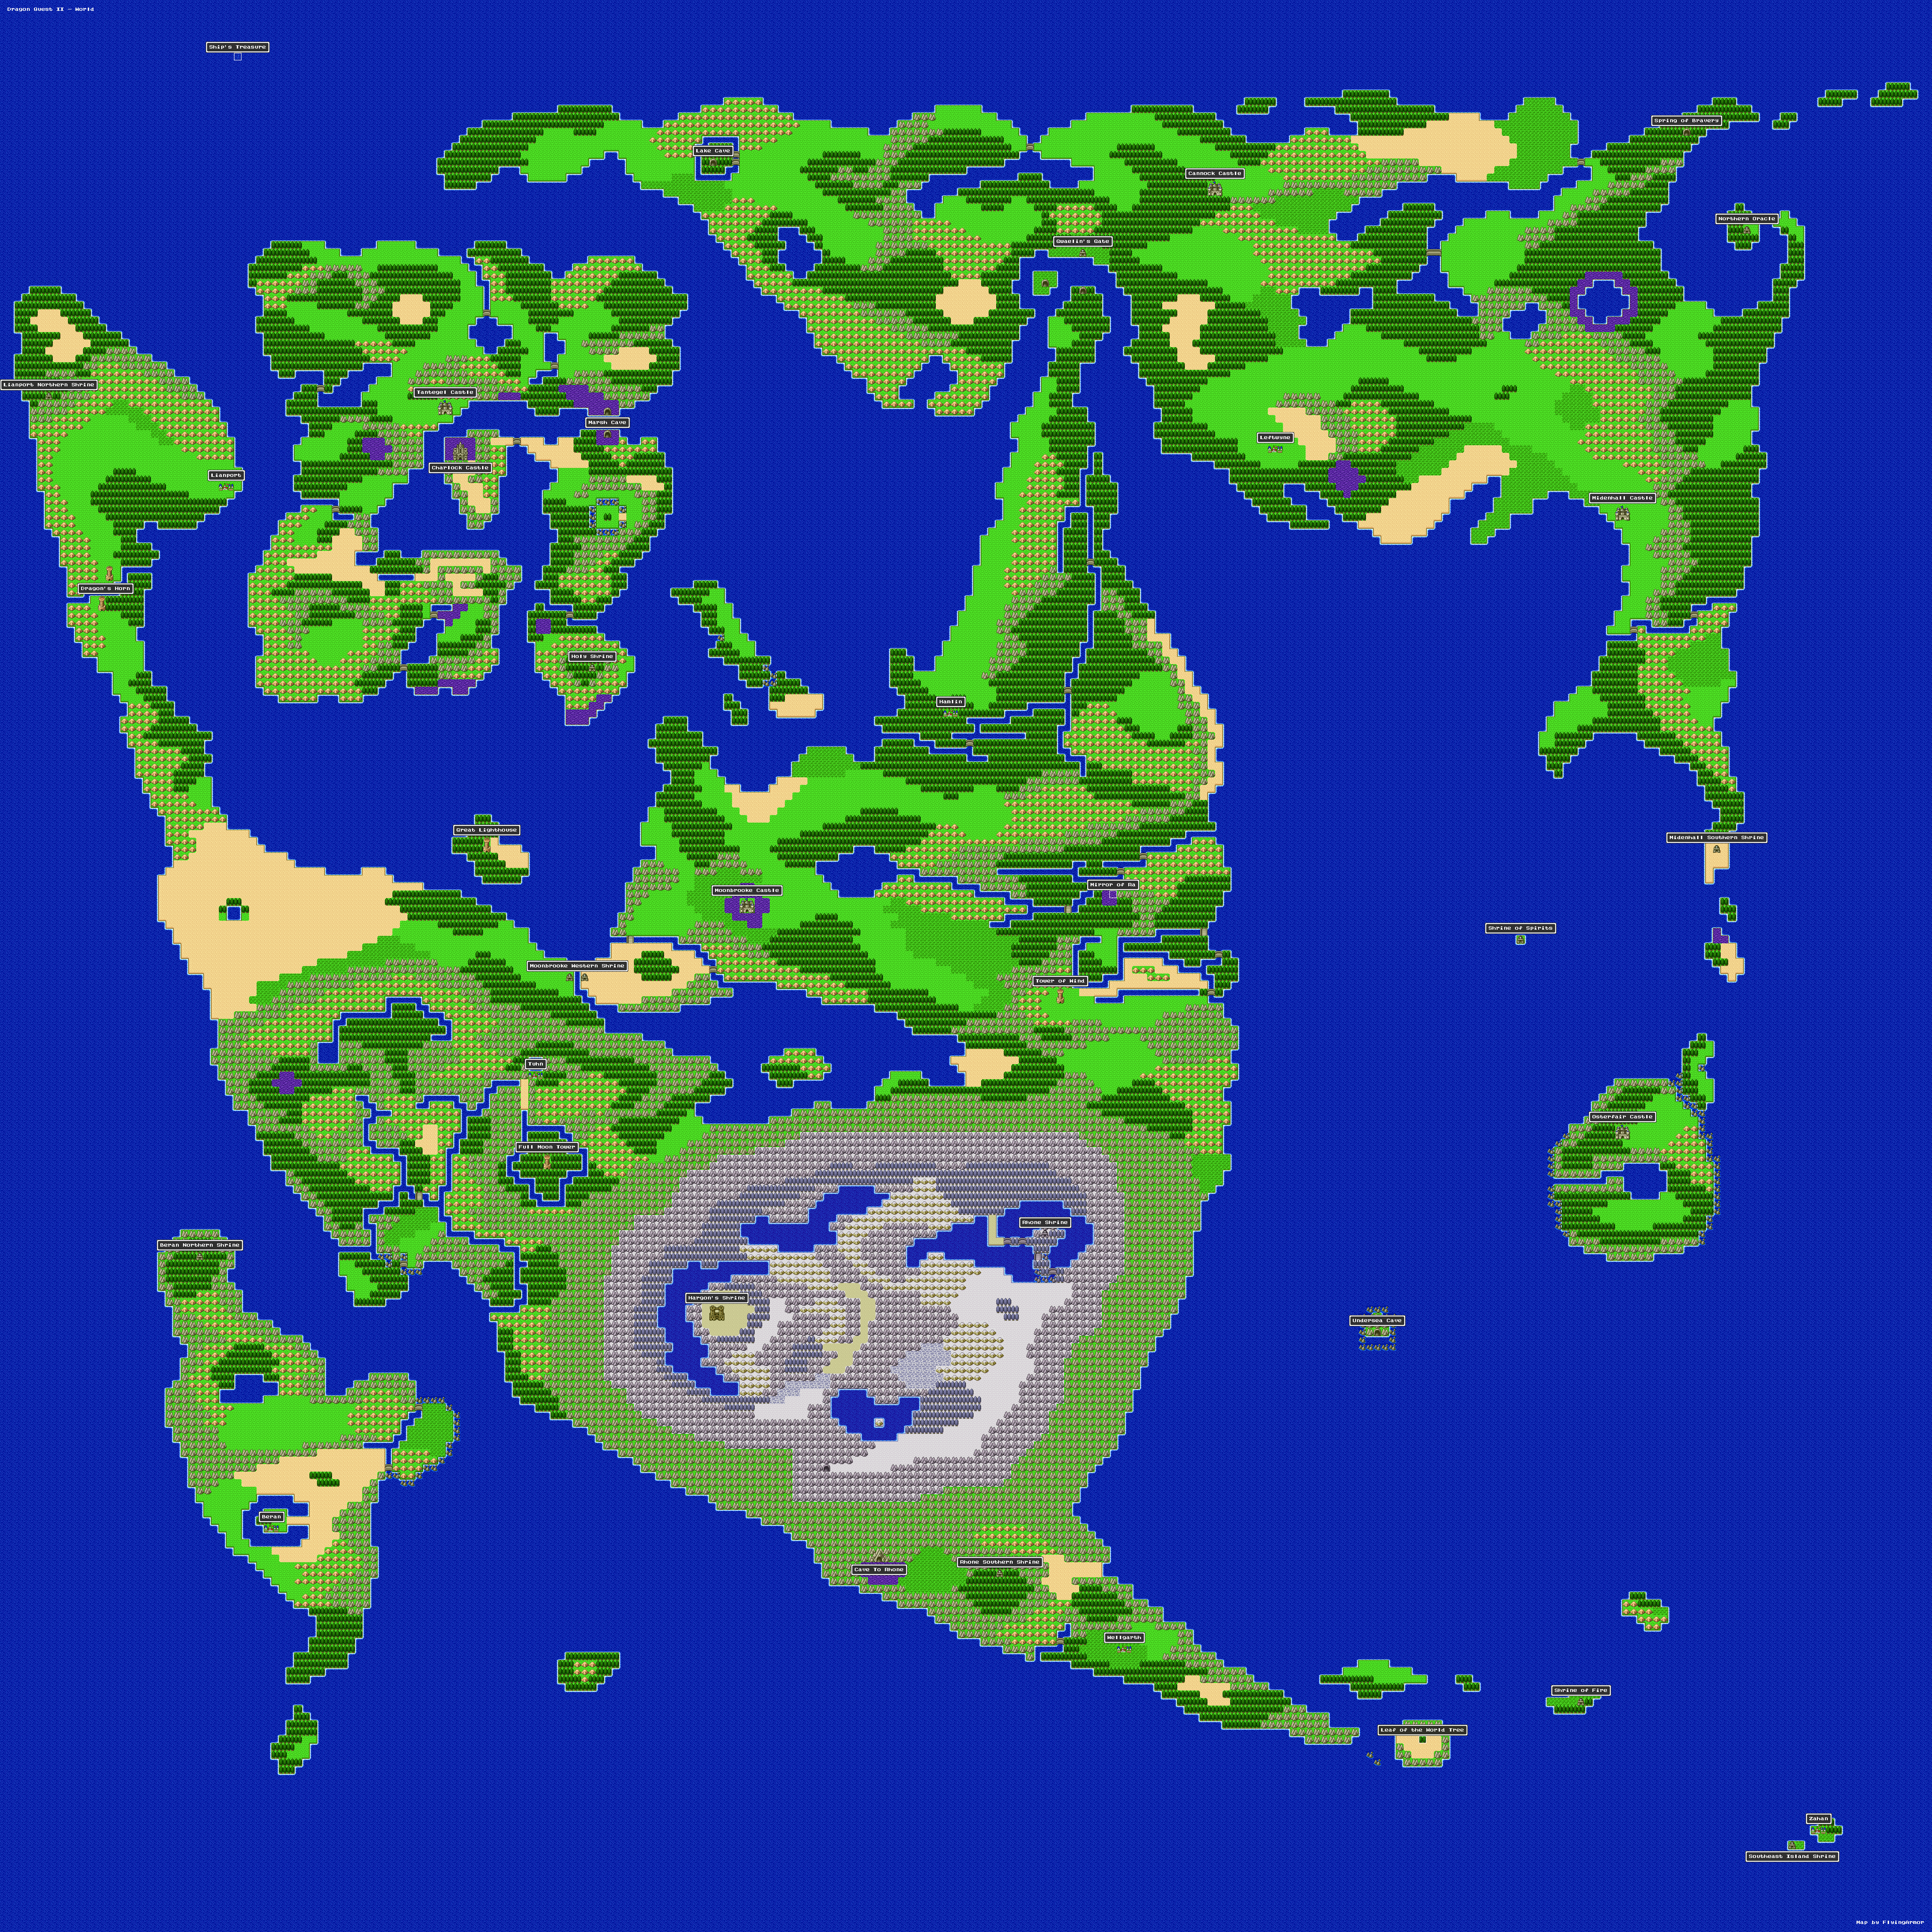
Very large Map - Click to enlarge
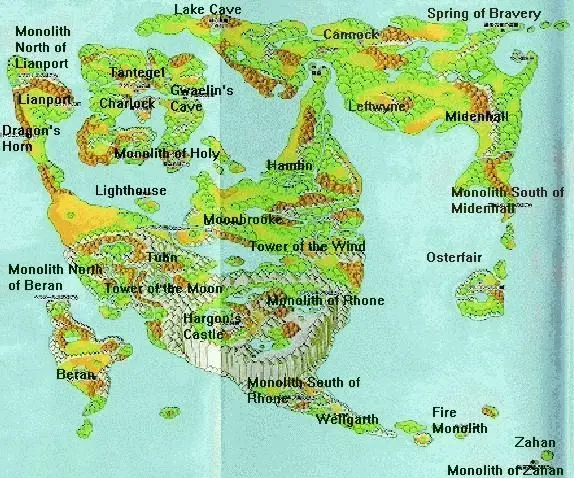
Small Map for those on Phones or who prefer petite maps
Inside of Cannock Castle you'll want to visit the King and speak with him. The King will tell you about his son, the Prince of Cannock who is currently (not) hanging out in the Spring of Bravery (aka Wellspring Cave) which is to the NE. Make sure you get this dialogue flag from speaking with the King because it's required to recruit the Prince.
From Cannock Castle you'll want to travel east; stay north of the impassable mountains and you'll eventually cross a bridge. Keep going along this route and you will eventually come across the Spring of Bravery/Wellspring Cave. Seeing as how this is the first dungeon of the game, it's extremely linear. You'll find a couple of chests inside too which include a Medicinal Herb, 84G and an Antidotal Herb.
The main thing you're looking for in this cave though is an old man standing near a large lake. When you talk with him he'll restore your HP to full and he will ask you if you're looking for the Prince. You must answer yes to get the second dialogue flag that you need. As tempting as it may be, I don't recommend you grind here because we're about to get a second party member that starts at level 1.
Exit this dungeon and return to Midenhall (the town we started in) because we need to speak with the King again for our third and final dialogue flag. After talking with him you'll want to visit Leftwyne (the second town we visited) next which is where we'll finally find the Prince of Cannock (pictured below). Since he joins you at level 1 - you know what that means! Grind!
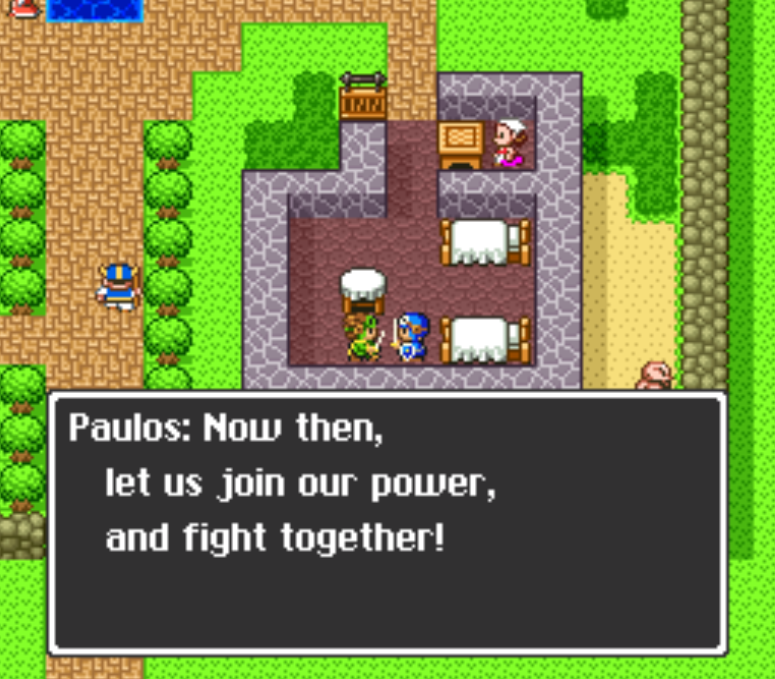
Talk with the Prince at the Leftwyne Inn and he will join you
The Prince of Cannock will need a shield and he could also use a new weapon/armor upgrade. Grind around Leftwyne until you're about level 3 on the Prince of Cannock - then travel west to fight harder enemies. Keep grinding until you are level 7 then return to town and purchase upgrades + sleep.
Our next dungeon is the Lake Cave which is found far to the northwest on this continent. It's a small cave surrounded by water (pictured below). Make sure you have a couple of herbs (both Medicine & Antidote) incase you're put into a situation where you need them. These games are very RNG after all.
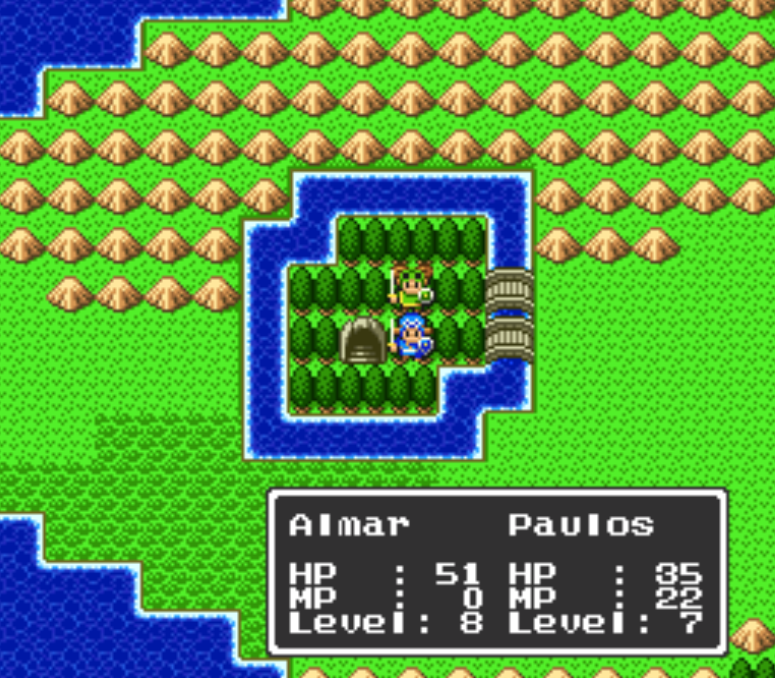
You'll find a Seed of Agility on the first floor of the Lake Cave as well as a Tombola Ticket. On the second floor you will find Seed of Life, Antidotal Herb, Chimaera Wing, 194G and the Silver Key which is not inside of a chest but instead lying on the ground. This is the item that we came here for. As for the seed items you're getting, I recommend waiting until the Princess joins your party because she is the weakest character and needs the extra help.
The Silver Key is the main thing that we needed though as this will let us open all of the silver doors in the game. For those of you who have played many games in the Dragon Quest series you'll probably find this familiar as it became a staple later in the series to give you a key like this.
Exit this dungeon and go southeast to Gwaelin's Gate; it's a small shrine on the Overworld. When you arrive you'll want to speak with the two guards here to make them move out of the way - head down the stairs behind them. Go south in this area until you find stairs up and keep going south. Our next destination is the town of Hamlin (aka Moonahan) which is directly south of Gwaelin's Gate on the Overworld.
For this next part of the game you kind of need a map since finding the Mirror of Ra without a map will be a real pain in the butt. To describe it in text, the location you're looking for is a small 4x4 of swamp tiles (purple tiles that damage you when you walk in them). In the top right corner of the 4x4 pattern you'll need to use your Search option to find the Mirror.
From Hamlin you will need to travel southwest around the mountain range and then go east once you pass Moonbrooke Castle. Use my map below if you need help figuring out a route. What makes this part difficult is that there will be powerful enemies throughout this area - especially when you get close to the Mirror.
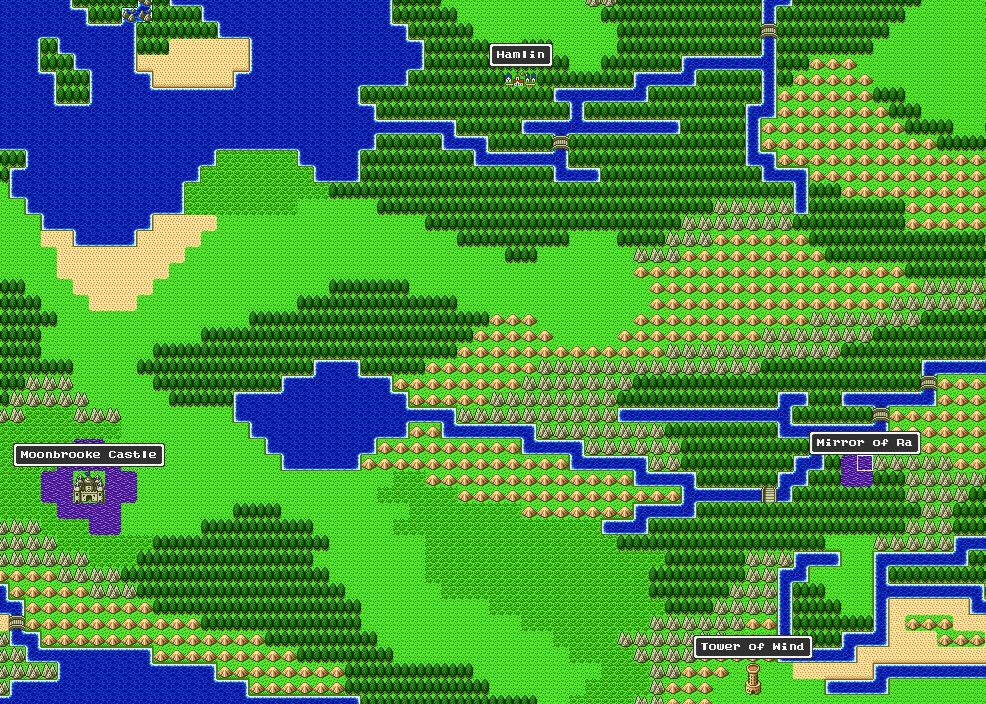
The Mirror of Ra is found east of Moonbrooke
The Mirror of Ra is an important item to get now because it will let us get our final party member, the Princess. Once we get this item we can transform her from a dog back into a human. You see, the Princess is actually the dog that is running around in northern Hamlin/Moonahan. A picture of her is shown below.
Approach the dog that is running around and use the Ra Mirror on her to change her back into a human. The Princess will thank you and then join your party. If you were saving the seeds from the earlier dungeon don't forget to use them on the Princess now. Much like the Prince, the Princess starts at level 1 which means you'll have to grind a bit to level her up. She also starts with very basic equipment, you'll have to upgrade that too.
My advice is to do some grinding outside of Hamlin/Moonahan to get her to level 5. This will also get you a bunch of extra money to buy better equipment for your team. One thing to note is Hamlin/Moonahan doesn't sell a weapon or armor she can use so you'll have to visit previous towns to get her upgrades.
Tip: Purchase a couple Wing of the Chimera from the Item Shop in town, when you use this item it will return you to the last town you entered.
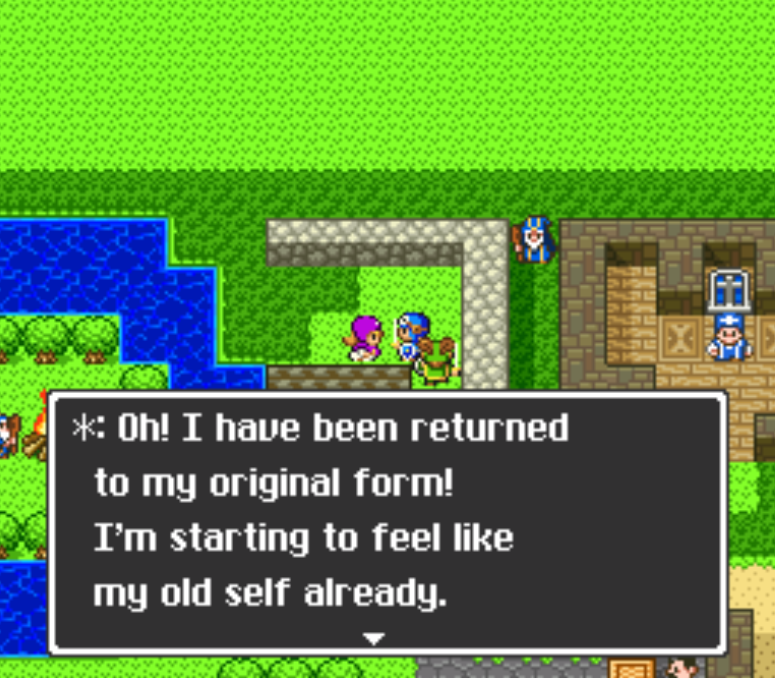
Transform the Princess back into a human using the Mirror of Ra
Our next dungeon is the Tower of Wind (aka Pillars of Wind on the Switch/Mobile) which you may remember seeing on the map just south of the Mirror or Ra. I recommend you raise the Princess' level to at least 7 before you attempt this dungeon, that will give you enough MP on both the Prince & Princess to keep yourself alive for the entirety of the dungeon. You should stock up on Medicinal Herbs too and bring a few Antidote Herbs with you just incase.
To reach the Tower of Wind you'll need to travel northeast from Hamlin/Moonahan. Cross the bridge near the ocean and then walk south along the sand strip between the mountains and the ocean. This will lead you almost directly to the first real dungeon of the game, Tower of Wind.
Like most dungeons in this game it's very linear, you're looking for two items in particular, the Windbraker and the Prayer Ring. In the original NES/SNES versions they're called the Wind Mantle and (sometimes) Wizard Ring. My SNES version called it the Prayer Ring but all the guides I use call it Wizard Ring. The two names per item is confusing, I know, but that's what happens with poor localizations.
Tip: Save the Prayer Ring for the final dungeon, we need them to restore MP before the final boss.
If you can't figure out where to go in the Tower of Wind, try going up the stairs on the right side of the tower on the 1F. The set(s) of stairs in the middle are basically a decoy. When you follow this route up it will take you to the 4F where you'll find two sets of stairs. The first leads directly to the Windbraker (Wind Mantle) item. As for the Prayer Ring, you'll find that on the 8F by going up the other set of stairs. The Prayer Ring is optional but I recommend you getting it anyway.
Equip the Windbraker/Wind Mantle and you'll be able to safely jump off this tower. You're also going to be using this item to reach our next story area! First, leave this dungeon and return to town so that you can heal up. Our next destination is west of Moonbrooke, aka west of the Tower of Wind too.
If you travel southwest of Moonbrooke you will find a shrine next to a river. Go through the shrine to come out on the other side of the river then travel west until you reach the other coast. From there you'll want to go north to the next dungeon, Dragon's Horn. Technically we're entering the South Dragon's Horn dungeon - there is another Dragon's Horn to the north of this one (pictured below).
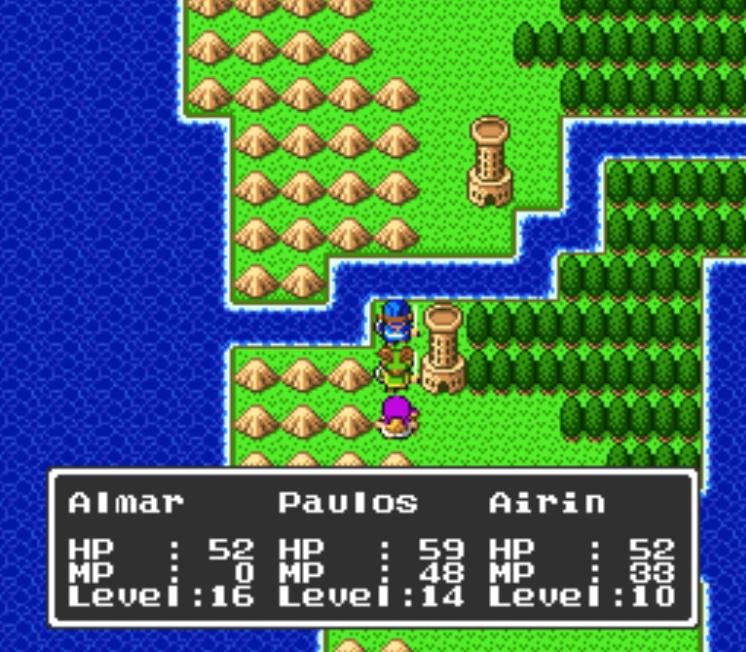
North & South Dragon's Horn
All you need to do inside of the Dragon's Horn is go up to Floor 7 and make sure you have the Windbraker (Wind Mantle) equipped. Jump off the northern side of this tower and you'll make it across the river. Travel northeast to find the next town, Rippleport (Mobile/Switch) or Lianport/Lupegana (NES/SNES). ((Great, now we're starting to get 3 names per town. At least the Lianport localizer was half way there... Lupegana sounds nothing like the original))
The first thing you'll want to do in town is purchase upgrades for the Princess and Prince. If you can afford them you'll want to buy upgrades for your main character too. When you're done buying upgrades approach the monsters in the northwest part of town for a battle. You can see these monsters from the weapon shop, they're right next door.
Once you defeat the monsters the girl you save will bring you to her grandfather and you'll be given the ship. Hop onto your boat and sail south to open the door with the Silver Key; speak with the guy inside to learn about some sunken treasure. We'll need this dialogue flag for the next town - we're done in Rippleport/Lianport for the time being so exit town inside of your boat and let's start sailing!
Next up is the town of Tantegal which is the first town from the previous Dragon Quest game. Infact, the entire continent from the first game is still (mostly) intact! We need two dialogue flags in Tantegal and (if you have the money) you can purchase upgrades in Tantegal as well. You can find Tantegal a small distance east of the town we got the boat in. As you can see on our map, you sail across the sea to the east, land on the continent then travel a bit more east to Tantegal.
Tip: You should purchase the Dragon's Bane item from Tantegal and then 'Use' it on every character to Equip it as an accessory. In the SNES version this is called the Bell Amulet.
Tantegal Dialogue Flags:
1. Speak with the green guy to the west of the entrance for information about the sunken treasure (in the SNES version he has green pants and is wearing a turban). Answer "Yes" to his first question and then talk to him again, answer No if prompted. Doing this will make some sparkles appear in the ocean which will make finding the sunken treasure easier.
2. (Switch Only; for the SNES only the Gold Key is required) Use the Silver (or Gold) Key to access the Draper's shop in the north. Talk with the lady inside and she will ask if you're looking for the Celestial Skein, which is an item we need to make some good armor. She'll tell you to search the northern Dragon's Horn dungeon for the item. Much like with the other dialogue flag, this will add a sparkle to your screen which will show you where the item is found.
Since we're unable to get dialogue flag #2 without the Golden Key on some releases of this game, we're going to go out of our way right now to obtain the Golden Key + complete the two tasks I mention above.
Obtaining the Golden Key & Sailing The World for Loot
Hop back into the boat and let's start sailing again! This time our destination is the town of Zahan (small island in the bottom right of the World Map) and the Yggdrasil Tree aka Leaf of the World Tree. If you need help finding these locations check out my extra large World Map or my very small World Map. The small World Map doesn't have Leaf of the World Tree marked on it though.
Zahan is where you'll find the Gold Key, follow the dog who barks at you and points. Search in the direction that the dog is pointing and you will find the Gold Key hidden. Screenshots of where you can find Zahan as well as the Gold Key are both shown below.
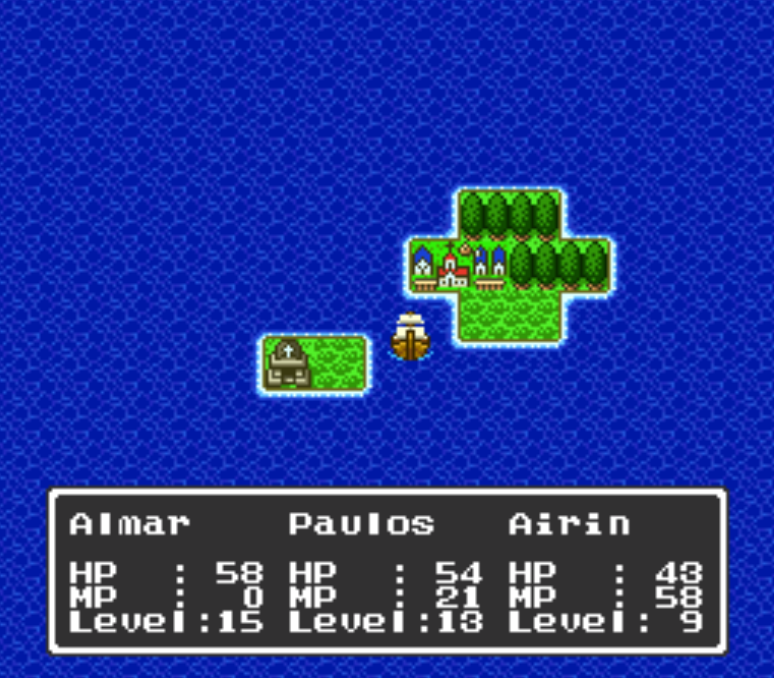
Zahan on the World Map
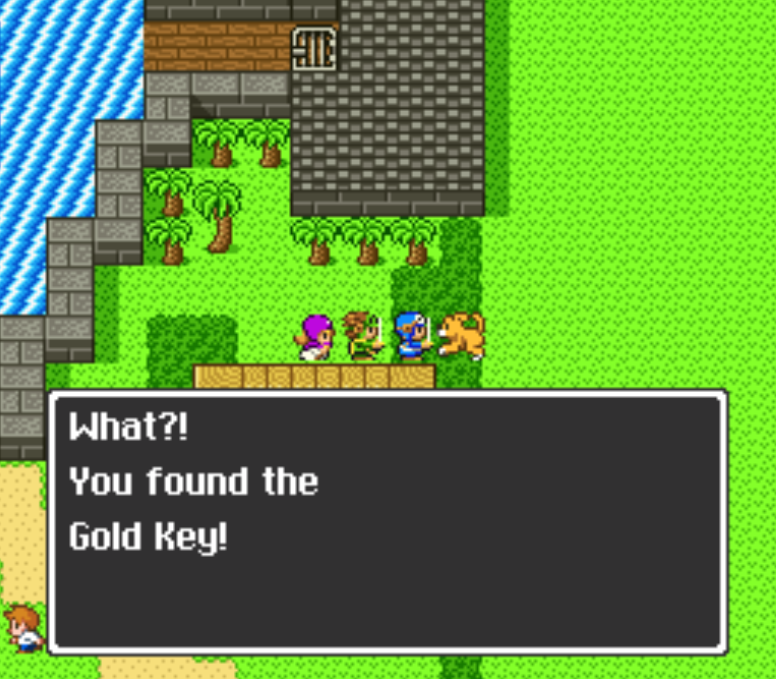
Where to find the Gold Key inside of Zahan
The World Tree is found west of Zahan and a tad bit north. You're looking for an island with a 1 tile entrance that is surrounded by rocky mountain. The entire interior is desert except for one tile of trees, use your Search on the tile with trees. You'll reveal the Leaf of the World Tree item which will rez any party member that's dead to full HP. Return to this island whenever you'd like another leaf.
Hop back into your boat and travel a bit west of this island then north to find the next town, Wellgarth aka Burrowell on the Switch/Mobile. You can open the door up top with the Gold Key to access the town portion. We need to purchase the Jailor's Key from the Item Shop in the western part of town (select the blank slot) and then get the Watergate/Floodgate Key by visiting the jail in the northeast next (more info below). The jail cell on the right will have a wall you can walk through which leads to the NPC that gives the Watergate Key. You'll need this item for story progression later.
Below are the various locations that you can/should visit right now for all of the optional loot. Any location that is required for progression will be marked so you know ahead of time.
(Required For Story) Jailor's Key/Watergate Key: Visit the town of Wellgarth/Burrowell and purchase the (blank space) from the Item Shop in the west. This will give you the Jailor's Key. Next, visit the jail in the northeast and go into the cell on the right. The cell will have perfect floor tiles except the one to the right of the pillar, if you walk into the wall to the right of the pillar you'll find a secret room with Rogue Fastfinger. Talk with him to get the Watergate Key/Floodgate Key (name changes depending on your version).
Leaf of the World Tree: Northwest of Zahan you'll find a tree on a small island, if you use Search while standing on top of the trees you'll uncover the Leaf of the World Tree item which will rez any dead party members to full HP. You can only carry one at a time but you can return here and get a new one any time you use it.
Tantegal: Return to Tantegal and use your Gold Key to open the doors you could not open previously. If you're on the SNES version you still need a dialogue flag from this place for the Celestial Skein/Dew Yarn. Alternatively, if you already know where this item is found (or use my guide) you don't need the dialogue flag.
Sunken Treasure - Echo Flute (Echoing Flute): Before you go searching for this item you should talk with the guy in Tantegal first to get the location marked on your Overworld. After doing that sail north of Rippleport/Lianport and look for the sparkles shown in the picture below. Search this area for the Ship's Treasure then return this to the guy in Rippleport for the Echoing Flute.
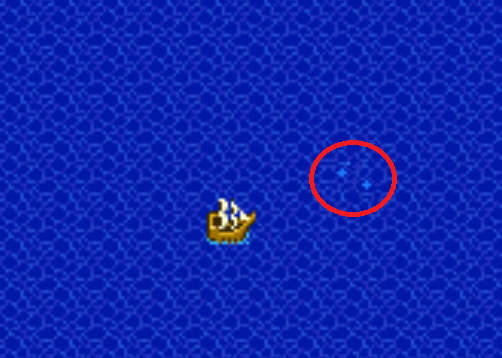
The Sunken Treasure sparkle in the ocean is shown in my picture above
North Dragon's Horn (Dew's Yarn or Celestial Skein): Go to the 3rd floor of North Dragon's Horn and look for the sparkle on the ground to find the item. On older versions of the game there will be no sparkle, in which case you'll want to use Search on every tile until you find it. The item can spawn on any tile (including the stairs). Basically how it works is each time you search you have a 25% chance of finding this item regardless of the tile you're standing on. It took me 15 searches to find it which seems like a drop rate less than 25%...
Midenhall Treasure Room: Search the treasure room in the castle for a Medical Herb, Seed of Life, ~1146G, Seed of Strength, Seed of Magic and most importantly the Mark of Erdrick aka Token of Roto/Erdrick's Token. You'll need to trade this Mark/Token to a man in the Holy Shrine on Alefgard for the Erdrick's Helm. The Holy Shrine is found southeast Tantegal, use this map for the exact location.
Midenhall Demon Priest (Thunder Staff): North of the Midenhall Treasure Room you'll find a set of stairs that go down into the basement/jail. The southern most cell of the jail has a Demon Priest inside, you'll have to walk across some floor tiles that damage you to reach him. Most of the time when you beat this enemy it will drop the Thunder Staff which is a best in slot weapon for the Princess of Moonbrooke. Search the area right in front of the Demon Priest to find a Seed of Agility too!
Cannock Castle Treasure Room: There is a single gold door in this castle, open it with your Gold Key and loot the treasure chest to get Erdrick's Shield aka the Shield of Roto on SNES.
Holy Shrine (SE Alefgard): Start at Tantegal and sail south east, check out my extra large World Map if you need help locating this place. All you need to do is speak with the guy inside and he will move out of your way so you can get the Helm of Roto/Erdrick's Helm.
Charlock Castle (World Map + Sword of Roto/Sword of Erdrick): You'll find Charlock Castle a small bit southeast from Tantegal Castle. This dungeon is very linear, just like it was in the first Dragon Quest. You'll get the Sword of Erdrick about half way through and the World Map + other goodies at the very end. Although this dungeon is optional, it's strongly recommended for the weapon and the World Map. Heal every few steps when you have to go across the damaging floor to reach the Treasure Room with the World Map.
Zahan (Jailor's Key Required): Walk across the tiles that damage you in the northern building, heal every couple of steps. The top left room has the Sacred Loom (Subtle Shuttle on the Switch/Mobile) inside which is 1 of 2 items we need for a best in slot chest for the Princess. The other chest in the room across from this one has a Prayer Ring.
Water Crest (Moonahan/Hamlin): Return to the town of Moonahan (SNES/NES: Hamlin) and use the Jailer's Key and Gold Key to reach the jail cells and unlock them. Inside you'll beat 2 Grimlins, Search the cell once they're defeated to find this item. I found it in the top right where one of the enemies was standing.
Once you're done collecting all of the items mentioned above it's time to get some of these items out of your inventory and continue with the story!
Continue to Dragon Quest 2: Walkthrough Chapter 2