
Crysis Walkthrough
Crysis is a first person shooter which relies much more on avoidance mechanics than it does run and gun. If you burst into an enemy base guns blazing you're probably going to be eliminated very quickly, in this game the correct approach is slow and methodical. Pick off as many units as you can from a distance and move in when you know it's mostly safe.
You have two primary suit skills that you'll be using through this game, Cloak and Armor Lock. Cloak is pretty self explanatory, when you use it you'll become invisible to enemies until you run out of suit energy. There are some limits to this, depending on the lighting and your surroundings you may be easier to see.
Armor Lock is a skill which makes you take much more damage in exchange for energy. Normally I use Armor Lock when I am surrounded and know enemies are going to pop around the corner or when I need to take out a machine gun nest or tower sniper. On normal difficulty, Armor Lock will normally give you enough time to stand in their line of fire to take them out. Probably doesn't work like that on higher difficulties though.
Mission 01: Contact
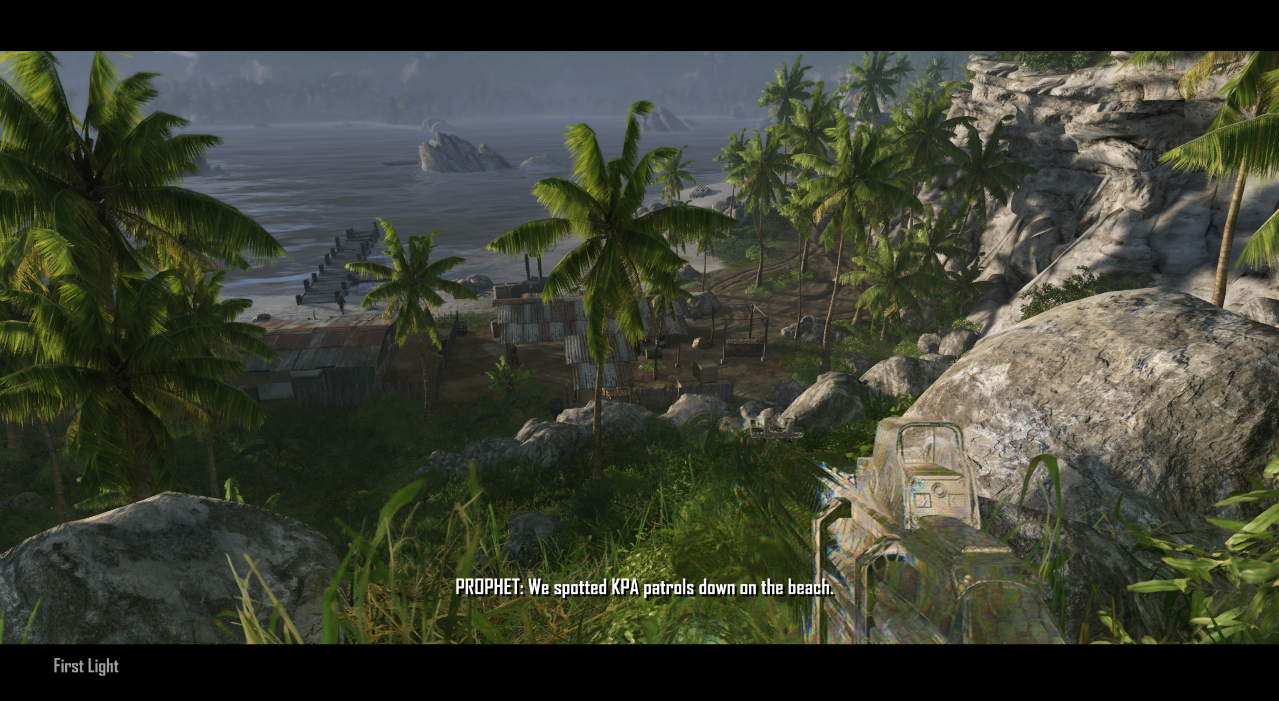
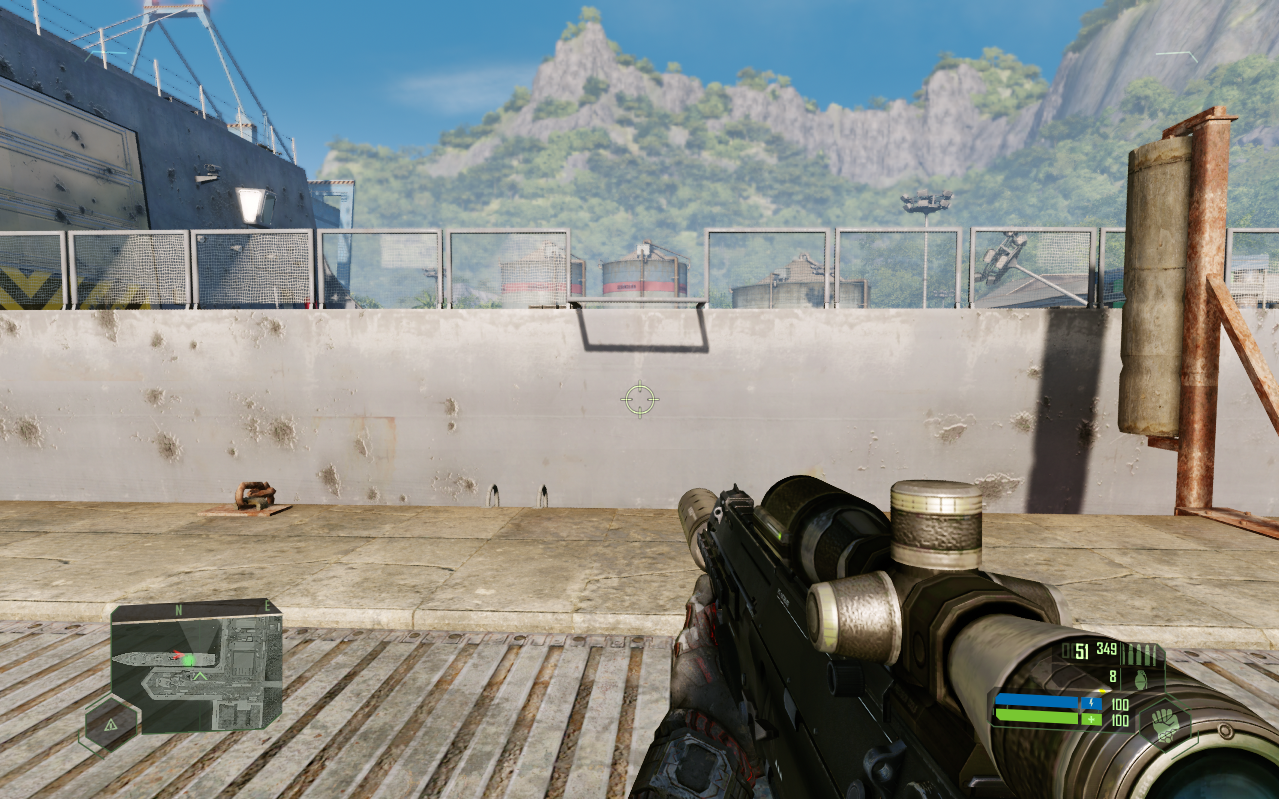
When you gain control of Nomad follow the linear path through the water and along the beach as you get your instructions. This part acts more or less as the game's tutorial so just follow it to your next few objectives. The game doesn't really begin until you reach the area shown below, the first Korean compound which you have to tackle.
This compound is your first real taste of Crysis and the freedom you're given to do things your way. Depending on your difficulty, you can approach this compound with stealth or with guns blazing. To be honest, even if you use Armor Lock and go in guns blazing, you're still going to have to be very careful. When you're shot you'll take a lot of damage in this game, unlike other FPS games. For this reason, picking off enemies from a distance is typically the way to go. Stealth can be used to pick off a bunch of easy enemies then, once you get impatient, you can Armor Lock and take out the last few with a more active combat style. That's my approach normally.
Once you've gotten rid of the enemies in that compound disable the GPS jamming device that is there and then head to the next objective on your map. You can take a vehicle there if you'd like, on easier difficulties you'll be able to fire the turret ontop without switching to that seat (which is nice). Alternatively, on higher difficulties you need to act like the Predator and stealth your way there through the jungle.
After traveling down the beach a bit you'll be given a Secondary Objective (yellow mark on your map). These are optional and don't really serve any purpose in the game outside of more content for you. In this case the Command Post has some explosives and ammo. You'll more or less get back all the ammo you use getting into the base.
When you reach the KPA Checkpoint Objective you'll have to deal with two machine gun nests. The easiest way I find is to use Stealth and get a clear shot on a nest. After you get a headshot hide behind the hill nearby and recharge then creep back out in stealth. Rinse and repeat until everyone is eliminated.
Your next objective, Rendezvous at Distress Signal, will require you to literally climb the mountain. Hold Jump to make your way up the mountain to the rest of your team. There will be another cutscene here, when it's done follow the linear route and story until the end of the mission. If you ever get lost, remember you can open up your HUD and view a map. Green marker is always our destination.
Mission 02: Recovery
For the start of this mission you'll be with Prophet and Psycho, just follow them and listen to what Prophet says to do. Eventually they'll both stay behind and tell you to go rescue a hostage; this is when the real mission starts. Just like before you'll have an option, you can hop into a vehicle and drive down the road or you can stealth through the jungle like the Predator.
As you progress down the road you'll eventually run into a barricade, around this point you'll also get a new Secondary Objective (pictured below). This is actually one of the only Secondary Objectives I will encourage you to do in the game. At the Access Point Secondary Objective you'll find a Missile Launcher and a Precision Rifle, both are weapons which will make getting into the village much easier.
I recommend using the Missile Launcher while you're up here to blow up machine gun nests in town. One tip to keep in mind is that the missile you fire will turn in the air if you move your aim. So be steady and don't move around! While you're up here use the computer in the building too, it will give you a more precise location of the hostage.
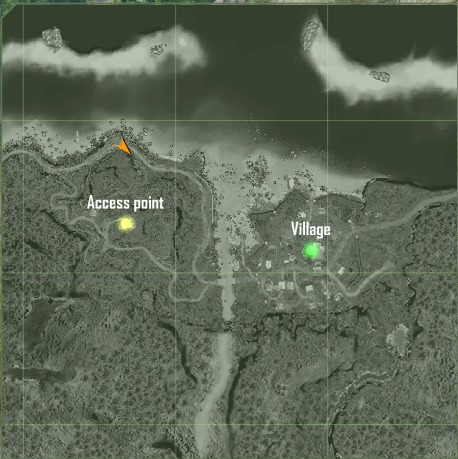
Visit the Access Point for a Missile Launcher and Precision Rifle
The village is heavily guarded by probably four dozen different soldiers and the only way in is across the bridge aka the front door. Every other entrance into the town has a mine field blocking you and I have tried to cross in multiple areas, it never works out.
You need to be slow and methodical in your approach once in the town, it's normally best to use the Stealth skill and to move around a lot. Pop out of hiding to eliminate one soldier and then Stealth again to change locations and look for another target. When enough people are dead you'll want to scavenge for ammo. Search inside of the buildings too, you'll find tons of ammo and weapons inside of buildings in this game.
I strongly recommend you clear the Town Hall building which is right next to the School (our mission objective) before you complete the "Infiltrate the school and rescue the hostage" objective. Once you rescue the hostage you'll have a boss fight with two tanks and dealing with the extra enemies while dealing with the tanks is going to make it harder.
To beat the tanks, grab Missile Launchers from inside of the School or the Town Hall and go Stealth mode. Wait until a tank enters your line of sight and hit it with all three missiles. You can hit it in rapid succession before it even has a chance to respond to you. You'll find plenty of Missile Launchers in both buildings so don't feel bad about being stingy, if one Missile Launcher doesn't destroy it (rare, but does happen) then get another!
Once both tanks are defeated you'll get a new objective outside of town, when you get close it'll change locations and make you climb up a stone rock wall. From here the path is pretty linear, there will be a couple of gauntlets filled with enemies along the way, you can either stealth past or shoot your way through, your choice. At the end you'll find Prophet who will direct you inside of a cave which starts Mission #3.
Mission 03: Relic
This mission begins with Prophet going MIA, follow the linear path forward and you'll find a large field with a bunch of enemies in it. I recommend taking out enough to reach a vehicle then using that to take out the rest. One tip about vehicles (if you didn't already know), you can switch their camera from first person to third person. On Keyboard the button to do this is F1 by default, check your settings if you're using something else.
Our goal inside of this Korean town is to disable the GPS Jammer. It's the yellow dot on your compass/map, look for the military grade machines. On the side of one there will be a panel which you can use to disable it and get your map back. Between you and our next objective there will be two enemy encampments, two road patrols and a helicopter. You can actually drive by all of this if you want, the helicopter will follow you but that's ok. You can find Missile Launchers inside many of the military buildings in this level. Really, any non-shanty hut building will often have ammo, including Missile Launchers.
Inside the KPA Base, the Intelligence that you need for our mission objective is just a laptop (pictured below). Approach it and interact with it to complete your mission objective.
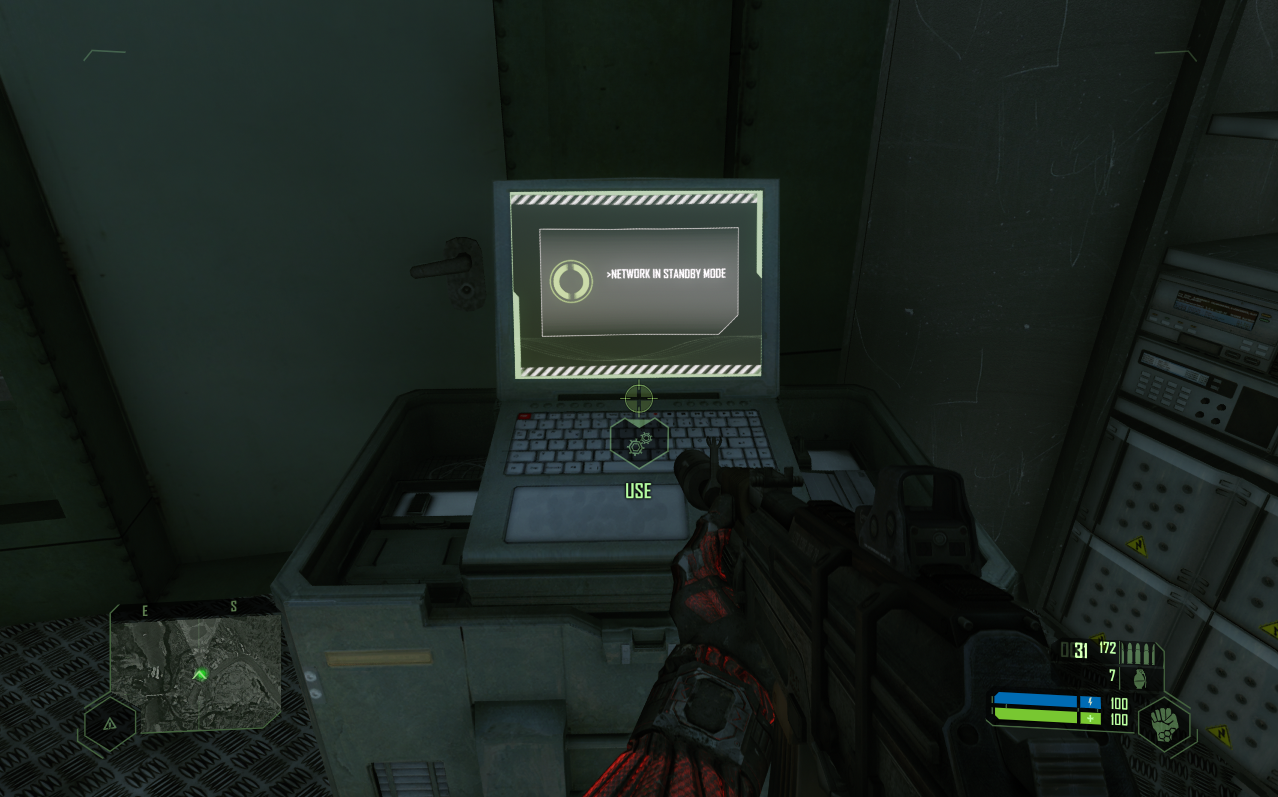
Most of the mission objectives in Crysis look like this laptop.
We're going to be heading east next to an area marked Excavation Site on the map. Much like earlier in the level, you can drive by all of the enemies on the way here... Don't get too close to the Excavation Site though, there's multiple machine gun and sniper nests. I normally get close with a vehicle and use that to eliminate anyone I see nearby. Depending on the difficulty you can shoot at the machine gun or sniper nests a bit too. Maybe you can take out a few more enemies before taking too much damage.
At 70% I hop out of the vehicle and go into stealth mode, you can enter this base in many different ways. Like always I will advise you to go slow, be methodical and take out enemies by cloaking until you get a good shot. Once you take one out, hide and cloak again, move away and find another target. Rinse and repeat until everything is dead. That's the "Crysis gameplay loop".
Once you're inside the Excavation Site you'll get an updated objective, Infiltrate the research dome. This is a structure nearby and it's just more enemies to kill in order to get inside. I figure now is a good time to teach you more about weapon customization in this game. On Keyboard the button is X, it will bring up the window shown in the picture below.
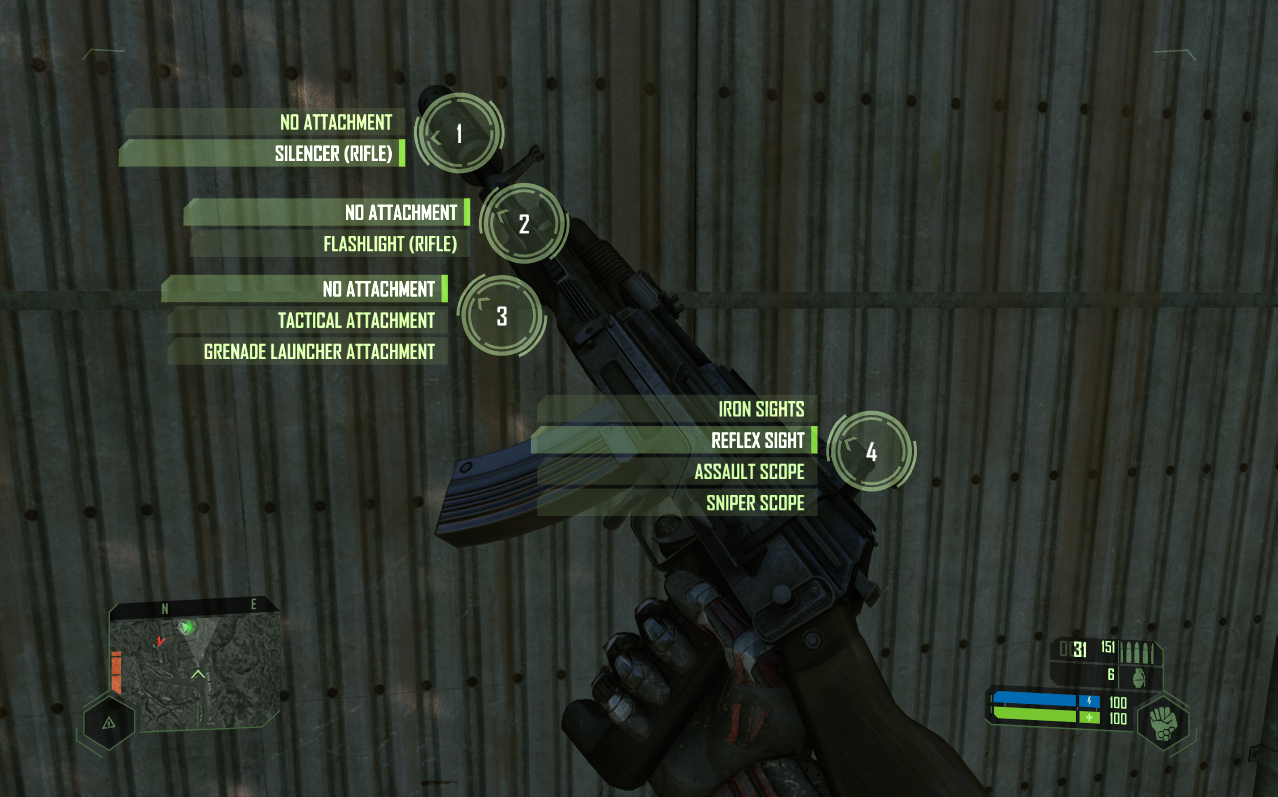
Make sure you customize weapons and pick the right sight and attachment for the situation that you're in!
The research dome can be accessed through the building connected to it, when you interact with the door you'll get a cutscene. After the cutscene it'll be dark outside and your research dome is about to get raided. Work your way out, grab a vehicle and start heading all the way south to the Extraction Point.
During your trip south you'll get a helicopter on you which will be difficult to lose until you reach the swamp area. Like before, my advice is to basically drive by everything you can. Alternatively, you can stealth and follow the wall down for safety. I sprinted in the forests and stealthed when I was in the open, it worked great.
Once you're at the cemetery in the swamp you'll have to deal with the hardest part of the mission and arguably the entire game. This will be your first encounter with enemy units that have Nanosuits; these enemies will all be using Cloak. Unlike your cloak too, they have permanent cloak and I can't figure out how to find them first.
Instead what I normally do is bait them out by standing in the middle of the cemetery. Watch your HUD and when one gets close enough you'll see his arrow. You can usually find him once you see his arrow but if not, he'll start shooting at you within a few seconds. My advice is to run and gun here, a few of them will have Precision Rifles which makes you very vulnerable to head shots. After you've defeated all of the enemies your evac will arrive and you'll be swept away to the next mission.
Mission 04: Assault
When the mission begins you'll want to run straight towards the green dot on your map (our first mission objective). I strongly recommend you stop at the building along the way to stock up on ammo and weapons, we were given a new load out for this mission and don't carry over our previous guns. For this mission I recommend long range weapons, you're going to be assaulting a few bases, one of which is on an island.
You'll meet Lieutenant Bradley at the green dot and he'll give your next task, disable two different AA guns. One of them is on an island and the other is along the road, it doesn't matter which of the two you do first. Although, the island AA gun I find has more enemies around it. There are also boats which have machine gun nests on them that patrol around the waters.
Tip: Make sure you customize the weapons you pick up during this mission. You'll want a better scope on them at minimum, I do the Sniper Scope initially then switch to Reflex when I get closer to my targets.
By each of the AA guns you'll find Explosive Charges and Missile Launchers; after you destroy the second AA gun you'll have to deal with a helicopter. Thankfully helicopters are pretty easy, just use Cloak and grab a Missile Launcher. Two shots per helicopter, don't forget too that the Missile will/can turn mid air if you change the location of your cross hairs. This is both good and bad, in my experience.
After dealing with the helicopter make sure you pick up more Missile Launcher ammo before heading out to the next AA gun, you'll have one more helicopter to deal with along the way so you want to be ready. When you're about half way to the AA gun in the harbor you'll run into another korean village. There will be a secondary objective here, Gather intel from KPA, this is also where the second helicopter will be. You can get Missile Launcher ammo from inside this village as well, it's sitting on a box outside.
When you're done with the village hop into a vehicle and drive towards the harbor where the final AA gun is located. If you're good with vehicles, you can use the machine gun ontop to clear most of the harbor, there are probably a dozen or so enemies in your way.
Tip: Search the large buildings in the harbor, they've both got a bunch of goodies. One of them has Incendiary ammo which is a hard ammo type to find anywhere else in the game.
For the next mission objective you'll have to Sabotage the jammer on the North Korean Cruiser. To do this you'll have to get onto the boat which is most easily done by finding the railing which is hanging down (pictured below). You'll be able to do one of your strength jumps onto this and then you can easily navigate through the cruiser.
Jump ontop of the piece of railing that's hanging to gain access to the cruiser
The jammer that we need to disable is a laptop onboard the ship, it's located inside one of the rooms on the upper floor. After disabling the jammer hop off the boat and make sure you have a Missile Launcher with full ammo because we're about to fight another helicopter. Once you're ready mark the boat using you Binoculars (just look at the boat and press the same button you use for shooting).
A few seconds later a helicopter will come out and attack you. Use your Missile Launcher to destroy it then run over to the new mission objective near the tunnel and get near Strickland's tank to start the ending dialogue.
Mission 05: Onslaught
The first part of this mission is very straight forward, you'll be in a tank and your job is to blow everything up in your way. Our first objective is to Secure the train station. I normally get out of my tank when I get close to this station since by that point my tank will have about 80% damage and it's easier to deal with some of the ground units when you can actually see them.
After clearing out all the enemies hop into the new tank that's parked here and use it to blast away the second boxcar (it's the one that is blocking your way). Our next area is another gauntlet which will include foot soldiers with rocket launchers, tanks and helicopters. During this stretch of the mission you'll get a Secondary Objective that involves destroying 3 AA guns. You don't actually have to do this one though, I personally drive by all of them and continue towards the primary objective (Sabotage the North Korean munitions dump).
When you finally reach the munitions dump, shoot the explosive barrels and you'll blow the whole thing up. Objective complete! In order to get to the mine, our next objective, you'll have to go through a barricade with a mine field and multiple mounted machine guns. Like always my advice is to use a long range scope and Cloak. Each time you pick an enemy off and Cloak, then rinse and repeat. Usually the NPCs will keep getting on the mounted machine guns which makes taking them out easy. It's like a line of lemmings.
Follow the train tracks after defeating all the enemies to avoid the mines. Once you're through the barricade just keep running and it's a straight shot to the end of the level.
Mission 06: Awakening
Much like before, there is no real reason to do the Secondary Objective at the start of this mission, you can proceed straight to the landing zone if you'd like. The landing zone is packed with enemies, it's got a tank and some KPA with Nanosuits too. Some will be using invisibility like before and others will be using Armor Lock and carrying miniguns.
Once all enemies have been eliminated a helicopter will come in and attack you. After that's destroyed your objective will be complete and friendlies will show up. The next objective requires us to Infiltrate the mining complex which is going to be another massive battle. My advice is to use the Missile Launcher to take out the two tanks and the jeep before leaving the landing zone. You can return to the landing zone multiple times to restock on Missile Launcher ammo before proceeding.
The entrance to the mine will be guarded by KPA soldiers with Nanosuits. Much like at the landing site, they are mostly using Miniguns with Armor Lock. You'll encounter the same things inside of the mine too, like always my advice is to be slow and methodical. Use your Cloak armor power up and take out enemies one at a time. Thankfully, you should have no trouble finding your way through the mine, it's very linear, just with a lot of enemies.
When you get far enough into the mine to see flares you'll also start hearing some voices. Follow the flares and when you get to the same room as the voices you'll trigger a cutscene. When the scene is over you'll have your first real boss fight of the game, General Kyong.

Look at those pixels on Kyong's face!
First thing you'll want to do is run around the arena and pick up all the ammo you can find. I strongly recommend you get an SMG and a Shotgun, you need both of these. During the Kyong fight I will use the SMG with an Assault or Reflex Scope to defeat him. He's in a Nanosuit so he'll regenerate health like you do... For this reason it's best to only shoot at him when you plan to go for the kill. The Shotgun you'll be saving for the next mission, it's desperately needed for that level. Make sure you load up on Shotgun ammo, it's found near the edge behind where you regained control of your character.
My best advice for Kyong is to position yourself behind an object and peek out just a bit, if you get it right his minigun will hit the object instead of you. Otherwise, just keep hitting him in rapid succession and don't let up to win. After the fight board the elevator and watch the scene, the level will end when the elevator crashes down.
Mission 07: Core
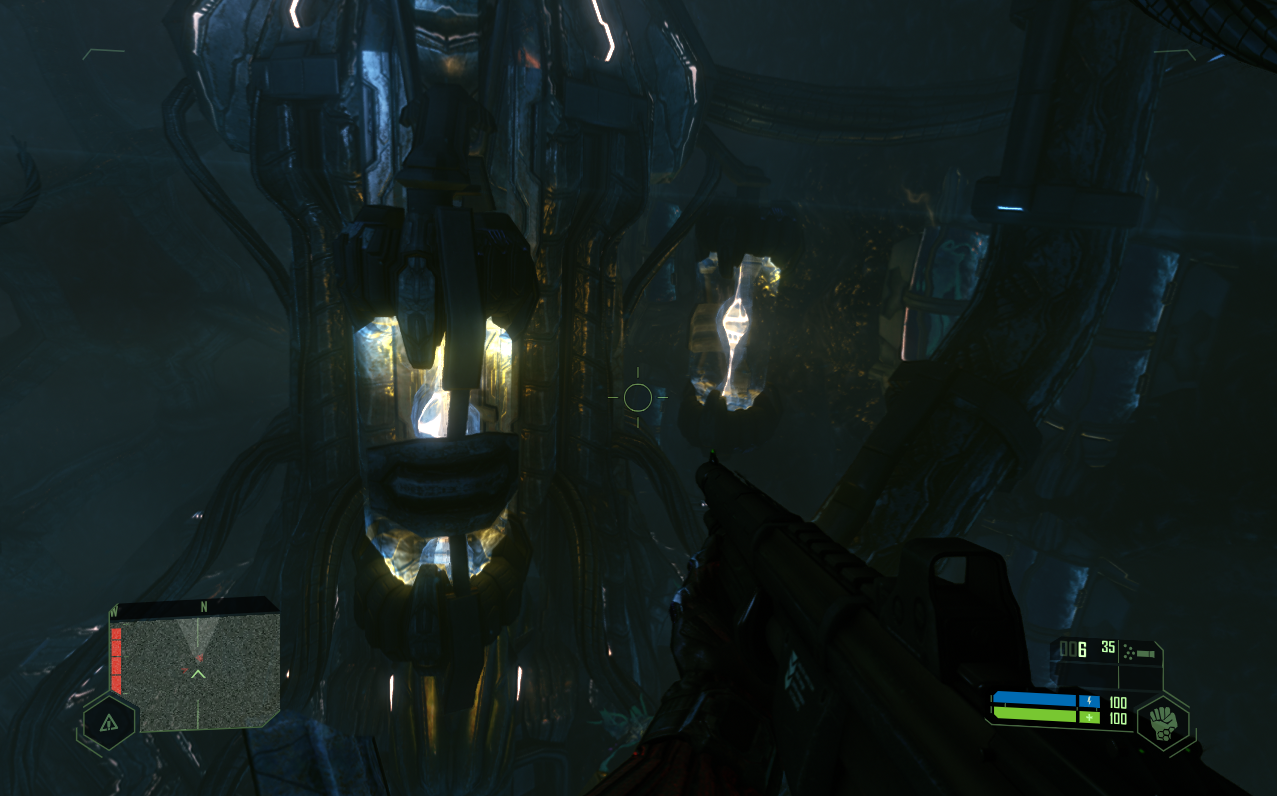
The Shotgun mission, without a Shotgun this mission is miserable. Make sure you grab one from the ground in front of you and max out your ammo. When you're ready, head up the stairs and into the alien artifact. The inside of this place is very confusing and it's pretty easy to get lost. To make things even worse, you'll lose gravity shortly into the dungeon.
At the end of this entrance hallway where you lose gravity you'll see one vent blowing air and the other vent is broken, you can go through the broken one to proceed. In the next hallway you'll have a vent which you have to melee a few times to break apart. Keep this in mind because it won't be the last vent we need to melee.
In the next room Nomad will mention "going against the current", do as he says. There will be a faint blue light in that direction too, not from the "flowers" but from an opening in the wall. Normally these are markers for which direction to go, keep following them and you'll get through this area. Just before the end of this area you'll be attacked by your first alien. The low gravity makes it a nightmare to try and fight, so I normally Armor Lock and flee.
Shortly after encountering the monster Nomad will commend about the large glowing tubes that are making the flow stronger. Shoot the one on the right and it will explode, allowing you to progress. You should also notice a different large tube below you with light spiraling through it, it kind of looks like a DNA double helix. This is another directional marker, the blue lights and the double helix DNA will guide you through here.
Shoot the glowing cylinders when you see them to progress
The next giant room you're dumped into will have a lot of enemies and I strongly recommend you just fly around the room and blast the energy containers pictured above. You will have to blow up about 6 in total before you will get a checkpoint and be able to proceed. The exit in this room can be found at the bottom nearby where you entered the room originally.
Our next challenging room involves force fields which will alternate on and off in a giant room with enemies. All I do in this room is stay on the move, Shotgun any aliens that get close and keep pushing through to the other side. When you enter the hallway on the other side of this room you'll be sucked through the artifact and given a bit of a tour. In the next big room approach the window for a scene and a checkpoint. After you get the checkpoint, turn around and go to the opposite end of the room. Some aliens will be waiting for you, but this is the way forward.
In the next room you'll be told to defend yourself against the aliens, my advice is to put your back against a wall and shoot them as they charge you. When you've killed enough you will get sucked out of the alien artifact and the level will be complete.
Mission 08: Paradise Lost
Ahh, back outside. Thankfully this mission is so much more straight forward than the previous one. Head down the mountain until you run into Prophet, there is a stash of weapons here (SCAR and a Shotgun). Once the segment with him is done, he'll give you a great weapon which comes with unlimited ammo. You'll be using this weapon to dispatch all enemies for the rest of the mission.
What you need to do now is run from fire to fire with Prophet, he needs the fire to recharge his suit. Aliens will attack you from the sky and ground while you do this, but it's very linear. At the very end of the mission you'll have a bridge to run across, when you reach the other side you'll be finished.
Mission 09: Exodus
Your first task for this mission will be to follow Prophet and meet up with the team of marines inside of the nearby building. There will be a scene outside and then inside, after which you'll be attacked by aliens. After a few waves of aliens you'll get into a convoy of vehicles, Prophet will be driving and you'll be on the gun.
Not very far down the road Prophet will stop and tell you to get out. From here you'll have to travel on foot to the next mission objective, Proceed to VTOL crash site. Once at the crash site you'll have to protect it from multiple waves of aliens. There isn't much room to take cover so my advice is to Armor Lock when the aliens are shooting at you. It'll reduce the damage you take as you return fire. If you're really close to dying, Cloak and sprint away to cover.
Tip: There is an AA gun at the crash site which you can jump into; the only downside of the AA gun is you can't pan it up very far which makes shooting targets directly above you impossible.
After you help evac the girl and Prophet, head over to the next location where you'll have to do the same thing again. Protect this location until evac by killing a few waves of aliens then board the VTOL to leave.
Mission 10: Ascension
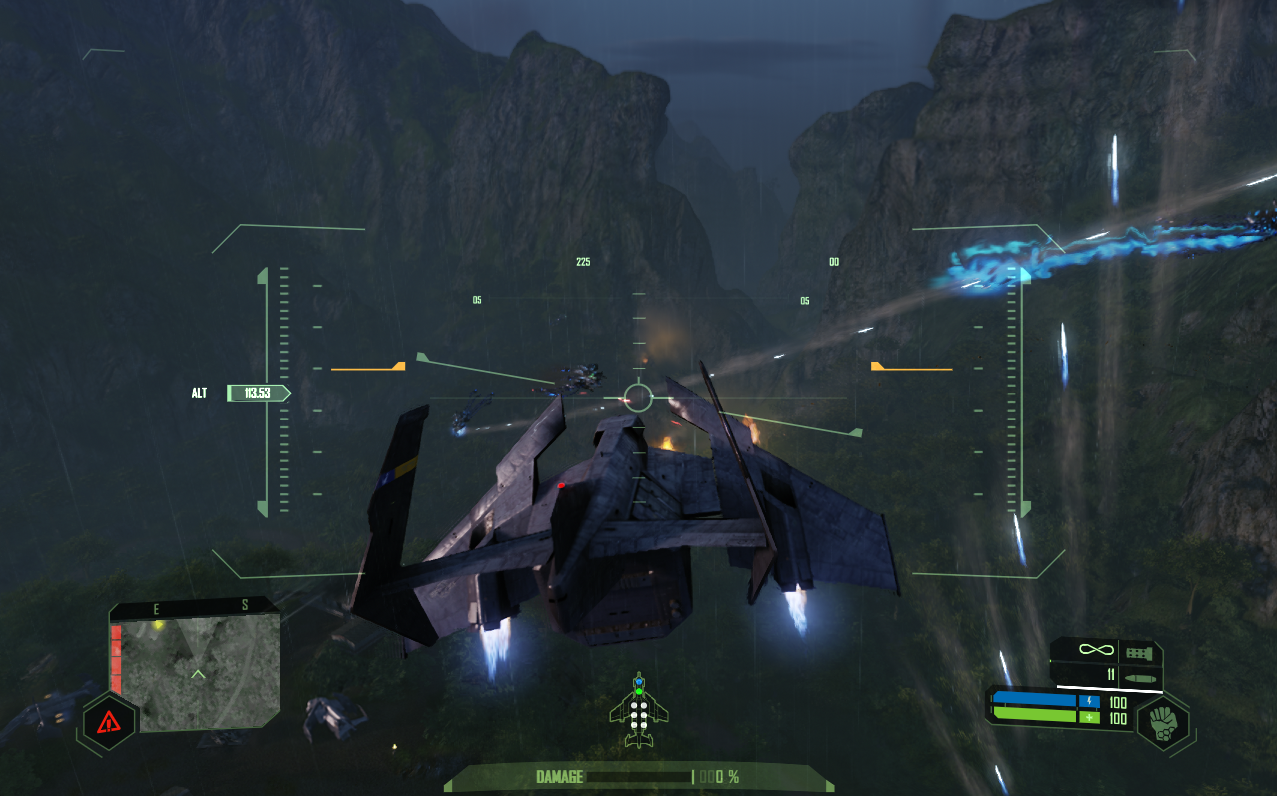
This mission is another very straight forward one. You'll be flying a damaged VTOL and you'll have to shoot aliens out of the sky in a few different areas and follow some fighter jets. I think the best piece of advice I can give you for this mission is to remember that you can switch your view when inside of the VTOL (as pictured below).
Another thing to mention is that it doesn't matter if you fail the objectives on this mission, they're all Secondary Objectives and none are required to complete the mission. All that you're required to do is escape the island.
Mission 11: Reckoning
When you gain control of your character follow Psycho down to the CDC on the bottom floor, enter the room and you'll have a long cutscene. Once you regain control of Nomad exit the room, cross the hall and continue towards the Armory. If you're having trouble navigating the ship look for the signs on the ceiling (pictured below).

In the armory you'll get another scene with Prophet, when you get into the chair a cutscene will take over too. After the cutscene head back in the same direction you came from and go up the stairs until you reach the Bridge. You'll have another scene here, when it's finished melee the door to get it out of your way and head to the deck of the ship. We're going to have a big battle here which you'll want to stock up on ammo for. As you arrive on the flight deck, go to the right immediately and you'll find a pile of Gauss and Minigun ammo.
The Gauss Rifle is great on the big flying aliens, honestly the Minigun is too. I recommend you use one or the other and ignore the other weapons that are available on the deck. Once the battle is over head over to the elevator and ride it downstairs. Inside big room walk over to the hole in the floor and fall down onto the broken elevator, it'll collapse under your weight. This next part is very linear, bash any doors in your way that can be bashed and follow the route through the ship.
Tip: If you die while going through the ship from explosions or electricity... Use your Armor Lock.
Eventually you'll come to a larger room with some stairs in it, there will be an electrical box ontop of it that you can use. Do this to update your Primary Objective with a new one, Shut down the reactor. Head through the water along the linear path until you find an opening that you have to prone for. The clipping is really poor on this opening, you kinda have to stand inside of it then go prone to get through. I wasn't able to prone before the opening and crawl through because I got stuck on the lip at the start.
Not too long after the hole you'll come to the reactor, when the door is opened use your Armor Lock before going in. You need to circle the reactor and depress the rods, there's 3 rods in total. I find it easiest to just circle the reactor and spam the "use" key. After the reactor room the path forward is pretty linear again, this time we're returning to the flight deck (kind of). Half way back to the flight deck you'll get an update, first we need to stop at the Armory and grab that TAC Cannon.
Back on the flight deck you're going to have two major battles. The first big alien creature you can defeat by just shooting at him, wait for Helena to tell you she is weakening it before shooting though. It has a lot of HP and it seems like it isn't taking damage but it is, you can tell its HP is going down because it'll start glowing more and more.
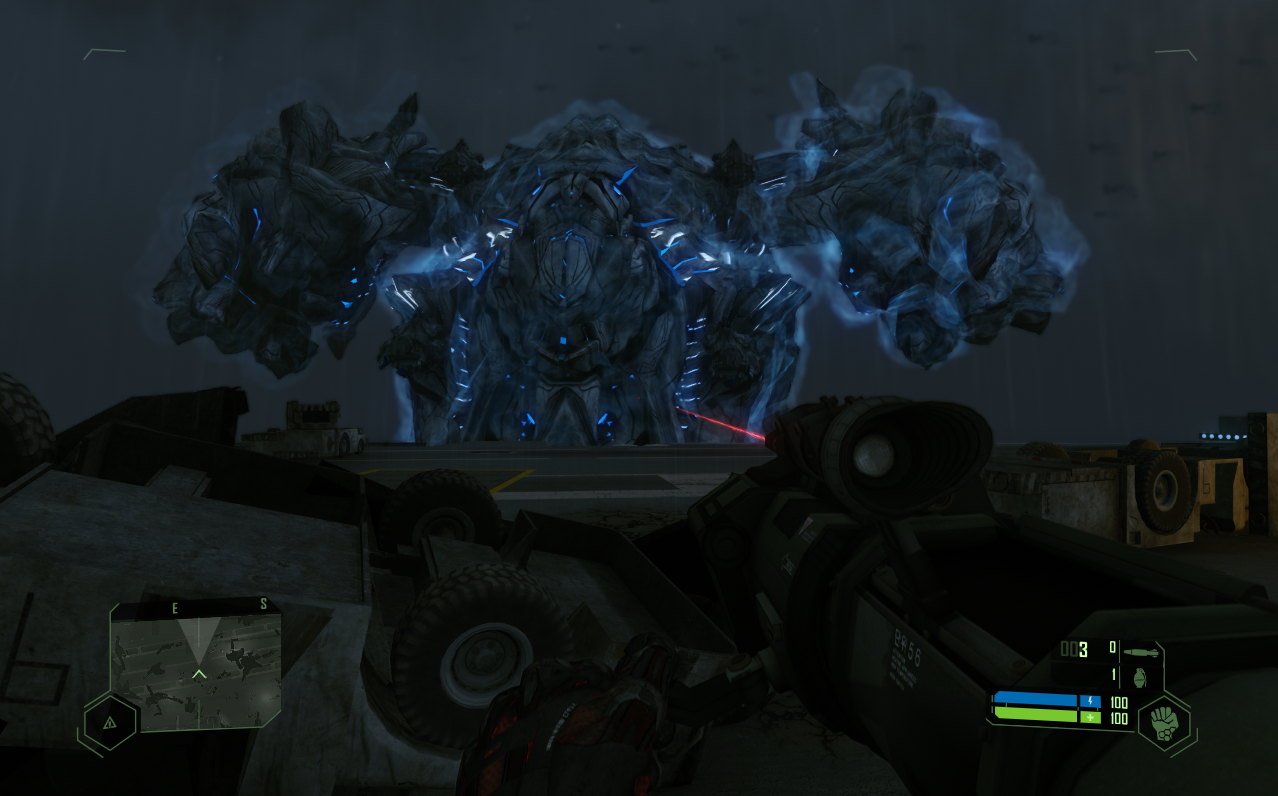
After that boss you'll be dealing with the final boss (pictured above). For starters, you'll have to take out the turrets on the boss then deal with some flying aliens. Once that's all done you'll be able to use your TAC Cannon on the arms to destroy them. With the arms destroyed the big machine will float over the ship you're on. Shoot the remaining turrets then blast the belly until you open it up. Launch a nuke in with your TAC Cannon and make a break for the VTOL to get your ending.