
Lufia and the Fortress of Doom Walkthrough - Chapter 4
The previous chapter ended with you finding all 7 pieces of Alumina and returning to Carbis to meet up with Raile. When you arrived a guard told you that Raile has since left and can be found on an island controlled by pirates that is nearby. This island is called Aisen Island.
I think the best directions I can give you to Aisen Island will be to first Warp to the town of Marse. From Marse you'll want to travel east until you find the mouth of the river that took you to Herat earlier. This time you'll want to go straight north, you'll run directly into Aisen Island when you do.
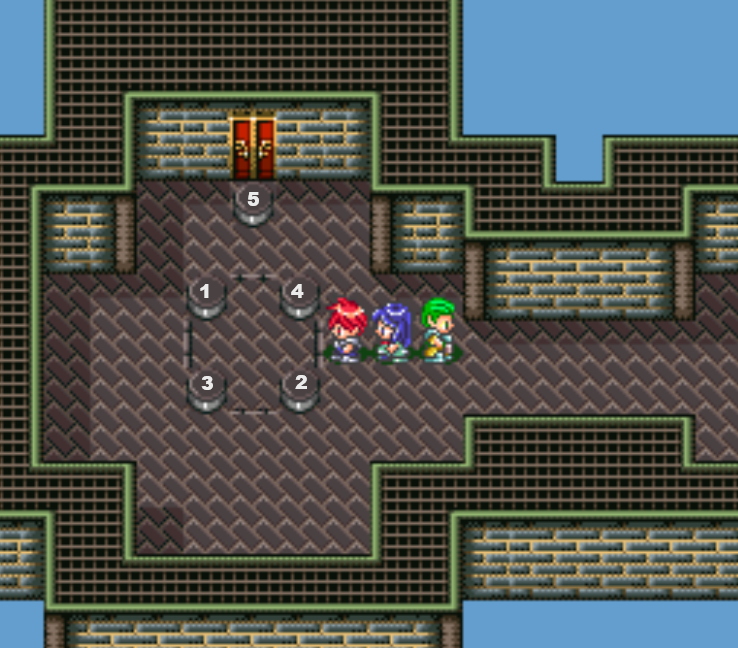
You can tell you found the right island because Aisen Island will have a boat docked here right next to a tower. The first part of the tower is pretty straight forward - however you'll eventually run into a button puzzle which will require you to press the buttons in the correct order. Below you'll find a picture of the correct combination, step on each button in the order shown.
After you solve the puzzle and open the door continue to the top of the tower and you'll eventually run into Bosun, the boss of this area. During the boss battle you'll want to eliminate Bosun first since he can heal the Pirates. Like always, I recommend you use the Drain debuff on the boss at least once to reduce their defense.
Tip: If you've completed the Old Cave dungeon you have gotten the Wind Flute item (if you sold it buy it back at Forfeit). The Wind Flute will heal your entire party when you use it during combat and you can use it infinite times. Many people have Jerin use this item every round since she acts first/frequently.
When the fight is over there will be a short scene with Lou, make sure to loot both chests that are here. One has a Silver Tarot inside and the other has a Pirate Key. We can use the Pirate Key to open up the cell with Raile on the third floor of this dungeon. You may have found him already before finding Lou, if you follow one of the forks on the second floor of this dungeon you will come to the jail cells with Raile.
Open Raile's jail cell and speak with him for a scene, when it's over you'll want to use your Warp spell to travel to Carbis. Talk with Raile inside of Carbis and he will outfit your boat with the Alumina which allows it to sail under the water. After the scene you'll want to sail north of Carbis, you'll run into a medium sized island with a large pool of water in the middle. On this medium sized island you can find the town of Soshette, it's along the northern ring.
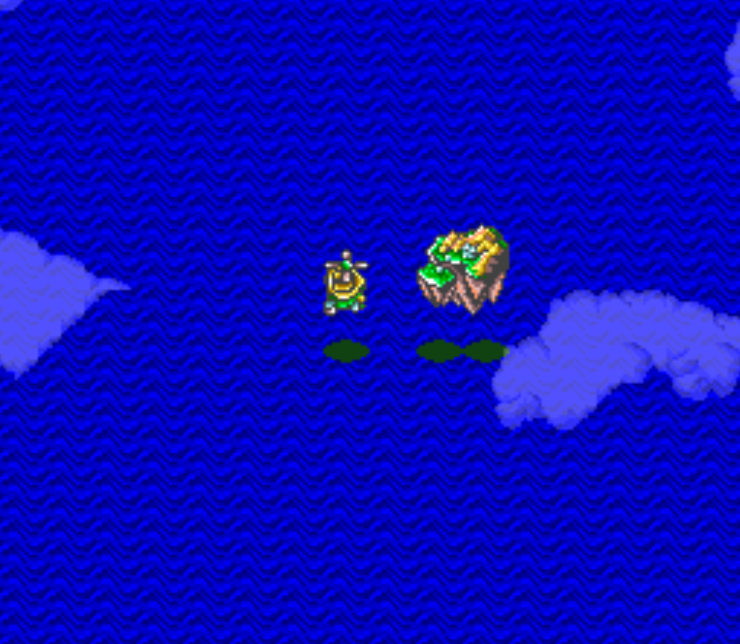
Enter Soshette and rest up if needed, you can also explore and collect hidden items if you want. There isn't anything of real note in this town right now. When you're done exit the town and sail west to the first eddy you see (pictured below). An eddy looks like a small whirlpool, they'll stand out against the back drop of the ocean. Technically any eddy works to reach the next dungeon, you'll find four of them surrounding this island.
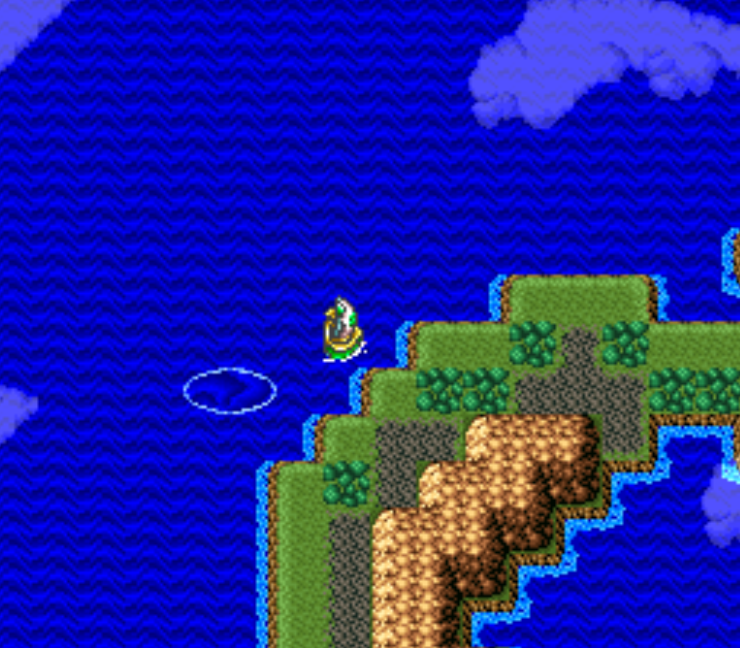
Use an Eddy near Soshette to reach the next dungeon
After using the eddy you'll find yourself under water with many different cave entrances in the surrounding area. Each entrance leads to a short mini dungeon, inside you will find many different currents of water and some treasure chests. When you drive your boat onto one of the water currents you'll be stuck on a rail until it ends. This makes navigating this dungeon to get all of the chests quite annoying.
My advice for this part is to clear one dungeon and find the eddy exit that takes you to the center of the ring. Sail around the castle in the middle and enter into another one of the dungeons. It's normally pretty easy to get the chests when you're coming at them from the exit.
When you're done collecting treasures you'll want to enter into that large underwater castle in the center of the ring. There is no loot inside of this castle so follow the linear path up the stairs and through the dungeon just like we did at the start of this game. You'll eventually reach the final room where you'll find a sword lying on the ground, interact with it for a long scene and a lot of dialogue.
You'll regain control of your characters inside of the Soshette Inn when the scene is over. Our next stop is Carbis to speak with Professor Raile, he'll tell you to visit Epro next because that's where you'll find something called Power Oil. Epro is found north of Marse, teleport there and sail almost directly north to reach Epro, it's a small town surrounded by forests.

Inside Epro you'll want to search the bush above the item shop in the NW part of town to find a Power Potion. To advance the story you'll want to speak with the other item shop owner in the NE part of town, he's the generic red haired NPC character model. Speak with him and he'll tell you that the store is out of Power Oil for today.
The NPC in this item shop will tell you about a man named Hedge who is looking for a way through a landslide north of town. Exit town and travel north across the first bridge you see, go right at the fork and you'll find Hedge right there standing on the World Map. Hedge will give you the Oil Key which you need to access the next dungeon, he'll also tell you about some eddies which just appeared northeast of where Hedge is.
Return to Epro, hop into your boat and sail to where you found Hedge on the World Map then a tad bit northeast of there. You'll find an eddy surrounded by mountains - sail directly into it. Just like before you'll find yourself in an underwater area, sail into the cave entrance here and then sail through the cave dungeon using the water currents to navigate your way. Much like the other cave, you'll have to do a lot of backtracking if you want to collect all of the loot.
You'll eventually find another eddy which will let you surface inside of the ring of mountains on this island. Dock your boat and walk across the island and across the toxic marsh to find another cave entrance. Use your Oil Key on the locked door inside to open it. This dungeon is pretty straight forward, as are most in this game. You're looking for a dragon at the bottom who is guarding a chest with some Power Oil inside (pictured below).
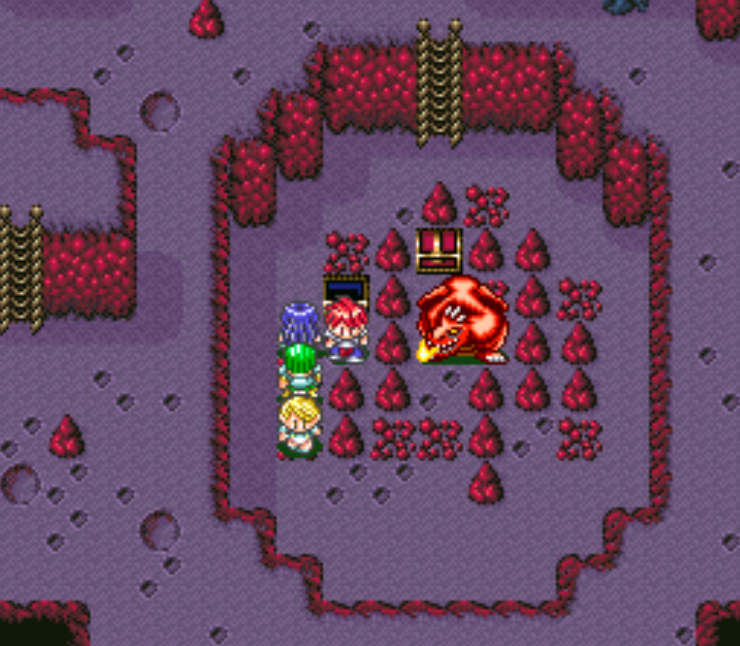
Talk with the dragon and you'll start a boss fight. Once defeated grab the chest from behind and you'll have the Power Oil in your possession. Exit the dungeon and use Warp to travel to Frederia; you can find Professor Raile inside his lab which is in the northeastern part of town. Go down into the basement and talk with him inside, there will be a scene after which you'll regain control of the Falcon with its new flying powers!
Before we progress with the game - now would be a good time to bring up the Dragon Eggs Side Quest and to encourage you to complete it now to claim your reward. You can complete this quest a total of 3 times, each time you get a wish granted the Dragon Eggs will scatter across the world again (just like a popular anime/manga you may know). Once scattered you can collect them again to make another wish. Check out that page if you'd like to learn more about this quest.
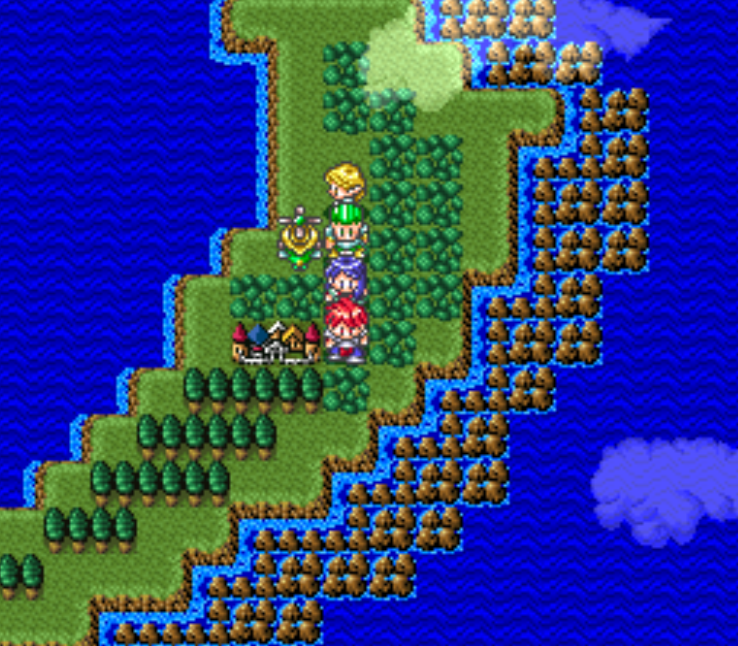
When you're ready to continue with the story you'll want to fly west of Frederia to the town of Arubus (pictured below). This is the last town in the game, which means it has the best armor/weapons that money can buy available.
There's actually nothing for us to do in Arubus in terms of story. Buy whatever you want, explore the town and collect the goodies you find and when you're ready to advance the story it's time to fly north to the cave at the tippy top of this island. The cave entrance will have some sand going by it, it's found directly north of Glasdar Tower.
Glasdar Tower is that big tower next to the smaller floating island. If you try and fly near this location it will redirect your ship and force you away. Use this as your landmark, it's also our next dungeon. Right now we need the cave north of Glasdar Tower because that's where we'll get the key to open the tower.
Much like many of the previous dungeons, search the teleporter first and go through it to collect the loot. Use the switch in this dungeon to change the teleporter location and then go through it again to find the Glasdar Key and other goodies. We're done with this dungeon now, it's time to head south for our next cave.
We have the key to Glasdar Tower but we can't land anywhere near it with our ship, so we have to enter the cave south of it instead. This cave is extremely big but also rather linear (thankfully). Not very far into the first cave you'll run into a secondary cave. It will go from brown to a blue color when you go up a set of stairs with four pillars around it. If you backtrack a bit and go directly south of this set of stairs you'll find two floor tiles that will restore your HP/MP.
If you find yourself with the need to grind at this point in the game, I would recommend this location due to these HP/MP restoration circles. Continue up the stairs and you'll find yourself in a giant room with blue colored walls, the exit we need is in the northwestern end of this room - a picture of the door you're looking for is shown below.

Go through the door shown in my screenshot above and use the Glasdar Key on the locked door that you find. This will lead you to the teleporter in my picture above and when you step on that you'll find yourself inside of Glasdar Tower. You'll know you're in Glasdar Tower because the environment will look nothing like the previous two cave dungeons. The walls will look a lot like the Tower of Doom/Sinistrals Tower from the start of the game.
Important!! Lufia will be leaving your party until the final boss fight once you complete this tower. Now is the last opportunity you have for leveling her up.
This dungeon is also your first dungeon in a long time that can be legitimately confusing. I recommend using some Sweet Water items inside of here to reduce the encounter rate or using a code to stop all random encounters if you're on an emulator. Without any random encounters you have a lot more time to think and explore instead of getting confused and frustrated from dealing with constant fights.
When you reach the 5th Floor of Glasdar Tower (read the signs on the walls in the hallway to know which floor you're on) you should start paying attention. The blue flooring that leads to the doorway in this hall takes you to a room with two large rooms inside. Inside the room on the right you'll find a teleporter that takes you to an area with an HP/MP Restoration Circle.
Inside the left room you'll find stairs up to the 6th floor. These stairs will lead you to a room with 4 switches and a teleporter (pictured below). This is the 'key' room for advancing the dungeon forward.

Depress the switch in the middle to change the Teleporter location
Tip: To reach the Glasdar Tower treasure room step on the two switches on the right and follow the linear path to a room with 10 treasure chests. In the future you'll (maybe) come here for the final set of Dragon Eggs. There are a few potions in here that give permanent stat boosts and some Miracles. Nothing that is the end of the world to miss.
Each time you step on one of the three switches below the teleporter it will change the teleporter's location. If you want to collect all of the treasures in this dungeon you'll have to go through each teleporter one by one. However, none of the treasures are really worth going that far out of your way for so I won't encourage that.
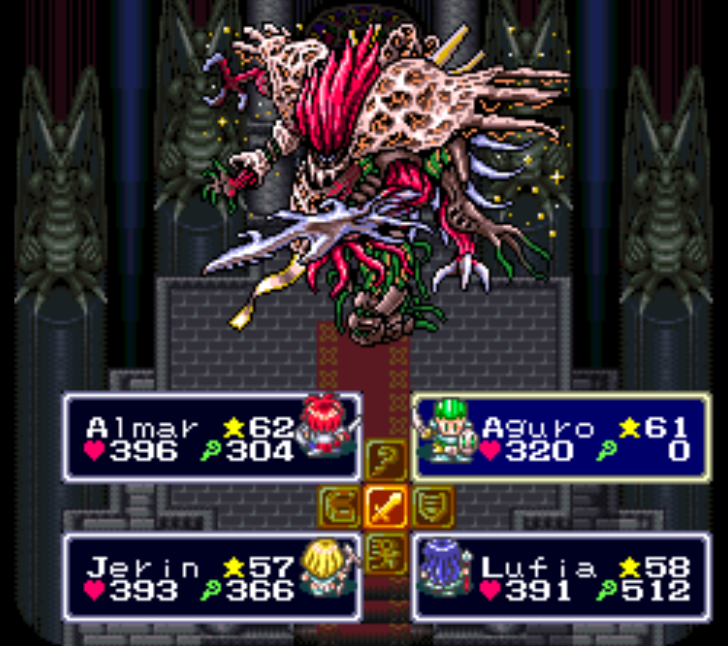
To advance the story forward what you'll want to do is press down on the switch in the middle (pictured above). Use the teleporter while this switch is depressed and you'll reach the next floor. Follow the linear path to the top of the tower and you'll trigger a boss fight when you walk into the center of the room.
Like I mentioned at the start of the dungeon, Lufia will leave your group at the end of this fight and you'll have to complete the last little bit of the game without her. As for the boss battle itself, depending on your team's levels it will either be a piece of cake or a traditional boss fight. Jerin was 55 at this time for me and my Hero was level 60 so I was able to roll this entire boss with ease.
After the fight there will be a short scene, when it's over you'll want to jump off the tower and Warp back to Arubus. Sell all of the items you don't want and purchase a weapon for your Hero if you don't already have one. Since he lost the Dual Blade he doesn't have anything he can use anymore.
When you're ready to continue with the story you'll want to fly northwest of Arubus to find Doom Island. Every guide I read says northwest but I feel like I flew NW from town 10 times looking for it and never found it. THis island is in the middle of some ocean somewhere (no World Map is really annoying) and it's a bit difficult to find.
Once you finally discover Doom Island fly into it and then land on the orange circle that you find. Exit the boat and continue north to find a large structure. In the middle you'll find an old man who will restore your HP/MP and record your journey. Around you there will be a bunch of rooms that are opened with the Glasdar Key. These will connect you to dragon shrines throughout the entire world.
Exit this building to the north and continue north to reach the final castle. The layout is the same every time that we're here - this time all of the chests will be refilled too. It's nice that our hosts were so thoughtful to leave out a bunch of loot for us. Keep going until you make it upstairs, you'll find the Sinistrals waiting for you here.
You'll face off against them one by one, Gades, Amon, Daos and then Guard Daos. For every fight you'll want to use Drain on your main character to decrease the bosses armor, use it at least 2 times but 3 would be nice. Jerin can heal with Wind Flute or with Champion/Stronger until you get Lufia back.
Lufia joins you for the final fight at whatever level she was left at. Depending on your levels the final fight may be hard or a total piece of cake. For my characters it was a piece of cake and I didn't need any consumables.
There will be a long scene after this fight - when it's over the credits will roll. That's all there is to this game!
Return to Chapter 3 of my Walkthrough