
Lufia and the Fortress of Doom Walkthrough - Chapter 2
In the previous chapter we just finished obtaining the Dais Key and revisiting the Old Cave to clear the Level 15+ floor out. When you're done all of that and ready to advance the story again you'll want to return to the town of Belgen, to get here you'll want to use the Swing Wing item and pick Belgen from the list of Warp locations.
From Belgen you'll want to travel west, hug the northern coastline this time and make sure you stay along the north side of the mountain range. Keep going west and you'll find another cave near the water, enter inside. This cave has a big red door that the Dais Key will unlock; to the south of this door you'll find a few chests with permanent stat boosting potions.
The dungeon is pretty short, explore it and collect all the chests - the exit will put you back onto the World Map in a new location. Nearby you'll find a shrine like building on the World Map (pictured below). Enter this location for some story events.
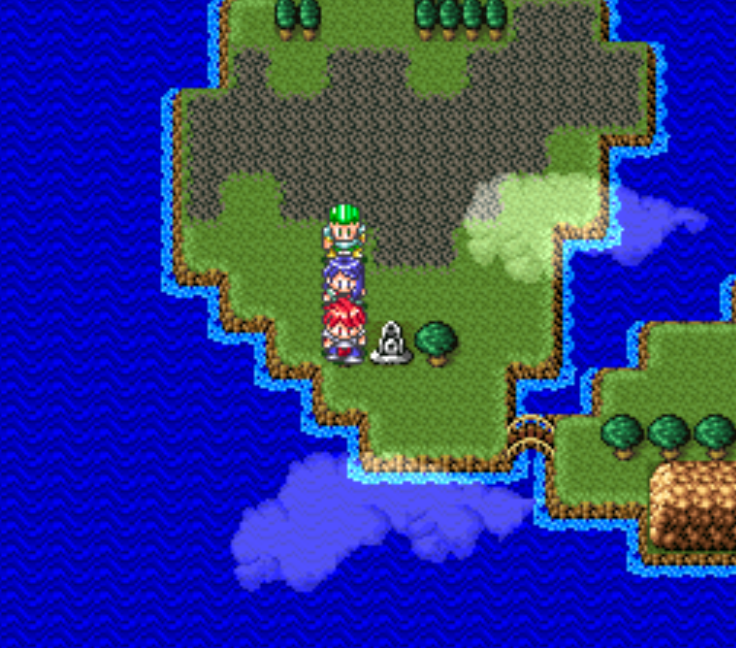
Dais location on the World Map
At the Dais location you'll find two urns on either side of the platform, inspect one to fully restore your HP and the other for MP. When you walk along the side of the platform for the first time you'll trigger a scene, after watching the scene try to leave for another one. During this one Jerin will be captured by a monster and carried to the north tower. When you speak with the guards they tell you to go there and check the top floor.
Like the name suggests, you can find North Tower to the north of this location. There are two things we want to do inside of this dungeon, the first of which is find the chest that contains the Flash Ring. You can find this chest by entering the dungeon and going into the northeastern-most door of this room. Basically the entrance of the dungeon is one big hallway, at the end is stairs up. The door on the right just before the stairs is where you wanna go for this ring and to advance the dungeon.
Use the teleporter and go up the stairs, follow the hallway down and search the rooms to the south for the Flash Ring. The reason this item is so powerful is because it increases the lightning damage that you deal, this is very powerful for Lufia since her best spells deal lightning damage (Flash & Bolt; you learn Bolt at 21). Equip this ring on her and leave it on for the majority of the game.
Tip: The Smoke Bomb is a good item to use if you want to escape from battle. Some enemies inside of this dungeon (Archers) will wipe out your entire group even if you're over leveled. 3 Archers can be tough but 5 Archers is nearly fatal.
In the final room of this dungeon you will find a dozen teleporters throughout the area along with Jerin on top of a platform. Use the teleporter in the eastern part of the room (pictured below) to reach the girl.

Use the teleporter on the right hand side of the room
After stepping on the teleporter go up several times and you'll reach the platform with the boss. On our way back we'll go down several times to get back. For this boss you'll want to use Power Gourd during the first round on your main character and Aguro. You'll also want to use Drain on the boss (Lufia's spell) to debuff his defense. Keep this basic strategy in mind for bosses because it will make them much easier.
When the fight is over speak with Jerin to have some dialogue and be teleported back to the village of Belgen. Once you're done talking with Jerin it's time to exit Belgen and travel northeast to Surinagal. If you've been following my guide this entire time you already visited this town during Chapter 1 to buy some upgrades. Technically visiting Surinagal is optional, we're mostly using it as a landmark right now.
South of Surinagal you'll hit the coastline, follow the coast west until you find a bridge and cross the bridge to the south. From here follow the linear route west to what looks like a town, it's actually the Forest Station. Talk with the old man inside of this building and there will be a scene - during which Jerin will join your party.
Outfit Jerin! You'll want to equip Heeled Shoes and Flame Ring onto Jerin if you still have them. Leave the Bow weapon she uses alone, it hits multiple targets which make it better than anything you can give to her. She will have a few empty slots in the Equipment window for the time being but that's ok.
Jerin's main strength is in her spell casting, most people use her as a support role but she works very well as a primary damage dealer too. For support spells she starts with Warp (this is fast travel in Lufia and lets you transport around to any city you've visited) and Escape (let's you leave any dungeon and return to the entrance). For damage dealing spells she starts out with Spark (deals fire damage & hits groups of enemies) and Frost (deals ice damage & hits all enemies).
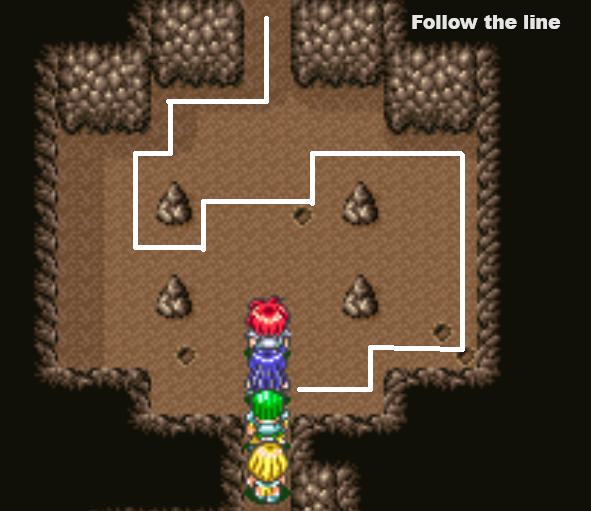
To continue with the main quest you'll want to travel south of the Forest Station, you'll notice a pair of mountains with a forest squeezing between them - this is our next destination. Since we have Jerin with us you will get directions while navigating this forest. All you need to do is listen to her and go the route she says, if you don't listen you'll have to start over and try again.
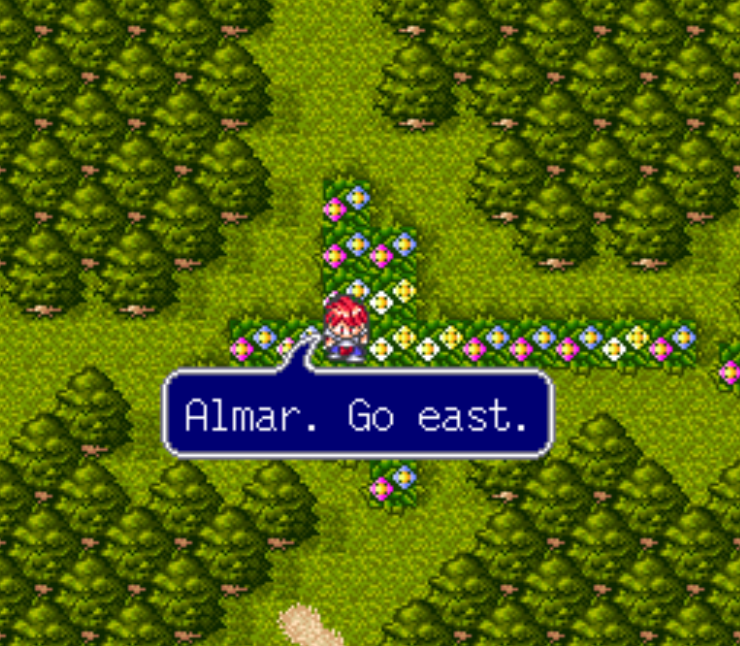
Follow Jerin's directions to navigate the forest
Once you come out the other side of this forest you'll find a small hut to the west and a shrine to the east. The small hut takes you to an old man's house, he is basically an Inn that you can stay at for free. If you want, level up Jerin a bit in this area while you're still near the free Inn. The monsters in the next area can one round Jerin with her current HP/Level/Equipment.
When you're ready to continue with the story enter into the shrine near the ocean and travel through the linear path to reach a new area of the World Map. This new section of the World Map has 3 towers that we must complete to advance the story. In this area you'll also find one new town - Jenoba.
After you cross the ocean you'll want to visit Jenoba as soon as possible. You can purchase a Long Sword here for the Hero which is a nice upgrade over your other weapon. There's also a bunch of armor upgrades you can buy here too for everyone on your team. Outfit everyone and also hit up the Item Shop in town too - you should purchase 10 - 20 Stone Cure items. Enemies in the next few areas use Stone against you which we'll need to cure with this item.
To continue with the story you'll want to enter the house in northern Jenoba and go down the stairs inside. Go up the next set of stairs and you'll find yourself inside of a tavern. There will be an old lady at the bar that asks you to buy her some Cider - do this for information about how to get to Elfrea. You'll still need to get the dialogue flag by talking to the old lady, but basically what she tells you is to climb each of the three towers in this area and collect a gem from on top of each. When you have all 3 gems you can access Elfrea.
Tip: When you reach Level 20 make sure to return to the Old Cave near Grenoble and do the new level of the dungeon! I'll remind you again in a bit.
The Quest To Enter Elfrea
Unless you want to spend a lot of time leveling up your characters, I recommend you stock up on 30~ or so Big Arrow items when you're in Jenoba (you can buy them in the Weapon Store). These items can be used in combat to easily eliminate groups of enemies. Lufia plays a bit different than most RPGs of this era, you're expected to use items like this during combat quite frequently. Not using these items will make battles harder and take longer.
Our goal at this point in the game is to find 3 gems and then to place them inside of the tower that they're colored after. There is a Blue Tower, Green Tower and Red Tower that we'll have to visit and 3 gems that are associated with them. You may have been thinking Blue Tower means you'll find the Blue Gem - but this isn't how it works. We'll actually find the Green Jade inside of the Blue Tower. Also, we'll need to return to the Blue Tower once we find the blue gem to place it into the pedestal that you find at the top.
In other words, this next part of the game has a lot of backtracking and running around. One thing I would like to mention too, in each of these towers you'll find a ring that corresponds to their color. I.E in the Blue Tower you'll find the Blue Ring. Make sure you find these in each tower as they are quite powerful for this point in the game. They're upgrades for everyone but Lufia, leave the Flash Ring on her.
Below you'll find information about each of the 3 gems we need and where you can find them. I also included information about where to find each of the dungeons associated with the gems.
Green Jade: Found inside the Blue Tower.
Blue Jade: Found inside of the Red Tower.
Red Ruby/Sapphire: Located in Medan Mine, a small cave near Medan. Talk with man in Ruan for dialogue flag.
Blue Tower Location: Found southeast of Jenoba along the coast.
Red Tower Location: Southeast of Jenoba on the other side of the ocean (walk east across bridge then south).
Green Tower Location: Go south of Jenoba until you hit the mountains, follow them to the east until you see the Green Tower to the north.
Ruan Location: Next to the Red Tower; southeast from Jenoba.
To get the Red Sapphire you'll need to speak with the man at the Jewel Shop in Ruan. He'll give you the dialogue flags you need to find it in the cave near Medan. As you can probably guess, the order you do these next steps in doesn't matter. When you find all 3 gems, the order you light the towers in does matter though - red comes last.
Tip: When your team turns level 20 you'll want to return to the Old Cave and do Level 4 of the dungeon. If you defeat enough enemies to turn 25 you can return to the cave a second time too! Try to make this a habit and return here every 5 levels because you'll get a lot of permanent stat potions each time you clear a level. Also, try not to wait too long because this quest can bug out on you. IE if you're level 35 and haven't been back since level 20.
The Green Jade
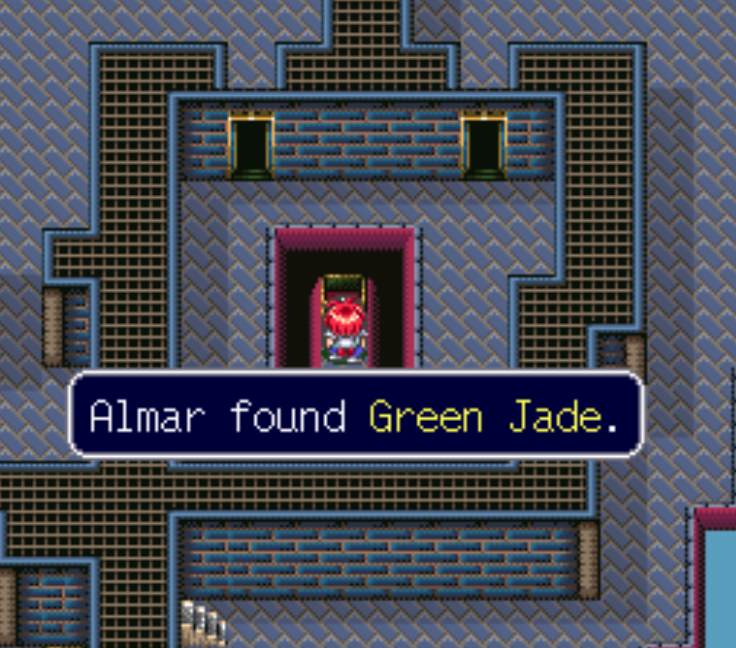
The Green Jade is found inside of the chest in the center of the 2nd floor of the Blue Tower. Since the chest is surrounded by a hole in the floor that you can fall through - the only way to reach it is by dropping through a hole in the floor above it. To reach this hole you'll want to take the stairs on the right at the fork on the third floor; this fork will lead you straight to your destination.
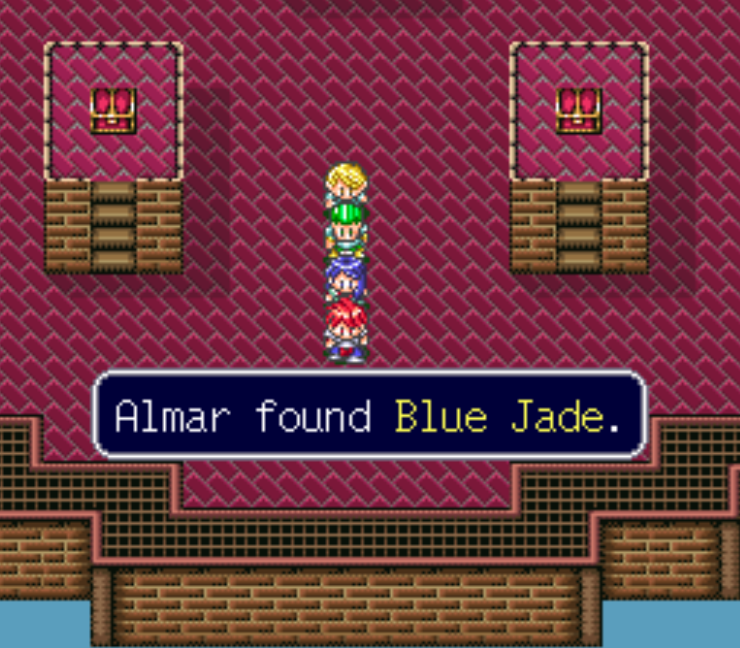
The Blue Jade
Much like the Green Jade, getting this jewel requires some dungeon spelunking. You'll find the Blue Jade inside of the Red Tower's basement. Defeat the Dark Ghost at the top of the Red Tower then fall off the tower and enter it a second time. Go into the basement (it was previously filled with toxic water) and you will find 3 new chests. If you're having trouble finding the basement - from the entrance go into the door to your left.
Go downstairs and you'll find the chest with the Blue Jade in the middle of the room (pictured below). Make sure you grab the other chests too, you'll find a Dragon Egg in one and a Miracle in the other.
The Red Sapphire
In order to get the Red Sapphire from the Medan Mine you'll first need to get a dialogue flag from Ruan. You can find Ruan near the Red Tower, both of these places are to the east of Jenoba. Once you're in Ruan you'll want to speak with the shop owner in the top right of town. She'll tell you about Medan Mine when you ask her about jewels.
While you're in Ruan you should inspect the flowers in the bottom right of town for an Empty Bottle and a Power Potion. Once you're done in Ruan use a Swing Wing item or use the Warp spell on Jerin to teleport to Medan. Travel north of Medan until you find the stairs down pictured below.
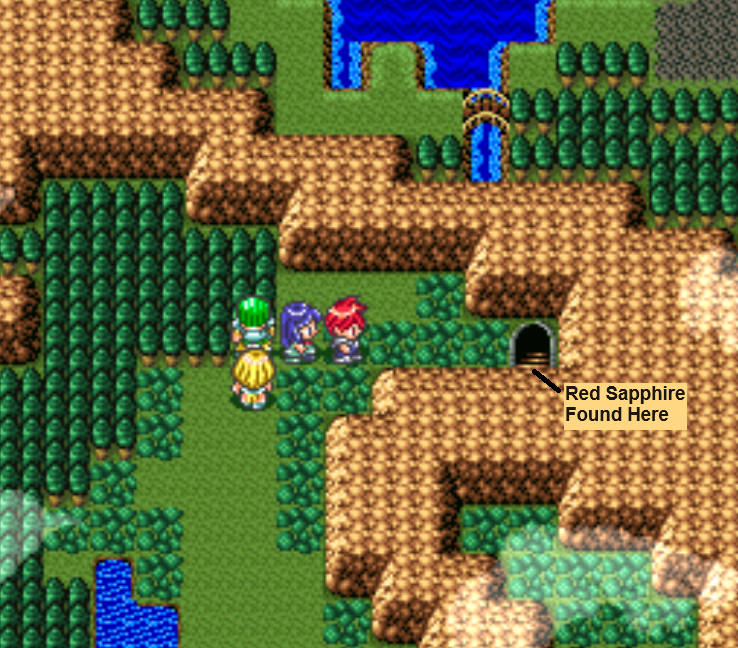
You'll meet someone at the entrance of this mine who tells you about an old man in the back who has what you're looking for. This dungeon is extremely short, talk with the old man found inside and he will give your party the Hope Ruby. This doesn't appear in your inventory and seems to be an invisible key item. Make sure you loot the room behind this man for 500 Gold, Diamond Ring, Opal and Emerald.
That's all there is to do here, you got the Red Sapphire/Hope Ruby/whatever it's called.
Activating The Towers
I assume that by this time you're level 20 on at least one character - that means it's time to return to Grenoble and visit the Adventurer's Guild. Grab the Level 20 task for the Old Cave and clear out the new floor of the dungeon. Alternatively, if you're already level 25 you'll want to do that floor now instead. Try to always remember this - every 5 levels you return to the Old Cave and complete another floor.
We now have 3 gems and we have a total of 3 towers to visit. You have to light them in the correct order, blue, green and then red last. That means going back to each of the towers, reaching the top floor and placing the gem into the pedestal that you find.
Blue Tower Location: Found southeast of Jenoba along the coast.
Green Tower Location: Go south of Jenoba until you hit the mountains, follow them to the east until you see the Green Tower to the north.
Red Tower Location: Southeast of Jenoba on the other side of the ocean (walk east across bridge then south).
Tip: To reach the chests in the middle of the Green Tower you'll want to flip the switch that you find inside the tower. Change it from Up to Down and you'll be able to easily access the chests.
Once you place the Red Sapphire into the pedestal of the Red Tower you'll have a short scene during which Jerin will learn the teleportation spell Elf (pictured below).
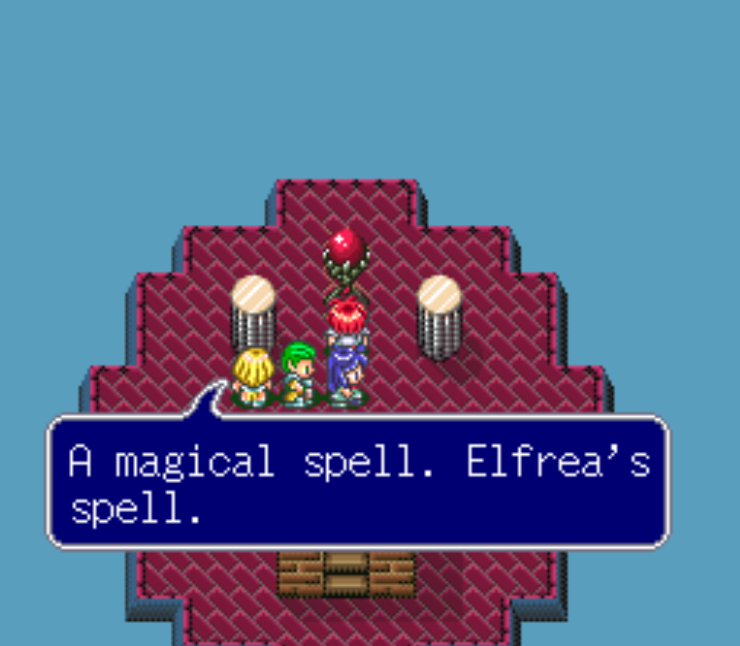
Jerin will automatically use the Elf spell to teleport you to Elfrea when you learn it. Enter the town of Elfrea and go north to find the large house, make sure you get both chests in this house for the Mind Potion and Speed Potion. When you're ready to meet Artea go upstairs in this house and speak with him; during the dialogue he will give you the Shrine Key. Try to leave his room and he'll give you his bow, Artea's Bow as well.
You'll want to equip this bow onto Jerin immediately. If you want, save Jerin's Elven Bow until later in the game. During the final boss fight there is a niche use for this bow so some of you may want to save it for that. Me personally, I would rather just grind more than do niche strategies like that.
To continue with the story go downstairs in Artea's House to reach the basement. Use the Shrine Key on the door here and step onto the blue teleporter to be transported to a shrine nearby. You may have visited this shrine earlier while exploring the island these 3 towers are located on. Use your Shrine Key on the second building at this shrine and step onto the teleporter inside - this will take you to a new spot on the World Map.
Our next destination is the town of Ranqs which is southeast from the shrine we exited. A picture of the area you're looking for can be found below. You'll have to travel between two mountains, south over a bridge and through part of a desert to find it.

The town of Ranqs on the World Map
Ranqs has a few upgrades that you can purchase, aside from that there isn't much to do here. When you're ready to proceed with the story you'll want to visit the cave south of Ranqs. This cave has an invisible wall puzzle in the second room, to get through you'll have to follow the route shown on my picture below.
Basically, hug the southern and right wall until you get to the top of the room. Then you navigate left through the middle and around the pillar (a bit of zig zag for this part), only to hug the top wall to reach the exit. Use my picture below for better directions.
When you go up the stairs you'll find yourself back on the World Map. There is a lot we can explore out here but to advance the story you'll want to visit the castle town of Odel which is southwest. In Odel head straight north and go inside of the castle. When you zone into the castle go to the right and you'll find 3 patches of flowers. Each flower patch has an item that gives you a permanent stat boost, you'll find Speed Potion, Mind Potion and a Great Potion.
You should also search the room in the back of the castle (first floor). If you inspect the dressers you'll find a Hi Magic, Power Potion and a Spell Potion. To advance the story you first need to chat with an old man and his son - exit the castle and once you're outside go west. You'll find an empty house with a chest and some stairs down. Inside this house will be two old people and a kid, talk with the old people and you'll learn about Arus and also who can help you reach it (Piron). You need this dialogue flag to continue.
Below are each of the steps you need to advance the story in this part of the world:
1. Talk with the old man in Odel and learn about Arus
2. Chat with Piron inside the throne room of the castle and agree to help him
3. Visit Lyden (southeast of Odel) and talk with the man eating at a restaurant in town (pictured below)
4. Return to Piron at the castle in Odel and talk with him
5. Inspect the broken bridge inside of the cave west of Odel
6. Return to Piron and talk with him
7. Follow Piron to the cave and inspect their work - then return to the bridge and it will be fixed
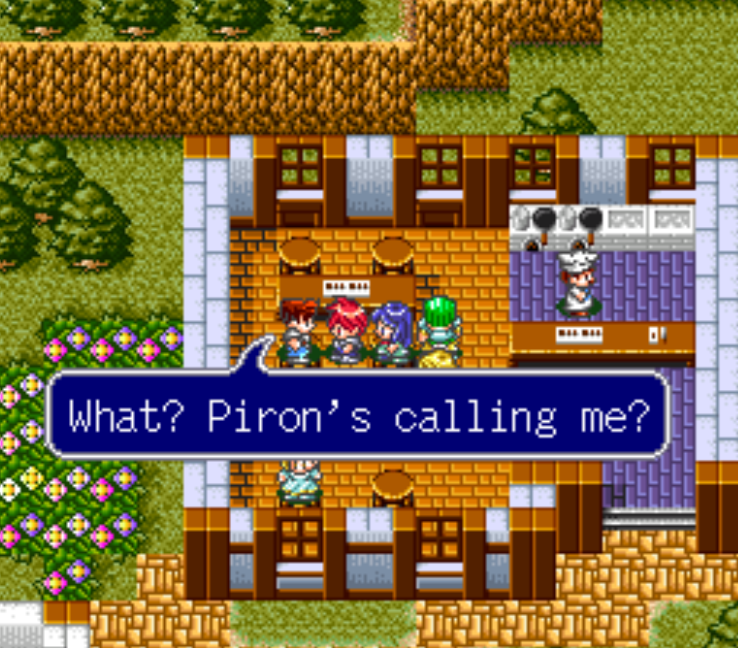
Piron wants you to find this guy in Lyden
You probably already noticed but there are tons of caves around Odel that you can visit. There is also a whole other island that you can teleport to that has a location called Shaia Lab 1. You can reach Shaia Lab 1 through a teleporter inside of Odel Castle or by a teleporter inside of a cave west of Odel. For right now all of this is optional for you to explore.
The main item you'll want from these caves is the Dragon Egg, this item is used in the Dragon Egg Side Quest which requires you to collect all 8 throughout the game. I forget the exact location of this egg but I remember it being in an obvious chest, as it often is.
I do recommend you spend some time exploring these caves though as there will be lots of goodies for you to find. You also could use the level ups since enemies in this game are strong and random encounters are frequent. When you're ready to advance to the next town continue to the next part of my guide.
Continue to Chapter 3 of my Walkthrough
Return to Chapter 1 of my Walkthrough