
Mikage Ruins Walkthrough - Persona 1
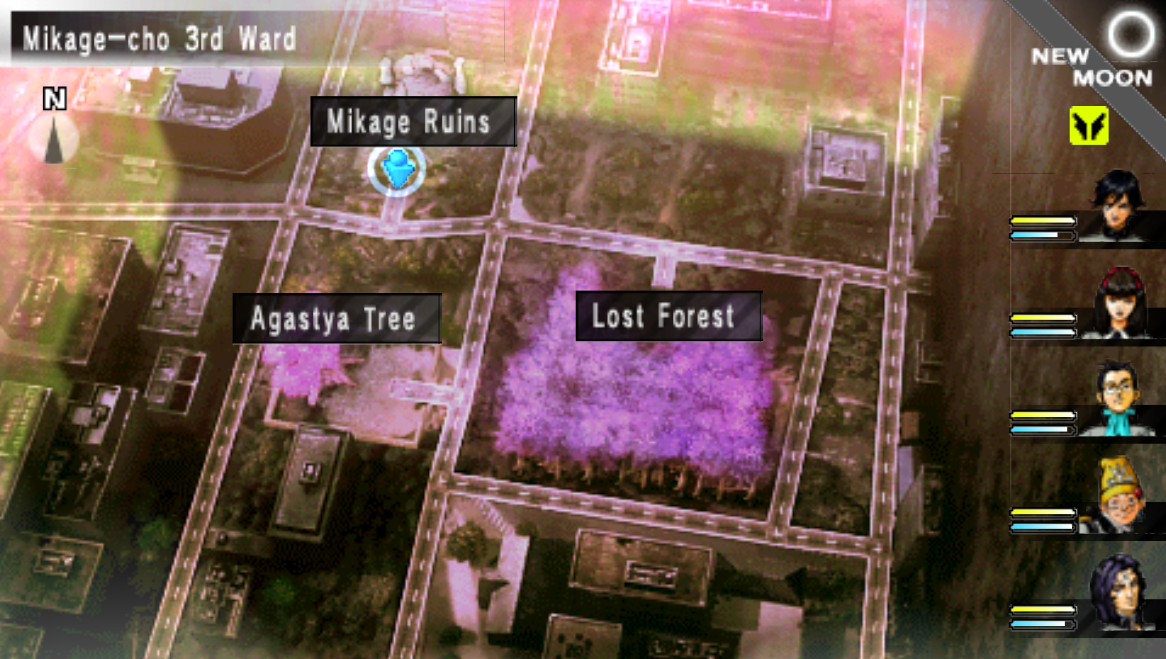
The Mikage Ruins are an optional dungeon in Persona 1 which can be accessed at any point during the SEBEC Route during the main story. At first only the first two floors of this dungeon will be available, once you beat Deva Yuga you'll unlock floors 3 - 7. To unlock the rest of this dungeon you'll need to beat the final boss of the SEBEC Route, Pandora, and wait until after the credits.
After beating Pandora you'll see a message at the end of the credits letting you know that a seal was lifted in the Mikage Ruins on B8F. This will give you access to the rest of the dungeon which goes down to B12F and has a lot of optional bosses on the final floor.
Note: The Snow Queen Route has an optional dungeon too called Devil's Peak. For more information about this dungeon follow the link provided.
Mikage Ruins is a bit unique as far as dungeons go, you can access this dungeon at any time and every enemy you encounter in the entire game can be found here. Each time you progress to a new floor (or a new area on the same floor) the enemies you fight will change. The deeper you go the higher level the enemies you fight will be.
If you missed a certain Spell Card and you need it - this is the dungeon you'll want to visit to collect them. Below are links to the Mikage Ruins wiki page which will give you complete lists of all the enemies found in this dungeon.
Mikage Ruins B1F Monsters
Mikage Ruins B2F (Part 1) Monsters
Mikage Ruins B2F (Part 2) Monsters
Mikage Ruins B3F Monsters
Mikage Ruins B4F Monsters
Mikage Ruins B5F Monsters
Mikage Ruins B6F - B11F Monsters
Mikage Ruins B12F Boss Monsters
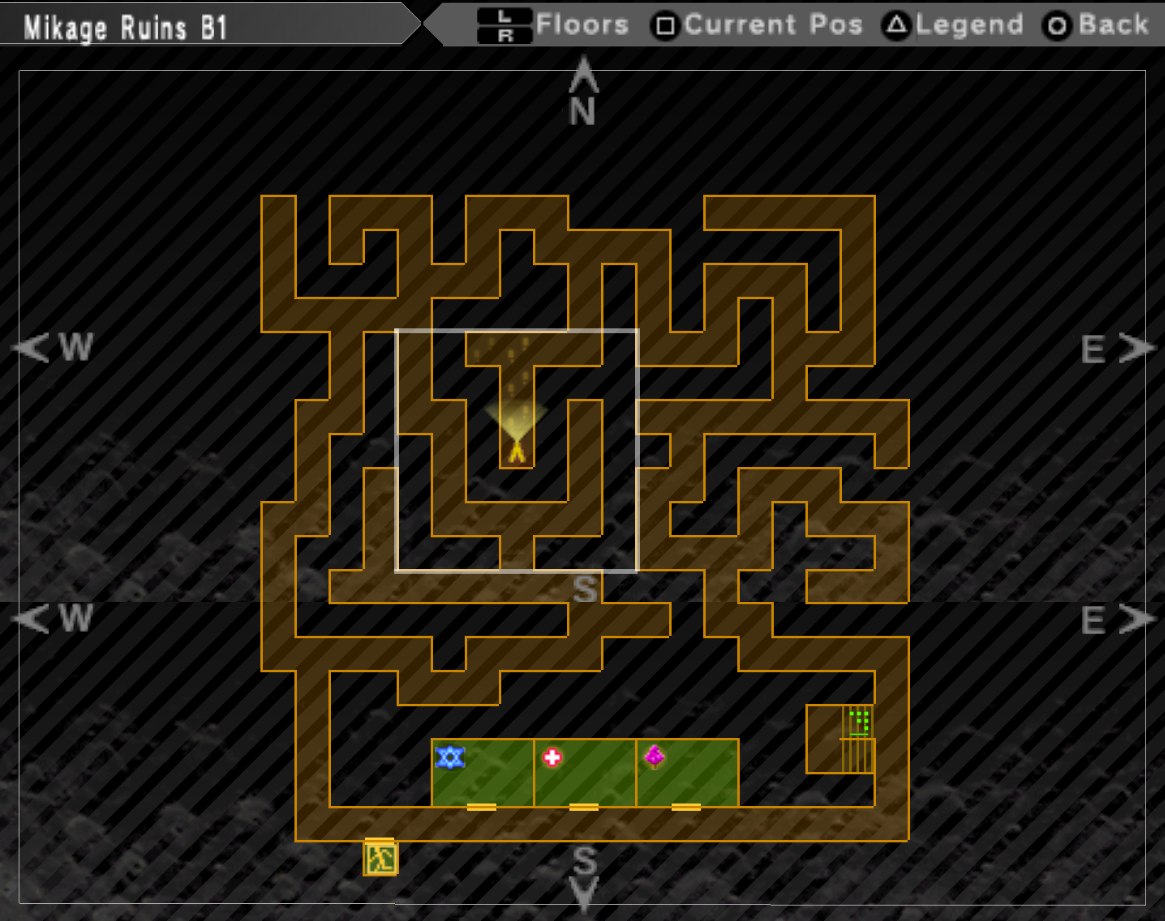
Mikage Ruins B1F Map
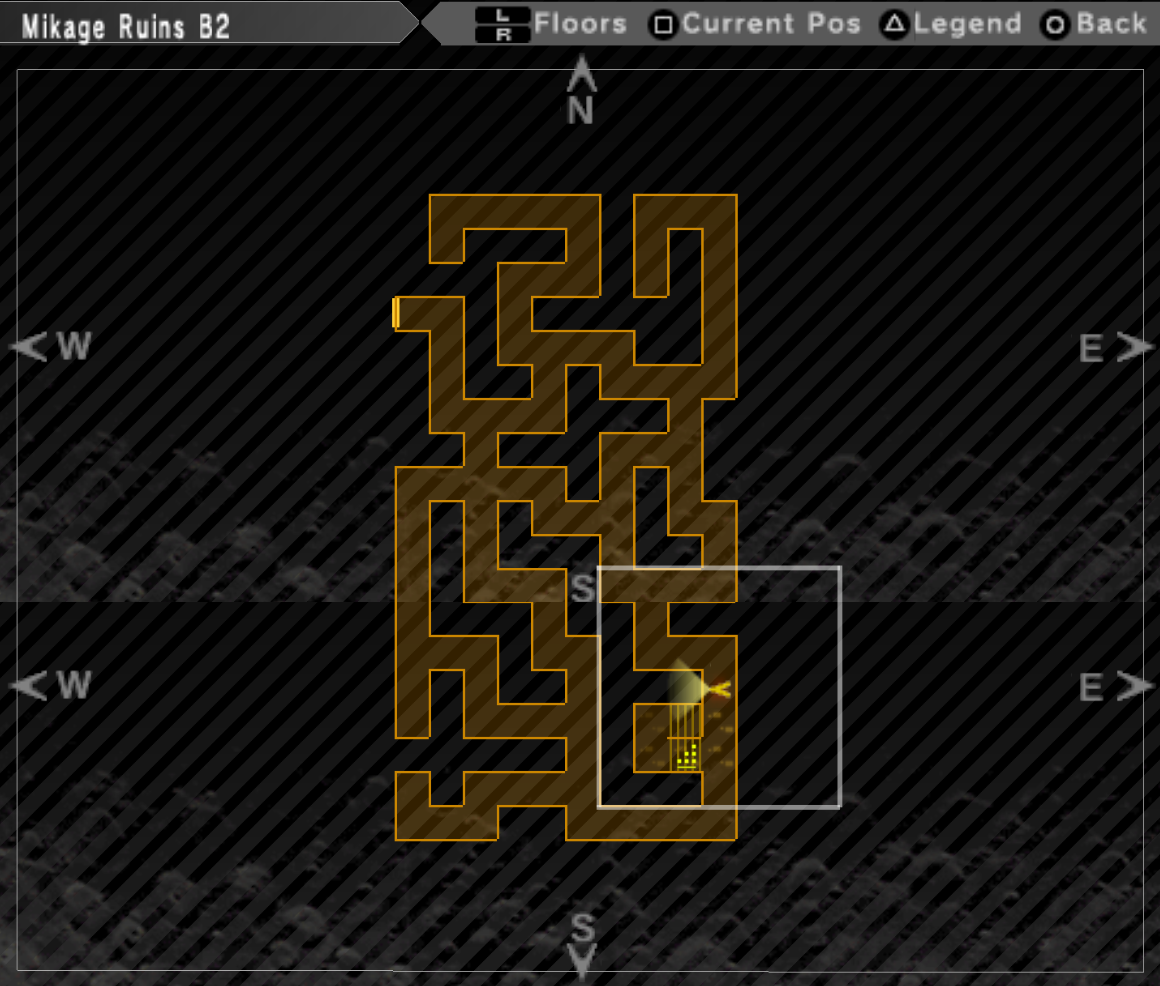
Mikage Ruins B2F Map
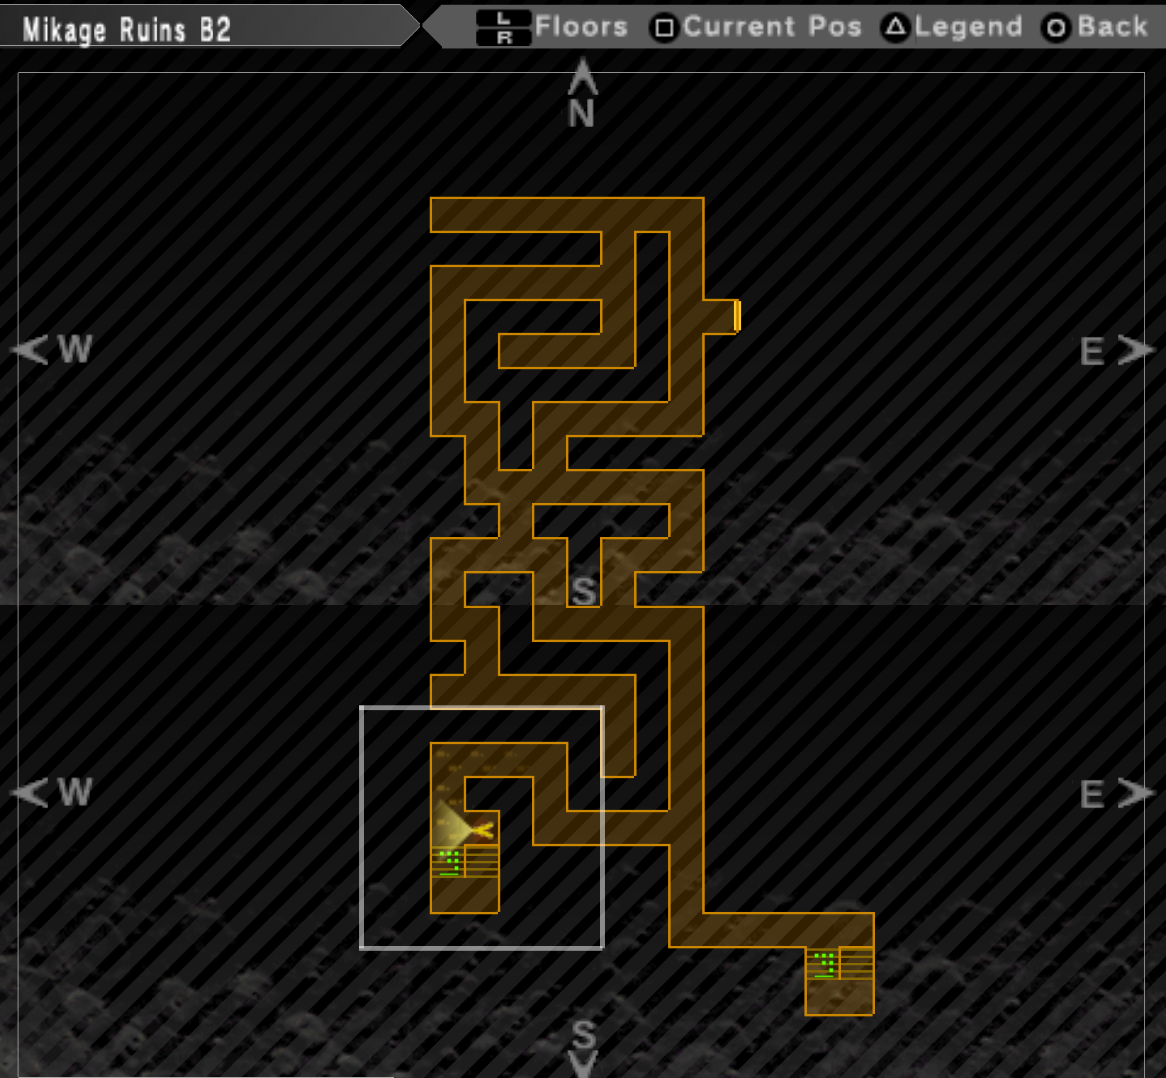
Mikage Ruins B2F Map (Part 2)
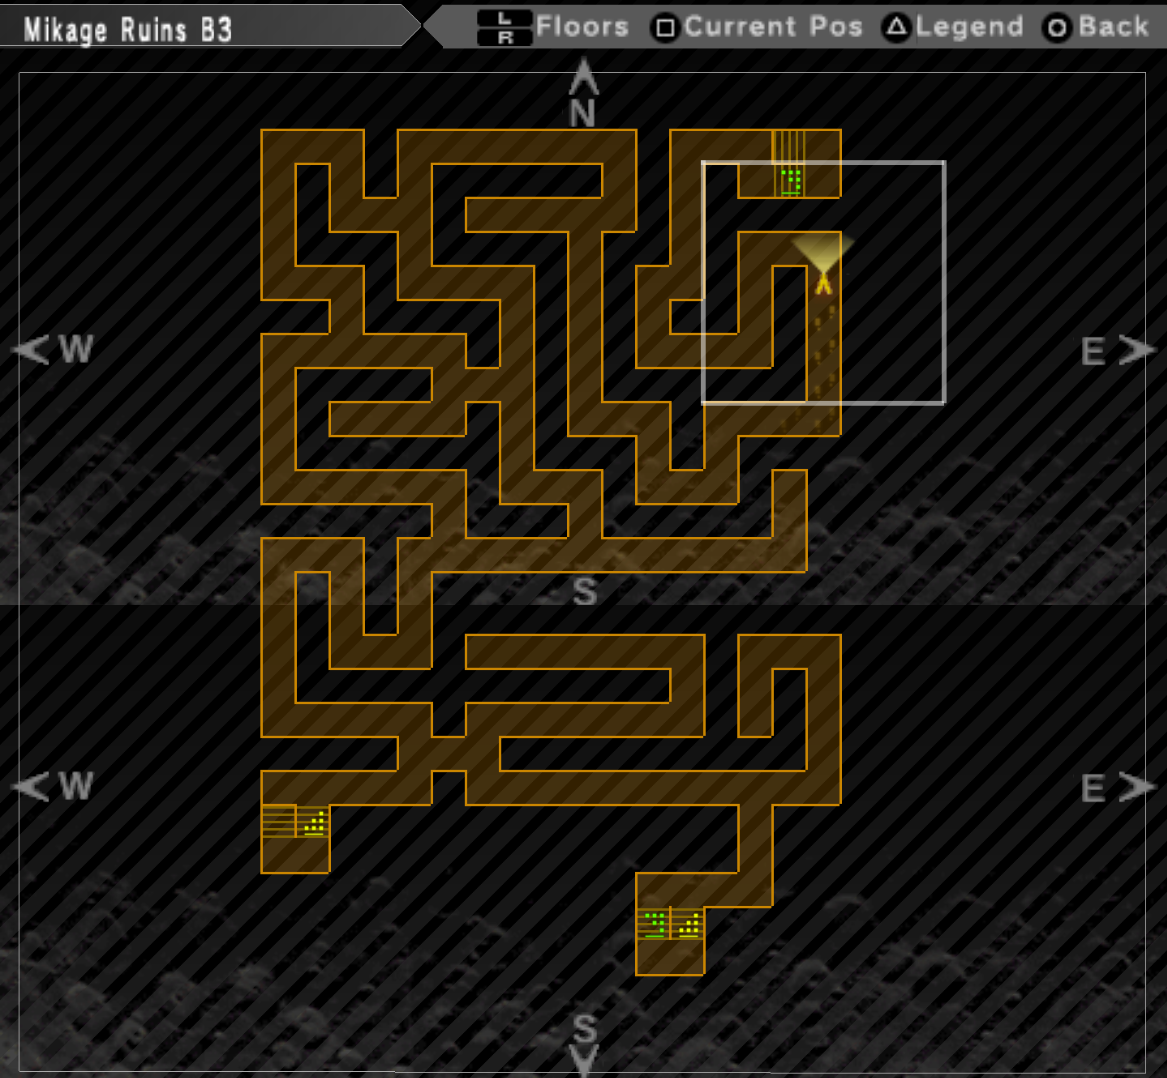
Mikage Ruins B3F Map
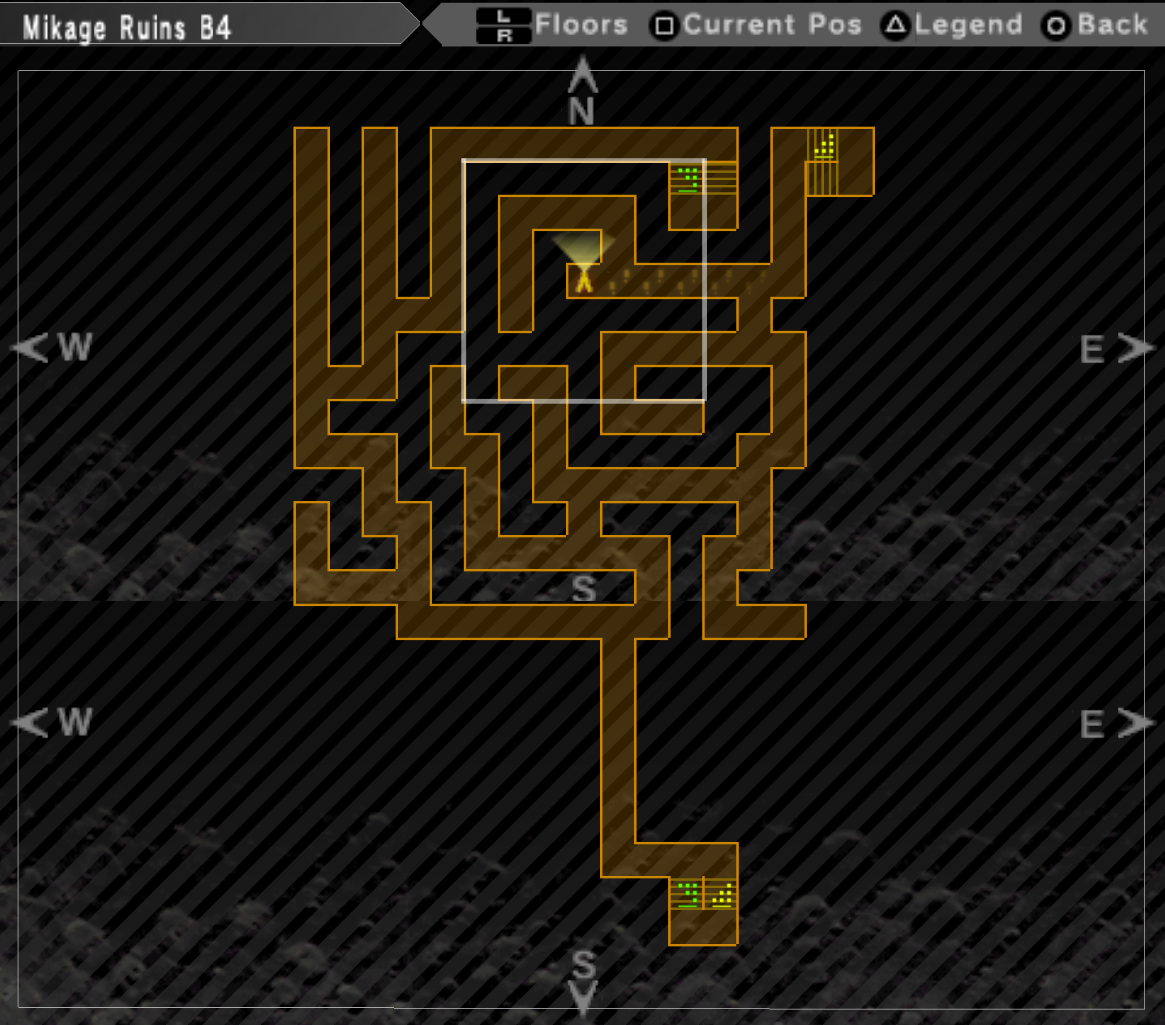
Mikage Ruins B4F Map
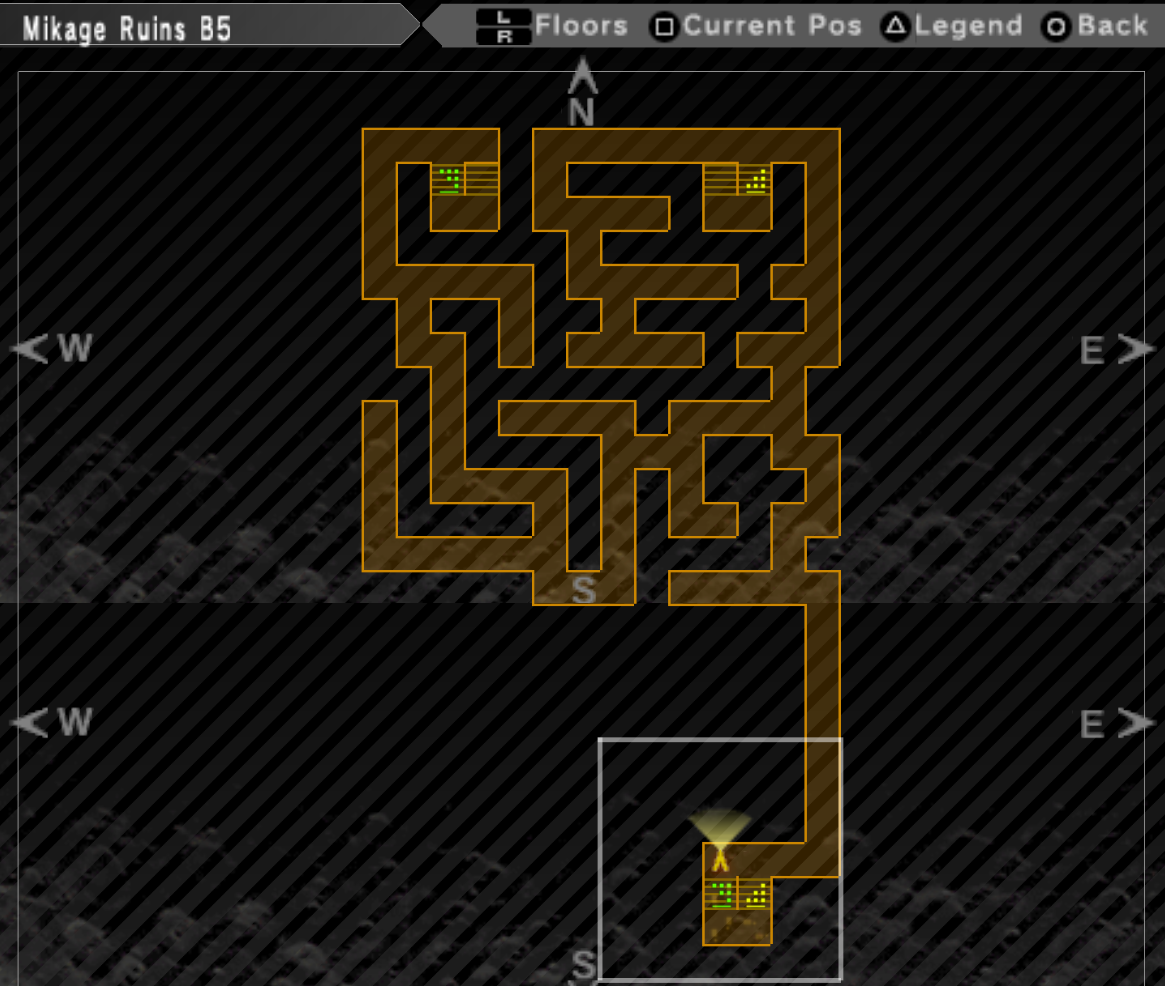
Mikage Ruins B5F Map
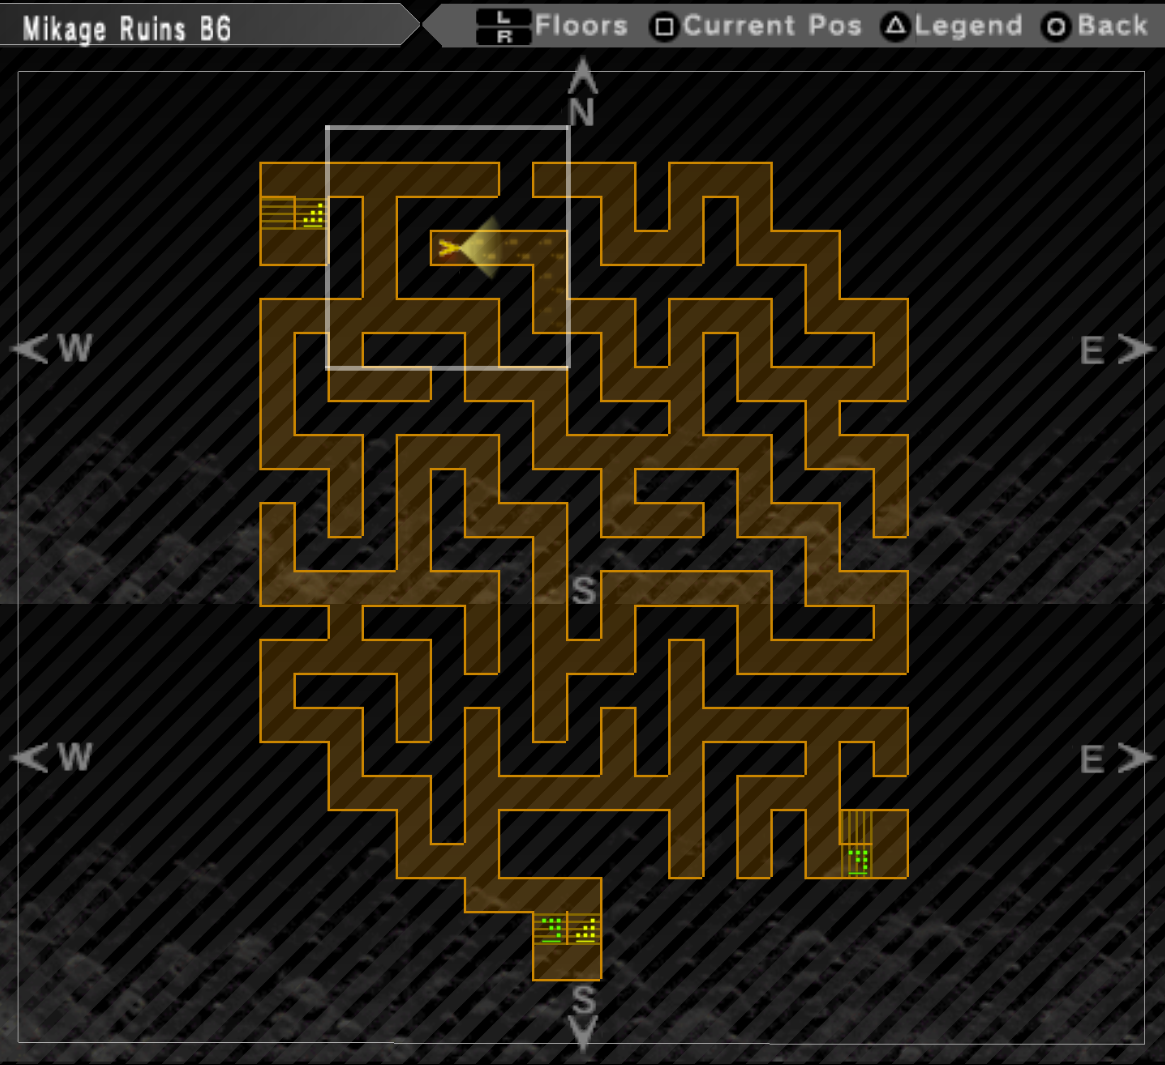
Mikage Ruins B6F Map
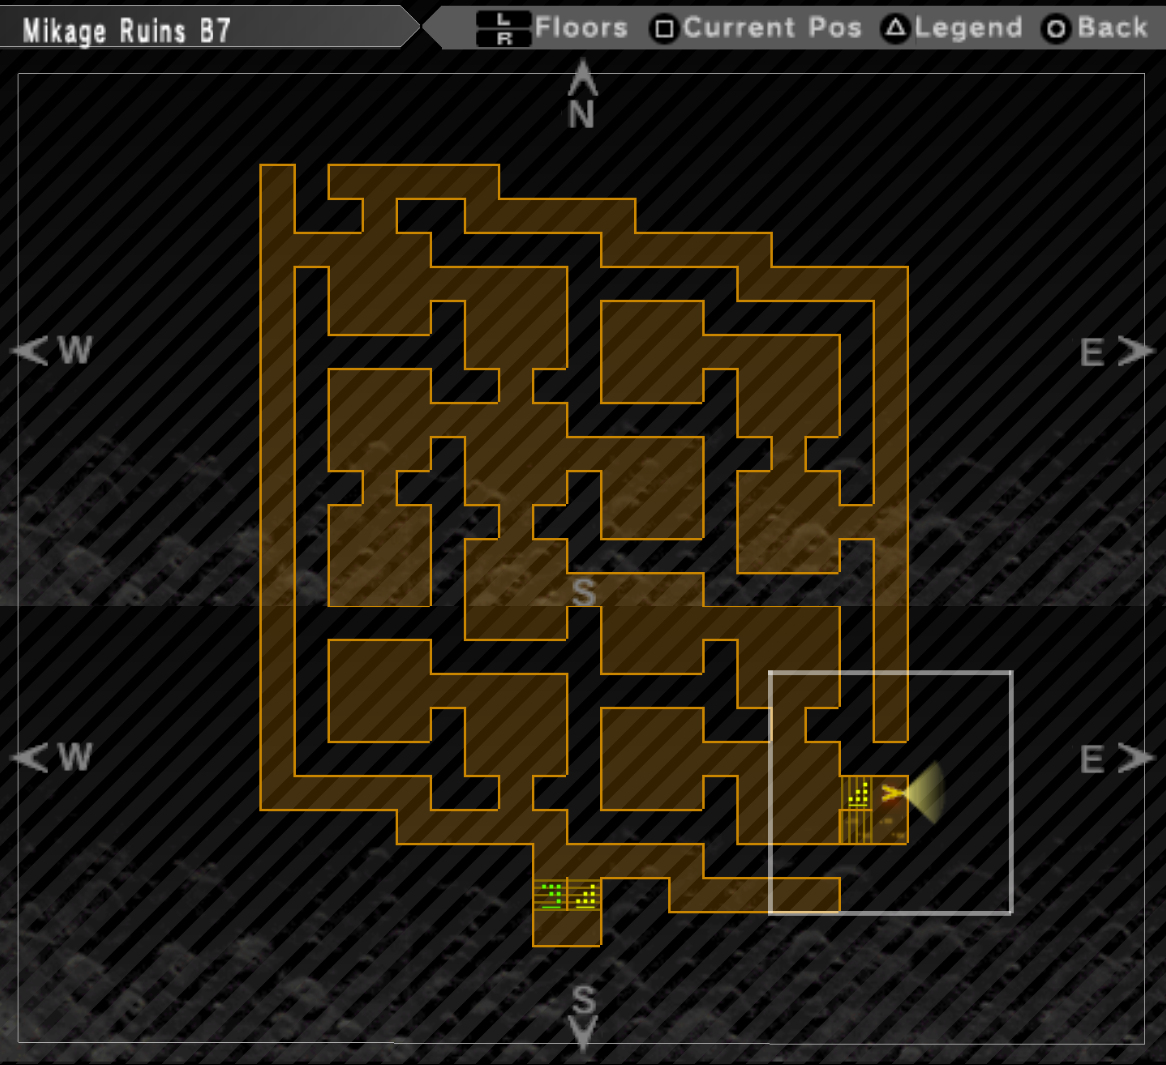
Mikage Ruins B7F Map
When you reach the Mikage Ruins B8F things will start to get a bit more complicated than the previous floors. As I said at the top of this page, you won't be able to progress through Mikage Ruins B8F until after you beat the game and unlock the rest of this dungeon. Once you beat the game you'll be able to pass through the doors on this floor near the stairs.
Mikage Ruins B8F works a bit different than the previous floors, for this floor you will need to find and press three levers to gain access to the entire area. Once you've done this you'll need to fall down one of the pitfalls in the southeast to Mikage Ruins B9F where you'll pull another lever in the center of this room. This will open up the northern part of Mikage Ruins B8F where you'll find another lever and another set of stairs down to B9F.
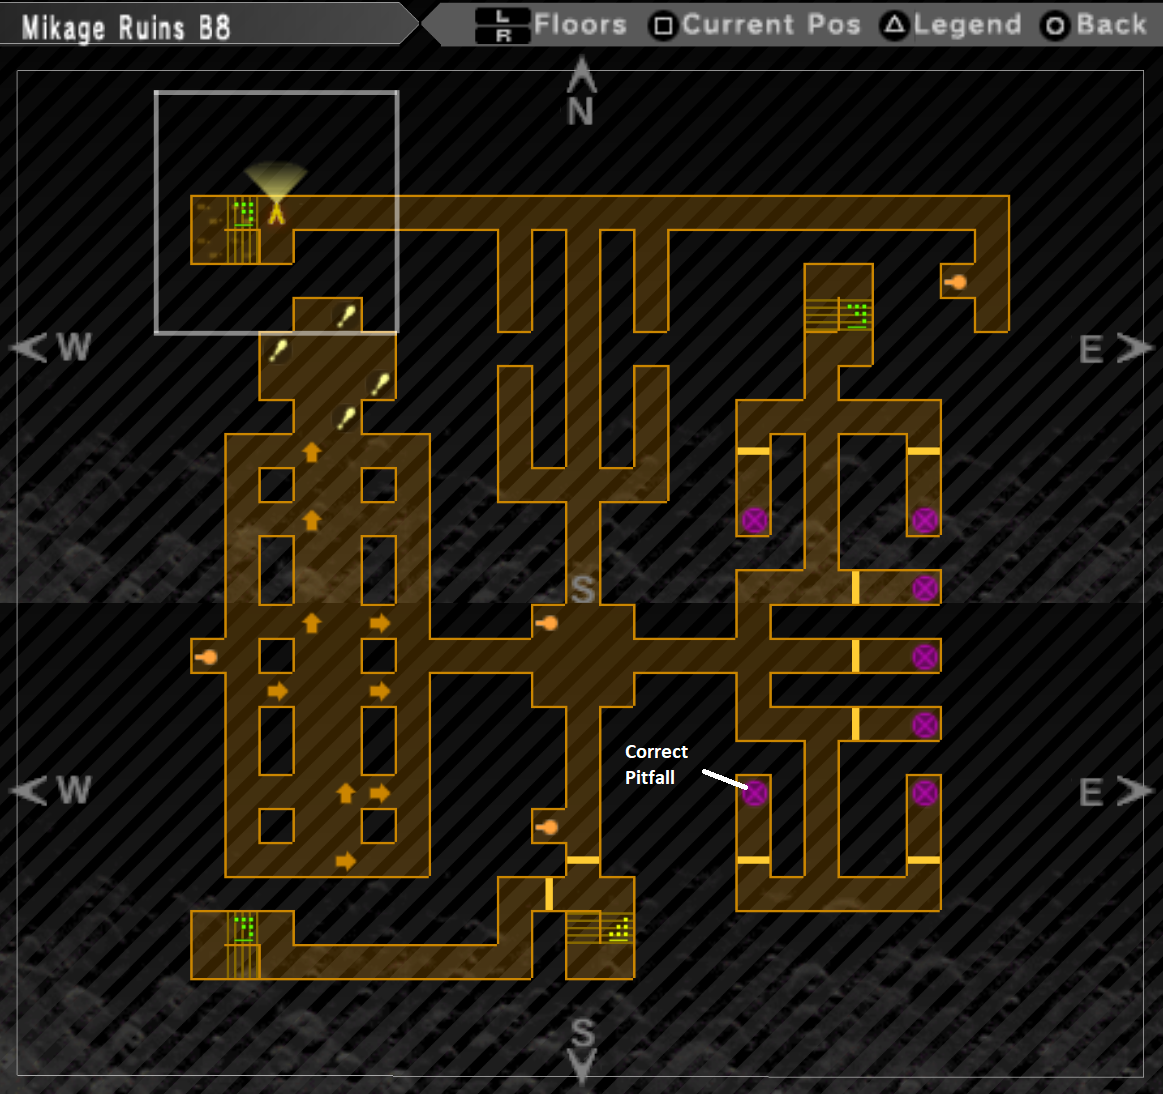
Mikage Ruins B8F Map
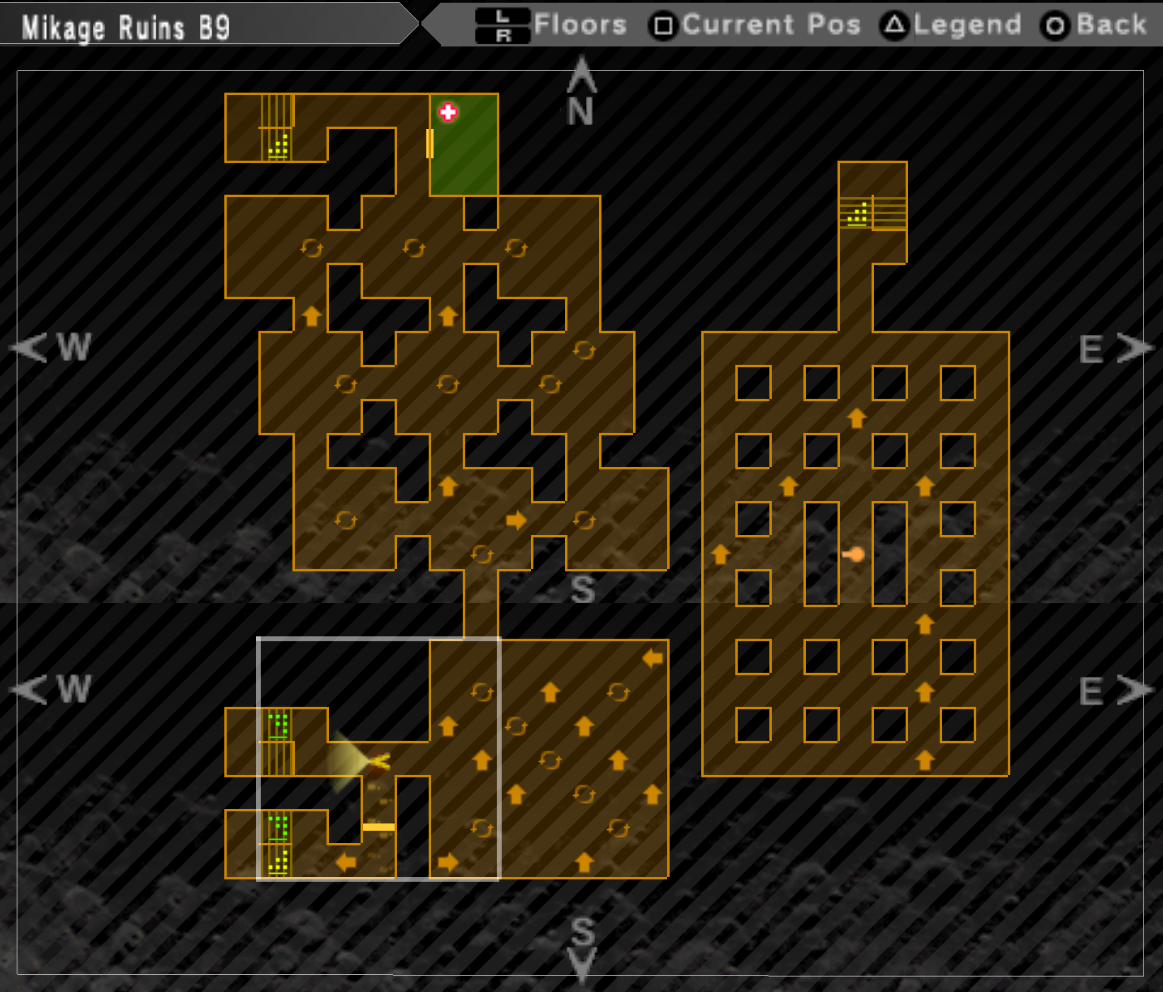
Mikage Ruins B9F Map
You'll encounter many different floor tile puzzles on Mikage Ruins B9F - other than these puzzles this floor isn't very difficult. If you missed my advice in either of the walkthroughs about the spinning floor tiles I will repeat it here for you. The 'secret' to these tiles is to keep walking backwards onto it. Each time you step on it your character will be turned and pointed in a different direction.
All you need to do is back up over and over again until you're pointing in the direction you want to go. When you use this trick the floor tile puzzles become really easy to complete. Use my map screenshot above if you need help navigating this floor to reach the stairs leading down.
The next floor is going to have a bit of a quiz puzzle for you.... I don't expect anyone reading this guide to know the answers to these questions either because they're so abstract it boggles my mind.
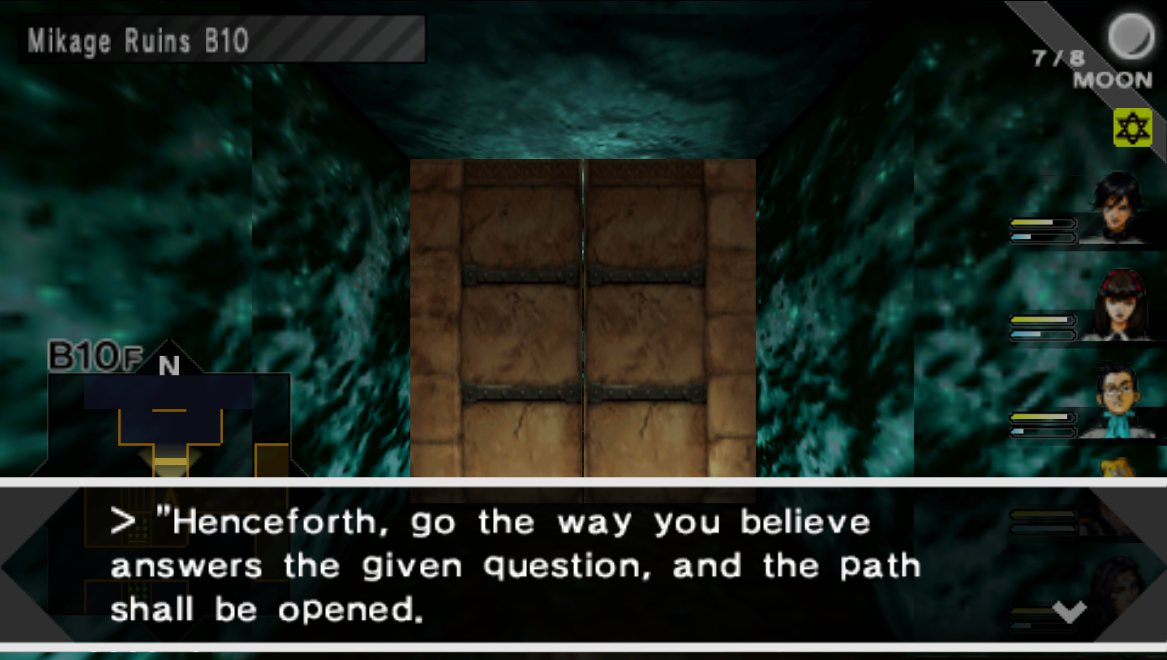
Instead of giving you the answers to the questions, I will tell you what direction you should go. Choosing the wrong direction will cause you to fall through a pitfall into B11F. There will be no enemies on the outside portion of B11F which is nice. If you fall down a pitfall proceed to the stairs in the south and take them back up to this floor. Other than avoiding the pitfalls this floor is very linear.
Mikage Ruins B10 Quiz Answers:
1. Right
2. Left
3. Right
4. Left
5. Middle route
The next floor is probably the easiest floor of them all, you can negate this entire puzzle by using either the Liftoma ability or the Core Shield item. If you don't have either of these things available to you then you can always use my map screenshot below instead to figure out the correct route.
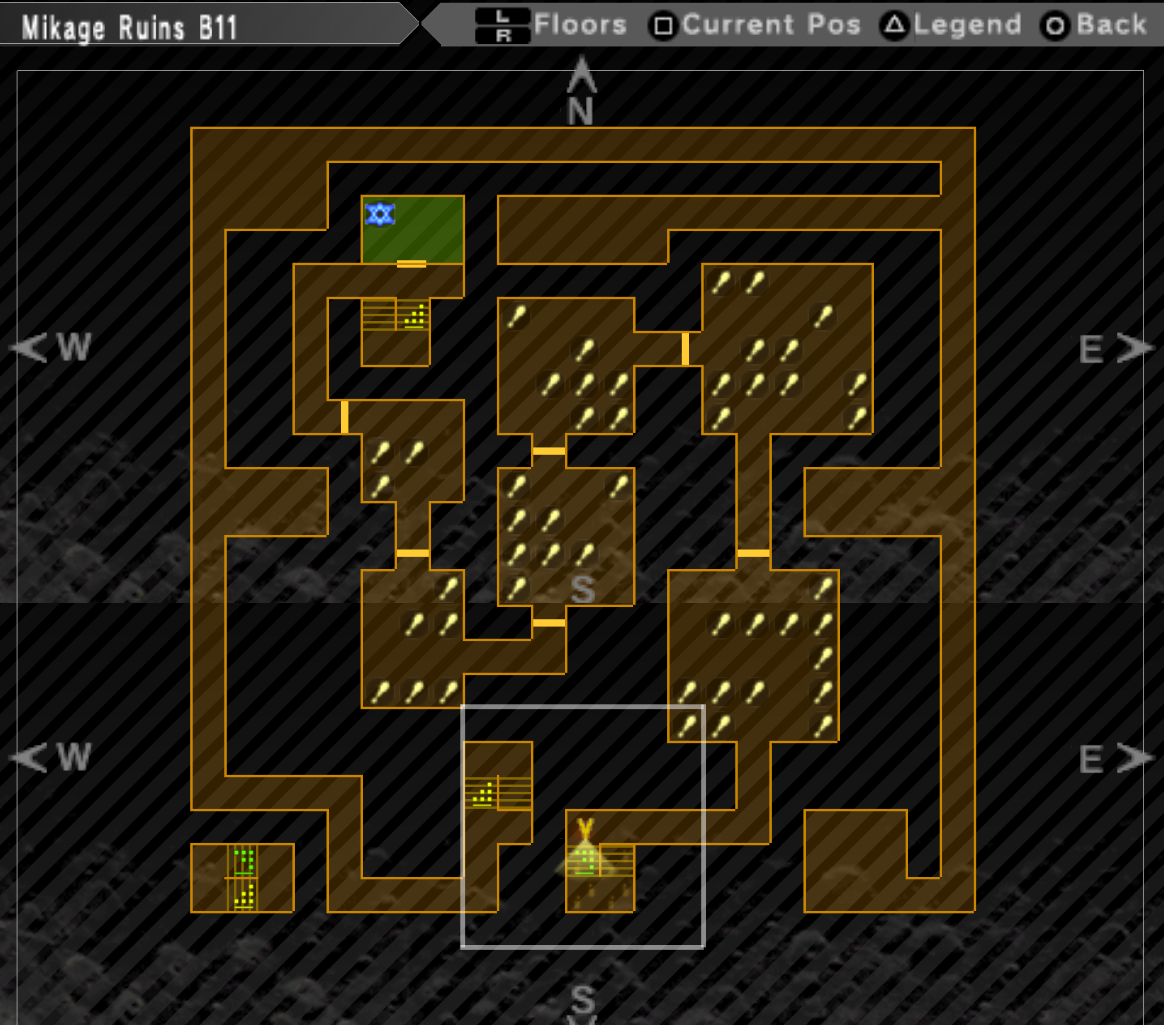
Mikage Ruins B11F Map
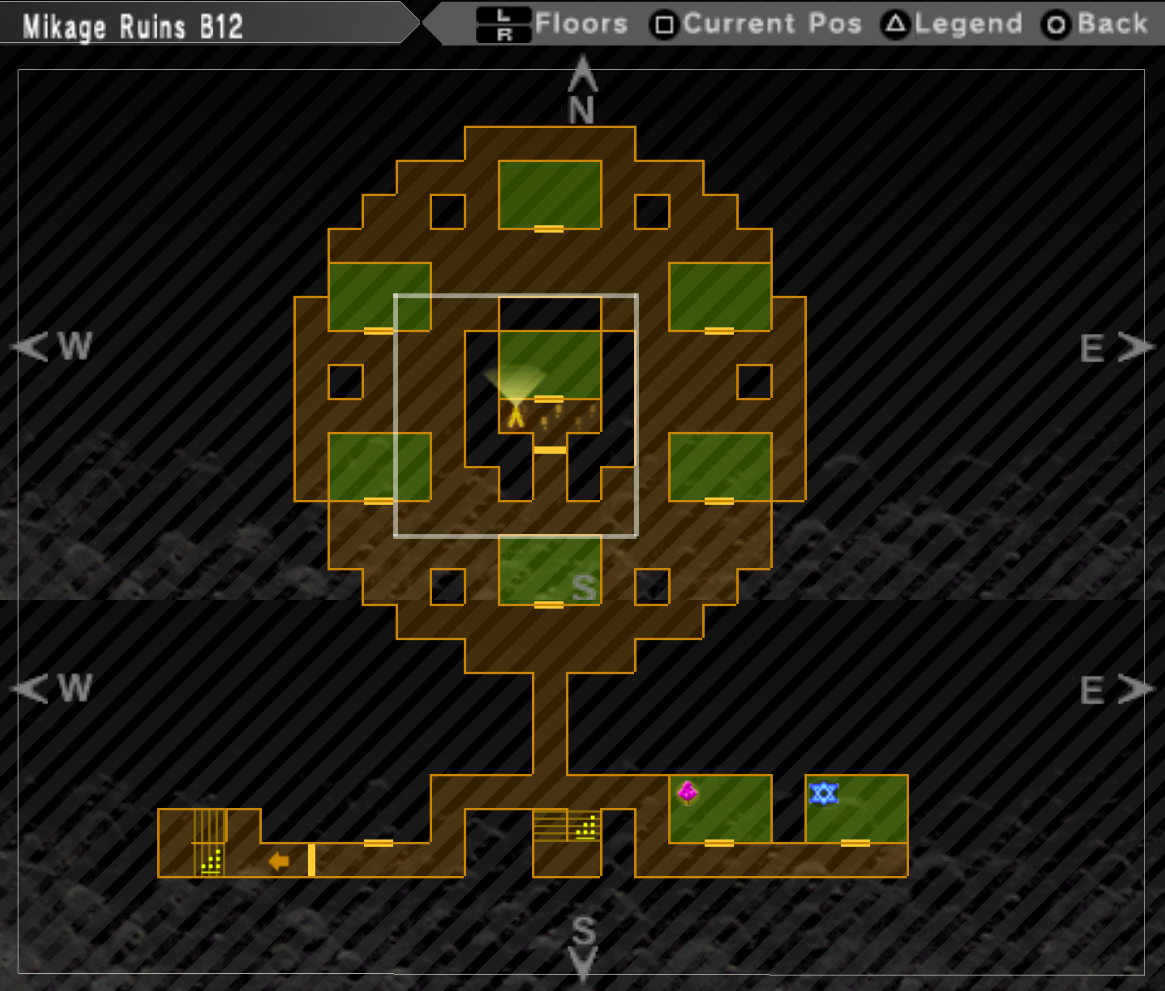
Mikage Ruins B12F Map
The final floor of this dungeon contains a total of 7 boss fights - you have to beat 6 bosses then you can challenge the final one in the middle of the room. Obviously some fights are harder than others but you should expect a challenge from every boss fight on this floor. It's pretty typical in Persona games for difficult enemies to have one shot mechanics and it's no different here.
Note: If you defeat a few of the bosses in the 6 rooms then leave the dungeon they will all respawn. You're expected to beat all 7 boss rooms at the same time without leaving the dungeon. This is a good way to farm EXP for your characters if you'd like to use this to your advantage.
I'm not the best person for advice when it comes to beating difficult foes in this game series, however I can link you to my page that covers the Best Personas in the game. Beating difficult foes like what you find in this dungeon will be easy or difficult depending on which Personas you use on your characters. If you use the correct Personas that resist or reflect the one-shot mechanics then the fight will be easy.
Defeating all six mini bosses as well as the final boss of this dungeon will reward you with a Mikage Ruins Conquest Badge. The item has no purpose aside from showing that you beat this dungeon.
Return to SEBEC Route Walkthrough