
Episode Prompto DLC Walkthrough
This page is a walkthrough for the Episode Prompto DLC in Final Fantasy 15. If you're looking for a walkthrough on the Episode Prompto Side Quests instead follow the link provided to that page. Out of all the Final Fantasy 15 DLCs, Episode Prompto is probably the longest one. If you choose to get all of the Trophies/Achievements you'll be here for quite awhile.
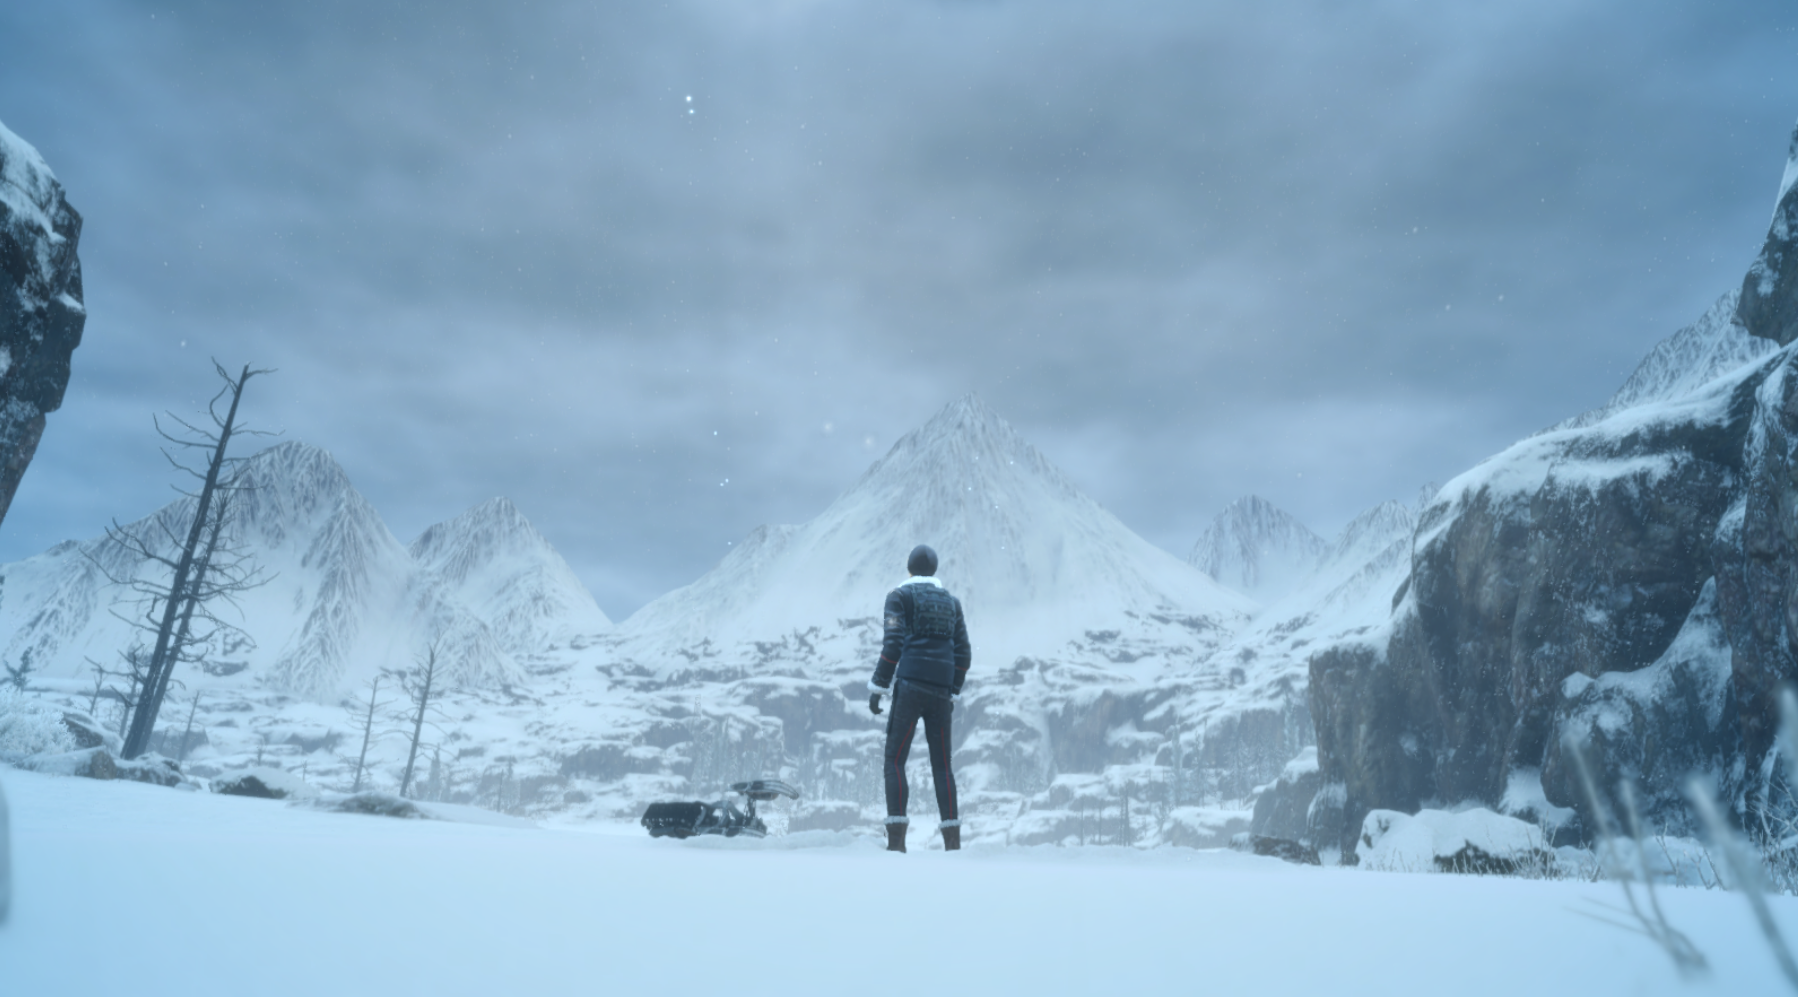
You begin this DLC in a linear snowfield where you can only move forward until you collapse. When you gain actual control of Prompto you'll be inside of a locked room with computers and other objects scattered about. In this room you can find a tape recorder and a newspaper clipping which will give you some backstory about the Magitek troopers - it'll be up to you to seek out Lore items like this in the future as I won't be pointing them out for this guide.
In a hallway near the room you're held captive in you'll find a vending machine which doubles as your rest area. Across from the vending machine you'll find a Hi-Potion which you'll want to pick up too. You'll get your first taste of the combat tutorial in this hallway as well, Episode Prompto plays unlike anything else in this game and will take some getting used to.
There is a Potion in the hallway ahead of where you fight the first guard as well as another Lore item. In the next hallway you'll be given another combat tutorial, this time on how to do a Stealth kill. You'll also acquire an SMG from this guard too and be taught how to use it. In the next hallway you'll be taught about the Crackshot ability, which is Prompto's special - and one you should utilize often.
Next to the second vending machine you come across you'll find a Phoenix Down. Rest here to heal before proceeding. The next thing you'll be taught about is objects you can fire at that explode. In the next hallway you'll find a ton of Magitek Energy Barrels that you can shoot which explode and damage anything near them.
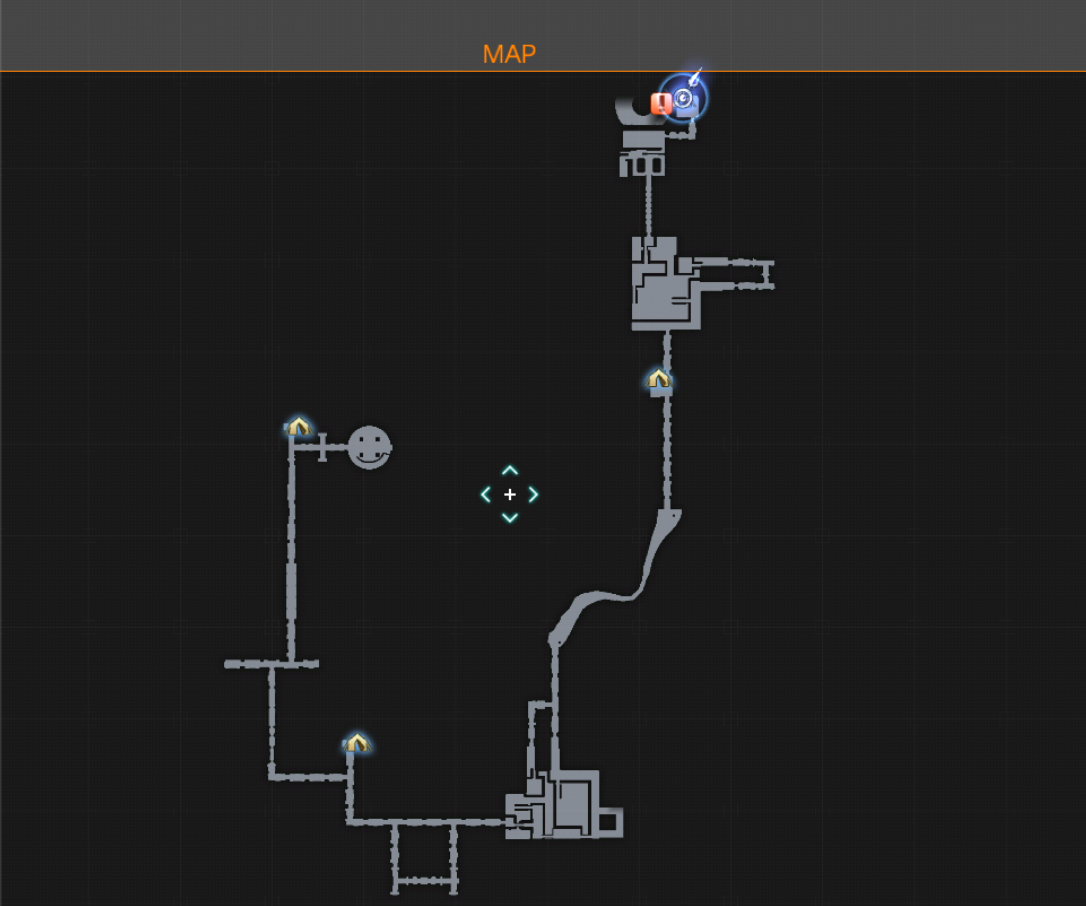
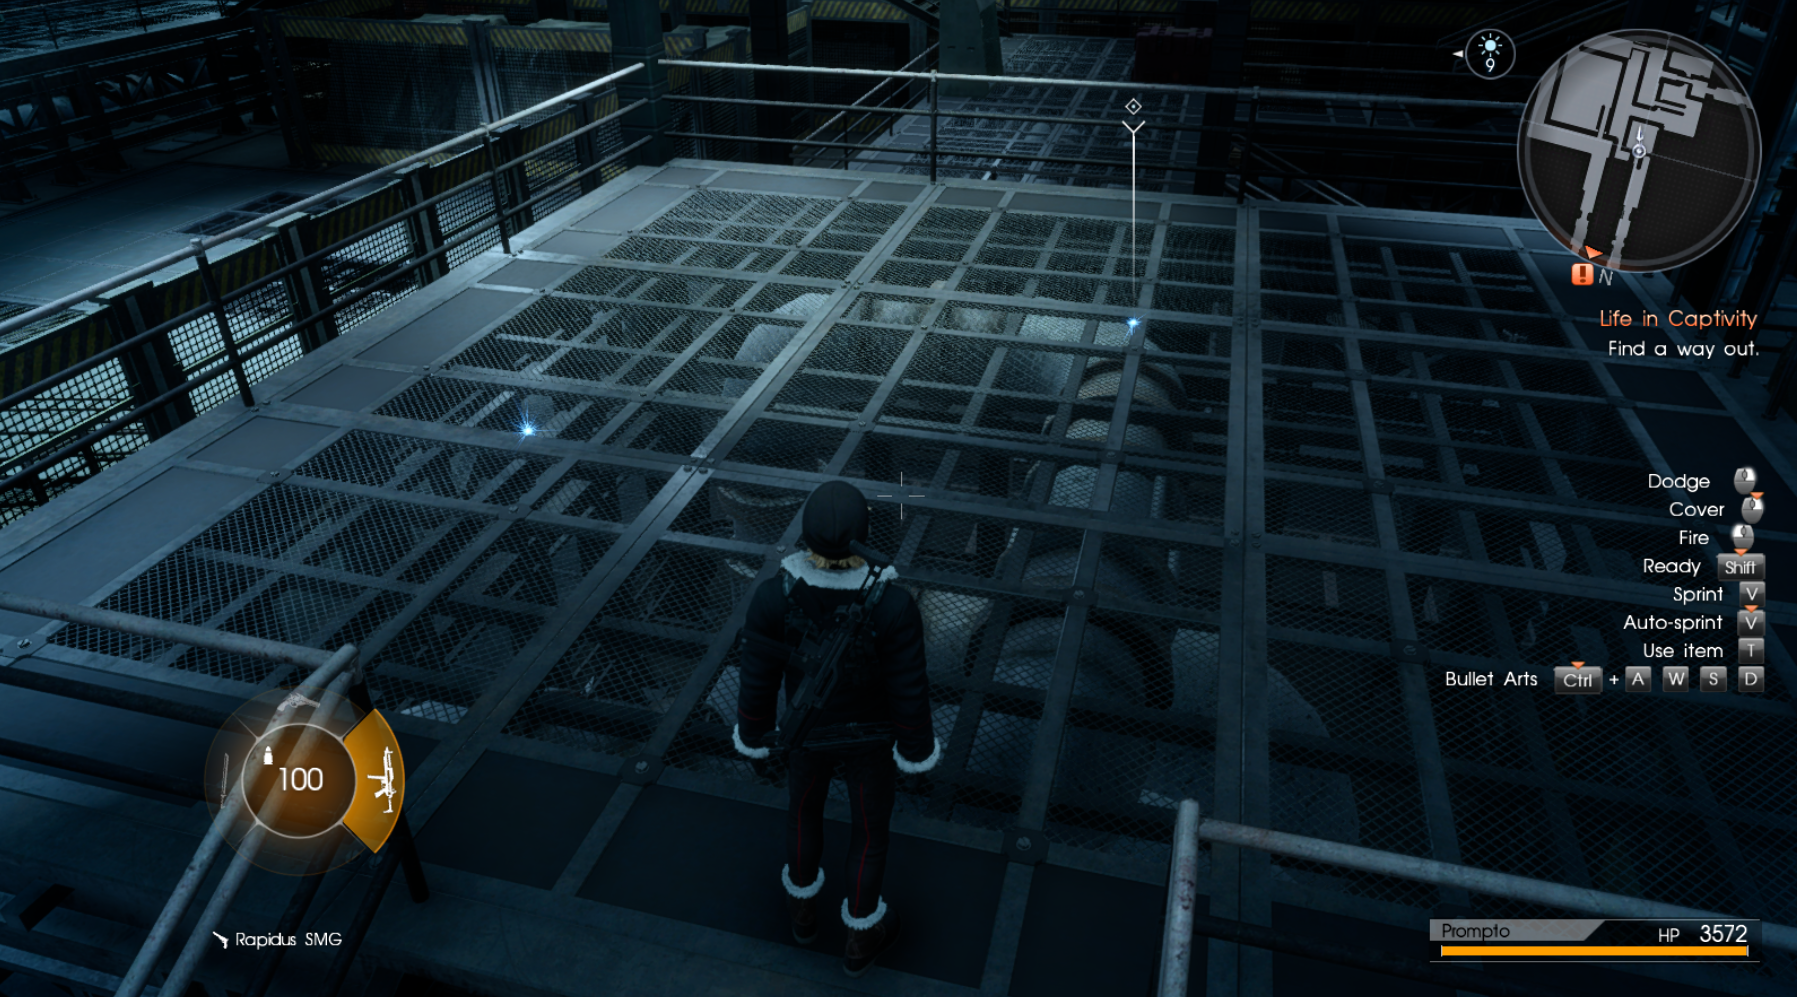
When you make it to the larger room with the sniper rifle tutorial and all the different sets of stairs you'll encounter your first defense node... These annoying things activate all of the dormant Magitek Troopers in the area - so you'll end up having to fight a lot more. Once you've cleared this room be sure to loop back around before proceeding forward for the two treasures, Elixir and Hi-Potion (screen shot below).
The next bit of the area is pretty linear - follow it until you reach your next vending machine and grab the Hi-Potion here before resting and saving. Now is when things will get really difficult. If you're not used to the controls yet or you're just not any good at this Episode you're going to struggle a lot in this room with all of the enemies.
You'll encounter a new enemy in this area called Magitek Axeman which only use melee attacks but when they do hit you they hit HARD. Both ranged and melee enemies will flood into this room multiple times meaning you'll have to stay on the run at all times with Prompto and you'll have to constantly restock on ammo when you run out.
My advice to you is use Crackshot as much as possible and stick to the SMG. The Sniper Rifle is nice sometimes too since it basically one shots the enemy but only having 5 bullets is no bueno. You spend so much time rolling around waiting for the rack of guns to refresh so you can get more ammo. When you clear out this room of all the enemies there are quite a few goodies for you to collect, use my map below for help finding them all.
Follow the quest marker to another vending machine where you'll want to rest and save. There is some stuff for you to grab in this room too - including a Lore item. When you're ready to proceed follow the quest marker and watch the cutscene. When you regain control of Prompto you'll be tasked with fleeing from the base. I'd recommend you do nothing but dodge roll until you reach the snow mobile - don't even bother stopping to fight enemies.
Once you make it to the snow mobile you'll be put in a good ol' fashion race down the mountain and avoid the enemies along the way ordeal. When you make it down the mountain there will be another cutscene after which your quest will update with the rendezvous point Aranea marked on the map. Head there now to continue Episode Prompto.
You'll spend the night at the camp and there will be a long cutscene with Aranea. In the morning you will get a notice about side quests being available at this time - I recommend you wait a little until Aranea joins your party again, it'll make all of the side quests much easier. Head to the quest marker on your map and you'll watch a few cutscenes followed by some linear story missions.
When you regain control of Prompto you'll have Aranea as part of your team and if you'd like to do some of the available side quests, now is a good time. I'd recommend you progress the story a little bit further ahead though, clear the front entrance of the Research Facility but do not go inside.
Note: I would recommend making a different save file before heading into the research facility. Incase you ever do wish to do the side quests you can load up that save.
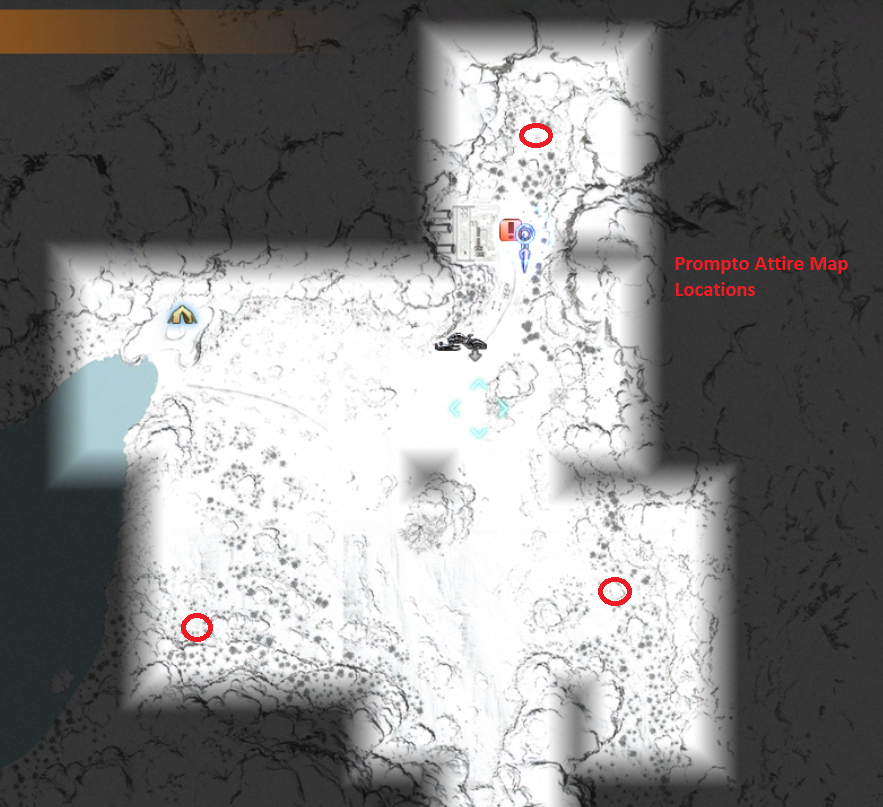
Before you complete this Episode, there is actually some side-stuff that you should do. There are a few items for you to collect (Tundra Attire) which will carry over into your main Final Fantasy 15 save file when beating this Episode. Each of the locations you can find the Tundra Attire at are shown on my map below. If you're interested in doing any of the Episode Prompto Side Quests I recommend you check out that guide by following the link.
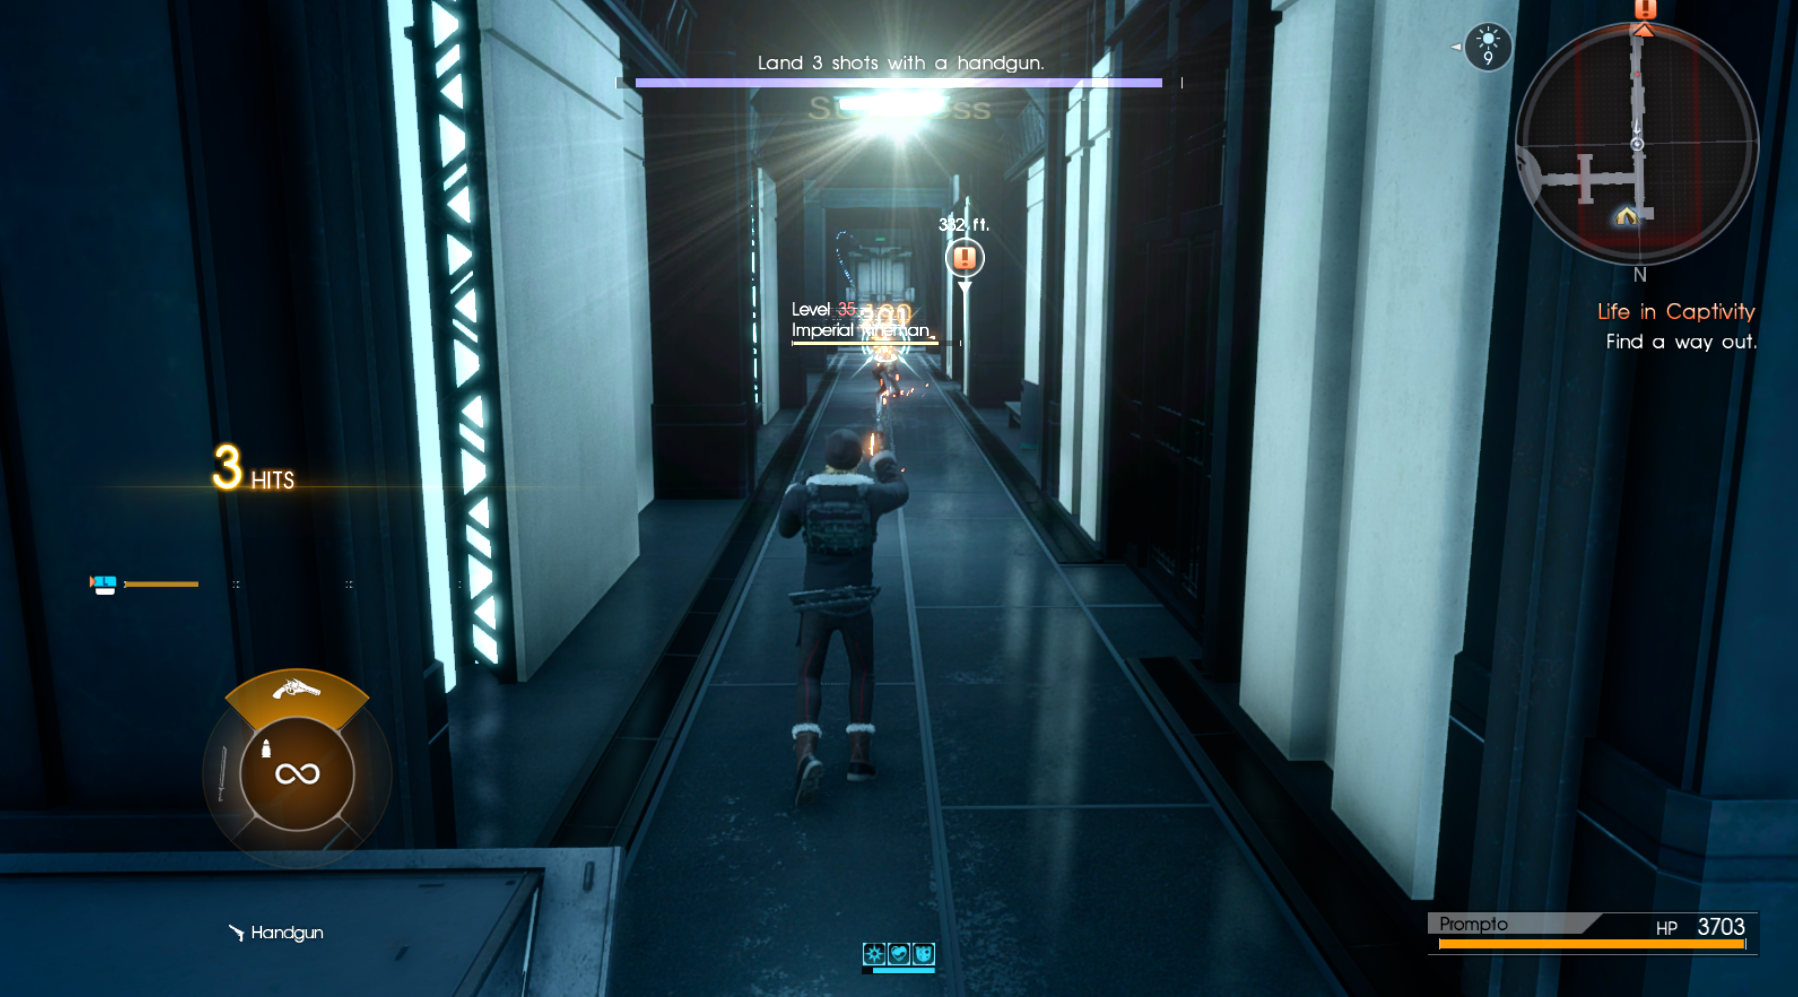
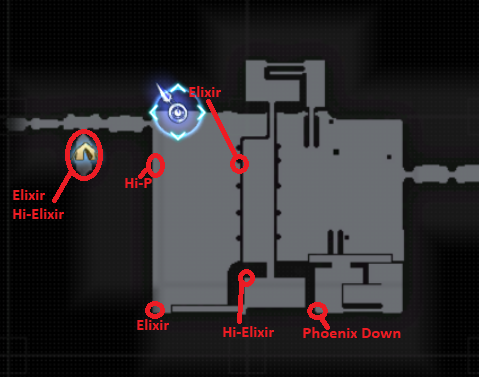
To proceed with the story for Episode Prompto head north to the quest marker and into the research facility. Inside it is more of the same old stuff, battle some enemies, collect the Lore items you come across and head towards the quest marker. The first really large room that you come across will have a bunch of treasures in it, use my screen shot below for help finding them all.
After the really large room you'll come across a vending machine and even more treasures to find there as well. This is the last hallway before the final boss of the Episode so it's littered with goodies and Lore items to find. Make sure you save and rest up before proceeding.
For the first part of this fight the ape will climb the walls and ceiling and use a blizzard breath attack on you. I recommend that you spend as much time during this phase getting acquainted with the room as possible. Blast away at the ape with whatever weapon you like most (I recommend Sniper and Bazooka for this encounter) and Crackshot/Dragoon Dive when it is available.
Tip: When the boss climbs on the ceiling hitting him with a Sniper Rifle will cause him to fall and 'Break' when he hits the ground making him Vulnerable.
About mid way through the battle the boss will ignite into flame and go berserk. Now the tactics change. He likes to charge Prompto much more and throw fireballs at him. Also, flame geysers will appear throughout the boss room as well which you must avoid.
Immediately after beating this boss you'll have a cutscene followed by another boss fight - technically two more boss fights. For these you'll be on the back of a snowmobile with Aranea driving. One tip for the rest of this Episode, never stop firing! You have unlimited ammo and your gun never overheats.

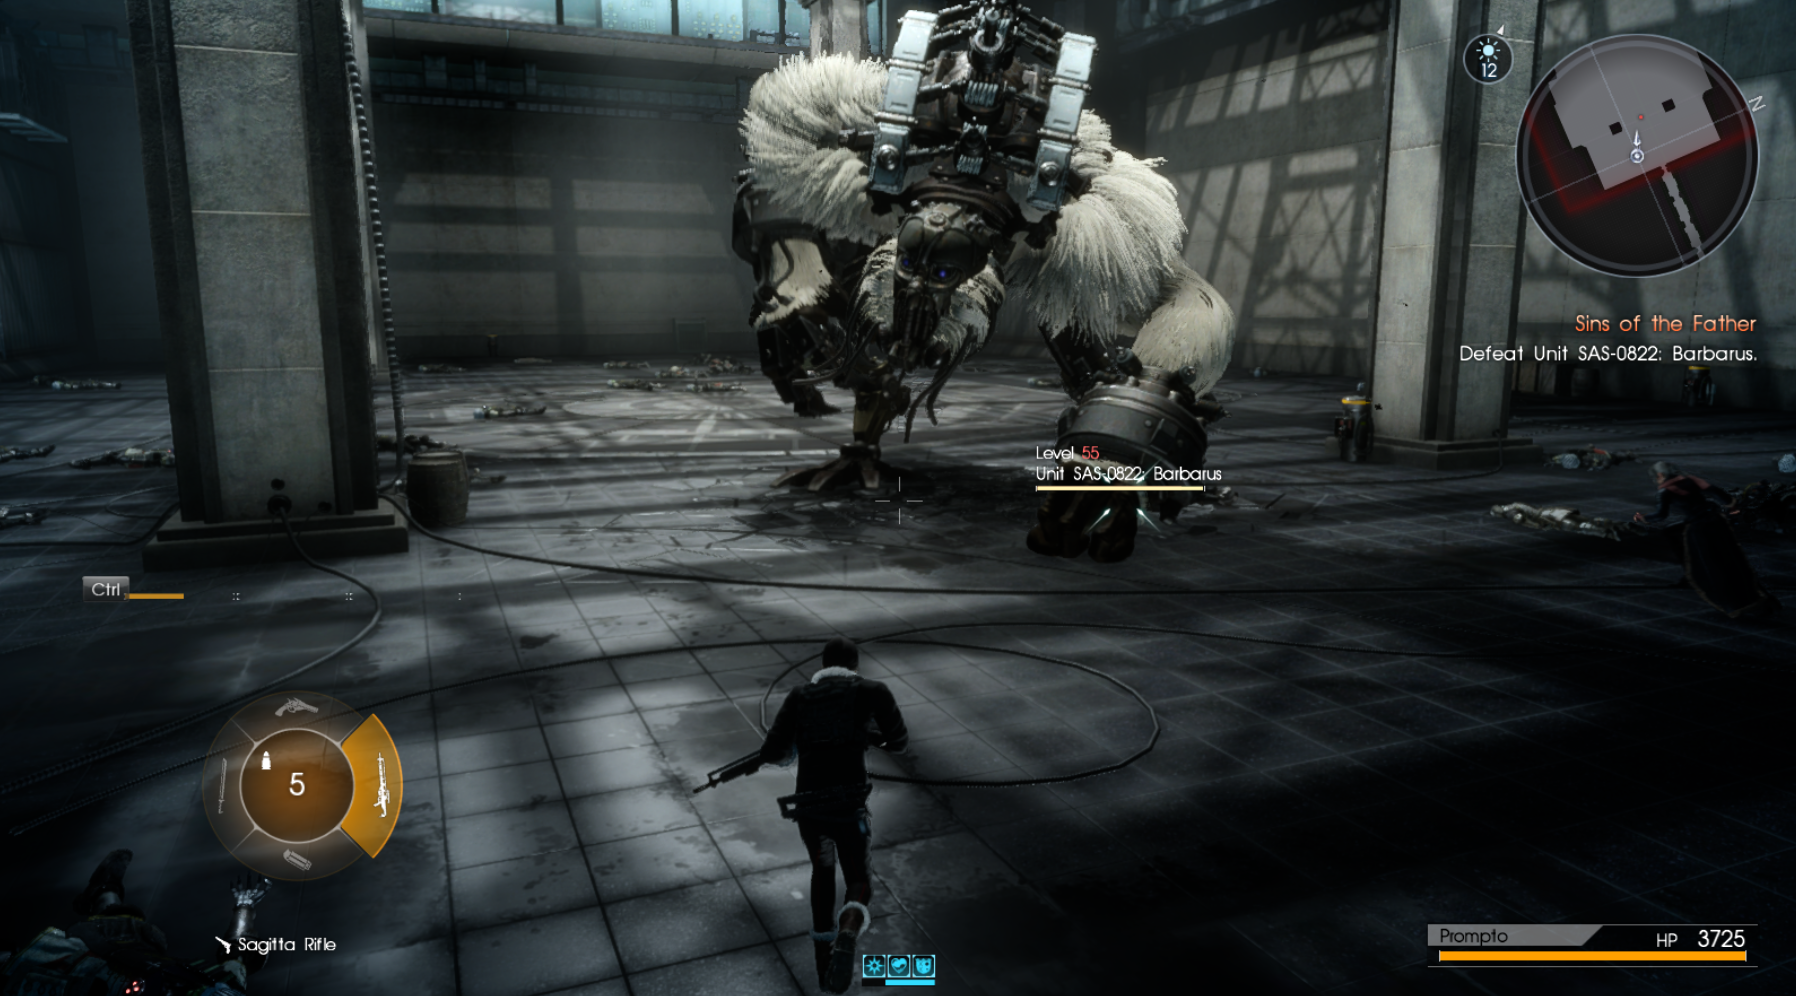
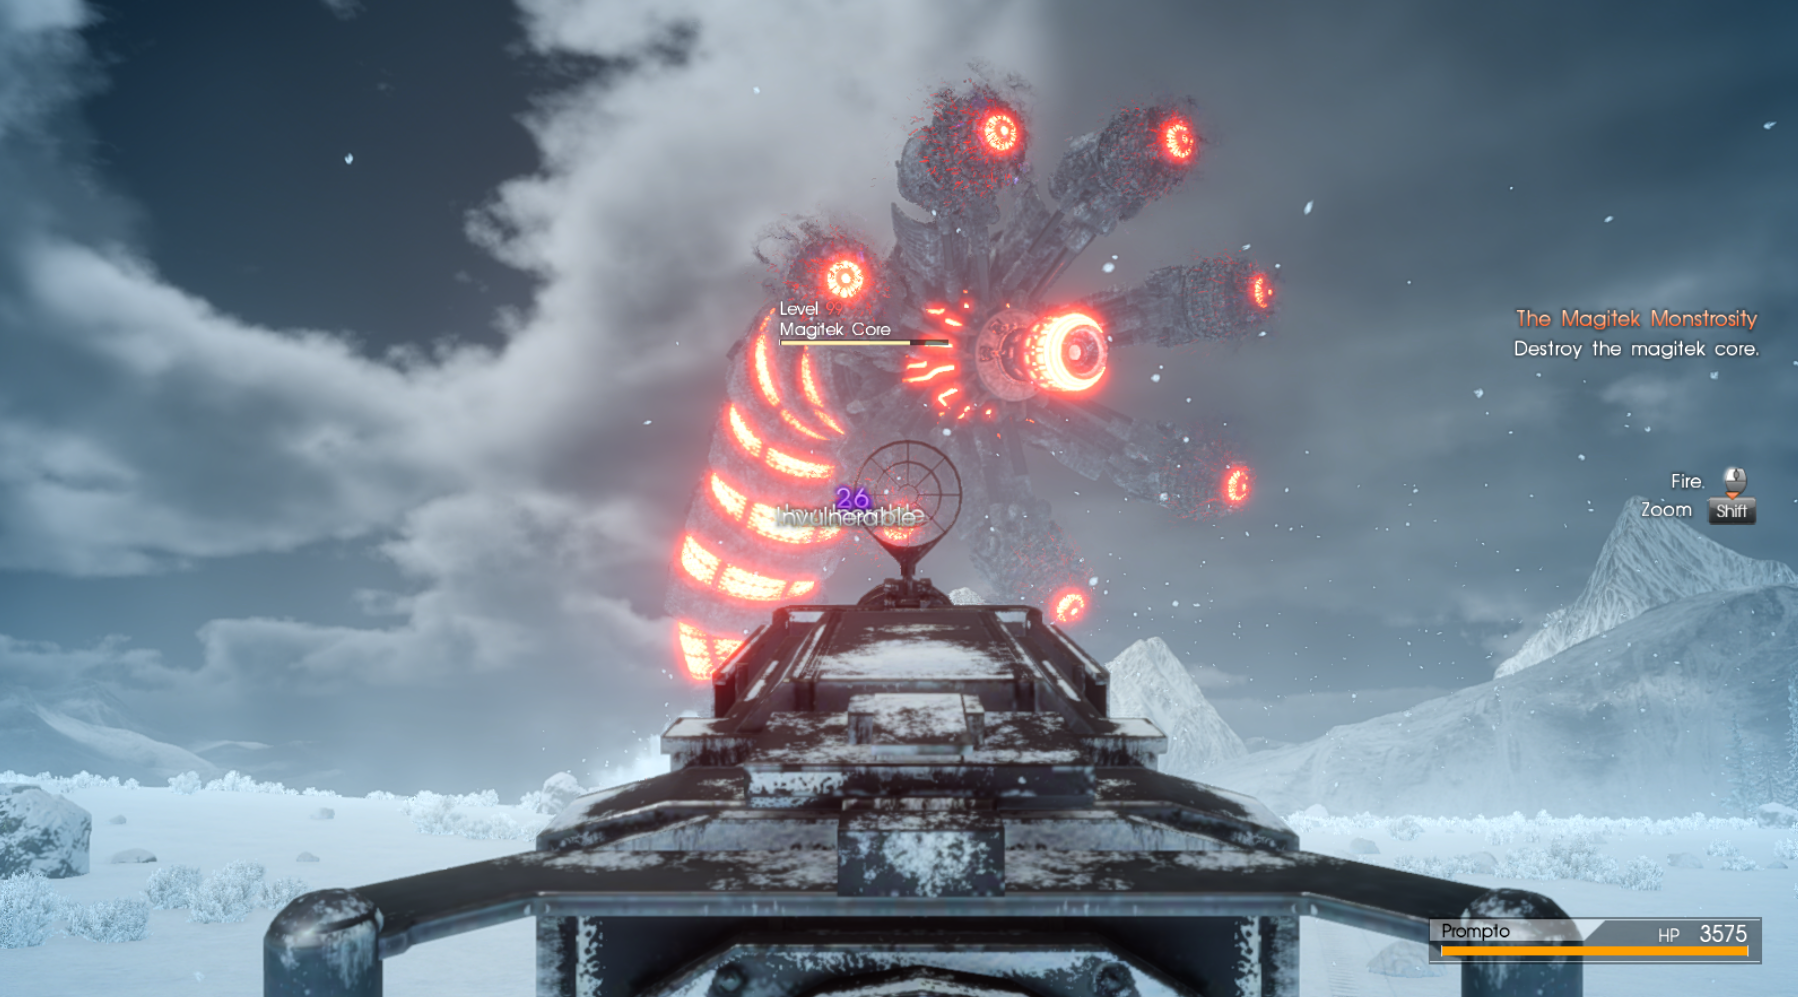
For the fight against Immortalis you'll want to aim at the center red core to deal the most damage to it, once you've destroyed that core you'll have to destroy each of the other red cores on its "face". After you've done this you'll defeat Immortalis and start the next boss battle against the Magitek Monstrosity (pictured below).
This battle is much like the first one, shot at the center of it to deal the most damage. Eventually you'll destroy it and score victory for yourself, enjoy the final cutscene - you deserved it! Also don't forget to stick around for the after credits scene!
Return to Final Fantasy 15 Walkthroughs