
Parasite Eve Day 5 Walkthrough
Video Walkthrough: Parasite Eve Day 5 Video Walkthrough
Day 5 begins on the World Map, to advance the story our next stop is Chinatown! If you have a full inventory or need Wayne for anything you'll want to visit the station first, otherwise head to Chinatown when you're ready. The first screen of Chinatown has nothing on it, just head north. On the second screen you will find two chests, a red one on the right side of the screen and a blue one on the left. They will blend with the environment well but they're right across from each other. I got a Medicine and PE +1 from them.
The third screen will have a telephone on the right (blinking red dot) which you can use to save, across the street from that phone on the left will be one chest and then right below it another one. I got an M79-2 from one and an Offense +1 from the other. Go right of the telephone to find a hidden area with an M1911A2 inside as well as a Tool. The gun is found in the chest, the tool you can find by searching the terrain in the southeast.
Return to the main street going through Chinatown and continue north to find Maeda. He'll give you another useless good luck charm, Narita. Grab the chest of ammo in the top of this screen then head down into the sewers. The first part of this dungeon is a maze of sorts, most of the areas look the same and there are almost always four directions you can choose from. There is a lot of loot scattered around this area including a Super Tool, a Tool and a few guns.
Since there are no landmarks in the sewers, giving you any direction would be difficult. My advice is to keep an eye out for chests as well as spots that sparkle on the ground (similar to how the fuses looked in the hospital), the Super Tool will be one of those spots. I also would recommend running in one direction until you hit a dead end, it makes navigating a bit easier. The Super Tool is found by running north down one of the tunnels until the very end.
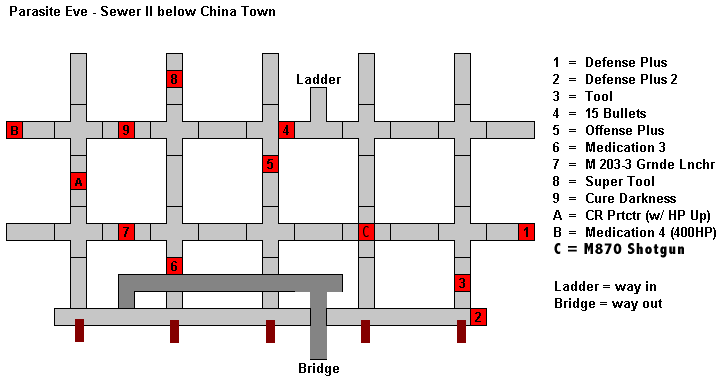
Credit for this map goes to the author of this guide.
The map above should help you navigate the sewers far better than any directions I can give you through text. As far as the enemies go, you'll be dealing with extremely annoying bats that like to inflict darkness on you. The only way to deal with this is using a Cure-D item, which they also drop. Try using your Haste PE power to more easily dodge the bats attacks, I found this to help a lot when dealing with them.
When you're ready to continue with the story climb up the large ladder in the room with all the tunnel exits (pictured below). There will be a Club 3 for you to get in a chest up here but aside from that just head south until you trigger a cutscene.

Go up the ladder and head south to advance the story.
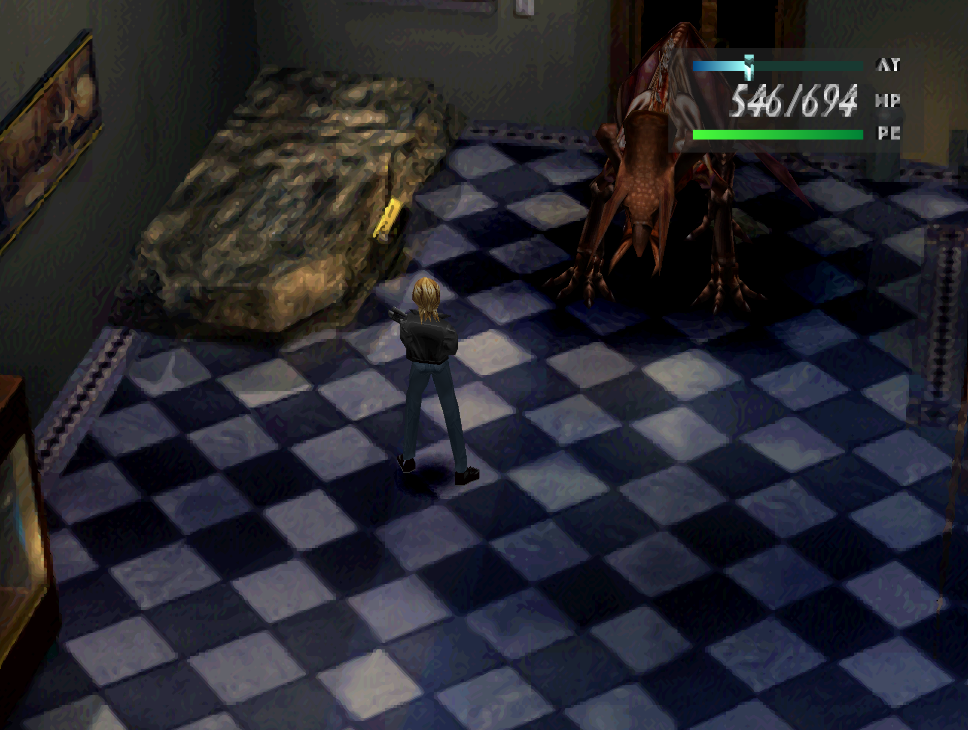
After you watch the cutscene of the blob, head down the ladder and battle the two alligators for some good items. Grab the Tool from the chest nearby too before heading up the ramp and into the other room. At the top of the stairs there is a control room with a chest. Interact with the control panel, turn it on and also turn on Pumps 1 and 2. This will trigger another cutscene, when it's finished turn off the power and then exit this room via the door in the north. If you don't turn off the power you won't be able to cross the canal, Aya will keep saying the water is too high.
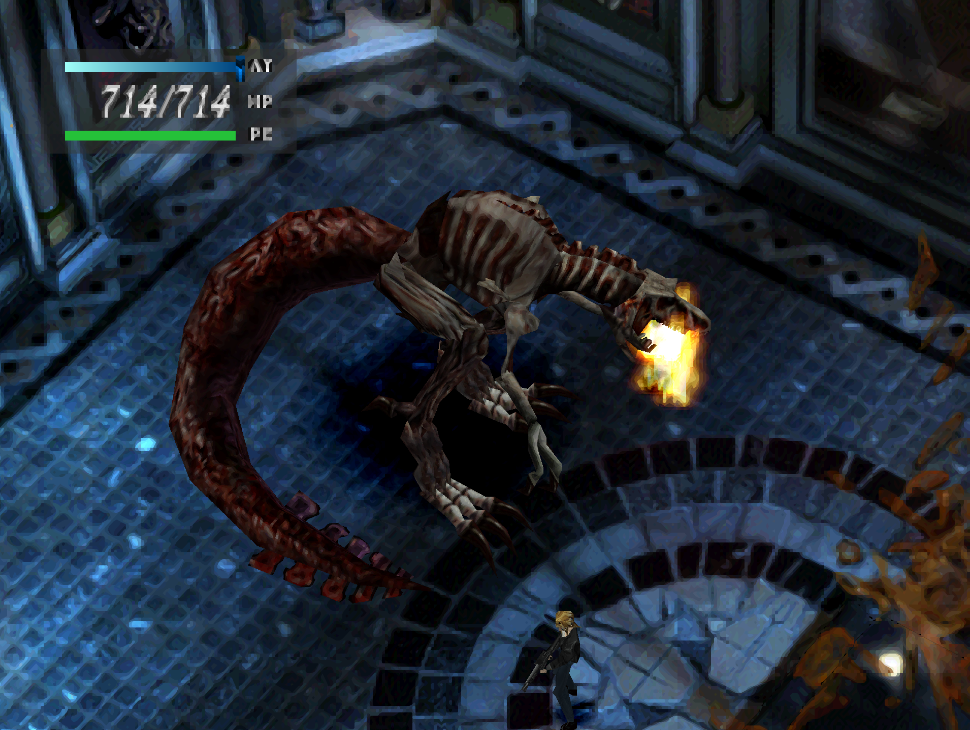
Follow the linear path and climb up to the train station, you'll find a blue chest in the top right (normally has a Medicine 3) and a red chest below it with a Range +1. Go south into another screen and you'll find a red chest with a CR Evade +1 inside. After collecting all of these hop off the train station and continue north up the tracks, you'll reach a split which is where our next boss fight takes place (pictured below).

The first phase of this boss fight will have you facing the Centipede as a whole. Once you deal enough damage it will split into four and spin around the arena, this is phase 2. I recommend you use Haste during both phases to avoid most of the attacks and to quickly damage the boss. For Phase 2, pay attention to when the body parts stop moving around to attack them.
Also, during phase 2 the middle sections have the lowest HP, the head has the highest and the tail has the second highest. For this reason it's best to save the head for last and focus down the other pieces first. Once the fight is over head southeast and climb into a train car, you'll find 3 chests inside - two have Tools and the other has a B Protector.
Continue north of where you battled the boss and you'll find a cop's body, inspect it for the Gate Key item. Exit this area and you will get the prompt to insert Disc 2. Now that we have the Gate Key our objective is to backtrack to the train station from earlier and exit via the gate. If you take the southwestern path on your way back you'll find another chest you can open for an item.
If you're having trouble finding the gate... it's right next to where you found the CR Evade +1 earlier (climb up to the train station and go south one screen, the gate is in the middle). Going through the gate will put you back on the World Map, there is one new location which we're going to do immediately - the Warehouse!
Warehouse (Optional)
The Warehouse dungeon is optional but it's strongly recommended that you do it for the loot it provides. When you first arrive there will be two chests outside, one has a Tool and the other has a PPK. The chest with the PPK is easy to find, it's to the right of the gate you enter at. The Tool is hidden behind the gate's door out of your sight, to find it you'll have to run around spamming X.
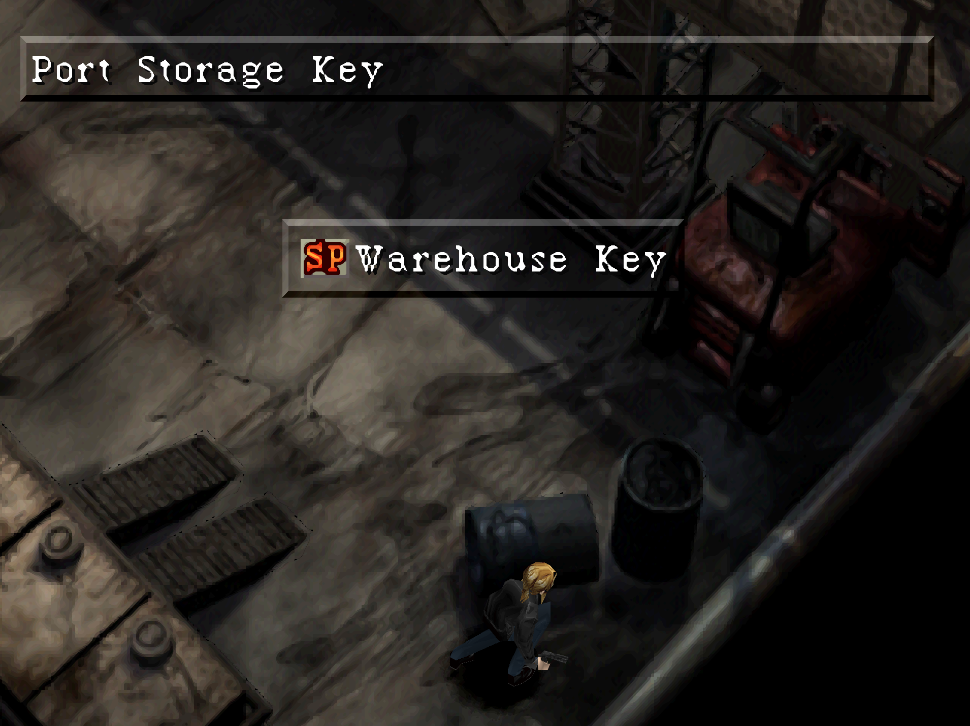
Inside the Warehouse you'll find a Cm Protector in the first room, it's in a red chest to your left. Continue north to the next screen, there will be a glowing spot in the bottom right which has a Warehouse Key that you can find. Northeast of that location is a blue chest, inside is normally a M203-2. Above that chest is a door, head through - go through the door in the southern part of this hallway too.
After the short hallway there is another big room, this one has a telephone where you can save your game. Below the phone is a red chest with an SP Protector inside, south of that is another red chest - that one has a Rocket. Go up the stairs and run past the telephone, you'll find a ladder which leads to another chest - it will have either an Offense +2 or +3 inside (normally). On the way to this chest, before we passed the telephone there was a door - go through it. Head across the catwalk into the next room.
There will be 3 chests in this next room, across from the door grab the red chest for an Offense +2. There's also a blue chest in the top right with a Tool inside and another red chest in the top left with a Defense +2. When you're ready to continue press X at the northern end of the screen and Aya will jump to the wire, climb this down to reach the boss of this dungeon.

For this boss the best strategy is to stay near his side since he won't be able to hit you with most of his attacks if you're at his sides. You'll want to focus on his claws first since they have the lowest HP and defeating them will disable his strongest attacks. Haste is a good PE to use for this fight since it will give you more mobility and attacks. I like to use Haste right when the boss deploys his eye balls, it'll give enough movement speed to avoid the beams.
When the fight is finished you'll want to grab the Tool from the sparkling spot in the top left of the boss room. Make sure you wait for the steam to not be spraying before you grab the item, once you got this item we're all done with the Warehouse - you can leave and head back to the World Map.
The Museum
Our next dungeon is the Museum, a familiar location that we've been to a couple of times prior. This dungeon can get pretty confusing and it also has numerous hidden areas with chests, if you're interested in getting all of the hidden loot I recommend you use my Museum Secret Rooms Guide. I won't point out the secret rooms on this page nor will I cover all the chests throughout with lesser items. For this page I will focus mostly on how to beat the dungeon and solve any puzzles you find.
When you first arrive you'll want to follow Dr. Klamp through a couple of rooms, he will lead you to a dead end with a locked door. Once you trigger this scene monsters will start spawning throughout the dungeon. Grab the two chests and backtrack to the Rainforest (an area north of the entrance).
Throughout this dungeon you're going to find terminals which will ask you a question that has a multiple choice answer. As we encounter these terminals I will list their question and answer below, when you answer correctly you'll get some items.
Rainforest Question: How many animals are hiding?
Answer: 9
Rainforest Secret Area Question: The name of the organelle that appeared in the first organism?
Answer: Mitochondria
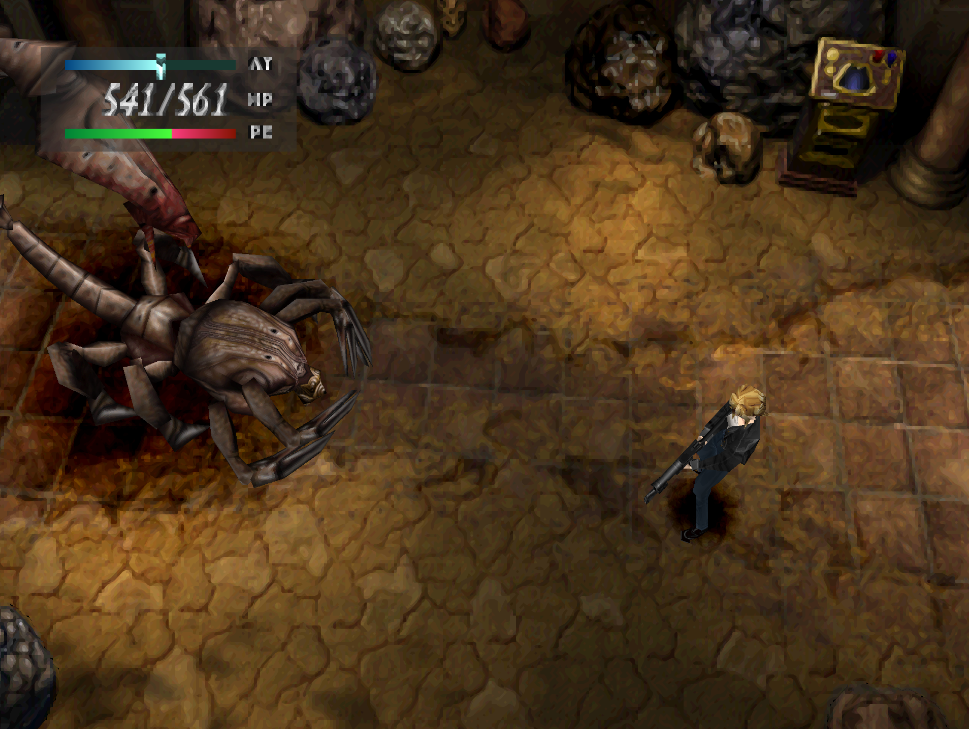
North of the Rainforest you'll find a large Scorpion in a desert geology exhibit, there is another terminal here which you can inspect for a question. Be prepared for a mini boss fight when you approach the Scorpion.
Geology Exhibit Question: What was the nutritional source of the first organism that lived 3.9 billion years ago?
Answer: Nitrogen oxides from volcanoes
After defeating the Scorpion go into the new area and continue north to the large room with a bunch of stone heads. When you try to leave this room there will be a noise which Aya thinks is an earthquake; return to the previous hallway and go up the stairs to find another question and answer terminal.
2F Hallway Question: The mitochondria creates ATP-adenosine triphosphate- within the cell. How much energy is this equivalent to?
Answer: 200,000 V per cubic cm
Head north and then through the door in the northeast corner of that room, you'll find yourself on a balcony with a ladder. You're given the choice of going up or down, head down first since that leads to some optional loot. There is a chest at the bottom of the ladder and a chest through the door to the left (press X while looking behind the statue).
When you're done go up the ladder to the third floor, the first room you come across is an anatomy exhibit of sorts. There will be another question and answer terminal inside here. You'll find another question and answer terminal in the room south of this one too, both are listed below.
Anatomy Exhibit Question: By taking mitochondria-which uses oxygen as its nutritional source-into the body and living with it symbiotically, the bacteria has acquired a tremendous amount of energy. What was the consequence?
Answer: Aging
Gorilla Exhibit Question: In 1987, Cann & Wilson released a theory stating that humans were derived from Mitochondria Eve. Which organism is thought to be Mitochondria Eve?
Answer: An African female
The next part of this dungeon is fairly linear, all the routes except the one you need to go will be locked or blocked off. You'll be lead to a room on the third floor and locked inside, to get out you'll need to climb out the window and drop to the room below.

Just like before, you will have an illusion of choice of where you can and can't go. There's really only one path to follow and it will lead you to a security room with a bunch of monitors. Along the way you'll pass a "Museum Tent" on the right side of the screen, there will be some hidden items inside of here.
When you're inside the security room, interact with the footage to see Eve on the 4th floor. Next, interact with the machine next to the desk that is blinking to turn off the security alarm. There is a chest you can open to the left of this desk which contains an MP5PDW, there is also a hidden elevator to the right across from this chest. Check out my Museum Secret Rooms Guide for more information.
Once you've got all the awesome items, return to the security room and exit for a cutscene. We now have access to the entire Museum and things get a bit confusing on where to go; our next destination is Klamp's Research Lab on the 2nd floor. A picture of the area you're looking for is shown below.
Dr. Klamp's Office on the 2nd floor
Find an elevator and ride it to the second floor, then look for the area show in my screenshot above. You'll have a scene with Maeda here, he'll give you Maeda's Gun which is the first useful thing he's actually given to you. At the end of the scene you'll get Klamp Key, a special item.
Exit Klamp's office and go two screens west and one screen north, this is one of the doors that the key unlocks. There is also another question and answer terminal next to this door, the answer is below.
Dinosaur Exhibit Question: 25 million years ago, oxygen increased in the air. Why?
Answer: Photosynthesis by bacteria.
After unlocking the door with Klamp's Key you'll want to go up the stairs to the room pictured below. There will be a mini boss fight here against a Triceratops (pictured below).
Much like for all of the other boss fights, I recommend you use either Haste or Barrier as far as PE powers go. After dealing enough damage to the boss it'll lose its head, it will move around a lot more and become much more unpredictable once this happens. Keep shooting until you've won.
When the fight is over walk south in this room and the triceratops will push you through the window and into the room below. Remember that T-rex from the previous cutscene? Well, he's our next boss!
Despite first appearances, this is actually a pretty easy and straight forward boss fight. The T-rex has 2,400 HP and only one phase, as always my advice is to use Haste or Barrier to make the fight easier. Alternatively, if you've already unlocked the Liberate PE power you'll want to use that instead.
Once you've defeated the boss head through the door in the southwest corner and use the elevator to go up to the third floor. From the third floor elevator room you'll want to go north two screens, west one screen and then turn south when you reach the three way split. You're now back in the triceratops room from earlier.
Exit the triceratops room via the southern exit and you'll get a cutscene. When you regain control of Aya you'll be in a new room with broken glass on the floor and to your left. There is some hidden treasure behind this broken glass, for more information about how to get it and a few other items check out the Museum Secret Rooms Guide.
-- This is the point of no return, from here on out you will be cut off from all previous content --
When you're ready to proceed go up the ooze covered stairs in the south and through the door in that room. There will be a few cutscenes followed by a lot of dialogue, when you regain control of Aya you will be next to Eve and the Statue of Liberty.

This fight has two phases, you will want to use Liberate during both of them. During the first fight there will be three targets, start by destroying the bottom, then middle then top. If you're having trouble dealing damage to her while also staying alive, my advice is to focus on dodging and let Liberate do all the heavy lifting for you.
In my opinion the second phase is much easier, there is one target and she has less health overall. Eve will also only have 3 different skills that you have to worry about. With one Liberate I did 90% of her total health in a single attack. Once you've defeated Eve you will get a scene and Day 5 will conclude.