
Fear Effect Walkthrough - Disc 1
Disc 1 Video Walkthrough: Fear Effect Disc 1 Walkthrough
When the game first begins you'll be in control of Hana, a young girl. During the game you will switch control of characters a bunch of times, I will always bring it up when this happens to help you keep track in the guide. Your first task with Hana is to walk around the helicopter and ride the lift up, the controls for this game can take a bit to get used to so play around with them now.
Use the bumper buttons to roll and crouch, as well as to run. Rolling will dodge (almost) every attack in the game. Some boss attacks or special events you can't roll through, but you can dodge basically any enemy attack with a roll. You're vulnerable for a split second when the roll animation is complete before you start another animation, but otherwise you can quite literally roll around enemies like a maniac to dodge them.
Crouching allows you to "stealth walk" around without being heard. You can sneak up behind enemies and eliminate them with melee attacks this way to save ammo. The last thing I will explain is item cycling, you need to cycle through your inventory in real time and choose items to use. Enemies will keep attacking you while you cycle through items, there is no pause while you do this. Your Mobile Phone, for example, allows you to save the game whenever you reach a point that rings. Swap to the Mobile Phone and select it to use it whenever you hear a ringing.
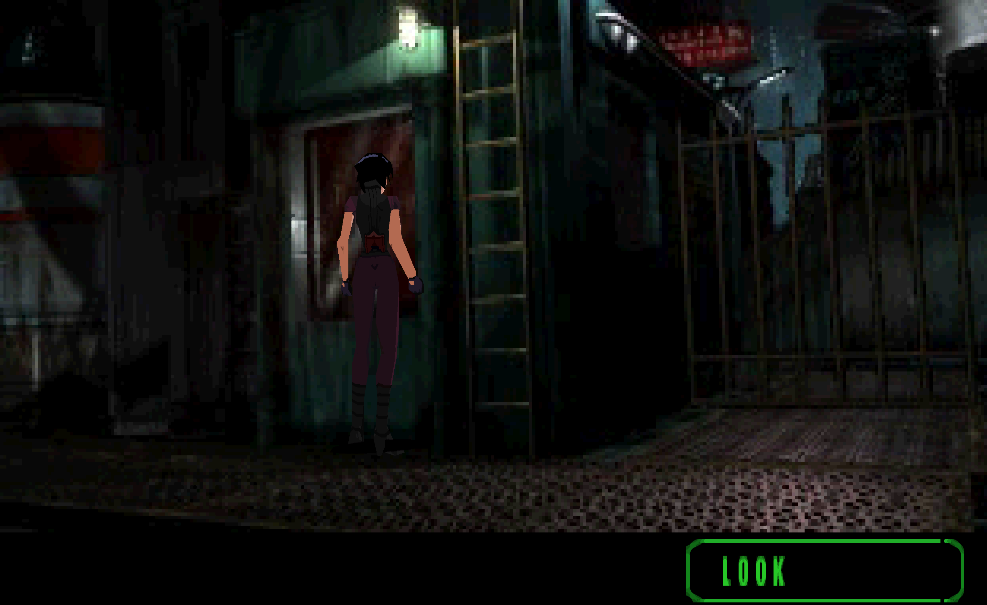
Getting back to the game, you will find two enemies at the top of the lift, near the second enemy you will find a window and a ladder right next to it. Position yourself just right and you can interact with the window. You'll see [Look] appear in a box at the bottom of your screen, the same that's pictured below.
Use your knife or gun to break the window and enter, interact with the lever in the room to turn off some steam. After that, walk to the back of the room and grab the Fuse from the cabinet. This item is important and easy to miss! Exit this room and climb the ladder when you're done--also use the valve on the roof to trigger a scene. Climb down and pick up the Gate Key item that the guard drops.
You will need to use this Gate Key on the nearby locked door to continue with the mission. If you're having trouble with how this game works, approach the object you want to interact with until you see [Use] pop up at the bottom. Cycle through your items and choose the one you want to use then press the action command (typically Triangle). My biggest issue with trying to get back into this game in 2025 when I wrote this guide was the controls. They're a bit... esoteric.
In the next area you will find two guards, one of them will drop a Red Keycard item which is important for you to pick up. The very next area you visit will have a door with a red glowing terminal next to it, use the Red Keycard on this terminal to open the door. You'll find one enemy in this room along with a wall of computer screens that you will want to interact with for a cutscene. There's also a save point in this room along with two lockers, one of which we will be able to open up in a bit.
Continue through the opposite door in this room and follow the linear path defeating enemies as you go. Eventually you will go down some stairs, before going down the second flight explore the area a bit to find the Locker Key. With this in hand, you'll want to return to the room before where we saw the lockers and scene with Jin. Use the Locker Key to open one of the lockers and you'll obtain the Blue Keycard along with a new weapon.
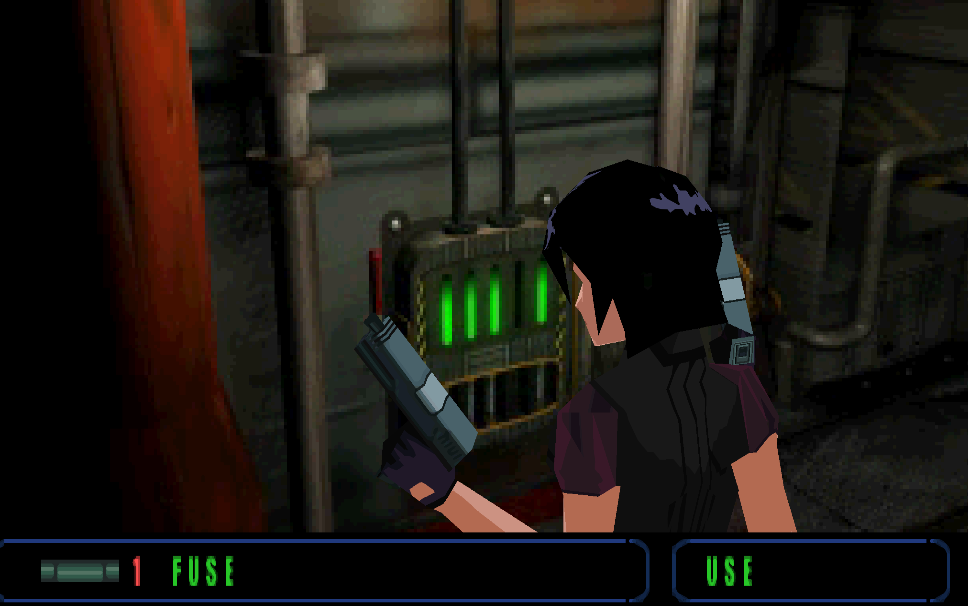
Return to the location where you found the Locker Key and this time go down the stairs into a completely new area. Down here you'll find a fuse box (pictured below), you'll need to put the Fuse we got earlier inside and this will turn on the electrical grid above you.
It also turns on the elevator across from the grid, which is our next destination. You'll need to back track the way you came to the electrical grid. Stop at this location for a bit and watch how it all lights up; you will need to dodge the electric on the floor to make it across. This is one of the first movement puzzles in the game so it's pretty easy.
Two screens over you will find the elevator, ride it down and then take the Wire Cutter from the box on the wall near the two fans. From here, head in the opposite direction-you'll pass a terminal on the wall with a bunch of blinking lights. This is actually the solution for the next puzzle, "back in my day we used to write this down on paper! Or use the Walkthroughs Gamestop sold."
Keep going through the next few screens and you will eventually reach a door with a blue glowing terminal next to it. You guessed it, use the Blue Keycard on this door to open it. There will be a large fight in the next room followed by another scene with Jin. He has a bomb on his chest which you need to disarm, select your Wire Cutters to enter the menu shown in the screenshot below.
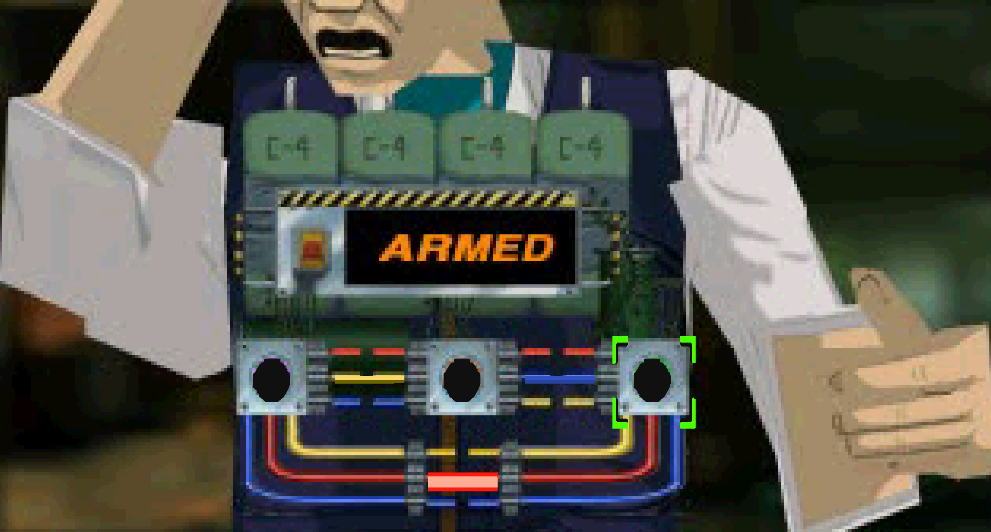
Tip: You always cut the top and bottom wires on each button.
On the bomb menu you will be able to select a "button", either Orange, Purple or Green and cut some wires around it. Select the buttons in the order shown below and cut the wires I mention to complete the puzzle.
Orange Button: Cut Red & Yellow
Purple Button: Cut Red & Blue
Green Button: Cut Blue & Yellow
After diffusing the bomb there will be a scene, when it's done return to the previous screen where you will find a locked door. Place the C4 you got from Jin onto the door and it will detonate, blowing it up and making a new path. Continue along through a few screens until you reach a door with a red terminal. Right next to this door you'll find a hatch that you can go down, follow through and you will come across a large outside area with four neon signs. The symbols you see here will open the locked chest in the next room.
Don't worry if you don't feel like writing them down though, because I have a screenshot below which will show you exactly what to use for this puzzle! Just before the puzzle, you will have your first real boss fight of the game. There isn't much advice I can offer you aside from "duck and roll" as that will help you avoid lots of damage. Pick up the Sign Key that the boss drops and use it to interact with the chest on the far side of the room.
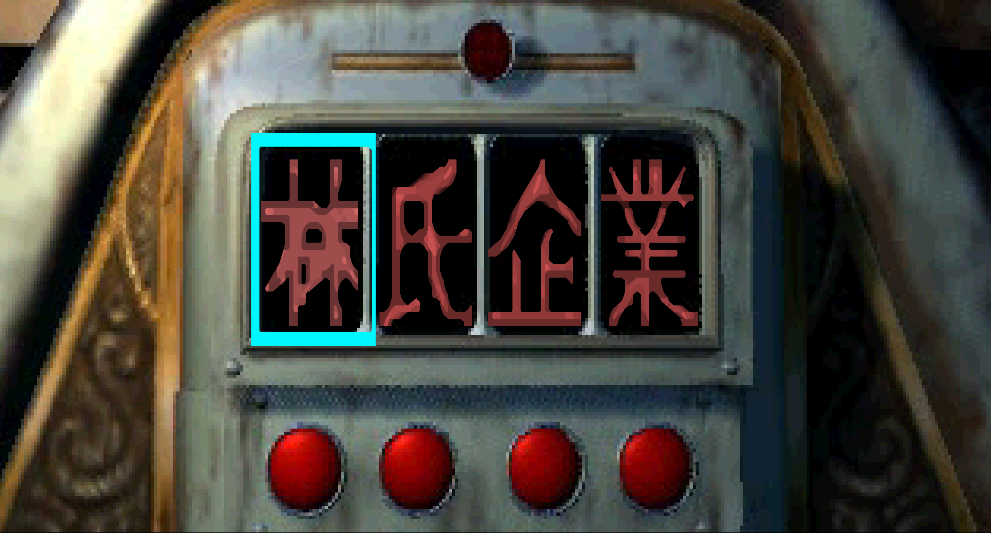
You will be prompted to choose 4 symbols, pick the ones I have above. Press the X/Shoot button to confirm your selections and open the box. There will be a short scene which switches the character you control from Hana to Glas. When you are ready step forward on Glas and interact with the terminal. You'll have another quick scene after which you'll need to move quickly with Glas to reach the nearby ladder.
Continue along the linear path to reach a ladder which goes ontop of another small building; this is all very similar to what we did with Hana. Before you get to the top of the ladder though you'll want to stop. The airplane (or is it a helicopter?) that shot at you earlier is still following you and it will light up the roof in front of you and the area on the floor behind you. What you need to do is time your ascent properly, right after it is finished shooting the roof you need to run across to the ladder on the other side and climb down.
There will be another scene, when it is finished make sure you pick up the Pipe on the ground nearby where you regain control of Glas. You'll need to swing this item at the large orange tank nearby to cause steam to erupt from it. Once you do this, take out your gun and shoot the tank to trigger another scene.
When the scene is over you'll find yourself back in control of Hana, she won't have any weapons though and you will need to pick up the Knife from the ground to defeat the guard here. Much like before my main advice is to "duck and roll" to avoid damage. Once you take out the guard, loot his weapon and continue through a few more screens for another scene. You will find yourself back in control of Glas when the scene is finished.
Glas landed on a maze of pipes, they will heat up in a specific order and you need to avoid them when they do otherwise you will take a lot of damage. Your first goal is to turn the valve in the middle of this area, once that is done you'll want to circle around the pipes to the far side of the screen. Use my screenshot below if you need some help navigating.
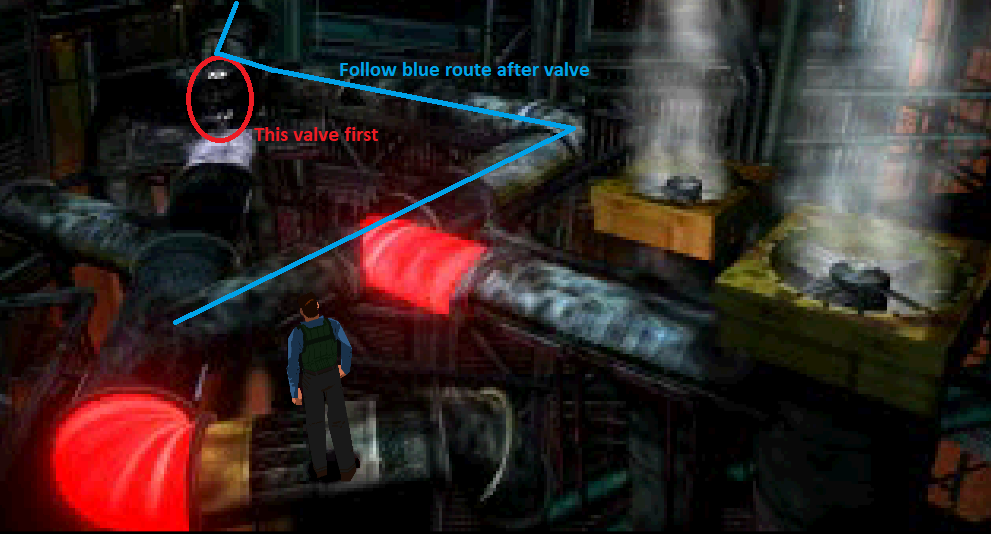
Stand around for a bit and watch the order they light up in to easily solve the puzzle. There are a few safe spots you can stand throughout the puzzle, one of these spots will have a Mobile Phone Save Spot! I strongly encourage you to save because the next area will have us fight that helicopter-thing that has been following us.
For this fight you need to wait until the helicopter flies in front of the large cloth that is hanging above you. When it does, shoot twice and you will hit the cloth and make it go into the engine. There is one cloth on the main screen and a second cloth on another screen to the left. Once you take out both the helicopter will crash and no longer be an issue.
The next few areas have some enemies but are all linear, go through the door we blew up earlier with Glas and continue up. Eventually you will dead end into an area with the red keycard door and a hatch right next to it; the same area Hana went. Continue down the hatch and you will get another scene after which will be your final boss fight of this mission. You will be in control of Hana again and you'll want to shoot the helicopter that is attacking you. When it's shooting back at you, hide behind the wall, otherwise stand out in the open to avoid shots at your cover spot.
When the helicopter is defeated there will be another scene after which you'll have a short sprinting sequence with Glas where you have to run and interact with the helicopter again. There will be another cutscene which concludes Disc 1 of the game.
Continue to Disc 2 Walkthrough