
Digimon World 1 Walkthrough (Chapter 1)
When the game begins, the very first thing you'll want to do is speak with all of the Digimon in the town. In particular you'll want to talk with Tokomon inside of Jijimon's House (he'll give you some starter items which you desperately need). North of Jijimon's house you will find Tanemon by the Meat Farm, speak with him for 3 pieces of meat. This is something you can and should repeat every day.
To the west of File City you will find the Green Gym area which is your Digimon training grounds, you'll be spending a lot of time here. Digimon don't live very long so you will be getting a new one every once in awhile. Each time you get a new Digimon you will need to train up its skills so that it evolves into something useful. Failing to train a Digimon properly will get you a Numemon; this is a very poor Digimon to have.
Our goal with the first Digimon we have is pretty simple... We want to train him up a bit so that he digivolves into a more useful Champion Digimon. After doing this we want to acquire key NPCs for our town to make life easier. Depending on how you answered the questions at the start of the game, you may have a different Digimon so your path to evolving him would be different.
My advice is to do some reading about how all of this works because it's the core gameplay loop of the game and you won't get anywhere without making stronger Digimon. Check out the links below to learn more about Digivolving.
Good Gamefaq Digivolve Spreadsheet/Guide
Evolution Tool (Great, does much of the thinking for you)
It's a lot of information to process and this is a game where you can really mess up your game at first by doing stuff you're not supposed to be doing. Once you learn how to play and what to do things become a lot easier... There is still a huge grind to this game though, which we will talk about in a bit. Before I jump into the meat of the guide, let's do some tips and tricks I wish I knew at first.
Tips & Tricks
- You will want to get Coelamon (Native Forest/Coela Point) and Centarumon (Tropical Jungle/Amida Forest) as soon as possible for your town.
- Purchase items when you have a Baby or In-Training Digimon to get a discount.
- Getting a Numemon isn't the end of the world, you can use him to grind food, Bits and sm.recovery items. There are even some Digimon that you can recruit with him! Check my section below on Numemon for more information.
- For all Baby & In-training Digimon you'll want to raise all of their stats to 100+ and then focus on their HP/MP.
- You can spam 'Praise' on your Digimon to raise their Happiness to max; you can also force feed them to raise their Weight. Both of these are sometimes needed for Digivolution requirements.
- Similarly, you can 'Scold' your Digimon to increase their Discipline gauge.
- If your Digimon refuses to take an item from you, Scold it and then try again.
- Always carry Port. Potty if you're trying to avoid Care Mistakes and Auto Pilot so you can fast travel back to town.
Your First Digimon (Walkthrough Part 1)
Starting out with our first Digimon, you'll want to figure out which path you are going to take it with your Digivolve. If you find this overwhelming, focus on training all stats to 100+ with a focus on Brains and Offense going higher. Weight is the easy one to mess up though, which is why I recommend you do some reading.
You will also want to raise MP/HP as they're both important for battles. Aside from training, you'll want to venture south into Native Forest occasionally to grab Digimushrm and to fight some enemies. When you go south into Native Forest from the Green Gym, this screen can spawn two Digimushrm items along with two ModokiBetamon which can drop sm.recovery items. I like to run a circuit between this screen and the Green Gym to collect food. You'll need it to maintain a proper weight early in the game.

The sm.recovery items you'll want to hoard until you decide to push your limits and fight some harder Digimon. We'll be doing all of that soon when we recruit more villagers. I personally would recommend waiting until you evolve your Digimon once before going after the next few recruits, but it's honestly up to you.
Our primary goal with this first Digimon is to recruit the important villagers so that we can more easily raise Digimon and progress through the game. Below is a list of all the first Digimon that you need to recruit to make your town functional. These Digimon will do things like add shops to your town, upgrade current structures and make short cuts to new areas.
Important Early Game Digimon:
Agumon (Native Forest): Right when you enter Native Forest.
Kunemon (Native Forest): Found in the Kunemon's Bed section of Native Forest. Feed him then fight him.
Palmon (Native Forest): Go south of the Native Forest's Toilet one screen and you will find Palmon at the northern end of the area facing away from you looking at some plants. When recruited, Palmon will upgrade the Meat Farm to give 3 Giant Meat per day.
Coelamon (Native Forest): You'll find Coelamon at Coela Point (in the afternoon) which is directly south of the Digimon Bridge area. If it's the afternoon when you arrive, then you'll find Coelamon swimming around in the water here--just look for the shadow moving around in the water. Coelamon is very important to get since he opens the first version of the shop in your town.
Betamon (Tropical Jungle): Betamon is found in the Mangrove Region of the Tropical Jungle. When you enter Tropical Jungle from the Digimon Bridge keep going east across the beach and into the vine/tree area, you'll find Betamon here.
Centarumon (Tropical Jungle): Check out my Tropical Jungle Recruitable Digimon page for more information about getting Centarumon.
In my opinion the two most important Digimon on the list above are Coelamon and Centarumon. Coelamon will open a shop in your town which sells Meat for 50 Bits a pop and recovery items for HP/MP. As for Centarumon, he will open the Clinic which will allow you to buy Medicine and Bandages along with fixing any ailments your Digimon has.
All of these Digimon will help you shape the town into something basic that you can work with to go on further adventures. We'll talk more about this in the next section, by now your Digimon is probably starting to get old. What I recommend you do with the rest of his life is explore and fight enemies. You need a lot of Bits in this game to buy recovery items and fighting is the best way to get them. Exploration is the second primary gameplay loop of the game and our main purpose aside from raising Digimon.
When your Digimon dies you will get a scene and you'll be asked to choose an Egg, depending on which Egg you choose, you'll be given a different starting Digimon. This is another system I talk about a lot in my Raising Digimon Guide, but I would really like you to try it first yourself before I hold your hand.
This brings us to the next section of the guide - Numemon and the farming gameplay loop. You'll need to do this loop a couple of times to build up consumables if you don't use codes.
Numemon & Farming Gameplay Loop (Optional)
Before I say anything else, this entire section is an optional read. I personally like to build up my item reserves before I go exploring a bit and that means raising one or two Digimon and farming some Bits. You should do this your first time playing the game so you can understand the main gameplay loop of raising a Digimon too.
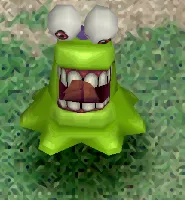
Normally, I would recommend a new player do what I talk about in this section when they end up with a Numemon or a Sukamon. You will very likely end up with one of these two if you don't follow a guide to Digivolve your Digimon correctly. Numemon happens when you don't meet any criteria for a Digivolution; Sukamon is what happens when you have too many poop Care Mistakes.
When you fail to meet any criteria for a Digivolution, you get Numemon
When you Digivolve to a Numemon or a Sukamon you'll actually lose stats. These Digimon also don't have access to many powerful abilities which makes combat with them much more tedious and difficult. It's for these reasons that I normally recommend you do this early farming route when you end up with these Digimon.
Another recommendation I would make to you is abuse these Digimon. When they want to eat, refuse to feed them until they drop down to 1 Weight. Doing this will help you save on Meat and other expenses. It will also teach you how much abuse a Digimon can handle (quite a lot). You'll need to abuse some Digimon and also over feed some Digimon to evolve them properly in the future. The Weight stat of your Digimon is very important for evolution purposes.
My recommendation to you when you get a Numemon or a Sukamon is to spend your days training and clearing the first screen of Native Forest. Your goal will be to collect Digimushrm from the ground and the sm.recovery items from the ModokiBetamon enemies. Collect these items, but try to use as few as possible. Our goal is to stockpile them with the Digimon we don't care about so we can use them on our better Digimon.
You should also be visiting the Meat Farm each day to stock up on whatever food is available for you. Keep in mind too that everything you get from the Meat Farm can be sold to the vendors in town if you need more Bits. If you only feed your Digimon once each time it is hungry and sell the rest, it will make your wallet much bigger than your Digimon!
If you find yourself getting Numemon over and over again it means you should probably take a look at my Raising Digimon Guide. That page will hold your hand and show you how to evolve each egg to an Ultimate Digimon.
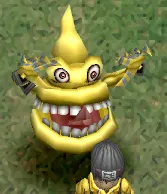
Letting your Digimon poop on the ground too much will give you Sukamon
Believe it or not, these Digimon aren't all worthless either. You need Numemon to recruit Monzaemon in Toy Town, this gives you something to do with him outside of the aforementioned grind. One of the areas in Overdell called Grey Lord's Mansion can only be accessed with a few different Digimon - both Numemon and Sukamon are on that short list.
You also have Penguinmon, he is found in Freezeland and will join you without a fight. All you need to do is beat his mini game to recruit him. Leomon is another Digimon you can recruit without fighting, you can find him in Gear Savanna at the training gym that's there. You'll have to talk with him then find his Ancestor's tablet, once you do that he will join your city.
Other options that are available to you include doing the Monochromon Recruitment in Great Canyon (you have to run his shop for 8hrs, it may take multiple attempts). Vegiemon in Tropical Jungle is another option for you, no combat is required for him. If you've advanced the game far enough to unlock Gear Savanna you could also check out the Secret Item Shop and purchase some cards.
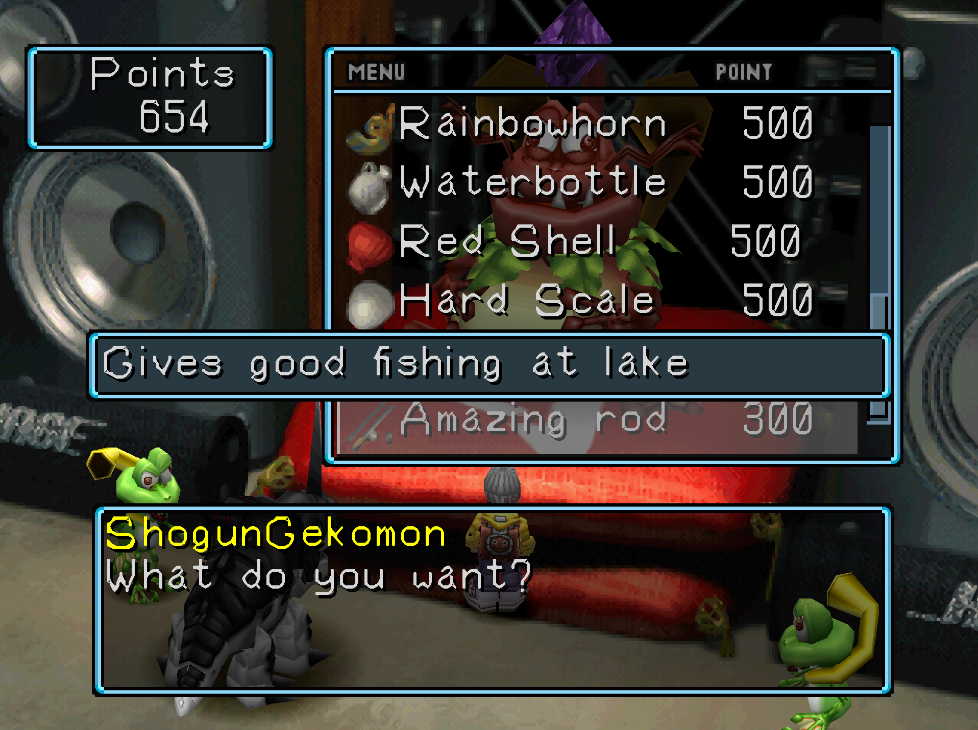
Alternatively, you could take those cards with you and visit Geko Swamp to meet ShogunGekomon. Here you can trade the cards for an Amazing Rod which will allow us to meet Seadramon, this NPC will give us access to a new area called Beetle Land. Seadramon requires you to fish at the lake in Native Forest at a certain time and involves no combat - which is perfect to do with a Digimon like Numemon or Sukamon.
I talk more about ShogunGekomon and Seadramon/Beetle Land further down this page as well. If you'd like to learn more about them now follow the links above. There are probably a bunch more things you can do with a Numemon or a Sukamon but to name one more, the entire Nanimon Recruitment Chain requires no combat. Nanimon requires you to return to places that you've once been and speak with him. Avoid the enemies and you will avoid battle.
Walkthrough Part 2 - The Midgame
Before you continue into the Midgame you're going to want a Champion or an Ultimate Digimon. Since this is your first time you may feel more comfortable with an Ultimate Digimon but it's not really required. Most of the places we'll be exploring and Digimon we'll be recruiting aren't going to be difficult fights (yet).
The main issue with waiting until you unlock the Ultimate Digimon is you will only have a few days of life left to explore and recruit new Digimon. What I would recommend is exploring with a Champion Digimon instead, if you find any really tough fights bring back an Ultimate Digimon to beat the enemy.
I've created a list below which goes over each of the areas in the (rough) order you should explore them. Click on any of the links to be taken to that page with a list of all the Digimon you can recruit there along with information about how to recruit them.
Native Forest Digimon Recruitment
Tropical Jungle Digimon Recruitment
Drill Tunnel Digimon Recruitment
Gear Savanna Digimon Recruitment
Mount Panorama Digimon Recruitment
Overdell/Grey Lord's Mansion Digimon Recruitment
Ancient Dino Region Digimon Recruitment
Great Canyon Digimon Recruitment
Geko Swamp Digimon Recruitment
Freezeland Digimon Recruitment
Misty Trees Digimon Recruitment
You won't be able to recruit all of the available Digimon in each location right now. Instead, grab the ones that are easy for you and come back for the harder ones later. Below you'll find a list of all the Digimon I would recommend you grab ASAP. These are typically Digimon that will upgrade your town in some way and provide you more benefits.
Birdramon (Great Canyon): Makes a fast travel building which lets you fly to many different areas.
Biyomon (Gear Savanna): Works in the Item Shop.
Drimogemon (Drill Tunnel): Works in the Treasure Hunt building.
Garurumon (Freezeland): Works in the Restaurant.
Greymon (File City): Runs the Arena in town.
Kabuterimon (Beetle Land): Improves Green Gym's training machines.
Kuwagamon (Beetle Land): Improves Green Gym's training machines.
Meramon (Drill Tunnel): Works in or opens the Restaurant.
Monochromon (Great Canyon): Works in or Opens the Item Shop.
Palmon (Native Forest): Turns the Meat farm into a Giant Meat farm.
Patamon (Gear Savanna): Helps in the Item Shop.
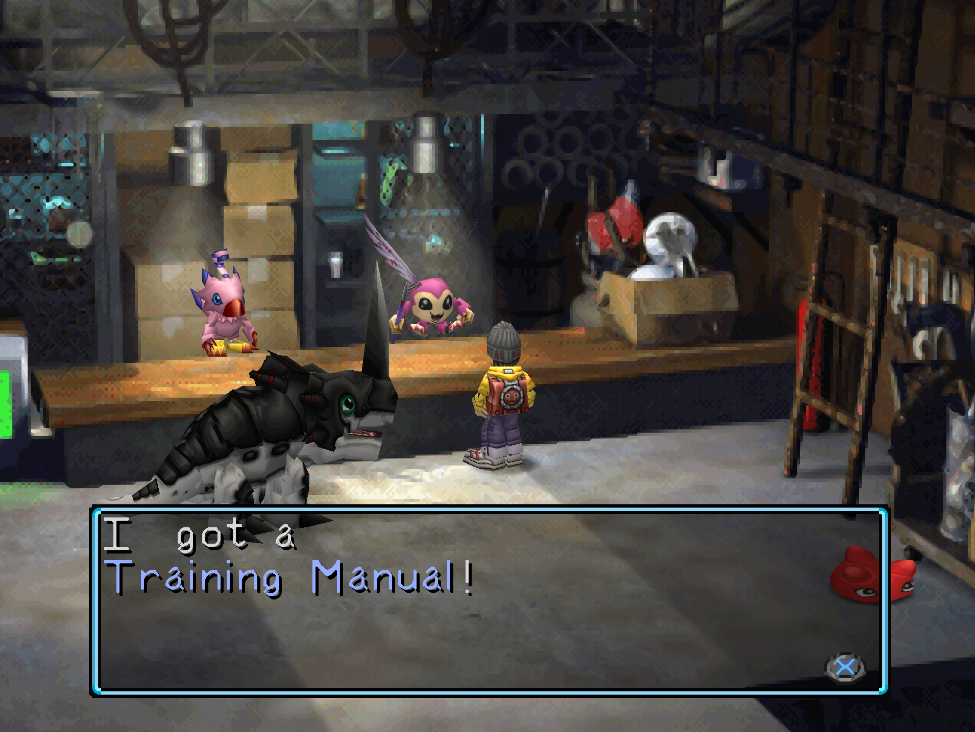
Piximon (Tropical Jungle): Sells Training Manuals in the Item Shop.
Seadramon (Native Forest): Lets you travel to Beetle Land. Check out my How To Catch Seadramon Guide for more information.
Shellmon (Great Canyon): Creates the Bulletin Board in town.
Tyrannomon (Ancient Dino Region): Works in the Restaurant.
Unimon (Mount Panorama): Sometimes works in the Item Shop.
Vademon (Mount Panorama): Occasionally found working in the Restaurant.
Vegimon (Tropical Jungle): Turns the Giant Meat Farm into a Sirloin Farm.
Whamon (Freezeland): Gives you a ride from File City to Factorial Town.
While collecting the aforementioned Digimon you'll also want to start branching out and doing other important tasks. One of these important tasks includes getting the Dimensional Key Chain, this is a Key Item which allows you to carry 10 more items on your persons.
To obtain the Dimensional Key Chain you'll first need to find Nanimon, a unique Digimon that is found in multiple locations throughout the game. Nanimon will appear in certain story areas after you complete the objectives at that location, for more information check out my Nanimon Recruitment Guide.
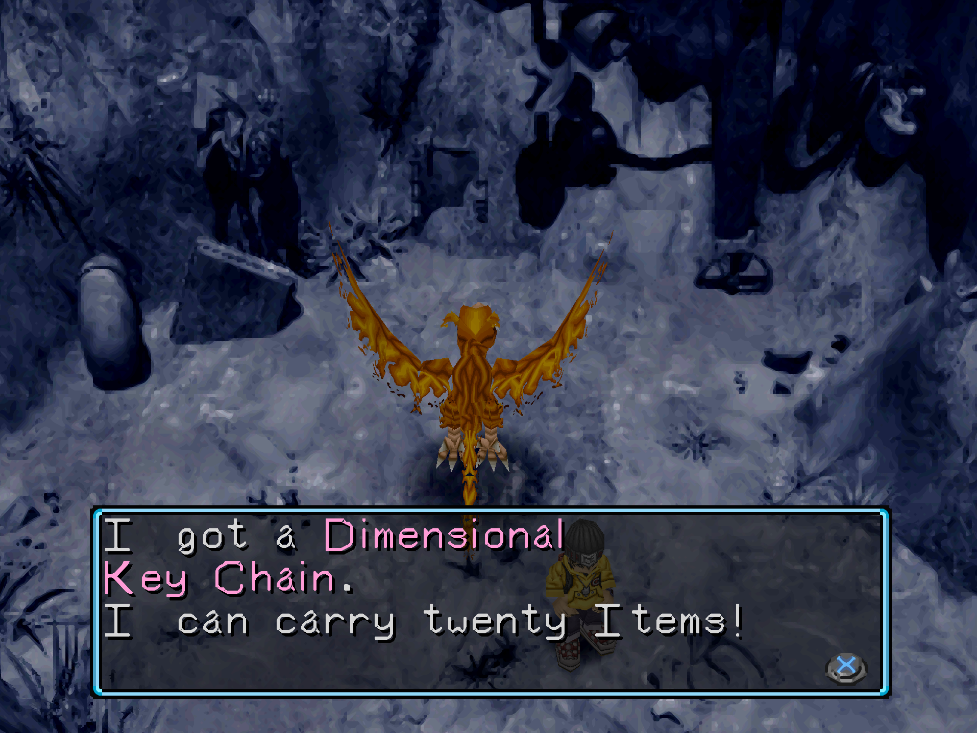
Find Nanimon to acquire both Dimensional Key Chain Upgrades
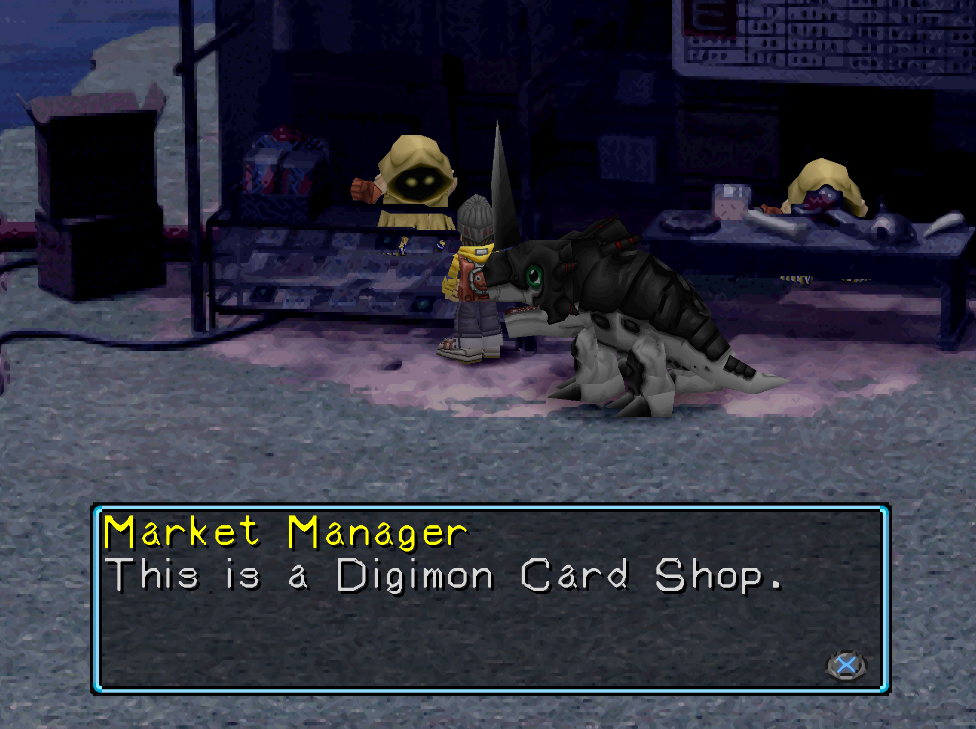
All three of the next areas kind of tie together, there is a Secret Item Shop in Gear Savanna which appears from the 1st - 15th of each year. You can purchase items you dropped upon defeat at one part of this shop and Digimon Cards at the other part. The Digimon Cards can be traded to an NPC in Geko Swamp called ShogunGekomon for unique items.
One of these unique items is the Amazing Rod which can be used at the Dragon Eye Lake to fish up Seadramon. Fishing up Seadramon is required if you want access to Beetle Land and the recruitable Digimon that are found there. Check out my How To Catch Seadramon Guide for more information about catching him. Beetle Land is an important location to visit since the two Digimon you can recruit there will make your Green Gym Training Machines more powerful.
For more information about How to Locate the Secret Item Shop check out the linked video. Getting there is pretty easy, but the path isn't obvious if it's your first time going there - which is why I made a video. I'd recommend dropping 25,000 - 50,000 Bits on cards in total that way you have enough for most of the things you want at ShogunGekomon.
The last thing I will talk about in this part of the walkthrough is how to upgrade the Green Gym Training Machines. I brought this up when I mentioned Beetle Land earlier, Kuwagamon and Kabuterimon both upgrade half the machines in your gym, together they'll upgrade all of them. Both of these Digimon are found in Beetle Land and you basically just talk to them to recruit them.
You can find a few write ups online with this information, most of them all point back to this post on Gamefaq though. The post goes over all the math for the Training Gym and exactly how it all works, including much more information than I provide here.
Below, you'll find a list of the permanent upgrades you can apply to your Training Machines and how to get them.
Gym Upgrades:
- Train 10 times at a station with a Fresh/In-Training Digimon (basically the first one you get out of the Egg or the one after that). The Brains/class board is upgraded by using the Waterfall MP training, you can do both of those at the same time. Completing this on a station will give you a +2 bonus.
- Kuwagamon and Kabuterimon will both give a +2 bonus to certain machines (combined it covers all machines).
- Training Manual will give you a +1. You can buy this from Piximon in the Secret Item Shop.
Continue to Digimon World 1 Walkthrough (Chapter 2)
Continue to Complete List of Recruitable Digimon