Breath of Fire Walkthrough - Chapter 5
When you arrive back in Gramor talk with the Mole Person that's next to the bed Mogu is sleeping in. Since we have the Bolster in our inventory he'll ask if we're ready to enter the Dream World. Tell him yes and you will be thrown into the Dream World! Upon entering the Dream World you'll be informed that you need to visit the North Tower and defeat the big bad boss that's there.
Talking to the residents in the Dream World will reveal that they are all aspects of Mogu. It's actually pretty neat to talk to them and hear what they have to say. You can also find an Inn at this town if you need to rest as well as a Dragon Shrine for saving your game. Once you're done exit out of town to the north and head north to... the North Tower.
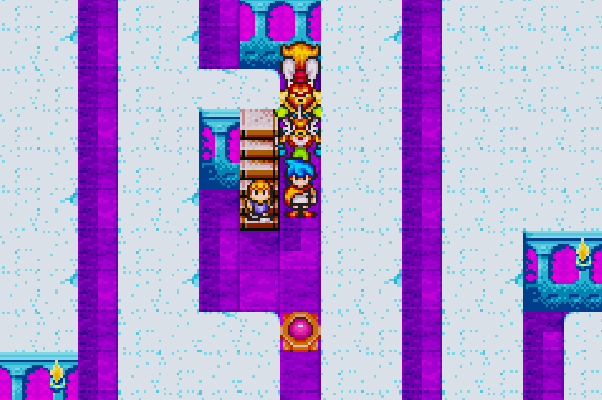
You will very quickly notice that this dungeon is not like the previous ones - this one is actually confusing! There will be red and blue switches on the floor that will either turn the walls of this dungeon invisible or make them visible again. Our goal for this floor is to reach the little kid in the center (pictured below) as they are standing near the set of stairs that we need.
To reach this child in the center you will need to follow a specific route through the dungeon. When you enter the dungeon go to the right and follow the linear path until you reach the blue button, turn left and follow the path until you can go north again. Follow that route until you have an opportunity to go south, you'll run by the kid we need to talk to on your way back down. Turn left and keep going south when you have the opportunity; all that's left is one right turn and that path will lead you straight to the child.
Are you confused by my directions? If so I recommend you check out my How to Navigate the North Tower Dungeon Youtube Video for a better explanation on where to go. Talk with the child that's here and don't agree to fight right now - as the child says you won't stand a chance. Use Bleu's Exit spell to teleport out of the dungeon and then return to the town that's south of us.
When you arrive back at the town there will be a little girl named Anne standing there - talk with her then enter the town. Rest at the Inn and then talk with Anne and the other guy inside of the south-central building. You need to speak with both in order for the triggers to be fulfilled and for the bridge to be finished. Exit town and head west then south and you'll notice there's now a bridge we can cross.
To the east of this bridge you'll see a cave on the World Map... However, when you approach the cave you'll enter into an intermediary area called the Wilderness. This area is basically a Gas Field which is annoying to navigate. Each of the "incorrect" paths you take will blast you in the face with some gas and prevent you from going further. So, you'll basically have to play around a bit and try to go different ways until you figure out which one the game wants you to go.
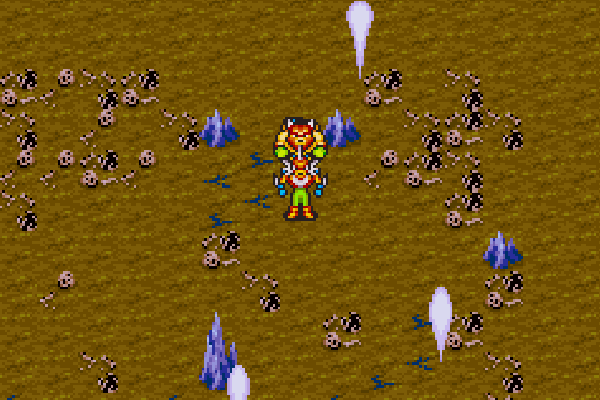
Cross the Gas Field in the Dream World to get to South Cave
Exit the gas field to the north and you'll find yourself back on the Dream World's overworld. Proceed into the South Cave dungeon and talk with Mogu's courage inside. There will be a scene when you talk to him and once the scene is over you'll have Mogu in your party. Now we need to return to the North Tower and talk with that kid again who is standing on the stairs.
If needed you should stop back at the town too and rest at the Inn. The enemies you fight in the gas field are pretty tough and enough battles will drain your AP quite a bit. Once you're back in the North Tower you'll have to navigate the first floor all over again as well as the upper floors. The upper floors are easier to navigate but they can still be confusing for some players. Once again, I recommend you check out my How to navigate North Tower Youtube Video for the best explanation of how to get through this dungeon. Written words aren't good enough to describe this dungeon without it being confusing.
On the top floor you'll find the kid that we're chasing and he will transform into a Mothro. Make sure you do enough damage before throwing your Pokeball though... I know, I just couldn't help myself. After defeating Mothro you'll be thrown back to the real world and there will be a scene during which Mogu will join your party.
Now that we have Mogu in the party there are a couple of optional things to do. Mogu's special ability lets him dig and access new areas, this can be used to get us some loot as well as Karn's final two transformations (including his ultimate transformation). I strongly recommend you go out of your way to do these things now since they will make the rest of the game easier.

This is a Mogu dig site
Karn's Doof Transformation: Warp to Camlon using Nina and head northwest across two bridges until you come to the dig site shown in the picture above. Dig here using Mogu then put Karn in the front of your party (turn off his transformation) and talk to the old man. He'll teach Karn Doof.
Mogu Digsite #2 (Near Tantar): Warp to Tantar using Nina and travel northeast; you will cross a bridge and go up a few ramps before reaching another Mogu dig site. This dig site is found east of where we first boarded/discovered the Stone Robot earlier in the game. Inside you'll find L. Ptn, Clog, A. Ptn and a V. Ptn.
Karn's Puka Transformation: Warp to Bleak using Nina and enter the house just above the Dragon Shrine. Place Karn (transformed using Doof) at the front of your party and move the objects blocking the staircase down in this building (bottom left is where the staircase is). Go down the stairs and move the two barrels in your way; go up and move the crates then search under them for a ClearCL. Return to the first floor and go to the room above this with the bed. Push the stack of crates aside and fall down the hole to reach the room with the old man. Talk with him using just Karn and he'll teach you Puka.
Puka is an interesting transformation because it makes Karn into a flying bug that doesn't look like any of the characters he's fused together with. At least the other transformations made Karn look like an amalgamation of each unit! Now that we have Karn's Puka transformation we'll have access to even more optional treasures!
You may remember seeing the symbol shown below throughout the game, when Karn is transformed he can interact with this symbol to reveal a hidden room with some loot.

Puka Symbol
Puka Symbol #1 (Near Auria): The first place we're visiting is Auria, Warp there using Nina and travel a tad bit north to find the Puka symbol along the cliff wall. Put Karn into the front of your party and interact with it to reveal a hidden room with the DarkBR item inside.
Puka Symbol #2 (Near Gust): Warp to Gust using Nina and exit town, travel south and then west when you are able to go west. You will come across another Puka symbol along the cliff which you can open up. Inside you'll find a chest with the LoveBR item inside.
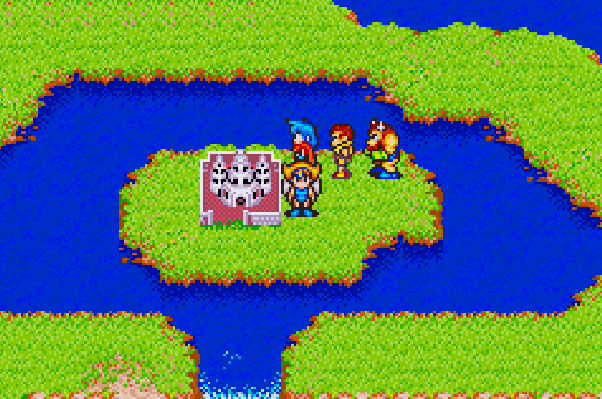
After you have gotten all of the optional loot it's time to Warp back to Gramor using Nina and travel south to Spring Cave. This cave is very linear, just travel through it until you come out on the other side. We'll be in a new section of the World Map with a new town (Spring) and a new dungeon (Spyre Tower).
Visit the shops in Spring and buy whatever you need, rest at the Inn and save your game at the Dragon Shrine if you want too. When you're ready to continue with the story head south to the tower below Spring on the World Map and put Mogu in the front of your party; press A to dig and gain entry.
Spyre is a large but rather straight forward dungeon, the first floor you come across will have a couple of treasures including the FlameAR and the WorldAR. I strongly recommend you grab both since they are some of the best armors in the entire game. The next few floors of this dungeon are gigantic but barren; you will have to run around the floors and look for the stairs that lead up to the next one. My advice is to hug the wall and run around the outskirts of these areas when looking for the stairs that go up.
After the desert floor you will reach a snowy floor which will look similar to the area outside of Spring (pictured above). In the southern portion of this floor you will find holes in the wall and when you go through those holes you will fall out of this dungeon and back onto the World Map... Don't take these holes or you will have to start over again and make your way all the way back here. Instead, keep looking for the stairs that go up.
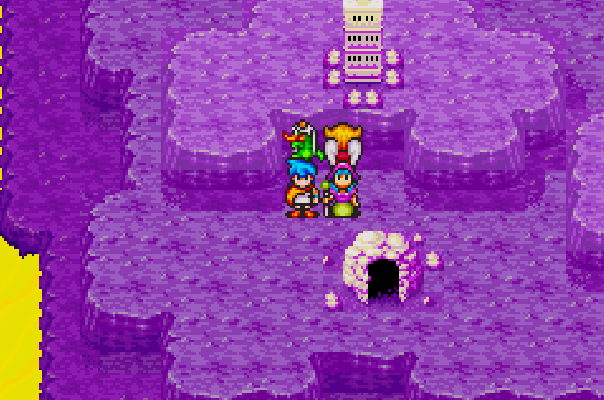
The snowy floor will lead to a floor that looks like you're walking around in the sky and that floor leads to one where it looks like you're in space. All of these floors are very linear, just look for the stairs that go up each time. On the space floor you will find a platform with a pillar that has a glowing orb and a large stone-thing with a blinking red light. Inspect the pillar to reveal Mote, he laughs at you and then teleports you to an alternate world...
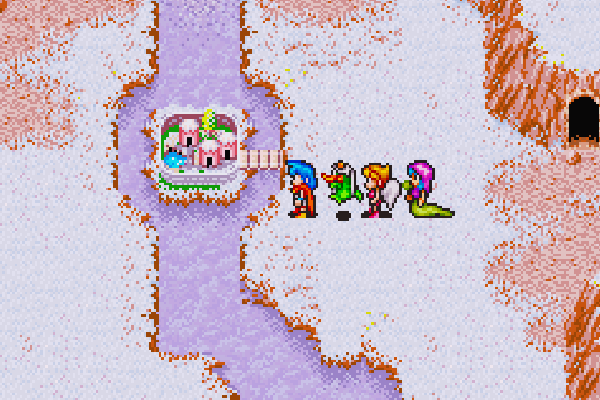
When you regain control of Ryu you'll be in a new place called Mare Town. Talking with the residents here will reveal that they're all trapped here thanks to Mote too. Rest at the Inn if you need to and save at the Dragon Shrine, when you're ready to continue with the story exit the town and go north to Mare Tower (pictured below).
On the overworld you'll have to go south and get ontop of the plateau before you can reach Mare Tower. There won't be any enemies on this overworld and the path is linear so you should have no trouble finding it. Mare Tower can be a confusing dungeon, the first few floors will wrap back around onto each other numerous times and it's easy to get lost.
If you're like me and you got stuck here, follow my directions below to make your way further into the dungeon.
How to Navigate Mare Tower (First Floors):
1. In the room with the four treasure chests and a hole in the floor turn around and go back north until you hit the fork - from here go east and up the stairs
2. Loot the three treasure chests to the east of these stairs - they contain Smoke, CursedHT and Facemask
3. Go north from these chests until you find Mote's Conscience
Mote's Conscience will knock down the wall that's blocking your path and tell you to defeat Mote. Go upstairs and you will find a room with water you can drink to fully restore your HP as well as a jar in the middle of a platform. Interact with the jar and you'll discover that it's a Dragon Shrine! Save your game if you wish and when you're done continue deeper into the dungeon via the northern exit.
This is where the dungeon gets even more confusing than it was previously. You will find yourself in a room surrounded by darkness and you'll be walking on a glass-like floor that is very narrow. Throughout this room you will find tiles on the ground that will spin your screen around and disorient you quite a bit. None of these spins are random which means you can easily find your way through this floor with the proper directions.
How to Navigate Mare Tower's Spinning Tiles Room:
1. After stepping onto the first tile go west
2. Go south after stepping onto the second tile
3. Proceed north after stepping onto the third tile
4. After the fourth tile you'll want to go east; take the first path south and follow it south to another spinning tile
5. Continue west after the fifth spinning tile
6. You'll want to go west again after the sixth spinning tile; you'll pass two routes that go north - take the second northern route
7. After the seventh spinning tile go north and you will finally make it to the next part of the dungeon.
Despite the directions I give above, are you still having trouble navigating this part of the dungeon? Would a video help you out moreso than my text directions? If the answer to those questions is yes then I recommend you check out my How to Navigate Mare Tower's Spinning Tiles Room Youtube Video for a video guide of this part of the dungeon.
That was the last really confusing part of this dungeon, the rest is much more straight forward. For the remaining bit I recommend you put Karn in the front of your party - there will be trap doors and you only want to fall in one of them. In this last part there will be tiles on the floor that damage you when you step on them, however the damage is so low that it's no big deal.
In the large room with all of the yellow tiles you'll want to fall down the trap door in the bottom right. The next room with all of the red tiles will have multiple trap doors that you don't want to fall in; go up the stairs in the southern part of the room instead. Finally, in the room with all of the staircases take the stairs in the bottom right to advance to the boss room.
For this boss fight you don't want to do anything but physical attacks for the first few rounds, the fight will restart after a short scene. Once it does restart you're free to go all out on the boss until you win. You'll find yourself back in the real world after defeating Mote - inspect the pillar for the SkyKey that you need and then interact with the large stone box next to the pillar to complete this dungeon.
Use Bleu's Exit spell to leave this dungeon and return to the town of Spring. You'll see now how the town gets its name since it's spring instead of winter here after that dungeon. Aside from resting at the Inn the other thing you'll want to do in Spring is go northwest until you find the tiny lake shown in the screenshot below. Equip the Rod5 on Ryu and some Worms and fish here to catch a DragonAR. You can buy Worms from the Item Shop in Auria if you sold the ones that we had before.
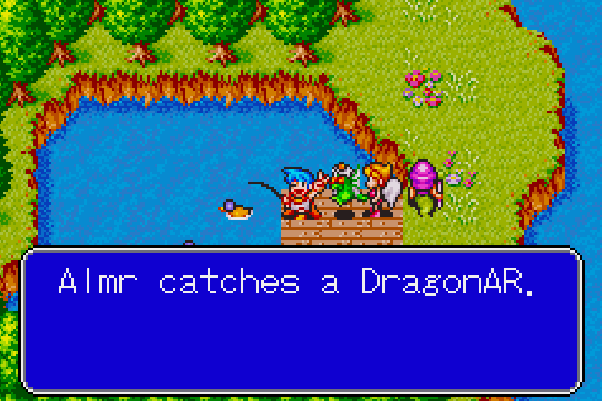
Fish up the DragonAR at the pond in Spring
After you fish up the DragonAR item from the pond go north up the river until you reach the waterfall in Spring. The middle of the waterfall will have a faint outline of a cave behind it - you can walk right inside to reach the next area. This is a very short and linear dungeon, when you reach the end it will dump you into a new part of the World Map.
When you exit the cave go south until you reach the town of Carmen. The first thing you will notice about this town is everyone except one person is standing completely still. Talk to this one person and you'll learn that time here has stopped and that it may have something to do with Tock to the east. Before we leave Carmen you'll want to visit the windmill building in town and go up to the second floor. Move the barrel near the beds and search the ground below it to get a W.Ant item. We'll need this for later so don't get rid of it or consume it.
Next up, it's time to visit Tock in the east. In order to reach Tock you will have to go south around the big plateau until you circle back around and make your way up it and over to Tock. The route is pretty linear so it shouldn't be too hard to get there. In order to reach Tock you will have to go south and around the big plateau until you can make your way up to the plateau that Tock is on. You'll have to un-fuse Karn and put Bo in the front of your party again in order to go through the forest and reach Tock.
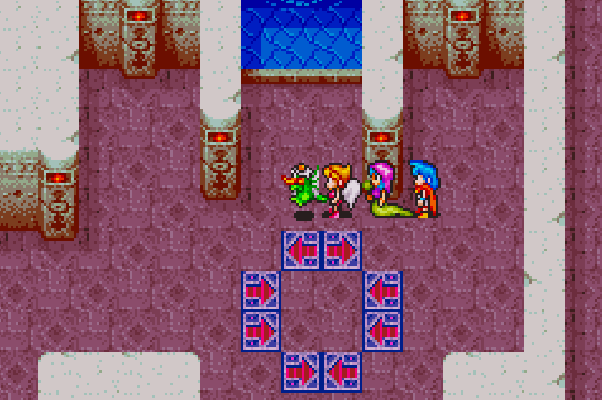
The first thing(s) you'll see upon entering Tock are arrows on the ground and a spring of fresh water that will fully restore your HP when you use it (pictured above). I strongly recommend you spend a bit of time in this room grinding your characters up in levels. At this point in time my Ryu was level 29 and my Nina was 34, I grinded until Nina was almost 40 and Ryu was 35.
When I grind I pay a lot less attention to the levels though and more attention to how fast my characters get killed during battle. I really hate when a character can get killed during a single turn and there is nothing I can do about it - that happens with Nina a lot since she is so squishy.
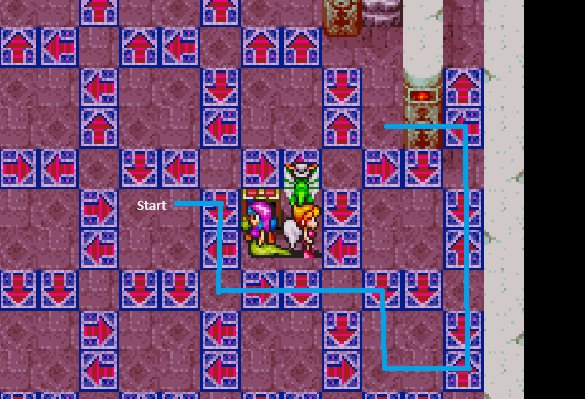
As far as the dungeon itself, the arrows on the floor will teleport you in the direction that they're pointing each time you step on them. You will always move the same distance, two tiles ahead of the arrow. The first two floors of this dungeon are pretty straight forward and they work as an introduction (more or less) to this mechanic. Things get a bit trickier when you reach the fourth floor with tons of arrows (pictured below).
Do you find this dungeon confusing? Would you prefer to watch a video demonstrating how to navigate each of these rooms? If the answer is yes then check out my BoF 1 - How to Navigate Tock Dungeon Youtube Video for more details. That video will show you how to go from the bottom floor to the top floor all in one go.
For this floor you need to make it to the central portion of the area where it says Start in my picture above. Once you've made it to this location you will be able to easily complete the puzzle by following the blue line that I have drawn across the picture. When you go up the stairs you'll find Cerl, one of Jade's minions that we saw earlier in the game. There will be a scene with Cerl after which Ryu will be removed from the dungeon and separated from the rest of the team.
You will regain control of Ryu on the World Map in an area south of Tock. Our destination is the town of Carmen which is northwest of where we start with Ryu - you should be able to find it easily since we just navigated this part of the world to get to Tock. I advise you to flee from every battle since Ryu is alone and fighting has a high chance of going very badly for you. Once you arrive back in Carmen you'll reunite with your team and things will be back to normal.
The next thing we need to do is return to Tock and navigate through the entire dungeon yet again. When you reach the top there will be another scene with Cerl after which you'll have a boss fight. Before you manage to defeat Cerl the boss fight will be interrupted with another of her time warping attacks. This time Ryu and Nina get separated from everyone and they will have a short scene at the South Castle with Cerl.
When you regain control of Ryu exit the South Castle and use Nina's Warp spell to return to Carmen. Enter the house above the fountain in town and talk with Alan who is in bed. During the scene you'll learn about the Holiday Tree and the fruit on it that may help Cerl regain her senses.
Do you remember the location that Ryu ended up when we first got sucked into the time warp from Cerl? This is where the Holiday Tree can be found; if you've forgotten then search the area southeast of Carmen until you find the tree shown in my screenshot below. Once here you'll want to put Ox in front of your party and interact with the tree to knock off some Fruit. Pick up the Fruit and return to South Castle.
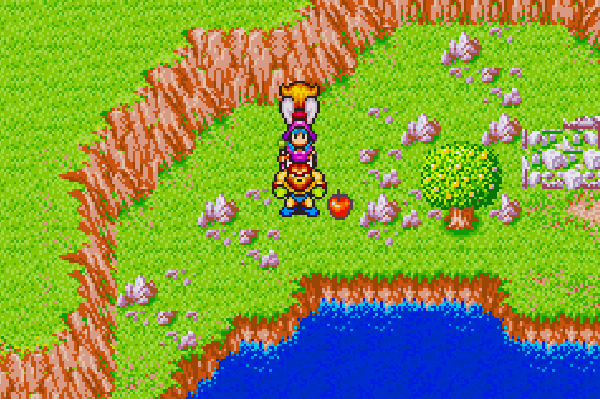
Use Ox to knock some Fruit off of the Holiday Tree
Approach the door at South Castle with the Fruit in your inventory, Cerl will recognize the smell and the door to the castle will open. Head upstairs, watch the scene and when it's finished loot the blue chest for the TmKey that we need. There will be another scene after you loot the chest, once it concludes you will regain control of Ryu back inside of the Tock dungeon.
Return to the boss room in Tock and Nina will take the TmKey and use it on the machine that's here to restore time to normal in Carmen. When the scene is over you'll regain control of Ryu and team outside of Tunlan. Enter Tunlan and go up the first fight of stairs then go up the flight of stairs to the right of that and you'll find Nina dressed differently inside of the building. Talk with the lady wearing green from earlier in the game in this room and she'll tell you that Nina has amnesia.
Exit this building and visit the Dragon Shrine in Tunlan (it's by the entrance to town); talk with the cloaked man next to the Dragon Shrine and he'll tell you that there is a famous doctor in Carmen. Once you've seen all the needed dialogue exit Tunlan and use Bleu's Warp spell to teleport to Carmen.
You'll find the doctor that we need in the windmill building in the center of town. When you talk with him he'll tell you that he can easily cure amnesia with the Tonic but you'll need to bring him P.Fish, Root, C.Nut and W.Ant to make it. Exit this building and before we leave town you'll want to talk with the cloaked man again - this time you can find him a tad bit northeast of the doctor's house, he'll be standing next to a water trough. When you talk with him all he will say is "Search here" before he disappears on you. Step into the same location he was standing and press A to find a Pass item.
Now it's time to travel around the world and collect the various reagents we need to cure Nina. The order you collect them in doesn't really matter, I have included a list of each item and where you can find it below.
P.Fish: The P.Fish is something you'll have to fish up with Ryu. You can find the appropriate fishing location by first traveling to the South Castle location where we last saw Cerl. When you enter there will be a brief scene, once it's over continue north out of this location and back onto the World Map. Follow the linear route through the mountains and then follow the dirt path through the swamp until you reach a broken stone bridge. Fish off this bridge using Ryu for the P.Fish item.
Root: For this item you'll want to Warp to Gramor and exit the town. Just south of town you'll notice a weird plant thing with a small patch of dirt in front of it. Dig here using Mogu for the Root.
C.Nut: Warp to Tunlan using Bleu and put Ox in the front of your party. Exit town and use Ox to punch the trees around Tunlan until one of them drops a C.Nut for you.
W.Ant: You can find this item in a few different locations. Carmen has one, in the windmill building push the barrel on the second floor and search the ground below it for the item. Inside of the manor in the northern portion of Bleak, you can find a W.Ant in one of the chests. The final location to get one is in Auria, after going up the stairs in the central part of town search the houses and you'll find W.Ant inside of a chest in one of them. If you've already got the item from all of these locations and you still need one, you can find it by hunting animals on the overworld. Put Bo in front of your party and he can shoot animals when you press A. From my understanding the white deer animal has the greatest chance of dropping the item.
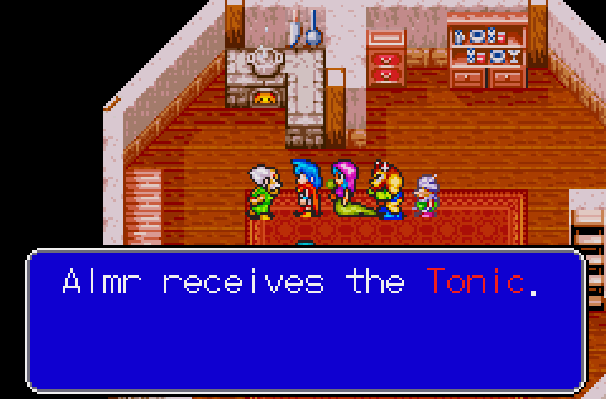
Once you've acquired all four of the above items return to Carmen and talk with the doctor to have the Tonic made. Take this item to Tunlan with you and enter the building Nina is in, if the Tonic is in your inventory you'll automatically get a scene with Nina after which she will join your party again. If you read the dialogue with Nina you'll have noticed she mentioned that she can fly now, we're about to use this.
Now that we have Nina back in the party exit Tunlan and put her in the lead. Since Nina has the ability to fly now all you need to do is press A while on the World Map with her in the lead of your party. She will transform into a bird and you can safely fly around the entire map without any random encounters!
Before we continue with our quest we'll want to fly around a bit and collect some powerful treasures. Check out my list section below for more information on where to go and what you can find there.
(Carmen) Puka Symbol: Fly east of Carmen and you will eventually run into a Puka symbol at the bottom of your screen. To give you a bit more details, it's found on a cliff wall next to the large inner lake. Inside you'll find the WindBR item. If you're still struggling to find this Puka Symbol fly to South Castle and go directly north, you'll run right into the location that way.
(Spring) Mogu Digsite: Warp to Spring and fly directly south using Nina's bird form. Inside of this location you'll find the HeroBW weapon which you should equip to Bo immediately. This is one of the most powerful weapons in the entire game!
(South Castle) Mogu Digsite: Visit South Castle again while Nina is in bird form and fly directly south. You will fly over a bunch of mountains and the swampy area that we fished up the P.Fish earlier to cure Nina. If you follow the coastline south you will eventually run into this dig site. You'll find 8 different treasure chests inside, they'll contain AgileHT, Life2, L.Ptn, A.Ptn, S.Ptn, MystCW, StarSH and LoveHT.
(Winlan) Mogu Digsite: From Winlan turn Nina into a bird and fly to the north. You won't travel very far before finding a small island with a digsite on it, use Mogu to gain entry and loot the chests. Inside you will find V.Ptn, Sash and an S.Ptn.
(Gust) Final Piece of Dragon Equipment: Warp to Gust and turn Nina into a bird, from here you'll want to fly south until you hit the water then directly west. You'll notice a well surrounded by mountains - land in this area. Equip the Rod5 onto Ryu as well as some Worms and fish here for the DragonSH. For some reason it took me 20-30 casts to fish this item up, I did some googling and found that others had the same issue too but it seems that it's rather rare. If you are reading this and you're in the same boat as me - keep trying and hope for the best!
Once you are done collecting all of the optional loot it's time to visit the final Dragon Temple to complete Ryu's training. This temple will only grant you access if you've fished up the DragonSH item from the location I mentioned above. Enter the Dragon Temple and talk with the old man for entry, heal up using the spring and open the chest for a Melon.
Talk with the spirit when you're ready to fight the boss, you'll be fighting against Avian. I recommend you transform into Ryu's BltDrg and then trade hits with the boss until it's defeated. You will probably have to use the Melon you just got and maybe one or two more restorative items to beat the boss. All in all though this should be a piece of cake battle.
When the fight is over Ryu will have learned the Rudra Dragon Transformation - this one is extremely powerful. Our next destination is the town of Scande which we can only access with Nina's bird transformation.
Continue to Breath of Fire Walkthrough (Chapter 6)
Return to Breath of Fire Walkthrough (Chapter 4)

