
Kenshi Walkthrough (Part 3) End Game
The last part of my walkthrough ended with you building your first base and working to outfit your characters in passable weapons and armor. At this point in time the possibilities available to you in this game really start to open up and you are able to do almost anything you want. This makes it very difficult to give you a set in stone path to follow for progression through the game.
Before we jump into some concrete goals that I can give you there are 2 things I want to talk about. #1: The world in Kenshi is one that is designed to react to your actions. If you decide to attack a city and take out that city's leader then the world state will change and that city will very likely fall under the control of a different faction or into ruin. #2: Kenshi gives players lore about the world through books, objects you can find and by talking with prominent NPCs in the game.
In my walkthrough I am going to teach you a bit about the lore of Kenshi and what happened to create the world as it is today because I believe knowing the lore is important for "beating the game". Before we get to all that though, let's take a look at some concrete goals we can immediately start working on.
1. (Exploration) Collect Ancient Science Books & Engineering Research to research new technologies
2. (Combat) Visit Fishman Island and clear Fish Isle as well as Island Lab
3. (Combat) Visit the Cannibal Capital up north and take out their leader
2. (Exploration) Collect AI Cores to research new technologies
Collecting Ancient Science Books and Engineering Research to unlock new technologies is going to be one of the main things constantly driving you to explore new areas around the world. We're going to need a ton of Ancient Science Books (154 in total) to research all of the technologies that we'll need for our base. You can find Ancient Science Books and Engineering Research at many of the "dungeon" locations throughout the world as well as at a few shops.
Flats Lagoon, World's End and the Scraphouse are the only towns in the game which will sell Ancient Science Books. At Flats Lagoon and Scraphouse you can also buy Engineering Research which is needed for some important technologies. You're also able to buy AI Cores too at Scraphouse which we'll need for researching endgame technologies. If you'd like to see a complete list of Mid game locations that you can explore for more of these items check out my Kenshi Walkthrough - Mid game Zones for more information.
I strongly recommend that you go through the list of zones and decide where you want to explore yourself. There is no best order to explore these locations in and for the most part the loot is randomly generated at each of them when you start a new game. Kenshi uses something called an Artifacts System which will randomly spawn items at the location up to a certain threshold - the wiki link explains it best.
To help you out with some combat oriented goals I have created a list of bosses below which will slowly scale up in difficulty and take you through to the next part of the guide. I think you will find the first couple of bosses pretty easy but then it will jump up in difficulty when you reach the Southern Hive. Prior to tackling each of these locations I recommend you do some Toughness training - those of you out there who don't mind cheesing this and raising Toughness extremely fast on a single character should check out my Kenshi - How to EASILY raise Toughness video.
One of the biggest tips I can give you for tackling these challenges is to make sure you've got Sleeping Bags for all of your characters stored on your pack animal. You can place Camp Beds almost anywhere in the world and pick them back up when you're done with them using the build menu. Characters who sleep in a Camp Bed will have their wounds heal 4x faster (half the speed of an actual bed) which is a massive help when you're out in the field and unable to get to a real bed.
King Gurgler (Easy/Medium): Found inside the Island Lab on Fishman Island. This boss is probably the easiest on my list but you should be warned that failure will result in death on this island. Fishmen will capture then eventually eat anyone who is knocked unconscious and left on the ground. Bring Sleeping Bags incase you need them and be prepared to rest if you need to in order to regain some health.
Gorrillo of Gorrillo Bandits (Easy/Medium): You can find this big boi north of Fishman Island in a dungeon called The Old Prison. Gorrillo Bandits will guard this place and they're all martial artists that are wearing practically no armor. Gorrillo is equipped with the Exile Plank Meitou weapon which is one of many items you can find in this dungeon.
Tower of Abuse (Medium): The Tower of Abuse is home of Agnu who is one of the Unique Recruits in Kenshi. This place is also the hideout for the Thrall Masters faction which is lead by 2 Skeletons, both of which drop Meitou quality weapons. Ponk (Meitou Holed Saber), Screamer the False (Meitou Heavy Polearm)
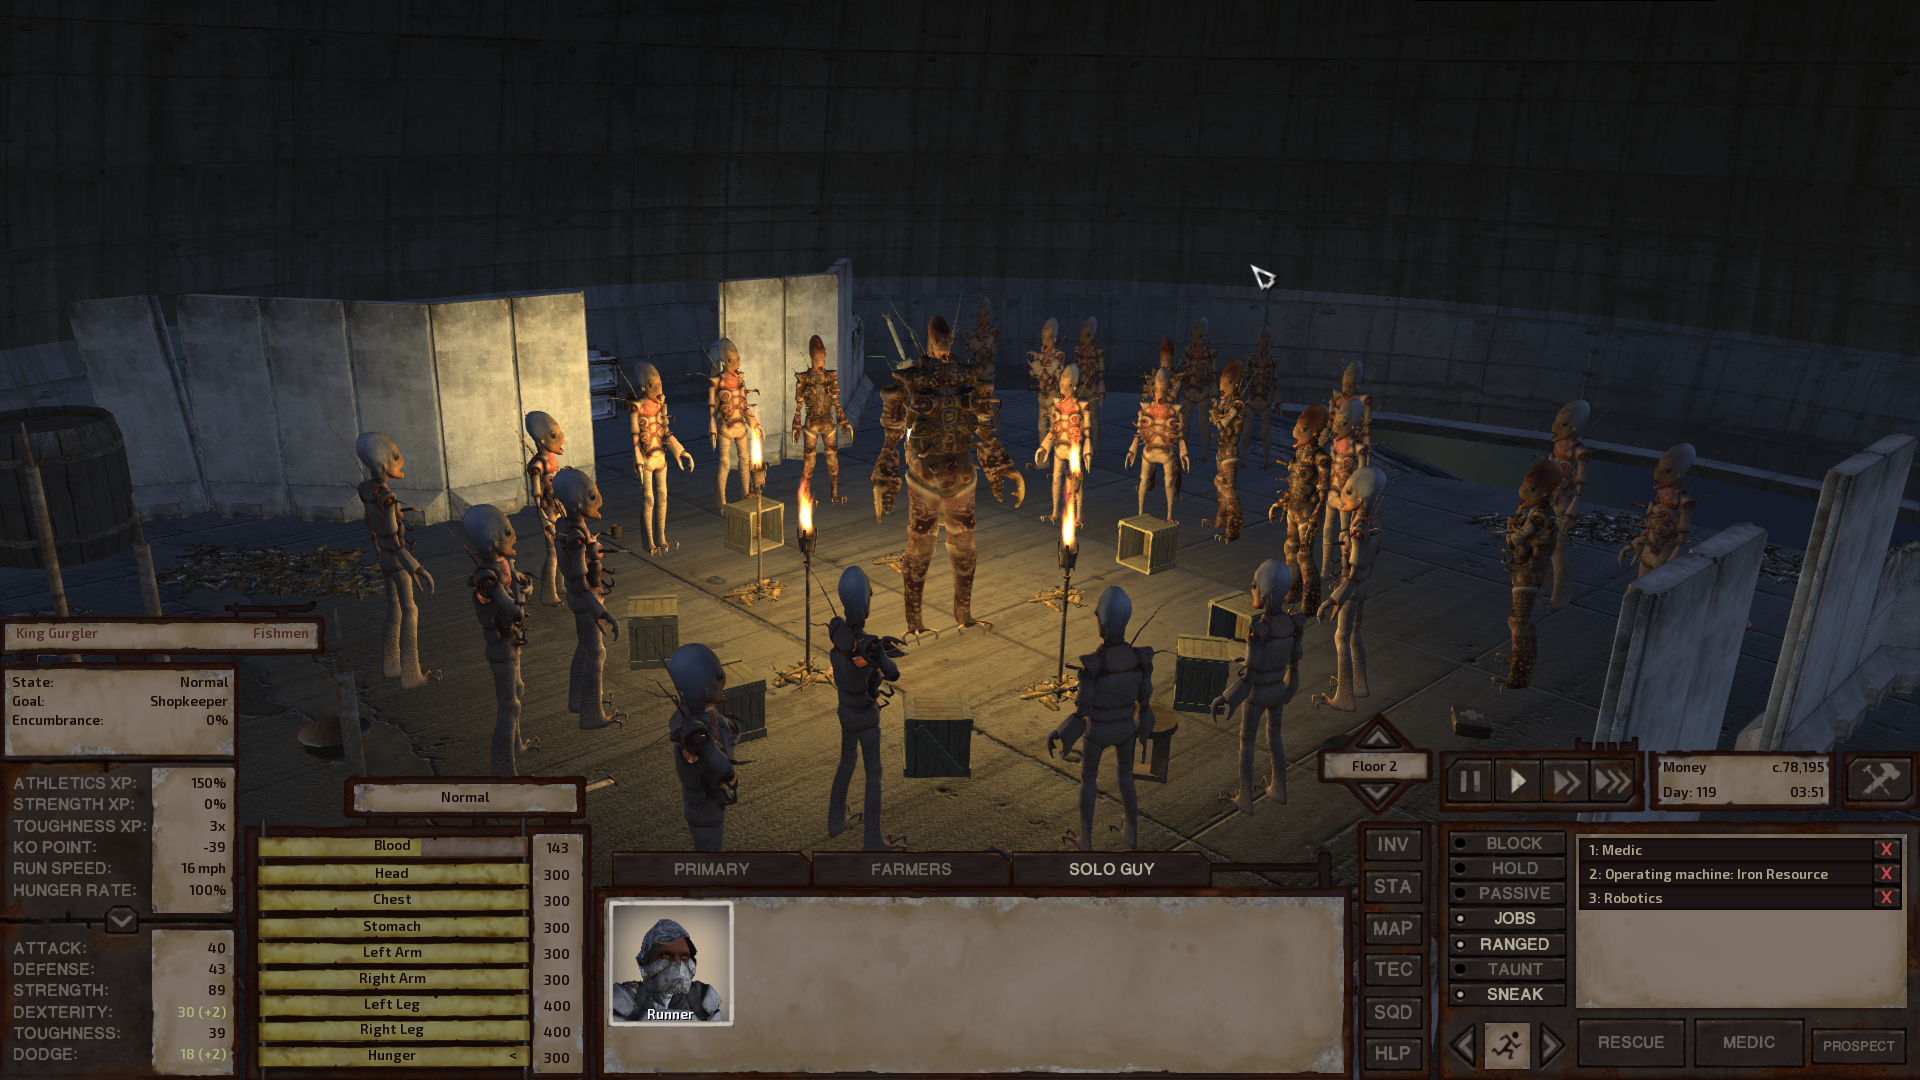
King Gurgler Boss in Island Lab
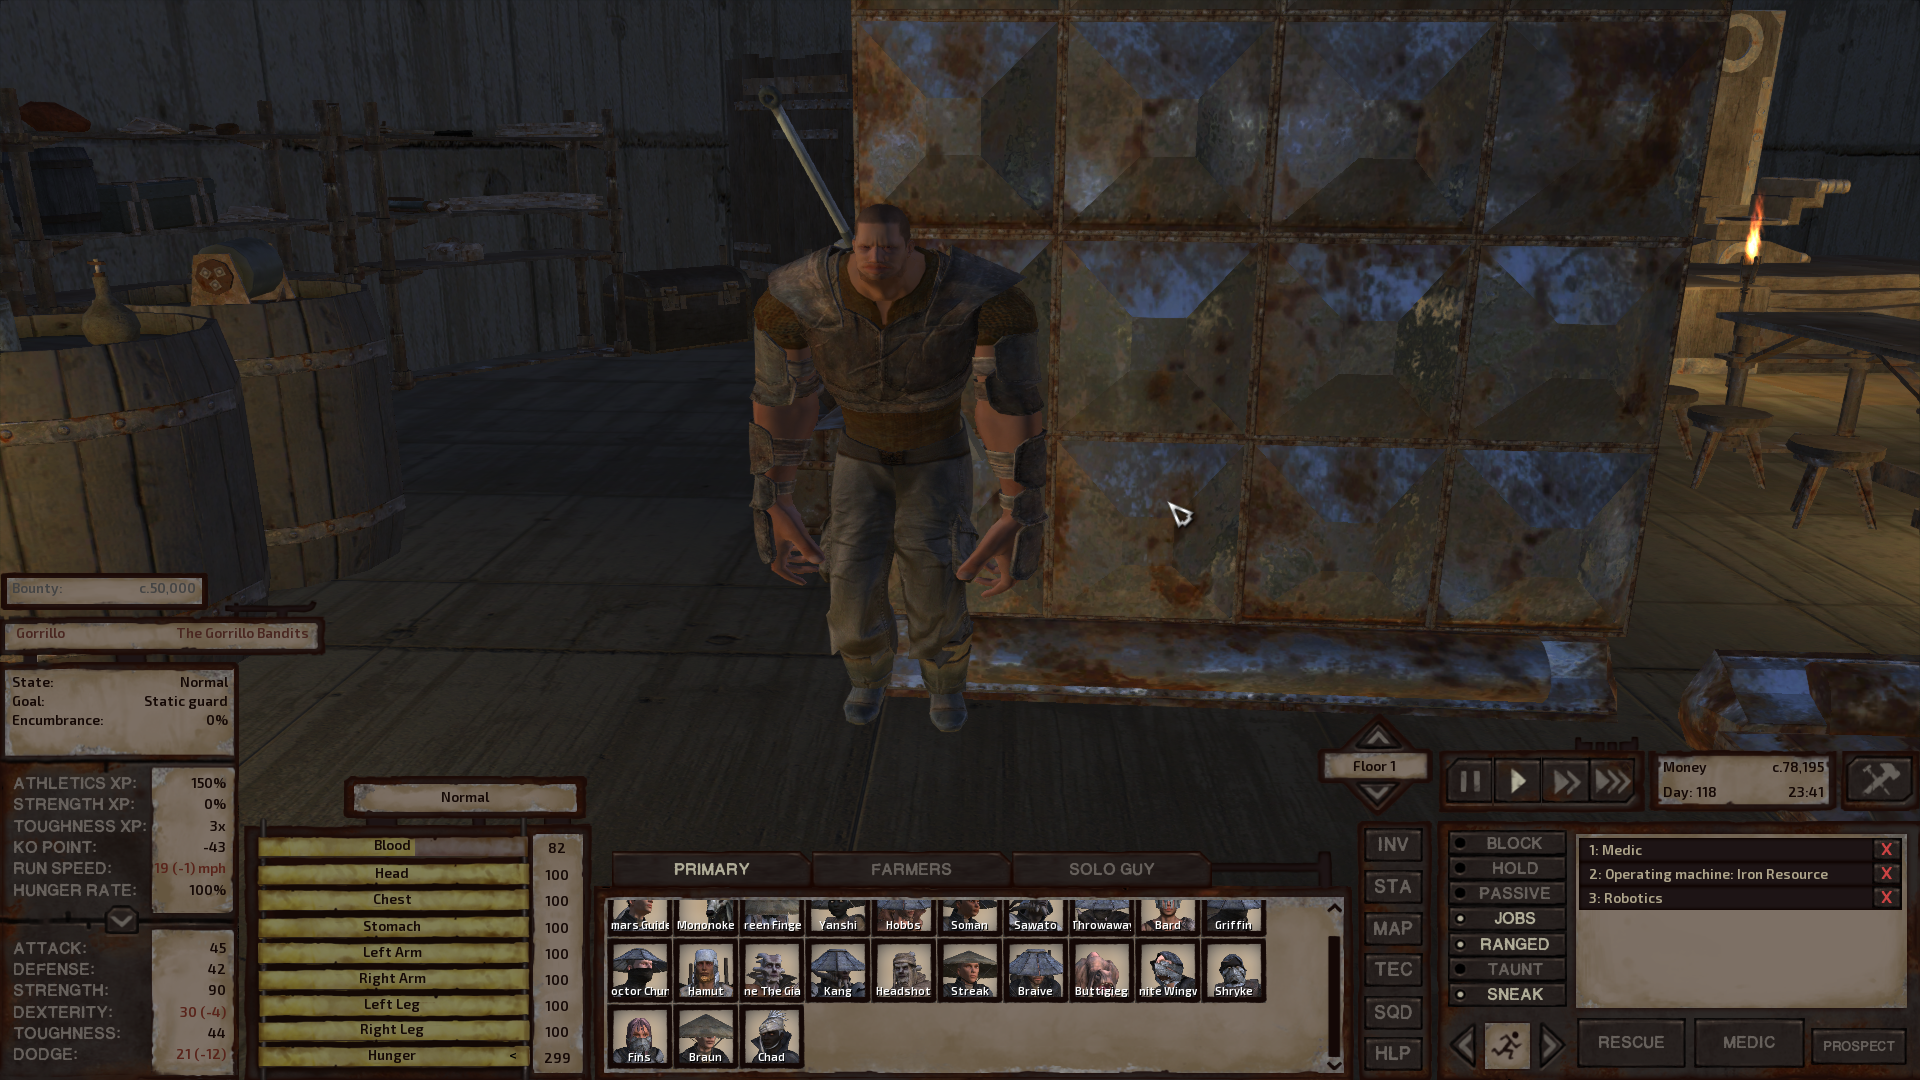
Gorrillo Boss in The Old Prison
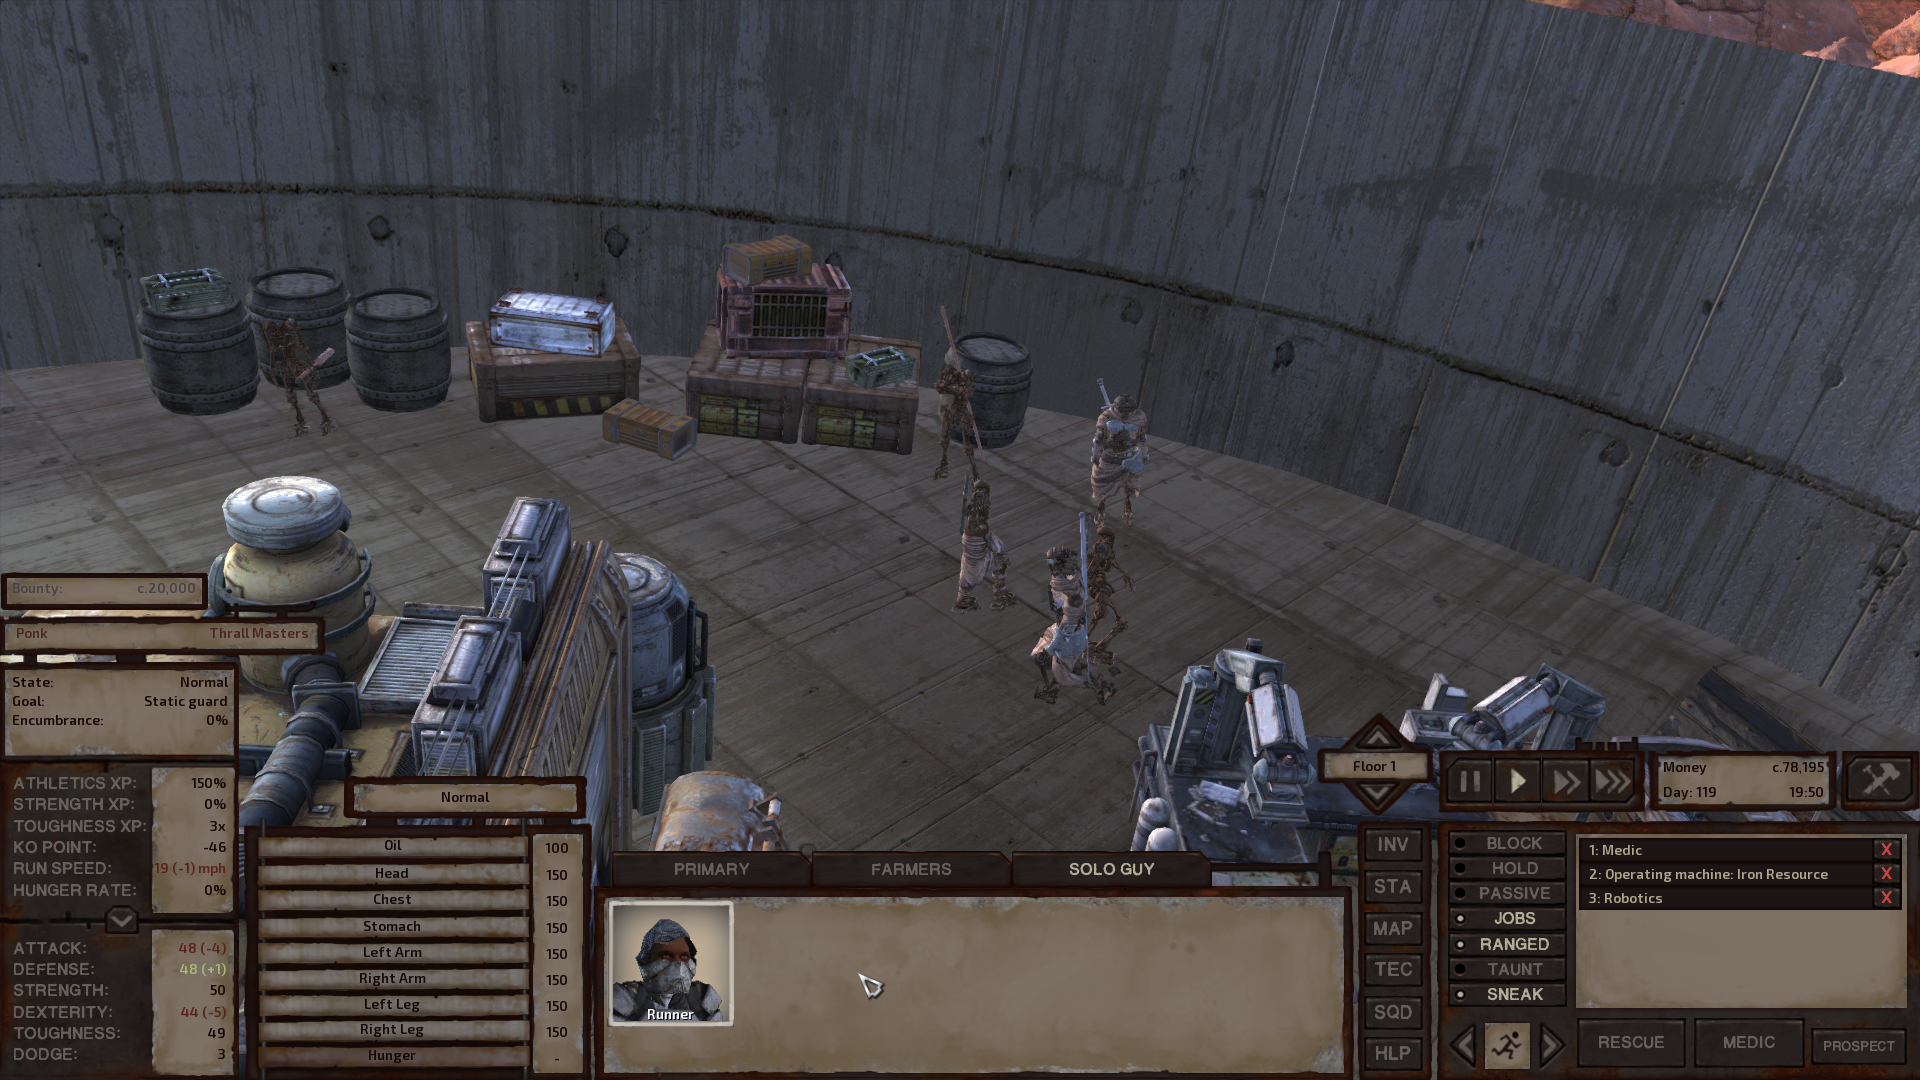
Venge, Tower of Abuse
If you'd like to take out more bosses than the ones mentioned above I recommend The Preacher in the Cult Village (Easy), Red Sabre Boss in Red Sabre Hideout, Megacrab, Megaraptor, Great White Gorillo, King Gorillo and the Spider Foreman in the Spider Factory (Hard). For those curious, I started the aforementioned list with the easiest boss and ended with the most difficult.
Before moving into the end game for Kenshi I strongly recommend you start upgrading your weapons and your gear. You're going to need a couple dozen Ancient Science Books, 6 - 8 AI Cores and maybe 6 - 10 Engineering Research to unlock all the crafting stations we need to make the best armor and weapons. In order to make pretty much anything at these crafting stations you're going to have to buy or find Blueprints/Diagrams which will teach you crafting recipes.
You can find lots of recipes for sale at pretty much any Armor/Weapons merchant you come across ingame. I'd guess that you can probably buy 97% of the total recipes in the game from various merchants and vendors throughout towns. Usually the rule of thumb is if the armor/weapons are sold in this town they will often sell the recipes to make them too; there are some exceptions to this rule though. If you'd like to visit the biggest recipe vendor in the entire game head over to Black Scratch and hit up The Great Library. More information about this spot below.
Below I have created a short list of the various recipes we need that will not be sold at traditional vendors or found in normal locations.
Crab Armour: Some of the best Heavy Armor that you can get in Kenshi is Crab Armour. I use Crab Armour and Crab Helmet on almost every single character in my combat Squad. Tanks use it and all melee DPS that is not a Martial Artist uses it. In order to reliably get Crab Armour you need to make it yourself and the recipes for it can only be obtained from Crab Village far in the southeast. For more info about this check out my Crab Armour Recipes Guide.
Fog Mask: This is one of the best Light Armor helmets in the game and you can only buy the recipe for it at the Scraphouse in Black Desert City or find it in Cat Lon's Exile. For more info follow any of the links for the Fog Mask.
Black Scratch (The Great Library): The Great Library is one of the best locations in the entire game to shop for recipes because they have a couple dozen for sale at all times here. You can also find a lot of the niche recipes for sale here that are only sold at specific locations. All the Swamper gear, Holy Nation gear, Hiver gear and much else can be purchased here.
Falling Sun (Weapon): Falling Sun is the highest pure damage weapon in the entire game. I typically always use one of these on a few of my characters because they're sooo good. My other characters typically use Foreign Sabres or Desert Sabres for the defensive bonuses. Much like with the Fog Mask you can only buy the Blueprint for this item at the Scraphouse in Black Desert City.
Hiver Leather/Chain Shirts: You can find these recipes at The Great Library in Black Scratch or from most Hiver vendors in Vain/Dreg.
Those of you interested in learning what the best armor and weapons are in Kenshi and why they're the best should check out my Best Equipment Guide and my Best Weapons Guide. I go through a lot more detail in those guides than I do in this one, below I will summarize what I typically outfit my team in.
Crossbow Characters: Eagle's Cross, Dustcoat, Samurai Clothpants, Leather Turtleneck, Fog Mask or Iron Hat, Wooden Sandals
Melee Characters: Desert Sabre or Foreign Sabre, Crab Armour, Crab Helmet, Wooden Sandals, Samurai Legplates, Leather Turtleneck
Martial Artists: Dustcoat, Samurai Clothpants, Wooden Sandals, Leather Turtleneck or Martial Artist Bindings, Fog Mask
What I like to do is to create multiple Armour Storage chests surrounding any crafting station that makes armor and multiple weapon storage containers around the Weapon Smiths. This will allow your characters to automatically unload any items they create -- sometimes they will get stuck trying to unload something into a full container but that's somewhat rare.
Usually I only use the [Specialist] and [Masterwork] quality items that they create and leave the rest in the chests. When a chest gets full I will Dismantle it and destroy everything inside and then make a new chest. I do this in an effort to save myself time since it's typically not worth it to vendor everything you make and we would run out of space real quick if we kept everything.
As far as upgrading your weapons go, if you can make at least Mk I weapons then I would recommend outfitting some of your characters in new ones. I usually do not waste my time upgrading everyone's weapons until I can make at least Edge Type 1 but that's just me.
Once you have completed all of these tasks and you have at least 60+ Toughness on your characters -- it'll be time to challenge the Bugmaster! You can find the Bugmaster in the zone of Arach which is in the southwestern portion of the world. Getting to the Bugmaster will be almost as challenging as the fight itself since there are hundreds of Skin Spiders that roam this entire zone.
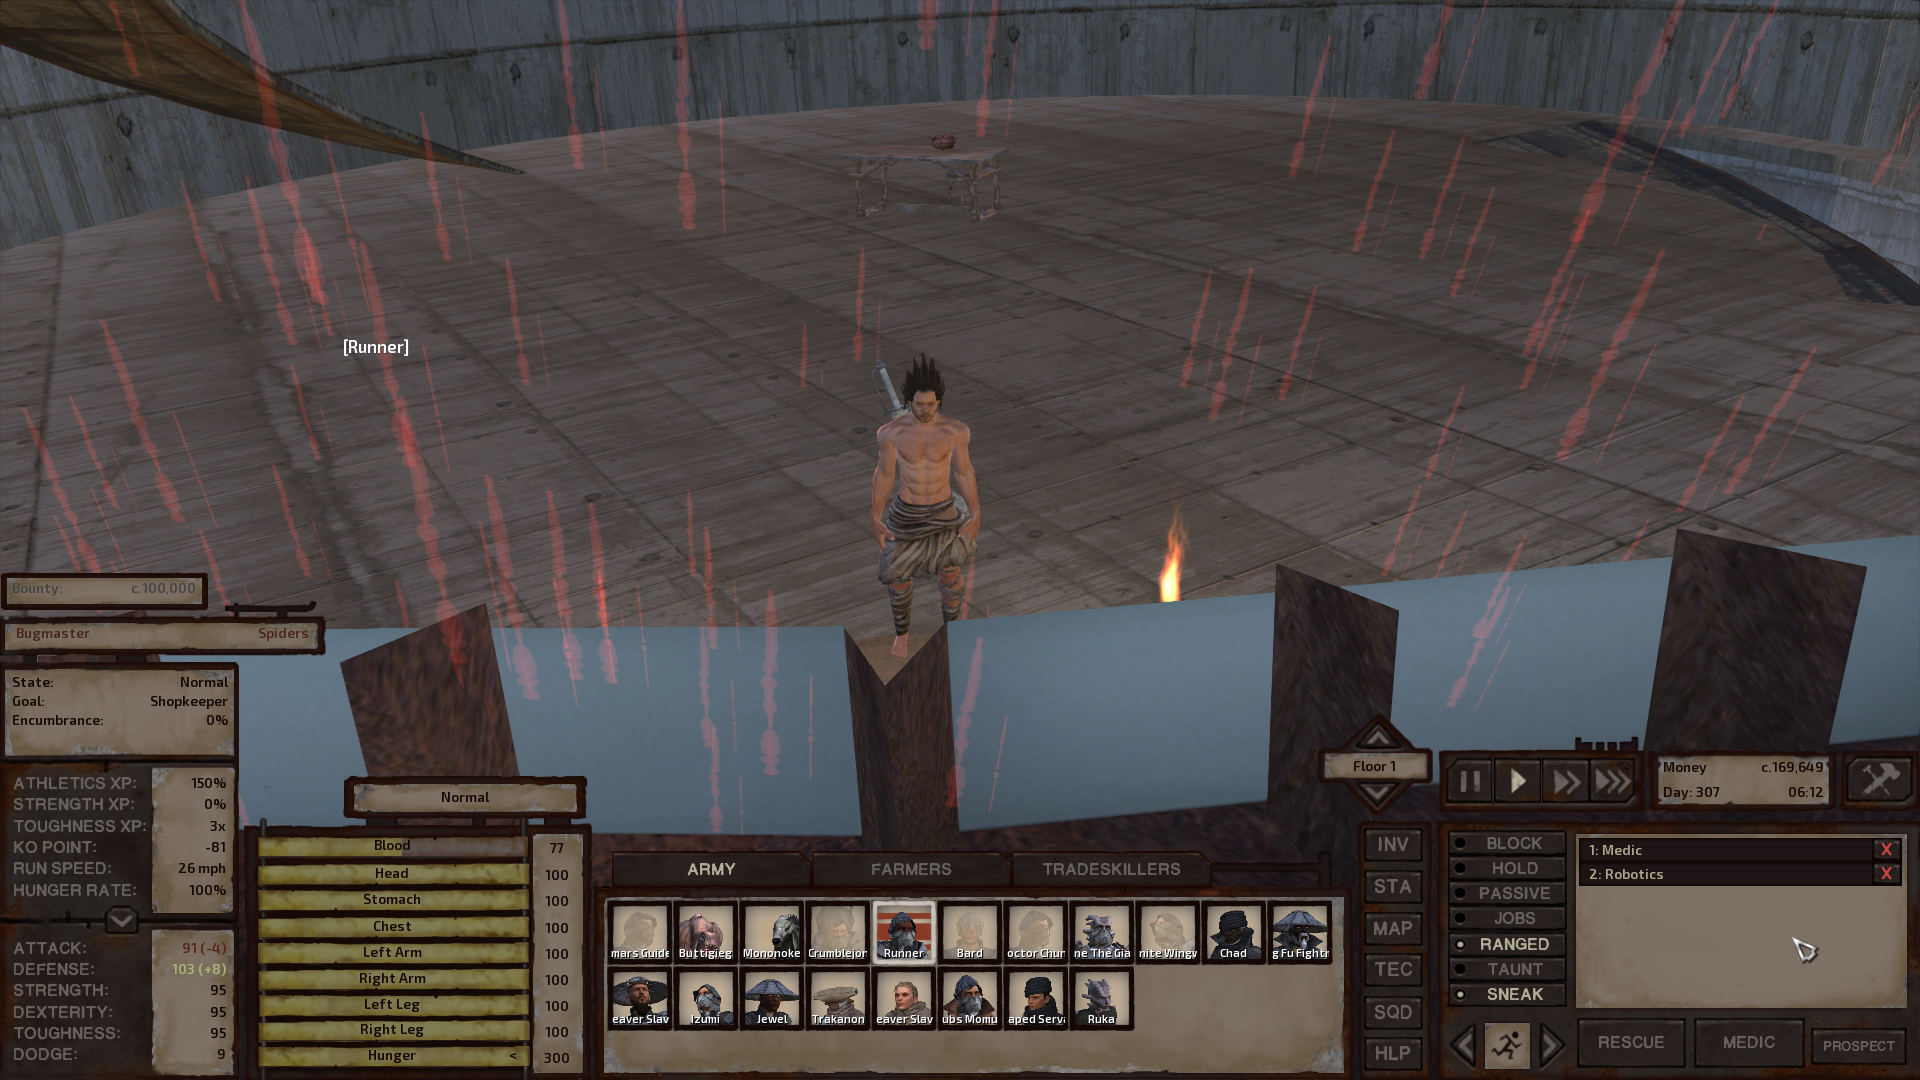
The Bugmaster
There are very few tips, tricks or strategies that I can give you for taking out this boss or any of the bosses in Kenshi. In my experience the big threat you face in Kenshi is attrition, constantly fighting packs of enemies will quickly wear your group down and make them weaker and weaker until you're not strong enough to defend yourself anymore. This is the reason that I recommend you bring at least 1 Sleeping Bag for every 2 characters you have with you; it'll give you a means of recovering HP away from your base.
Once you reach the Bugmaster's tower you can hang out on the first floor of the tower or on the ramp leading up to recover your strength before fighting the Bugmaster. Again, the battle with him is going to be about attrition. You need to keep throwing characters at him until you are successful in taking him out. He is a very skilled fighter and went through about 8 of my characters when I fought him 1 on 1 despite me having at least 60 - 80 Toughness on all my characters, solid combat skills and mostly best in slot armor.
When I ganged up on him as a group it was much easier. I have the mod (technically I edited the code myself using the Forgotten construction set Kenshi gives you) that increases the attack slots to 3. Usually it makes the game harder except for moments like these when it makes it easier if you gang up on the enemy.
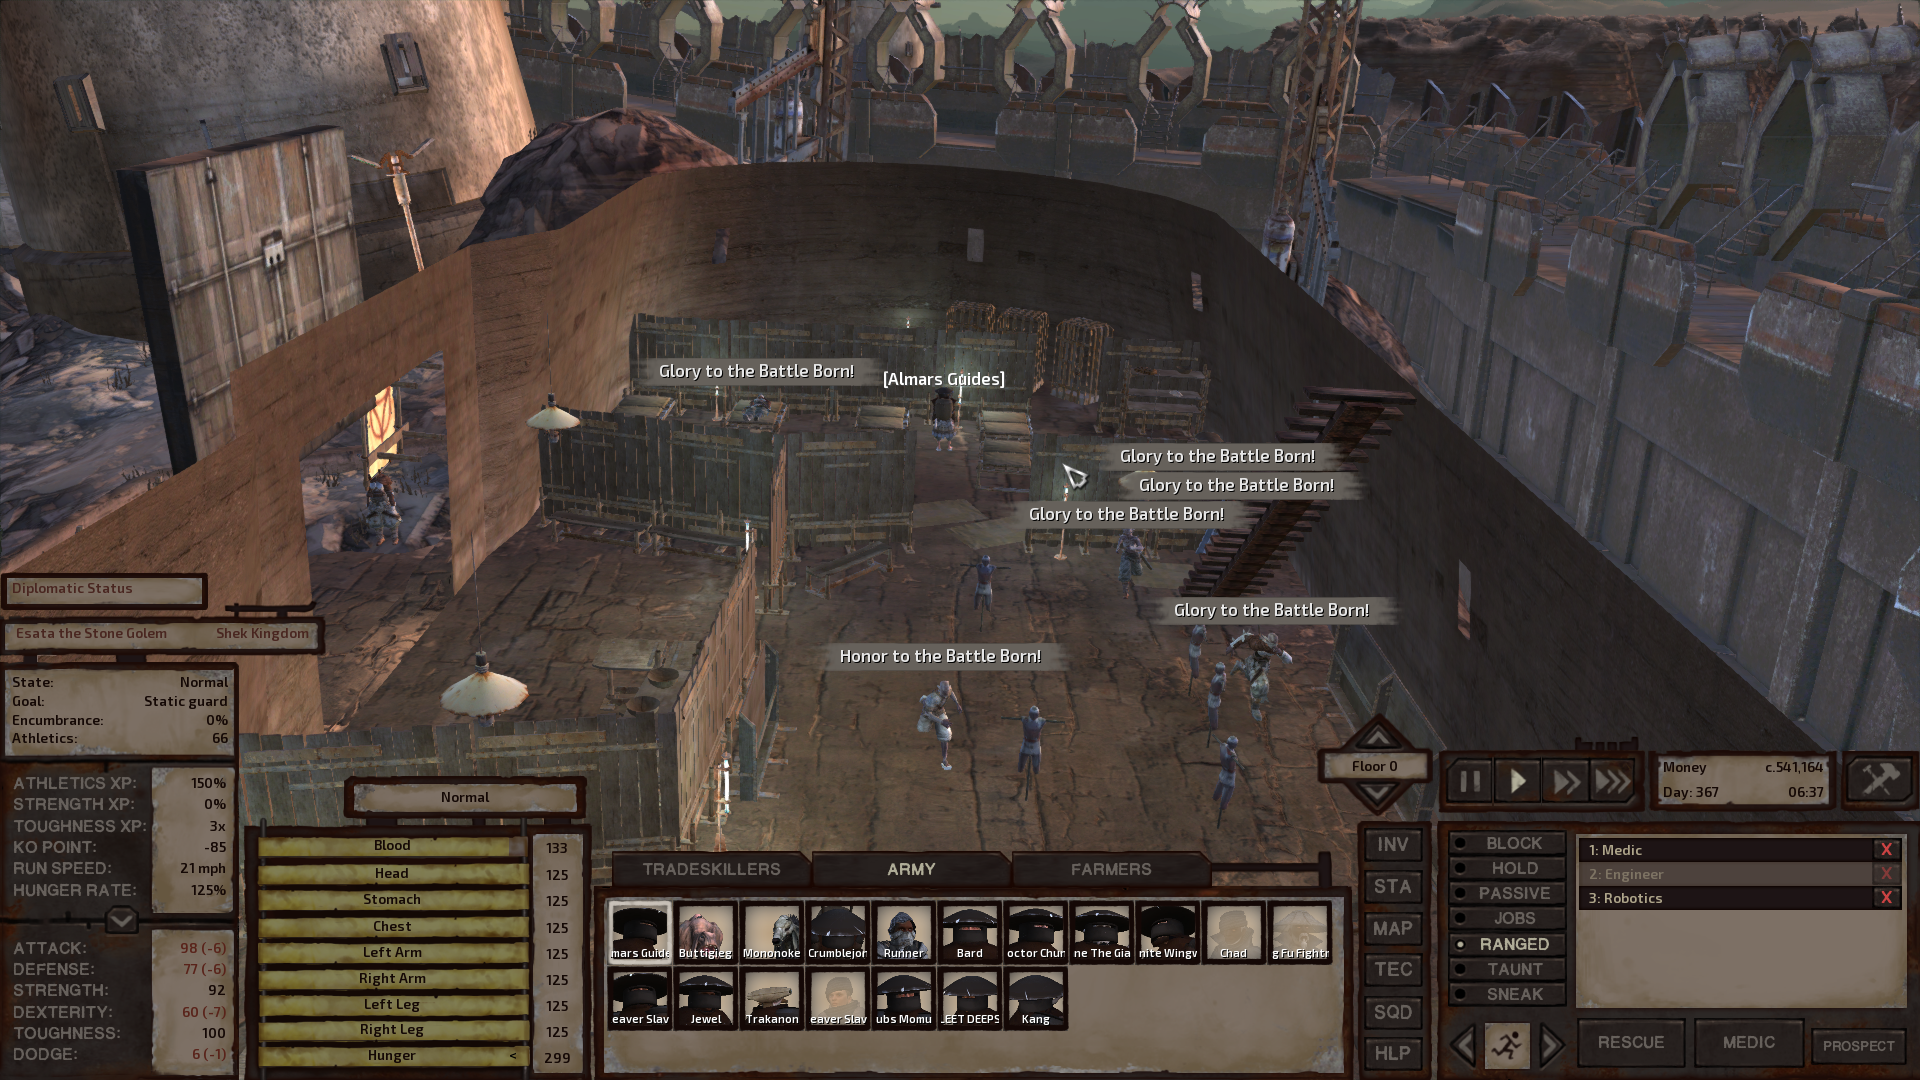
After you've taken out the Bugmaster you should grab his body and bring it to Admag, the Shek capital. Here you can turn him in for a 100,000 Cats bounty and more importantly you can get the Shek Princess to join your party (sometimes) by doing this. The game is quite buggy and Esata doesn't always give you Seto but you can usually get the bug to work by saving and reloading until it does or importing your game.
For those of you who agree with my goal to make humanity flourish in Kenshi which I talk about in Part 4 need Seto. Shek are a very warmongering and imperialist race and having Seto gives you leverage over them.
Now that we've gotten Bugmaster out of the way let's move on to a few more bosses and then we'll go into the final end game zones. The first boss I would recommend is taking out Valamon in Ark, he is the leader of the Reavers faction and carries the Meitou Longsword. If you use a proper strategy this will be a pretty easy fight.... Do NOT run inside of Ark to fight Valamon and all of the Reavers, pull them outside little by little and you will be fine.
This next part is going to be optional but I like doing it because the United Cities faction is one of the worst morally in the game. Our plan of attack is going to be to cripple the United Cities supply routes by taking out all of the Slave Camps after which we'll take out all of the cities that they control. When we take out the leaders of these towns the "World States" will change and they'll become controlled by the Empire Peasants faction instead. I will talk more about this further down.
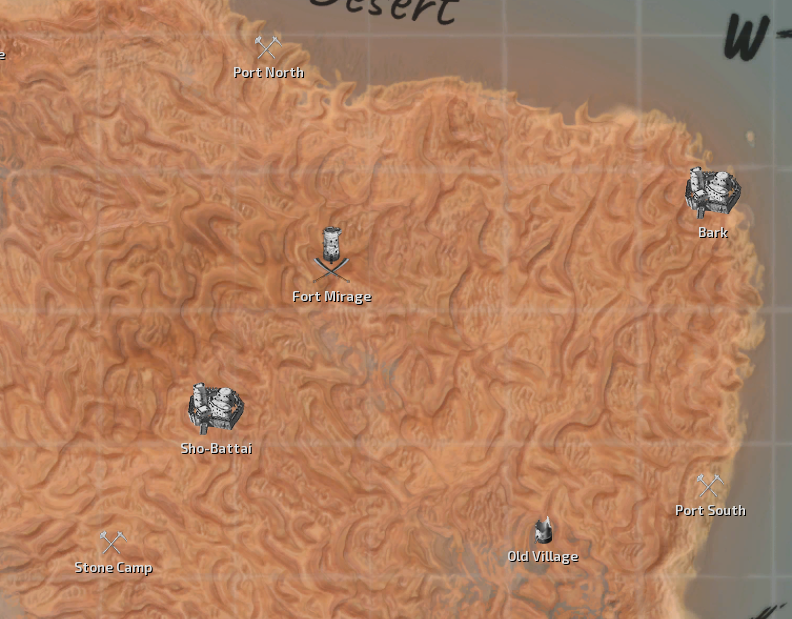
The Great Desert Slave Camp Map Locations
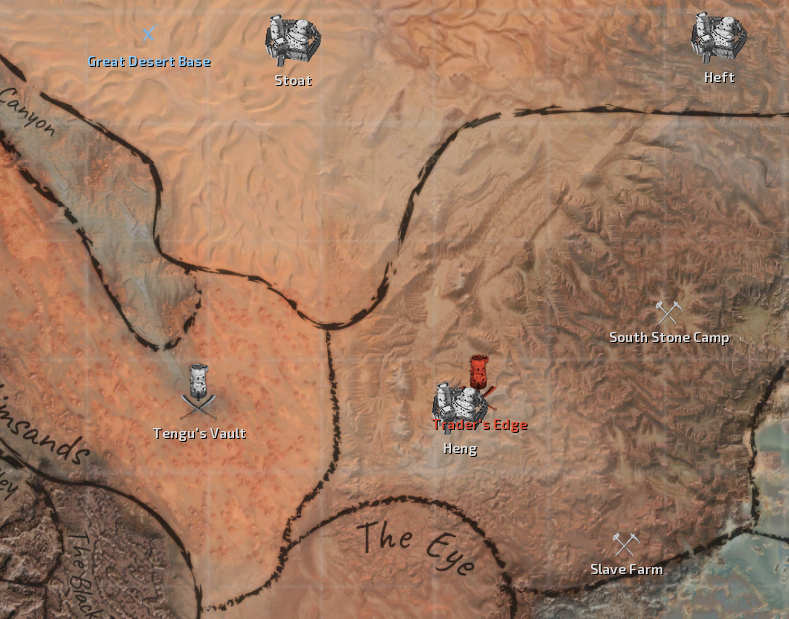
Heng Slave Camps & Tengu's Vault Map Locations
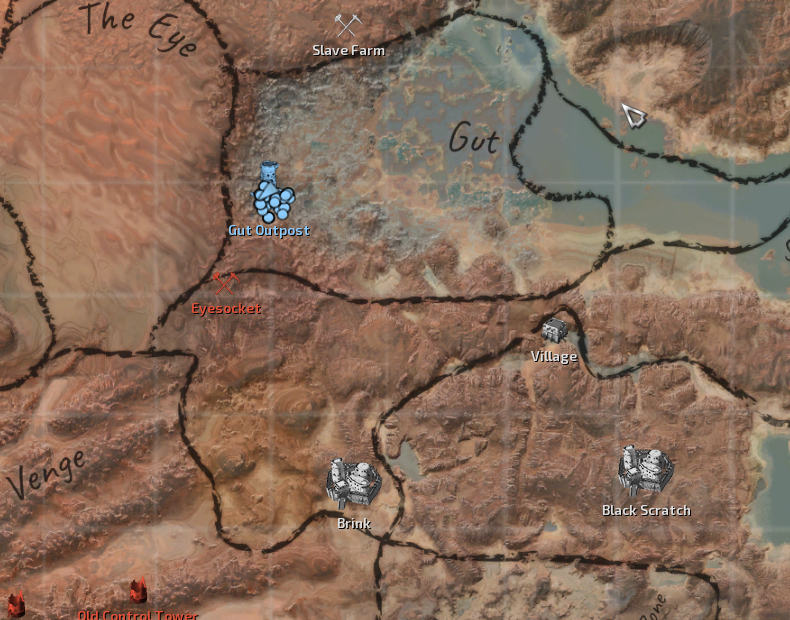
Eyesocket & Brink Map Locations
Crippling the supply routes of these towns will cause them to become Malnourished which puts a pretty significant debuff on the guards and residents in the town. This will make each of the United Cities towns easier for us to overthrow when the time comes. Below I have created a list of all the Slave Camps that we're going to hit followed by the towns we're going to hit.
Port North (The Great Desert): Port North is controlled by Lady Kana who carries a Wakizashi Meitou weapon. This is a small settlement and should be easy to take out with about 6 - 8 characters. Killing or kidnapping Lady Kana will make Sho-Battai Malnourished.
Port South (The Great Desert): Port South is controlled by Slave Master Wada and when he is kidnapped or killed there will be no changes to any world states.
Stone Camp (The Great Desert): Stone Camp is controlled by Slave Master Haga. Kidnapping or killing Slave Master Haga will contribute towards the Malnourished state for both Stoat and Heng.
South Stone Camp (Heng): South Stone Camp is controlled by Slave Master Ruben. Killing or kidnapping Slave Master Ruben will contribute towards the Malnourished state for Heft and Heng.
Slave Farm (Heng): Slave Farm is controlled by Slave Master Ren who carries a Wakizashi Meitou weapon. Killing or kidnapping Slave Master Ren will contribute towards the Malnourished state for Heft and Stoat.
Eyesocket (Stormgap Coast): Eyesocket is controlled by Slave Master Grande. Killing or kidnapping Slave Master Grande will cause Brink to become Malnourished if it's controlled by United Cities and contributes towards the Heng Malnourished state.
Once you've taken out every one of the aforementioned Slave Camps our next target should be Tengu's Vault. The Vault Warden is the head honcho here and he is using the Meitou Jitte weapon. I find that it's best to do this dungeon now because it has some unique recruits for us and we can free Yabuta of the Sands who will take control over Stoat when the time comes.
Tengu's Vault (Skimsands): Tengu's Vault is the United Cities maximum security prison. This prison has 3 unique recruits which will join you, Luquin, Sinklyde and Espher. It also has a few other unique characters such as Yabuta of the Sands who will take control over Stoat once we chase out the United Cities.
With all of the Slave Camp locations out of the way it's time to start taking out the main cities which should all be Malnourished now. Each time we take out the leader in one of the United Cities another faction will move in to take control of the city. Sometimes it's the Tech Hunters or Anti-Slavers that will take control of the city but most of the time it'll be the Empire Peasants.
Some of the buildings will become destroyed when the Empire Peasants take over but for the most part the city will still function just without the previous tyrants leading it. You may be wondering why we're doing this to the United Cities but not the Holy Nation -- good question! I have a few reasons for this, the first of which being I do not think the Holy Nation is as morally repugnant as the United Cities. I explain more about this in Part 4 of my walkthrough.
My second and third reasons are; the Holy Nation provides the majority of food for the entire world and when you destroy the Holy Nation cities they either fall to ruin or the Shek take over. The Shek do not care about properly running the cities they just want to occupy them because they're warmongers. This kind of goes against my overall goal of Kenshi which is to help humanity flourish. You can't really cripple humanities main food supply then expect them to flourish.
Stoat (The Great Desert): Stoat is controlled by Lord Inaba. If Lord Inaba gets kidnapped or killed and Emperor Tengu is also dead or kidnapped then Stoat will fall under control of the Tech Hunters or Yabuta of the Sands.
Heft (The Great Desert): Heft is the capital of the United Cities and is controlled by Emperor Tengu who carries a Meitou Katana weapon. When you kill or kidnap Tengu Stoat and Heng will become half destroyed if they're still under UC control and civil wars will break out with Rebel Swordsman. Many other world states are effected, all of which are mentioned on the wiki.
Sho-Battai (The Great Desert): Sho-Battai is controlled by Lord Nagata. Killing or kidnapping Nagata as well as Tengu will result in Sho-Battai being taken over by Empire Peasants and becoming Malnourished.
Bark (The Great Desert): Bark is controlled by Lady Sanda. If Lady Sanda and Emperor Tengu are both killed or imprisoned then Bark will be taken over by Empire Peasants.
Heng & Trader's Edge (Heng): Heng is one of the more important UC cities as it's connected to Trader's Edge which is the Trader's Guild main HQ. Lord Yoshinaga is the UC leader in Heng and Longen is the Trader's Guild leader found in Trader's Edge. Longen uses the Meitou Longsword and is one of the most important UC leaders to eliminate. If you've killed Emperor Tengu and Longen then Heng will fall under the control of Empire Peasants and the Trader's Guild will fall into the control of Tinfist and the Anti-Slavers.
Brink (Stormgap Coast): Brink is controlled by Lady Tsugi. Unlike all of the other UC towns if you kill or kidnap Lady Tsugi Brink will not become controlled by the Empire Peasants, it'll fall under the control of the Reavers if Valamon is still alive. Otherwise it will become ruins. For this reason it's up to you if you want to take out Lady Tsugi at all.
If you find any of these cities too challenging to take on then I recommend you tackle them in waves. You can attack a city and wipe out half the guards then return to base, heal up and recover before attacking again. Also, keep in mind that you can strip the guards of their weapons and armor and they will not equip anything once you have done this. This is a good way to make sure the guards can't properly recover from your attacks as well.
After you've taken out both Emperor Tengu (Heft, Leader of United Cities) and Longen (Heng, Leader of Trader's Guild) so long as Tinfist is alive and well the Anti-Slavers faction will create a new city on the world map in Stobe's Gamble called The Free City. There will be a couple of shops here for you to visit as well as a couple of buildings to purchase if you're interested. The creation of Free City is one of the main goals I wanted to accomplish here because it's a pretty cool feature to allow us to change the world like this with our actions.
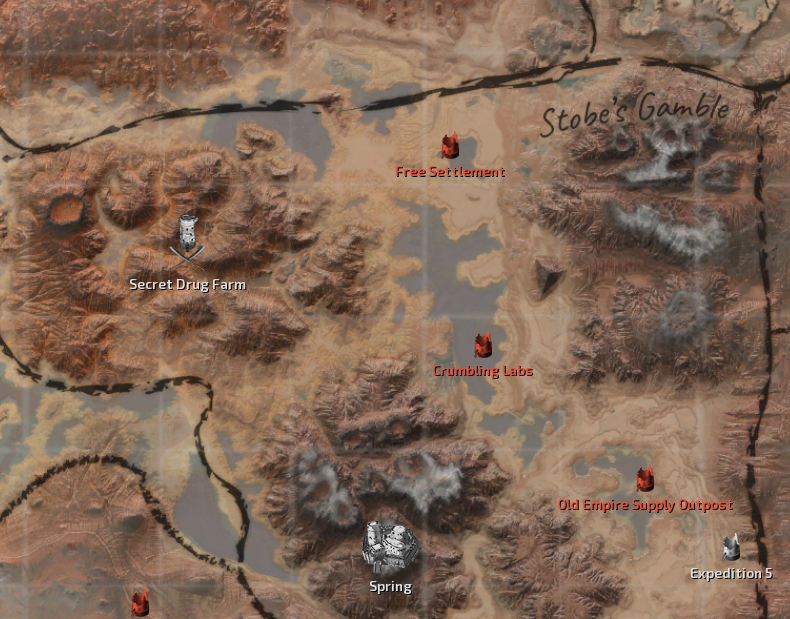
The Free Settlement/Free City Map Location
After you've dealt with the United Cities (or not) it's time to move onto the first real end game bosses of Kenshi! Our first 2 bosses are going to be the King and Queen of the Southern Hive. The queen is a total pushover but the King is going to be the hardest boss that we've faced thus far -- his stats are almost double that of the Bugmaster!
You can find the Southern Hive in the Royal Valley zone which is to the south of Flats Lagoon. The Queen resides at the city marked on the map and the King roams around Royal Valley sometimes by himself and sometimes with a patrol of Southern Hivers. As you can see from my screen shots below the King is a robot of sorts and has abnormally high HP for his vital areas making him an extremely hard target.
There is a nifty strategy you can use for the King though and it involves Crossbows. You can actually solo the King if you kited him with a Crossbow character and kept firing at him but it would take quite awhile to do this. Our strategy will still involve Crossbows but we're going to be lazy and have our tanks fight him and kite him around while we also shoot at him.
The Southern Hive Queen is more of an attrition fight. She herself is not that much of an issue but there are many Hivers throughout the building with her that will attack you and your Squad while you fight her. They'll also constantly heal up when they get downed and quickly rejoin the fight. Since they are Hivers though they're quite squishy which makes this a little bit easier.
All of your loot is going to come from inside the building the Queen is in. It's a very large building and the camera angles totally suck in here so poking around looking for loot is going to be tedious. Usually I find a couple of Ancient Science Books and Engineering Research here along with numerous other weapons, armor and tradeskill materials. Be thorough and click on every container to see if it has contents before leaving. Keep in mind too that while you scavenge the place for loot you can make use of the Camp Beds which are placed throughout the area. Feel free to sneak a quick nap with your characters to recover health as you loot the place.
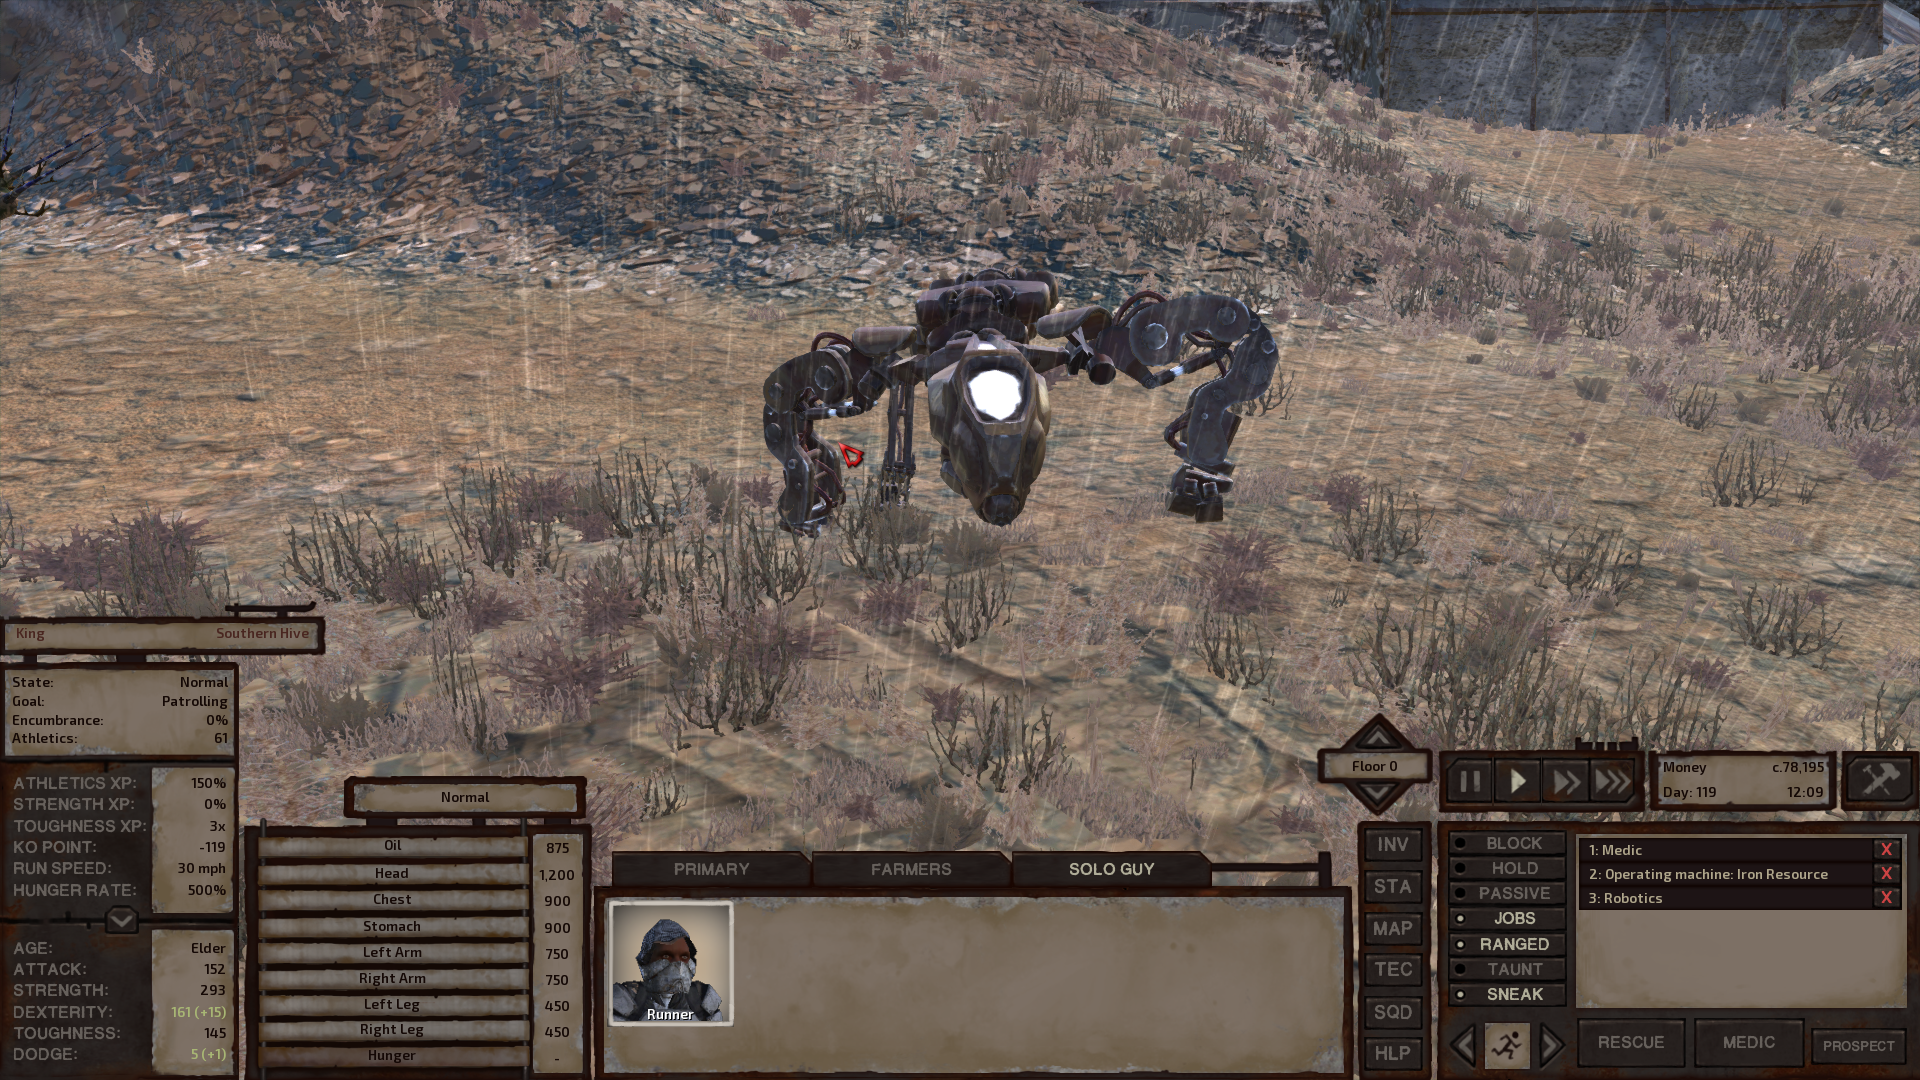
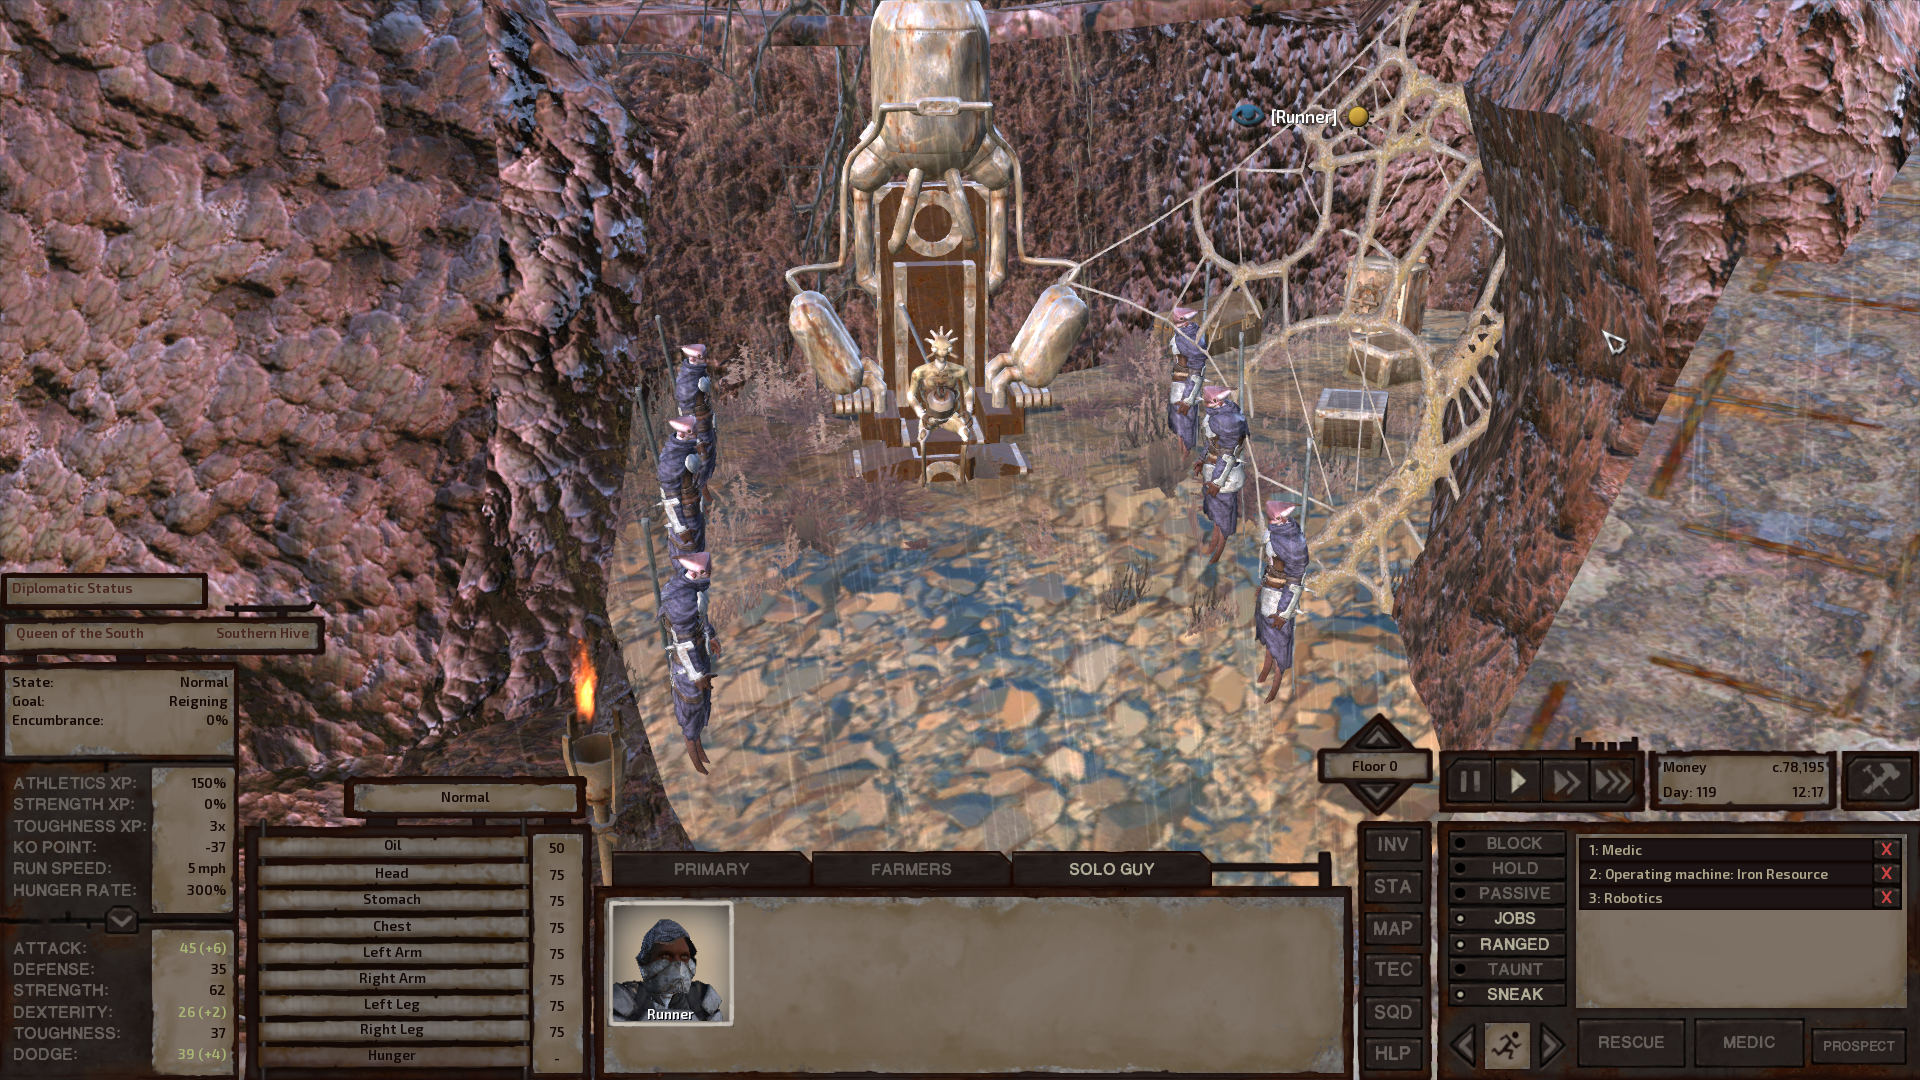
Southern Hive King & Queen
Once you're finished with the Southern Hive it'll be time to move onto the harder end game zones. I would consider Stobe's Garden, The Crags and Sniper Valley to be the start of the end game zones and everything south/east of them to be harder. With the exception of probably Greenbeach, this zone is only difficult if you aren't allied with the Crab Raiders Faction in the south -- which is something I strongly recommend you do.
Stobe's Garden is probably the easiest of the end game zones since the enemies are few and far between which will give you more time to recover after each fight. It will be slightly harder than the Royal Valley area but not too much. However you should be extremely careful when moving into The Crags and The Pits as you will start running into Skeleton Bandits and Skin Bandits which will kidnap you very quickly if you get knocked unconscious. To make matters worse their "prisons" are nothing more than peeler machines which will kill your characters unless you save them within a few ingame hours.
The final 2 hardest end game zones in Kenshi are Sonorous Dark and Ashlands. Sonorous Dark is home of the Skin Bandits and you will find dozens of patrols roaming this entire zone. In my experience you will have very little time to recover in between each battle in Sonorous Dark and the longer you stay in the zone the more your Squad will get worn down. This is typically when the enemies will start to become a problem. You'll be able to fight off probably a dozen Skin Bandit patrols but eventually all your characters will become injured and worn out and when they start dropping unconscious in battle they're going to get scooped up and taken to a Skinhouse.
When this happens you'll be faced with a difficult decision - charge into the Skinhouse and fight the 40+ Skin Bandits to save your comrade.... Or let them die and evacuate with the rest of your Squad? A third option that many of us choose is to reload a previous save before we got put into that situation to begin with too!
Ashlands is the second end game zone and is home of Cat-Lon who is arguably the final boss of Kenshi. Cat Lon resides in Cat-Lon's Exile which is found ontop a mountain deep in the Ashlands. Aside from Cat-Lon you will also find 4 Ashland Domes each with their own bosses and a story to tell inside the zone. I recommend that you do each of these as there is a lot of loot to be found at them along with a couple of Meitou weapons. Below is a bit of information about the unique loot you can find in both Sonorous Dark and Ashlands.
Skinhouse HQ (Sonorous Dark): Savant is the boss here and he carries a Nodachi Meitou weapon. You'll also find 2 unique recipes that you can't get anywhere else in the game on Savant's body, Human Skin Suits and Peeler Machine.
Ashlands Dome I (Ashlands): Head of Agriculture is the head honcho here and he is sporting a Meitou Short-Cleaver. Each of the Ashlands Domes will typically contain numerous Ancient Science Books, Engineering Research and AI Cores. Usually you'll need a character with Lock Picking 60+ at minimum to collect all of the loot throughout the place.
Ashlands Dome II (Ashlands): Rhinobot is the boss of this place and he carries a Meitou Topper. Each of the Ashlands Domes will typically contain numerous Ancient Science Books, Engineering Research and AI Cores. Usually you'll need a character with Lock Picking 60+ at minimum to collect all of the loot throughout the place.
Ashlands Dome III (Ashlands): General Jang is the leader of this dome and he carries a Meitou Guardless Katana. Each of the Ashlands Domes will typically contain numerous Ancient Science Books, Engineering Research and AI Cores. Usually you'll need a character with Lock Picking 60+ at minimum to collect all of the loot throughout the place.
Ashlands Dome IV (Ashlands): General Hat-12 is the boss here and he carries a Meitou Heavy Jitte. Each of the Ashlands Domes will typically contain numerous Ancient Science Books, Engineering Research and AI Cores. Usually you'll need a character with Lock Picking 60+ at minimum to collect all of the loot throughout the place.
Cat-Lon's Exile (Ashlands): Cat-Lon's Exile is where you will find the final boss of Kenshi, Mad Cat-Lon who wields the Meitou Falling Sun weapon. There are 2 large Ashland Domes in this area, one of them has Mad Cat-Lon whose found sitting ontop his throne and the other has 120+ Stormthrall enemies. The building with all the Stormthralls will contain some loot for you to scavenge along with the enemies, the dome with Cat-Lon in it has nothing except him.
As you can probably imagine, both Sonorous Dark and Ashlands are going to be difficult zones to explore. Each of these zones has large groups of Skeletons that patrol through them with stats in the 50s and 60s and there will be very few places for you to safely recuperate between fights. I'd recommend a team of 10+ characters with Toughness stats 65+ along with their combat skills 50+ before coming to either of these end game zones.
I'd also recommend that you do both of these zones at different times. The only loot worth getting in Sonorous Dark comes from Savant whose at the Skinhouse HQ. You can easily come into this zone from the north and hit Skinhouse HQ for Savant then leave. As far as the Ashlands go, I would recommend you enter that zone from the north. Do not enter Ashlands through Sonorous Dark!!
This is very important which is why I put it in big bold letters. There is a small strip of land near Sniper Tower which you can travel across to avoid all of Sonorous Dark, I show this spot below on the map. Going through Sonorous Dark will wear your group out a lot because there are a lot of Skin Bandit and robot patrols. What's worse, as I mentioned before, the Skin Bandits will capture injured characters and place them into Peeler Machines.
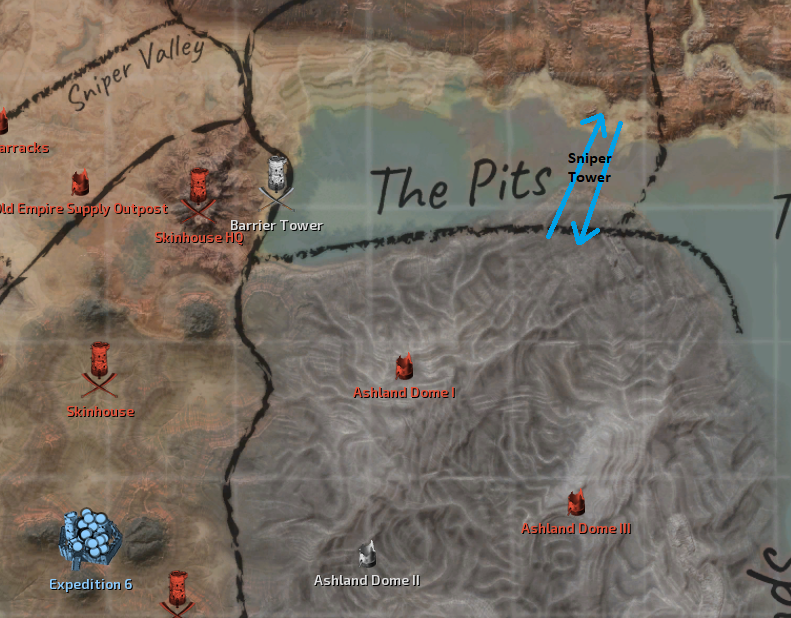
The best way to get in and out of Ashlands (map location)
Once you clear Sniper Tower you'll be able to safely pass it unmolested since enemies will not respawn. Be ready for a really tough fight when you try and take this tower as they'll be able to hit you from very far away as you swim across the water. What I would recommend you do is ally with the Crab Raiders (optional) then wait until one of their patrols is in the nearby area as they'll agro the Sniper Tower and give them something else to shoot at as you close the gap between you.
Throughout the Ashlands the 2 types of enemies you'll come across are bands of roaming Skeletons which are typically 12+ in numbers and Cleaner units. Cleaner units are large robots that roam around the zone and clean up the large gas clouds that you see floating about (and sometimes choke on). Much like with Leviathan enemies you'll want to fight the Cleaner units one on one or with at most 3 characters at a time. If you allow your entire team to fight the Cleaner unit then they'll all take damage from its AoE attacks. It's best to set all your characters to passive and let a few fight at a time.
If you need to rest while in Ashlands what I recommend you do is hunker down inside one of the Ashlands Domes after you clear it out. None of the patrols that roam around this zone will enter inside one of the domes so it'll be safe for you to go inside and turn on 3x speed until you're fully healed. You can speed the healing process up too if you bring some Sleeping Bags with you.
Each of the Ashlands Domes are pretty easy and you most likely will have more trouble with enemies throughout the zone than within the domes. As I talk about in my Kenshi Walkthrough (Part 12) Sonorous Dark & Ashlands Exploration Video, the Skeleton enemies here will run from you when they get low health and typically will run into other patrols of Skeletons nearby. This can cause things to get out of control very quickly if you're not paying attention.
What I typically like to do is clear as many Ashlands Domes as I can then stop and rest inside one when I need to recuperate. As previously stated it's safe enough to AFK inside one of these Ashlands Domes and leave your game on turbo speed as you heal up, I have done it probably a dozen times. Once you've cleared each of the Ashland Domes it's time to take on the head honcho of this area - Cat-Lon.
You'll find Cat-Lon at Cat-Lon's Exile aka Ominous Palace in the southern portion of this zone. Reaching his palace can be a bit annoying since there is only one clear way up and the pathing in this zone isn't the best. At Cat-Lon's Exile you'll find 2 giant Ashland Domes for you to explore. One of these domes has Cat-Lon inside sitting on his throne and the other dome has 120+ Stormthralls.
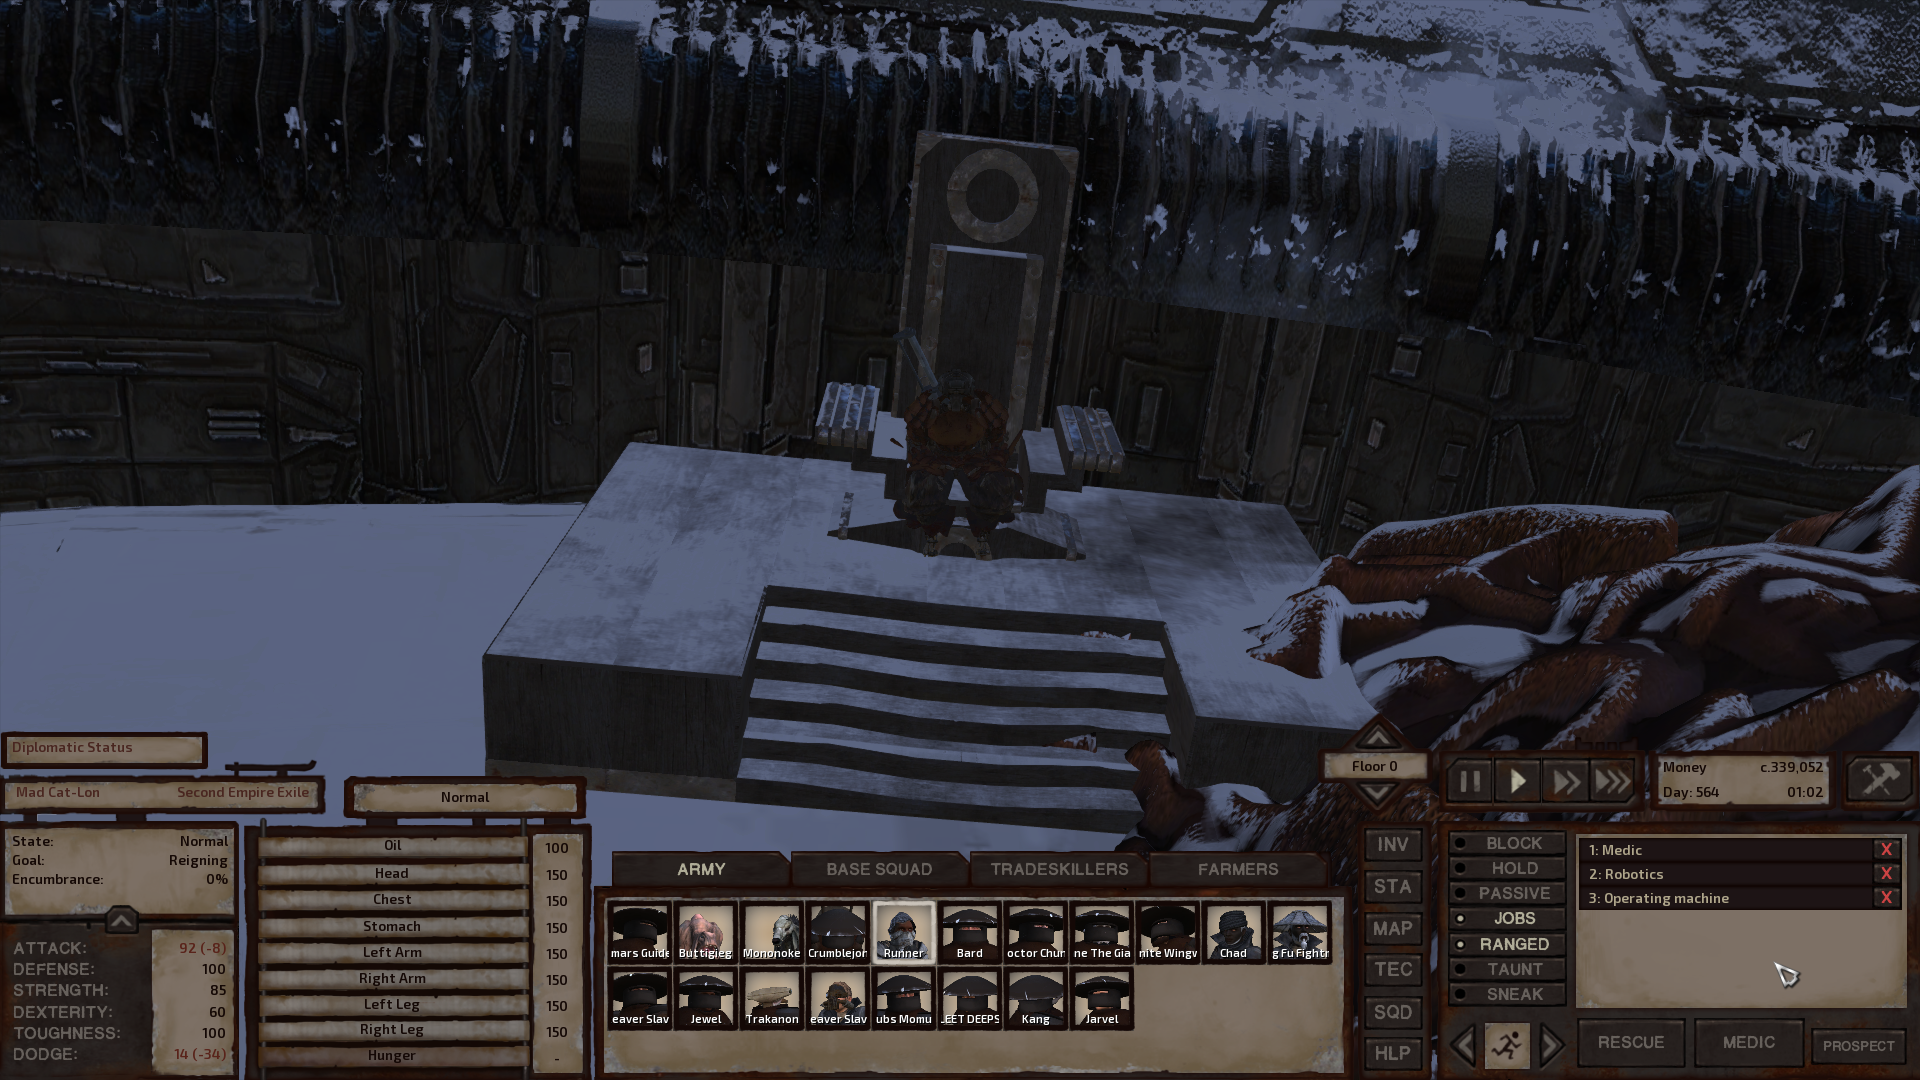
Mad Cat-Lon sitting upon his throne.
If you attack Cat-Lon before dispatching the Stormthralls in the adjacent dome you'll end up agroing all of them the moment you attack Cat-Lon. For obvious reasons, this will make the fight significantly harder for you and I strongly recommend you defeat all of those Stormthralls before attacking Cat-Lon. You can take out all the Stormthralls then rest and recover in their dome before moving into the one that houses Cat-Lon.
The fight with Mad Cat-Lon is likely going to be the hardest fight for you in the game (Duh). Most of his stats are 100 and he is carrying the highest pure DPS weapon in the entire game. Since you'll have to fight him one on one (unless you are using mods) you'll not be able to zerg him down. In other words, this is not a battle that you can win with sheer numbers - you need well geared and skilled characters. When Cat-Lon knocks your character unconscious he will not kill them which means you'll have an opportunity to escape if you lose your fight.
Due to Cat-Lon's insanely high stats he actually makes a great target for you to train against too. Once you defeat him you can "Import Game" at the title screen and "Import Dead NPCs" to respawn him to fight him a second time. This will allow you to claim more than 1 Falling Sun Meitou weapon as well along with an additional Meitou weapon from all the other Ashland Domes.
With Cat-Lon defeated you can officially consider yourself having 'beat' Kenshi. As always with this game, it's completely up to you what you'd like to do next. I have one more section for this walkthrough which goes into a bit of detail about the different things I do for end game. For anyone interested in reading about that be sure to continue to the final part of the walkthrough below.
Continue to Kenshi Walkthrough (Part 4) Philosophy & Random Nonsense
Return to Kenshi Walkthrough (Part 2) Building A Base and Mid Game